
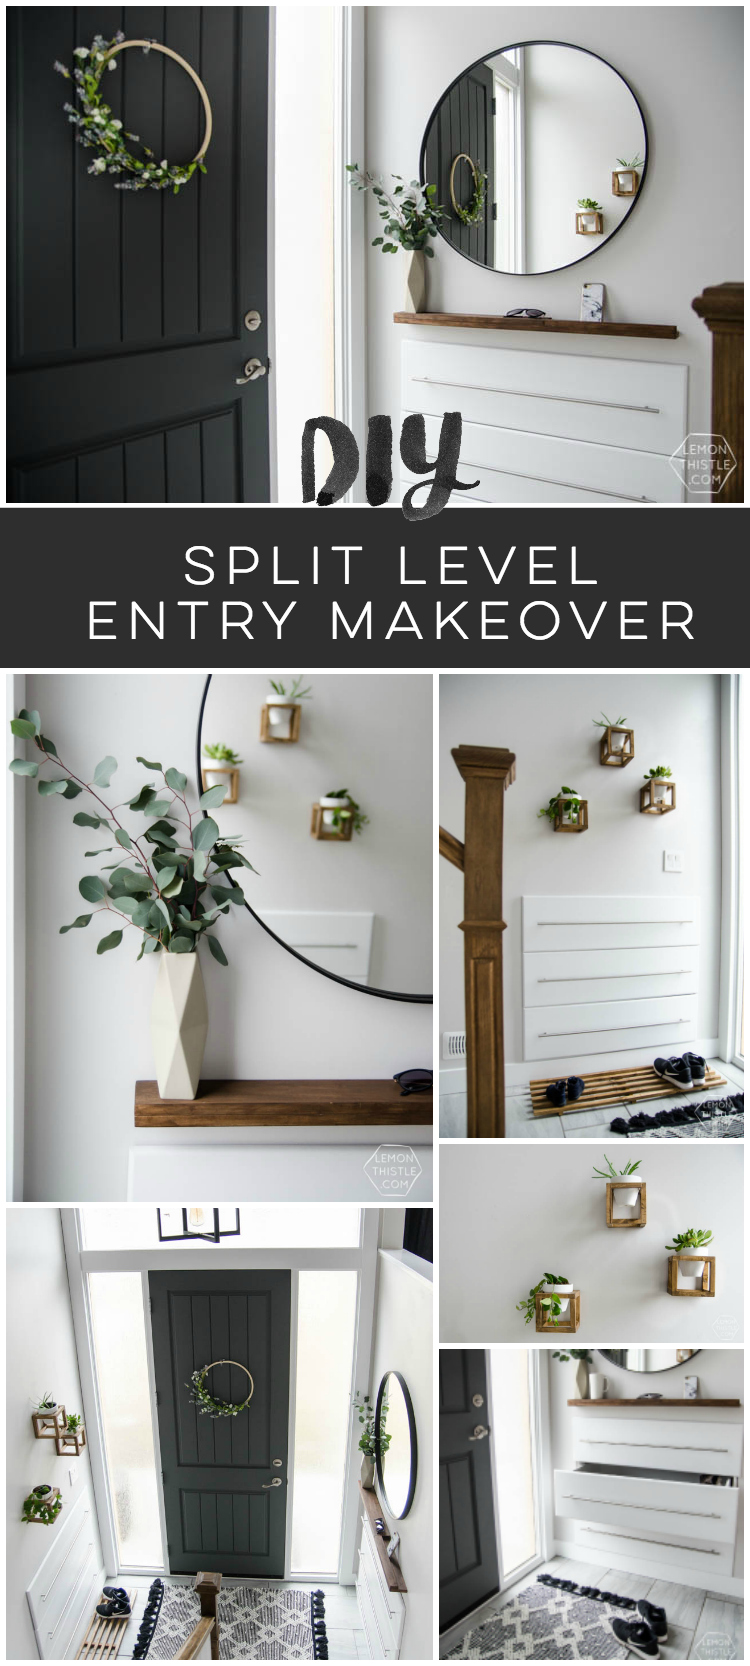
I am so excited to share our entry way makeover with you guys today! I officially finished it yesterday and couldn’t wait to share it… so that’s what I spent my morning doing. I can’t believe how big of a difference such a small space makes now that it’s all DONE and functional and beautiful. Living in a cathedral entry (split level entry), we see this entry from our kitchen and our living room. It’s RIGHT in the middle of things and it was pretty neglected before. Like everything, we worked on it in stages until recently when we decided it was our priority to finish off.
Shall we take a peek at the before? You can see we’ve done EVERYTHING from new tile, wooden stairs, hand rails, shoe storage drawers, new door and window, light… the whole thing, you guys!
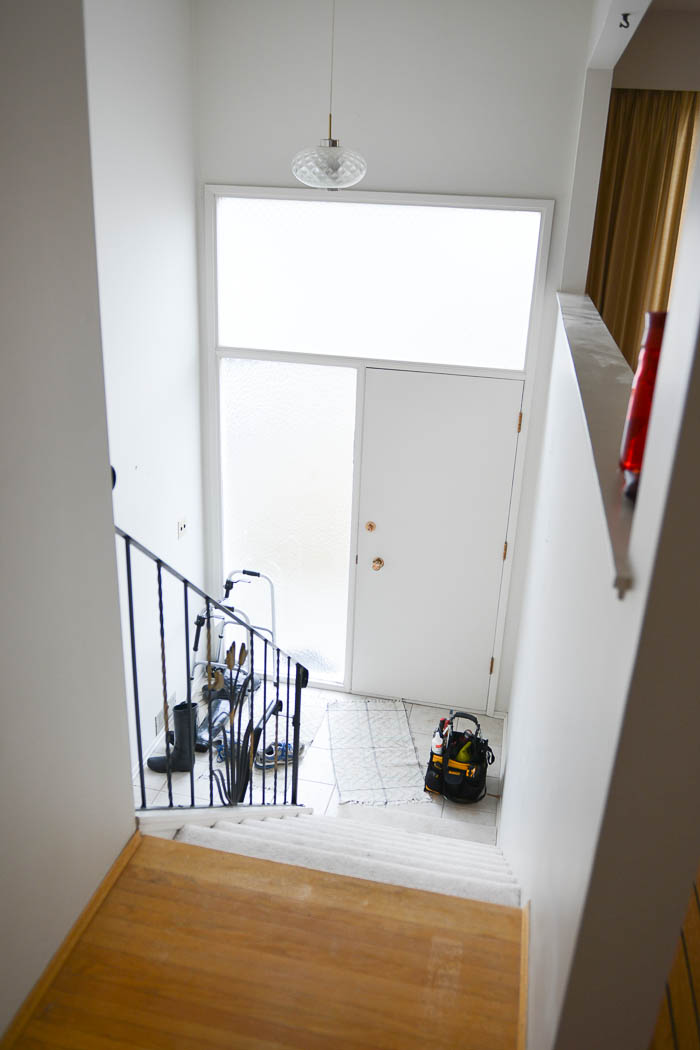
Isn’t that before SO different? I can hardly remember that. If you are curious, you can totally check out our whole home before photos right here. So obviously, I have a lot to talk on here. Let’s start with what we changed BEFORE moving in. And that is the floors.
If you’ve ever refinished floors, you know it’s a put you out of house type situation. Especially when the wood floors are everywhere. We sanded those babies down and refinished them you can read all about that right here.
We also tore off the carpet on the stairs to put wooden stair caps on. BUT they were a strange rise and the caps wouldn’t work (we tried a few kinds) SO we tore out the stringers too and rebuilt the stairs.
That sounds like a ton of work, but we had some great help and it was done in a weekend. The hardest part was that these old walls were pretty warped and we had to cut each stair cap (tread) at different angles.
We chose to stain the oak treads to match our hardwood floors and to use a high quality plywood painted white for the rise. I really love the white/ wood look which influenced the new hand railing when we finally did that this year.
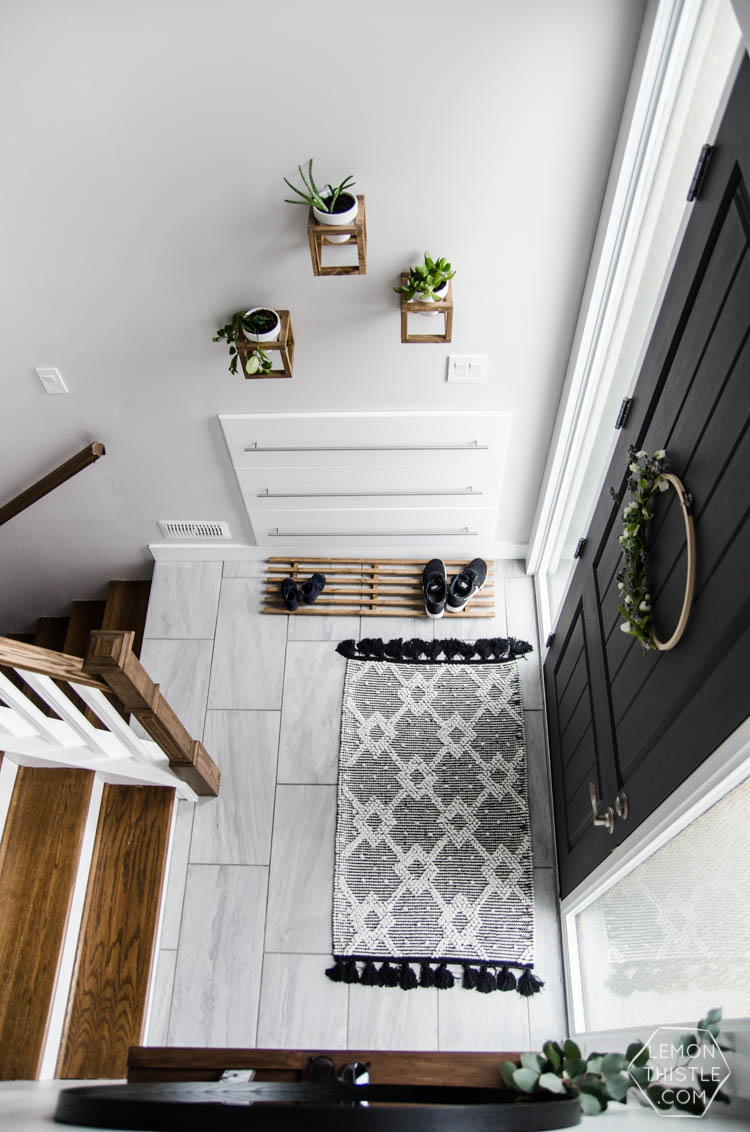
We also knocked out the old tan tile that was in there and lived with plywood subfloor for a few months. When our bath tub started leaking and we put in a new one (and tiled the surround!) we tiled the entry at the same time. This tile is 12×24″ from Home Depot with Delorian Grey grout. I really love how it looks for such an affordable tile- I would totally do it again!
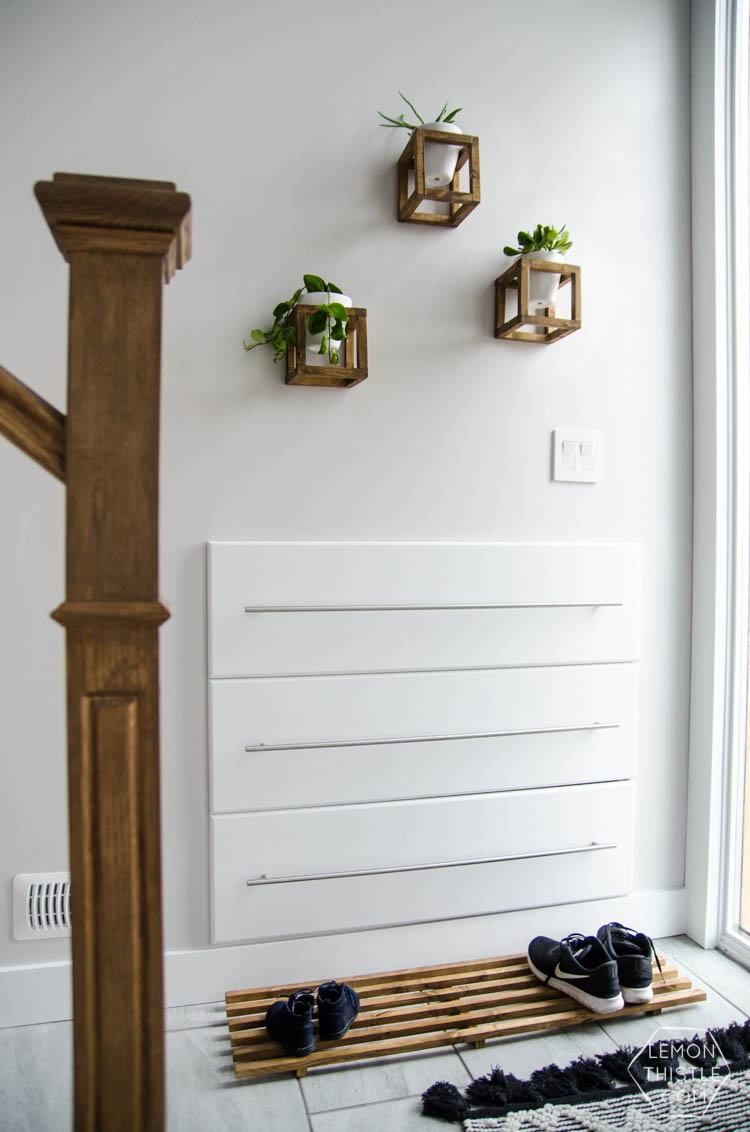
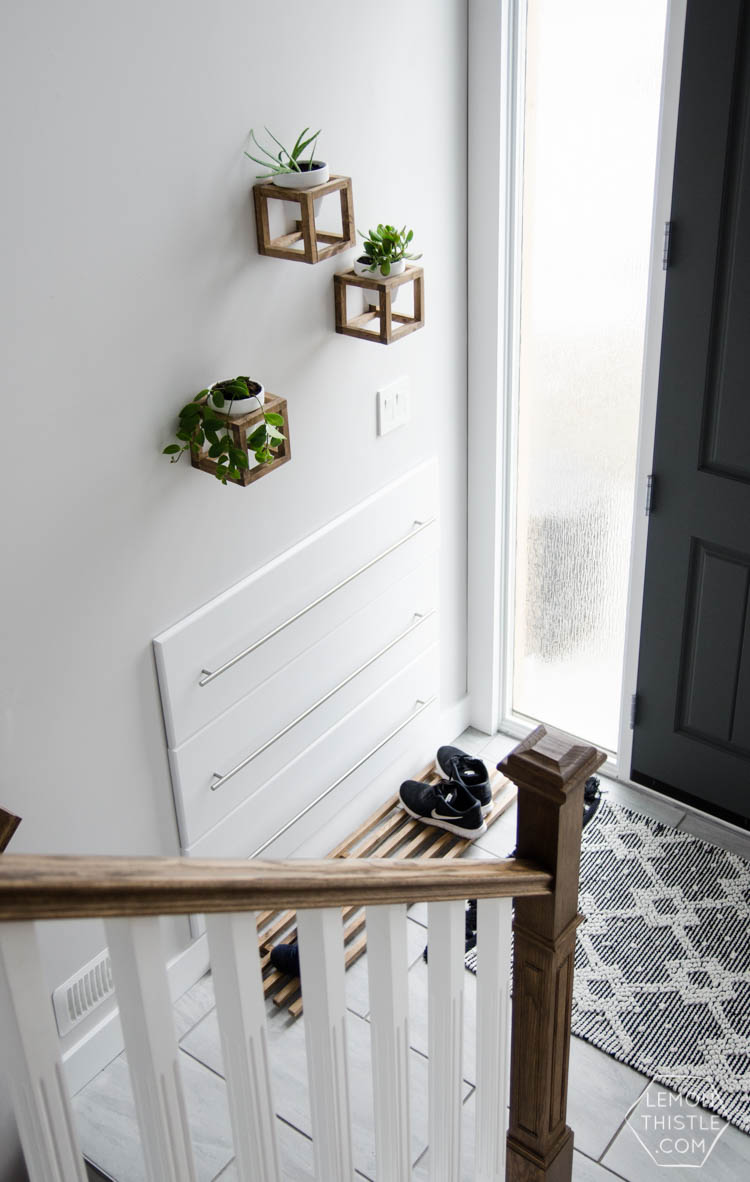
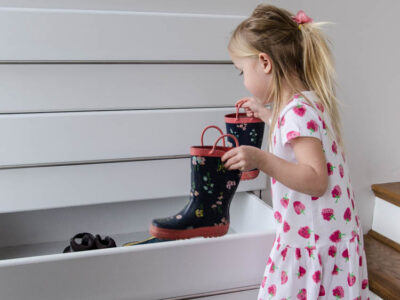
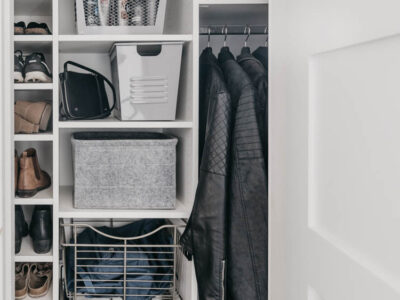
Next, we cut some holes in the drywall for shoe storage.
SEE THE FULL DRAWER TUTORIAL HERE
We did this about a year into living here when we were finishing the basement (you can check out the suite and our side). We had planned to make these into shoe shelves but the clutter would have been killer so this year we made them into built in shoe storage drawers.
Having all the shoes contained and out of sight makes SUCH a difference in how clean this space feels! It NEVER looked clean before, you guys. I talk more about how much I love them and how they are made (so you can make your own!) in the DIY post right here.
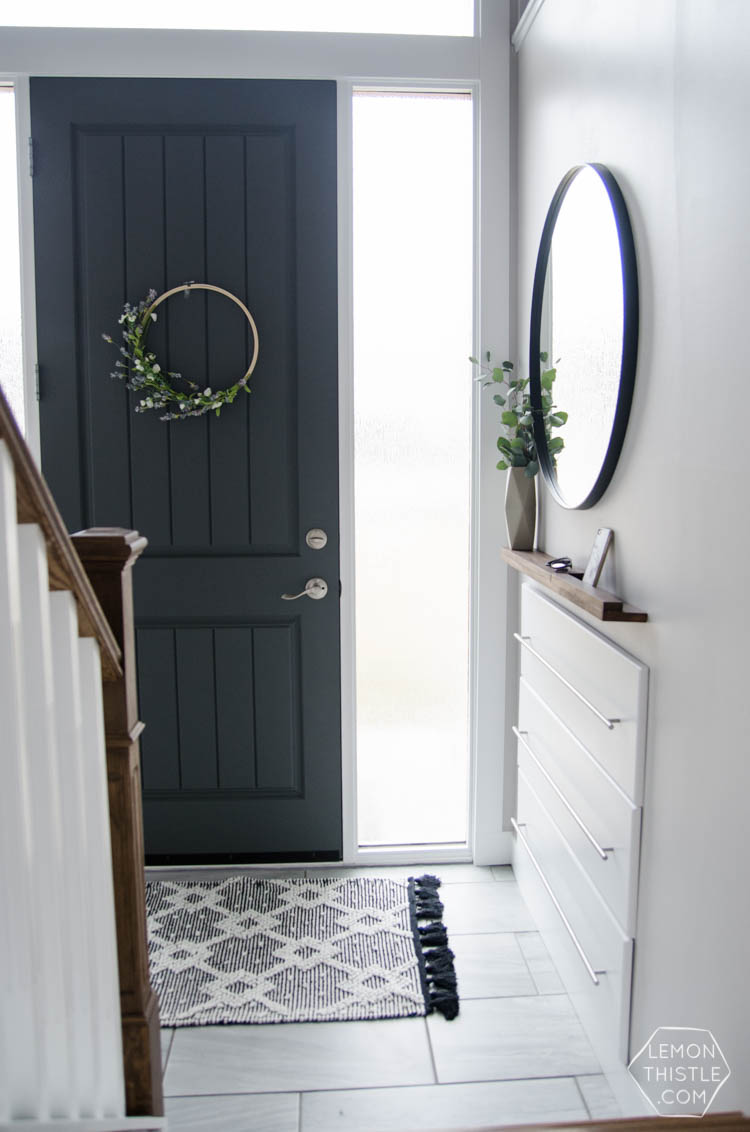
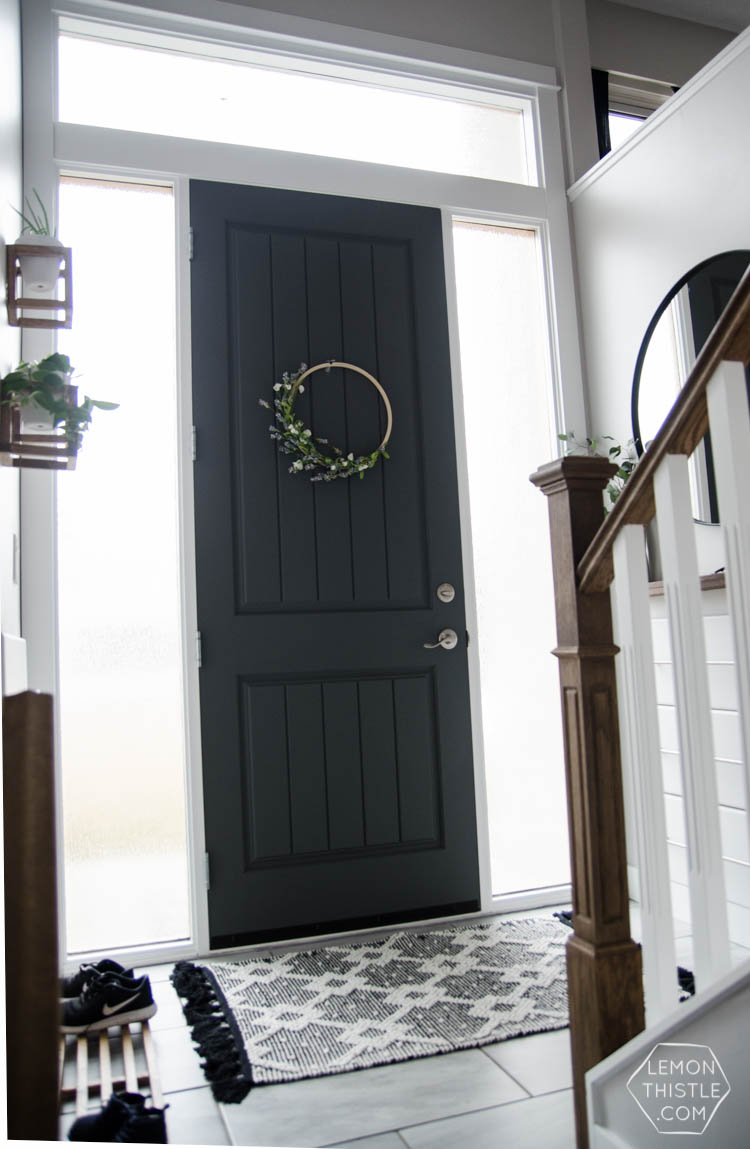
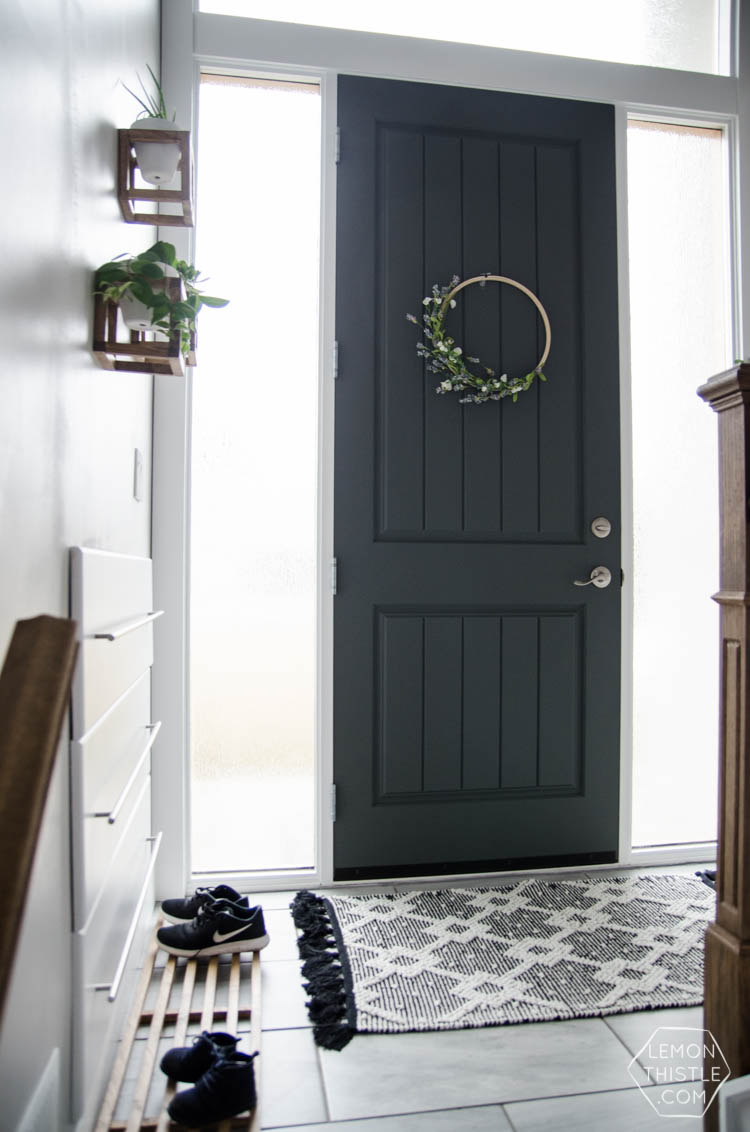
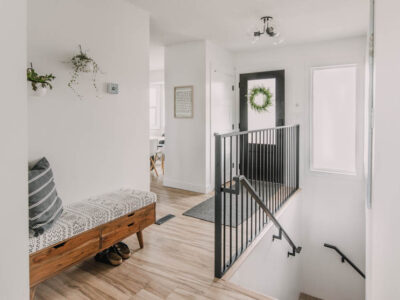
There were really SO many things in this entry that demanded a makeover- not just aesthetically. One of those was our door. It didn’t shut properly and would swing open when it felt like it unless we had the deadbolt turned. It also leaked, you guys. Like if there was a storm, our entry flooded. The worst. That’s not mentioning the chunks/chips and how dated the glass (checkered?) looked.
This fall we had saved up and decided it was time for that baby to go. I’m in LOVE with the door that we have now. It’s over sized which I thought might look strange in this age of house but it really pulls the levels together instead of having such a giant window above the door. If you’re in Kamloops, by the way… I’d be happy to recommend a doors company to you (amaaazing service).
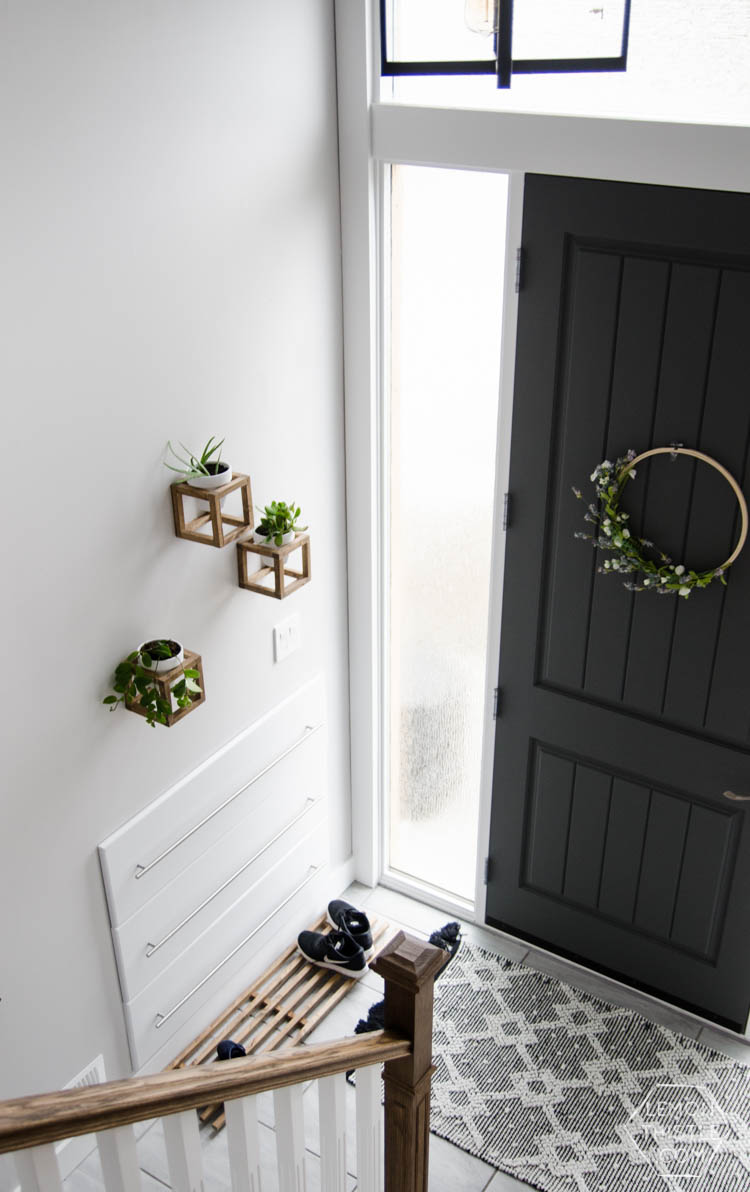
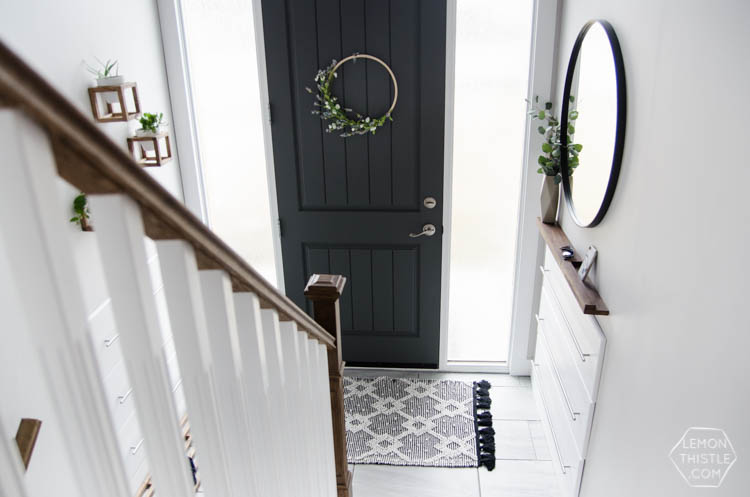
We chose a fibreglass door that has a wood texture (did you know there was such a thing?) and rain glass sidelights and transom windows. I know that clear glass is the ‘in’ thing and it’s what they put in new houses… but I like my privacy, thank you. We painted it a light charcoal color called ‘Straight Goods’ from Para Paints and trimmed it out with a modern farmhouse trim. Speaking of paint… the wall color is custom BUT we found almost an exact match (by happy accident) from Para Paints called ‘Dreaming in the Clouds’.
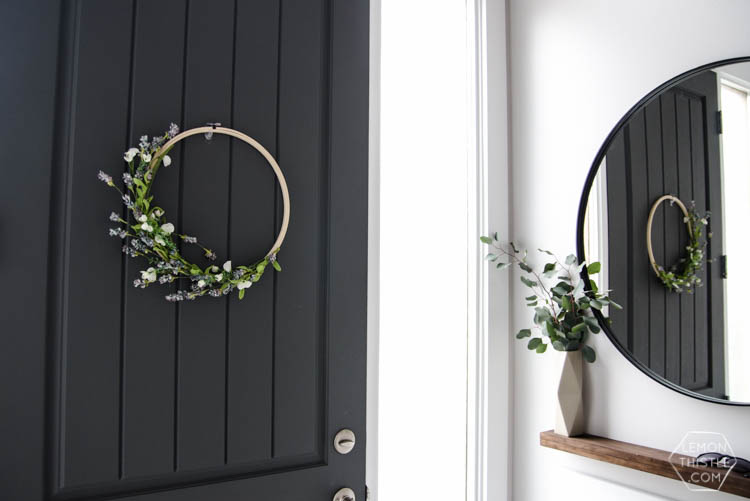
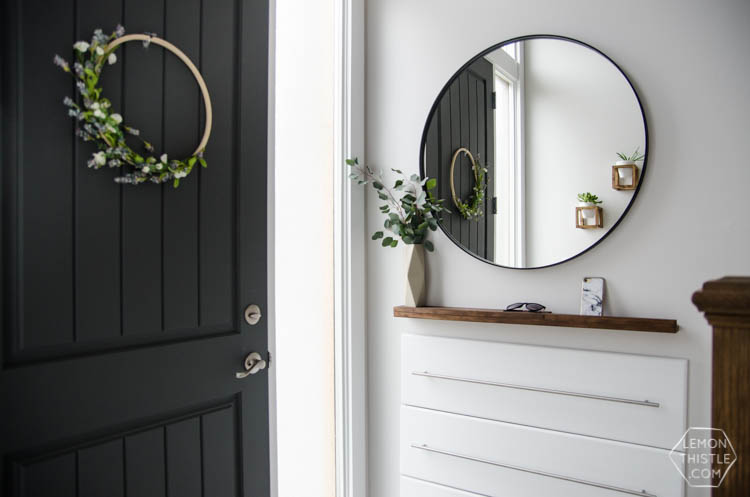
I also made up a simple hoop wreath to add on the inside of the door. We had hung a paper wreath Aubrey made for the holidays here and I fell in love with having wreaths on the inside of the door. Since we see that door so often from our main living area, it’s nice to add some life to it. I’ll be sharing a DIY video for that guy next weekend!
The other major concern in this space was the hand rail. It just wasn’t safe before. The spacing of spindles was so wide that our kids could sit in between them (stress a mama out!). We built this wooden stair rail with materials from Home Depot and wrote a whole post about the process if you’re interested. I really love that we chose to do the white spindles with the wood rail and newel post. It ties together the stairs so well.
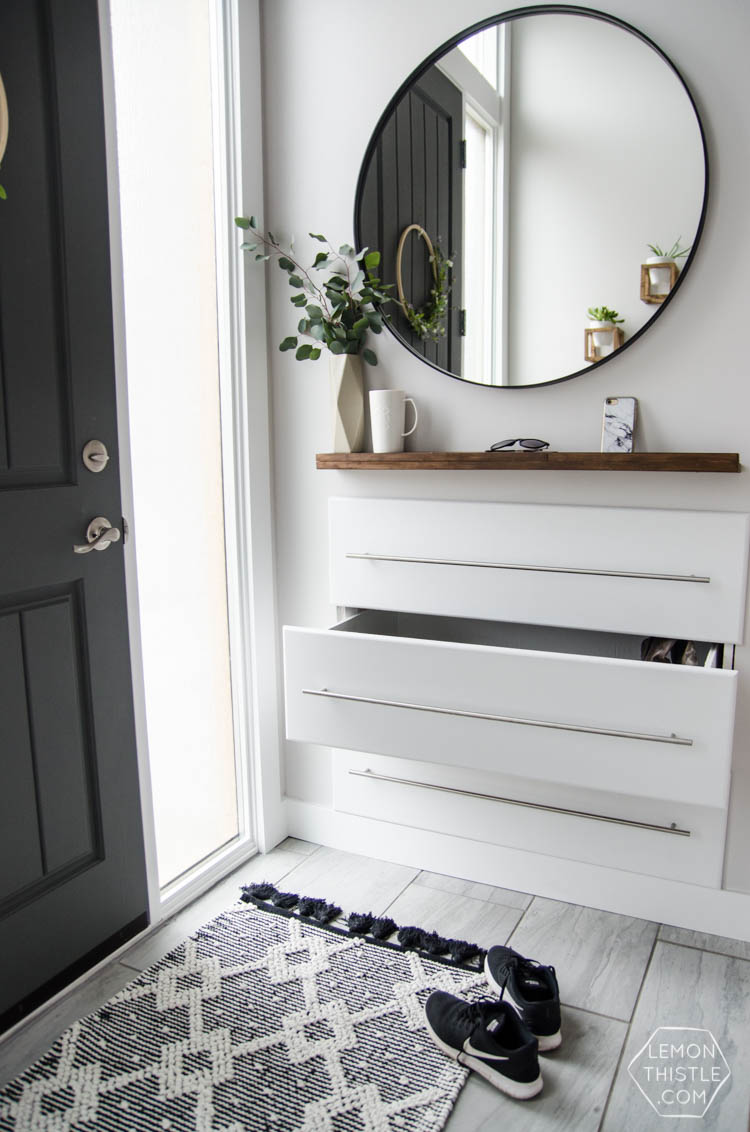
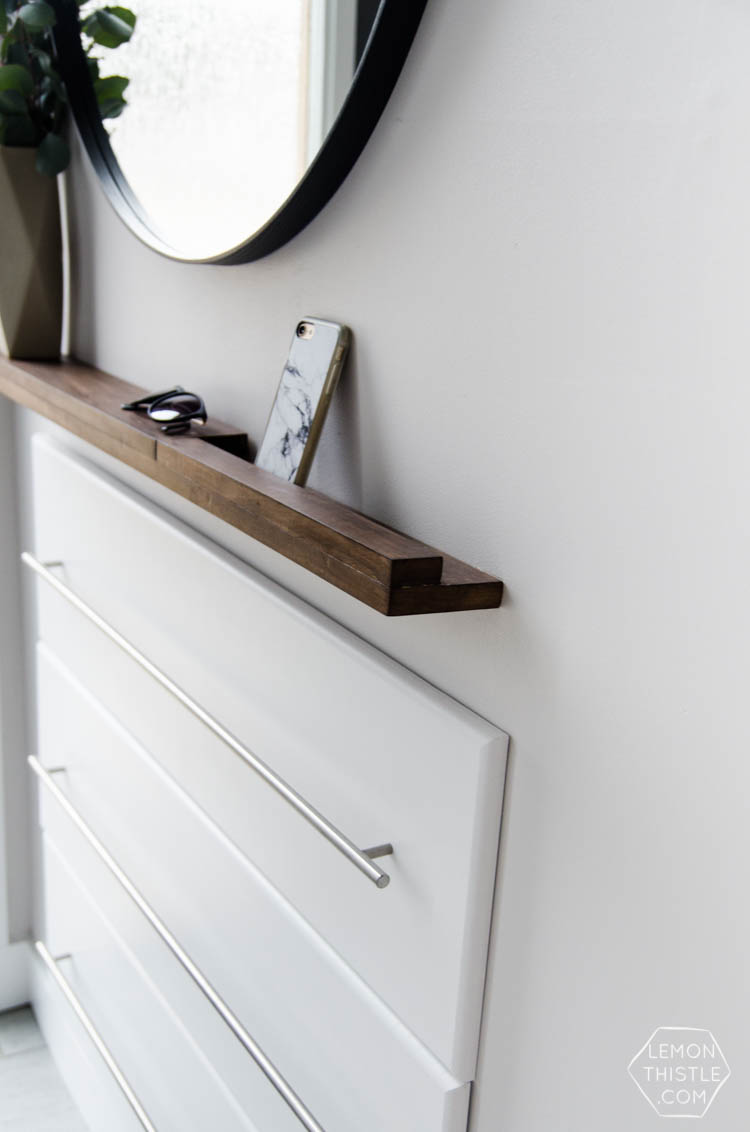
We wanted to carry the white/ wood theme down onto the entry way so quite a while ago now I’d made a thin floating shelf for keys and coffees. I made it using L brackets but when we moved it (we switched the way the door opens when we got the new one), we changed how it was installed. I’ve updated the post with instructions to make it truly floating (it’s amazing FYI).
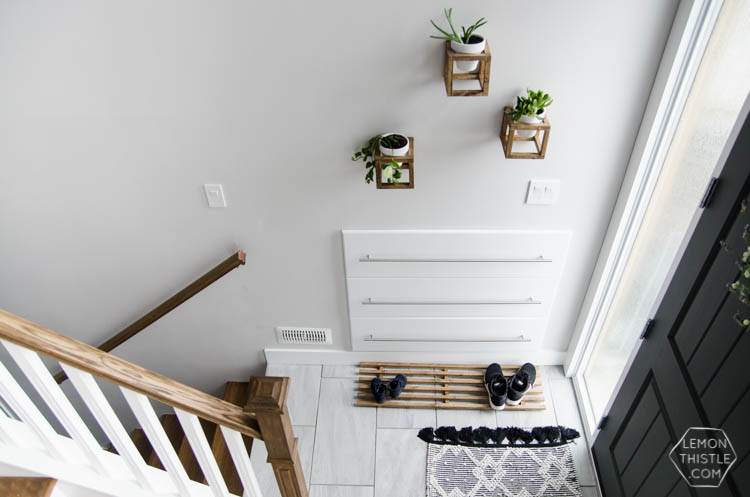
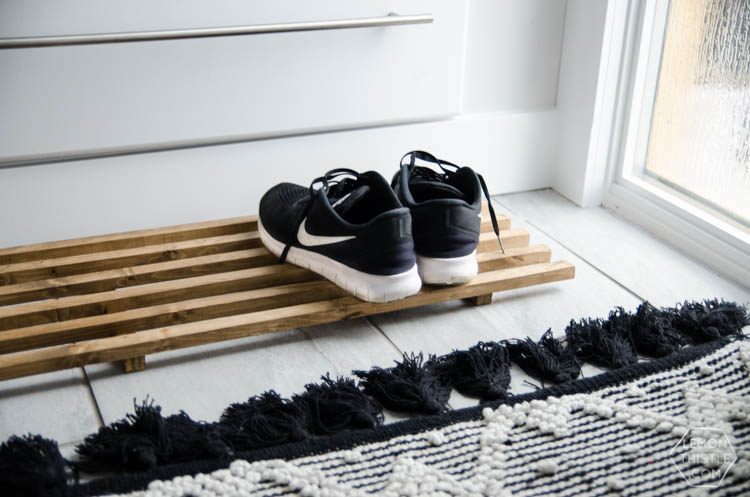
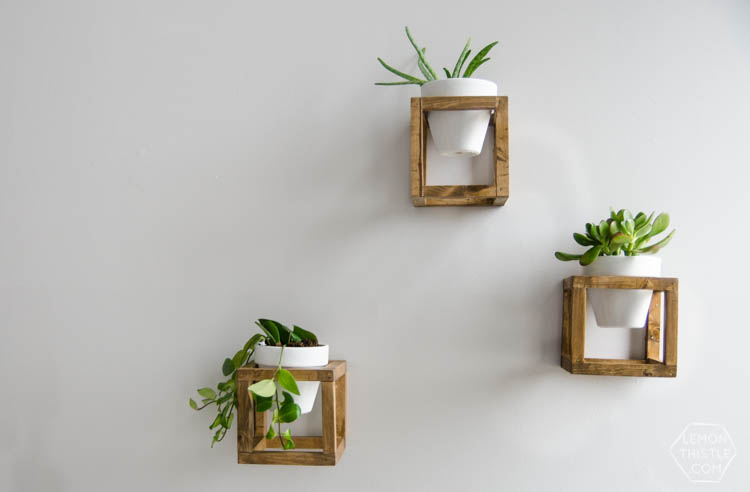
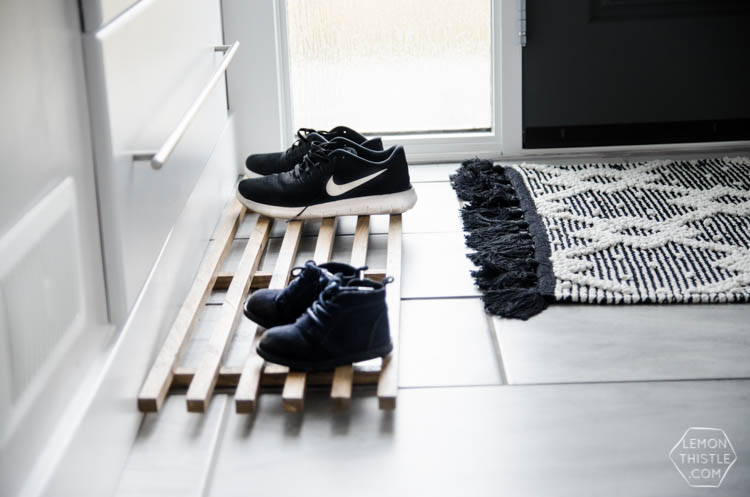
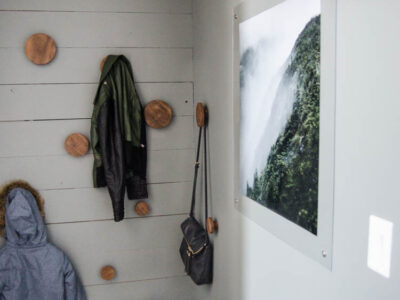
We carried that same wood tone from the stairs and rails to the other side of the entrance with a wooden shoe mat I made (I am DONE with the rubber ones, you guys, I put those inside the shoe drawers and will never trip over one again) and cube wall planters. These two projects were done in a day using two 8 foot 1x4s. That’s about $8 total if you’re wondering #win.
I’m not going to post DIY instructions for those- you can check out this post for the planters (it’s in German, but Google Translate is a wonderful thing- I used brad nails though) and this post for the mat BUT I used 3/4″ square pieces of wood cut with a table saw from a 1×4 instead (also I sealed it with Varathane Crystal Clear Satin).
Honestly… most of the time for those projects was staining and sealing them. A word of advice- if you want to stain yours and seal them… do it BEFORE you assemble and save yourself some serious time. Oops.
Aren’t these planters amazing though? I really love how they work in the space to bring the wood tones up the wall and add some life but also they add such good shape around the light switches. For all you plant lovers, those are (top) aloe, (left) lipstick, and (right) jade.
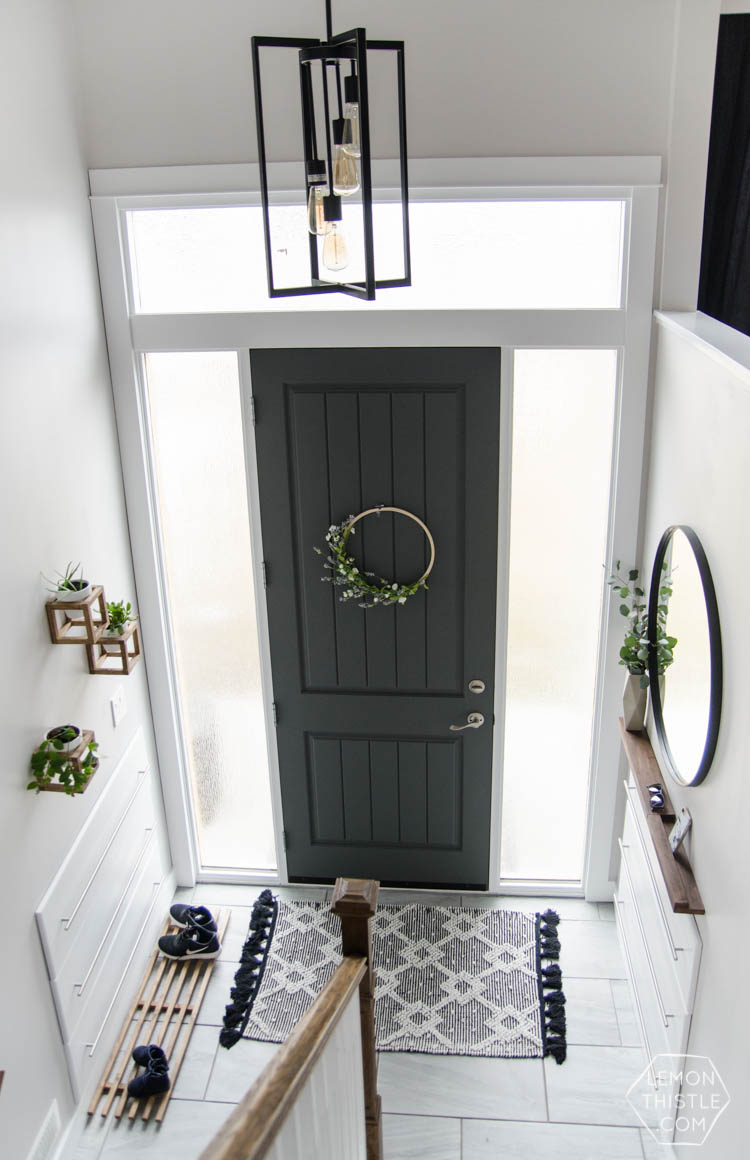
Originally, I’d planned to leave the light that was there when we bought the house and just paint the different pieces (except the glass- there was silver, gold, white, and black in ONE fixture) but as the entry started to come together we knew a bigger light would make such a difference and it really, really does.
Also- we went from one lightbulb to four so the space got so much brighter in the evenings. We grabbed this one from Home Depot (can you tell we are there ALL THE TIME?) and I really love how the length of it compliments this HIGH space.
We have pendants with Edison bulbs in our kitchen (right at the top of the stairs) so I love that they are featured here too for continuity. BUT the bulbs we picked up from home depot have this champagne kind of coating that make the light really yellow. We ordered some LED ones (tested them first) from the lighting store and will replace them when they come in. Thank goodness for neighbours with really tall ladders ;)
In the past, I would have stopped at getting it functional, but the more I do this blogging thing (and do this living in a house of my own thing), the more I’ve realized how satisfying it is to have a decorated space- not just a done space. Now every time I walk by this landing (which happens 100 times a day, I swear) I feel happy.
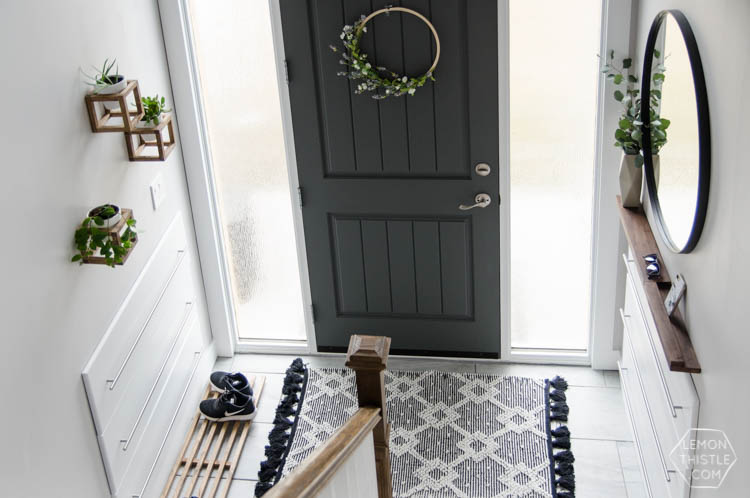
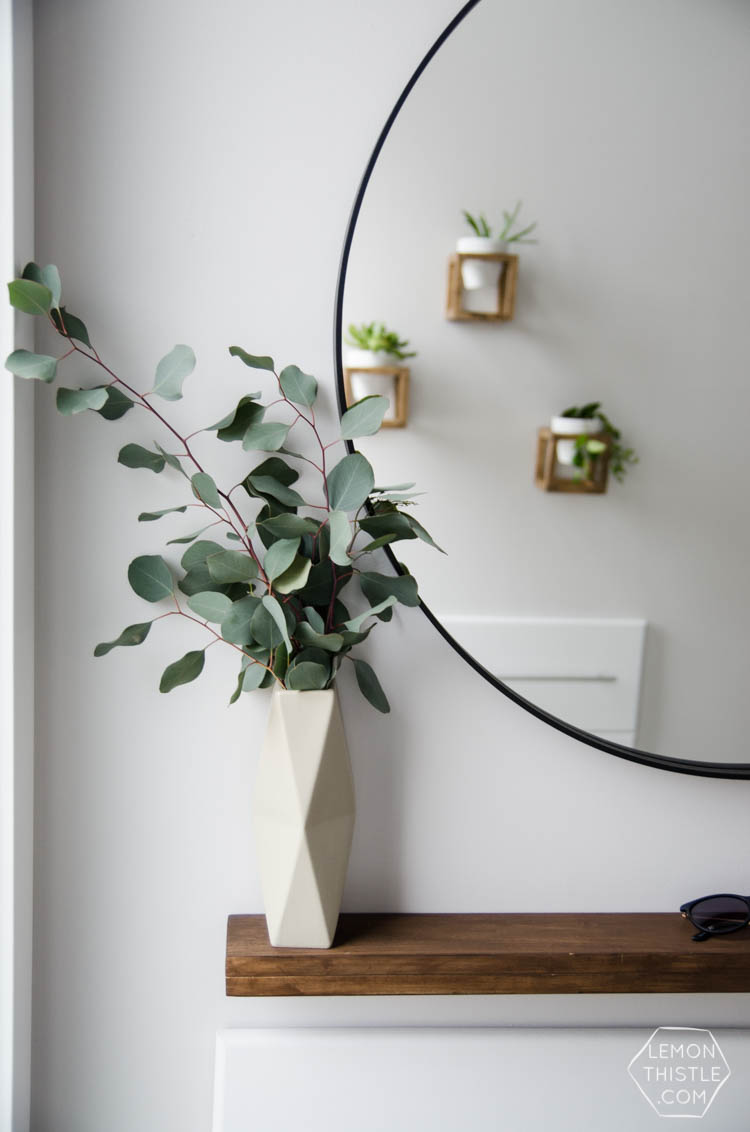
Some of the details we added at the end are that round mirror, that tasseled rug and the vase of eucalyptus. The round mirror is from Ikea and I’m so happy we decided to buy it. We tend to make everything for our decor just to save on cost but mirrors aren’t exactly makeable- and it’s what this space needed. I love the round shape over that floating shelf. We had planned on buying the smaller one ($30) but made the impulse decision to get the bigger one and I’m so glad we did.
The floor mat is 100% cotton and doesn’t have a backing. I know that’s stressful for some of you BUT here’s what’s rad about that… you can toss it in the wash. The mat we had in there before was alright (not great) but since it had the rubber backing, we couldn’t toss it in the wash. So all winter it got more and more dirty and looked pretty gross but we couldn’t take it outside and hose it down while it’s this cold.
My sister in law told me about a little secret to keep a less structured mat like this in place in a high traffic area- 3m velcro strips! Just stick one to your rug and one to your floor in all the corners and middle and you’re SET. I need to do this to the rug in our kitchen too because that one is constantly getting kicked around. I found this one at Homesense and was able to use a gift card so I paid $7 for it which felt like a steal. The vase is from Target.
Alright- that was a LOT of details! If you’ve stuck with me this long… thank you! Shane and I are so amazed at how big of a difference such a small space makes in the feel of our home. It’s the first place we walk into and it used to just cause us stress. Now, it’s one of my favourite spaces in our home. Maybe because it’s the only one clean right now, but nonetheless ;)
You can see this full home makeover RIGHT HERE if you’re interested!
LOOKING FOR ENTRY STORAGE SOLUTIONS? CHECK THESE IDEAS OUT!

LIKE IT? PIN IT!
 Spring Hand Lettering Practice Sheet
It is all so good I can’t choose what I love the most but I will try: the floors, the stairs, the DOOR: everything is just working! So gorgeous, Colleen. And also very timely: I was sitting on the couch a few nights ago staring at my horrible, carpeted stairs and sad entry way and I just couldn’t. Take. It. ANYMORE! So I ripped all the carpet up on a whim and now I have no choice but to finish it! You did an amazing job and it gives me hope! Can I also say I’m so happy that you are Canadian and those tiles are available at HomeDepot Canada? They are GORGEOUS and I may totally copy you. Hope that’s ok. ;)
Ahhh you are too sweet, Allison! I love that you just ripped it up- that sounds like something I would do! And yes, please- nothing would make me happier than to have inspired your entry :)
What stain color did you use on post and banister? And what product did you use?
Hi Laura! It’s a custom colour from Cloverdale paint :)
I need to know where the rug came from
Homesense :)
You have done a fantastic job with your split entry Colleen. I have been a journeyman carpenter for nearly 50 years but I have not come up with some of the ideas you have. Well done. I am from Grand Forks bc and we purchased a home with nearly the same front entrance as yours and we just started talking about renovating the front entrance and then I saw your pictures and descriptions of just what you did. Good job. I just wish there was a way we could hook up in some way as I have many questions I would like to ask you. I doubt my address will be published here but I will post it here in hopes you see it. If you do please send me a quick email so we can connect.
That’s really kind Terry! You can ask any questions here :)
Hi!! Love the entry, can you tell me wheee you got the shelves for the shoes ? The hidden drawers! Thank you!
They’re a DIY! https://www.lemonthistle.com/diy-shoe-storage-split-level-entry/
Hi! Can you tell me where the post is for the instructions on the planters? Thank you
Hi, Colleen used this website but you may have to use Google Translate as it isn’t in English: https://www.craftifair.de/wohnen-mit-pflanzen-diy-hangende-pflanzenhalter/
Beautiful. We are redoing ours in a few week. Where is that front door from? Love it.
Thank you! It’s a Masonite Door from Windsor Plywood :)
Looks great! Can you tell me what paint colors you used for the door and walls?
Thanks!
Those drawers are genius! I had a split entry and it was just always so awkward. Drawers for shoes would have been great to have. All your other details are lovely too. Well done!
Thanks so much Kelly! They are definitely awkward spaces to work with!
Where did you get the floor rug from?
Homesense :)
those built ins are insane! i would have no idea that you can even DO that there. great makeover, i know this is a tough space to make your own and to really maximize how you use it. great job!
b
Ahh thanks so much :) I’m so glad we had the space in the basement to build them in- they’re definitely the best part of the whole makeover.
I love what you’ve done! Split entries are so hard to decorate, especially the tiny entry, but you nailed it!
Thank you so much Emelia! what a sweet comment :)
I have almost the exact same entryway that is under construction right now. I love your chandelier!!! I was wondering when standing from the upper level is it blinding to see those bare bulbs? And I also love the idea of a mirror to make the space appear larger.
The light was perfect for us! We didn’t find it blinding at all, but having the right brightness of bulb is definitely key.
Gah, amazing! I love everything about it! :) That velcro strip idea is also amazing.
Right?! She’s so clever!
We live in a split level too. The entry is so frustrating. It is on our list to tackle this year. Love yours! Can you send me a picture of where the tile meets the stairs going downstairs. How did you make that work? Is there a “lip”. I would like to do tile, but worry about that it will leave a lip and would be a tripping hazard.
I have to finish caulking the bottom set of stairs so I didn’t photo it in this post :P BUT I took a late night phone photo just for you ;) https://www.lemonthistle.com/img_0874-jpg/
It’s a transition strip that is a flat edge instead of a slope- they’re really affordable and come in lots of finishes- there’s no lip at all to trip on.
This was exactly what I was looking for! Do you remember what that specific transition strip is called? Or where you got them from? I love the fact there is no change in the flooring height and no bullnose to have to add on. Thank you in advance!
I think the brand is schluter… and we got them from a flooring supply store that our tile company directed us to!
I can’t get over how amazing this is Colleen! Those drawers are genius, and that mirror so swoon worthy!
Ahh thanks so much Tan! We’re really happy with it :)
Hi!
Can I ask where you got that tile from?! Love it!
Home Depot!
LOVE what you’ve done with this space. I can’t believe how functional your space looks now. I will be taking so many of these ideas when I update our split level entry this summer!
Just wondering you mentioned finding Edison bulbs that were not so yellow. Where can I find these??
Thanks so much Bianca! Check out a lighting specific store. We have one near our house and have gotten ALL of our lightbulbs from there (most of our fixtures have that style of lightbulb or different shapes)
Could you send please share the brand name of the rug? Thanks!!
I actually don’t know! It was a homesense find and I tossed the tag! But homesense always has amazing rugs in this size :)
I too live in a split entry home, and am always interested to see how others have their entryway! You did a great job with yours, and I would like to share one picture, with a link back to your blog, on a favorites post that I am currently writing. If you don’t want me to share, please let me know and I am happy to remove it. Thanks so much!
I’m happy to have you share! Thank you Nicki :)
Your entry turned out gorgeous! We are currently remodeling a split level and our next project is the entry. I love your door/sidelights. I was curious if you have a picture from the outside of the house so that I could see how it looks? Great work!
Thanks Lauren! We are so bad and haven’t even trimmed out the outside of the door yet (so lots of insulation foam is showing!) because we are working on ripping the stucco off our house to side it this month. When it’s all done I’ll be sure to post!
Hi! I absolutely love your front door with transom and sidelight glass. I’ve been pinning for months as we are about to redo our house exterior and the front door is a big part of it! Do you have a photo from the outside you could share now? And where did you get your door and windows? Looks gorgeous!
I was going to ask the same question! Would love to see it from the outside. :-)
here you are! https://www.lemonthistle.com/modern-christmas-entry-decor/
Wow, beautiful job! We will be moving into a split-level next month and have been looking at solutions for the entrance. This is the best yet! I’m curious as to your paint colours for the entry wall and door. Do you recall your choice?
Thanks so much Suzanne! The wall color is a custom one we used for all our house, but the closest match I’ve found is called ‘Dreaming in the Clouds’ from Para and the door is painted ‘Straight Goods’ from Para (3 coats, the 3rd one really darkened it!)
Do you know the name or brand of the light fixture? Thank you.
You bet, it’s this one we linked to in the post :) https://www.homedepot.ca/en/home/p.4-light-pendant.1000837072.html
This is the best split level entry I have ever seen! Would you mind sharing the paint color on your walls? I’m in love!
Thanks so much Lesley- what a compliment! It’s a custom colour from BeautiTone but we’ve found Para Paints ‘Dreaming in the Clouds’ is almost an exact match!
Thanks so much Lesley! It’s actually a custom colour but the closest match I’ve found is ‘Dreaming in the Clouds’ from Para Paint
This is amazing! We just bought a 70s – era home this summer and our entry needs some serious work. I’m so happy I found your blog for inspo!
I would love to see see a post on your stairs. The previous owners kind of sort of halfway remodeled and they botched the stairs. The flooring they used is full of gaps and the stair caps are awkward. We want to redo it but just aren’t sure where to start.
Thanks so much Martha! I didn’t take ANY pictures of the stairs process (other than the railing!). We took out the stringers and cut new ones to start from scratch, then used the hardwood stair caps you can buy prefab. The kicks are just plywood :)
Hi Martha, Congrats on the new home! We took the stairs completely out and cut new stringers to keep them even/level with the new caps. I wasn’t very involved in this so couldn’t do a post about it- we were lucky to have my FIL who used to frame houses do that part for us :)
Love this!
Can you tell me me where the floating shelf under the mirror is from?
Of course! It’s actually a DIY, you can find it right here: https://www.lemonthistle.com/diy-thin-modern-wood-shelf-partial-ledge/
Oh my gosh, I’m swooning <3 Wonderful work, I cannot wait to try some of these ideas! I will insta tag you if it comes out half a nice as yours! I also love that you use the word rad :-D
Oh please do!
Haha I feel like it’s an uncool word… but I love it ;)
Beautiful!! So inspiring! I cannot find the perfect mirror on the IKEA website. How long ago did you purchase it and what is the circumference? Any help is appreciated:)
Hi Kate, we purchased this in the spring- it’s about two and a half feet!
Your entryway looks amazing! I just bought my first house, also a split level entry, and I’ve been searching for a solution to the lack of storage available in this space. I’m so happy to have found your blog post and I can’t wait to begin my own entry makeover process! I’ve never done any home improvement/DIY work, so finding your blog posts about the whole process was a lifesaver!
Love this! We also have a split entry, I bought a new light this spring, finally, after asking for one for almost 12 years. Now my husband is stuck on how to put it up. What kind of ladder did you use that allowed you to reach the light fixture?
We borrowed one that can adjust just one side height- I hope that makes sense!
I’m totally obsessed with this look. My entry is practically non-existent and hard to know what to do with but this is so beautiful and functional. I really like the wood elements and wish that I had the tools to make the shelve and the planter.
Colleen, I just have to tell you that I have never been a fan of that style house….until now!!! Your entry is beautiful!! The dark dreary entrance is what always turns me off since it’s the first thing you see! This is the very first one I’ve seen that is bright! It looks fantastic, thanks so much for sharing it.
Ahh thank you so much JoAnne! Honestly… I felt the same way when we bought it ;)
I am trying to hire someone who will attempt these stairs for me! It has been a huge issue with me having shoes everywhere! Any chance you have a photo of the opposite side of the wall? I’m curious how far it sticks into the room? It would back onto a spare room for us – but the room isn’t huge. I read yours is between closets which is smart!
I will rigt away snatch your rss feed as I
can nnot in finding your e-mail subscription link or e-newsletter service.
Do you’ve any? Kindly permit me recognize in order that I could subscribe.
Thanks.
Hi, I am wondering what the other sides of the walls looks like that you cut into for the drawers? Just wondering how you finished that side. Thanks.
I just shared that on my Instagram! https://www.instagram.com/p/Btd66D5F3HK/
Hello,
I have the same style house as yours. I love how you did your entryway. I’m trying to figure out what to do with mine. It’s smaller than most bilevel entryways. I have a throw rug in my entryway that is very similar to yours with the tassels on the sides. The tassels sometimes get stuck in the door when opening and closing and it doesn’t stay in place. Do you use anything to keep yours in place or does yours move around also? thanks!
Your door might have a lower clearance than ours did! We never actually did anything to stick ours down (this is our old house) but I did have command strips velcro suggested to me on the tile :)
Hey! Did you buy the floating shelve you have there? Or you made it? If so, do you have a tutorial?
We made it! You can find the tutorial right here: https://www.lemonthistle.com/diy-thin-modern-wood-shelf-partial-ledge/
This is not a split level. It’s a bi-level. When you enter the front door, you need to decide whether to go upstairs or downstairs: bi-level. Split levels are when you enter the front door to an actual living area. You will go up a short set of stairs to another level; then usually, there is another set of short stairs to the bedroom level.
We call them Cathedral Entries here, but google liked split level better ;)
Nice job! Can you please give measurements for how you hung your light (how low or high)? I have a split-entryway and cannot find rules of thumb for hanging a light for split-entries. Thanks!
Hi Denise- I just hung it so that it showed from the living room. We don’t live here anymore so I can’t measure for ya! But I’m not a rule follower when it comes to these things- do whatever looks good to you!
Nice Job Colleen
Did you make the railing yourself? I too have a split entry and we also have the iron railing and I hate those things! I want to replace them with the kind you have!!
We did! I have a full tutorial on that right here: https://www.lemonthistle.com/install-wooden-handrail-split-level-stairs/
Can I please ask what stain color you used for the mat and plant hangers? Thank you!
Hi Karlie! I always use Early American :)
My first interest was the stair railings, I have a wall there. But the more I looked at your space the more interesting it became. I love the way nothing is taking up space . The drawers are flush , the shelf does not stick out too far, small planters and the mirror is perfect . i appreciate the information about the stair caps, something to consider. The post was full of ideas , Colleen thank you for sharing.
Thank you so much Jim! I appreciate this comment so much.
Where did you get your door from?!
can you provide the directions for how you did those built in shoe storage?
Hi Chrissy! Check out this post here: https://www.lemonthistle.com/diy-shoe-storage-split-level-entry/
Can you share the dimensions of your wooden mat in terms of the 3 cross pieces and how far apart you spaced out the 6 long pieces?
Hello! I’ve moved out of this house and no longer have the mat :)
Hi there! Your entry in gorgeous. Would you mind sharing where you got your light fixture?
You bet! https://mitzi.com/Product/H270603-OB
I’m curious about the shoe drawers rather than a closet. I currently have neither at my entry and hate it. I told hubby I want a closet. Our garage is just on the other side so he isn’t thrilled.
Hi!
Could you share what tile you used?
Beautiful job!
Thank you for sharing!
Hi Susan, It’s this one: https://www.homedepot.ca/product/msi-stone-ulc-classico-blanco-12-inch-x-24-inch-glazed-porcelain-floor-and-wall-tile-16-sq-ft-case-/1000851450
Can you please tell me where you purchased your floating shelf below your oval mirror?
I love it!!
My daughter just moved into a condo and hung an oval mirror behind the door. We have been
looking for months to find a floating shelf to hang below that is narrow enough not to impact opening
her front entry door but have had no luck whatsoever.
Thank you so much!!
Fabulous job by the way!! Your entrance is stunning!!!
Hi Brenda, that shelf is a DIY! You can see how she made it here: https://www.lemonthistle.com/diy-thin-modern-wood-shelf-partial-ledge/
I would love to see how you did the stairs! I ripped the carpet off of mine and want to make the drawers. So my project is underway, Thank you for the inspiration!!
Thank you very much for taking the effort to share such useful and great information.
Love it!
We just moved to a split level/bi-level house and this is exactly the inspiration I was looking for.
I know you mentioned the light fixture is from Home Depot but do you happen to have the link or the name?
This is the light we used. https://www.homedepot.ca/product/home-decorators-collection-4-light-pendant-light-fixture-in-oil-rubbed-bronze/1000837072
I am getting ready to redo our split-level entry with tile. Can you show me a picture of the tile transition at the top step going downstairs? I am trying to figure out the best-looking solution for this.
Hi Jennifer! This is our old house- I don’t have a close up of that :)
Adding built-in drawers to your entry is so clever that it cracks me up. It’s attractive too.
I was just googling for staging ideas as I’m about to put a my split level house on the market. I am SO SAD that I didn’t see your drawers years ago. What a FANTASTIC idea!!!!! I could have desperately used that shoe storage all these years. It’s definitely more than I’m going to do for staging, but I will take your round mirror and small shelf and a wreath on the inside of the door :-)
Thank you for the comment Wendy! I do love that thin shelf in the entryway with the mirror- awesome choices for staging!