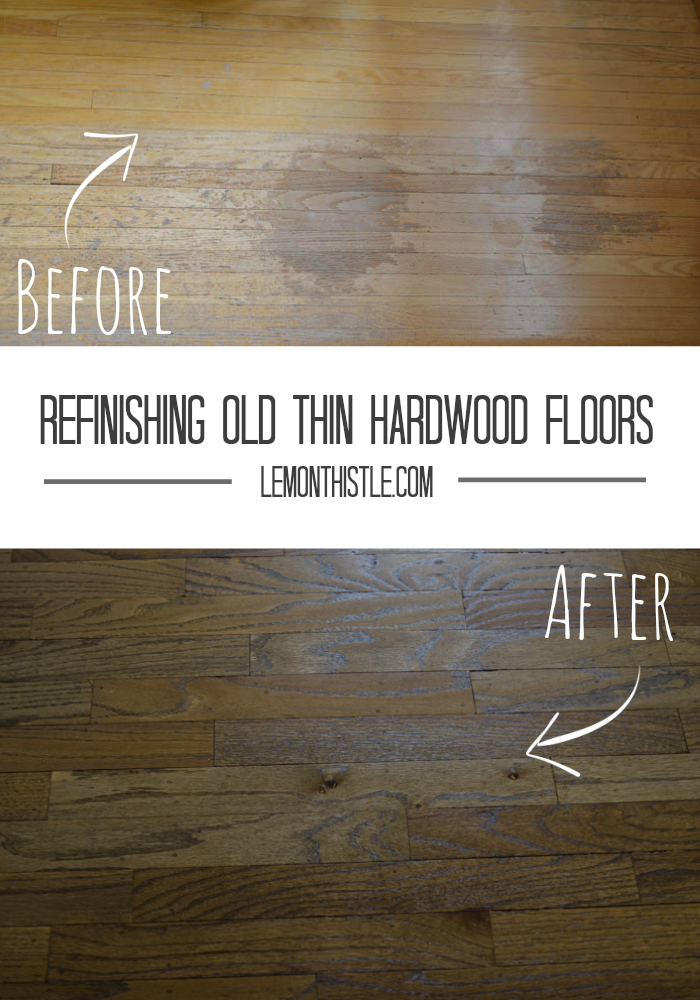
Alright guys, so we’ve been done our floors for a while, but I kept putting off this post because I took so few photos of the process. It was a dirty job and so my camera wasn’t being toted around. We did take some IPhone photos of most of the steps though. I am so happy with how our floors turned out, but we definitely learned a lot along the way. Here’s how we did it and what we would do differently/ what we learned. If this ain’t your thing- beware this is a wordy post so just check out the before and after :) Let’s start with the before photos, shall we? You can see all the before photos of the house here.


There are tons of tutorials online about refinishing hardwood floors. Some of them make it seem ridiculously easy (like one blogger did it in a weekend while her husband was out of town). Others give a more realistic picture of what it takes (like this one and this one). The only thing NONE of them (that I read anyways) talked about was really thin flooring. So I talked to every flooring guy I could find in our town and all of them seemed pretty un-excitable when I said we were refinishing the floors ourselves. I was told the same process over and over- use a random orbital sander 60 grit, 80 grit then 120. Easy, right?
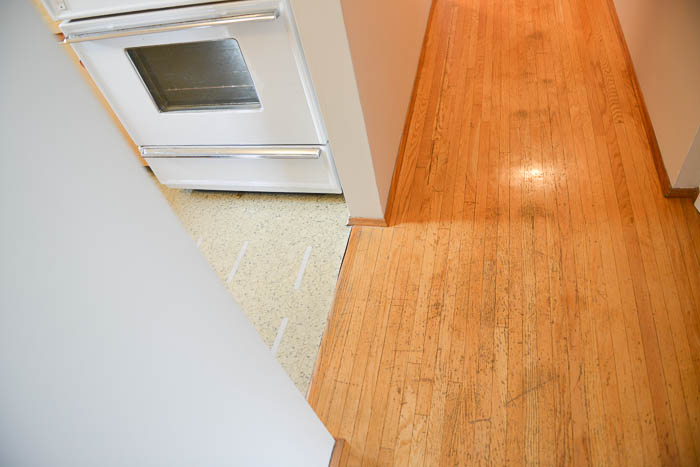
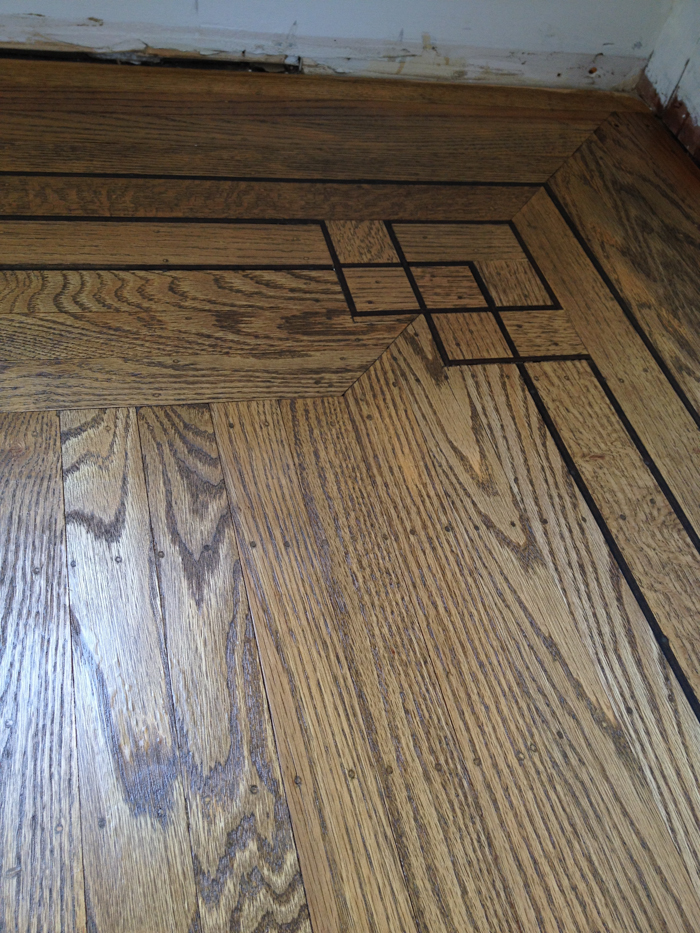
Our house was built in the ’60s and the hardwood is super thin with a walnut inlay. It’s about 1/4 inch thick and nailed straight through the plywood sub-floor (which looks really creepy from the basement). I got a little history lesson from one of the older flooring guys in town- he said the floors are red oak and were shipped to Canada en masse during prohibition (cool right?) and they used to nail it down then flood the floor with wood filler and trowel it off. Then they’d give it a quick sand to get it off the surface. When I talked to him about refinishing the floors (pretty much the day before we were starting), he raised red flags like crazy. I guess with the wood being so thin it splinters really easily and he’s seen a few nightmares of splintered floors when it gets sanded. He strongly suggested not sanding the floor. My brain was freaking out at this point because that’s exactly what we’d planned to do! His recommendation was to use a screen (like this– but we used a different type of sander- shown here) instead of sandpaper to knock the finish off. I called all over town and Home Depot was the only place that carried them for the sander we were renting. So what’s the big deal with the floors being so thin? 1) Splintering 2) Nail holes- sand to far and you’d have nails to sink and fill, one by one 3) If they’d been previously refinished- you might have even less than 1/4 inch.
Anyways! Here’s the process. If you can possibly take off your baseboards (ours were ancient and splintered when we removed them, so we ended up replacing them)- do it. It was so much easier to get right to the edges when we didn’t have to worry about getting stain on the trim. We did a couple passes with the 80 grit screen (as course as we could find) and it wasn’t quite cutting it. We switched to the 60 grit sandpaper and did one really quick pass just to get the bulk of the finish off. Then we switched to 80 grit sandpaper and did a couple quick passes to get it looking much closer to done. We went over it all with the 120 grit a few times to finish it off. The finer the grit, the less stain will take (something to keep in mind if you want really dark floors). Please excuse the blurry photos… I Phones, y’know.
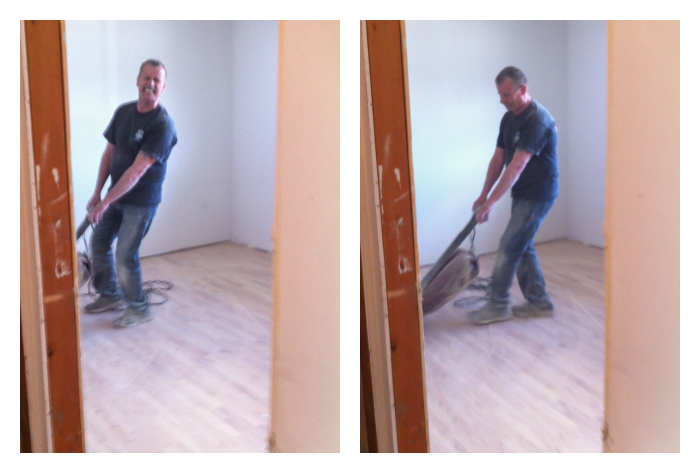
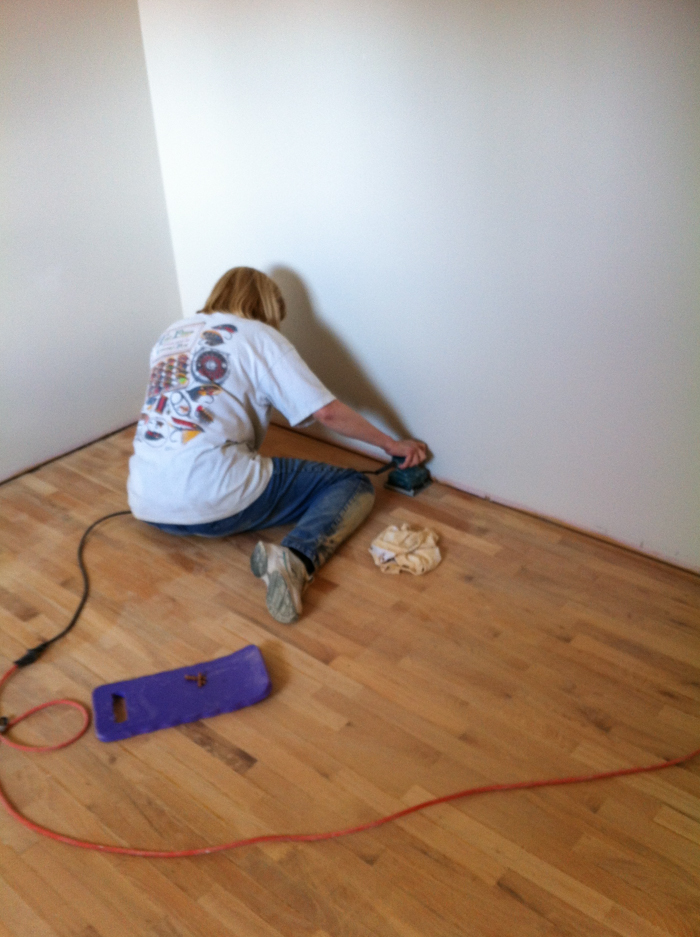
The problem we had was: no matter how many times we went over the floors, there were spots that weren’t getting touched. The floor was pretty warped and the edges were sunk more where the nails went in. We used a palm sander with 120 grit to get at these spots. It worked really well but was pretty darn time consuming. The first picture you can see shiny spots in the sun where there’s still finish- that’s after a million (probably 5 or 6) passes with the large sander and that much was left everywhere. We would have done more passes with the large sander, but we had a couple spots where the nail heads were getting really close to the surface. You can see my aunt getting the edges with the little guy here. This probably would be no big deal- and quick- if you were only doing one room… not 800 square feet.
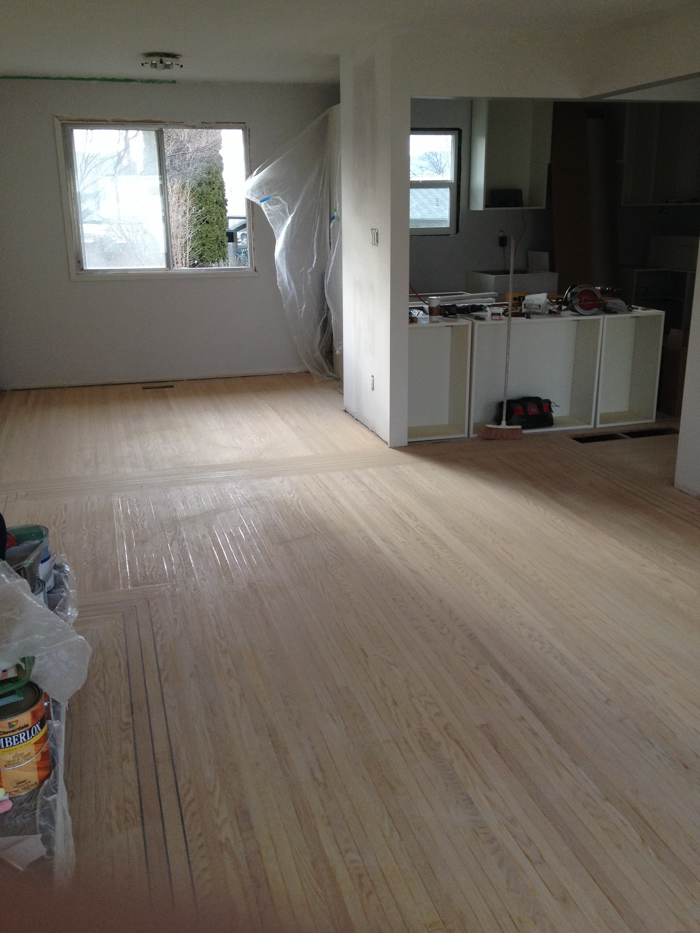
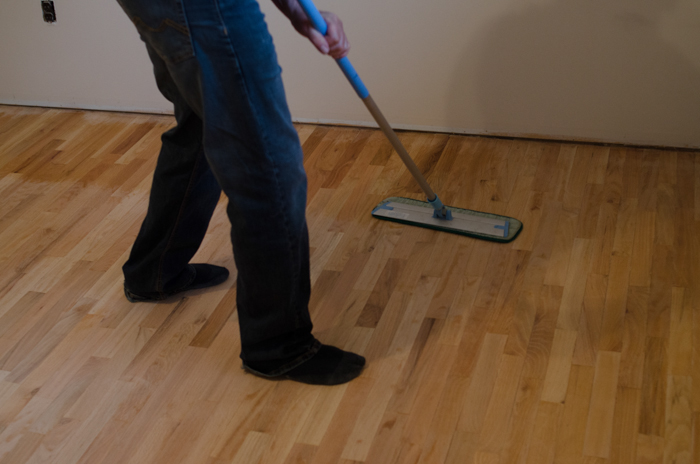
So once you’ve got it all sanded, give it a good wash. There will be sawdust everywhere and the last thing you want is it settling into your sealant when it’s wet. We did a wipe on all the walls too, then stuffed rags in the vents to keep the dust down (we had the vents cleaned before moving in). The raw wood looked so nice! We filled some bigger gaps with wood filler here.
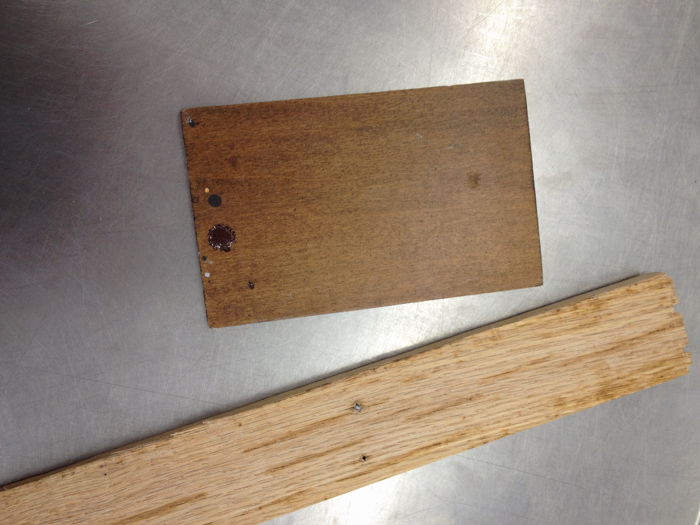
Picking out stain was pretty stressful for me- I was making so many decisions with the reno and for some reason I just couldn’t get my head around stain. We ended up going with Cloverdale Paints for a few reasons. They sold stain by the gallon instead of the quart. Since we needed a couple gallons to do the whole house, buying it this way was much more affordable. They also tinted stain for you and tested it on your sample wood to make sure it was what you wanted- so you didn’t have to pick one of five colours off the shelf. The problem with this? More choices! I came in with this photo as inspiration (below) and ended up picking this sample out of a box they had to colour match. It’s next to the sample wood we brought in. One tip I have for staining is to buy the best possible rubber gloves. Ours kept breaking (which gives you pretty gross looking hands) and we’d have to pick out the pieces of latex from the floor- ugh.
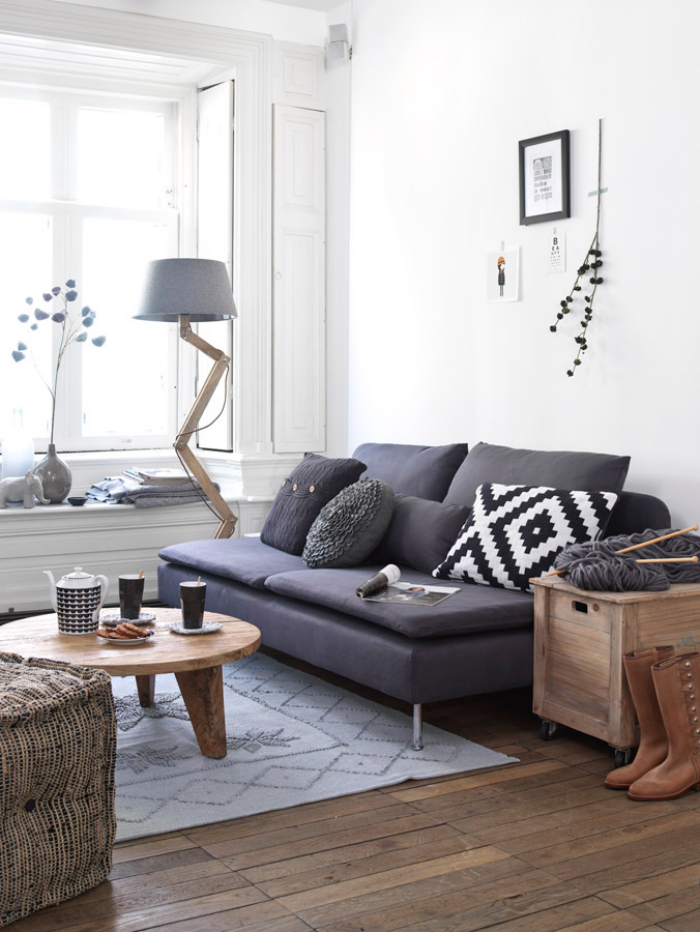 Source: Kim Timmerman via 79 Ideas
We wiped the stain and off on with plain white rags (you can buy bags of painters rags so you don’t need to wash them out and re-use them). The hardest part with a house this big is avoiding lap lines (when the edge of the stain dries so you get streaks). Since the flooring is pretty much continuous, we worked quickly (with 3 of us) to make sure the edges of the stain didn’t dry. After one coat, I was so disappointed- the flooring soaked it right up!

The second coat was so much better. We were finally ready to seal it. We used a satin finish oil based clear coat for a couple reasons. The store owner tried unsuccessfully to convince us to use semi-gloss. We really like the finish satin gave us- we wanted something that would hide scratches and showed the woodgrain a bit more… and I’m so glad we stuck to our guns. Water based is the new standard and so oil was harder to find, but an old hardwood specialty store was still stocking it. The fumes are way worse with oil, but it has a longer dry time, so is easier to work with. It’s also more durable- and durability was huge for us, we weren’t going to be doing this over any time soon. The downside to oil based is that it can yellow over time. We chose durability over the possible yellowing. We applied it with an applicator the hardwood store supplied. Like everyone suggested, we did three thin coats with 24 hours dry time in between. We waited 48 hours for it to cure before putting furniture on the floors.
Guys, I am so happy with our floors! They are totally worth the hours and hours of work, although if we were living here at the time- I’m pretty sure I’d feel differently (it was super stinky). Closing thoughts? If you want to refinish your floors- do it! It cost a bit more than we’d expected- we ended up having the sander for a week instead of one day (babies interfered a bit with our ability to go all day to get ‘er done). But it was still a fraction of the cost to pay a professional or get new floors. We love the character that the old floors give the house so replacing them was our last resort. It’s also not a weekend project if you’re doing more than one room (especially if your floors are as thin and warped as ours). Oh, and lastly- go satin! It’s seriously the best.
So I’ll stop now… if you’re still reading. This was a beast of a post- I promise the next one will be much more to the point :) If you’ve been following along on Instagram, you’ve seen how much the babes love it too. Plus one more look at the before/after. Seriously awesome.
Would you ever consider refinishing your hardwood floors? I’d love to hear if you’ve done it before.
XO – C
 Spring Asparagus and Pea Omelette
Wow! They look awesome! We have two bedrooms with original hardwood floors that need to be redone desperately…this makes me feel better about the condition of ours :)
You can do it! There’s definitely a charm to old wood floors.
What a HUGE transformation! I’ve always loved the charm of old hardwood floors – what a perfect way to update them while still keeping that character they bring to your home! Thank you SO much for sharing at this week’s Linkn’ Blogs! Enjoy the rest of your week!
-Kristi
Thanks Kristi- we love the character they have, dents and all :)
I’m all for DIY, but I’m scared of actually doing things to a house, does that make any sense? Furniture doesn’t scare me, but floors or even painting cabinets makes me nervous! But yours turned out great!! I can’t wait to see how your house turns out when you guys are finished with everything!
Thanks Kala! I totally agree it’s intimidating… this is the first time we’ve ever done something so big. We hated the floors enough that we were willing to risk it :)
You two did SUCH a good job. The floors look wonderful. You’re being featured today on Friday DIY Favorites! http://homecomingmn.blogspot.com/2014/06/friday-diy-features_20.html
Thanks so much Kayla! You’re the best!
Awesome post! Your floors looks amazing. We are in the middle of getting bids to have the floors in our new house refinished. The current floors are great, but they are warped in some areas, and theres a spot where a floor heater used to be that needs to be patched. Our house was built in 1950 and has white oak flooring. After lots and lots of research and advice from others weve decided to forego DIYing this project and we’ll be hiring a guy! I love that you chose satin coat over semigloss. We plan to go satin as well. I love the soft almost matte look of satin floors. I also love the color you chose. Awesome all around!!
Ooh, your floors sound like they’ll look so lovely when they’re done! I think the worse off they are the more character they have when they’re finished. We DIYd out of budgetary restraints (and curiosity) it’s definitely a risk… and I totally support your choice in going satin- it’s the best!
I’ve attempted floors before and I’ve never been able to get the desired finish. I have to say, you did a fantastic job and the floors look amazing. I’d take those floors over new hardwood any day.
Thanks SO much Meryl! We are super happy with them. There are a couple spots where the finish is less than perfect, but I’m so happy with them overall :) Definitely more character than new wood floors!
Absolutely awesome, I love them ! You probably at some point wonder why on earth, when problems crop up but it is definitely worth NOT listening to everyone’s advice but go with your gut feelings as to what will work and what you want … but it was SO worth it ! You are an inspiration ! Thanks for sharing *hug*
Aw, thank you so much! Every house is different with it’s own surprises and issues, isn’t it? But so worth it to tackle!
They look fab! We (meaning me) also refinished our hardwoods and it was the hardest I’ve ever worked to date on a project but also yielded the biggest impact! I too was met with a lot of naysaying and sceptics but you know…if you hate it to begin with the only way to go is up! Way to go, your house is looking beautiful. :)
SO HARD, but so worthwhile. Isn’t it funny how strong of opinions people have with what you do to your own home? Thanks so much for the sweet comment!
Wow you’ve done a superb job because after refinishing it look likes a new one hardwood floor. I’m hoping that you have further tricks about flooring.
Some finishes!
What do you use to seal stains? Varnish or oils?
Very good content
I used an oil based clear but they are hard to come by in Canada
Great write up! I appreciate your realistic and step-by-step guide with all the challenges you faced. When you take on a big project like this, I can also relate to uncertainty when you can go so many different directions. I will have to say you did a great job and I love the end results! Your floor color is rich and on-trend now. Thanks for sharing!
Thank you so much for this post! I am looking to refinish our floors, and can’t seem to find any with thin wood. I’m so glad you talked about all the challenges you faced and this was such a wonderful step by step guide. I will definitely be revisiting this as we contemplate what finish to use and what stain we want to use. Thank you again. I can’t wait to look through and see how the rest of your renovations turned out.
Thanks so much for the encouragement Mariah! Best of luck on your floors :)
Thanks, Colleen. My husband and I are about to embark on this project and you post is so helpful. What sander did you use? Would you recommend it?
We rented one from Home Depot and then used a mouse sander for finicky parts. It was a hand me down mouse sander but did great- I would just avoid rotary if you’re new to sanding :)
Thank you for posting. The enduring good looks of hardwood flooring come in many types and styles to fit different needs and budgets.
Excellent post! My wife and I just bought a house with the same thin hardwood strip flooring, and I’ve been beating my brains out trying to figure out how to refinish it. You provided some excellent advice. We still get started on ours next week. I just have one question. How bad was the dust situation? We just painted the house and I’m worried about ruining the paint job when we refinish the floors.
We did this before repainting! You would just want to wash the walls after :)
I’m doing it by myself right now. The floors im working on are awful. God help us all!
We are wanting to pull up the carpet and refinish our hardwood floors. The problem is, when I peeked under the carpet I noticed that the hardwoods run opposite the direction they should be running. Instead of running with the long part of the living and dining room they run with the short part. So if you’re walking through the living and dining room the hardwoods would be perpendicular to you, not parallel. This seems like it would look bad. What are your thoughts on this?
I think it totally depends! Are you sure it’s hardwood or is it the subfloor? Older houses sometimes have that thinner board for subfloor.
And any hardwood is really better than old carpet ;)
Our house was built in the 50’s, and had thick orange colored stain on the floors. We rented a big sander for the main areas, and a small hand sander for the edges and corners. Now you can see a lot of circular sanding marks. I’d like for it to be a little smother looking before we apply to color stain. We have vacuumed and swept and still have saw dust. You said after we have sanded, “give it a good wash”, how and with what do I wash it?
When I did not only the floors but had to replace sheetrock, dusty, in my house I used a sweeping compound. I sprinkled it around and then swept it gingerly. Picked it up with a dustpan and then shop-vaced. I did get it all up.
Hope this helps.
I had just used rags with water, rinsing it out over and over :)
We are tackling this project this weekend!! Fingers crossed we can get it done in two days! I think we have the same hardwood as you… my hubby just sanded one room tonight, looks like we will also have to go in with the palm sander… thanks for this post- it’s helpful already ?
We have recently started our new hardwood floor installation and repair company and came across this article.
Really appreciate how you took the time to educate us on the subject. It is very important to understand what goes into a project like this before you attempt it on your own!
Hardwood floor refinishing by no means is an exciting topic to write about, but you did a fantastic job keeping it interesting and informative! Thanks a ton!!
What type of sander did you use? When I did mine, old house, I was told to use a drum sander as it was much easier to control and less likely to get swirls in the floor as the orbital would. It also takes off less wood. I refinished what was the old wood subflooring-wood floors.
My daughter bought a house built in the 70’s and has the really thin wood floors and they are in poor condition especially the hallway.
We rented the one in the photo from Home Depot :) I can’t remember what it was called now! I would go in and ask them- they should know by looking at it
Great job! As for me, I would not risk doing wood floor refinishing and will opt for professionals. The cost of an error can be too high, and I have very little experience in flooring.
Thank you for the information regarding refinishing old thin hardwood floors. I enjoyed reading this article as it provided us lots of information regarding it. I am sure many people will come to read more about it in future.
I appreciate all the hard work you put into this site!
Great post! Work done is perfect and amazing, certainly looks professional as refinishing hardwood floors are not an east task requires a lot of hard work. Hope to see more in the future!
That looks amazing! I love how your floors turned out and the color of the stain! The satin finish turned out so good and I can see why you didn’t go for the semi-gloss.
What was the sander you used?Home depot orbital with 3 sanders underneath?
Thanks
Just the rented one but with a screen instead of sandpaper :) We used a palm sander for the corners and grooves.
What colour of stain was this. My gosh so pretty.
I’m sanding 1/4″ red oak flooring and was looking for instructions on how to proceed, so thanks for the detailed write-up!
I rented the 3 disc sander from Home Depot and what I found was I needed to use 36 grit sandpaper to get the 1965 oil base finish off. 60 grit just took too long and since the floors in the living and dining room were stained dark I found I had no choice.
Yes, I was worried I’d take too much of the floor off, but since the floors had never been sanded (this was my parent’s home where I grew up) I gave it a shot. What I found is the 3 disc sander is very forgiving. My process was to use 36 then 60 then 80 and finally 100 grit which did the job without removing too much wood.
Since the floors were relatively flat, I only had to use a hand sander in the corners and against the walls. When I started out using 60 grit I found I would have had to use the hand sander on the floors in way too many spots, hence my going to 36 grit.
Again, thanks so much for the detailed explanation of your process.
What wood filler did you find that worked and stayed well?
Ohhh this was so long ago I can’t remember, We just bought what the flooring store reccomended :)