• Skip to main content
  • Skip to header left navigation
  • Skip to header right navigation
  • Skip to site footer
  • Shop
  • Get The Email
  • Work With Me
  • About
  • Search

  • DIY
    • DIY Home Decor
    • With Power Tools
    • Renovation
    • For Kids
    • For Parties
    • Wearable
    • Organization
    • Cricut Crafts
  • Home Decor
    • Room Reveals
    • Kid Friendly
    • DIY Home Decor
    • Renovation
  • Lettering
    • Hand Lettered Printables
    • Free Practice Sheets
    • Handlettered DIY
    • Free Brush Lettering Quickstart Guide
Lemon Thistle

Lemon Thistle

Rad DIY, Lettering and Design for Real People

  • Printables
    • For Cricut
    • Party Printables
    • Home Decor Printables
    • Bachelor Bingo
    • Handlettering Practice Sheets
    • All Free Printables
  • Entertain
    • Party Printables
    • Party DIY
    • Tablescapes
    • Kids Parties
  • Blog

DIY Drink Labels (fit for a party!)

Aug 11

Such a great idea to label your drink at a party! I never would have thought of this, but it's so simple and cute

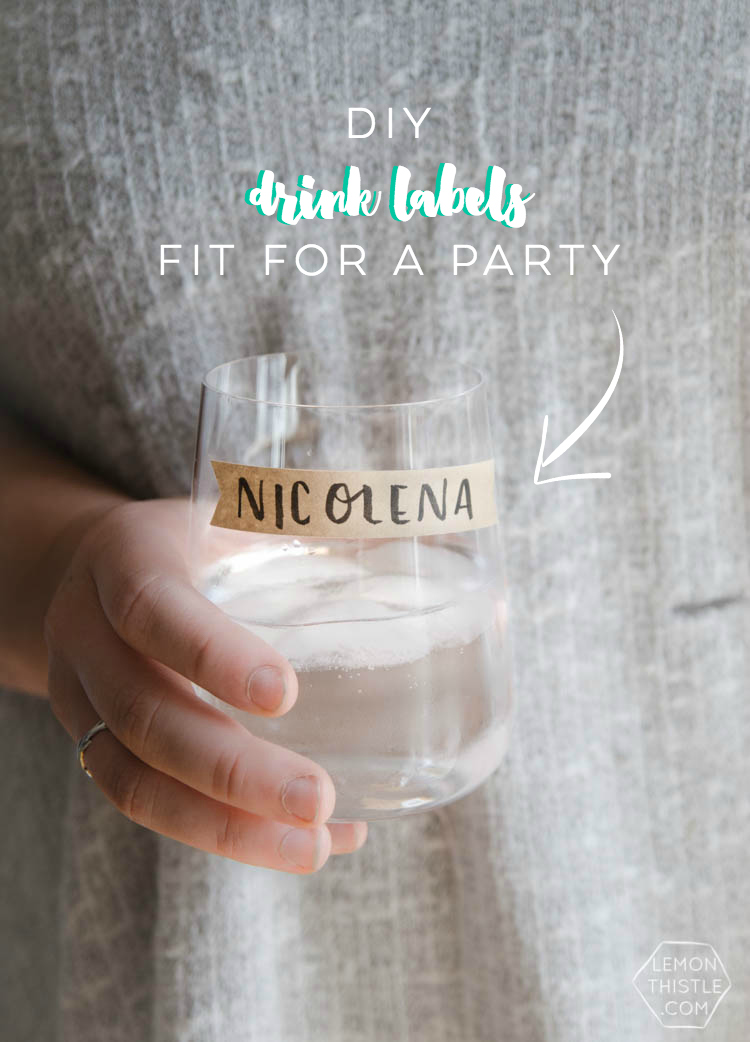
Remember that slew of parties I was telling you about from February? I hardly do either. But I had made these drink labels for one of the baby showers and never did get around taking any photos of them to show you how EASY they are to recreate… until now. So today’s party DIY is another 5 minute one.

Can we talk about labelling party drinks though? I totally get why people grab paper cups and a sharpie and say ‘forget it’ to proper glassware. People forget which drink was theirs and grab another and by the end of the night you have 30 drink glasses to wash for 12 people and it looks like you had a classy frat party. When we got married I went out and bought some silicone drink markers and I really love them, I use them all the time. They work on wine glasses and cups (it looks like they’ve been replaced with these gem ones which are even cuter!). But I love to try different drink labels (that aren’t so rainbow) to match party themes. So far, I’ve done drink flags on sticks and on straws, wrapped straws in washi tape, wrapped jars in chalkboard, and that’s just that I’ve blogged. It’s one of my favourite things to do for a party. And if it’s a kids party? Well, don’t expect them to take care of their drink labels. Pull out the paper cups, for sure. But you can customize them! I’ve done patterned ones, bumblebee ones, and watercolor. And I’m sure I’ll do more #cantstopwontstop. But let’s get back to the project, before I dive into my opinions on glassware at parties.

Such a great idea to label your drink at a party! I never would have thought of this, but it's so simple and cute

Such a great idea to label your drink at a party! I never would have thought of this, but it's so simple and cute

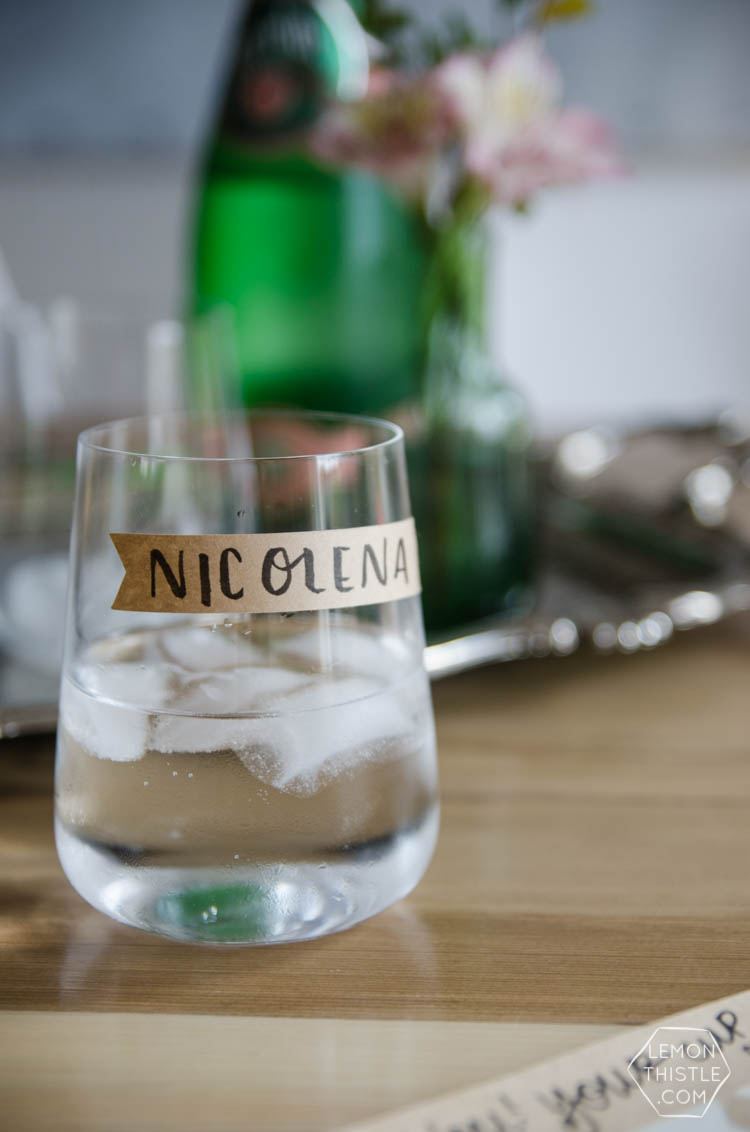
These drink labels are so easy, I love that they don’t rub off during the party from condensation (I’m looking at you glass writers), but they peel off and clean up like they were never there. And although I used my Cricut to make these in less than 5 minutes once I’d designed the template, scissors would accomplish the same thing. The only difference would be- if you cut with scissors you would have individual stickers for guests to write their names on and peel the back off, instead of a sheet of labels. I actually kind of wish I’d cut them all out ALL the way (which you can also do with a Cricut) and set them in a little shot glass or something.

Such a great idea to label your drink at a party! I never would have thought of this, but it's so simple and cute

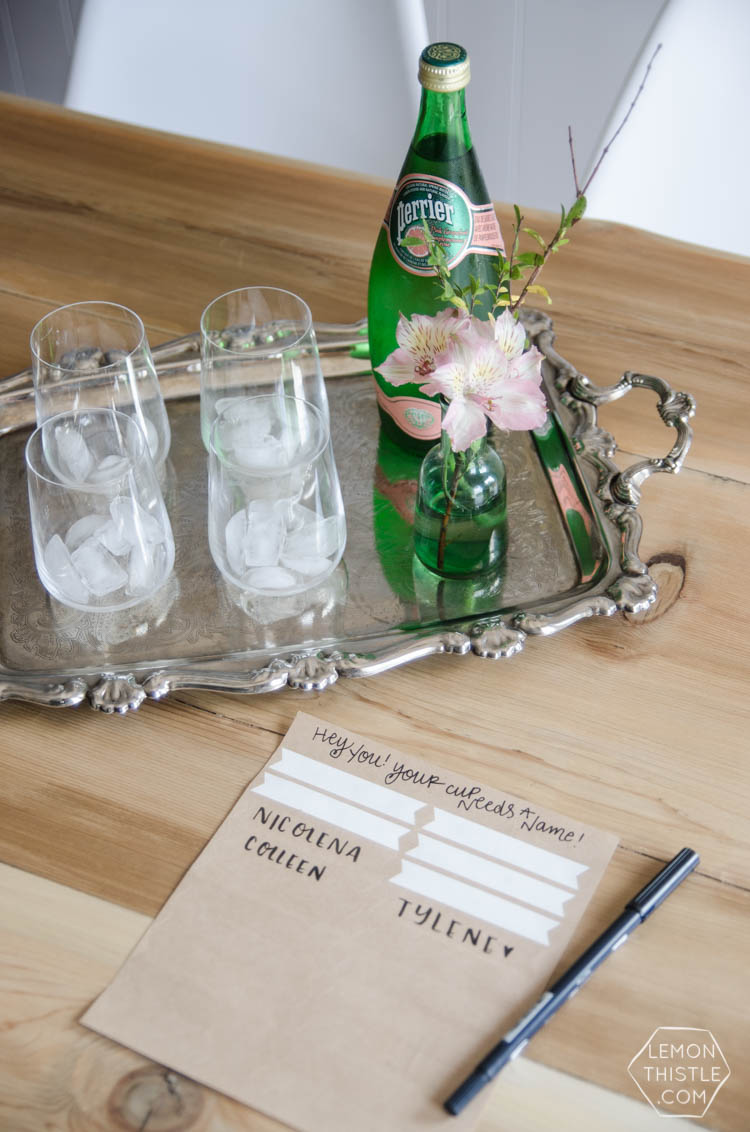
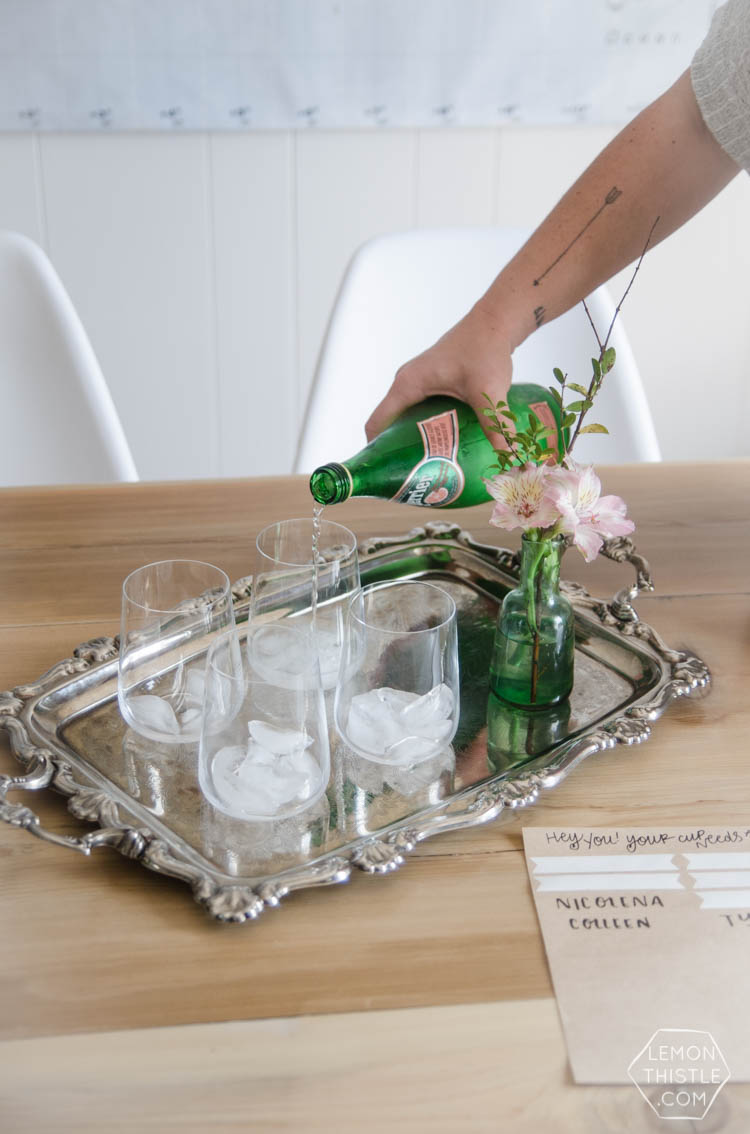
The labels I used are kraft paper look and I love how basic they look and they blend with class a bit better than an all white label would. You could probably print a pattern on white labels (with a laser printer so the ink doesn’t run) or even do some sweet clear labels, but I’m a fan of the simplicity of kraft. These labels I had leftover from my Valentine’s Day treat labels and are from World Label. It’s a full sheet label, so you can cut any shape you like out of it. If you were using scissors, you could get busy cutting, or you could print the template on top of the labels (or on the back side) to give you a guide for cutting. If you’re using a Cricut like I did, you can upload the template to Design Space and there is a custom setting for labels (or choose paper if you’d like them completely cut, backing and all.

GRAB THE FREE TEMPLATE HERE

The template is ONE label. Copy and paste it as many times as you need in your word document or on Design Space!

Such a great idea to label your drink at a party! I never would have thought of this, but it's so simple and cute

The only thing I would suggest/ caution is to remove the labels the same day of the party. Don’t leave them until morning or the adhesive is a bit stickier and takes a bit more peeling. We popped the ones we forgot about into the dishwasher and it came off no problem though.

If you use this party trick, I’d love to see photos! Tag me on social @colleenpastoor or shoot me an email [email protected] :) Party on, friends.

Such a great idea to label your drink at a party! I never would have thought of this, but it's so simple and cute

Category: Entertain, PrintablesTag: Baby Shower, Cricut, Digital Design, Freebie, Party, Party Decor, Party DIY, Party Printables, Tips and Tricks, Wedding Shower, Weddings
Facebook0Tweet0Pin0LinkedIn0
Previous Post: « Three years blogging?!
Next Post: DIY Thin Modern Wood Shelf (With Partial Ledge) I LOVE this DIY modern wood shelf for an entry way. It's totally minimal but really functional with that ledge. »

Reader Interactions

Leave a Reply Cancel reply

Your email address will not be published. Required fields are marked *

Sidebar

WOOHOO!

Check your email to confirm!

(+ get your freebies + discounts)


Thanks for dropping by!
I’m Colleen: wife; mom to 4 wild ones; and DIY blogger behind Lemon Thistle. You can expect to see rad DIY, modern home decor, renovations, hand lettering and the occasional party on Lemon Thistle. Read More…

email facebook youtube instagram pinterest

Unless otherwise noted, all content and images are mine. Full posts may not be shared without express written consent. But I love when you share! Feel free to share, without altering, one image with proper credit and a link to the original post. All free printables are for personal use only.

Everyone loves proper credit- if you ever notice something improperly credited, please please shoot me an email and I’ll fix it lightning fast.

Find all my policies right here.
This includes my privacy policy, info on the GDRP compliance and information on affiliate links (Including Amazon Affiliates).

Visit Colleen Pastoor’s profile on Pinterest.

colleenpastoor

My house is never this clean
-
DIY + Home Decor Blogger
Mama of 4 👶🏼🧒🏼👦🏼👧🏼
Renovating our 🏠 the DIY way
🖤 Lettering & ☕️
-
✉️[email protected]

colleen pastoor/lemon thistle
What’s next on your project list? Spring is teas What’s next on your project list? Spring is teasing us so we’re starting on outdoor projects around here!
$100 play room makeover is DONE! This room has se $100 play room makeover is DONE! 
This room has seen so much change over the past year (swipe over to see it 2 weeks ago, 10 months ago and 1 year ago!). I took this last week to make over this space with mostly pieces we already had and I’m so so happy with the results! It’s a good reminder that some hard work, creativity and of course paint can work magic.
I’m sharing all the details (and that under stairs space!) on YouTube today (link in my stories!) and so is my friend @thediymommy (she made over her daughters bedroom for $100!).
Do you think dried grasses are only for fall decor Do you think dried grasses are only for fall decor? I used to think so, but these bunny tail grasses are too cute to put in a bin until next year. Plus the name sounds like spring decor to me ;) What do you think?

Ps. Today’s going to be a full day of playroom progress! I’ll share as much as I can in stories as I go :)
Paint is honestly magic.✨ I am so excited to sha Paint is honestly magic.✨
I am so excited to share this kitchen makeover with you guys! These are the same cabinets, just painted (countertops too!) And some updated finishes. I blogged the full before and after if you’d like to check it out!
Big thank you to @schaubhardware and @wagnerspraytech for partnering to make this space possible!
Ps. Most of the work done here was by the homeowners so if you’re thinking about taking on a makeover in your own home, maybe this is the encouragement you need 😘
As I’m sitting here staring at the dishes on the As I’m sitting here staring at the dishes on the counter while I try to focus on editing a video, I thought it’s as good of time as any to share this reminder 😘
I feel like I’ve lucked into the best job out th I feel like I’ve lucked into the best job out there, but then I’m also so aware of the amount of work it took to get here. Today I chatted with two of my blog friends in an Instagram live about DIY blogging as a job and answered some questions we get asked all the time about our work and the balance of it all! I saved it as an IGTV so you can watch it if you missed 🥰

Big thanks to @love_create_celebrate and @thediymommy for chatting with me today! One of the biggest perks of this job is all the talented ladies I’ve had the privilege of meeting and calling friends- these two are top of that list!
I’m having some fun in stories with a little giv I’m having some fun in stories with a little giveaway guessing game. I’d love if you played along!

I put up a question box and you can guess my next room makeover and the guesses are all over the place. Some are projects on my dream list, some are rooms I wish to even have in my house and some are spaces we’ve already tackled! Like our main bathroom ✨ these photos are from my spring home tour I shared over on the blog earlier this week. Hung up a pennant and called it decked for spring 🐣
Who is ready for spring?! I know we totally are- w Who is ready for spring?!
I know we totally are- we’ve been soaking up outside time this week with the kids home on spring break but over on the blog... it’s spring home tour time! I am sharing my home all ready for spring along with some amazing bloggers as part of the #seasonalsimplicity spring series!
You know I love a touch of DIY decor in every spac You know I love a touch of DIY decor in every space in my home, so I’m so excited to be partnering with @HGTVCanada to celebrate #$aveMyReno being back TONIGHT! #partner
 
My favourite thing about $ave My Reno is that they encourage home owners to get involved and DIY to maximize budget. They even help kids get involved- it’s everything Shane and I work towards in our own projects. You can catch it every Tuesday at 9/9:30PM EP on @HGTVCanada or catch up on episodes on STACKTV through @primevideoca!
 
PS. I made those tie dye pillows, similar to the ones featured in tonight’s episode! You can catch my stories to see the super speedy how-to :)
Load More... Follow on Instagram

Copyright © 2021 · Lemon Thistle · All Rights Reserved · Powered by Mai Theme