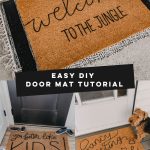
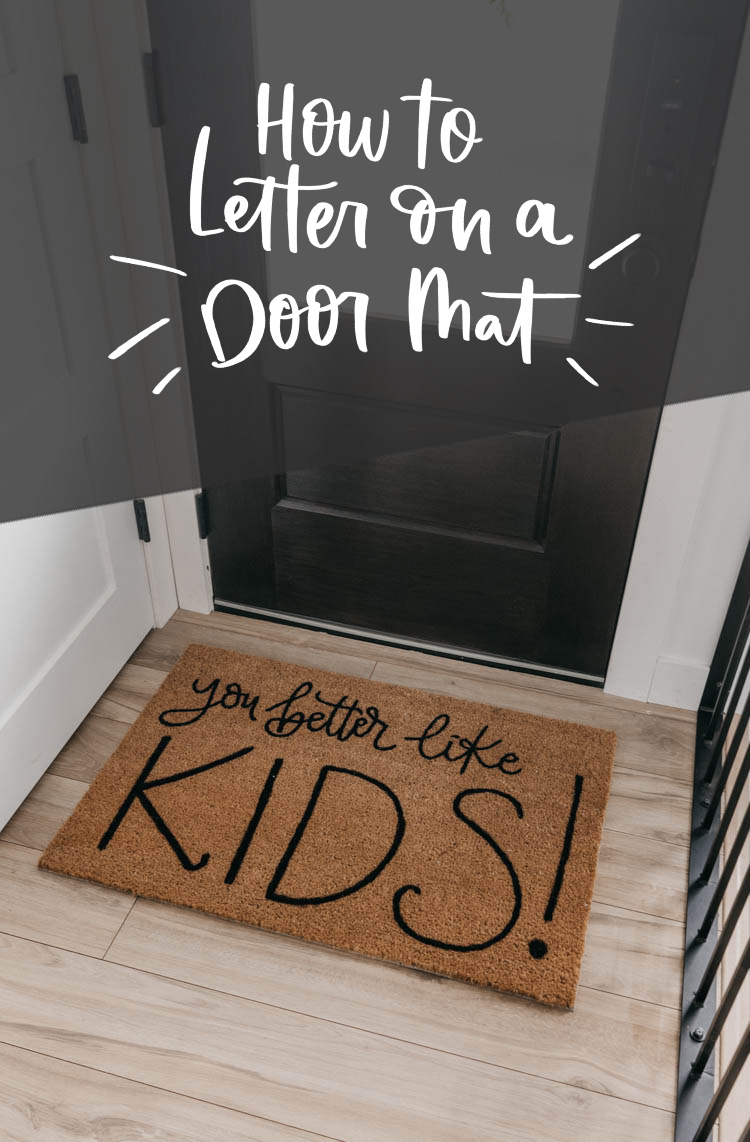
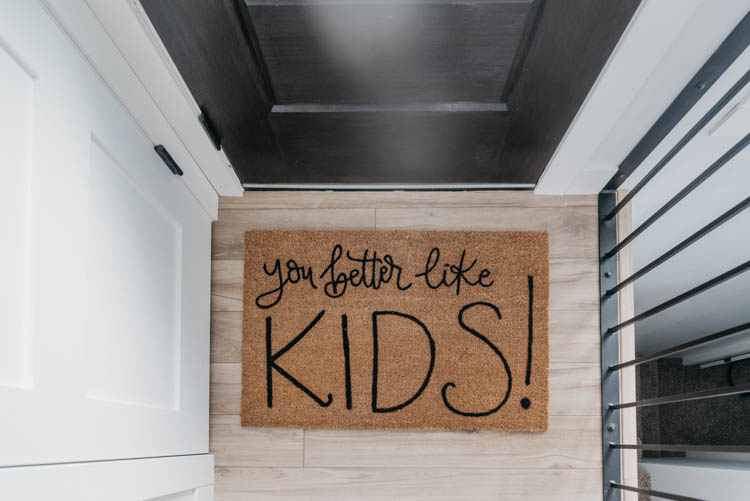
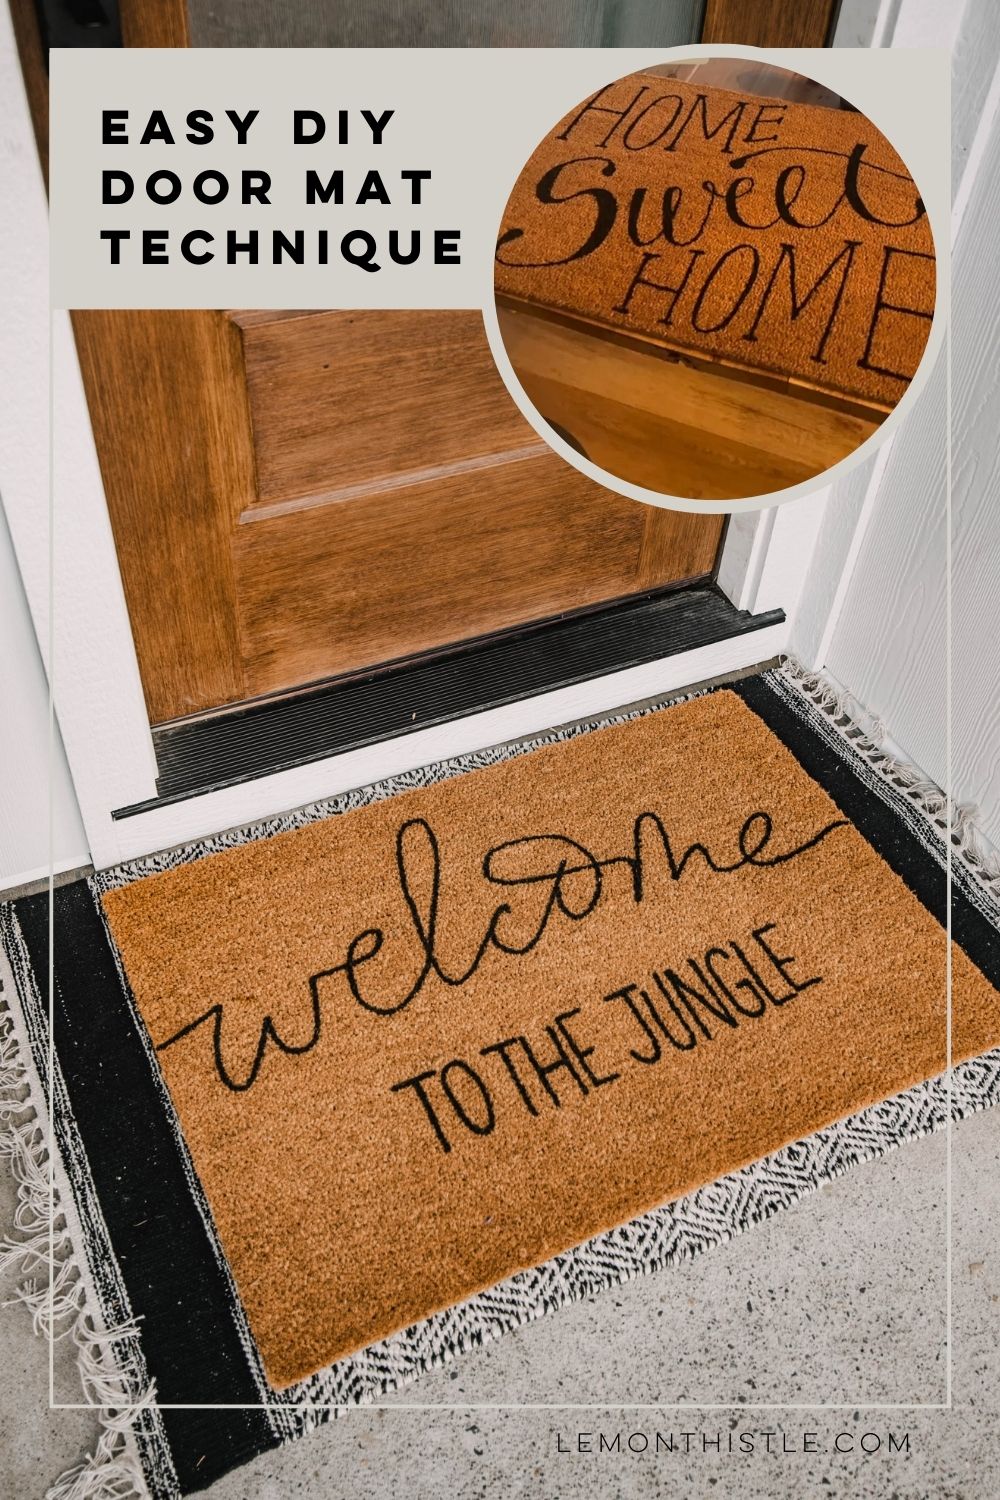
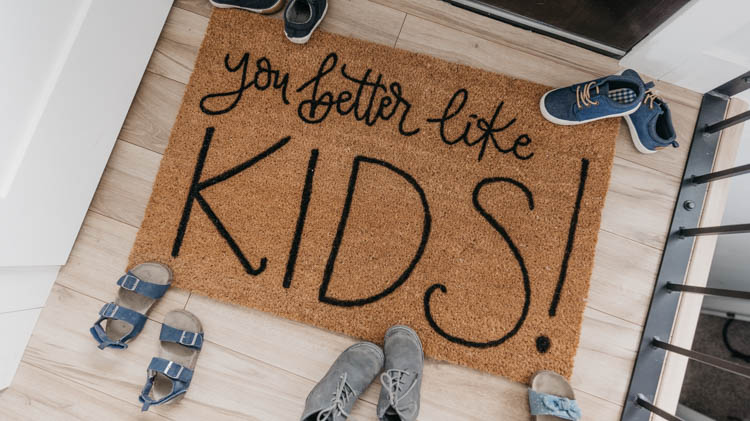
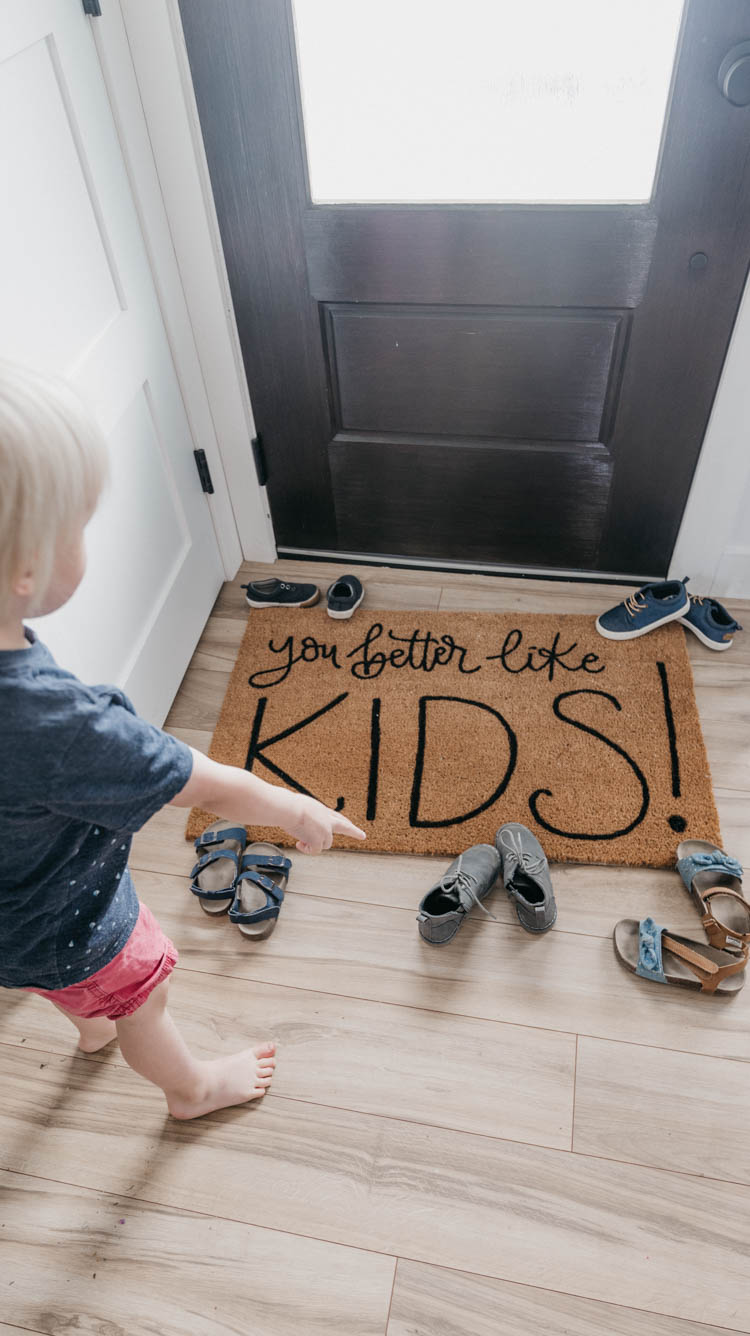
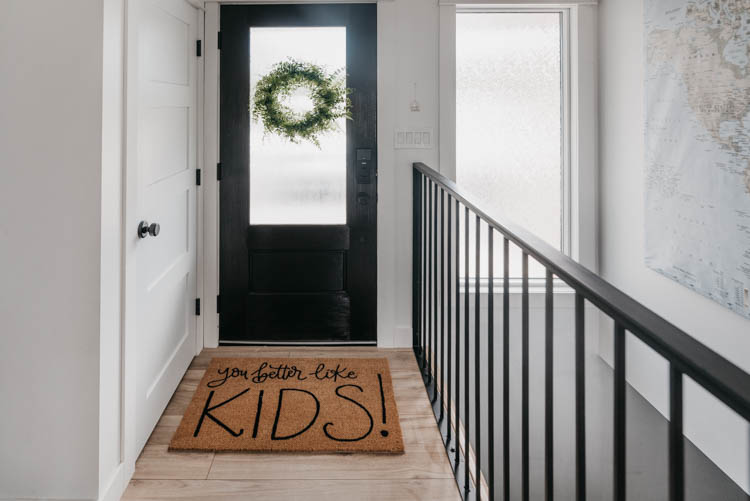
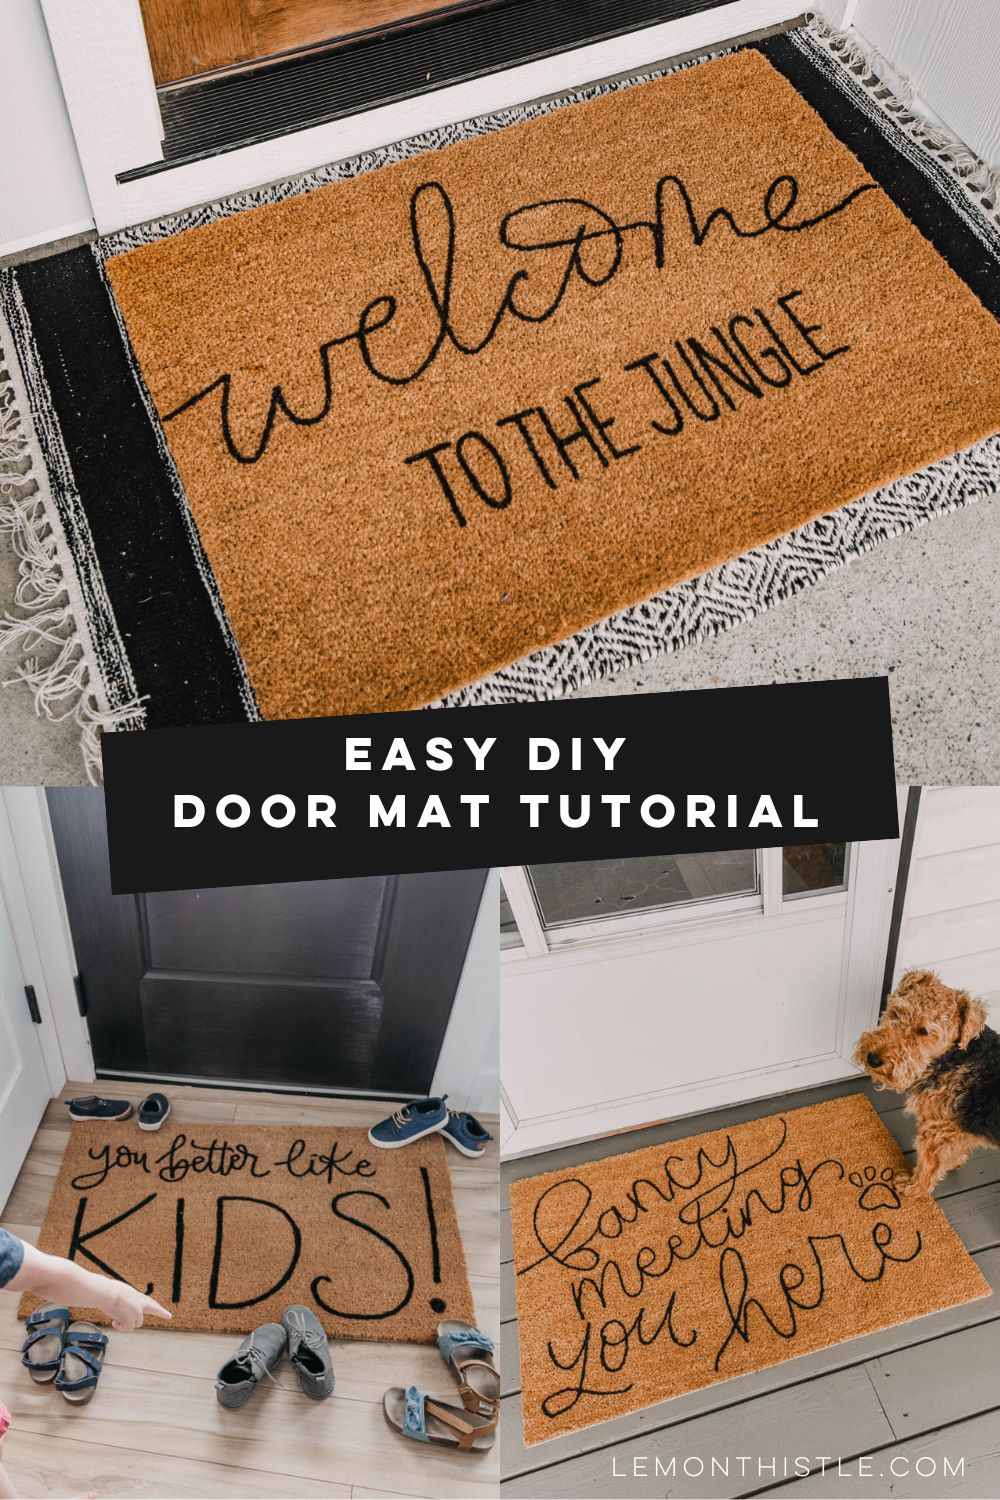
Sharing the easiest way to letter on coir door mats for this DIY personalized door mat project! Mine says ‘You Better Like Kids’, but yours can say whatever you choose. This way of painting door mats helps the paint hold up longer than spray paint.
*Post originally published May 2019, updated July 2023 with more tips and examples*
These DIY door mats are the perfect house warming gift or for you to welcome guests to your front porch. They’re so easy to make without any fancy cutting machine (although I do love my Cricut machine!), I wanted to find an easy way to make a custom door mat that didn’t require freezer paper, flex seal, stencil or transfer tape… just a super easy project for your home decor.
This is the perfect way to make your own DIY door mat out of a blank door mat. You can make a funny doormat or a personalized door mat or even take this easy DIY doormat tutorial and make a larger doormat for double door entry.
For us? We wanted a funny custom door mat and I love the look of the natural fiber on plain coir door mats.
In looking for the best way to combine those two, I tried a few different techniques to make this personalized doormat before I landed on this simple technique. I tried so many techniques. I followed custom cricut doormats tutorials and it was more work and more expensive for the materials but also they didn’t look as great for the small details and clean lines.
I just wanted black paint and the plain doormat I was using (coir) has such rough edges that the end result using any kind of cricut stencil had a hard time sticking to provide clean lines and clear edges. I’ve tried spray paint (bleed was terrible) and painting with outdoor acrylic paint and a stencil but it took SOOO long. I am an impatient DIYer.
By far… friends, this is the EASIEST. It’s also worn the best of any of the DIY door mats I’ve made.
This method I’m sharing today goes a heck of a lot quicker and the edges look so nice and clean. Plus, the black goes right into the fibres so you don’t need to worry about your design wearing off too quickly like spray paint does!
Since sharing this DIY tutorial, I’ve made so many of these mats. They’re the perfect DIY house warming gift and super affordable to DIY as well.
Our own DIY door mat was a fun way to add cuteness to a total renovation zone. Our siding was off (notice all the photos were inside!) and our kitchen was half remodelled when I made this. Did I mention 4 kids 4 and under? May as well prepare guests by making them laugh ;)
Over on YouTube, I joined in with Christina from The DIY Mommy’s Outdoor DIY + Decor Challenge and shared this project. I thought I’d put together a little written tutorial for you over here as well!
You can see the video below :) If you’re over on You Tube, I’d so love if you subscribed to my youtube channel!

TO MAKE YOUR OWN PERSONALIZED DOOR MAT, YOU’LL NEED THE FOLLOWING MATERIALS:
- A LOT OF KIDS. I recommend 4…. JK! You can write whatever you want to on your mat! No kids required ;) You could even just put your family name on there
- A coir mat, mine is this one from IKEA but I’m sure you could find them at Home Depot
- Black Multisurface Acrylic Paint or any outdoor acrylic paint (that’s a big bottle, I bought one a while ago and am still using it- it goes a long way)
- A little bit of water
- Stiff Paint brushes (I like the crayola kids ones from the dollar store!)
- Fine point applicator
So I’ve used this technique before but it took me way too long to try it on coir mats. This is how I love to letter on fabric as well. It’s a great technique to letter on rough material that you find you need to reload your paintbrush too often.
Because coir mats are the best material for us to brush our dirty shoes off before coming inside, I really wanted to work with a blank coir doormat even though it’s rough and difficult to paint. This technique makes a painted doormat easy. Promise ;)

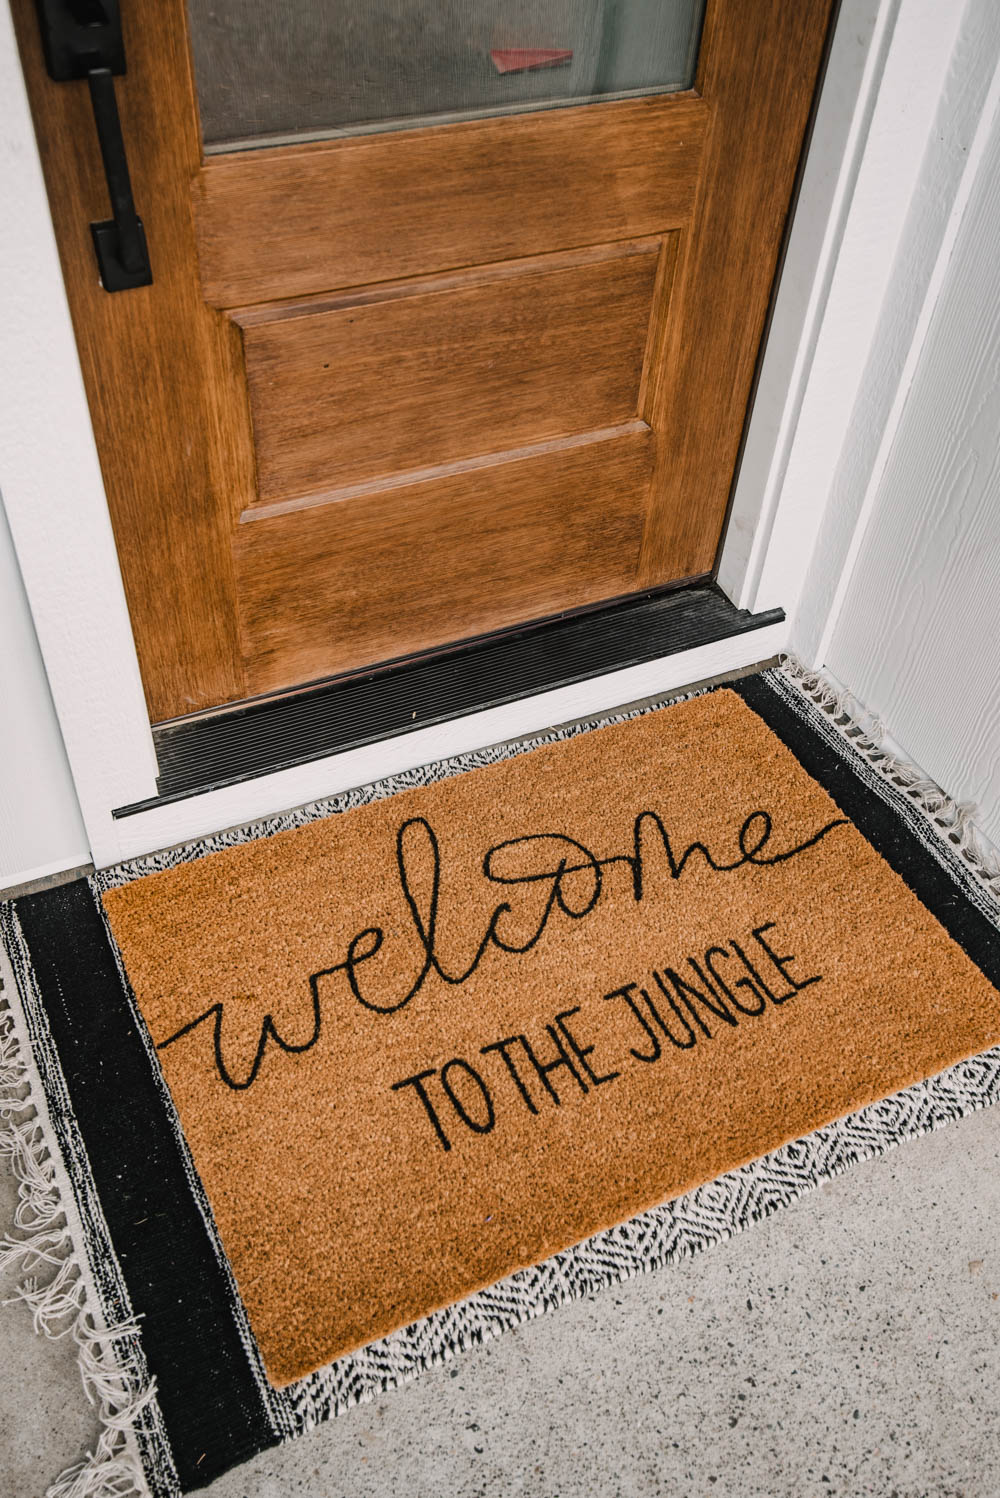
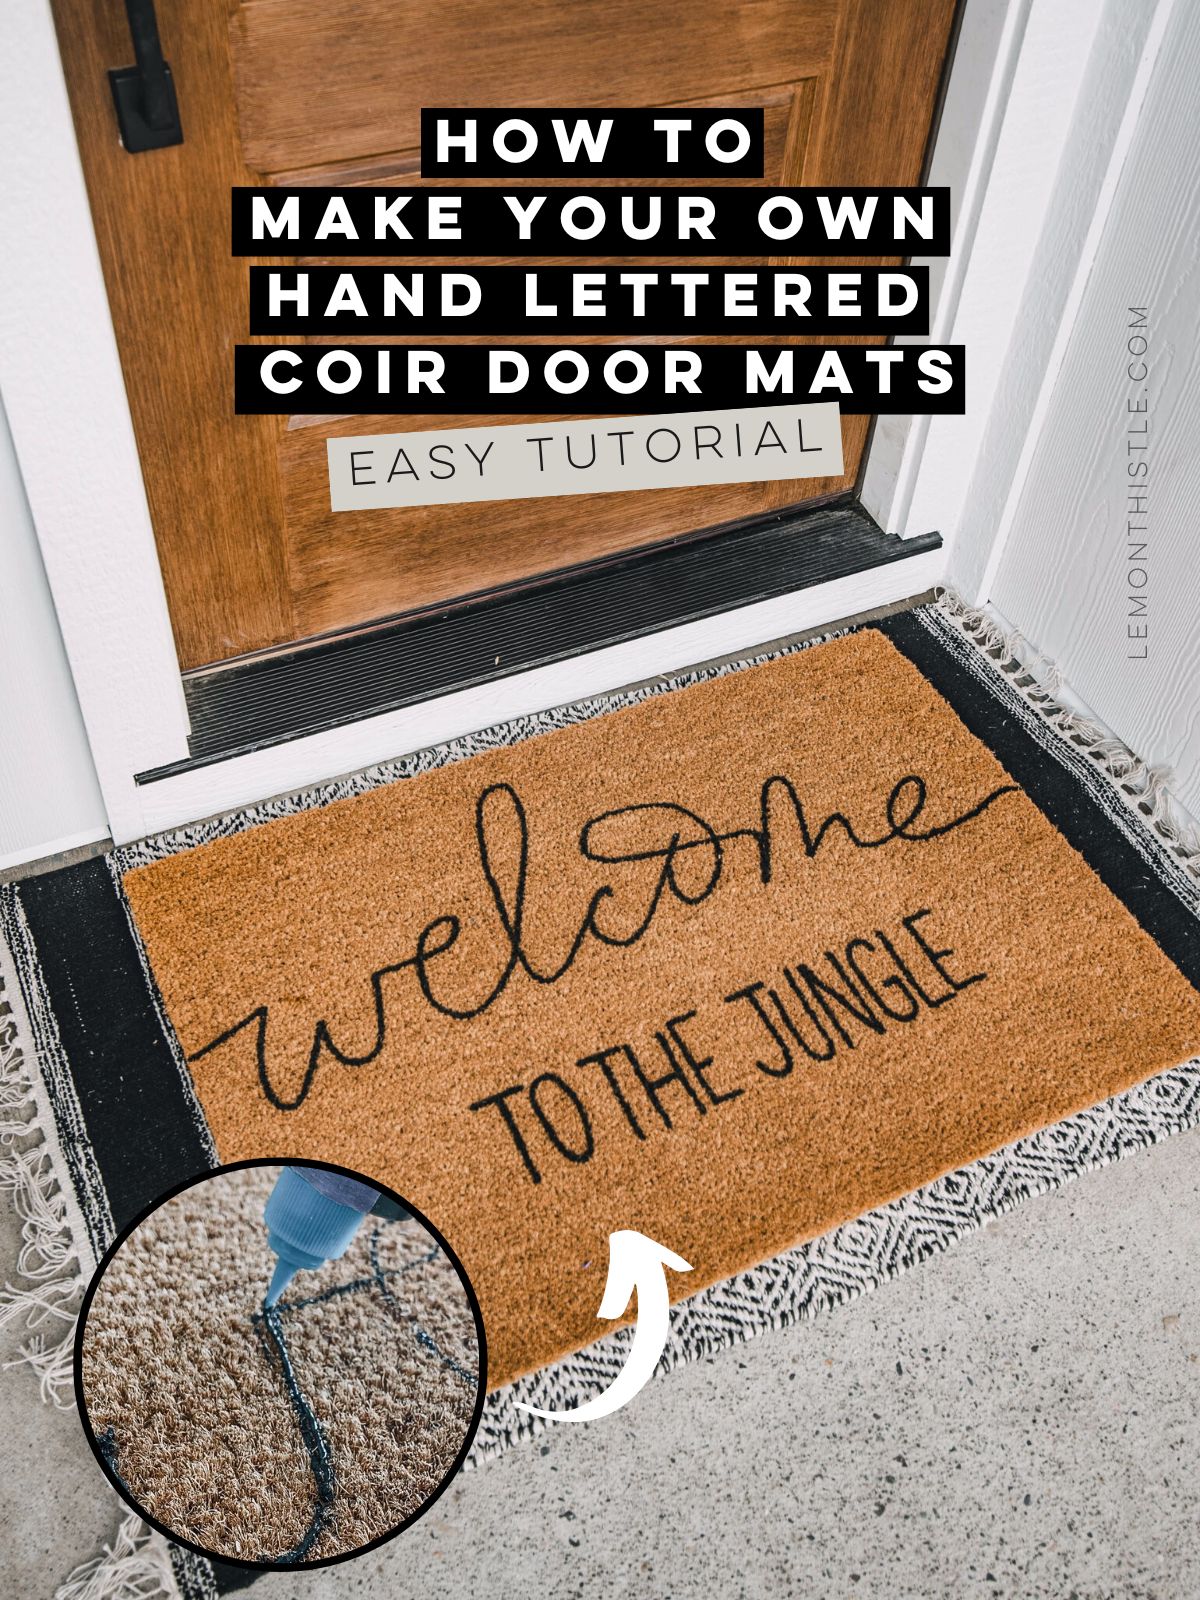
Before you get started, I’d suggest sketching out your design to copy on to your mat. I have hand lettered free hand for most of the mats, but the Welcome to the Jungle one I wanted to have a bit neater/more aligned so used my iPad to draft it. I then used painter’s tape to give myself lines to keep everything aligned.
You could also just use Canva to come up with your own design and print it out as a template. If you would love to learn how to hand letter and don’t know where to start? I’ve got you with my quickstart lettering guide!

Interested in learning how to brush letter, but not ready to commit to a course?
I have a free Brush Lettering QUICKSTART guide and video training you will love!
Here’s the quick how-to: First thing to do is switch out your acrylic paint lid for the fine tip and add a little water to thin your paint if it’s too thick to squeeze.
I like to use the multi-surface acrylic for better durability than traditional craft acrylic paint. This one is my fave but I ran out for this project so used another I had on hand. The kind of paint that you choose to use will determine how long your custom welcome mat lasts for.
Test your squeeze tip to make sure the paint flows easily as you squeeze before moving to the door mat. Thin it down with water if needed or make the hole in the applicator a bit bigger with an awl.
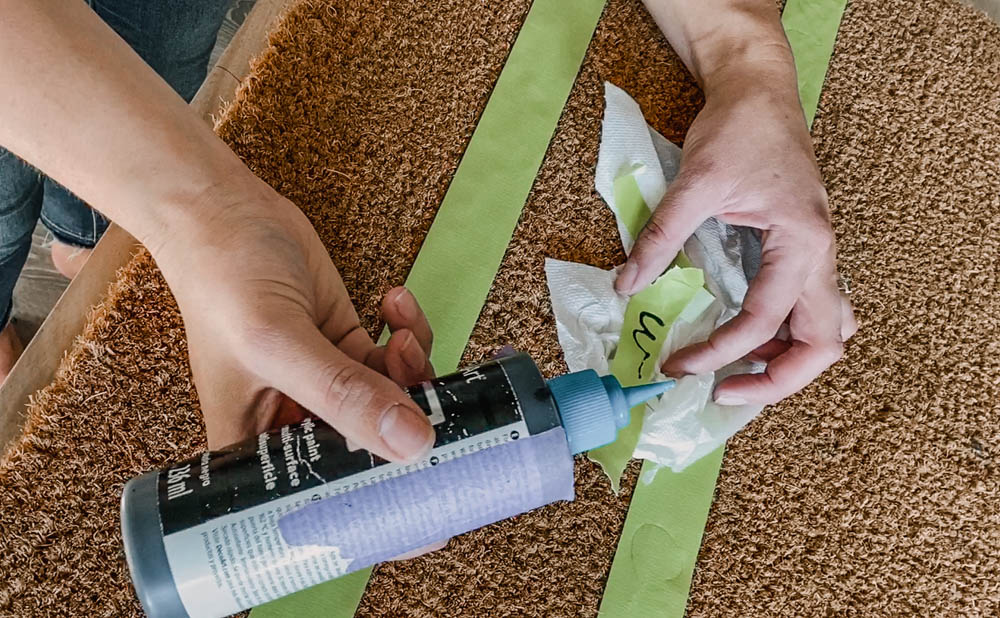
Use this paint bottle with fine tip applicator to letter your design onto your mat. You could do this with a stencil or just freehand it like I did. I have also sketched in pencil before and I have used painters tape to make guide lines. Depending on your style of door mat quote, any of these might be helpful!
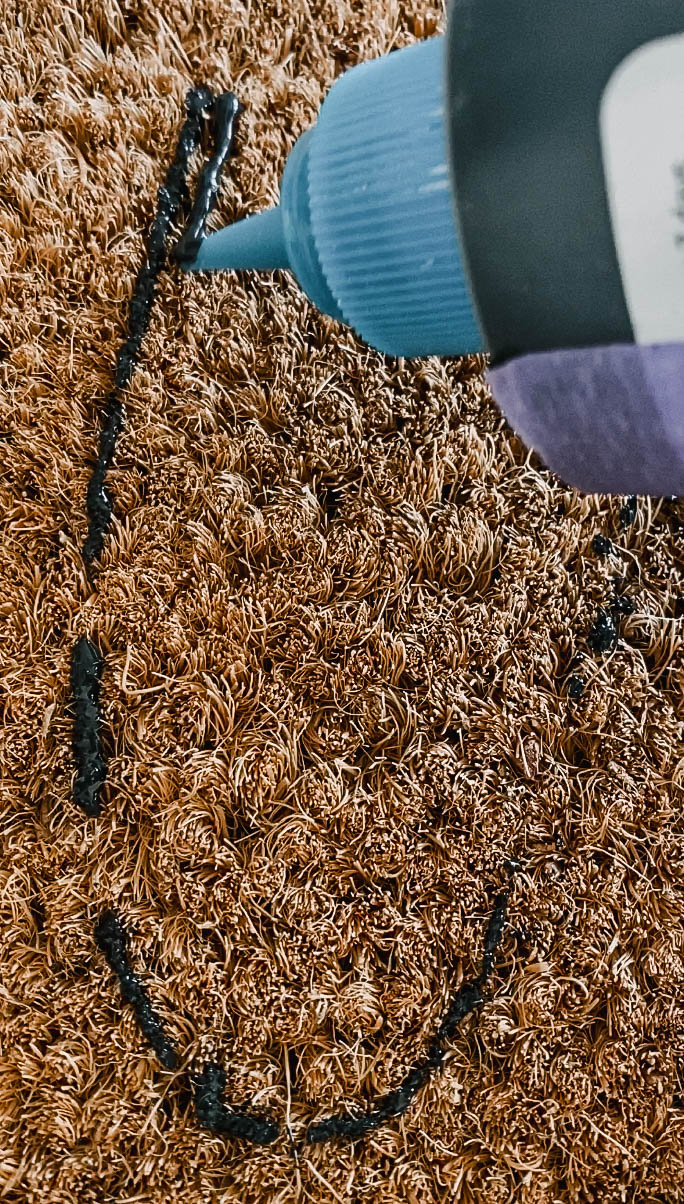
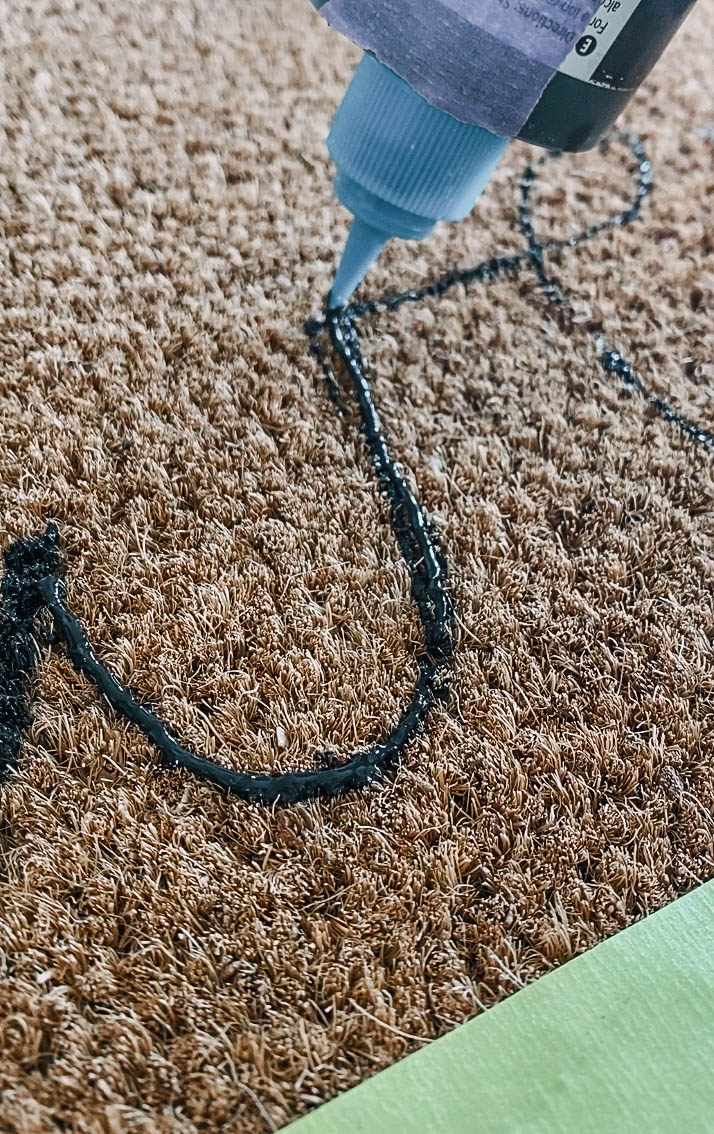
Squeeze evenly and start tracing your design with the paint, one letter or section at a time. You’re laying down the paint here, but it’s not going to look beautiful until the next step.
Then, take your stiff paint brush and press it in to your paint strokes to push the paint off the surface and down the sides of the coir fibres. This will help with durability and also makes it look so much more professional!
I would do at least two passes on each line to make sure you have enough paint laid down. If you want thicker looking letters, you can do two lines side by side (shown above). I would still go over this a second time though to make sure there’s enough paint in there.
You may need to pause and clean your applicator as the uneven coir will flick bits of paint up as you go.
*Update* The last few front door mats I’ve made I’ve skipped the paint brush and just used the applicator tip to push the paint down into the coir. In our climate, the coir gets gungy and gross before the paint wears off using this method.
That’s it! Super simple and this outdoor mat only took me less than 30 minutes start to finish. I had my 3 1/2 year old working on his own project beside me so if I was uninterrupted, I’m sure it would have been done in less than 20 minutes!
*Update: after making several of these, I can affirm that yes it takes less than 20 minutes without helpers ;) 5 years later and this project is still a total winner for me! You can see my outdoor entry mat in this exterior entry reveal!
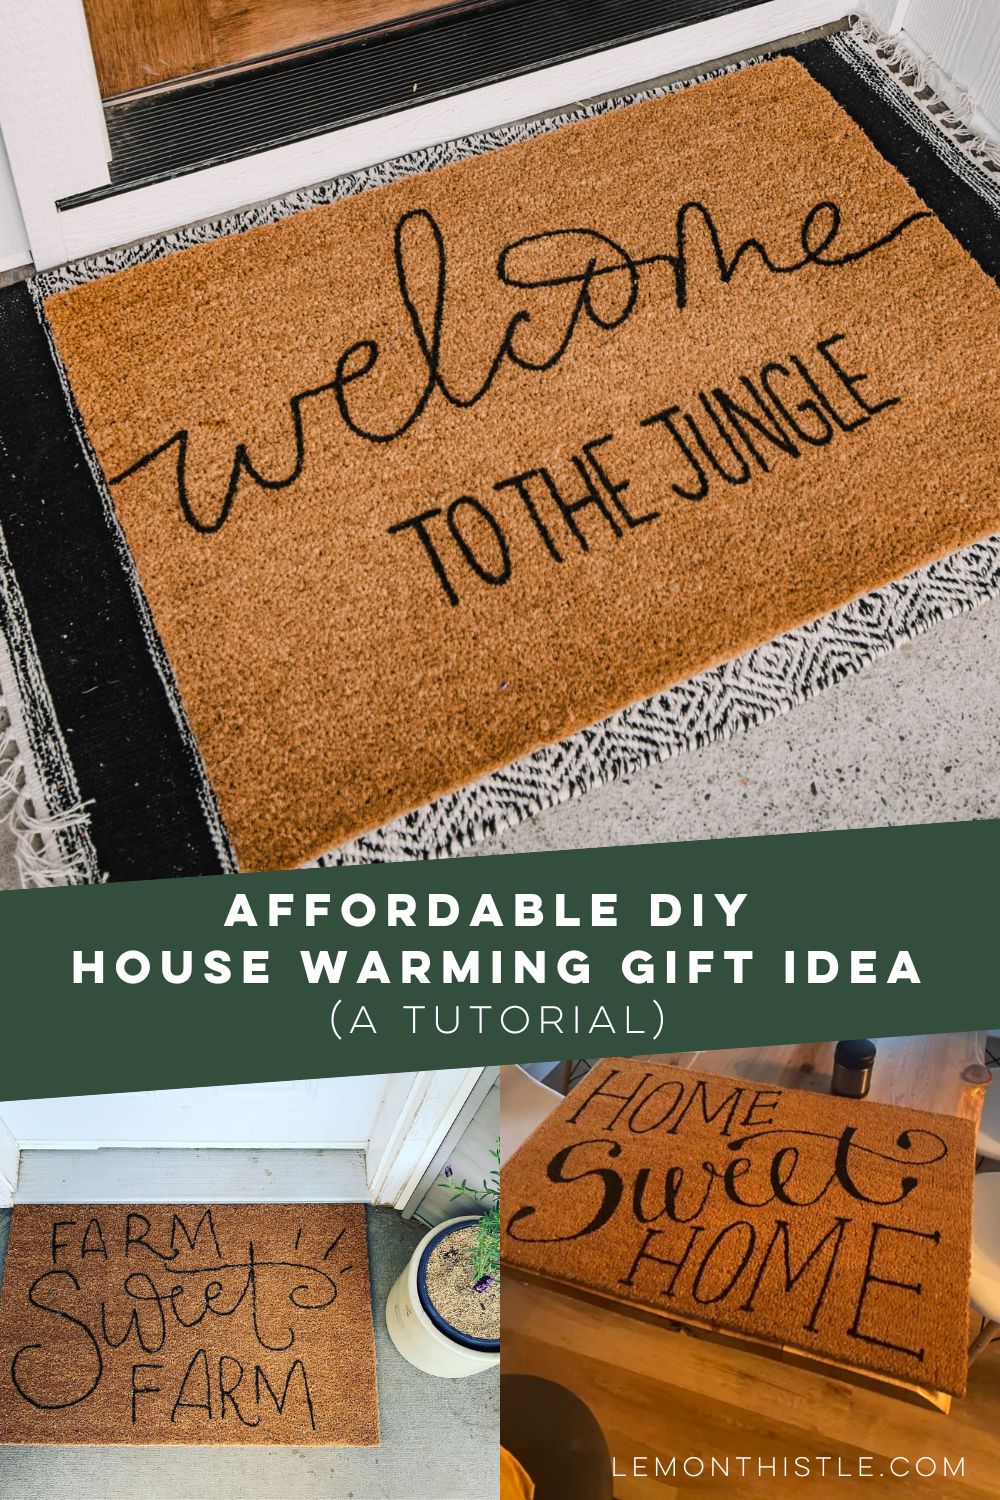
Tell me… what would you letter on your door mat? I haven’t taken photos of all of them since many were last minute house warming or christmas gifts (‘aint no minute like the last minute!) but here’s some other DIY Hand Lettered Door Mats I’ve made since this post:
- Welcome to the Jungle
- Home Sweet Home
- Farm Sweet Farm
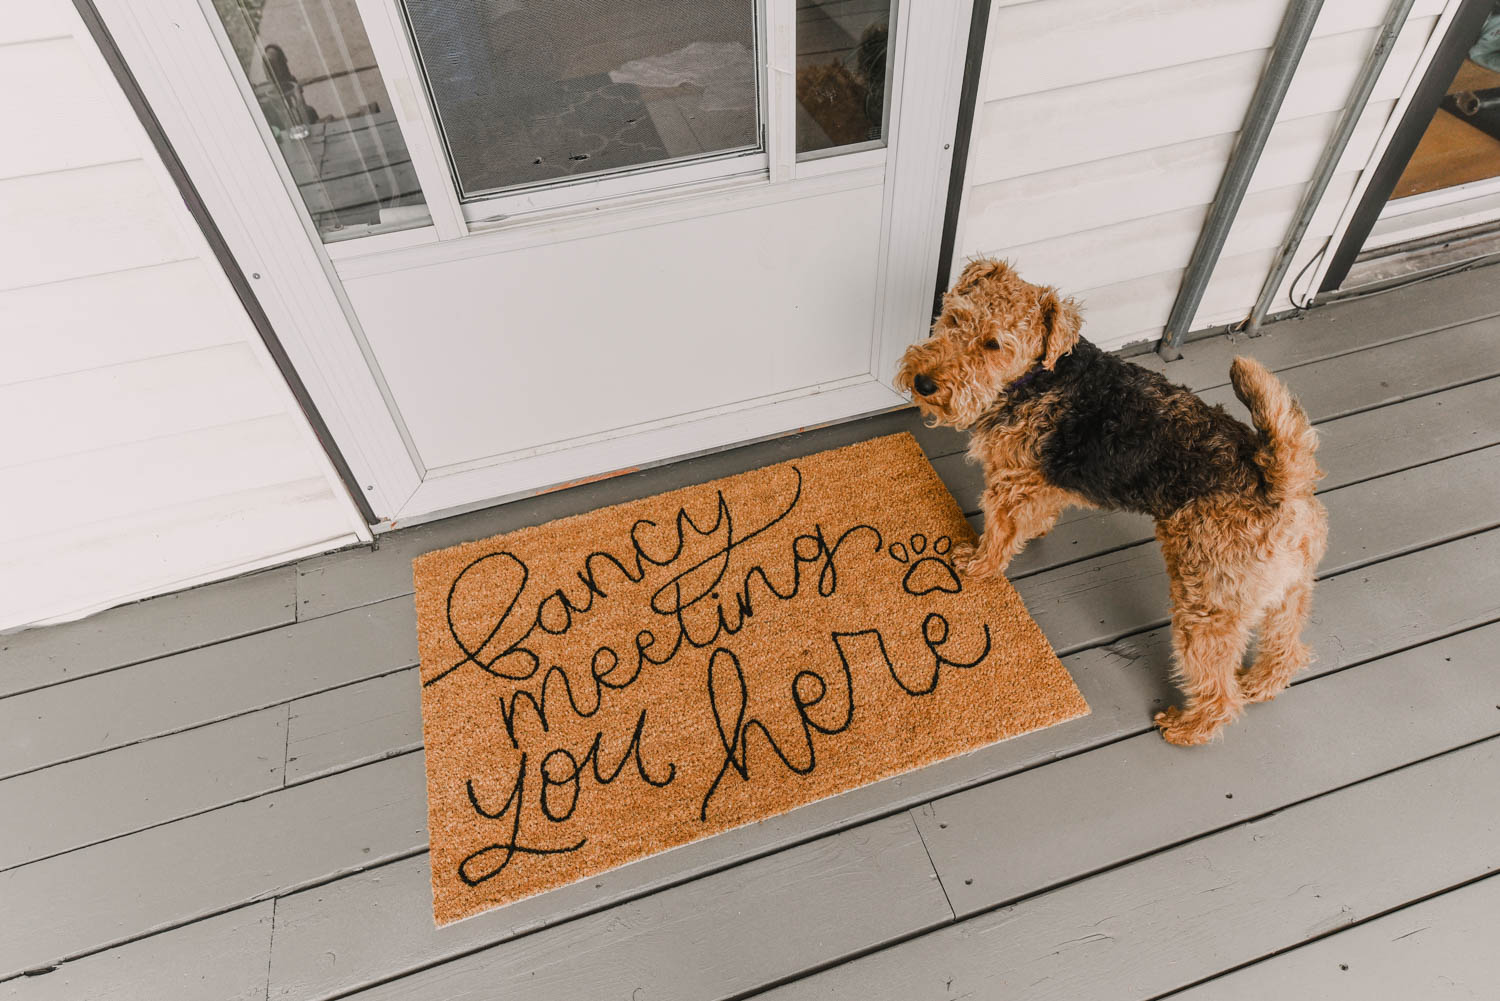
- Fancy Seeing You Here Door Mat (on my sister’s wood patio makeover)
- A last name welcome mat (always so popular)
- Hi There!
PS… my entryway is DONE! The before and after makes me so so proud. You can see the whole space and all the projects we took on (flooring, railing, doors, lighting, oh my!) in our full entryway makeover post!
Pin this for later!
Don’t have time to take on this DIY right now? Planning to make these for gifts closer to the holidays? Pin this so you can come back to it! Plus, pinning or sharing on FB helps this post reach more people which helps me be able to keep sharing with you. Thank you!

 Free Printable Halloween Candy Bowl Signs
That was fabulous. I was going to use stencil vinyl but if you had problem with bleed and it really only sits on top of the mat, I would much rather do it your way. So glad I found you!!! Thank you.
You could totally use the stencil and this method together!
Love the tutorial! Thinking about trying this. Now that it has been a while since you made it, how long did the lettering hold up after being used to scrape off shoes?? Thank you!!
We still have it outside our front door! The lettering has held up incredibly well, while the coir has darkened from our wet winters :)
Could I do this with chalk first, as a guide? And then put the paint over it?
It’s still going strong more than one year later! That’s the beauty of pushing it down into the fibers. The coir has darkened but we still get compliments on it.
Do you seal it? Is this outside all the time? Wondering about the lettering washing away with the elements of rain and scraping shoes off.