• Skip to main content
  • Skip to header left navigation
  • Skip to header right navigation
  • Skip to site footer
  • Shop
  • Get The Email
  • Work With Me
  • About

  • DIY
    • DIY Home Decor
    • With Power Tools
    • Renovation
    • For Kids
    • For Parties
    • Wearable
    • Organization
    • Cricut Crafts
    • DIY Yard Games
  • Home Decor
    • Room Makeover Consults
    • Room Reveals
    • Kid Friendly
    • DIY Home Decor
    • Renovation
    • Tux House
    • Shop My Home
  • Lettering
    • Hand Lettered Printables
    • Free Practice Sheets
    • Handlettered DIY
    • Free Brush Lettering Quickstart Guide
Lemon Thistle

Lemon Thistle

DIY, Hand Lettering + Home Decor

  • Printables
    • For Cricut
    • Party Printables
    • Home Decor Printables
    • Bachelor Bingo
    • Handlettering Practice Sheets
    • All Free Printables
  • Entertain
    • Party Printables
    • Party DIY
    • Tablescapes
    • Kids Parties
  • Blog

How to Use Transfer Tape for Vinyl – Cricut VS Silhouette

Feb 20

If you’re going to be using your Cricut or Silhouette to cut vinyl… then you NEED TO KNOW ABOUT TRANSFER TAPE! We’re talking all about how to use transfer tape for vinyl, what is transfer tape, what kind of transfer tape is best for what kinds of vinyl (glitter vinyl, adhesive foil, printable vinyl and more).

Everything you need to know about transfer tape for vinyl including what kind to use for what materials

If you’ve been around for a while, you’ll probably know that I love to use my Cricut to personalize things. When I first got it a few years ago… I knew NOTHING about vinyl or how to use the stuff.

I actually cut out decals and peeled each piece off by hand and placed it on my surface. What a pain!

Transfer tape wasn’t anything I’d considered. What a game changer!

So today I’ve partnered with Alexis from Persia Lou to share ALL about transfer tape… or transfer paper or whatever you want to call that sticky paper or vinyl that helps you transfer your adhesive vinyl to your surface. I’m sharing my three favourite transfer papers and what I use with which materials as well as demonstrating HOW to apply it in my YouTube video.

Also, since publishing this video, I’ve learned that everyone in the US says decal ‘dee-cal’… and a lot of people care enough to tell this Canadian that ‘deck-all’ is wrong. So be warned about watching the video if that’s going to bother you ;)


WHAT IS TRANSFER PAPER OR TRANSFER TAPE?

Transfer tape is basically sticky paper or vinyl like material that you use to transfer an adhesive vinyl decal to your surface.

After weeding your decal, you pick up your design with the transfer tape (removing it from the backing) and lay it down on to your surface. Then you can peel off your transfer tape and reveal your finished decal placed perfectly on your surface.

Easy, right? But there’s some things to keep in mind. 

WHAT DO YOU USE TRANSFER TAPE FOR?

Transfer tape is essentially for all regular adhesive vinyl. Indoor vinyl, outdoor vinyl, stencil vinyl, chalkboard vinyl, adhesive foil, glitter vinyl… pretty much all adhesive vinyl is simple to transfer using transfer tape.

BUT there’s an exception to this! DON’T use transfer tape with printable adhesive vinyl. The printed design is too easy to grip and will be damaged by your transfer tape. These you will have to peel and apply by hand. If you want to see me mess this one up… I did that here.

You also don’t want to use transfer paper for other materials like paper, window cling, sticker paper… anything that doesn’t have a vinyl finish. And of course, you don’t need it for any iron-on material. 

HOW to use transfer tape for vinyl and what kind to use

(photo from this post)

SHOW ME HOW TO USE TRANSFER TAPE FOR VINYL!

The best way to teach you is to show you, which I do in the video BUT if you’re watching from work or without sound- here’s the short of it.

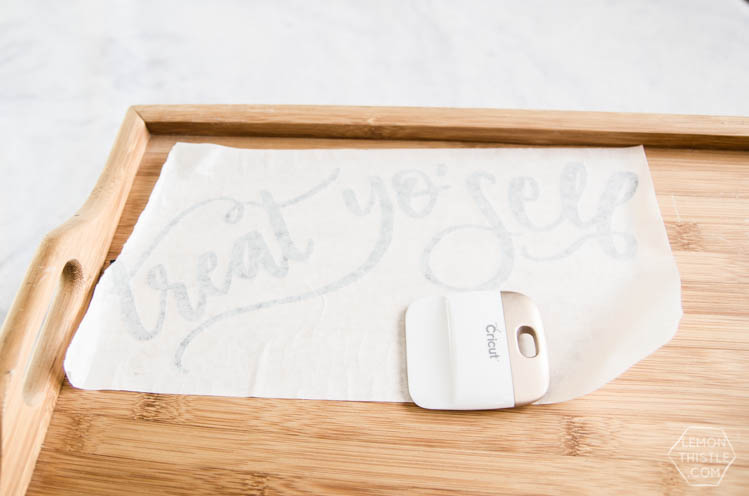
The first thing you’ll need to do is to cut out your design from adhesive vinyl and WEED it. The example photos here are stencil vinyl so they are reverse weeded if it looks confusing.

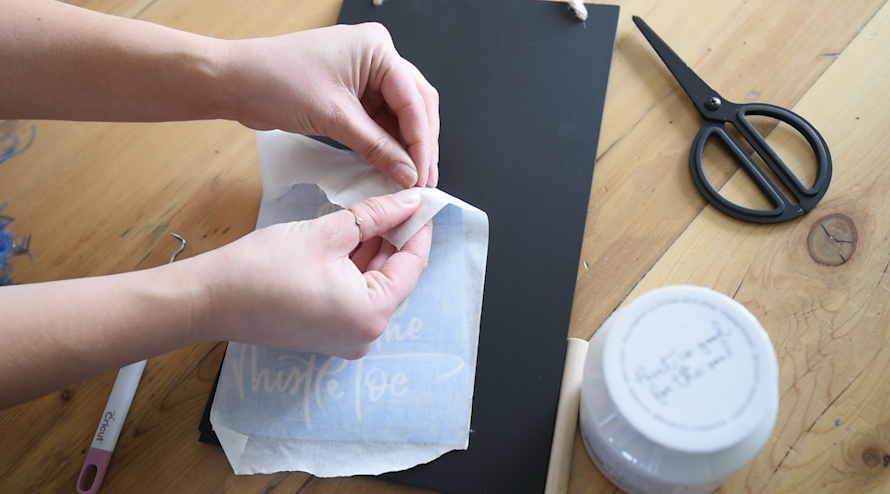
Once it’s weeded and still on the backing, you lay your transfer tape OVER your design and smooth it down. Then I like to turn it over and smooth it down extra well from the back. 

Then you can peel back your backing, leaving your vinyl design ON your transfer paper. If it is being tricky and wanting to stick to the backing more than the transfer tape, I find the best way to make sure it sticks to the tape is to fold the backing all the way back and peel it off that way (demonstrated in the video). This fold is so hard for the vinyl to stick to so it stays on the transfer paper. 

HOW to apply vinyl decals using transfer tape

(photo from this post)

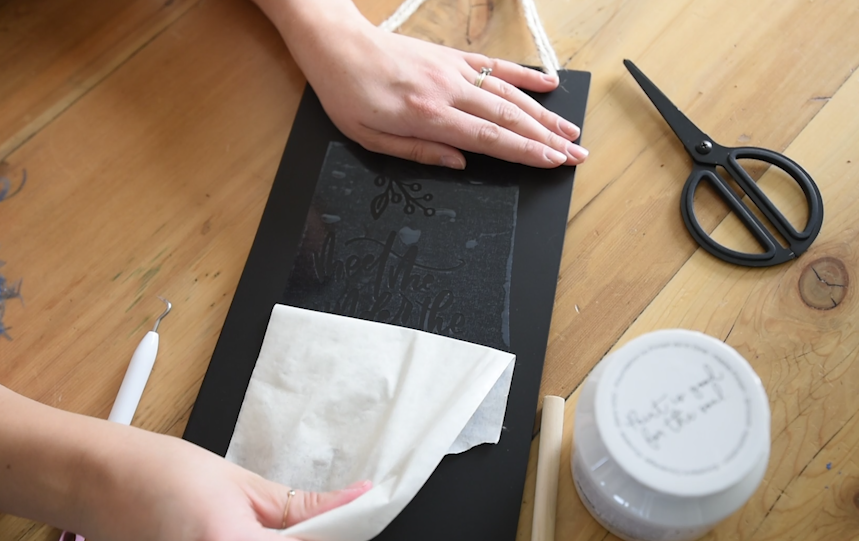
Once you have your decal on your transfer tape, line it up and lay it on your surface. Smooth it really well (you can use a scraper if you like!) and then peel back your transfer paper.

Again, I like to almost fold the transfer paper back as I peel it to keep the decal from coming up with the paper. This reveals your beautiful design (or stencil in this case) on your surface. Then, smooth your decal on again before calling it DONE. 

WHAT KIND OF TRANSFER TAPE SHOULD I USE?

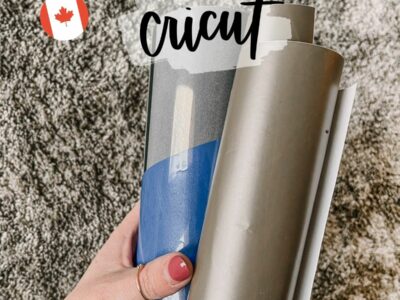
There are SO MANY kinds of transfer tape out there. I haven’t tried them all. But I use these three regularly and would recommend them to you 100x over. So here’s what I use each of them for. 

Everything you need to know about transfer tape for vinyl including what kind to use for what materials
DIY Breakfast Tray Upgrade- Treat yo'self... how cute is that! Would make a great Christmas gift. (with template!)

(photo from this post)

For regular adhesive vinyl,stencil vinyl and other thin vinyls, I reach for the Expressions Vinyl Paper Transfer Tape. This roll is so big and affordable. I really love it because I can tear it easily and don’t have to find scissors when I’m making a bunch of smaller decals.

It has a lighter grip than some of the other transfer tapes (lighter than both the other two I am holding) which makes it great for really delicate designs and thin vinyls. This is honestly just the easiest, most convenient transfer tape I’ve used.

Love this idea! Vinyl transfer for a laptop decal

(image from this post)

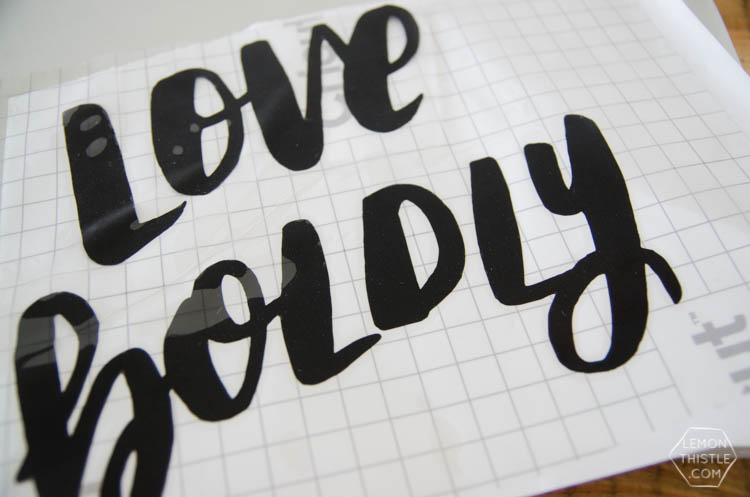
For MOST all other vinyls like adhesive foil, matte foil, holographic vinyl, chalkboard vinyl etc., I reach for Cricut Transfer Tape. It’s a bit stickier for these thicker materials and is nice because it’s crystal clear with a grid to make lining up your design really easy. I would pull out the scissors to cut this one instead of tearing it since it is a little bit thicker. 

Glitter vinyl from Cricut is a beast. I love how it looks (it’s like sprayed glitter into a sheet so has a great texture) but is so hard to grip with transfer tape to transfer. That’s where the Cricut Strong Grip Transfer Tape shines. It’s SO good for the trickiest of materials! It’s also clear with a grid and this one is definitely thick enough that you must use scissors.

Alright… there you have it! That’s my guide to transfer tape as I use it. If you want to learn MORE about transfer tape, some tricks to applying it (Alexis is the master of vinyl on curved surfaces), and see some other types of transfer tape in action, you should check out Alexis’ video!

LIKE IT? PIN IT!

Pin image of hands holding transfer tape rolls with text over: Transfer tape: what is it, how do I use it + what kind should I use for what?!

MORE CRICUT IDEAS

What is the best vinyl to use for my decals? a comparison- image of two sheets of flower decals, one in clay glossy permanent adhesive vinyl, one in light blue matte removable adhesive vinyl

Choosing the Best Vinyl for Decals with Cricut

DIY wood sign being held by kid. Sign reads best father ever in saw outline, black vinyl on light wood panel.

Free Father’s Day SVG Files

Photo of earth day black tee shirt with vinyl transfer. hand lettered 'earth day every day' design.

Earth Day Every Day Free SVG

modern easter tea towel with black easter bunny silhouette and hand lettered 'happy easter'

Handlettered Free Easter Bunny SVG

DIY wall flag for a playroom makeover

Giant DIY Wall Hanging on a Budget

'you're my lucky charm' hand lettered on a shamrock ironed on to a tee shirt

Lucky Shamrock Free SVG

DIY Faux Chalkboard Signs & Cozy Christmas Hand Lettered SVG Bundle!

Cozy Christmas Faux Chalkboard Signs

Where to buy material for your cricut

Where to Buy Vinyl for Cricut Online

DIY Modern Pillow Covers with Cricut

whimsical flora and fauna faux wallpaper

DIY Faux Wallpaper with Cricut

Happy Birthday glittery cake topper on white iced cake

Happy Birthday Cake Topper (free cut file)

DIY Bamboo Plant Markers

DIY Wooden Plant Markers with Cricut Joy

10 DIYs for your Future House Goals

10 Modern Home Decor Projects with your Cricut (for your Future House Goals!)

Comparison of Cricut Machines

Which Cricut Machine Should I Buy?

plant mugs

Plant Lover Gift Idea

DIY Leather and Felt Pennants

Leather and Felt DIY Handlettered Pennant (2 Ways!)

4 Different ways to make monograms using Cricut Design Space

Make Monograms in Cricut Design Space

Organize your pantry with DIY labels and clear baskets

5 Ways to Organize Your Home with Cricut Joy

Fun mermaid backpack and teen boy space themed backpacks

How to Use Iron On to Backpacks with Cricut EasyPress Mini

DIY Enneagram shirts with hand lettered designs using the Cricut EasyPress

DIY Enneagram Shirts! (Free Cricut Files)

How to use the Cricut Draw Tool

How to use Draw with Cricut Design Space

Punny Valentines Day Cards with Cricut

Valentines Day Jokes Cards (made with Cricut!)

6 Free Accessibility SVGs

6 Free Accessibility SVG Files

DIY Cricut Storage + Caddy... perfect to keep everything handy and ready to use but tucked out of the way!

DIY Cricut Storage + Caddy

25 awesome DIY personalized gift ideas using Cricut

26 Personalized Gift Ideas with Cricut

Matching pyjamas for your pup and you- with eachothers face

DIY Gift for the Dog Lover | Pup + Me PJs

Cricut Maker DIY Doll Dress gift idea

Gift Idea for Crafty Girls : DIY Doll Dress with Cricut Maker

DIY Wooden cutout sign for christmas eve - personalized holiday decor is the best!

Personalized Christmas Eve Sign (Cut Wood with Cricut!)

Such a good detailed tutorial on how to use up vinyl scraps, draw on precut shapes and surfaces, and how to cut out photos using Cricut snapmat.

How to Use Cricut SnapMat – Silhouette vs Cricut series!

Matte metallic pumpkin with 'hello pumpkin' hand lettered design (free cut file)

Hello Pumpkin! Free cut file + Matte Metallic Pumpkins

DIY acrylic sign made from a free SVG file of that line art maple leaf!

Free SVG Maple Leaf Line Art Sign

DIY Kids waterbottle labels and how to make your own knockout name design

Cricut How To: Knockout Words in Shapes

how to design and make your own planner stickers!

DIY Planner Stickers with Cricut

How to use the print then cut feature in cricut design space

How to Use Cricut Print Then Cut

How to use advanced text features in Cricut Design Space

How to use text and fonts in Cricut Design Space

Easy Striped Cake With Railroad Cake Topper | Train Party Cake

Easy Striped Cake With Railroad Cake Topper

Where I buy transfer tape and vinyl from in Canada

How to Use Transfer Tape for Vinyl – Cricut VS Silhouette

DIY Wooden Trees Tablescape for the Holidays

DIY Handlettered Ornaments- 3 ways to make them

DIY Handlettered Ornaments – 3 Ways to Make Them!

Holiday DIY Pennants- two ways to make them

Holiday DIY Pennant- Two Ways

Category: DIYTag: Collaboration, Cricut, Video, Vinyl
FacebookTweetPinLinkedIn
Previous Post:Beautiful soft veining in this quartz countertopWhy We Chose Quartz Countertops
Next Post:DIY Textile Art – Simple Faux ShiboriSimple DIY Faux Shibori tutorial
Avatar photo

About Colleen Pastoor

Colleen is the DIY blogger and author behind Lemon Thistle blog where she shares hands on DIY tutorials, home renovations, hand lettered designs, and projects to simplify your life… beautifully.
If you enjoy modern home decor (that’s totally cozy for your family!), saving money through DIY and simplified lifestyle- you’ll love the tutorials Colleen shares on LemonThistle.com. Find her @colleenpastoor everywhere else!

Reader Interactions

Comments

  1. Avatar photojesse

    Feb 28 at 11:43 am

    If I apply a laminate over printed adhesive vinyl then use print and cut, would i be able to use transfer tape then to transfer my project to desired surface, since the ink is being protected. I feel like this might be possible and time saving but just want to confirm your thoughts, thank you!

    Reply

Leave a Reply Cancel reply

Your email address will not be published. Required fields are marked *

Sidebar

WOOHOO!

Check your email to confirm!

(+ get your freebies + discounts)

diy room makeover plan


Thanks for dropping by!
I’m Colleen: wife; mom to 4 wild ones; and DIY blogger behind Lemon Thistle. You can expect to see rad DIY, modern home decor, renovations, hand lettering and the occasional party on Lemon Thistle. Read More…

email facebook youtube instagram pinterest

Search

Copyright

Unless otherwise noted, all content and images are mine. Full posts may not be shared without express written consent. But I love when you share!

Feel free to share, without altering, one image with proper credit and a link to the original post. All free printables are for personal use only.

Legal

Everyone loves proper credit- if you ever notice something improperly credited, please please shoot me an email and I’ll fix it lightning fast.

Find all my policies right here.
This includes my privacy policy, info on the GDRP compliance, and information on affiliate links (Including Amazon Affiliates).

Copyright © 2023 · Lemon Thistle · All Rights Reserved · Powered by Mai Theme