• Skip to main content
  • Skip to header left navigation
  • Skip to header right navigation
  • Skip to site footer
  • Shop
  • Get The Email
  • Work With Me
  • About
  • Search

  • DIY
    • DIY Home Decor
    • With Power Tools
    • Renovation
    • For Kids
    • For Parties
    • Wearable
    • Organization
    • Cricut Crafts
  • Home Decor
    • Room Reveals
    • Kid Friendly
    • DIY Home Decor
    • Renovation
  • Lettering
    • Hand Lettered Printables
    • Free Practice Sheets
    • Handlettered DIY
    • Free Brush Lettering Quickstart Guide
Lemon Thistle

Lemon Thistle

Rad DIY, Lettering and Design for Real People

  • Printables
    • For Cricut
    • Party Printables
    • Home Decor Printables
    • Bachelor Bingo
    • Handlettering Practice Sheets
    • All Free Printables
  • Entertain
    • Party Printables
    • Party DIY
    • Tablescapes
    • Kids Parties
  • Blog

DIY Brush Lettering on Canvas with Acrylic

May 31

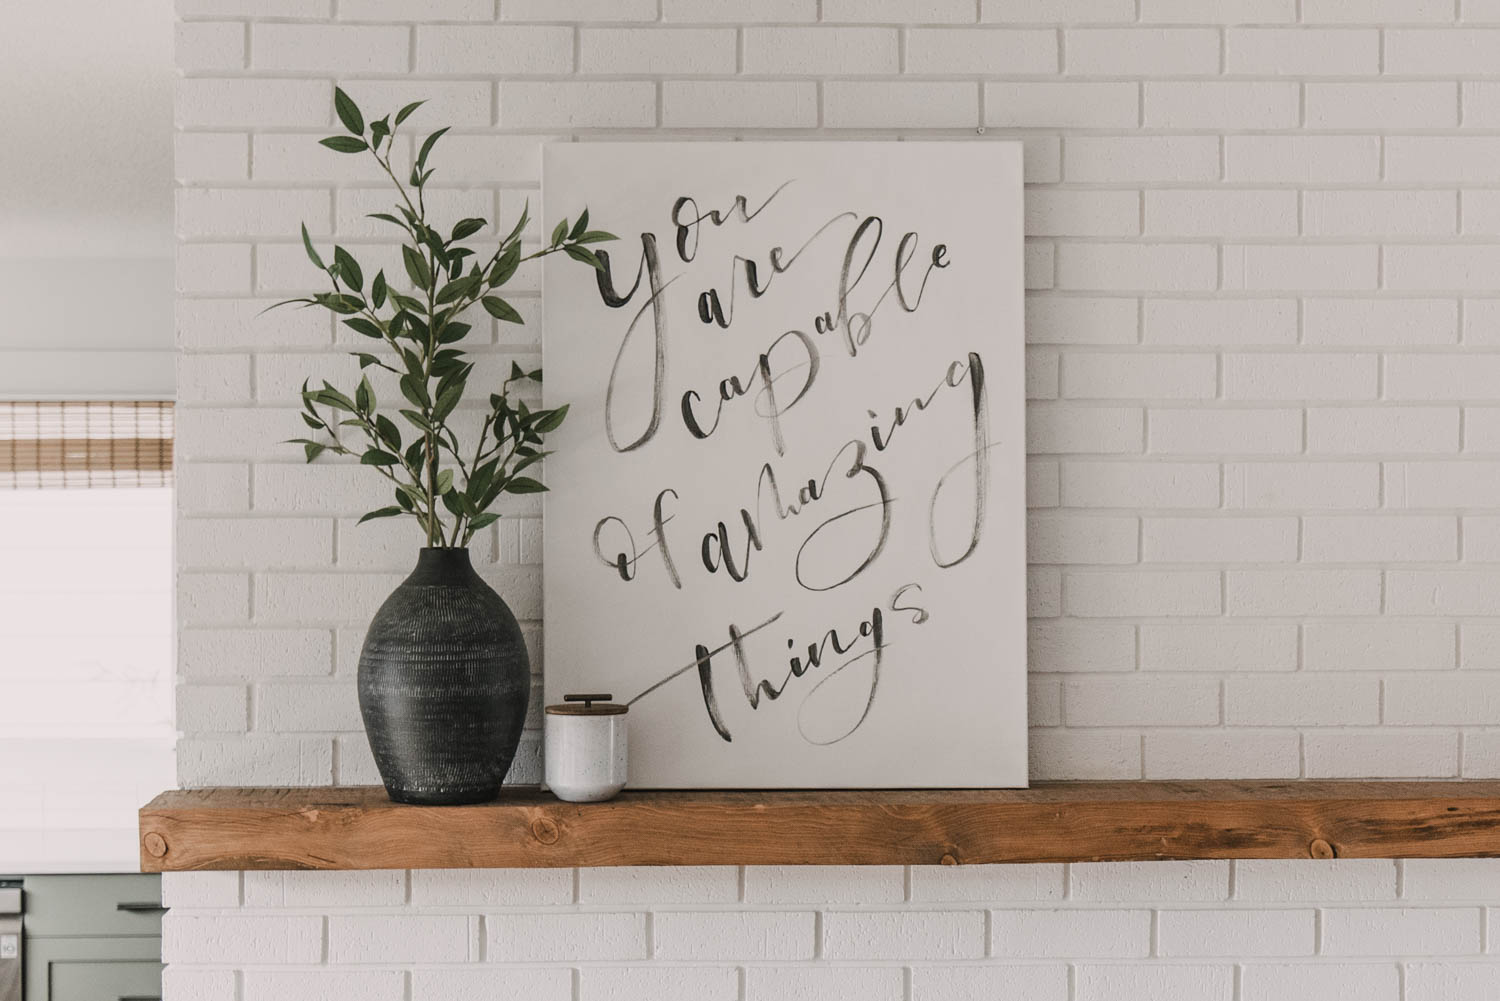
Sharing all about brush lettering on canvas using acrylic paint, water and a brush for this brush stroke-y effect I used for my living room art. 

How to get that brush lettered effect with acrylic on canvas

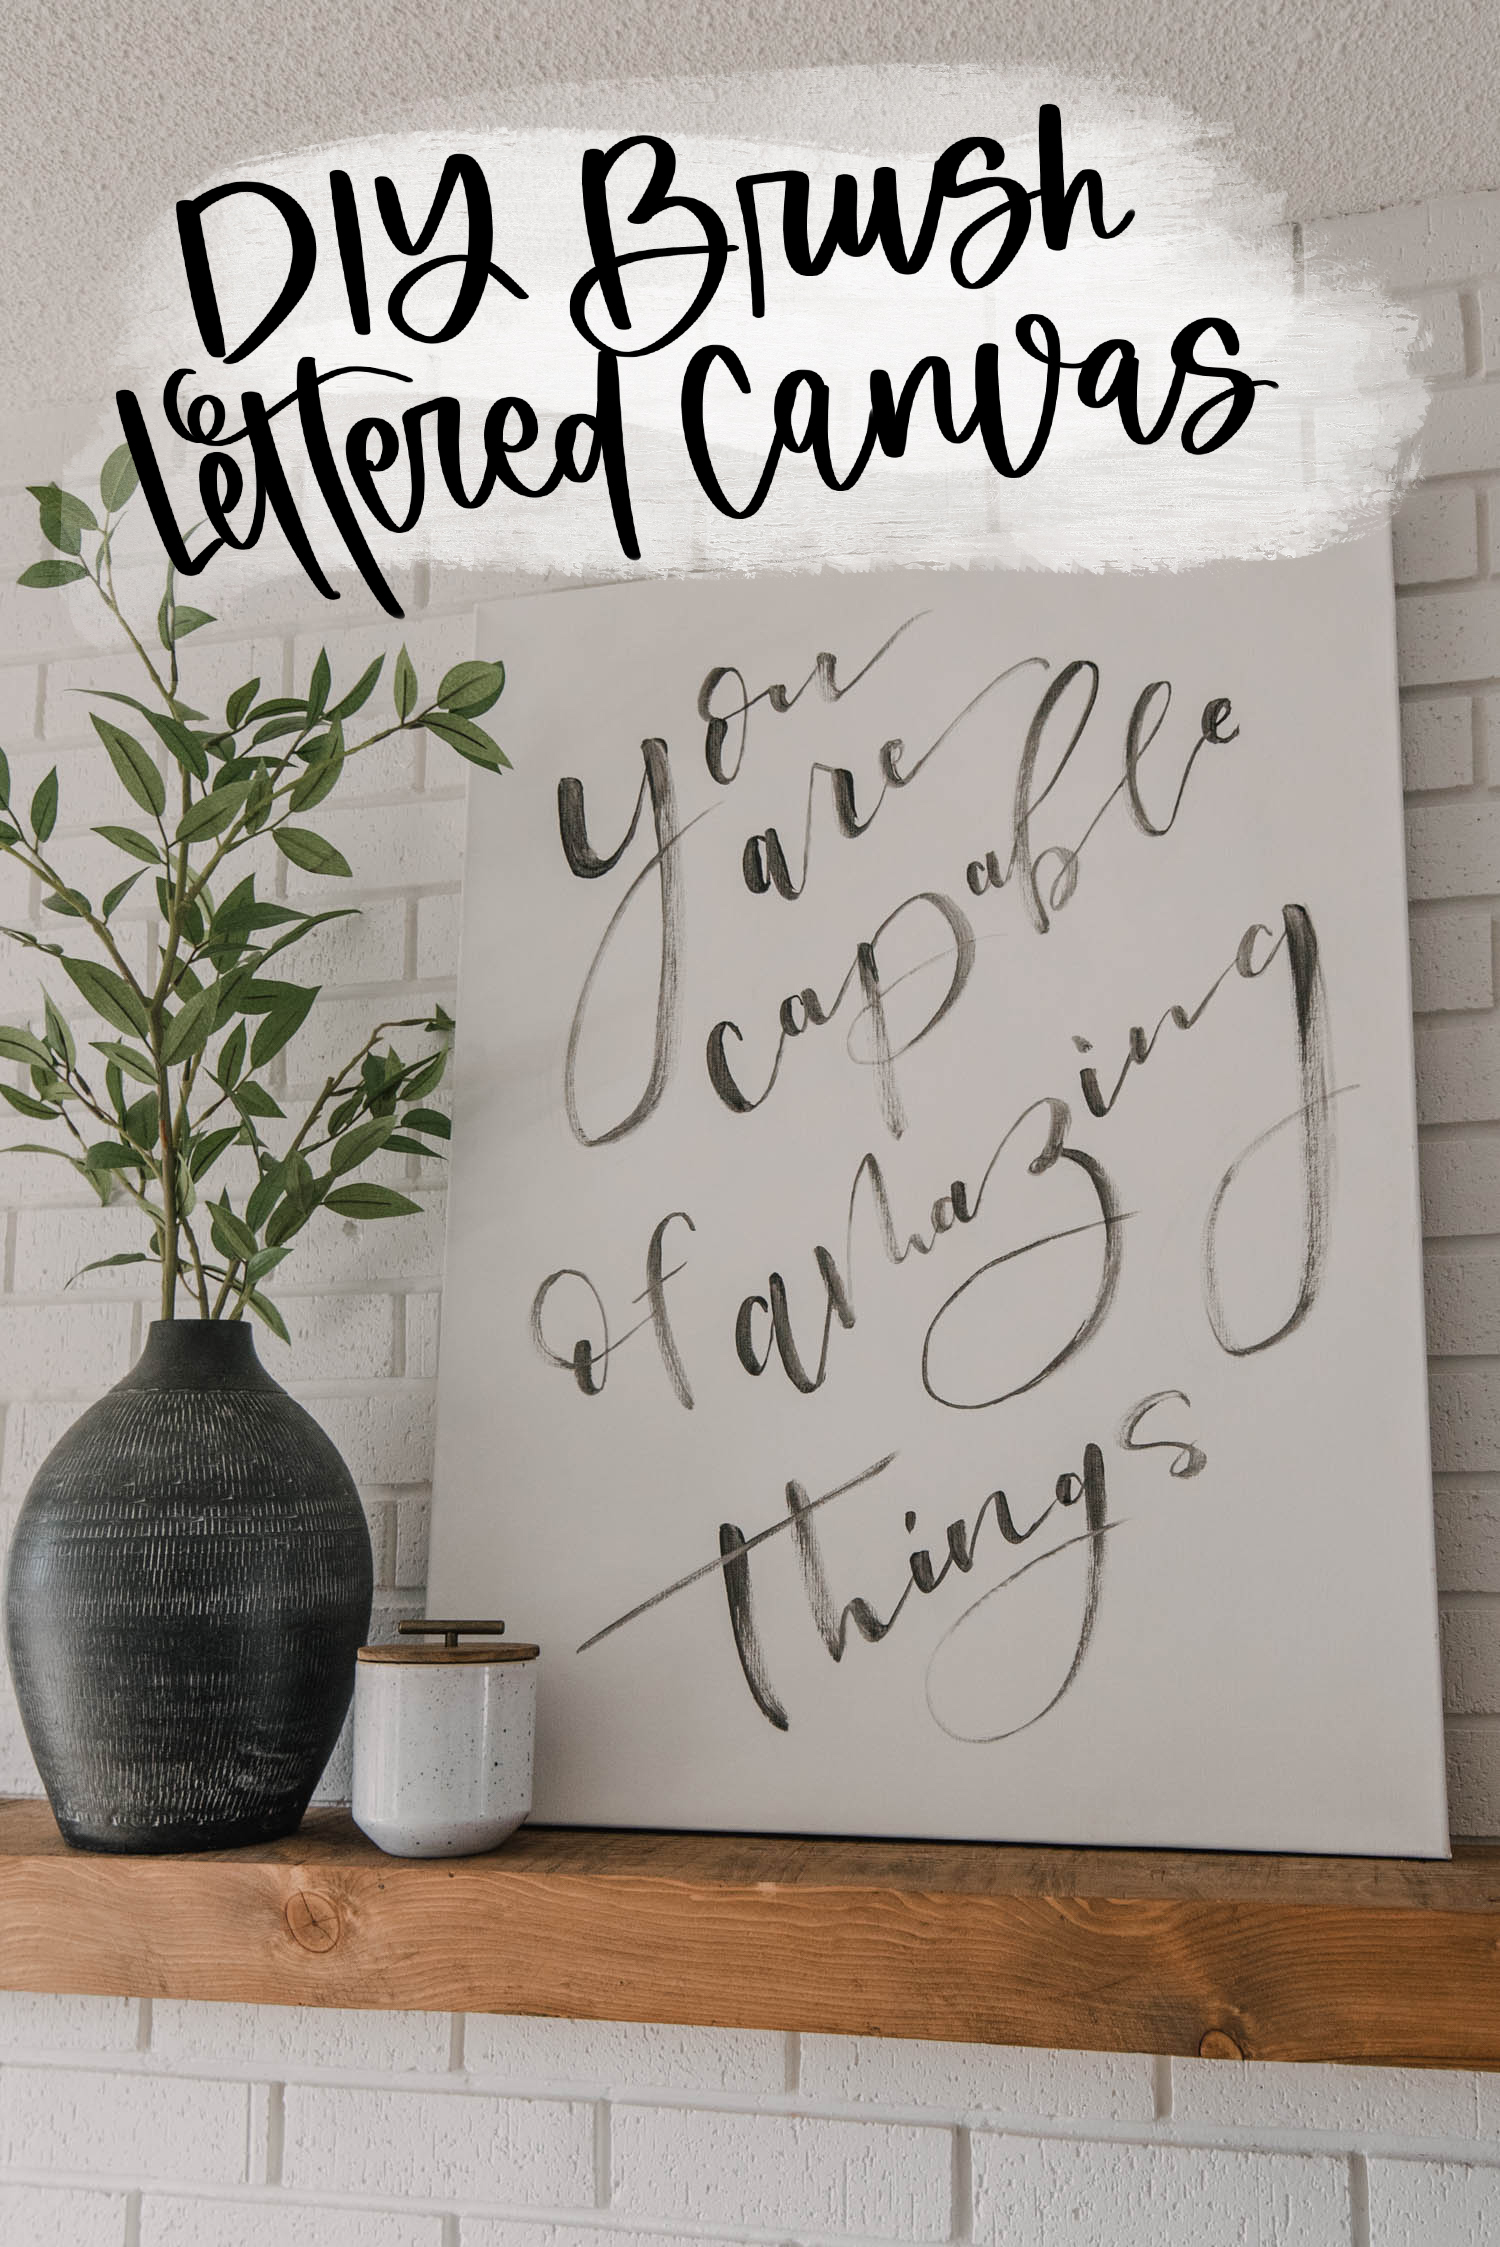
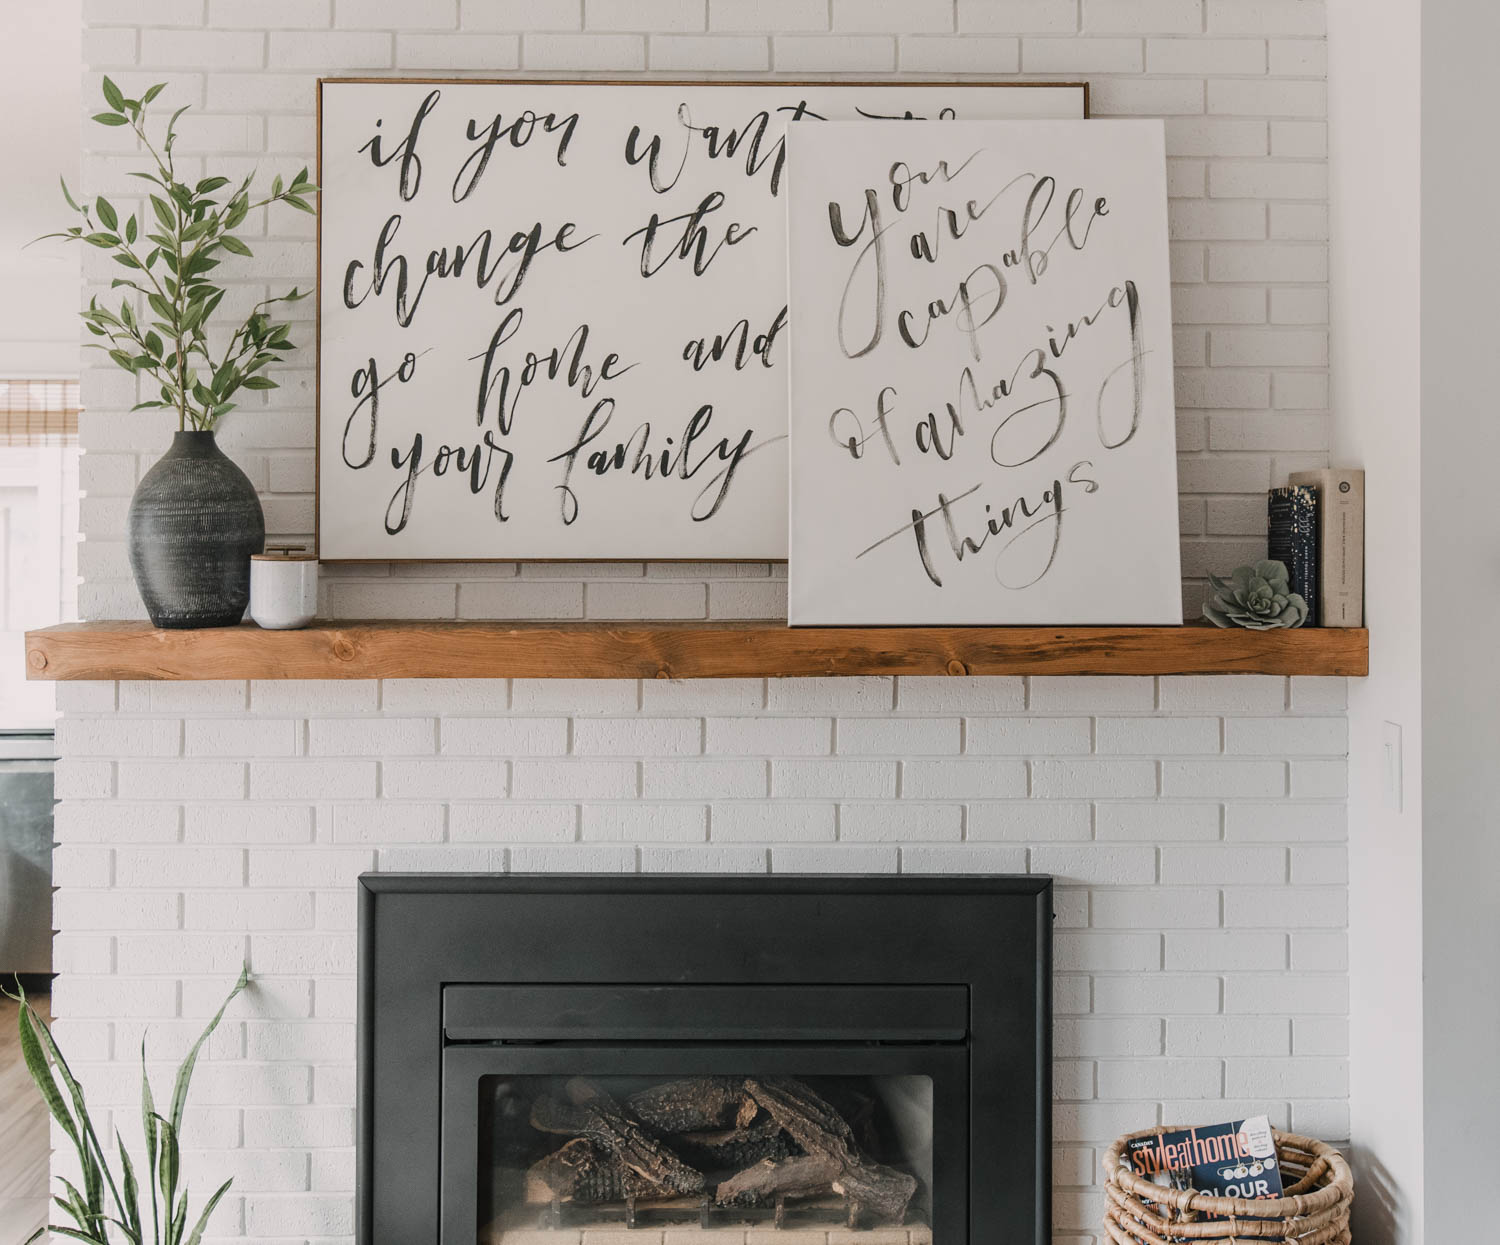
I made this large canvas for my living room years ago for a living room makeover. I hustled to get it done – a last minute DIY that I wasn’t sure would work out how I’d envisioned. It did… and more than 4 years later I still get SO many questions about this piece- I’m excited to answer them today!

If you’ve followed me for anytime at all- you’ll know that I LOVE brush lettering. So much so, that I teach a full course on it. But the questions I get about this project aren’t usually about HOW to brush letter- but how to get the ink and brush effect with paint on a canvas. So I’m going to focus on that! 

DIY brush lettered canvas

But first… a little bit about brush lettering! Brush lettering is a type of hand lettering that’s traditionally done with a brush, but now more often than not with a brush marker. The lettering features a heavier downstroke (thicker line) and thinner upstroke. This is achieved through the pressure and angle of your brush as you letter.

If you’re new to lettering- I find the biggest ‘ah-ha’ moment for me was changing my thinking about lettering from writing to drawing letters. Pick your brush up as often as you need! If you want more information on HOW to brush letter- I’d love to invite you to join my brush lettering e-course! Find out more about it right here :)

OK, so for this project, you’ll just need a canvas (I buy the affordable ones from Michaels, HomeSense or Jysk whenever I see them on sale), acrylic paint, water, and a round paint brush. 

The paint I’ve used here is a multi surface acrylic craft paint from Deco-Art. I used this on my entry mat as well and it’s held up really well. This art is going to go in my bathroom to covers some shelves built into the wall so I wanted it to hold up to moisture and being touched lots (hoping to put it on hinges). 

I find brush lettering easiest to do with a round brush. I used a size 4 for this piece. This brush is one of my favourites and it came with a kids set of paints… so I guess I’m saying you don’t need a fancy brush ;)

How to brush letter on canvas

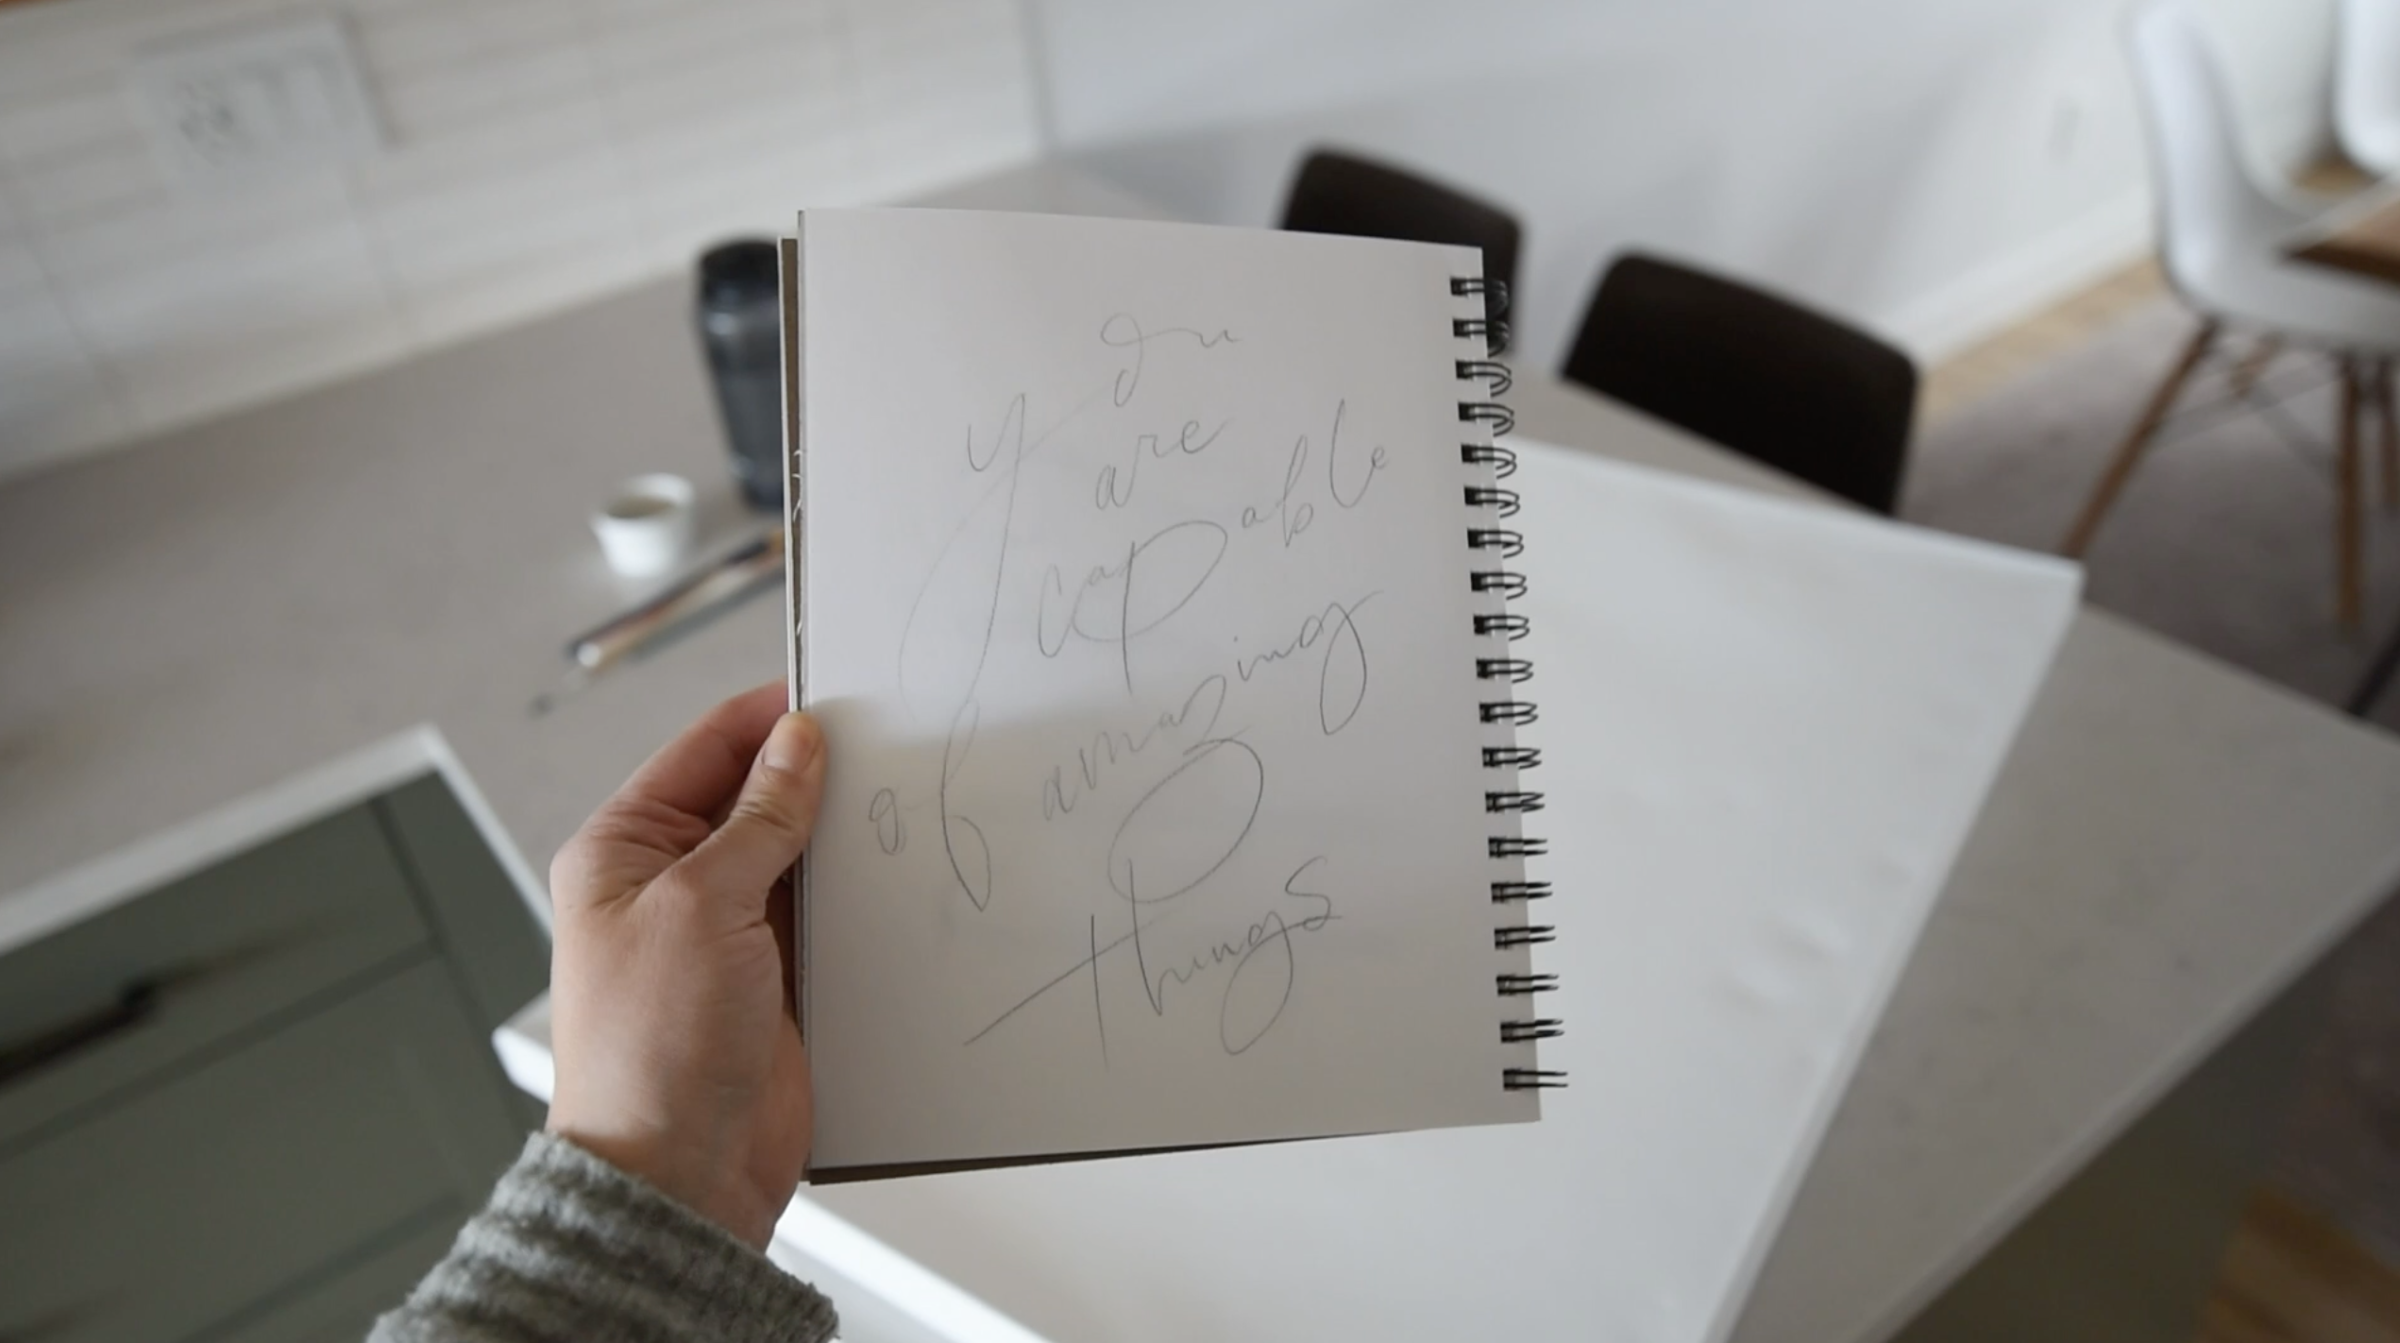
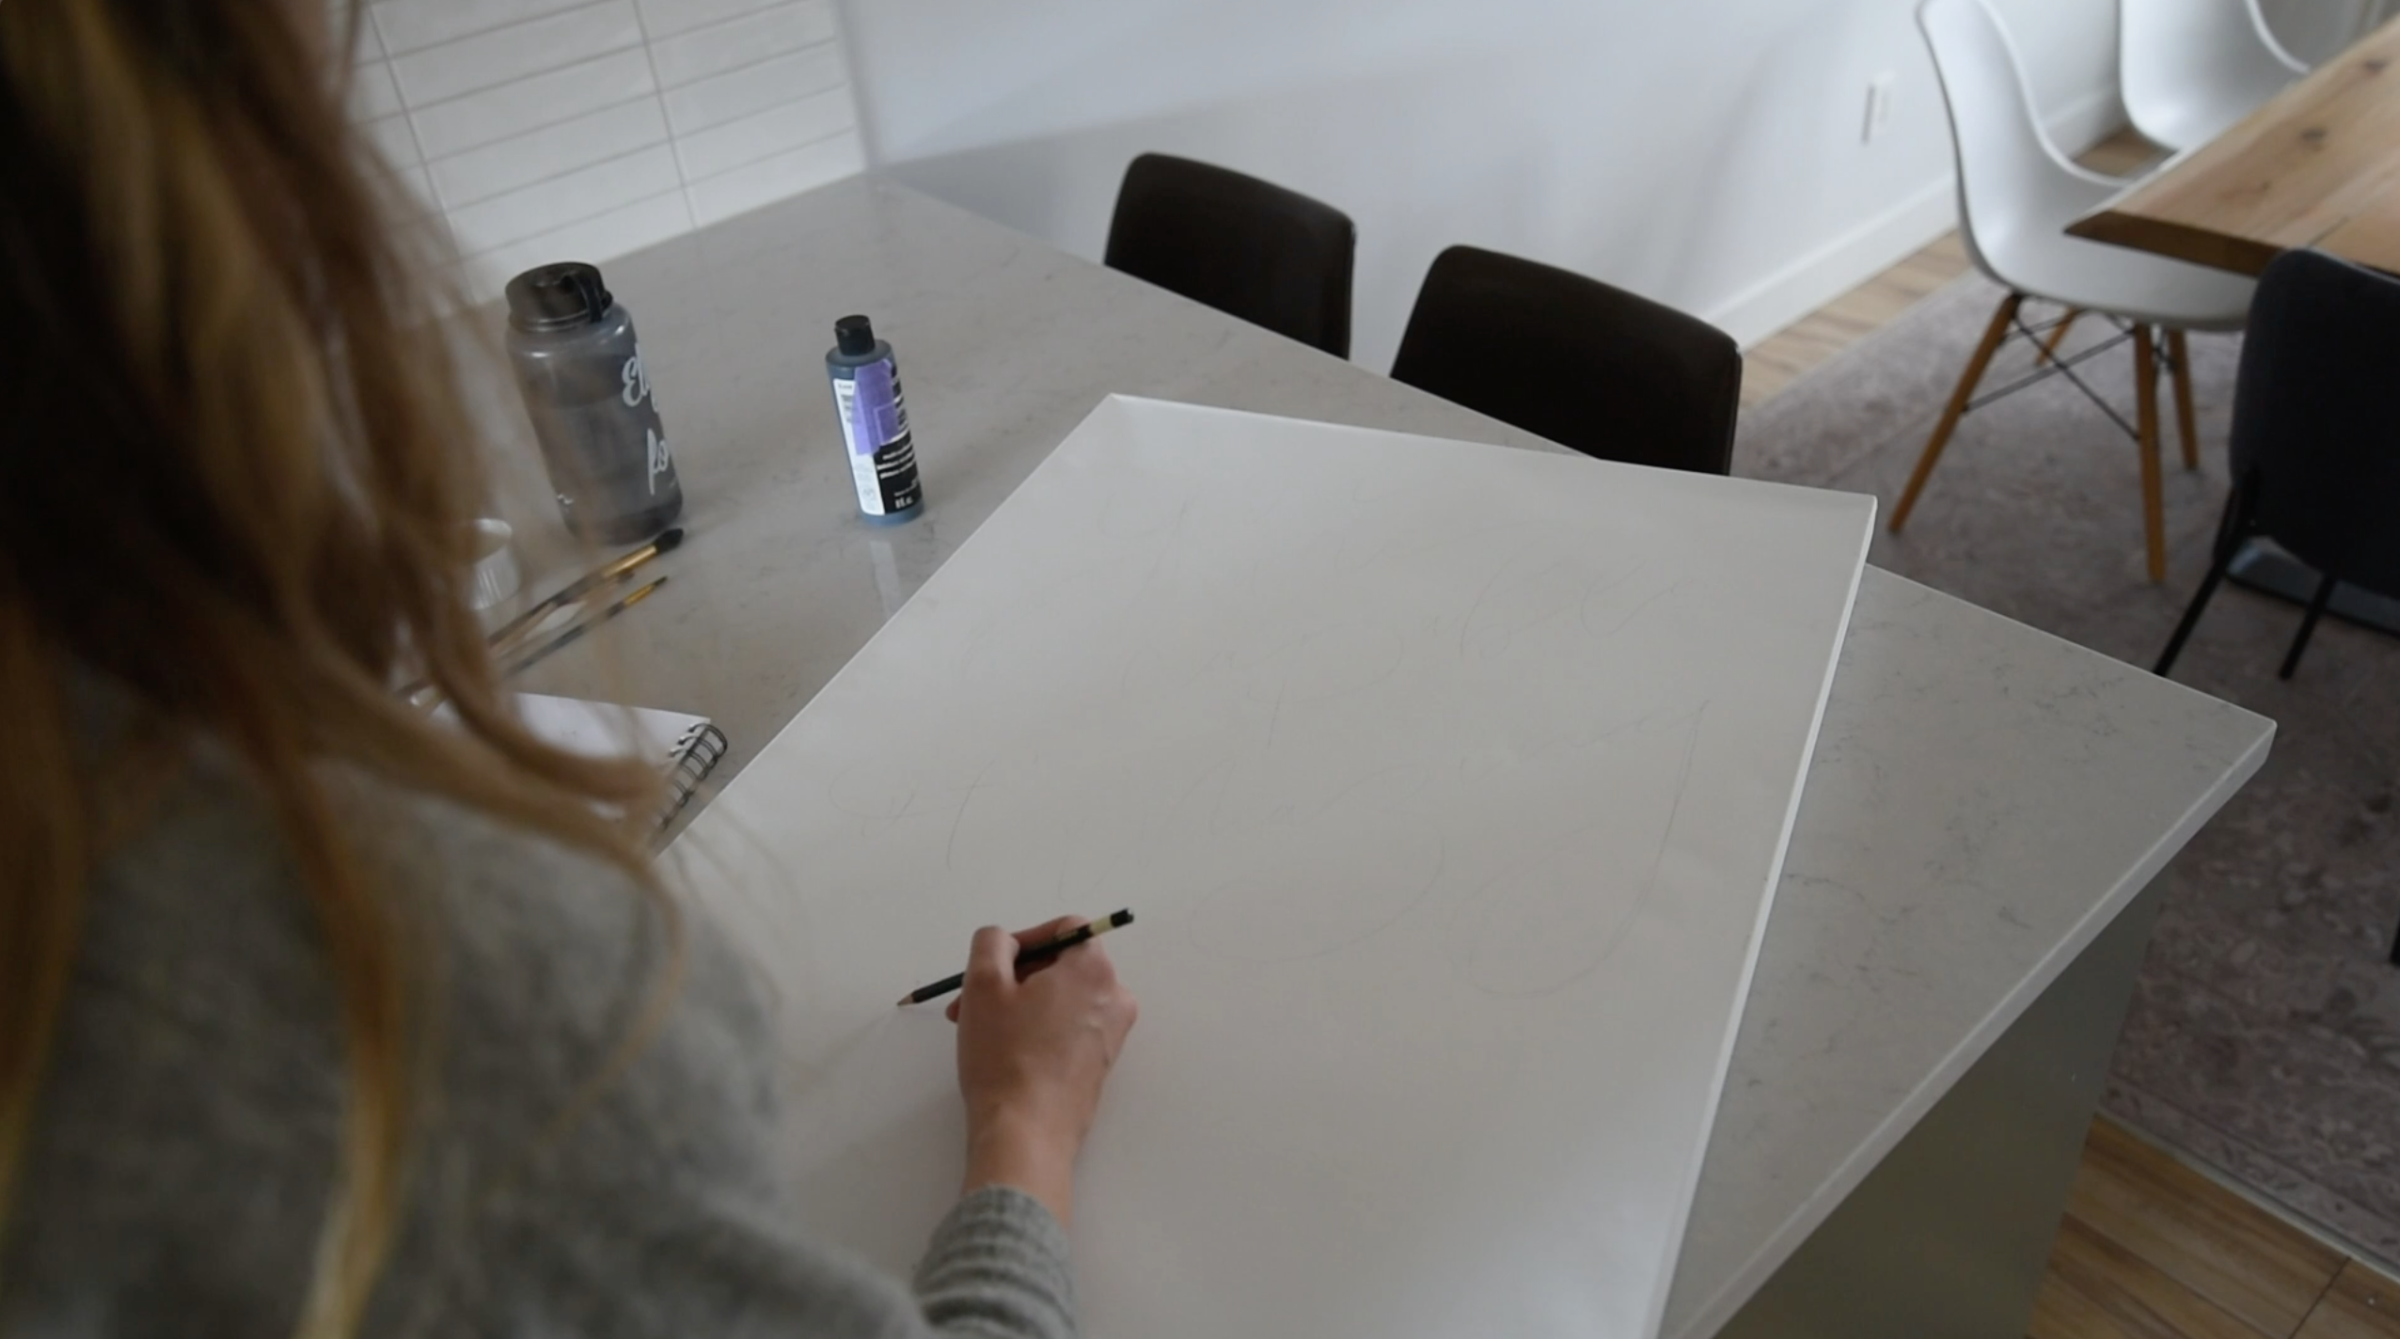
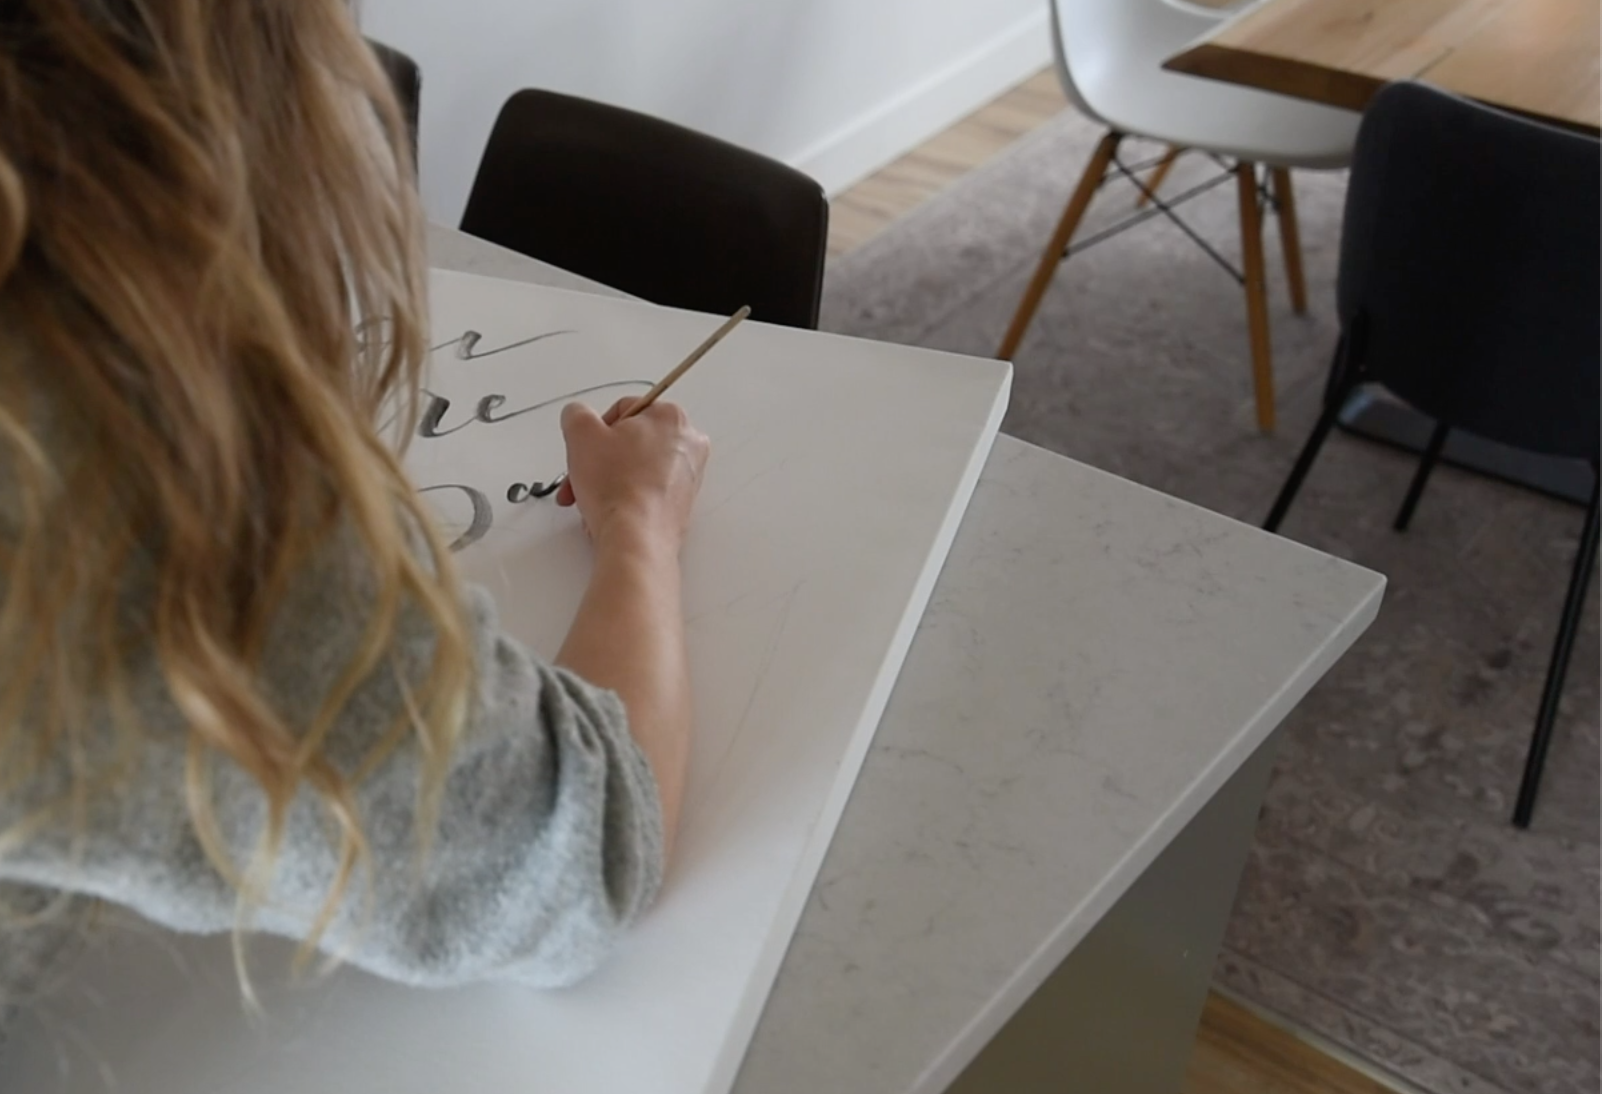
Start by sketching out your design. I used pencil and sketched this in my sketch book then directly on to my canvas, lightly in pencil. You can easily erase pencil lines once your paint dries. If you want to trace a font or stencil your lettering, you could do that too. 

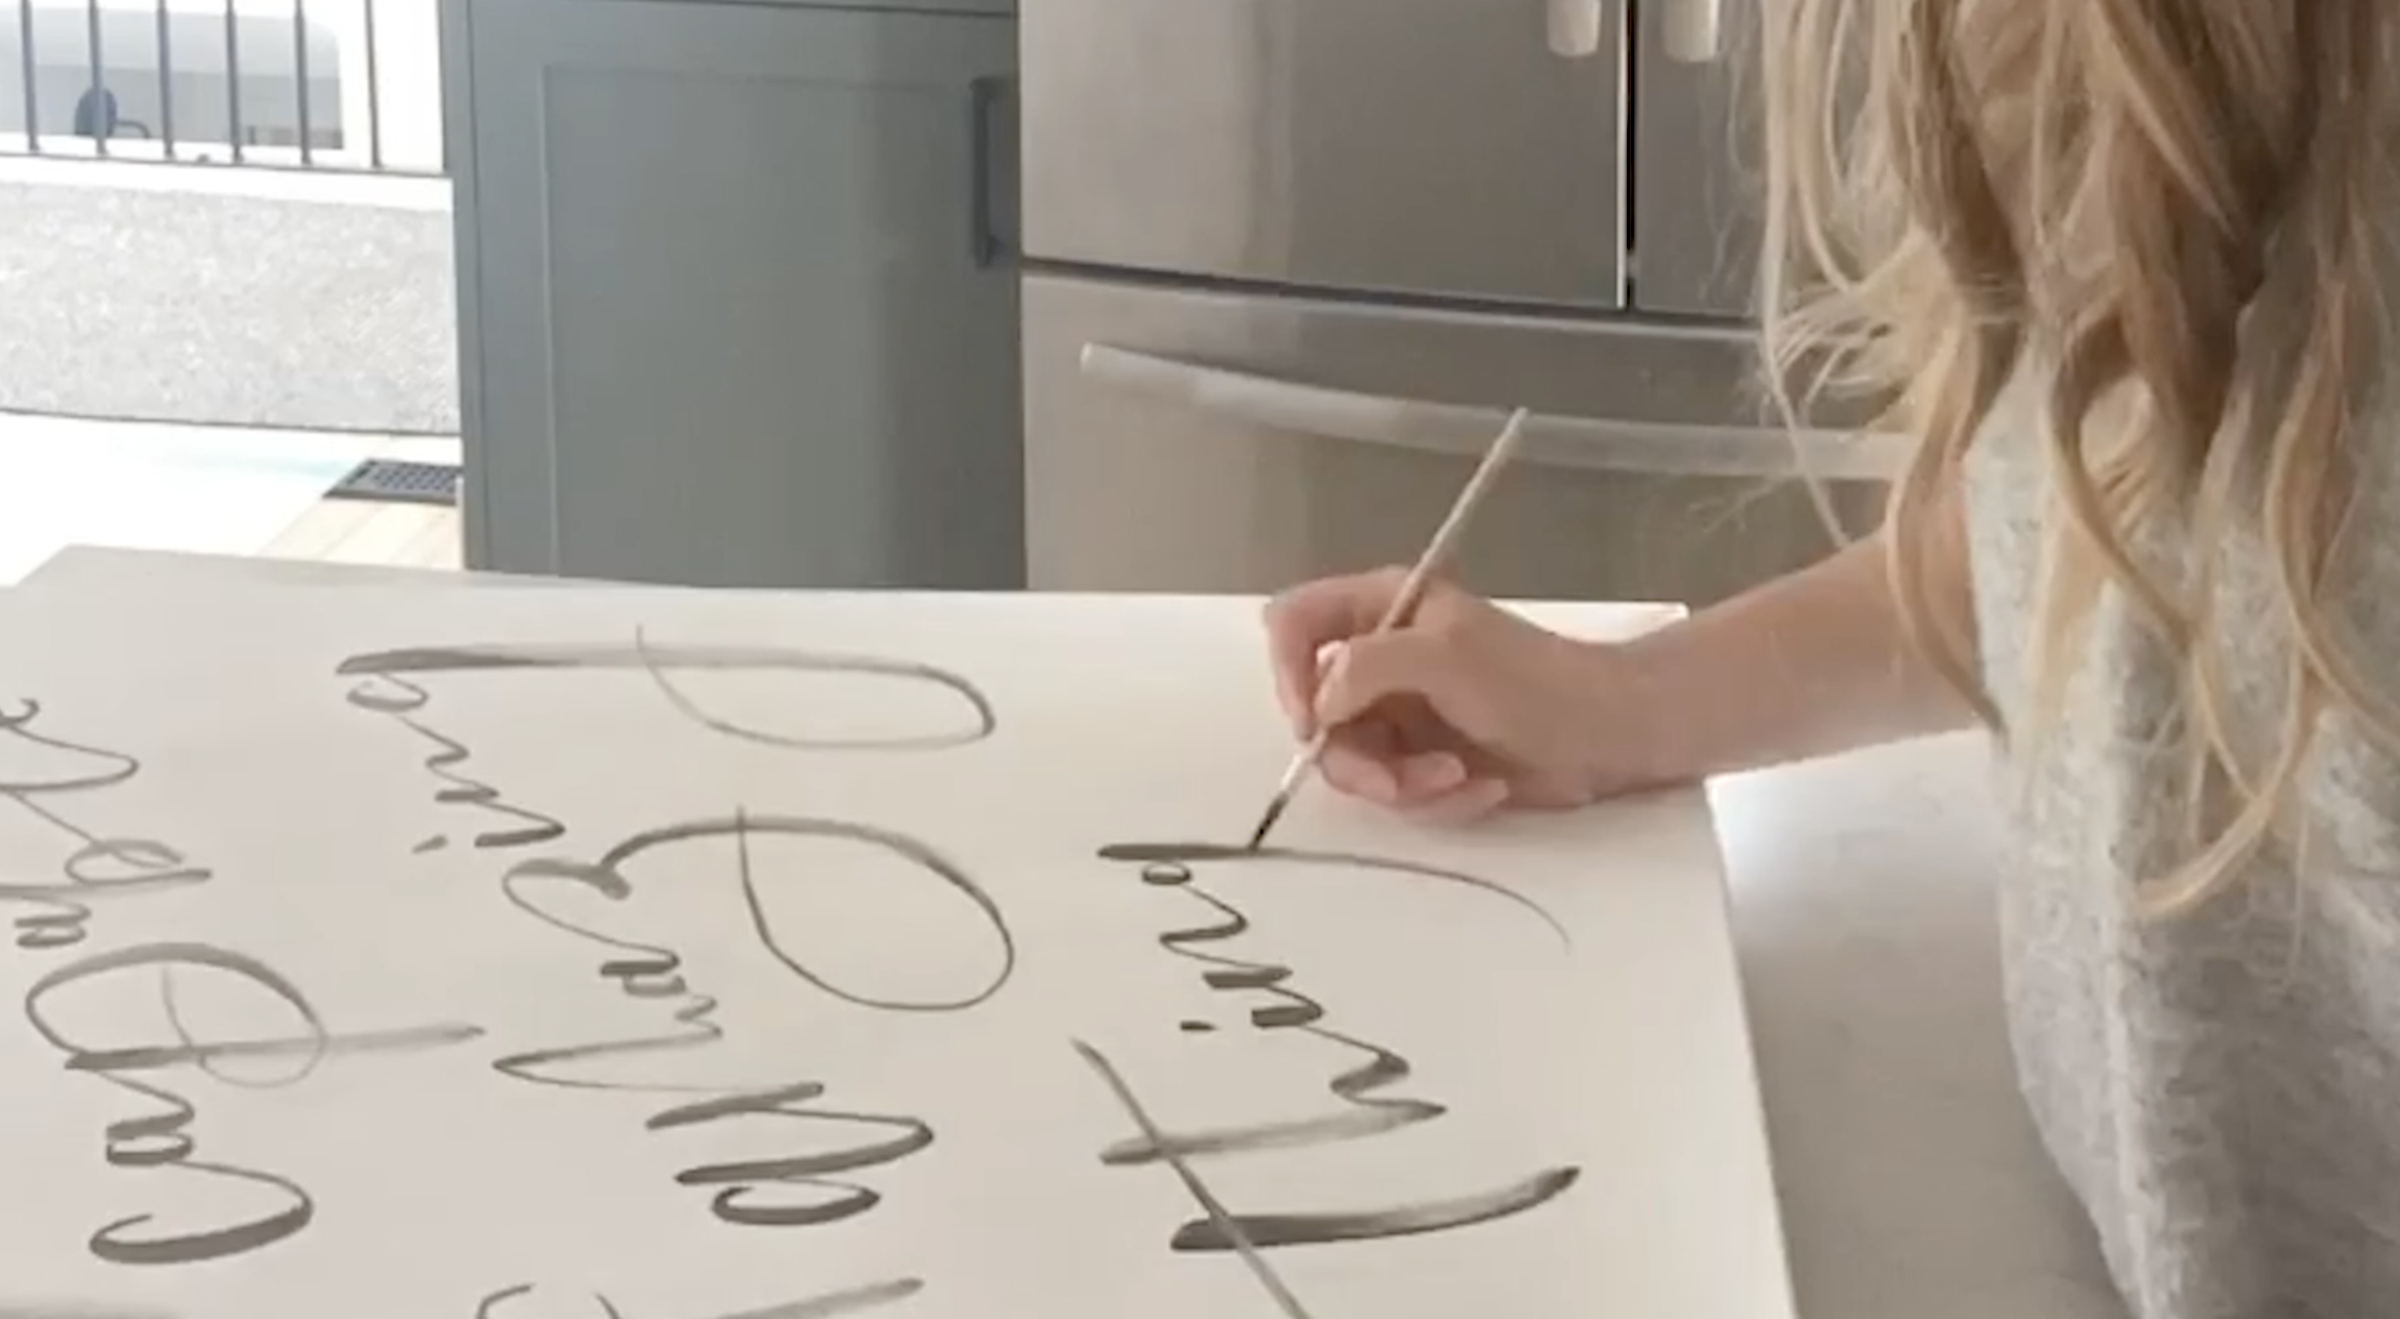
Once you have your design on your canvas, it’s time to get painting! Mix you paint with a little bit of water in a small cup or ramekin. Add just a little bit of water at a time until you get a consistency you’re happy with. Test out the consistency on a piece of scrap paper. You want the acrylic to be be thick enough that it holds pigment and will leave voids (unlike watercolour where the fill is smooth) but with enough water that you can paint a downstroke the length you desire without having to reload your brush with more paint. Play on scrap paper, practicing your strokes until you’re happy with the consistency, then get painting your lettering on canvas!

how to brush letter on canvas with acrylic paint

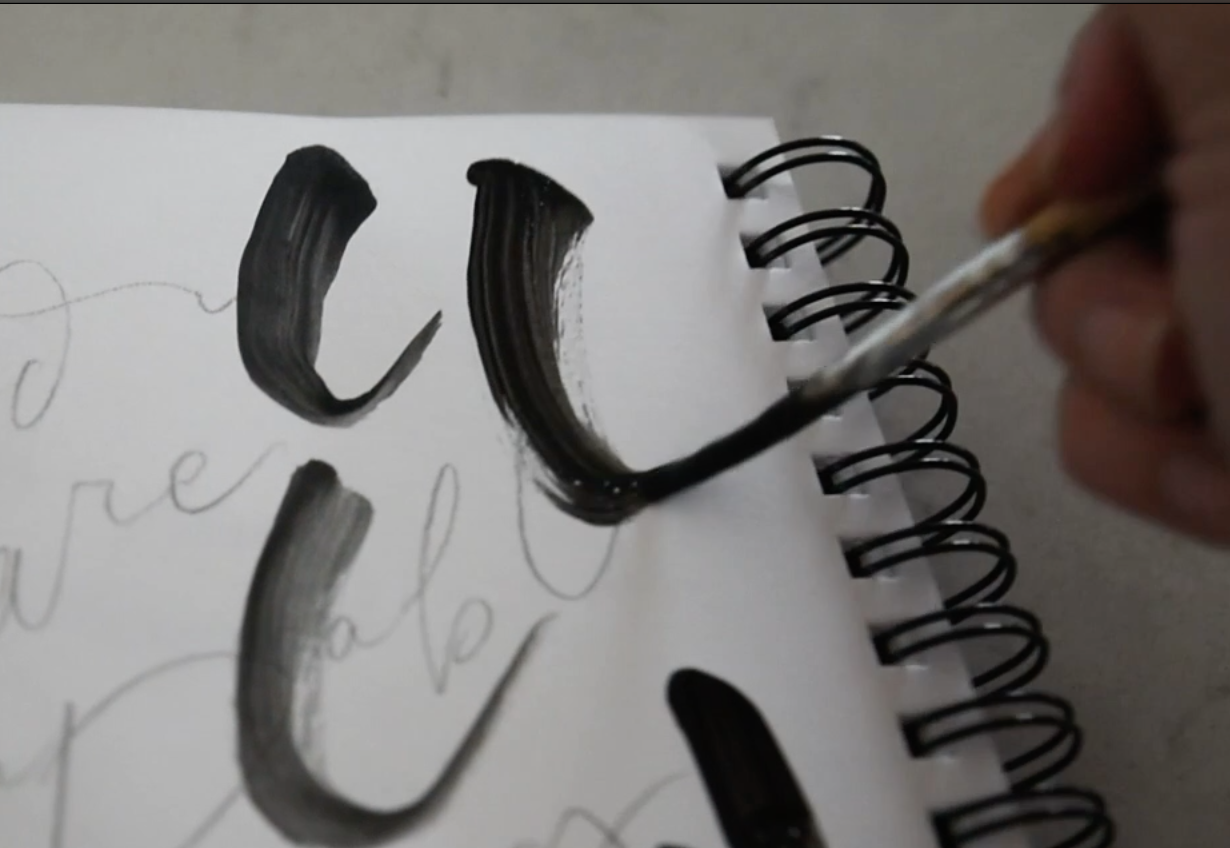
A few things I have found helpful as I paint my lettering on canvas. The first is to again consider painting letters a separate art from writing. Pick up your paint brush, friend! I can’t emphasize this enough. Anywhere your stroke changes direction or crosses over another stroke is a great place to pick up and reload your brush or reposition your hand/grip. Just make sure not to pick up halfway through a downstroke. It will be hard to match the natural voids that happen in those downstrokes- they are better to be left continuous and add more paint after the fact if your brush is running low. 

Tips to get a modern calligraphy look of brush lettering on canvas

I also find that I prefer to paint downward strokes. You’ll see in the video, I start out lettering as I normally do, but partway through I realize my upstrokes are so shaky on the bumpy canvas. I painted these in downward motions after that. I know what brush lettering looks like so for me to do that was easy to maintain the shapes- thin upstrokes and thick downstrokes, even while painting in a downward motion for all strokes. 

DIY brush lettered canvas
How to get that brush lettered effect with acrylic on canvas

Alright- that’s really it! I end the video with a little pep talk on creativity. If you are new to lettering (even if you’re not!) it’s a great clip where I share how I criticize my own work and how we can work on our mindset to embrace those flaws in our work. 

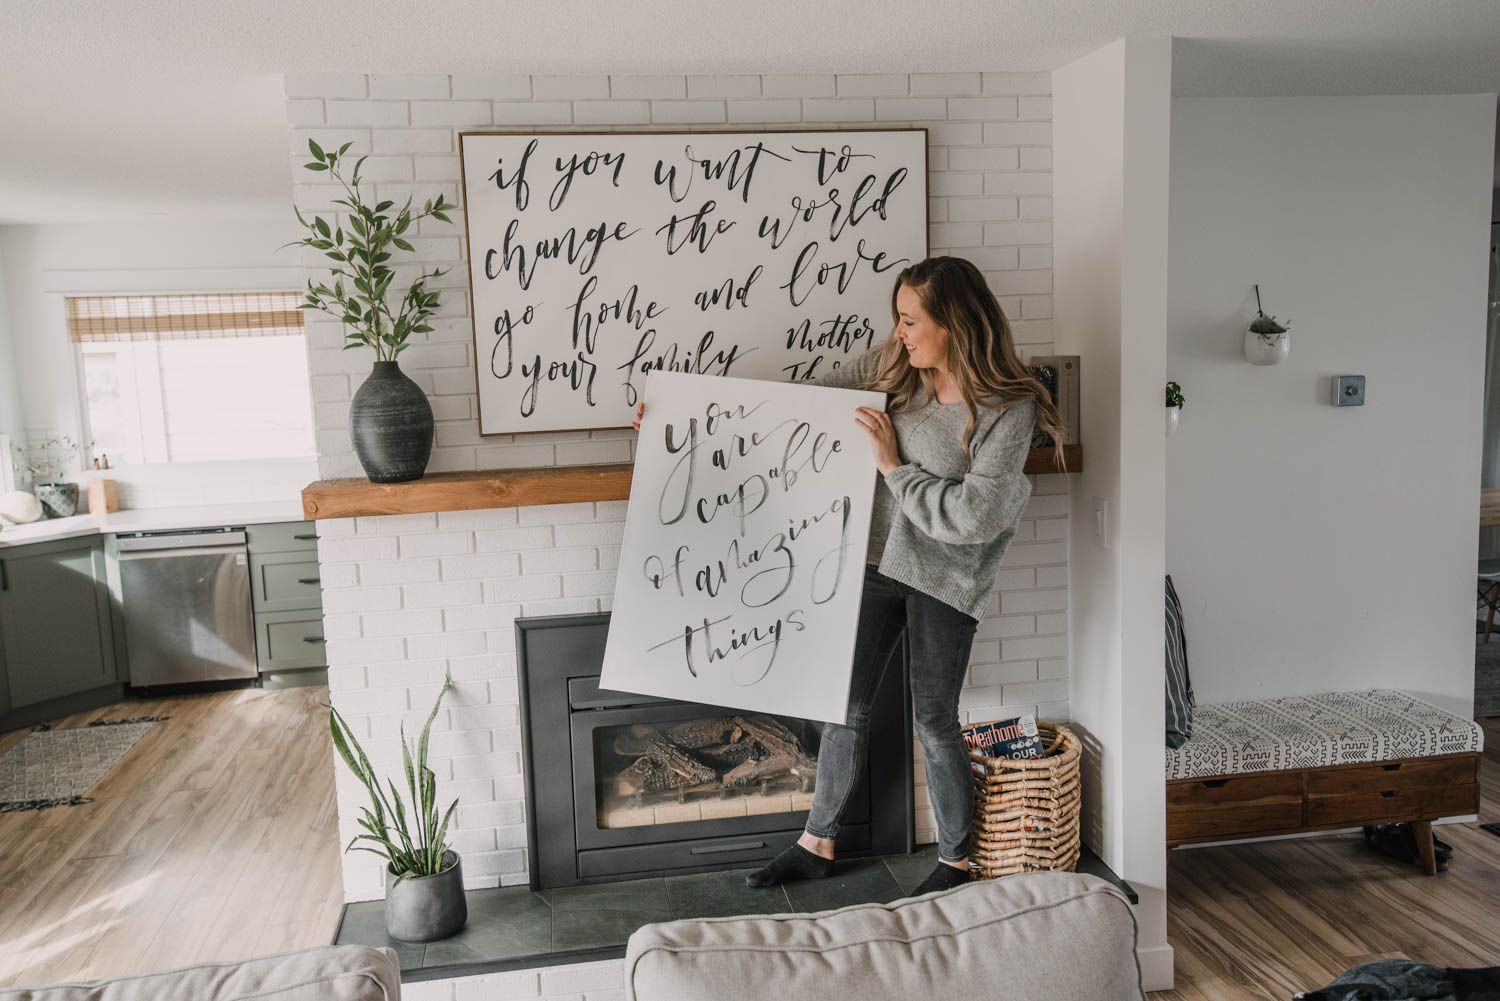
I may frame this out like the one from over my fireplace- or I might leave it as is until I remodel my bathroom. I have a great simple tutorial on framing canvases coming up in the next couple of weeks- can’t wait to share you!

Category: Featured, LifestyleTag: Art, Handlettered DIY, Handlettering, Lettering Tutorials, Paint, Video, Wall Art, Wall Decor
Facebook0Tweet0Pin0LinkedIn0
Previous Post: « Kindness is Contagious / June 2020 Tech Wallpaper and Printable
Next Post: How to make your own coloring sheets (from hand lettering) »

Reader Interactions

Comments

  1. Mary Miller

    Nov 25 at 11:48 am

    I have dipped my toe in the water of canvas painting w/add on lettering.. Oh my pictures are not anything to write home about but I love trees and flowers but mostly trees. So as I do my daily devotional in my Bible I find something that hits me and I find one of my previous paintings and add a scripture to it or I start a new painting . your tutorial on brush lettering has been very helpful. One of the lessons I learned the hard way on my own was not to add medium or an extender when I want to do brush lettering. I am a self-taught painter and I love to paint and play with my cats at the same time why my paintings are drying. thank you for your time perhaps I could send you a photo of one or two of my pictures thank you.

    Reply
  2. Sam

    Mar 20 at 8:42 am

    I’d love to purchase a couple of those signs. Any idea where I can buy them?

    Reply
    • Sarah

      Mar 24 at 7:57 am

      Hi Sam! Are you asking about the canvas she used to make them? Or you’re interested in purchasing a hand lettered sign?

      Reply

Leave a Reply Cancel reply

Your email address will not be published. Required fields are marked *

Sidebar

WOOHOO!

Check your email to confirm!

(+ get your freebies + discounts)


Thanks for dropping by!
I’m Colleen: wife; mom to 4 wild ones; and DIY blogger behind Lemon Thistle. You can expect to see rad DIY, modern home decor, renovations, hand lettering and the occasional party on Lemon Thistle. Read More…

email facebook youtube instagram pinterest

Unless otherwise noted, all content and images are mine. Full posts may not be shared without express written consent. But I love when you share! Feel free to share, without altering, one image with proper credit and a link to the original post. All free printables are for personal use only.

Everyone loves proper credit- if you ever notice something improperly credited, please please shoot me an email and I’ll fix it lightning fast.

Find all my policies right here.
This includes my privacy policy, info on the GDRP compliance and information on affiliate links (Including Amazon Affiliates).

Visit Colleen Pastoor’s profile on Pinterest.

colleenpastoor

My house is never this clean
-
DIY + Home Decor Blogger
Mama of 4 👶🏼🧒🏼👦🏼👧🏼
Renovating our 🏠 the DIY way
🖤 Lettering & ☕️
-
✉️[email protected]

colleen pastoor/lemon thistle
What’s next on your project list? Spring is teas What’s next on your project list? Spring is teasing us so we’re starting on outdoor projects around here!
$100 play room makeover is DONE! This room has se $100 play room makeover is DONE! 
This room has seen so much change over the past year (swipe over to see it 2 weeks ago, 10 months ago and 1 year ago!). I took this last week to make over this space with mostly pieces we already had and I’m so so happy with the results! It’s a good reminder that some hard work, creativity and of course paint can work magic.
I’m sharing all the details (and that under stairs space!) on YouTube today (link in my stories!) and so is my friend @thediymommy (she made over her daughters bedroom for $100!).
Do you think dried grasses are only for fall decor Do you think dried grasses are only for fall decor? I used to think so, but these bunny tail grasses are too cute to put in a bin until next year. Plus the name sounds like spring decor to me ;) What do you think?

Ps. Today’s going to be a full day of playroom progress! I’ll share as much as I can in stories as I go :)
Paint is honestly magic.✨ I am so excited to sha Paint is honestly magic.✨
I am so excited to share this kitchen makeover with you guys! These are the same cabinets, just painted (countertops too!) And some updated finishes. I blogged the full before and after if you’d like to check it out!
Big thank you to @schaubhardware and @wagnerspraytech for partnering to make this space possible!
Ps. Most of the work done here was by the homeowners so if you’re thinking about taking on a makeover in your own home, maybe this is the encouragement you need 😘
As I’m sitting here staring at the dishes on the As I’m sitting here staring at the dishes on the counter while I try to focus on editing a video, I thought it’s as good of time as any to share this reminder 😘
I feel like I’ve lucked into the best job out th I feel like I’ve lucked into the best job out there, but then I’m also so aware of the amount of work it took to get here. Today I chatted with two of my blog friends in an Instagram live about DIY blogging as a job and answered some questions we get asked all the time about our work and the balance of it all! I saved it as an IGTV so you can watch it if you missed 🥰

Big thanks to @love_create_celebrate and @thediymommy for chatting with me today! One of the biggest perks of this job is all the talented ladies I’ve had the privilege of meeting and calling friends- these two are top of that list!
I’m having some fun in stories with a little giv I’m having some fun in stories with a little giveaway guessing game. I’d love if you played along!

I put up a question box and you can guess my next room makeover and the guesses are all over the place. Some are projects on my dream list, some are rooms I wish to even have in my house and some are spaces we’ve already tackled! Like our main bathroom ✨ these photos are from my spring home tour I shared over on the blog earlier this week. Hung up a pennant and called it decked for spring 🐣
Who is ready for spring?! I know we totally are- w Who is ready for spring?!
I know we totally are- we’ve been soaking up outside time this week with the kids home on spring break but over on the blog... it’s spring home tour time! I am sharing my home all ready for spring along with some amazing bloggers as part of the #seasonalsimplicity spring series!
You know I love a touch of DIY decor in every spac You know I love a touch of DIY decor in every space in my home, so I’m so excited to be partnering with @HGTVCanada to celebrate #$aveMyReno being back TONIGHT! #partner
 
My favourite thing about $ave My Reno is that they encourage home owners to get involved and DIY to maximize budget. They even help kids get involved- it’s everything Shane and I work towards in our own projects. You can catch it every Tuesday at 9/9:30PM EP on @HGTVCanada or catch up on episodes on STACKTV through @primevideoca!
 
PS. I made those tie dye pillows, similar to the ones featured in tonight’s episode! You can catch my stories to see the super speedy how-to :)
Load More... Follow on Instagram

Copyright © 2021 · Lemon Thistle · All Rights Reserved · Powered by Mai Theme