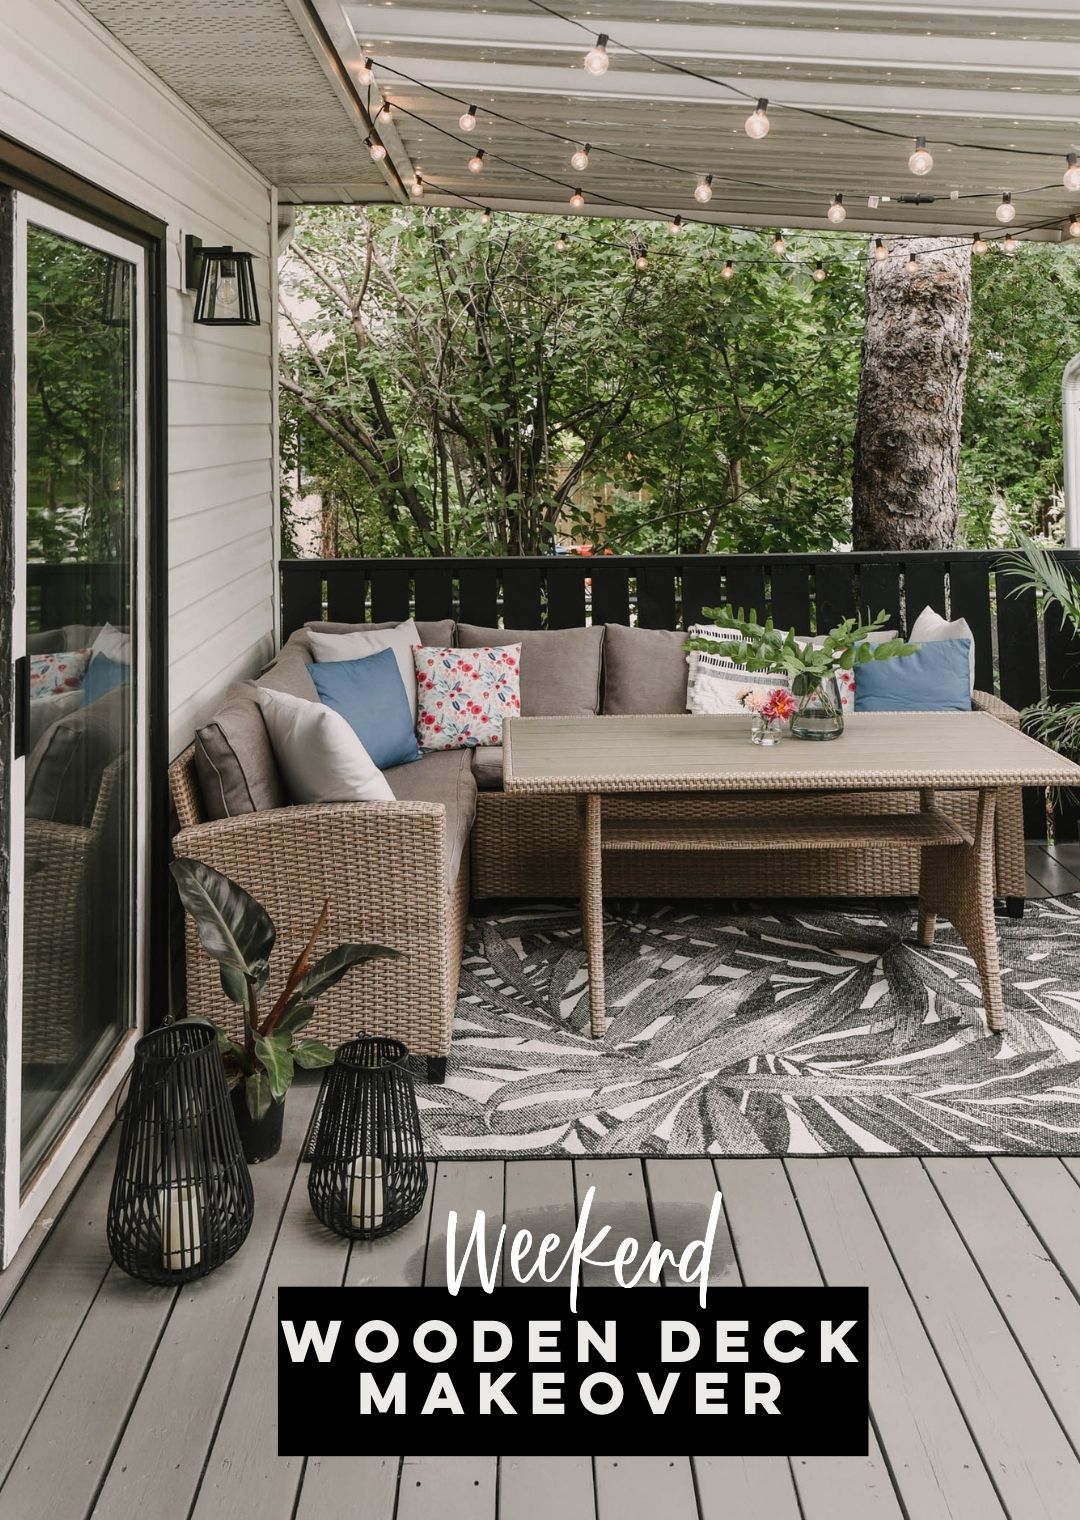
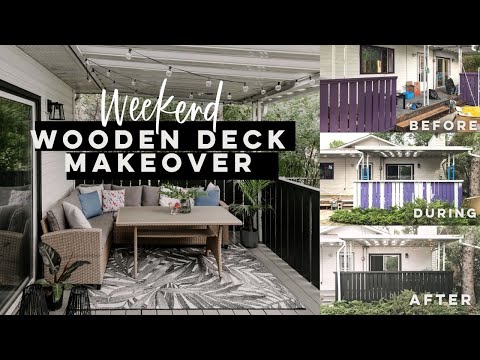
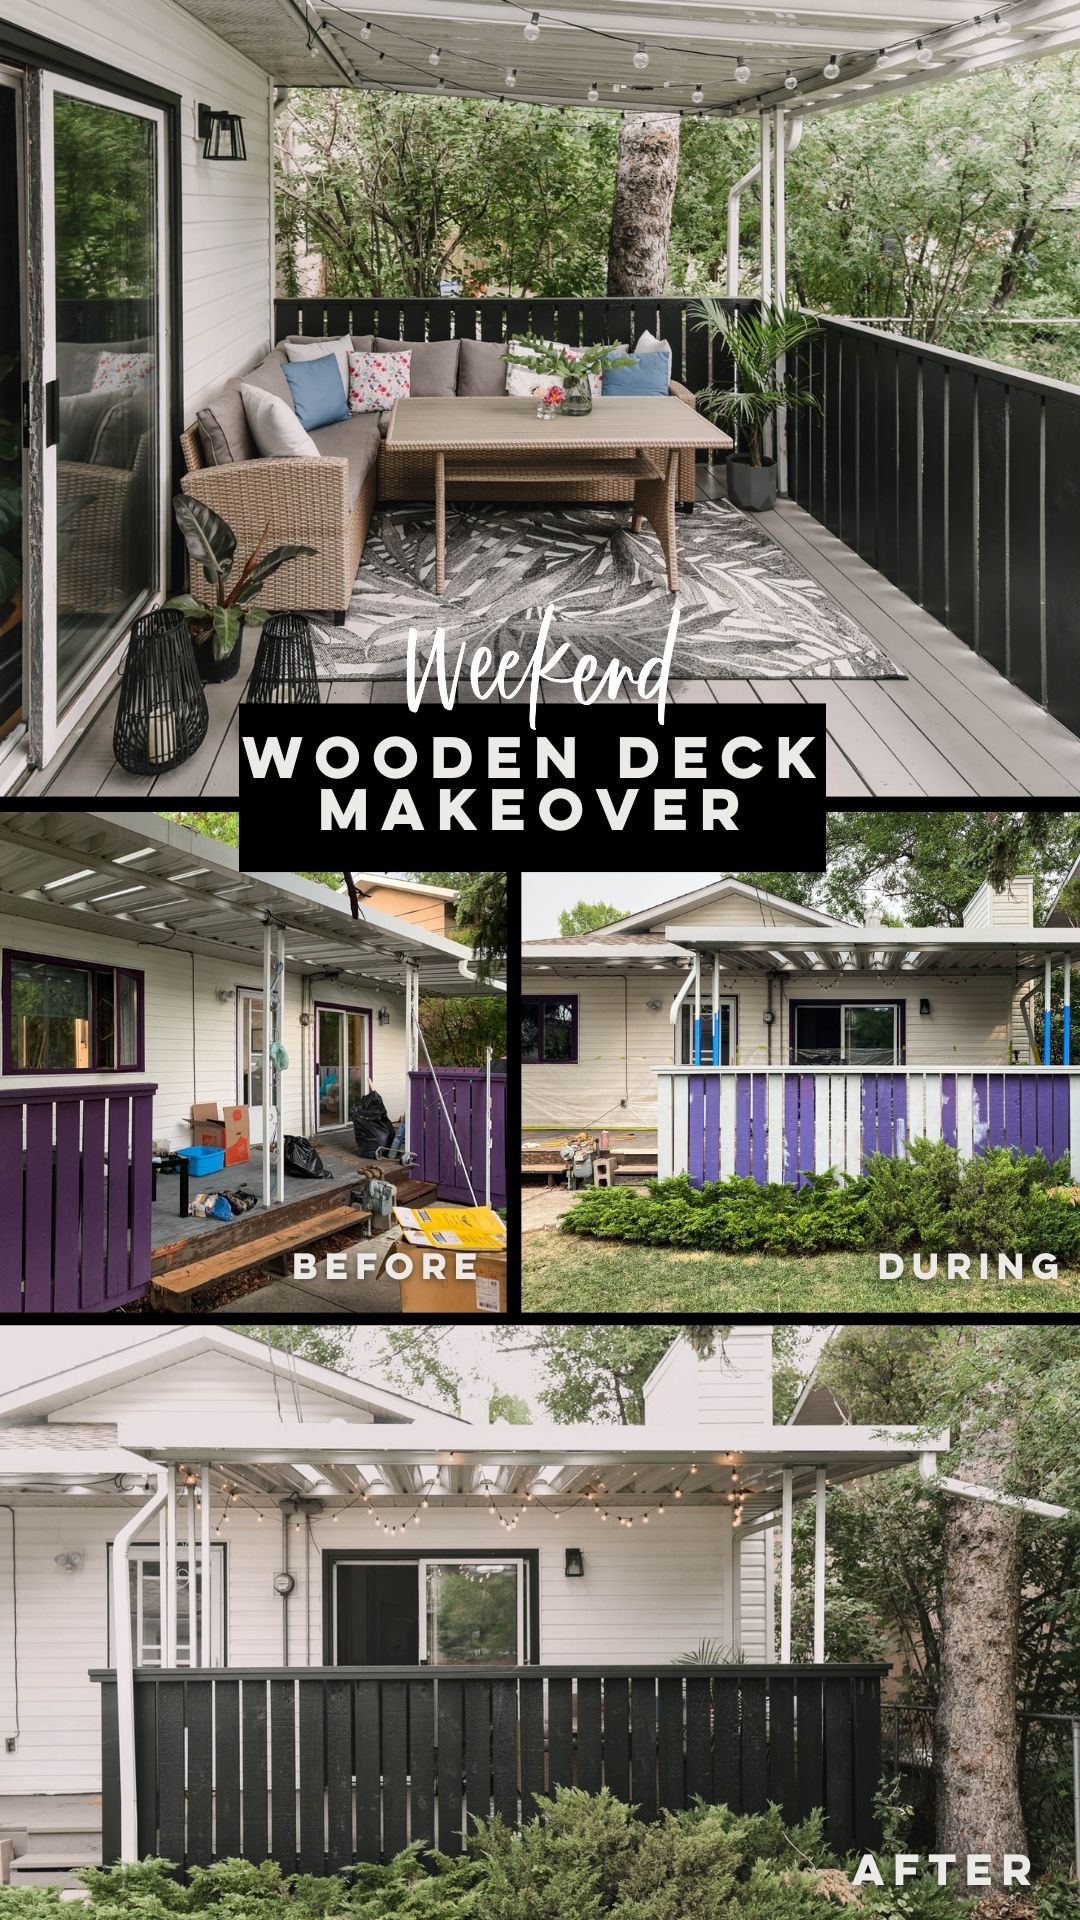
Sharing this old wooden deck makeover from replacing rotting boards to sanding the chipping paint to painting and decorating, we finished this deck refresh in a weekend thanks to some helpful tools and lots of coffee!
Earlier this month I flew to visit my sister and help with a few projects on her new home. She’s my younger sister and I’d always promised that when she bought her first home, we’d be there with tools- so it was time to live up to that promise! The first space that I’m sharing from that trip (there’s another one coming!) is this deck makeover.
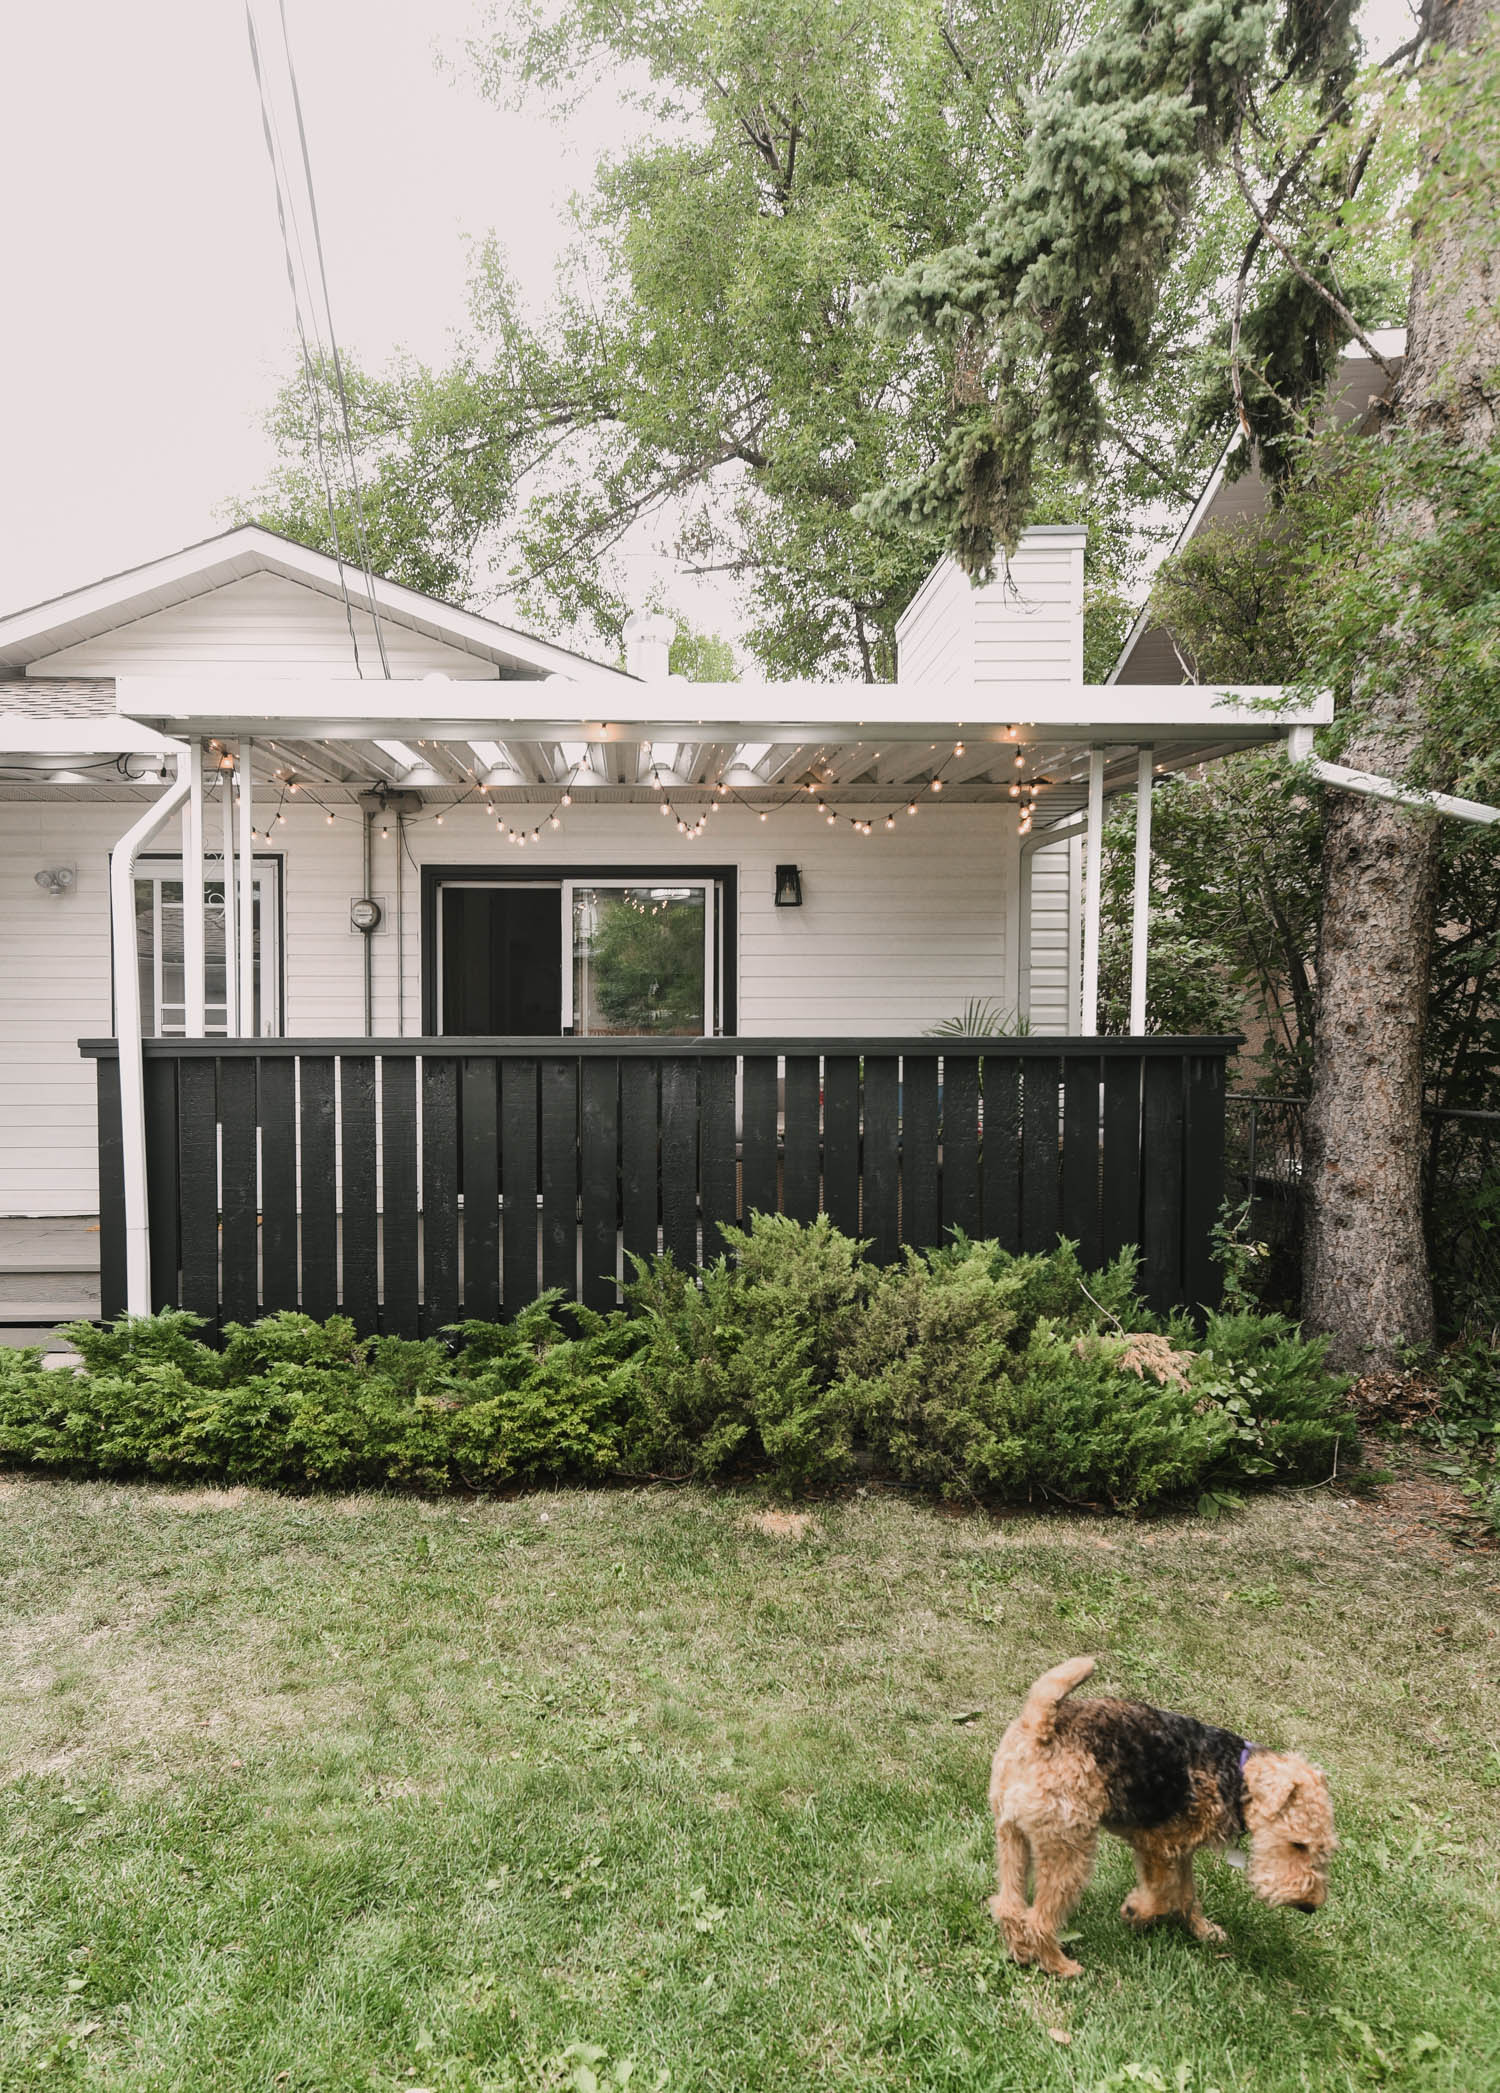
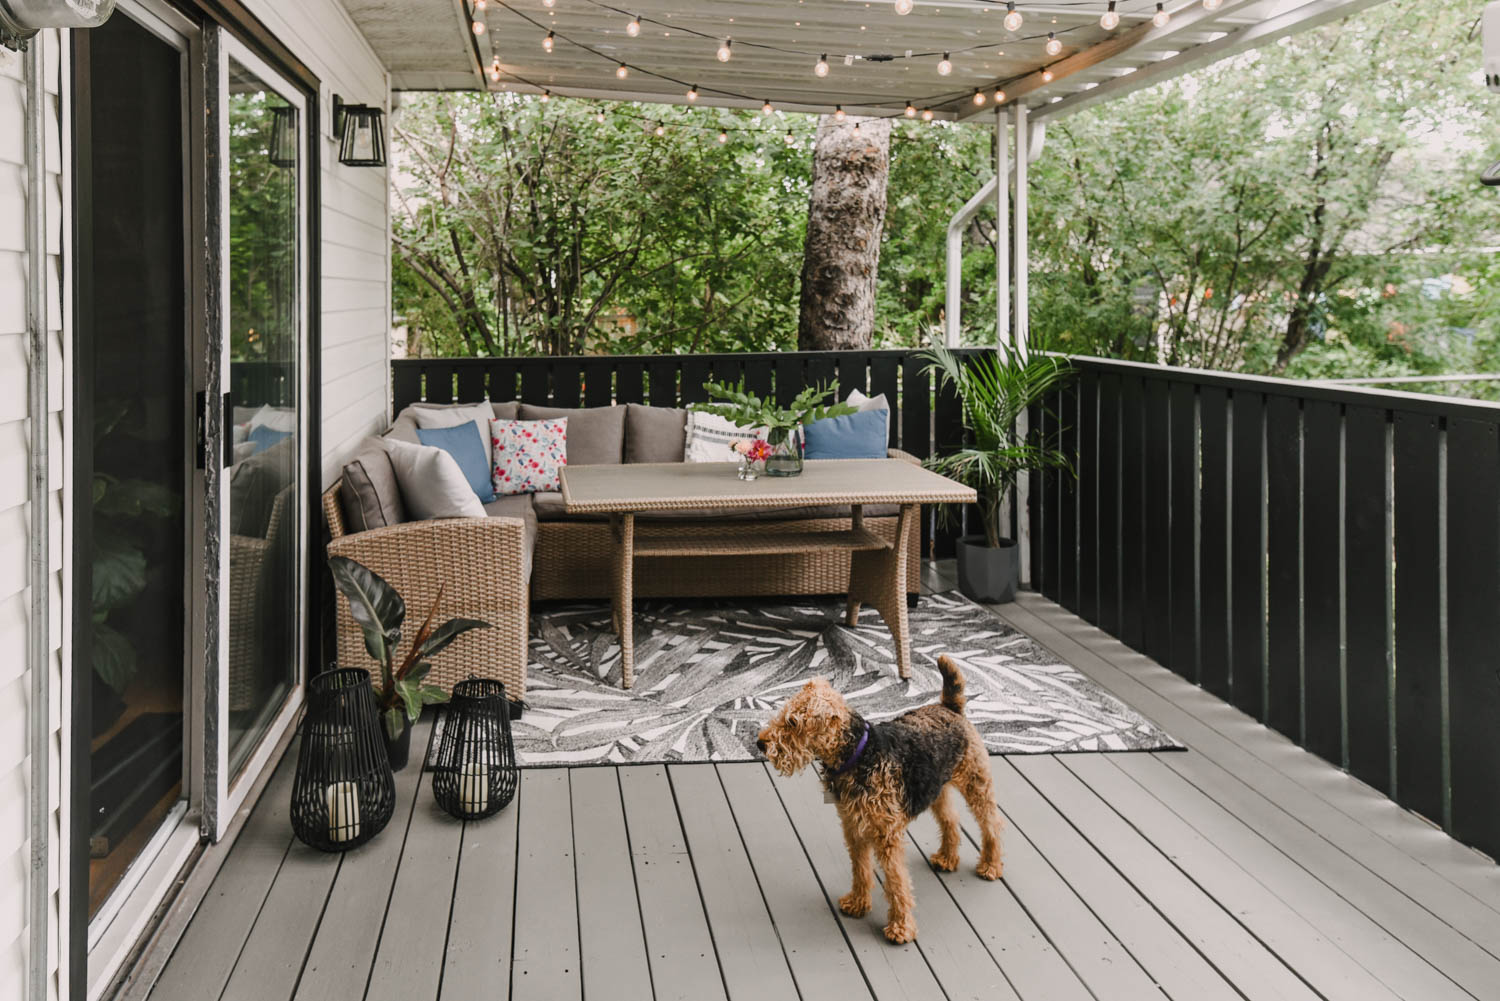
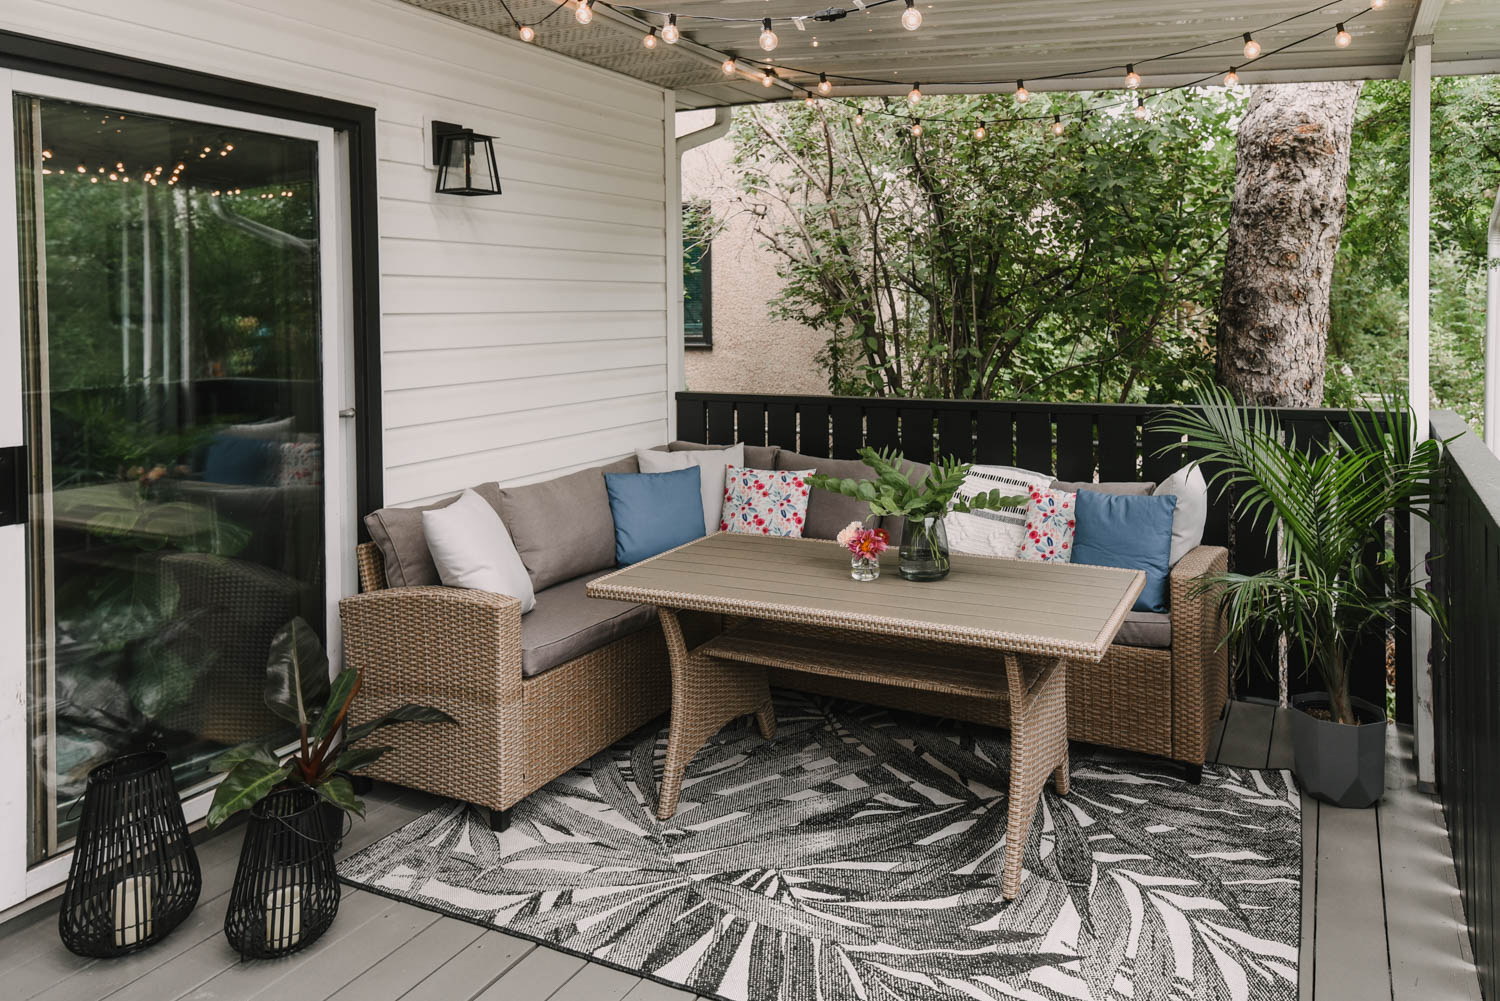
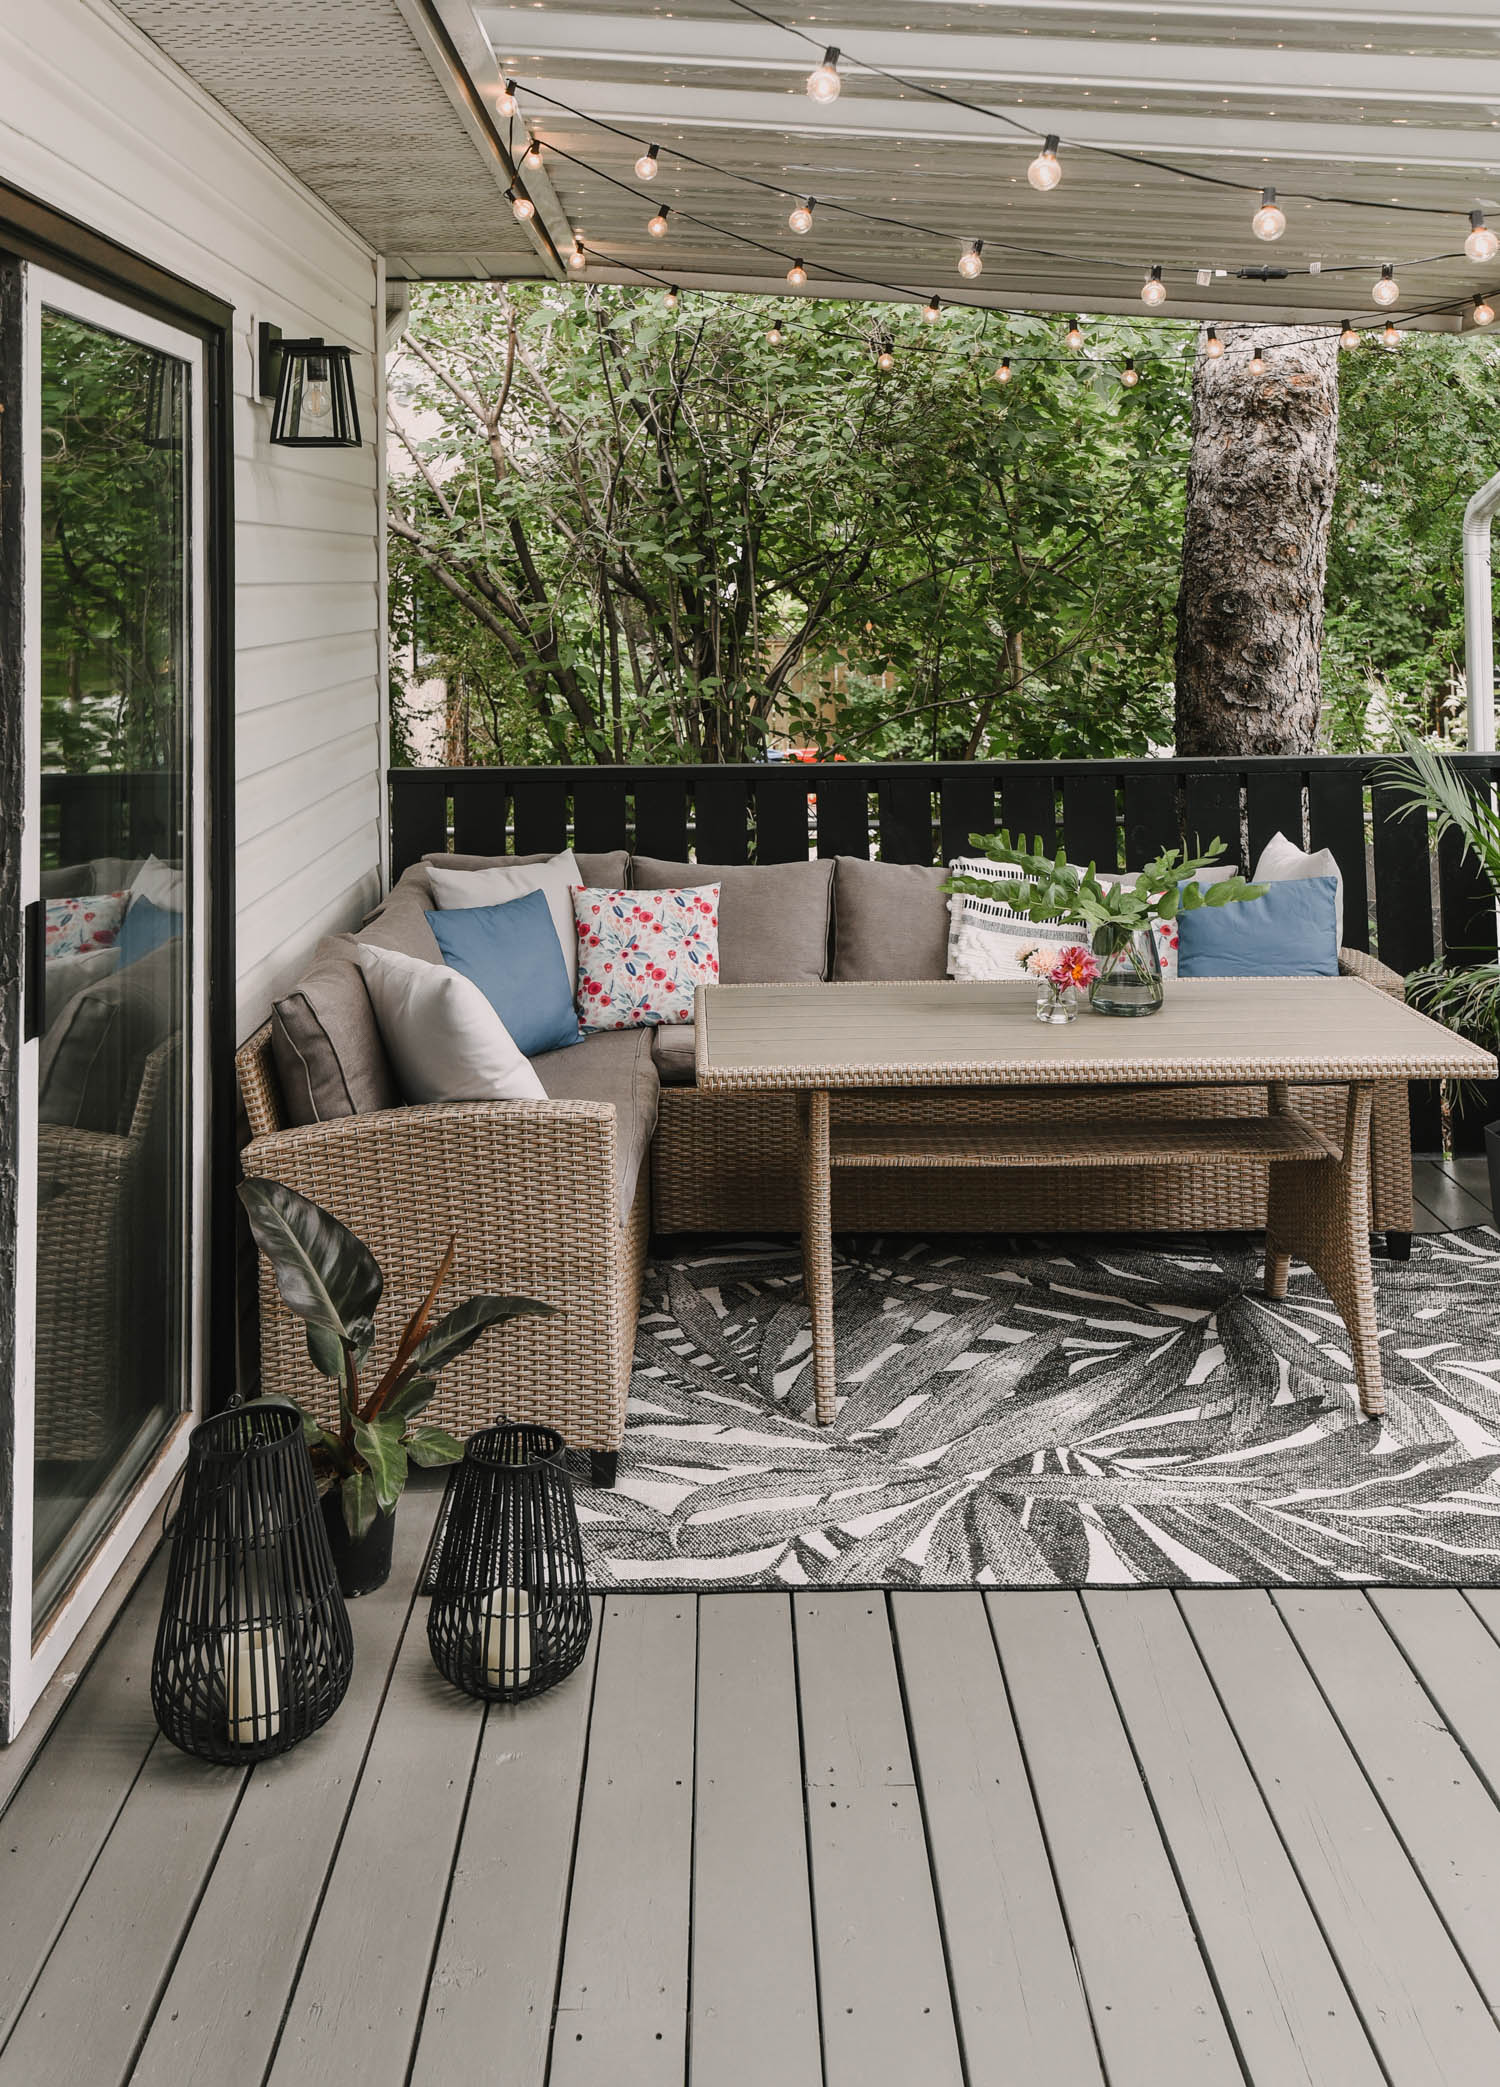
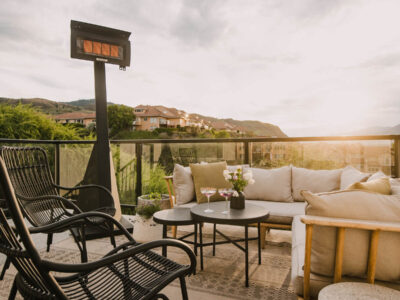
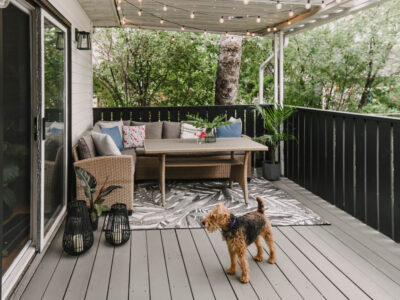
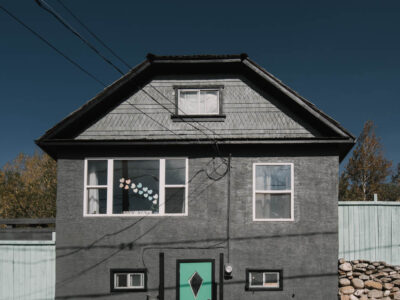
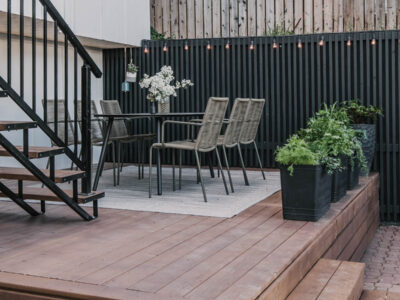
This deck is one of her favourite places to hang out from drinking her morning coffee to playing games in the evening by those patio lights. It has such great tree cover providing privacy and bird noises and since it’s covered, she can enjoy it in most weather. But… it was in need of some love.
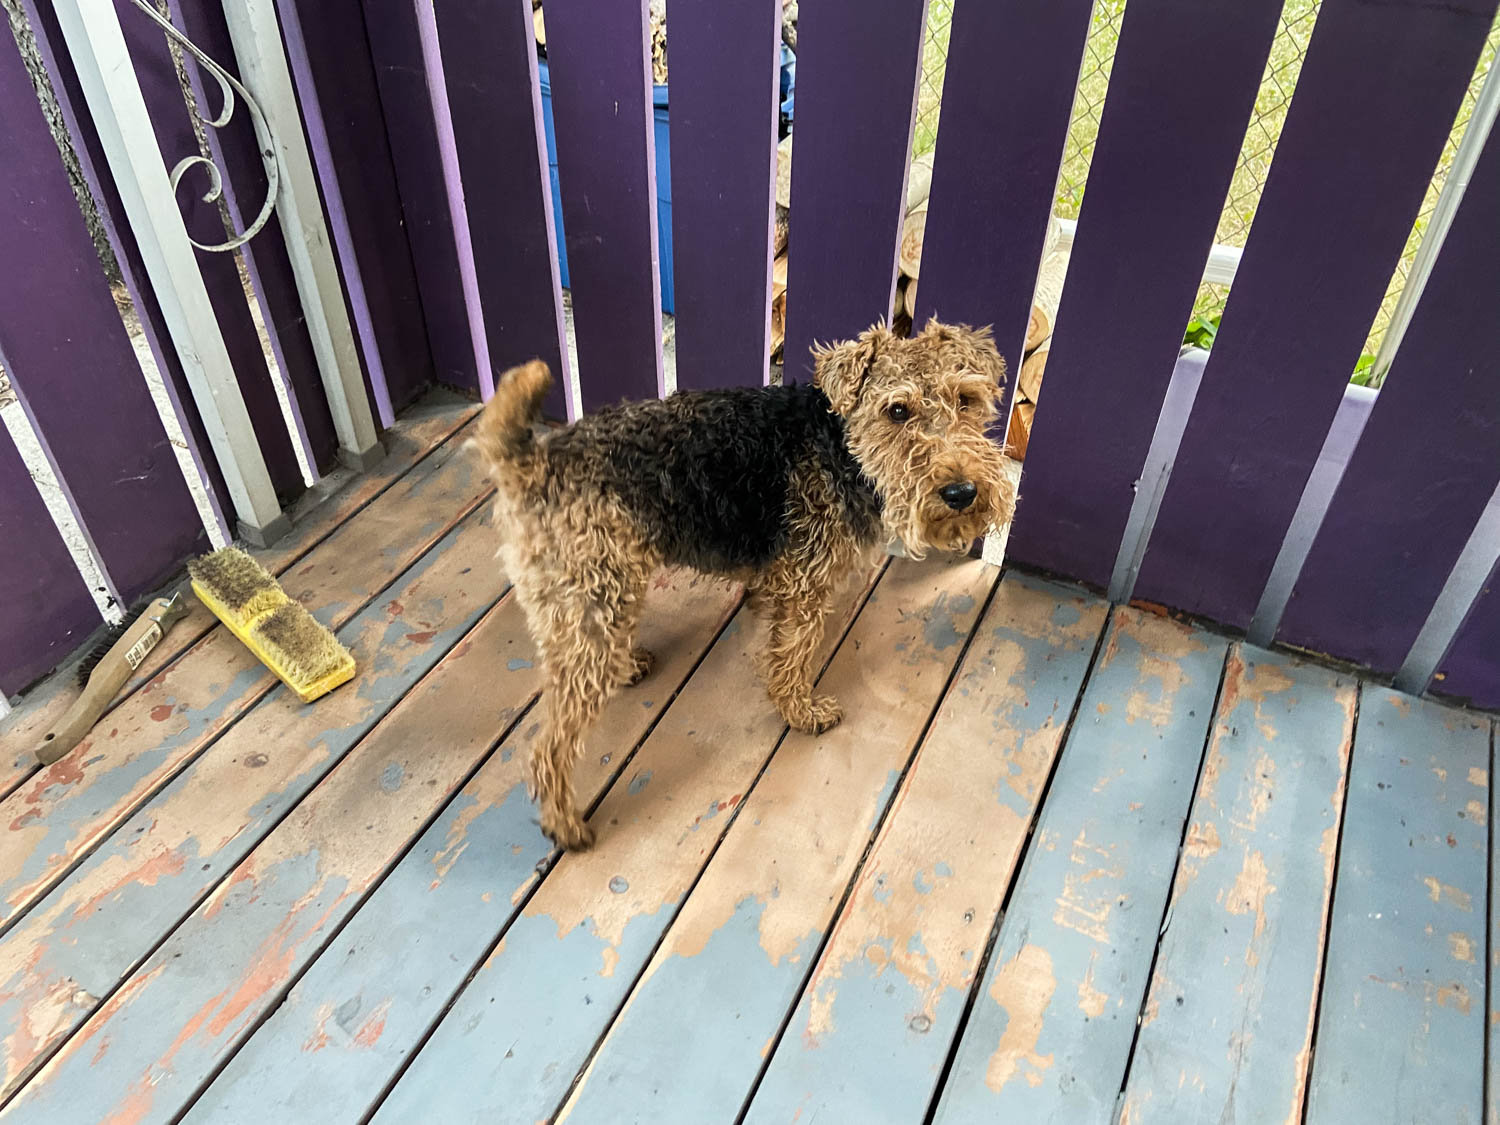
The layers of paint were heavily chipping off the deck floor and there were several boards that had either started rotting, splitting, or just falling apart from wear. Plus… the purple was a LOT to try coordinate patio decor with. Here’s a closer look at the before…

We made this space over in just one weekend thanks to lots of coffee and some Wagner tools to help speed up the process.
*This post was originally created in partnership with Wagner Spray Tech in 2021 and updated 2023. This post inlcudes affiliate links at no cost to you. See all our policies here!
Ready to see the makeover?
Repair damaged deck boards
The first thing we did was replace the damaged boards. We carefully pulled them up using a pry bar, removing nails and then replacing the damaged portions with fresh deck boards. We also hit down any nails that had loosened up over the years.
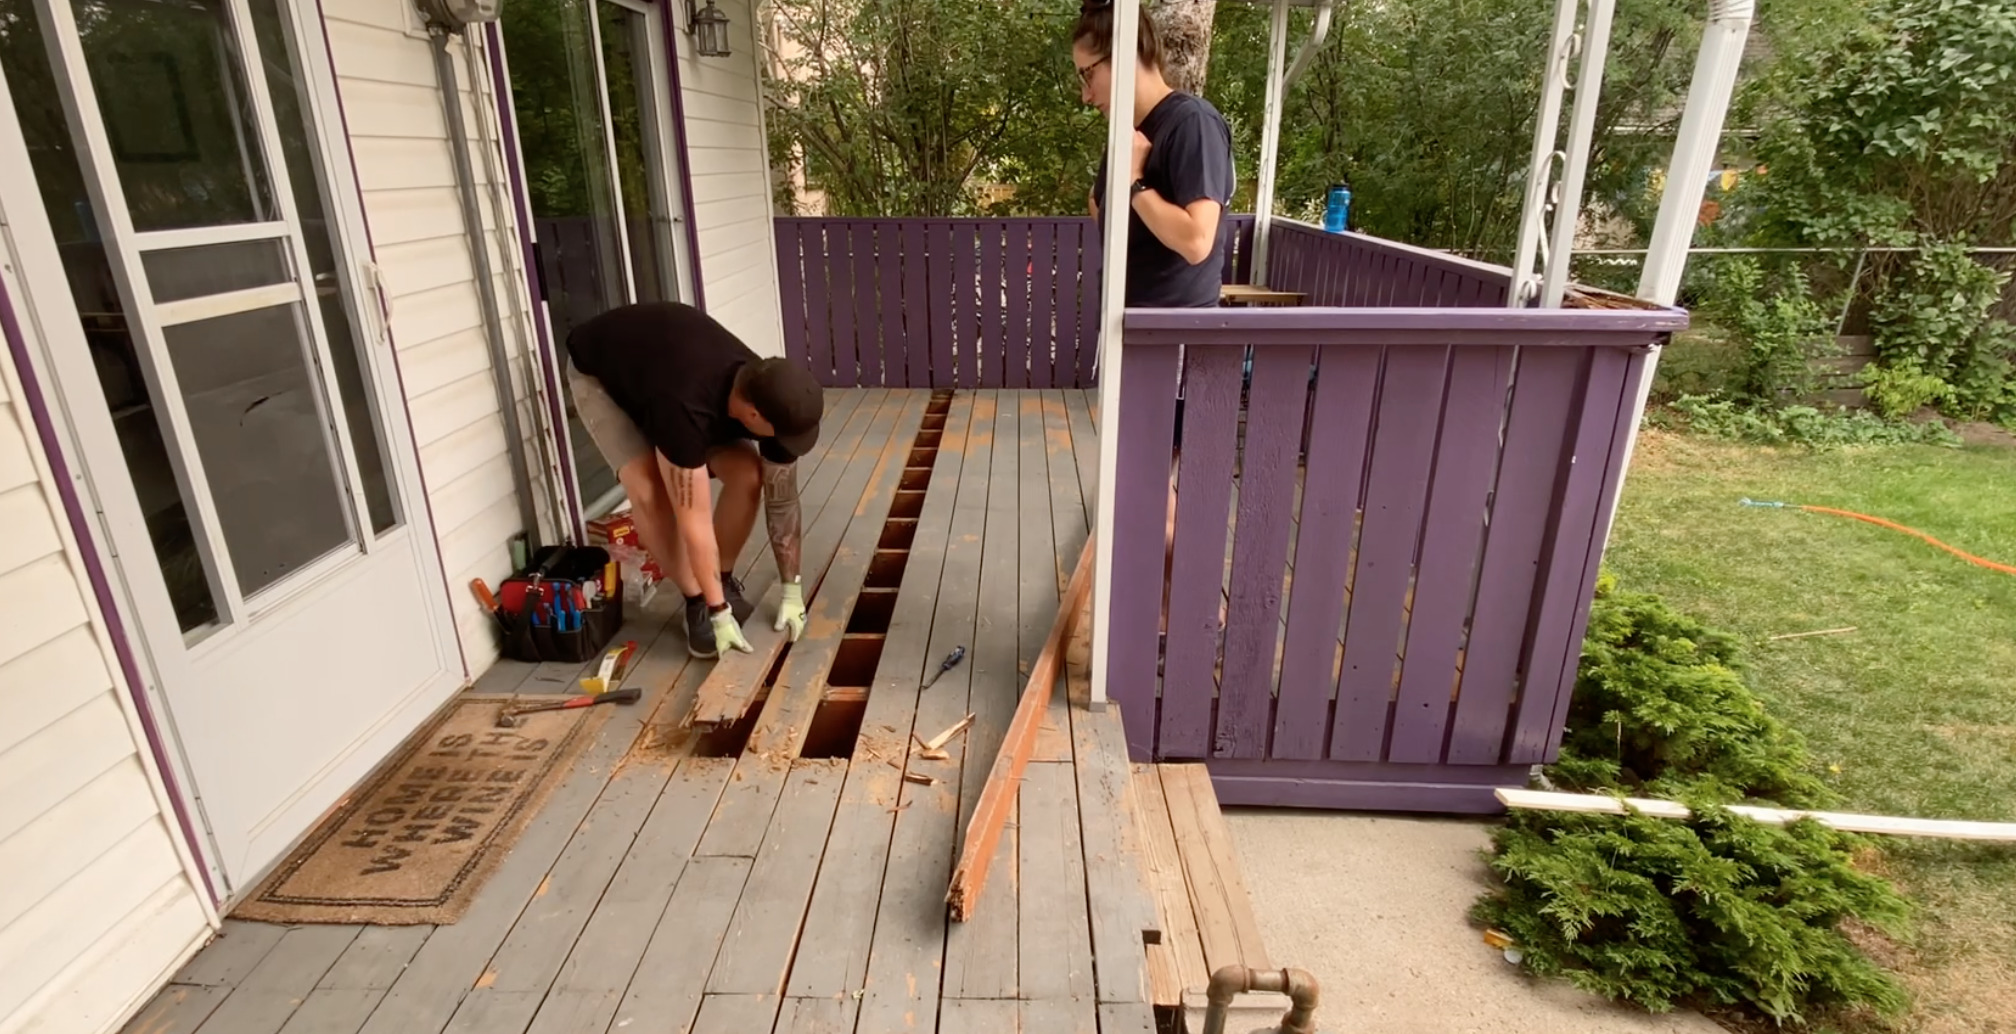
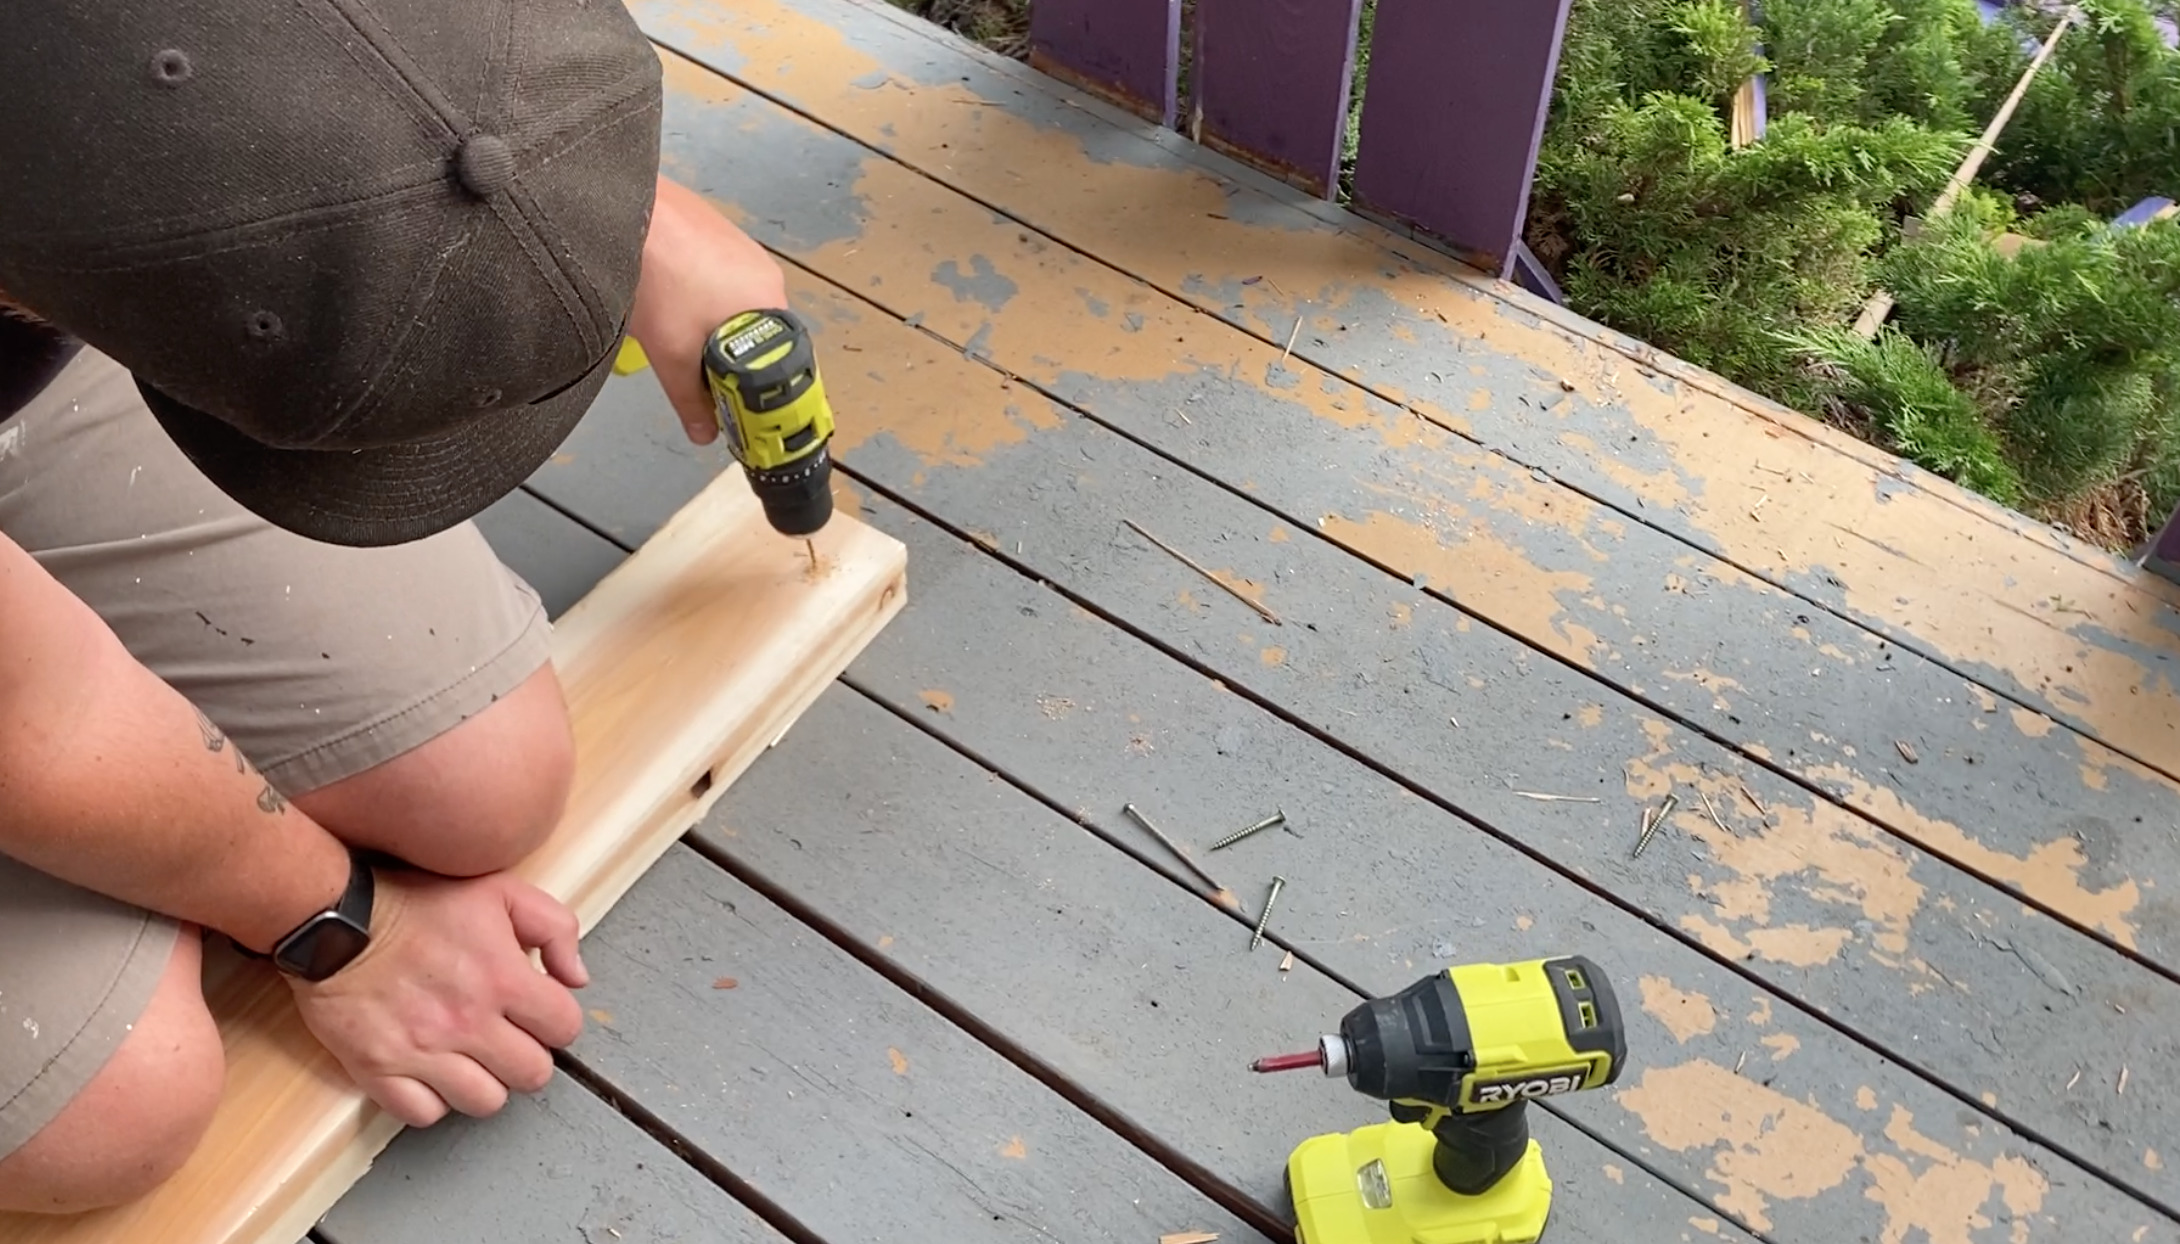
When replacing deck boards and the pickets on the railing, make sure to drill pilot holes to avoid the wood splitting!
Prep the wooden deck for painting
Then it was time to prep the deck for painting. Since there was so much loose paint chipping up, we had a lot of sanding ahead of us.
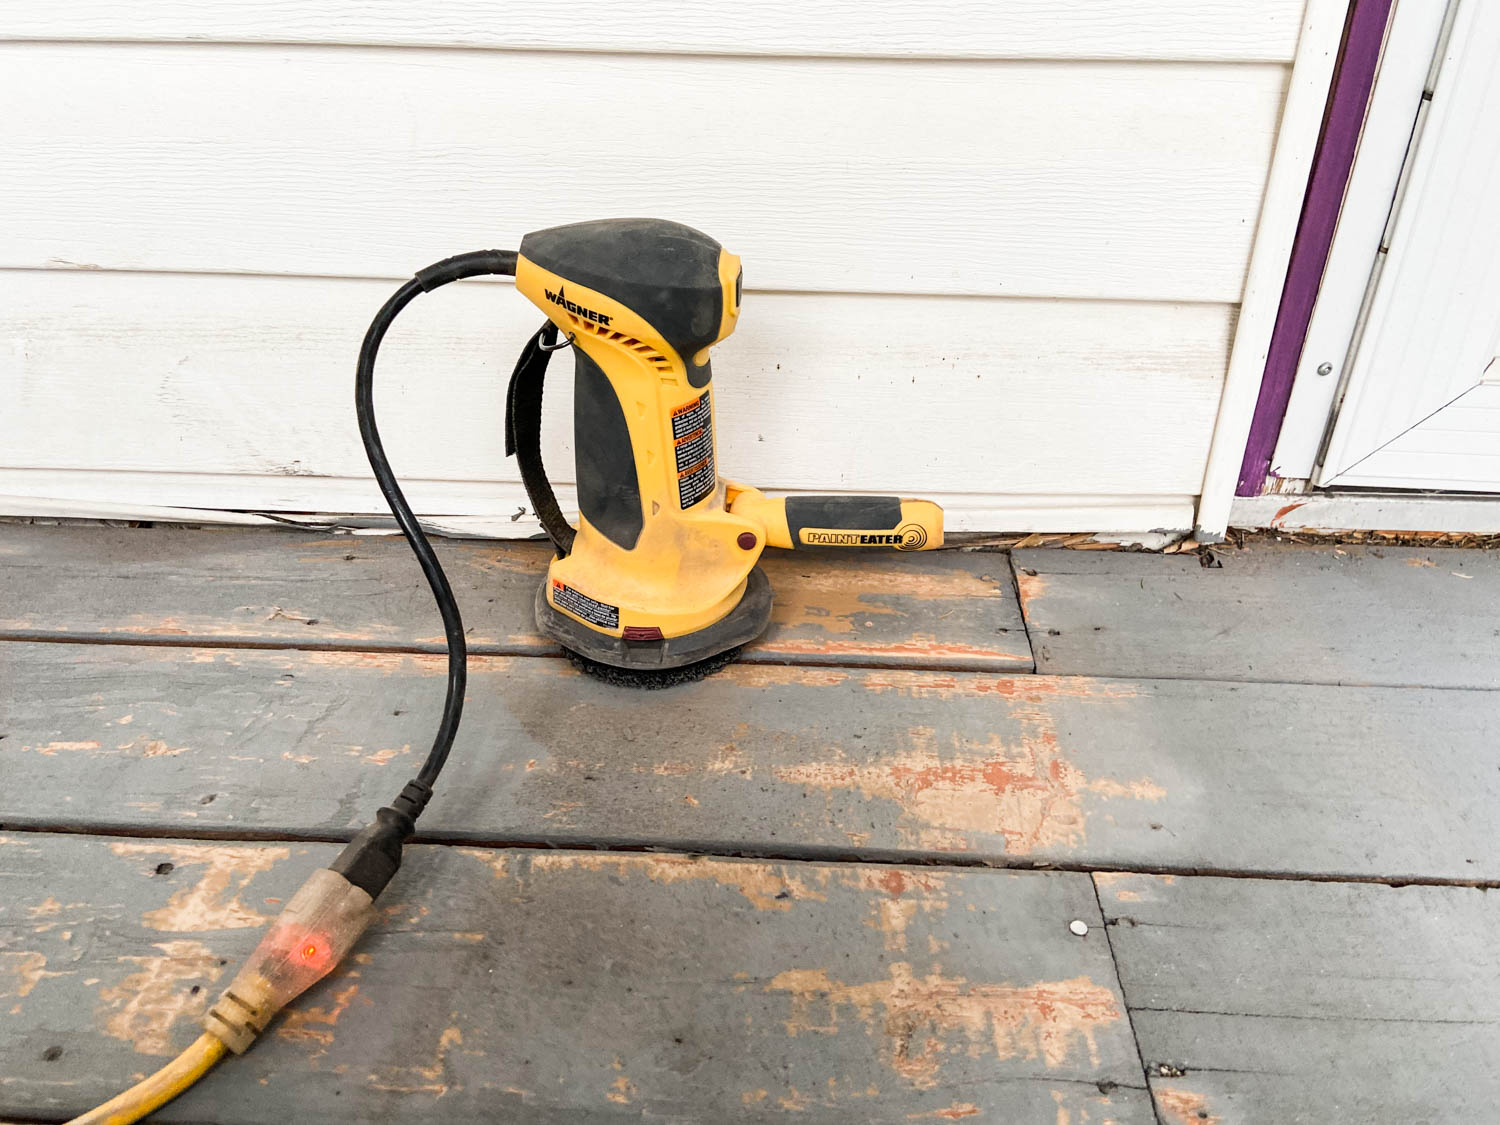
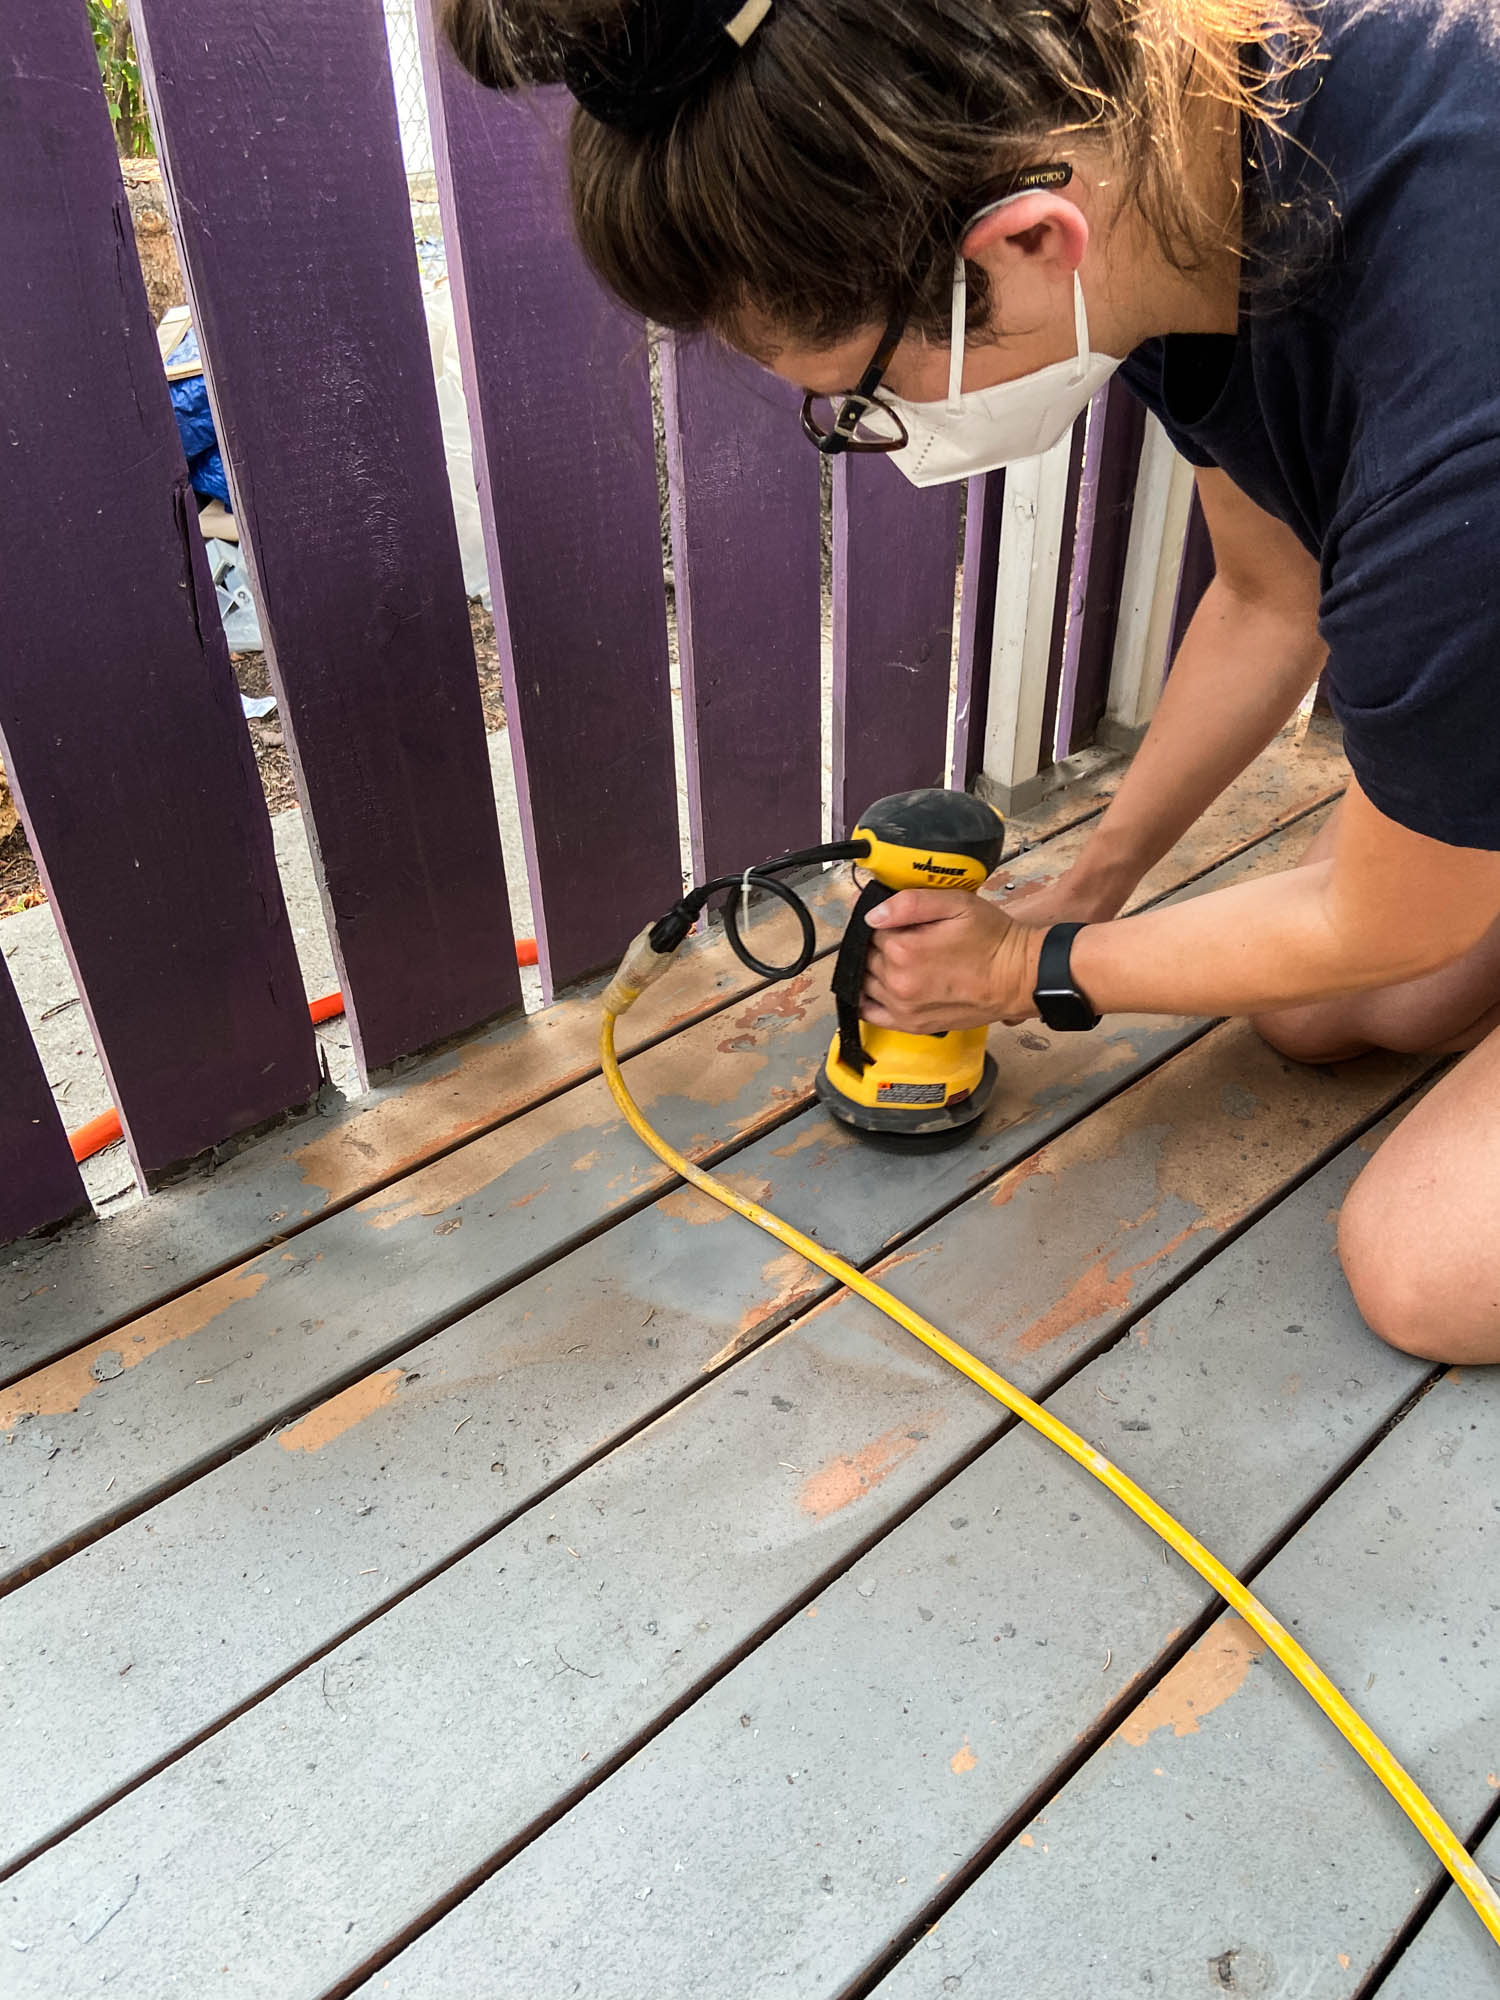
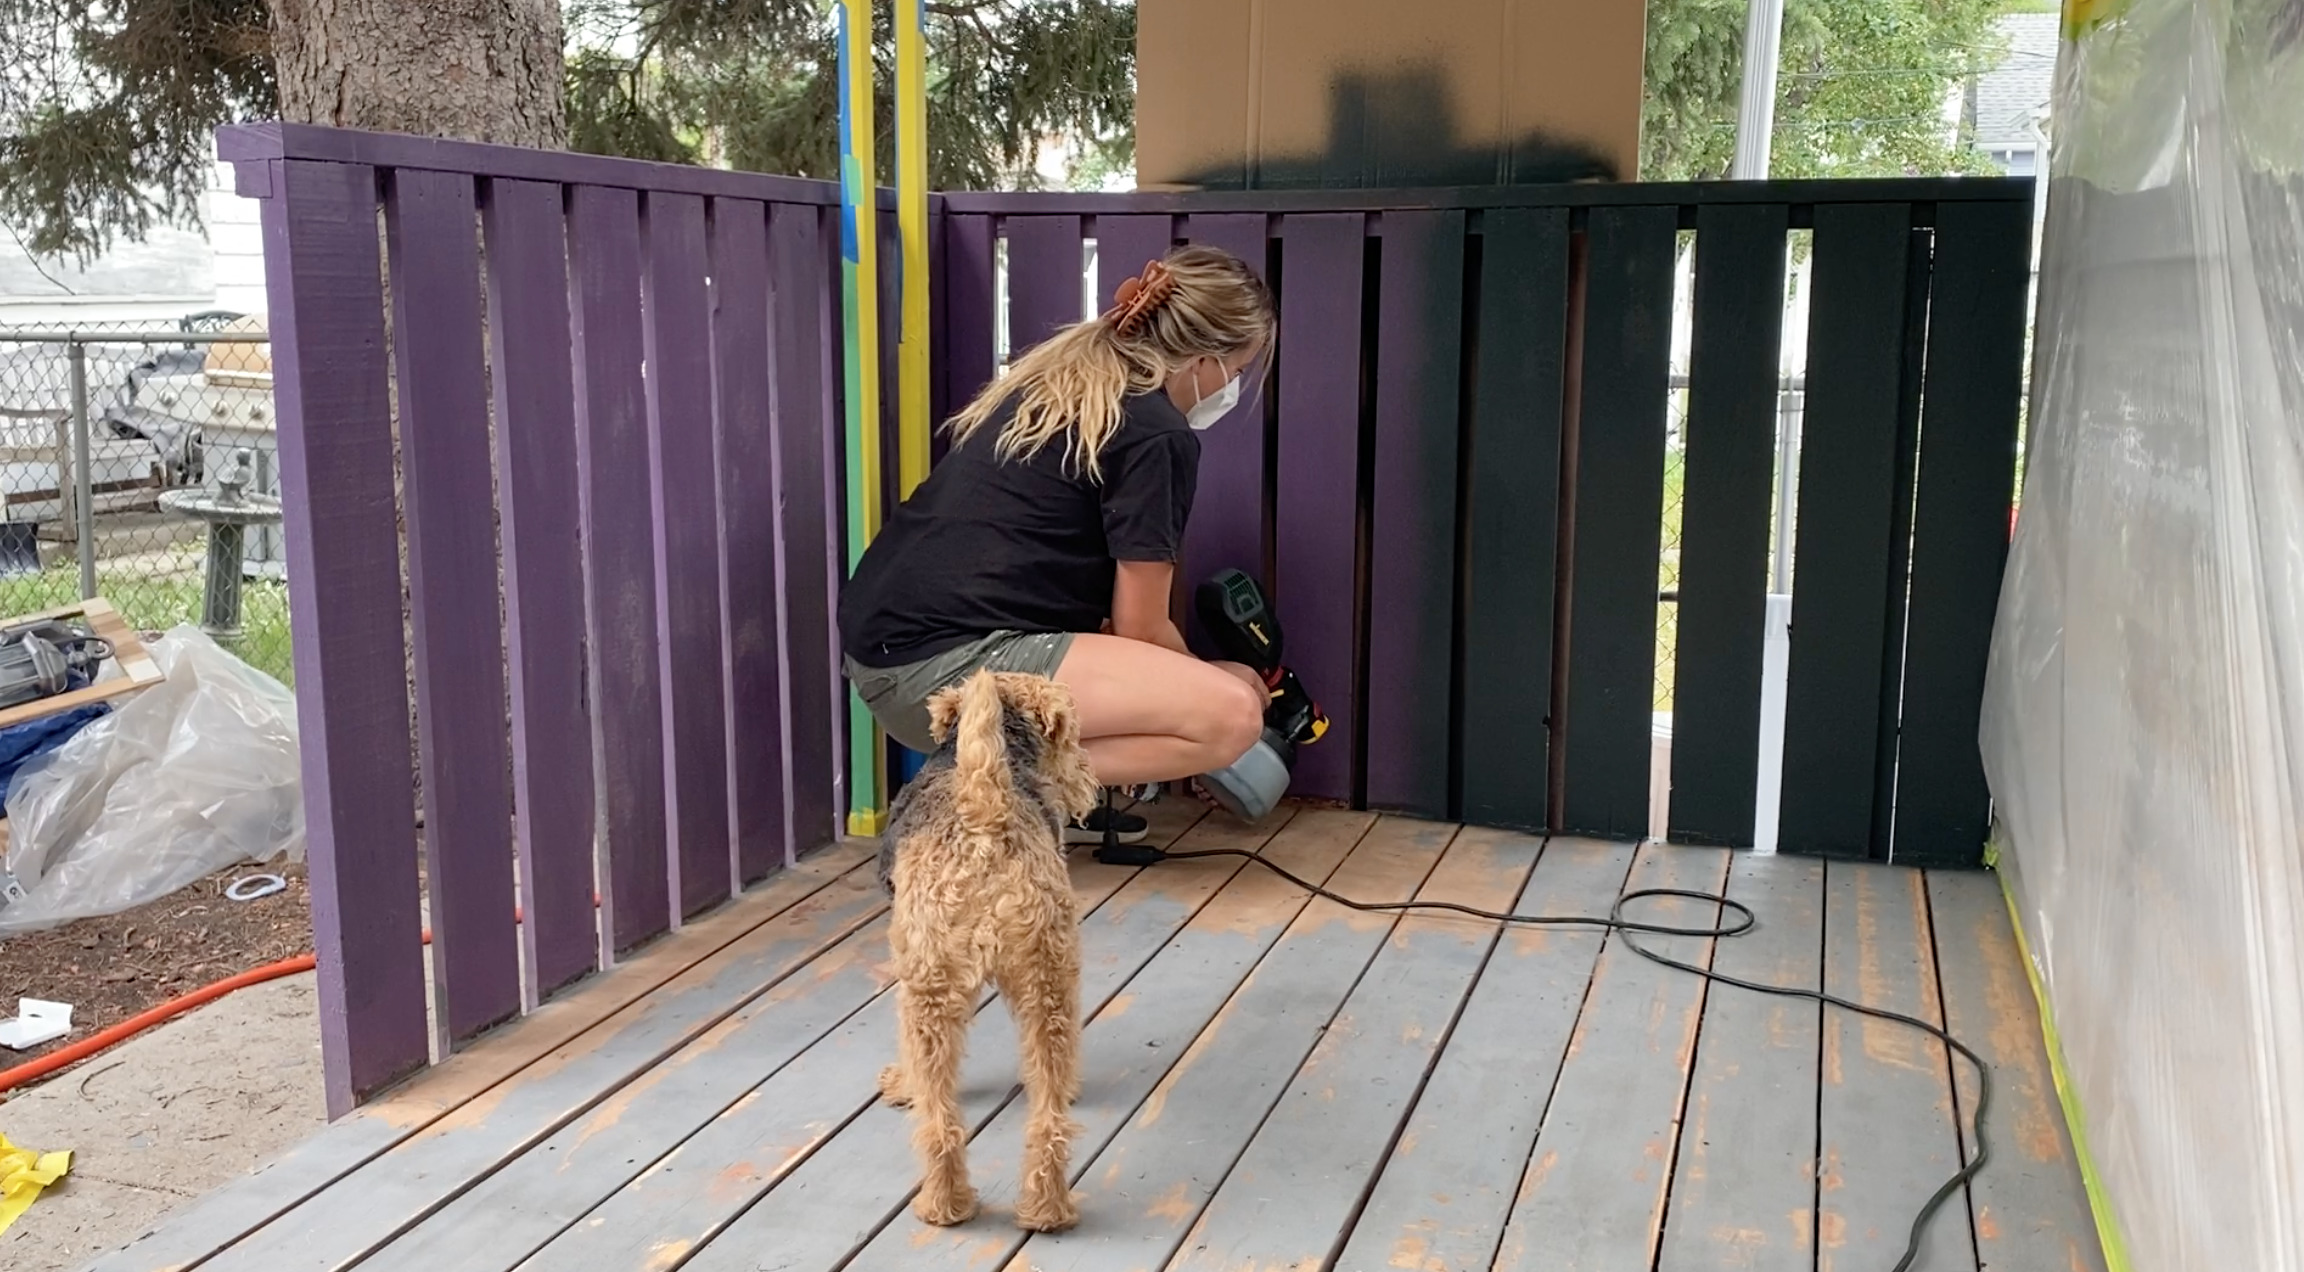
In the past, I would have taken the time to scrape loose paint using a wire brush before sanding. This is super time consuming. I’ve been looking for an opportunity to try the Wagner PaintEater and this was the perfect project for it.
The PaintEater is a disc sander with a spongy wire disk instead of sand paper. It skips the wire brushing step and makes SUCH quick work of the sanding. Plus since it’s spongy, it gives a beautifully feathered edge to the sanded area.
We went through three of the sanding discs for the deck and I’m guessing took less than half the time it would of had we done it with a wire brush and traditional sander.
Prime a wooden deck for durability
Next up was priming!
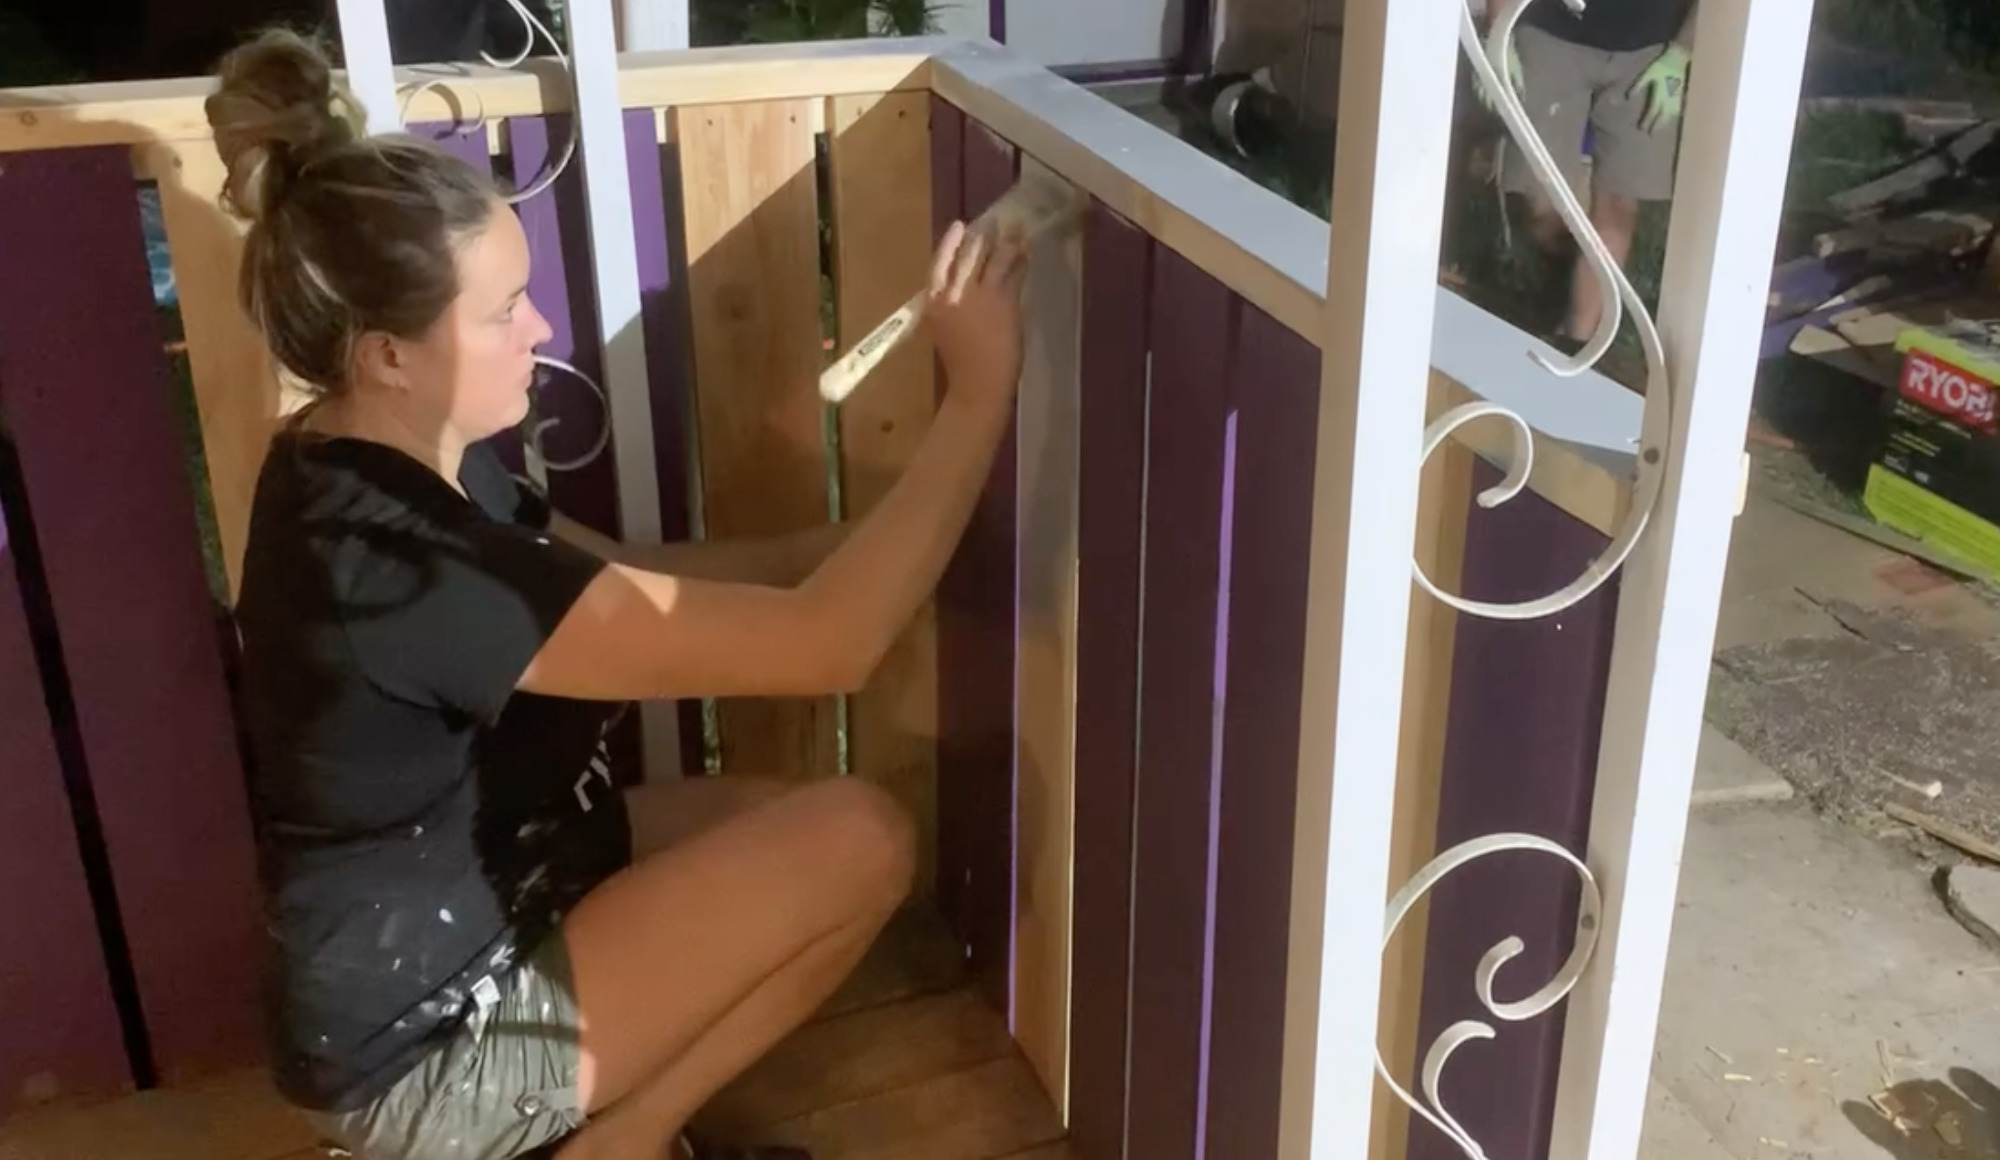
Since the purple paint was mostly in great condition, we only primed the new boards on the railing. We did this by hand late on the first night of the work weekend, you can see how tired I am- I even knew I was being photographed but didn’t have a smile in me- ha!
This just helps to seal the wood so that the sheen of the paint would be even across the new and old boards. I really love a Killz Primer. It adheres to almost any surface and we have found it to be incredibly durable. I did this with a paint brush but if you were doing a large surface- you could do a sprayer as well.
I did want to point out that you can also tint primers. We tinted it to be the floor board color. You can do this with pretty much any primer and it helps speed up your painting process, usually saving you a full coat!
Painting a Wooden Deck
In the morning, we got to painting the railing.
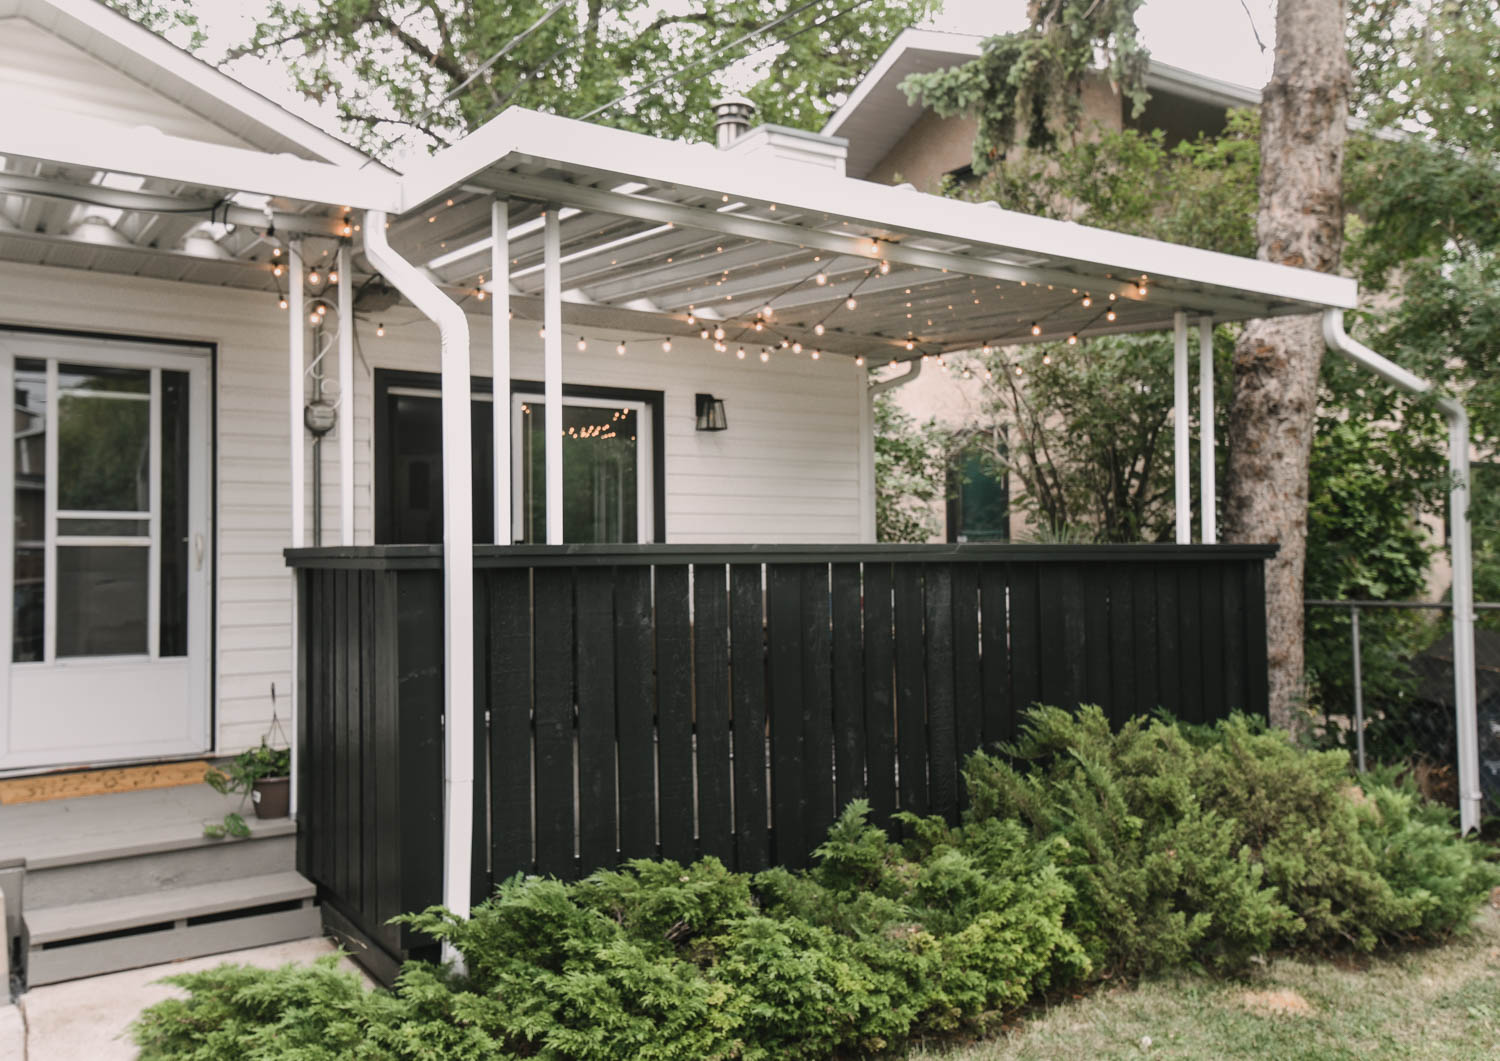
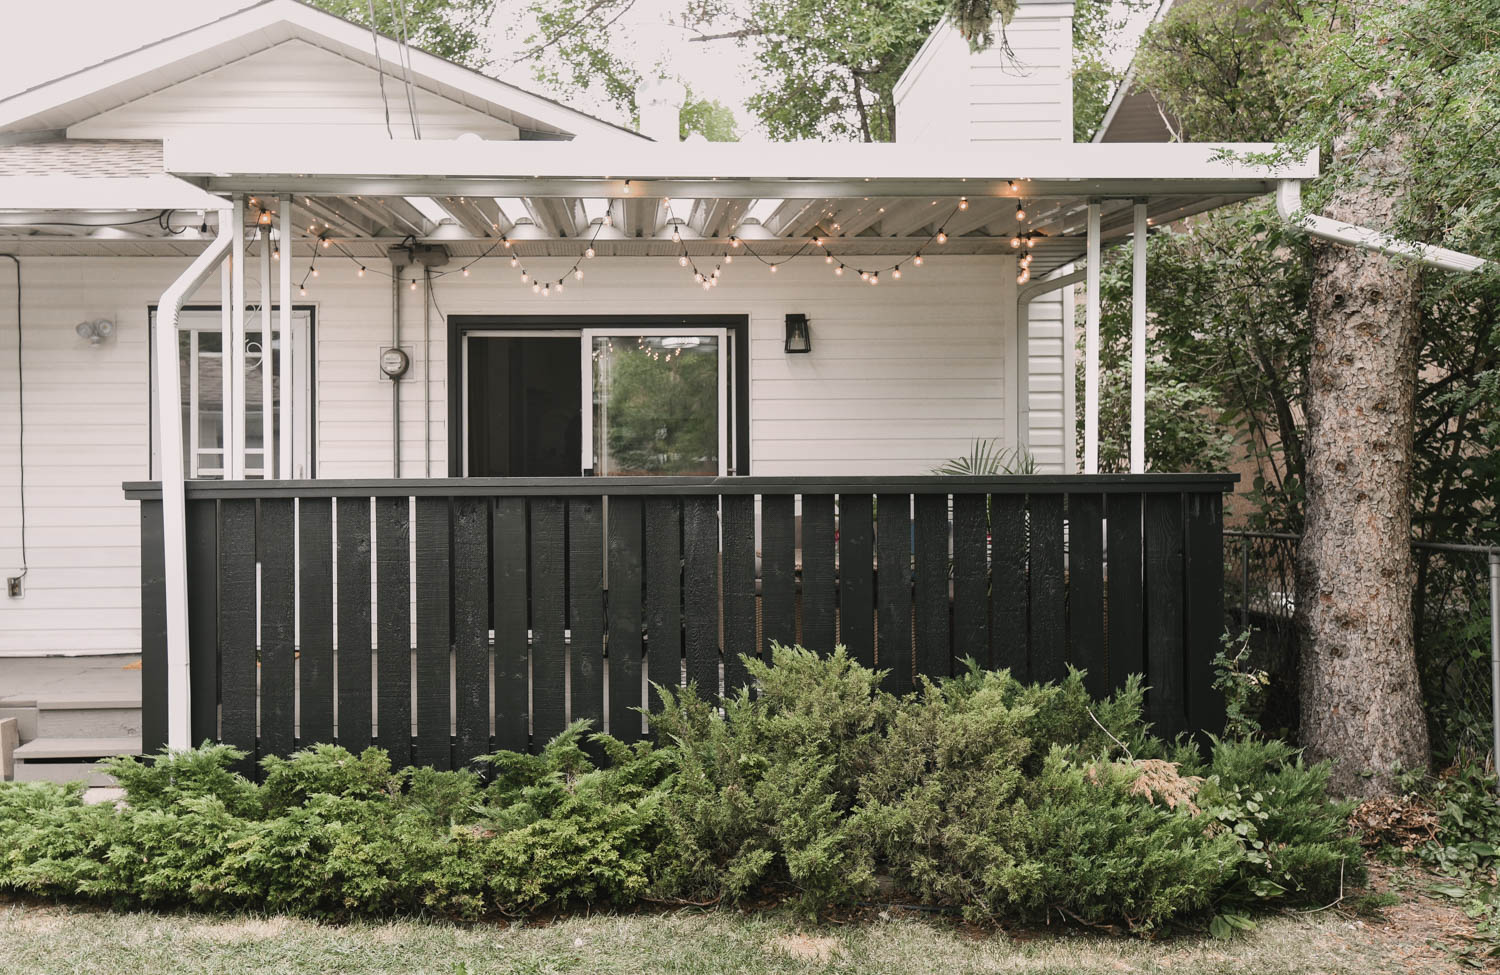
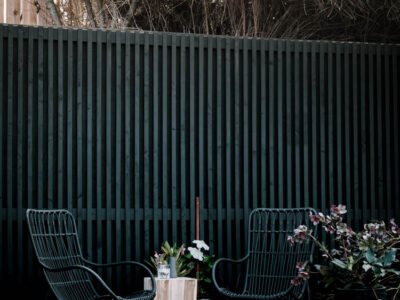
The colour we chose is one of my all time favourites. It’s called Broadway by Behr and is the same colour we painted our primary bedroom, our kids playhouse, our wood slat retaining wall cover, and the inside of our exterior doors.
When my sister picked it out of a lineup of charcoal to black paints, I was pleased ;) She loves the black and white look but this colour is softer than a deep black, making it perfect for an older home like this that isn’t stark white, but more of a bone colour.
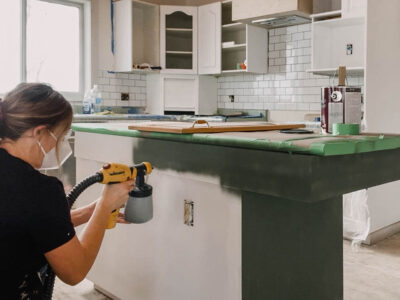
Since there was a TON of painting here to do and a limited amount of time, we chose to use a paint sprayer. This also allowed us to get into all those nooks between the boards without much effort.
New to using a paint sprayer? This is a great introduction to using one here!
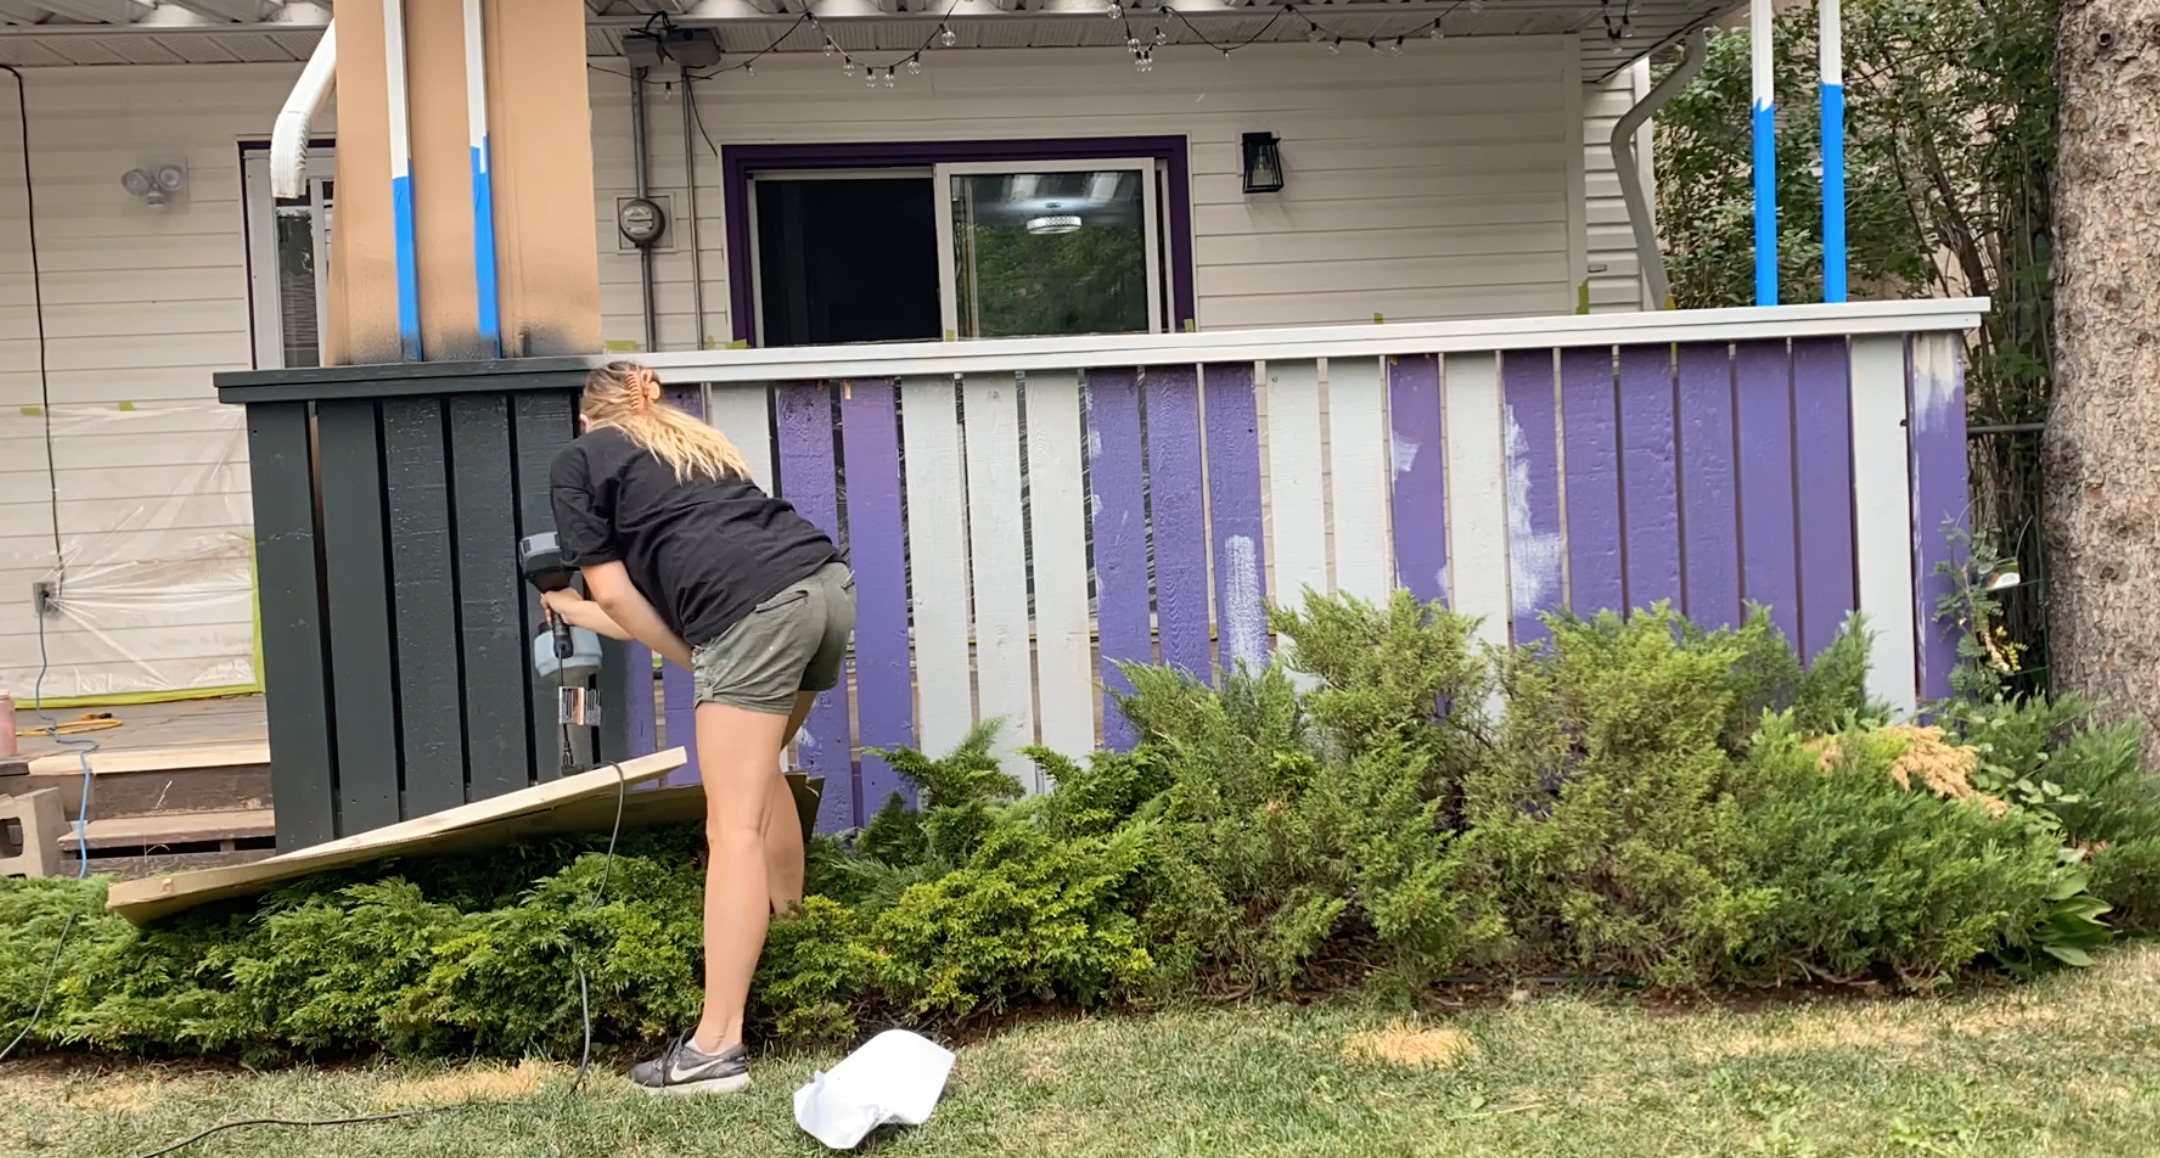
We masked the house and the posts to support the roof and held up cardboard behind the spray area to avoid overspray. This worked beautifully and helped us avoid taping to the railing. We were able to spray both sides of the railing in one go this way.
For this project, I used the new Wagner FLEXiO 2500, it’s very similar to this newer version. It’s a really affordable option from the FLEXiO series, compact and lightweight, but still so efficient.
It’s a great sprayer for beginners with a high and low air pressure instead of a dial with multiple.
I stuck to the high air pressure and a pretty high material flow for this to get a nice even coverage. I moved quickly to avoid drips.
As always, test your spray pattern on cardboard or scrap wood before starting your project and make sure to wear a mask!

Since I’d recently stained my fence using a paint sprayer, this went really quickly for me. I knew to spray each side of each board to get in the gaps before doing one spray down the centre of the board to fill in the spray pattern.
I changed the direction of the spray to vertical to get in the nooks of the top edge of the railing as well. Watching this railing transform in the video above is so satisfying!
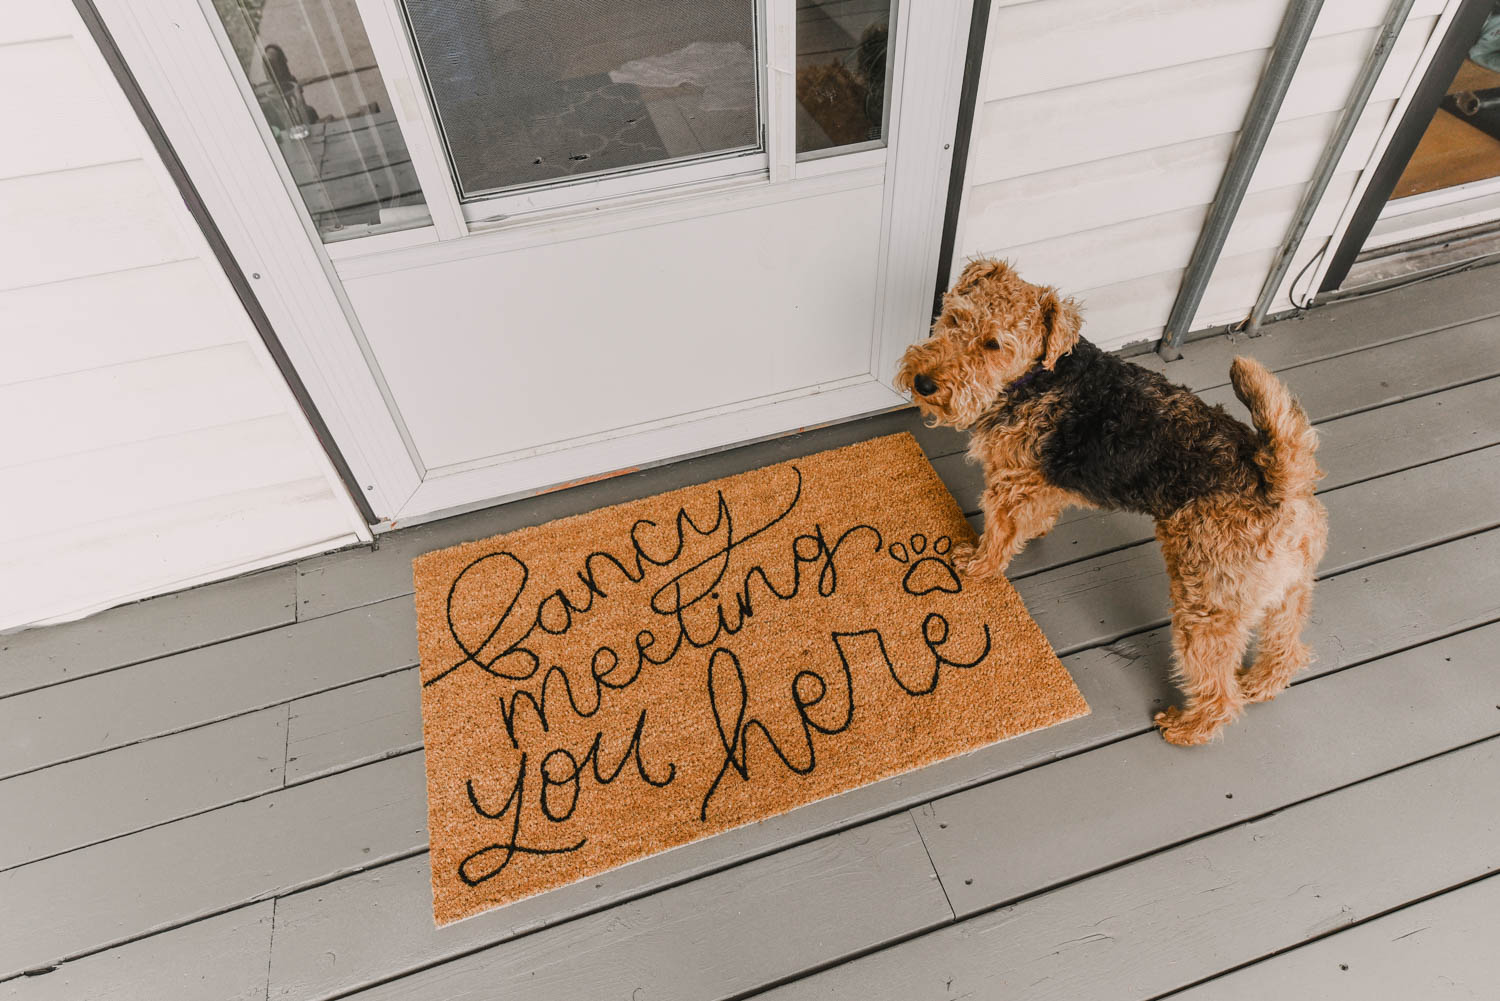
We let that dry for 4 hours and I got busy making a door mat for the back door while we waited.
The video shows that process but if you’d like a tutorial for that, See how to make custom coir mats here. You know I always like to add a DIY touch of decor to every space I take on!

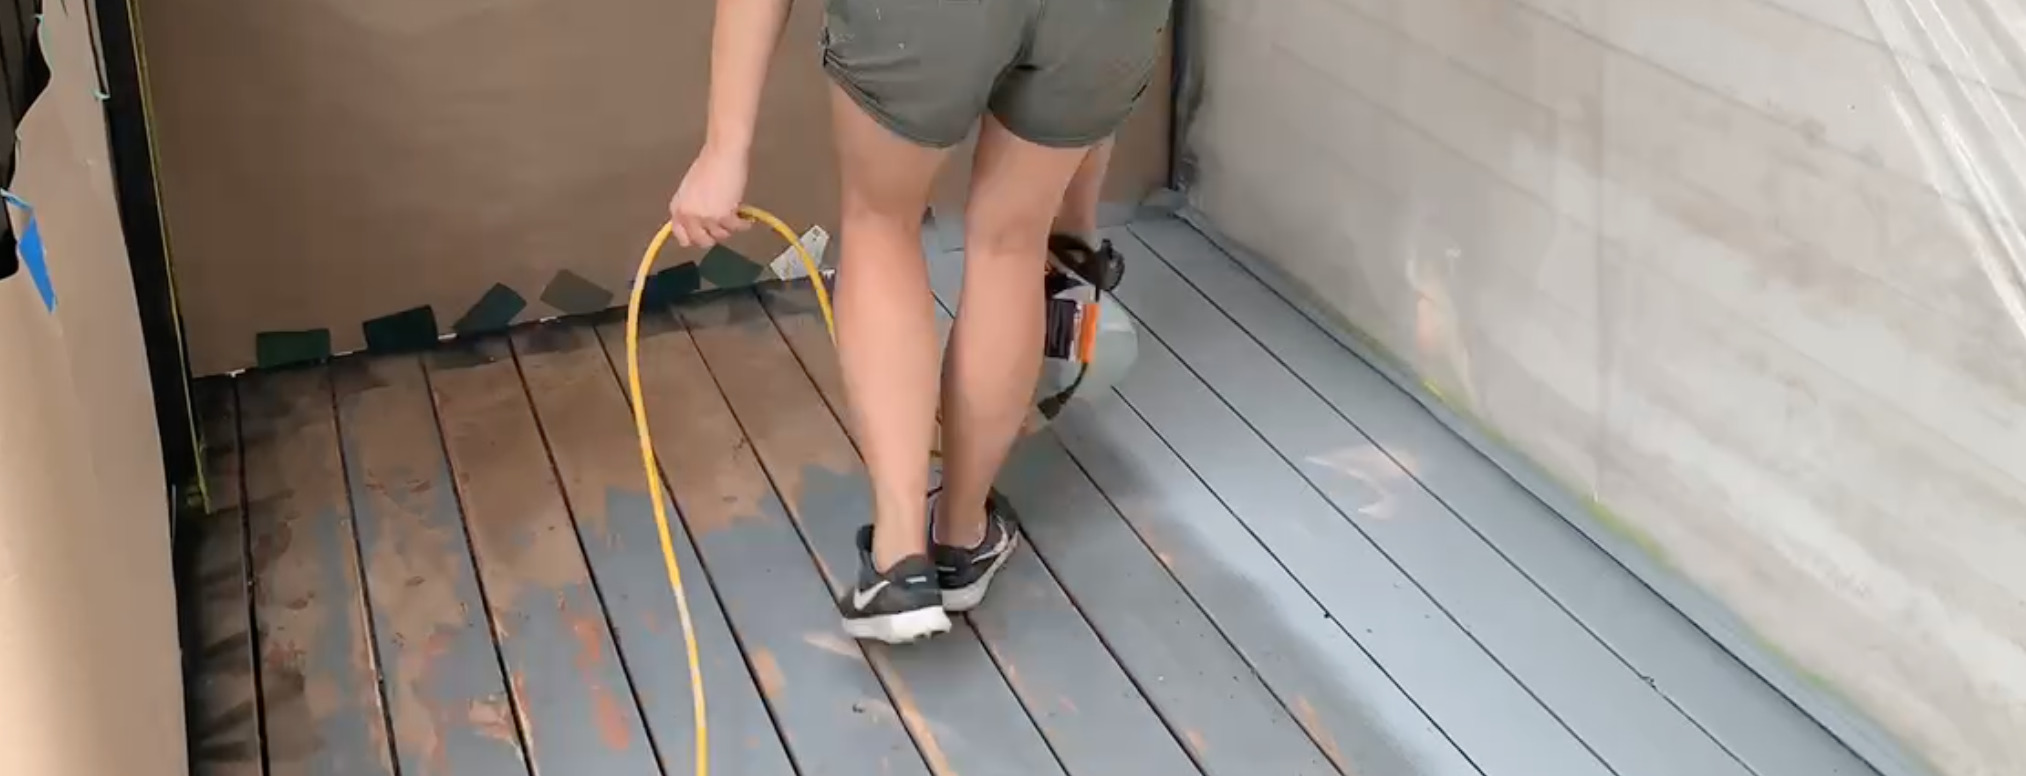
Alright, once that paint was no longer tacky, we masked the railing to get to the floor painting.
We masked the railing with flooring paper and avoided taping to the freshly painted wood. We looped tape around the deck railing boards and taped the paper to itself only, tucking it between the deck railing and floor.
We used the paint chips that we didn’t choose to protect the gaps between the boards from overspray. I know this doesn’t look ideal, but it worked really well and helped us be able to paint both surfaces in one day without having to tape to freshly painted surfaces.
We primed the entire deck instead of just the new boards. The idea here is that it will help the paint adhere better and help to seal the layers of paint and old wood so that this paint job can last longer than the previous one.
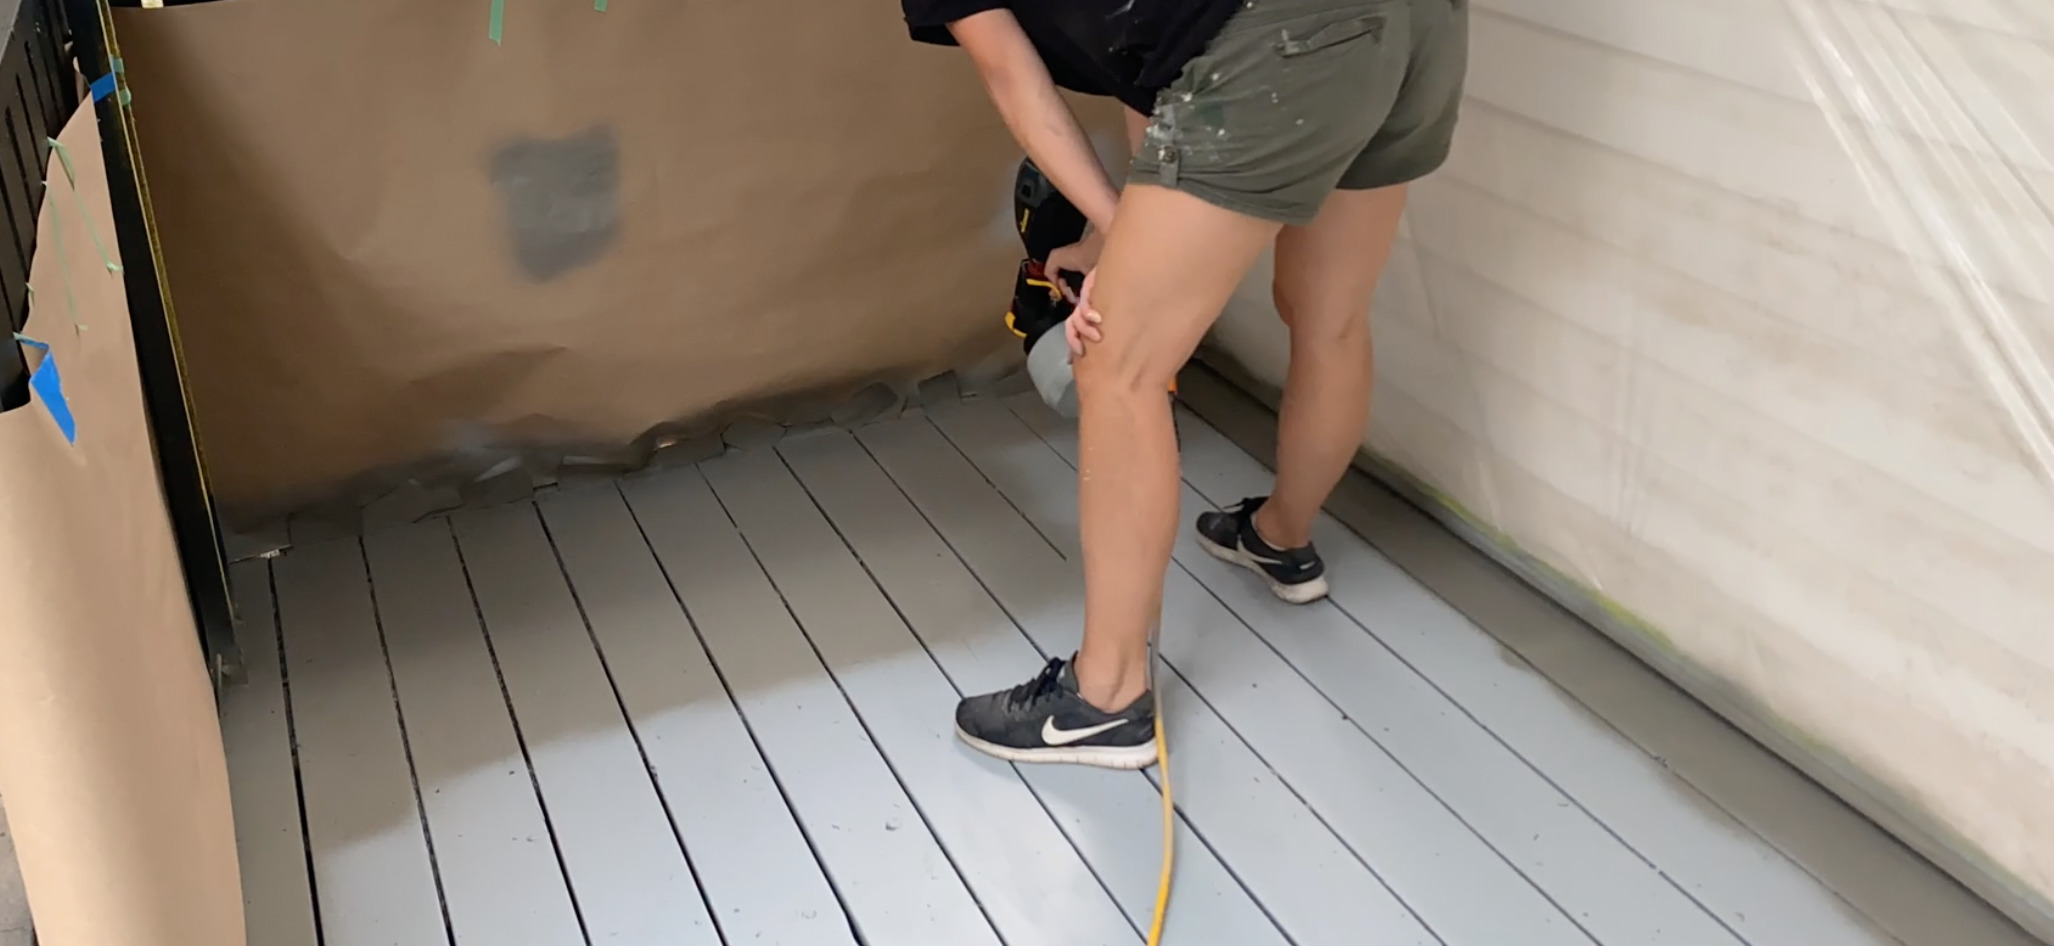
This painting went super quick with the paint sprayer, the masking is always the most time consuming part, then we waited about 5 hours and got to painting the floor colour.
We chose a deck and floor paint for this in a muddy kind of grey. The colour is called Slippery Shale from Behr.
This colour plays so well with the bone coloured siding and the charcoal trim and railing. It’s more modern than a brown but plays really well with the brown furniture and brown roof too.
We let this dry overnight before walking on it or putting furniture back.
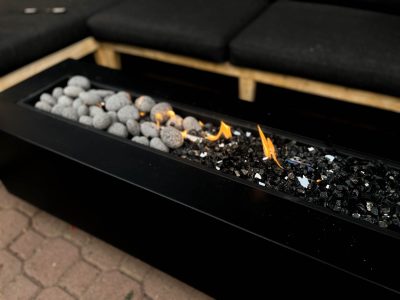
We also painted the trim on the house with the charcoal colour and swapped out the patio light for a more modern choice.
These changes all together totally modernize the space and it feels fresh and welcoming. I’m so impressed with how quickly this space transformed! It really is testament to how having the right tools can speed up the painting process.
I wish we could have stayed and spent an evening playing games on the deck here, but the minute we were done recording the video… we had to hit the road to head home.
Next time we visit it will be to enjoy this space ;)
*Update* two years later, we were back here enjoying an engagement party! 50+ gorgeous guests showed up to celebrate my sister and her fiance and hang out in this space and the yard. It’s such a treat to see how well it all came together, is holding up, and working so hard for them!
LIKE This old wooden deck refresh? PIN IT!
Don’t have time to take on this project right now? Planning to make over your deck later this year? Pin this so you can come back to it! Plus, pinning or sharing on FB helps this post reach more people which helps me be able to keep sharing with you. Thank you!


 DIY Modern Pillow Covers with Cricut
Woooooo this transformation is amazing!!
Great job….and it was wonderful that your furry friend was the inspector….LOL
Oh yes, he needed to make sure it was perfect :)