Sharing my step by step process to prepare hand lettering to cut with a Cricut machine using photoshop. This will allow you to cut your lettering out and put it on… well, on everything!

This post was originally published in 2018 in partnership with Cricut and was updated and expanded in 2023.
Today I have an informational post for you! A lot of my DIY tutorials use lettering that I’ve created and digitized for you to cut out with a Cricut or similar machine.
I know as much as my designs are awesome for my projects- I know some of you have rad lettering you want to cut out for your own projects.
So today I’m walking you through the steps I use to get it from paper to project using screenshots to help explain it.
So ready to hear how I prepare hand lettering to cut with a Cricut?
LETTERING TO CUT WORKSHOP
Looking for a simple to follow, detailed walkthrough and some options to get your hand lettering not just ready for Cricut
but also…
to be turned into SVG cut files you can sell and use with other cutting machines?
I have just the thing!

The first thing you’ll need to do is create your design on paper.
I’d recommend starting with something simple to test the process out (long quotes or intricate designs can take a long time! I’d also recommend starting with black on white with not a lot of texture or variance.
So a marker on white paper is perfect over watercolor lettering. This will make it MUCH easier to digitize into a clean cut file.

Interested in learning how to brush letter, but not ready to commit to a course?
I have a free Brush Lettering QUICKSTART guide and video training you will love!
When you are happy with your design, go ahead and scan it in to your computer.
I now have a cute little scanner (this one) that I LOVE SO MUCH, but before I got that, I’d always used my phone with an app called Scanner Pro Plus.
Either works.
Then I pull it into Photoshop.
This tutorial will only use Photoshop but you can see my workshop that goes into tutorials for a few different tech stacks!
If you don’t have Photoshop but want to give it a try- they have a 30 day free trial… but fair warning, that’s how I got hooked ;)
Psst! Here’s another fun Photoshop tutorial!
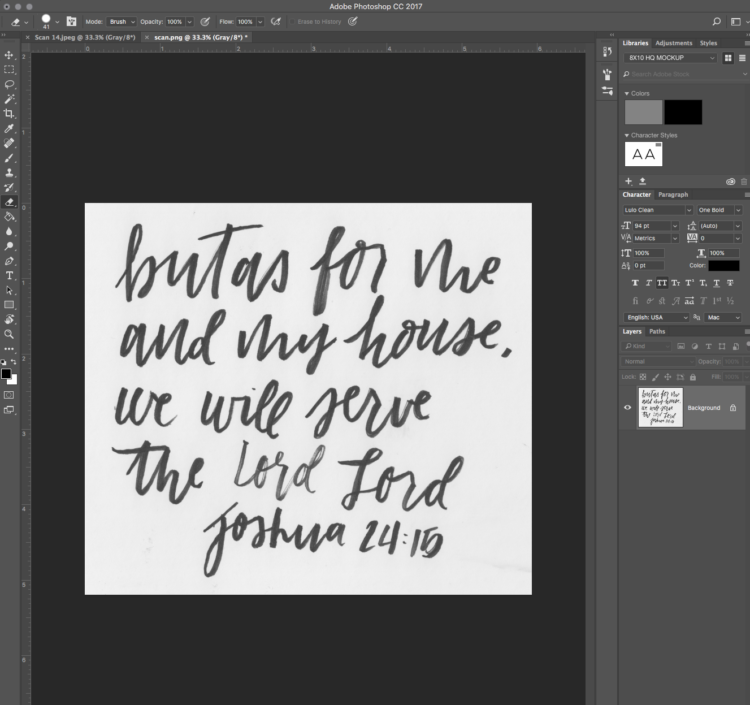
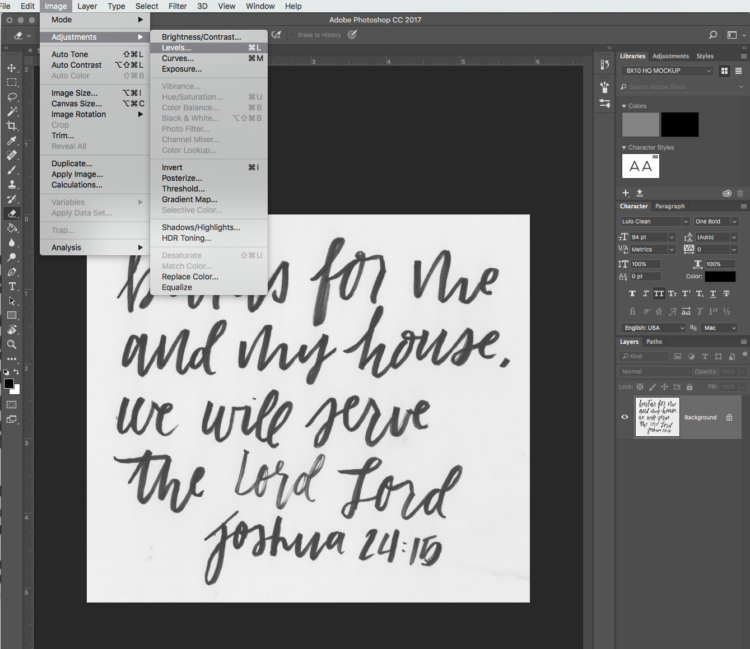
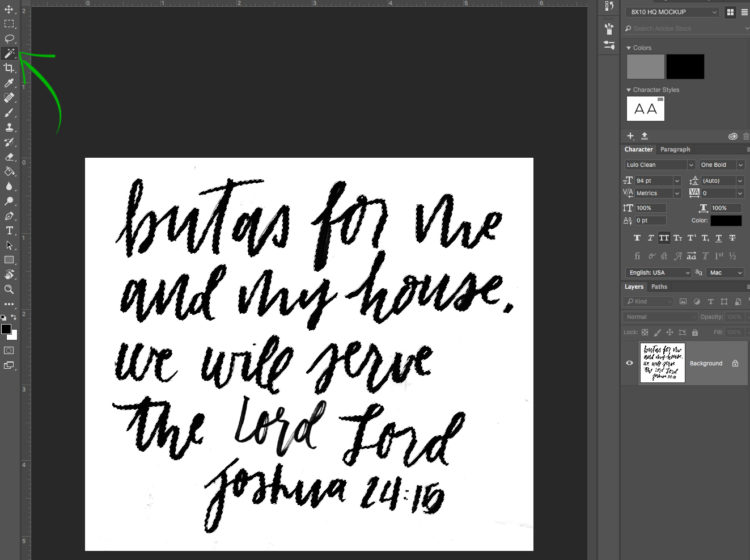
Once you open your file into Photoshop, the first thing I do is adjust the levels.
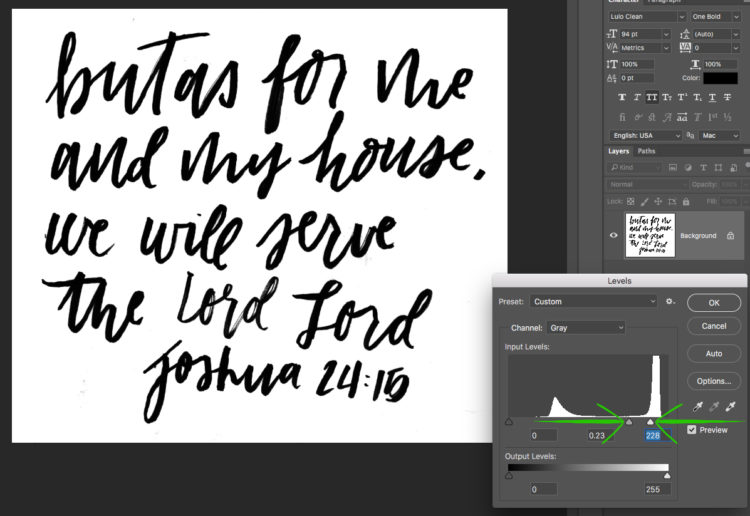
You can find that under Image/ Adjustments/ Levels… I do NOT do this if I’m trying to save the texture for a printable- I just do this to make it easier for cut.
I slide the middle slider towards the right, darkening the shadows and I slide the far left one towards the right to brighten up the white (but avoid clipping of the design).
Start simple? Go brightness and contrast!
When it’s cleaned up some of the textures, I hit OK.
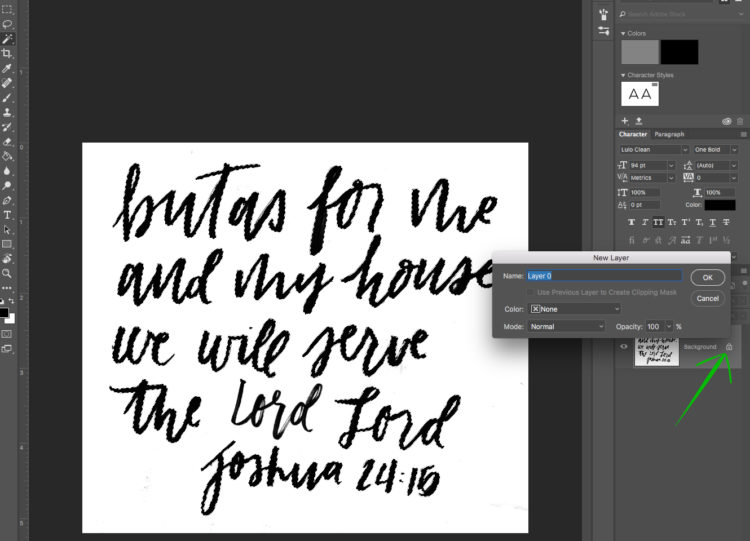
Next, I turn it into an editable file by double clicking on the layer and hitting OK.
This will remove that little lock.
Then I use the magic wand/ select tool [w] to select the lettering I want to use.
Hold down the shift key to select multiple pieces.
You can adjust the sensitivity to make sure you’re getting enough without getting weird edges. I usually start around 77.
When you have it all selected, copy and paste it to a new layer and delete the original layer (or turn it off view if you’re unsure).
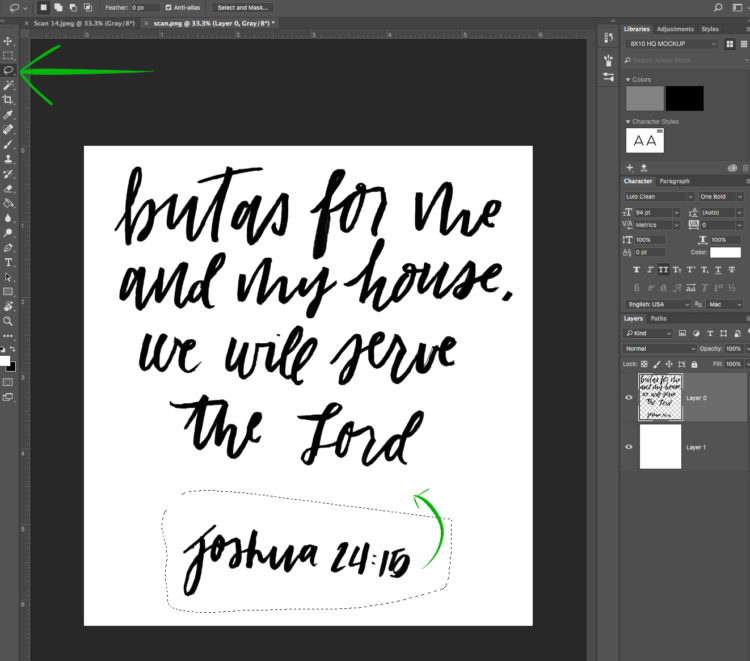
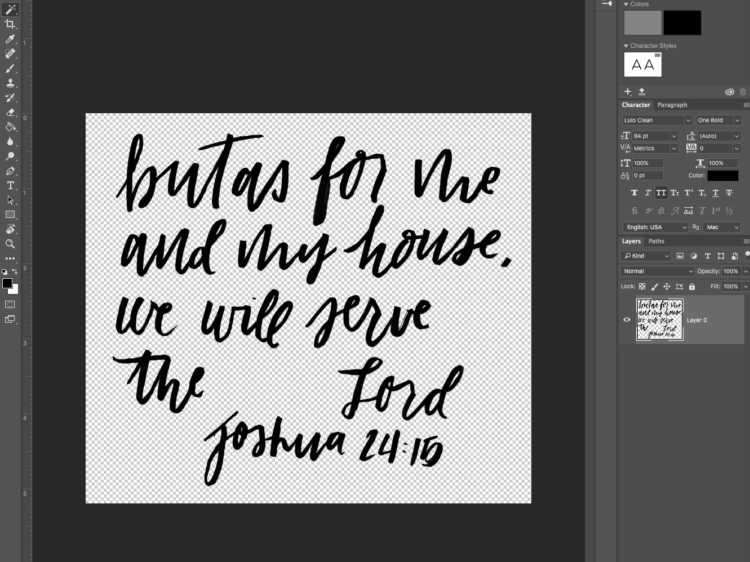
Now it’s time to get picky and clean up all the rough edges.
I usually add a layer behind the lettering layer and color it [g] white or pink or something that’s easy to see what needs to clean up.
Then I switch back and forth between the erase tool [e] and the brush tool (black) [b] to clean up the rough edges and fill in the gray spots.
This will make the cuts a lot cleaner. I also rearrange the lettering if I had an error like the ‘Lord’ in there.
I do this using the lasso [l] tool and move parts around.
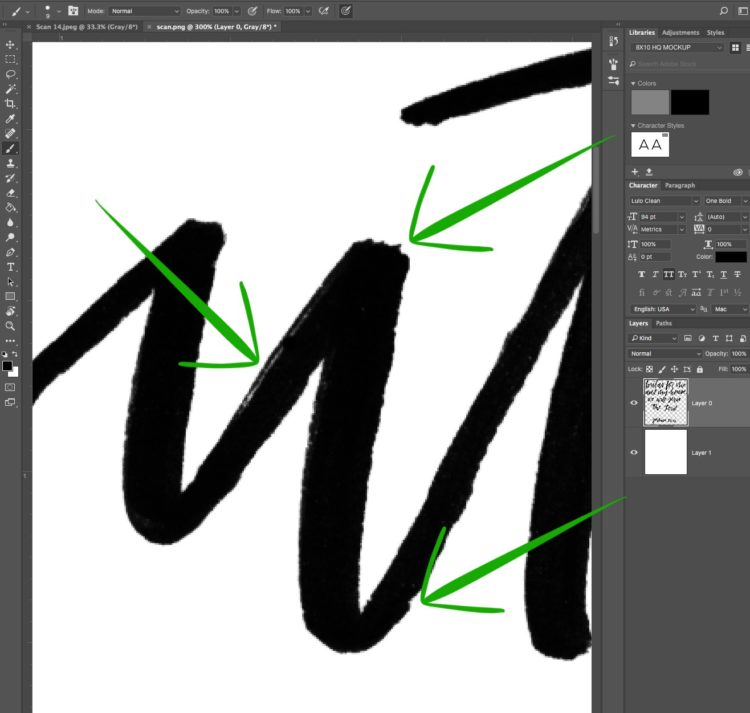
If your file didn’t scan in really well, you could have some fuzzy edges that are grey and not black.
You can use the magic wand on a more sensitive setting and clean it up that way if you have an unsteady hand for the brush eraser.
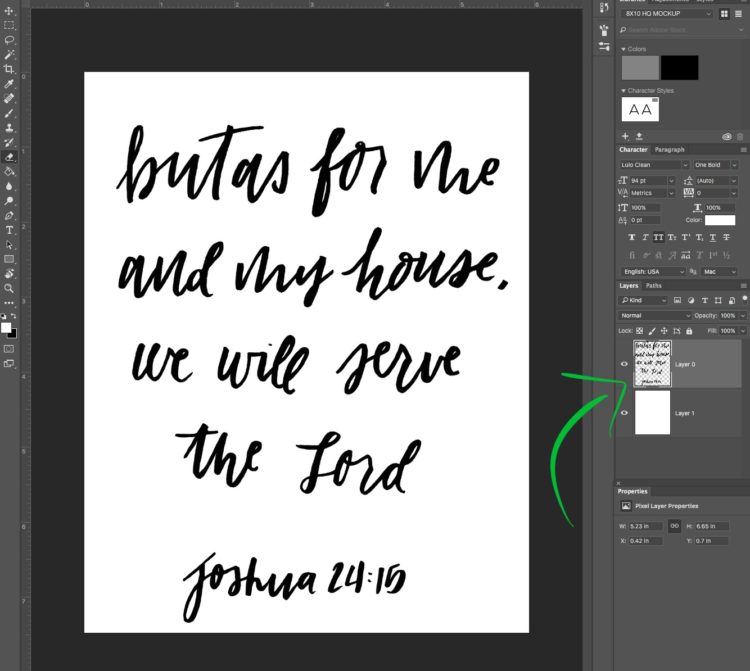
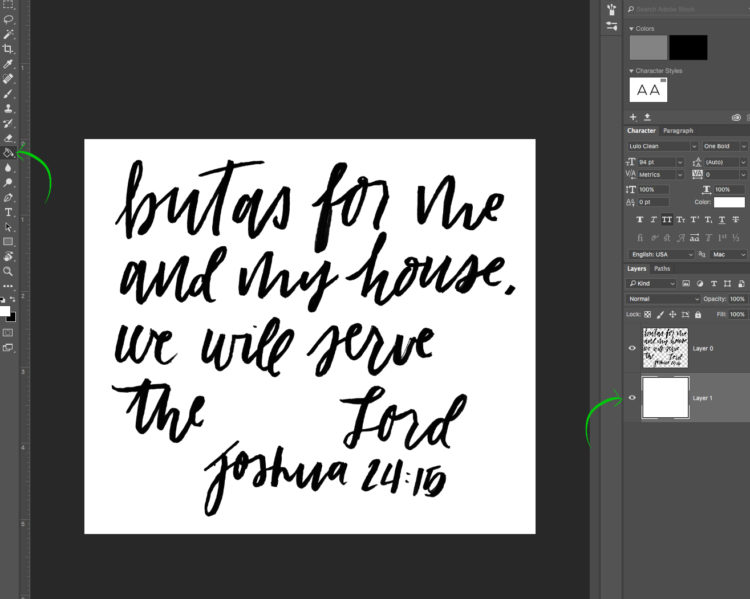
When it’s looking great, I turn the background layer off and save it as a png file.
You could export it as an .svg as well but that’s more time consuming #lazyblogger.
If you’re new to SVG files, you can see a great introduction to uploading your own files to Cricut Design Space here.
In this tutorial, I include a detailed overview of different file types you might run into (like SVG!) and what they are used for.
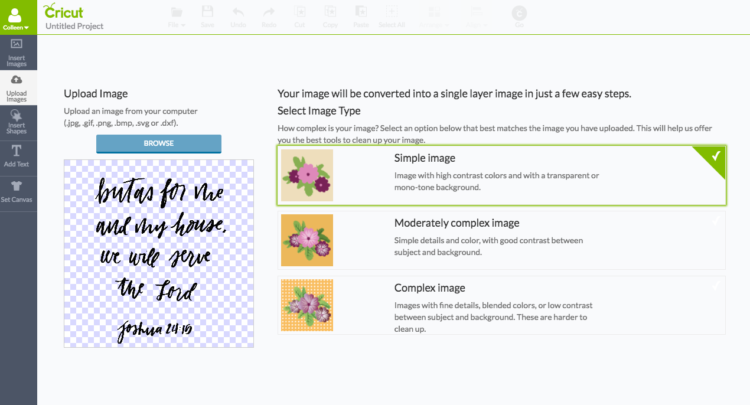
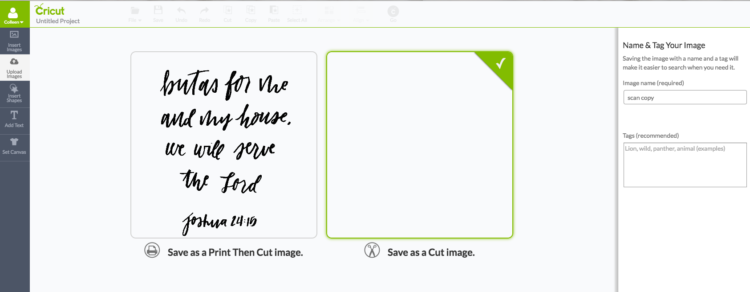
Now you can upload it into Cricut Design Space!
Go to Upload Images, Select your file, Simple image, Save as a Cut image, then add it to your canvas!
Now you can officially take your hand lettering to cut with a Cricut.
See… that wasn’t too hard… was it? ;)
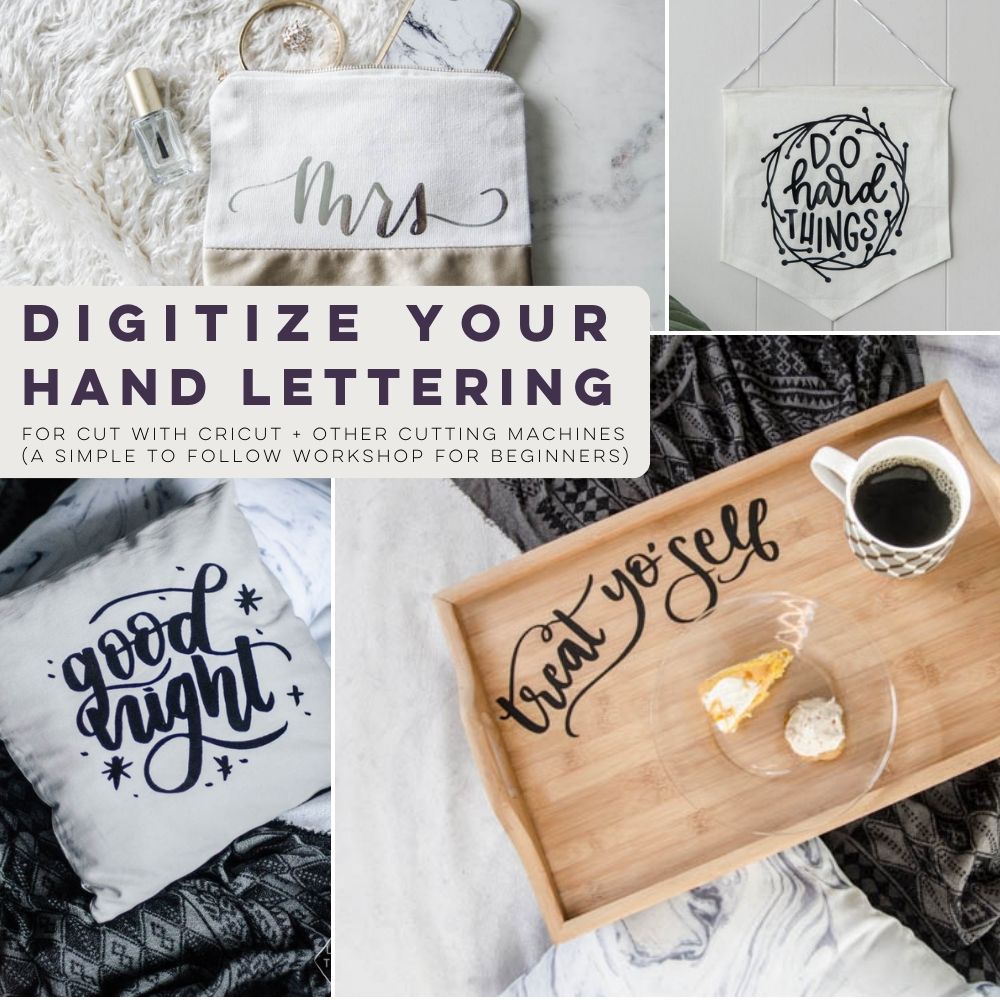
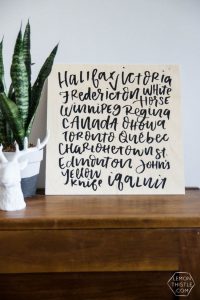
Here’s a few examples of Hand Lettered Cricut DIYs I’ve made using this method:


Let me know if you have any questions! And if this was helpful for you- I’d LOVE to see what you’re making!
* Are you new to Cricut? Or deciding which machine to buy? I wrote a whole post about the differences between the Cricut machines RIGHT HERE. And if you’re looking for more Cricut projects and tutorials, you can find them all here!
WHAT PROJECTS CAN I MAKE WITH my Digitized Hand Lettered Files?
There are so many different projects you can make with your letterings. Here’s some tutorials I have if you’re looking for instructions on how to make that type of project!
- T-Shirt
- Wood Canvas
- Tea Towel
- Acrylic Sign
- Wall Pennant
- Throw Pillow
- Tumbler or Coffee Mug
- Stickers
- …And so much more!
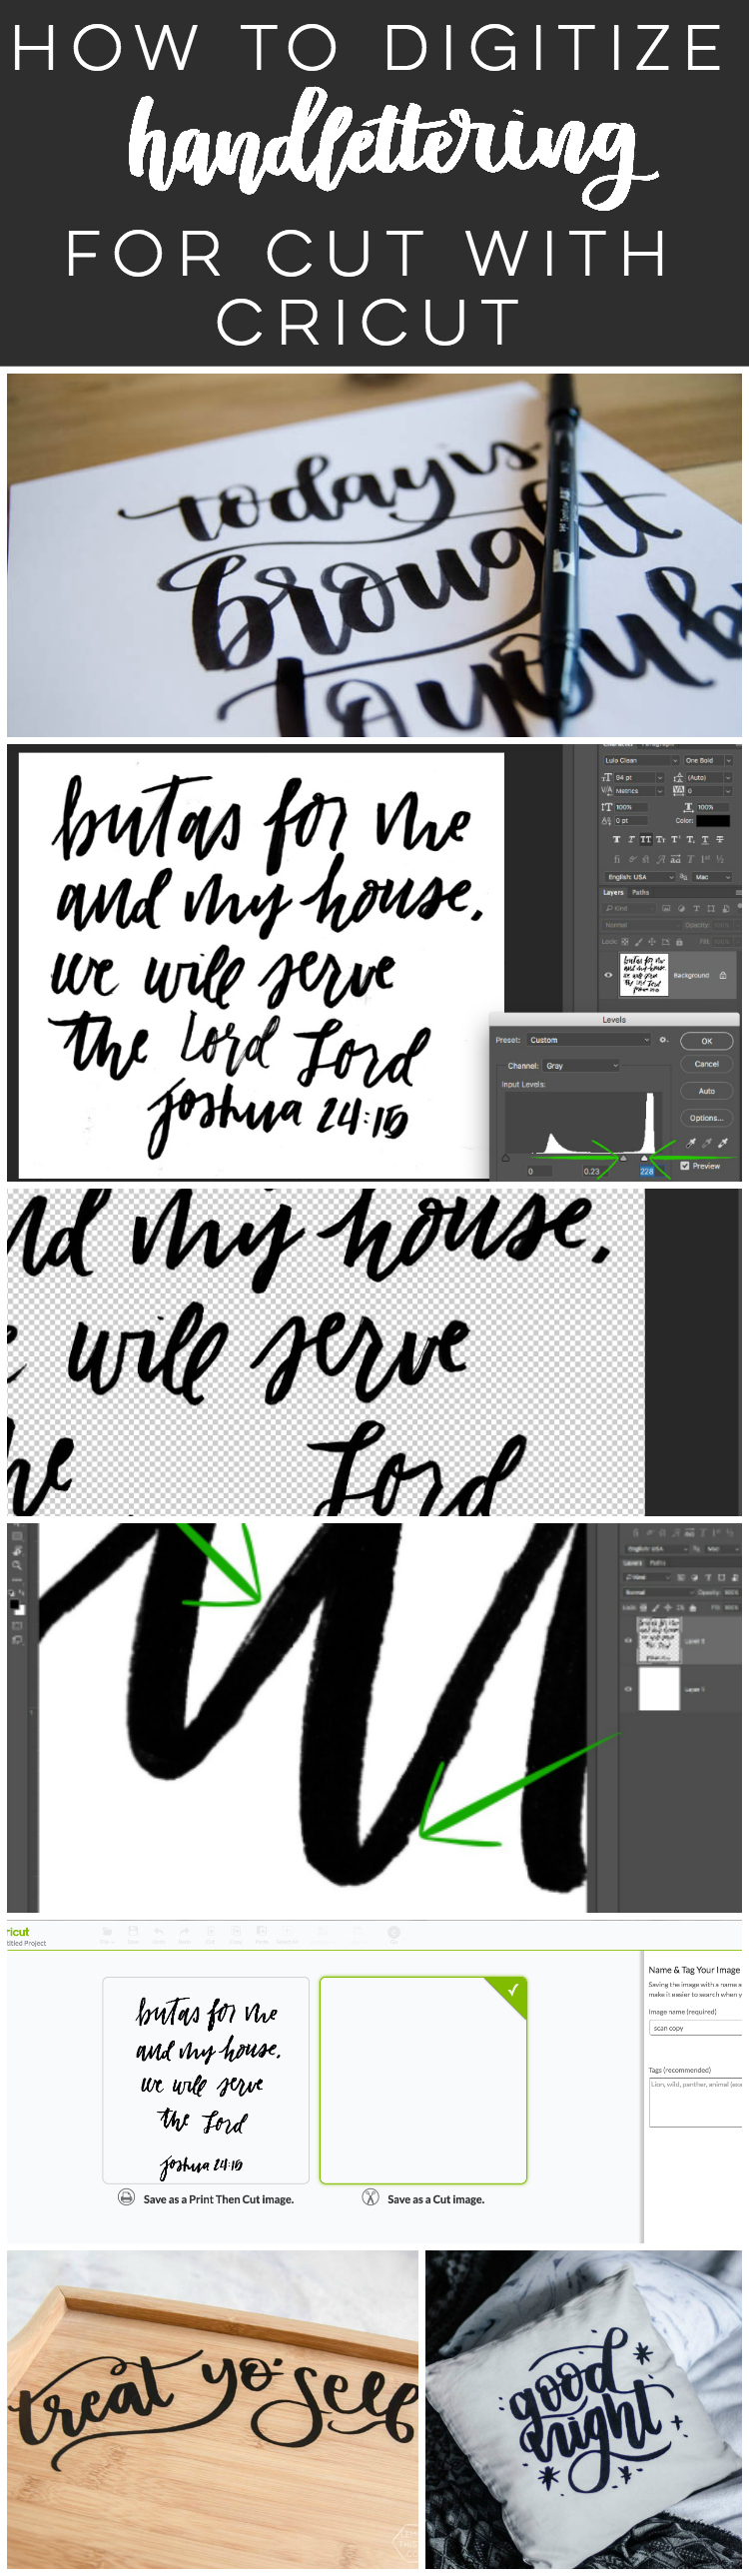
LIKE IT? PIN IT!
Don’t have time to take on any crafting right now? Planning to open up your Cricut for some weekend crafting come Saturday?
Pin this so you can come back to it! Plus, pinning or sharing on FB helps this post reach more people which helps me be able to keep sharing with you. Thank you!
 DIY Rustic Canvas Banner [remake!]
Hi I was looking at the scanner you recommended o Amazon. It says it will upload the images to the Cloud Services. Will it also just save to the computer as well?
Oooh I’ve never tried uploading to cloud! I just use it to scan to my computer :)
Am I correct in saying the old model Cricuts, like the 1 st air Cricut, can’t upload? Mine doesn’t have access to Design Space. Sure wish it did. Had just bought it and then the models that use Design Space came out.
Great tutorial by the way.
I didn’t realize that! I got mine a couple years ago now and sure love that I can add my own images. I believe they do a trade in promotion a couple times a year- you should keep your eye out!
Can you used this technique with old handwritten recipes to get the original handwriting??
Yes! You totally could! The only thing I’d caution is that if the recipe has aged quite a bit, you might have a lot of clean up to do to get rid of the background. Good luck!
Can you use the the pin scann to make your printable more clean on first try and then maybe still go to Photoshop to digitize the lettered then upload to Designer space and also,doese uploading into designer space decrease the size of your image and by how much thank you for your tutorials they are the best on cricut maker for beginners and I have been on YouTube for weeks!
I haven’t tried that! it would definitely be worth a shot :)
I’m a beginner wanting to use my own lettering and design ideas. Which cricut would serve me at this point?
Any cricut! It just depends what you want to cut ;)
Hi- I want to use the cricut pen to duplicate handwriting. Can you do that?
It will outline your design. The pen tool only works with lines!
Hi!! Any tips for digitizing/ editing on adobe illustrator? thank you so much!!
I don’t use illustrator for this purpose!