• Skip to main content
  • Skip to header left navigation
  • Skip to header right navigation
  • Skip to site footer
  • Shop
  • Get The Email
  • Work With Me
  • About
  • Search

  • DIY
    • DIY Home Decor
    • With Power Tools
    • Renovation
    • For Kids
    • For Parties
    • Wearable
    • Organization
    • Cricut Crafts
  • Home Decor
    • Room Reveals
    • Kid Friendly
    • DIY Home Decor
    • Renovation
  • Lettering
    • Hand Lettered Printables
    • Free Practice Sheets
    • Handlettered DIY
    • Free Brush Lettering Quickstart Guide
    • Learn Brush Lettering E-Course SALE
Lemon Thistle

Lemon Thistle

Rad DIY, Lettering and Design for Real People

  • Printables
    • For Cricut
    • Party Printables
    • Home Decor Printables
    • Bachelor Bingos
    • Free Monthly Wallpapers
    • Handlettering Practice Sheets
    • All Free Printables
  • Entertain
    • Party Printables
    • Party DIY
    • Tablescapes
    • Dinner Party
    • Kids Parties
    • Party Eats
    • Baby Showers
    • Wedding + Showers
  • Blog

DIY Planner Stickers with Cricut

Mar 27

This is a sponsored conversation written by me on behalf of Cricut. The opinions and text are all mine.


How to make planner stickers in Cricut Design Space using print then cut

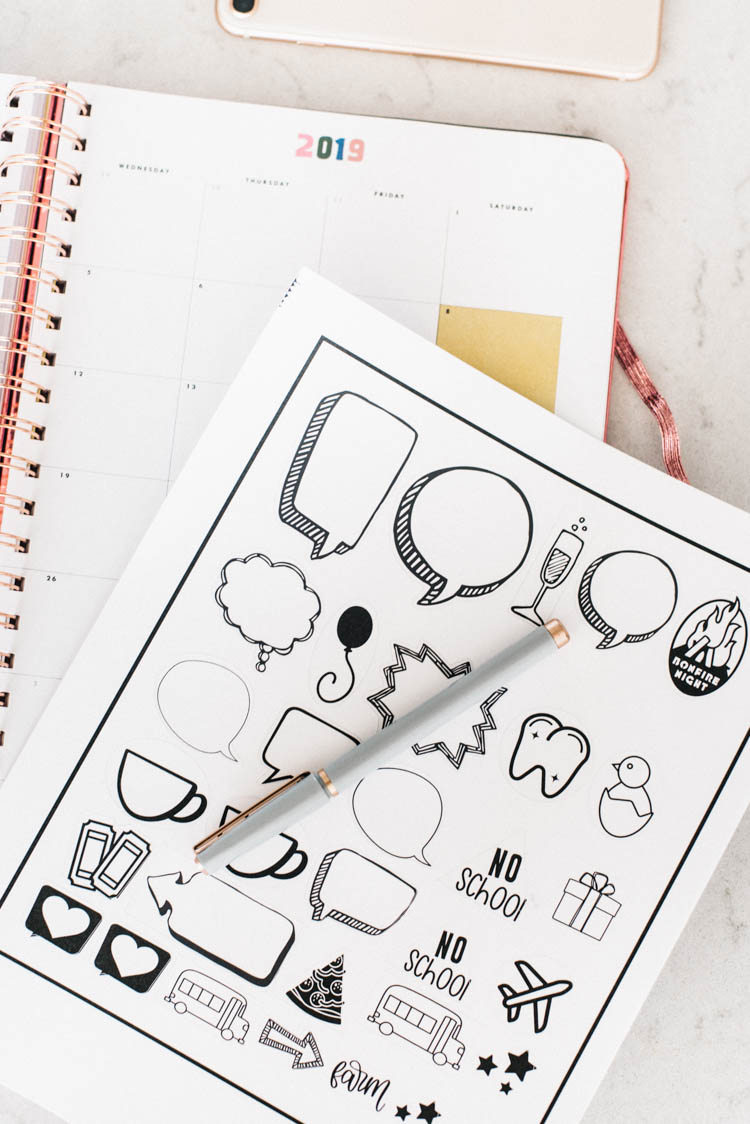
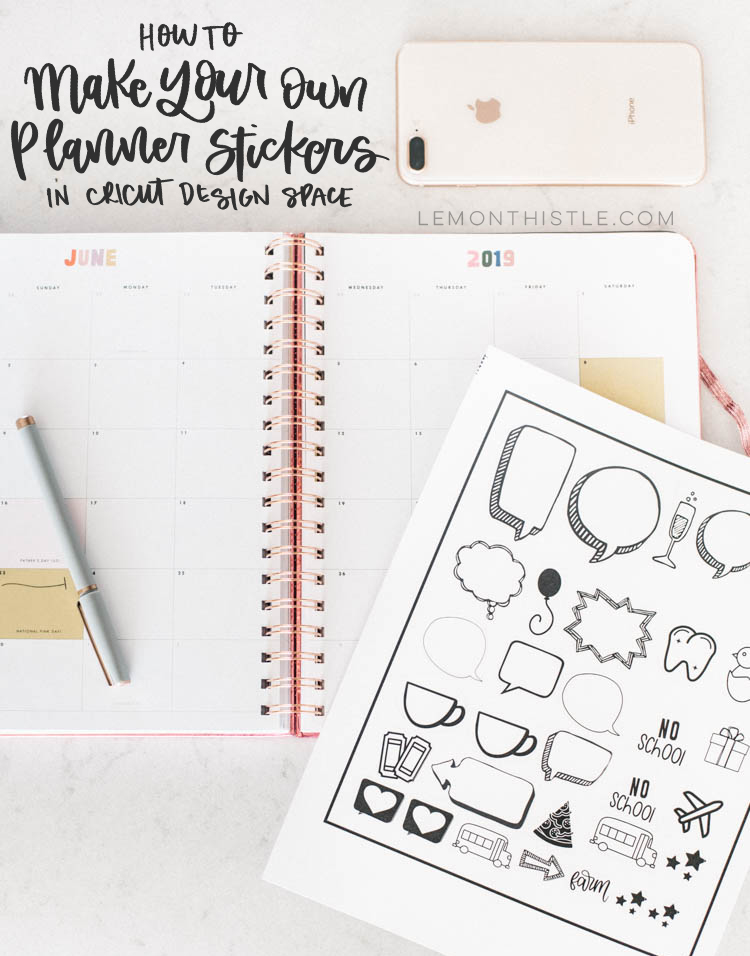
These planner stickers are modern and fun for your day timer or calendar and thanks to the Cricut- they’re simple to make as many as you like! Today I’m excited to be sharing not only my project (you can use my exact designs) but also a tutorial to make your own using Cricut Design Space and Cricut’s Print then Cut feature! 

I’m a calendar addict. I might not be great at maintaining it all the time but I sure do love it and I love to make it pretty. Every year I make my own printable calendars with hand lettering that are simple and easy to print in black and white. I thought it would be fun to make printable stickers that coordinate well with that calendar since I know so many of you use that calendar as well!

how to design and make your own planner stickers!

To keep this tutorial clear, I’m going to break it down into two parts. I’m going to first share a tutorial of how to use my designs to make your own planner stickers and then I’m going to share a tutorial of how to design your own using elements from Cricut Design Space (or you could totally upload your own following this tutorial!).  If you’re looking for more detailed instructions on the Cricut Print Then Cut feature- I wrote a WHOLE post about that last week! You can find that RIGHT HERE.

how to design and make your own planner stickers!

how to design and make your own planner stickers!

How to Print + Cut Your Own Planner Stickers with Cricut

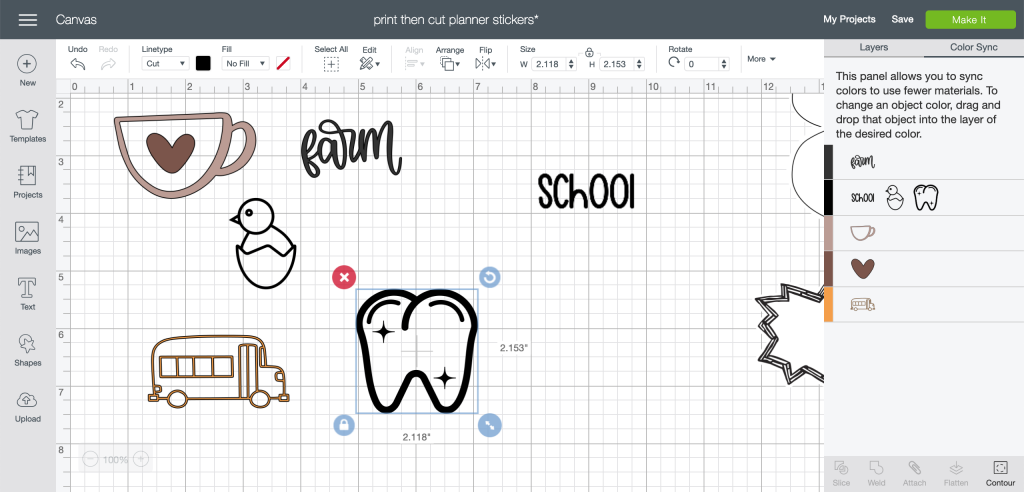
Alright, let’s get started talking about how to actually make your own planner stickers! This part is once you know what you want to use as planner stickers. You can use the stickers I made RIGHT HERE. You can duplicate or delete or resize as you please and still follow this tutorial without issue. 

YOU’LL NEED:

  • An Inkjet Printer
  • A Cricut Capable of Print Then Cut (Maker or any Explore)
  • Cricut Sticker Paper
  • Standard Grip Mat 

How to use the print then cut feature in cricut design space

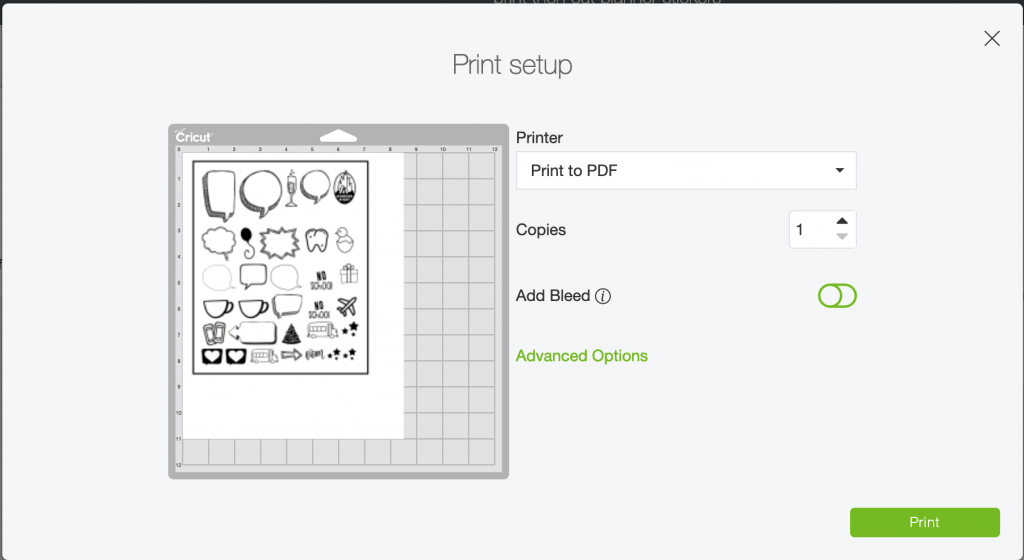
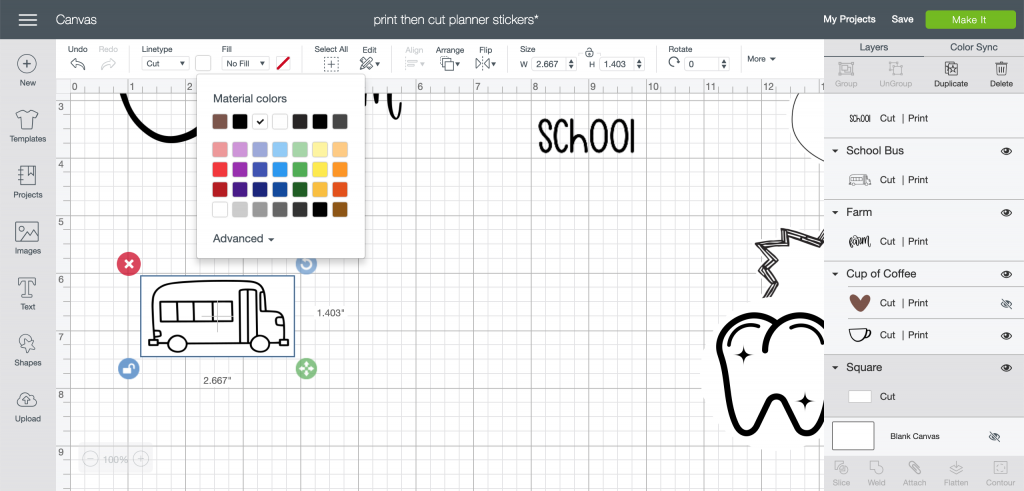
Once you open up your design and make any changes you’d like, hit ‘make it’. From here, you’ll need to send your design to your printer, making sure to turn OFF bleed. This will keep the printed lines nice and crisp. Also, if your printer is like mine, you’ll need to click ‘advanced options’ to get it to print from the correct tray with the thicker sticker paper. I used Cricut’s Printable Sticker Paper which is really nice and thick. 

How to use the print then cut feature in cricut design space

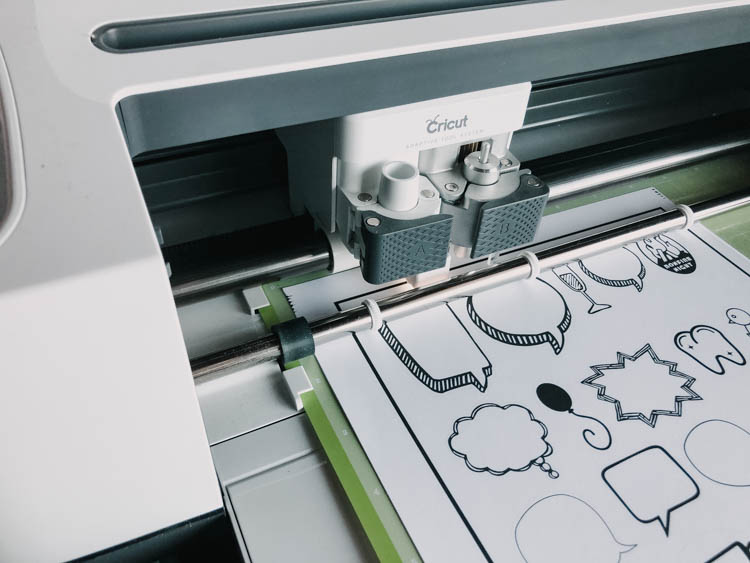
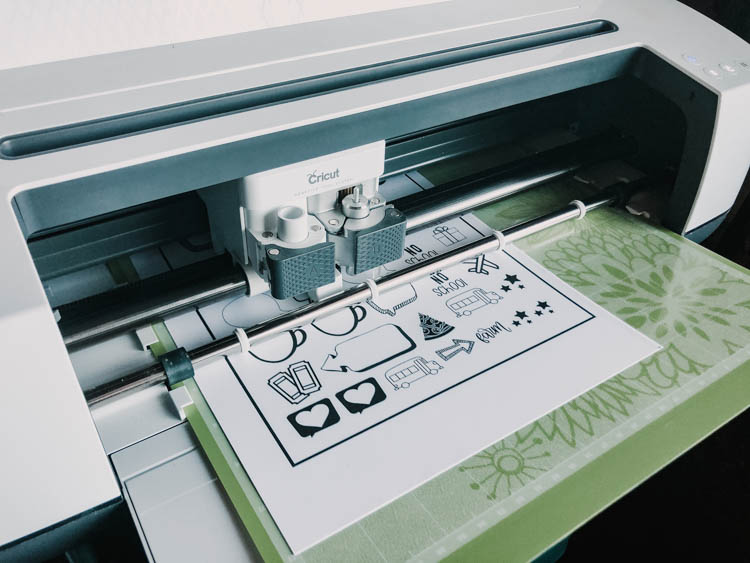
Once you’ve printed your design, you can line it up on your mat and get it loaded into your Cricut. Do your best to make it straight, but the Cricut will use the bounding box it prints f0r the markers to keep it cutting straight. Select the Cricut sticker paper for your material and hit go! The Cricut sticker paper is thicker than most sticker paper so if you’re not using it, you might need to play with your settings a bit.

How to use the print then cut feature in cricut design space

How to use the print then cut feature in cricut design space

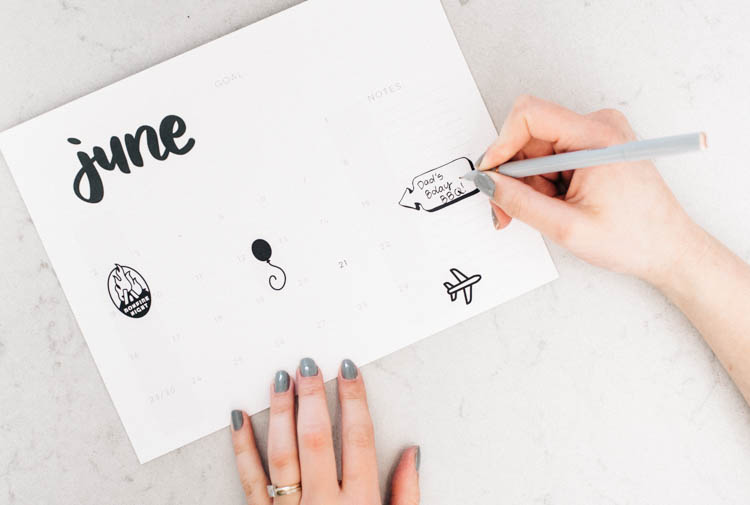
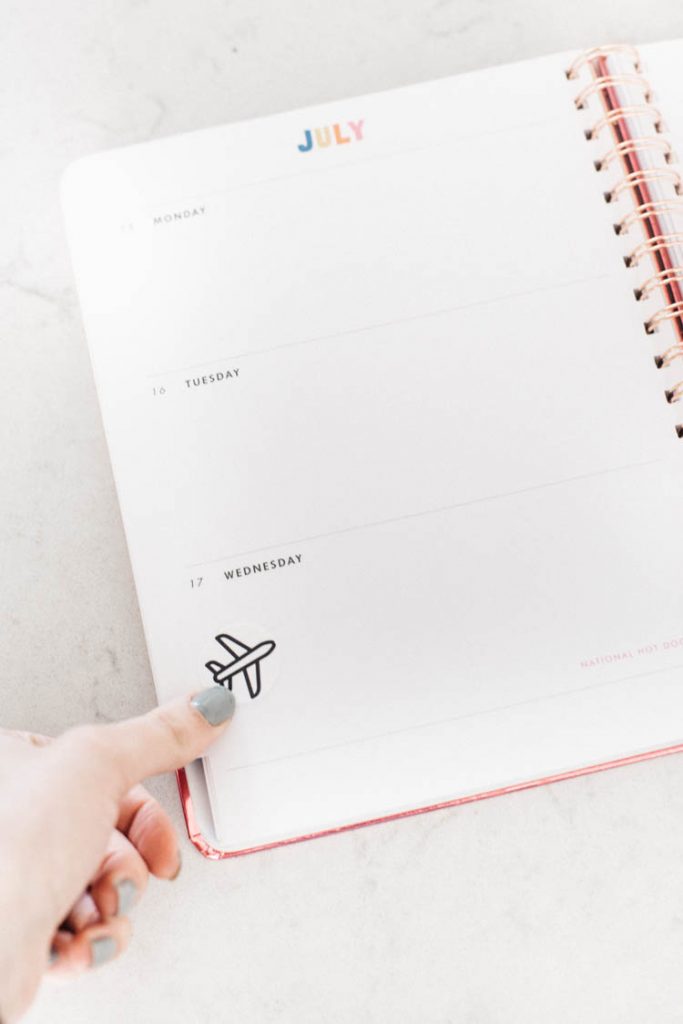
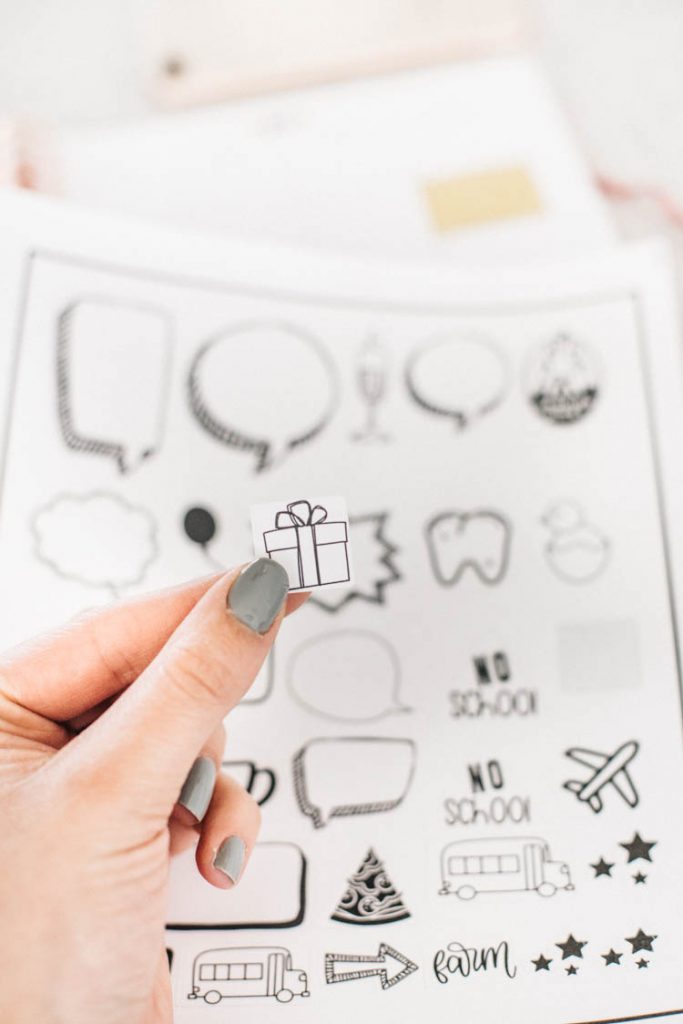
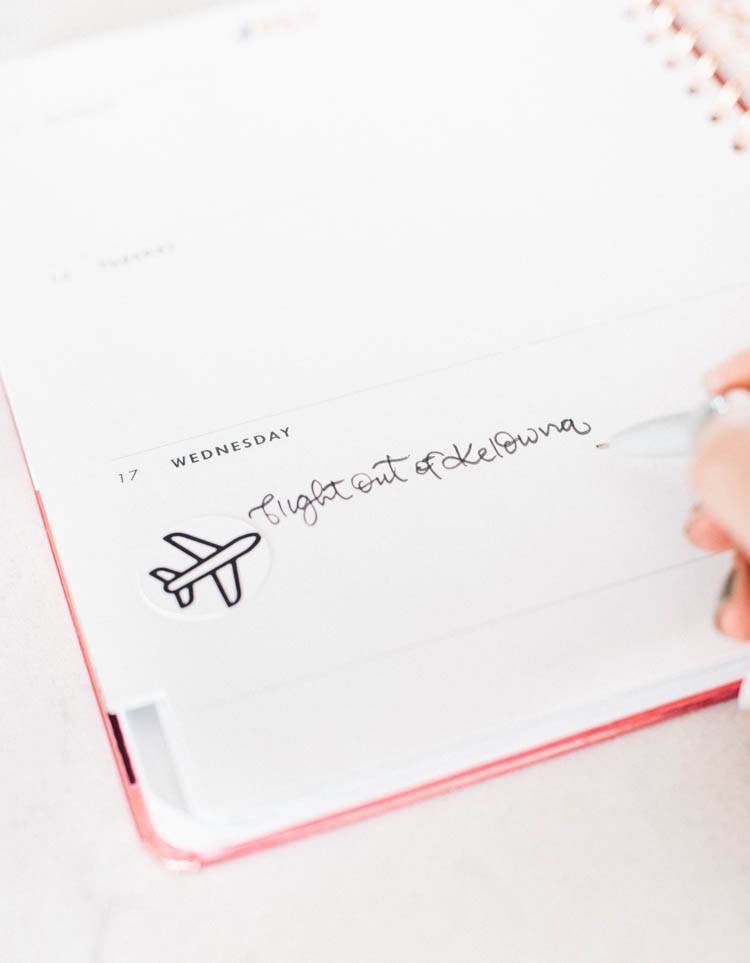
That is IT. It’s seriously simple if you’re not designing your own. You can peel them off and stick them into your planner and enjoy a little bit of fun in your calendar!

How to Design Your Own Planner Stickers in Cricut Design Space

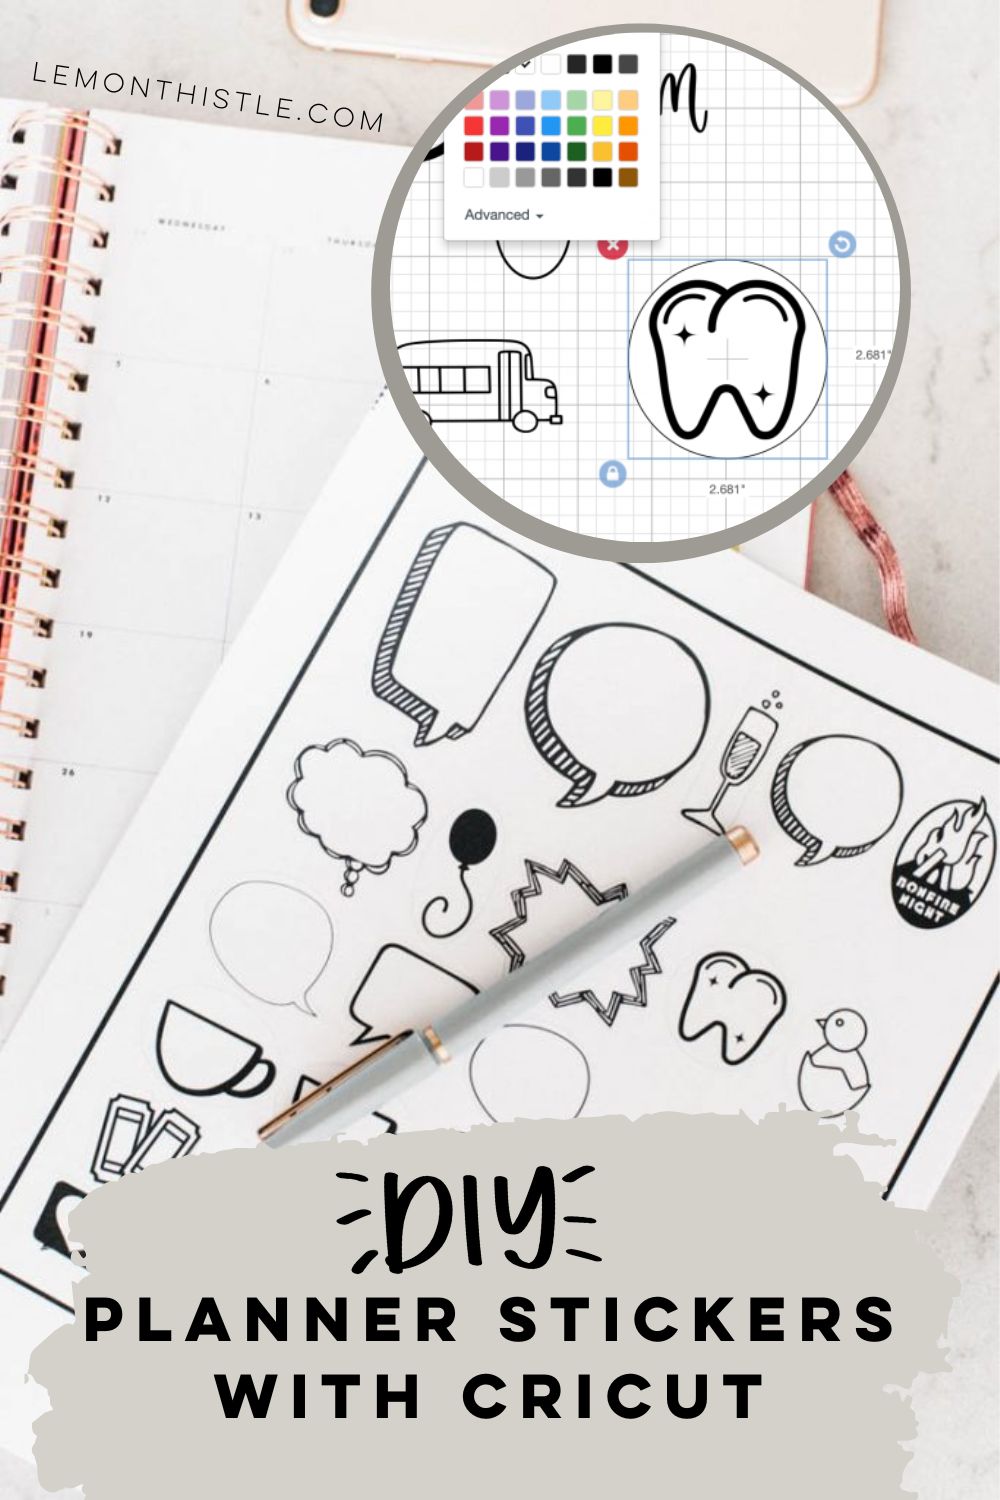
Okay, so you can cut them out- but what if you want to design some for yourself? Maybe you’re a big soccer family and want a soccer ball. Or maybe you want a rose for every Bachelor night (hindsight, I should have done this! ha!). I chose to make mine all black and white and the aesthetic I really like is line art BUT you can totally do colour if you’d prefer.

How to make your own planner stickers using Cricut Design Space

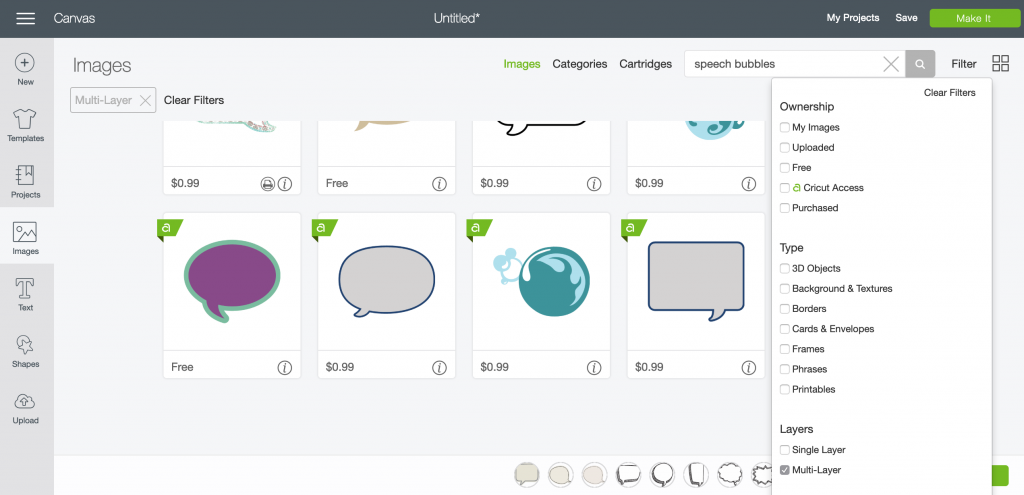
The first thing you’ll want to do is go into Cricut Design Space and find whatever design you’re interested in. You could also upload your own artwork. I searched for speech bubbles and the first thing I checked for is to see if there were multi layer files that were ready for me to print and cut. You can filter by multi-layer files just by tapping filter beside the search bar. It does NOT need to be a printable design to work. All of the files I used were from Cricut Access (subscription), which is noted by that little green ‘a’.

How to make your own planner stickers using Cricut Design Space

How to make your own planner stickers using Cricut Design Space

How to make your own planner stickers using Cricut Design Space

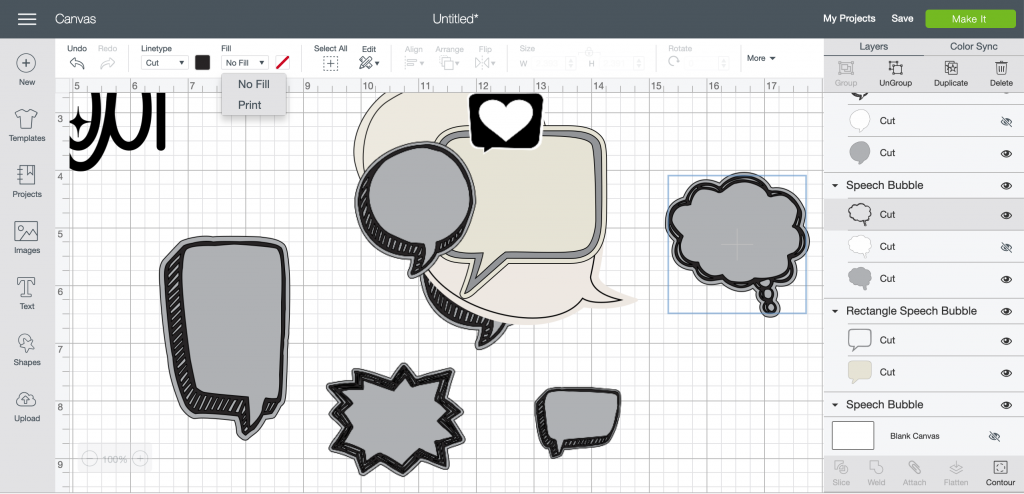
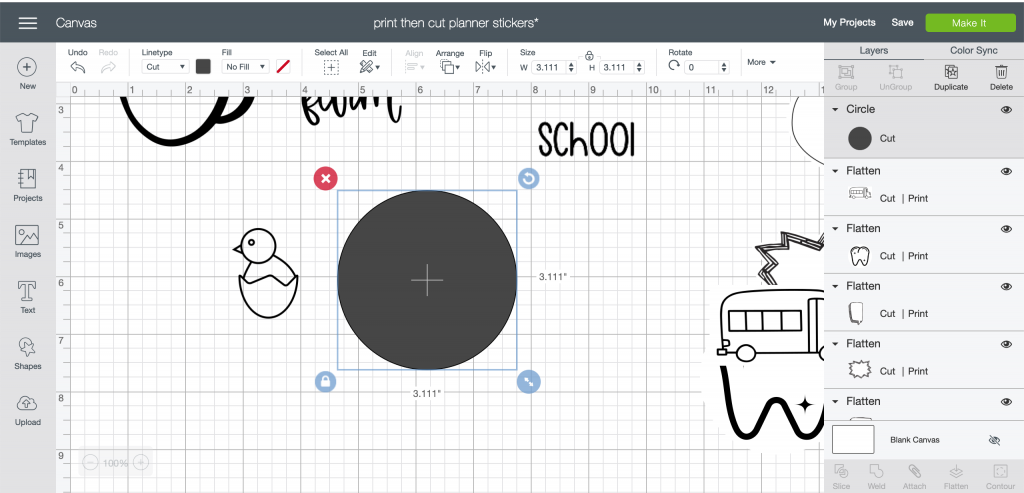
If you get lucky, you’ll find a design that has a background layer (usually off) that is a little larger than the design. This is perfect! You can’t tell until you add it on to your project canvas and look in the layer panel. Turn that on, turn off the background that’s perfectly sized and then we can turn it into a print then cut layer. To do that, make the line art/ sticker layer the color of your choice (for me, black) then in the toolbar beside the color option select ‘Print’ from the Fill dropdown menu. Then, make the background layer white so it won’t print. 
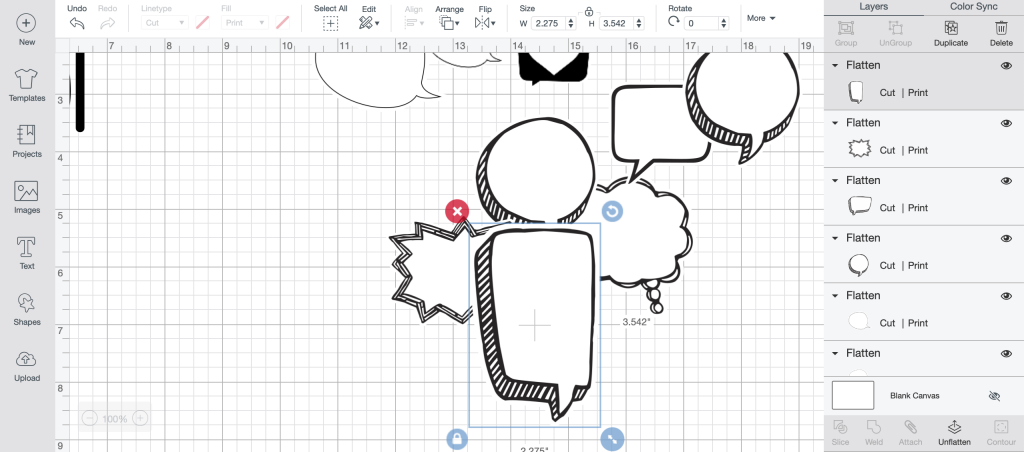
Lastly, select both layers and click ‘flatten’. This will turn it into one print then cut layer. You can always unflatten if you need to make changes.

How to make planner stickers from cut files in Cricut Design Space

How to make planner stickers from cut files in Cricut Design Space

If you find one that you like that doesn’t have that third bonus background layer that is slightly larger than the design, we can make one. Not all designs will resize slightly larger in a way that works for this. BUT you can ‘ungroup’ the layers of your file, then size up the background layer slightly. If this looks good, then turn your top layer to print, make sure your bottom layer is white and then select both layers and flatten them. 

How to make planner stickers from cut files in Cricut Design Space

How do I add a background to a design in Cricut Design Space?

This is the one time you’re going to have to get a bit crafty. If you find rad line art or sticker designs that DO NOT have their own background already, you’ll have to make one. There are two ways to do this. But first I wanted to share the tip of using Color Sync if you are wanting to change a bunch of files to one color- this is by far the quickest way to do it! Just drag your designs up to the colour you want. 

How to make planner stickers from cut files in Cricut Design Space

How to make planner stickers from cut files in Cricut Design Space

How to make planner stickers from cut files in Cricut Design Space

How to make planner stickers from cut files in Cricut Design Space

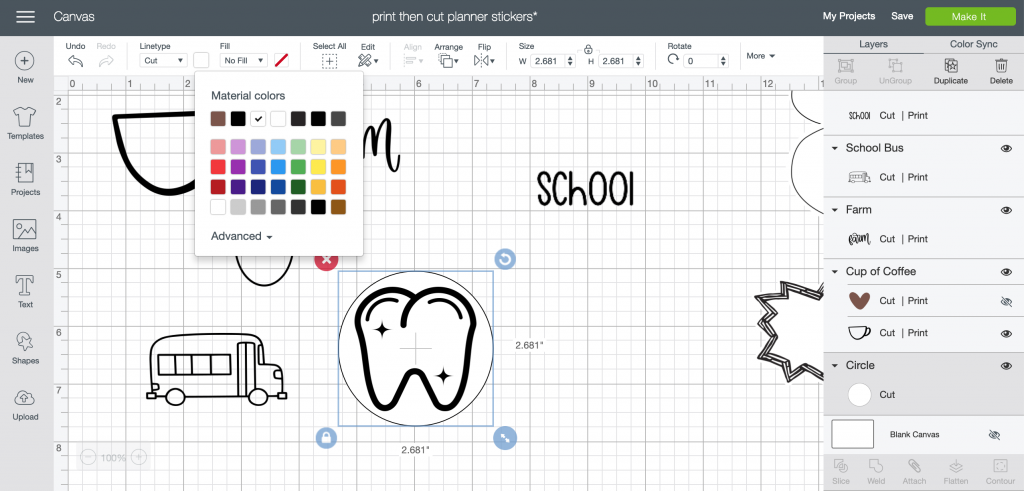
The first way is to add a general shape as your background layer. This actually works really well for most shapes since you can ‘unlock’ the shape and stretch it. To get it into a print/cut file, just change the color to white, send it to the back (arrange) and then you’re ready to use it as you would the background layer in the other instructions. Select both layers and flatten them to one.

How to make planner stickers from cut files in Cricut Design Space

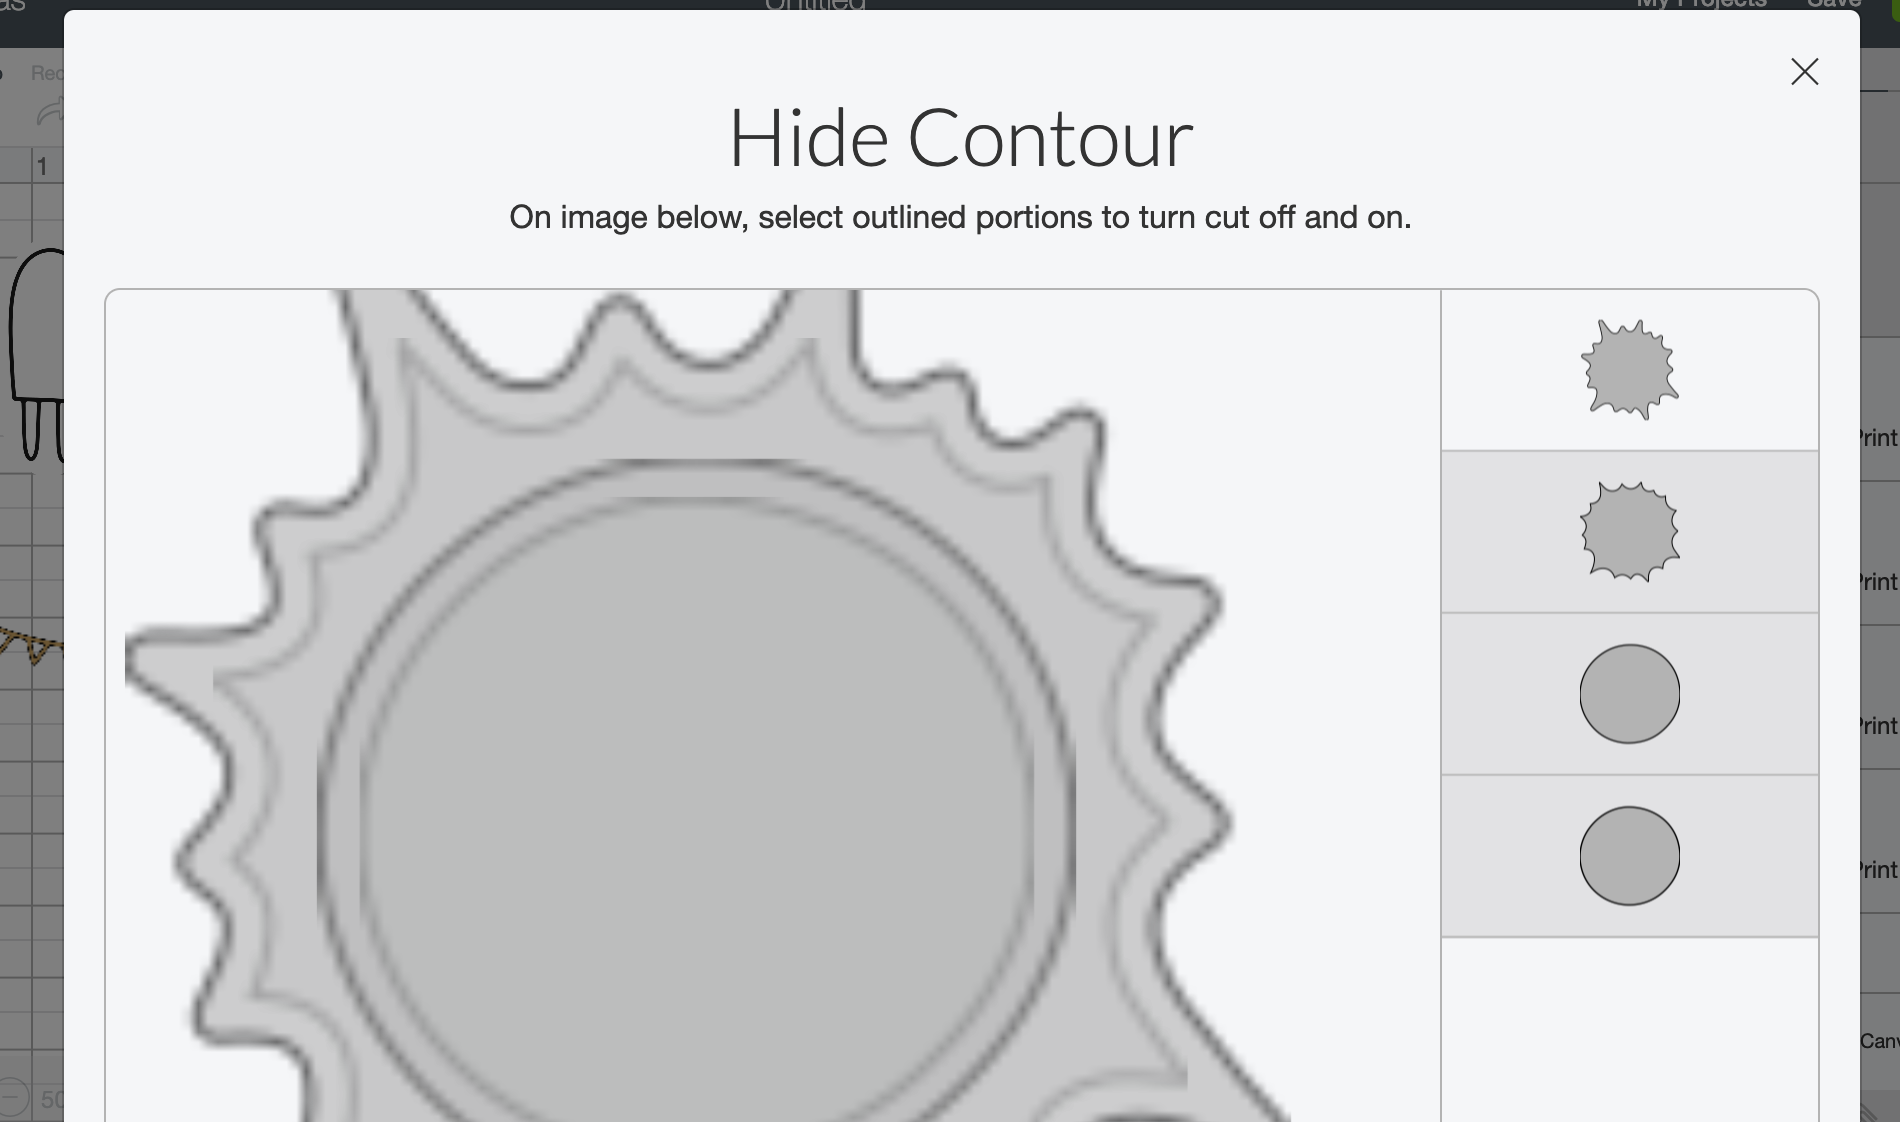
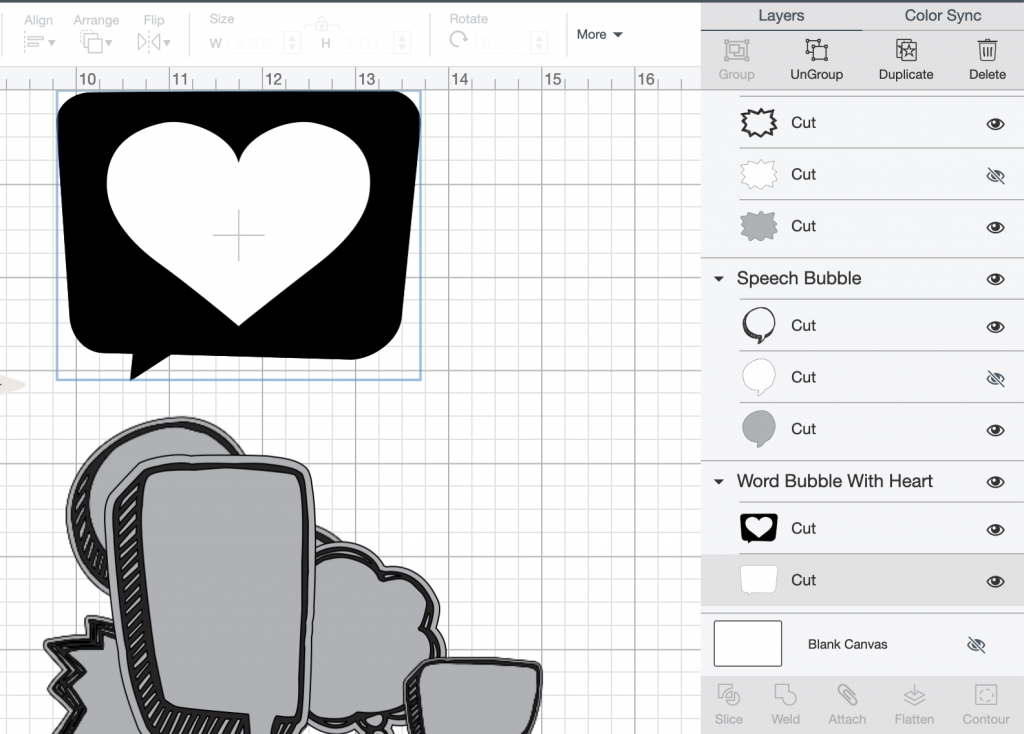
The other option is to try make the background out of the design itself. This is where, like in the conversation heart example, it doesn’t always scale in a way that doesn’t skew it. To do this, duplicate your design and selecting one of the layers, click ‘contour’. 
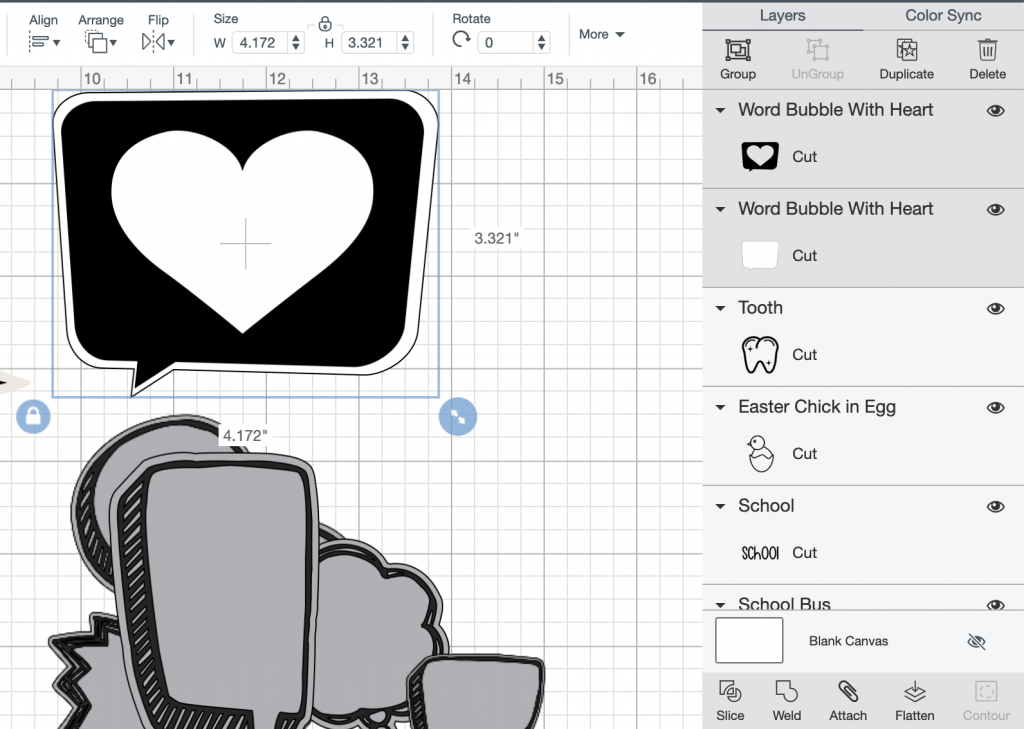
Select ‘countour all’ then only select the outside line to turn back on. This will make a full shape. You just need to size it up a tiny bit, send it to the back, make sure it’s white, then flatten with the other layer. 

use text to make planner stickers

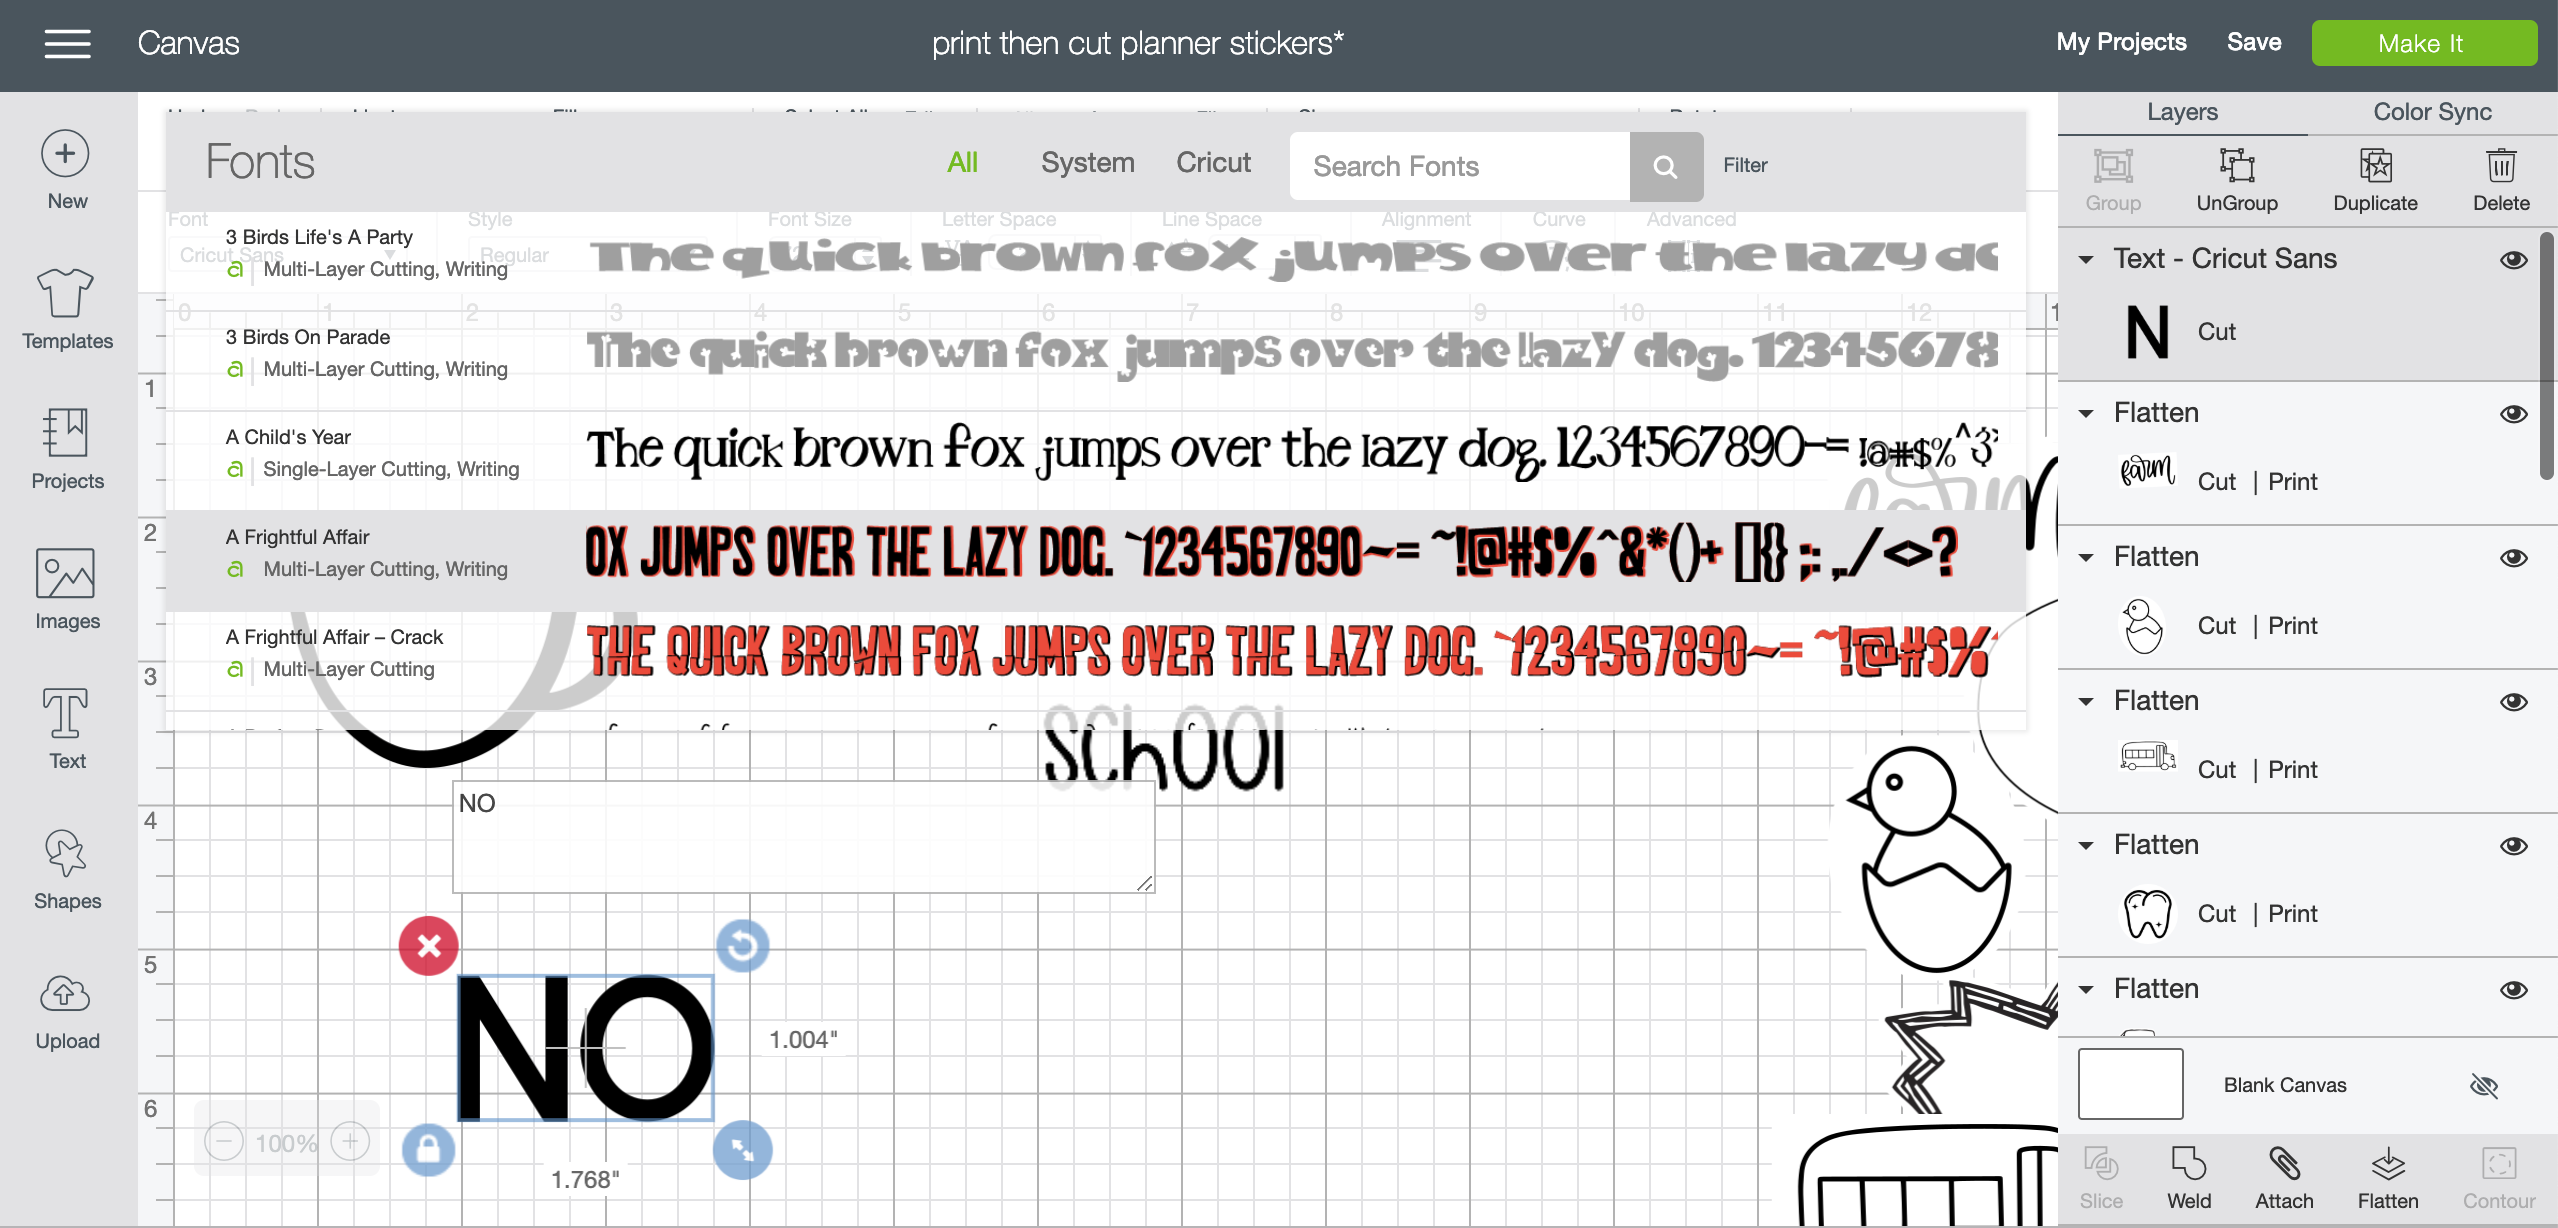
The last thing I wanted to mention is that you can use text as well to design a sticker, then just add a background whatever shape you like to it. Again, just make sure to turn the text layer to ‘print’, make the background white and select both layers to flatten. If you want to use more than one font type, you will need to make more than one text box (you can’t have two fonts in one text box). That’s totally fine, just select all the layers of text (set to print) that you want plus the background layer before hitting flatten.

how to design and make your own planner stickers!

how to design and make your own planner stickers!

Alright, I hope this was helpful for you! These are the 4 different ways that I made planner stickers. If you just want to use the designs I made- again, you can just get that RIGHT HERE! 

Category: DIY, PrintablesTag: Calendar, Cricut, Organization, Printable, Sponsored
Facebook0Tweet0Pin0LinkedIn0
Previous Post: ← Modern DIY Easter Wreath... love this easter bunny hoop wreath! Simple DIY Easter Bunny Hoop Wreath
Next Post: Modern Rancher Living Room Plans! Modern Rancher Living Room Plans with article leather sofa and tree ring prints →

Reader Interactions

Comments

  1. Arel

    Jan 06 at 1:31 pm

    Thank you! I have a Cricut and have shied away from using it because I’m so intimidated, but I LOVE to plan. This is a great explanation. I have subbed! Thanks again!

    Reply
    • Colleen Pastoor

      May 25 at 8:20 pm

      I’m so glad! Hope you find other projects that are easy to tackle soon too!

      Reply

Leave a Reply Cancel reply

Your email address will not be published. Required fields are marked *

Sidebar

WOOHOO!

Check your email to confirm!

(+ get your freebies + discounts)


Thanks for dropping by!
I’m Colleen: wife; mom to 4 wild ones; and DIY blogger behind Lemon Thistle. You can expect to see rad DIY, modern home decor, renovations, hand lettering and the occasional party on Lemon Thistle. Read More…

email facebook youtube instagram pinterest

Unless otherwise noted, all content and images are mine. Full posts may not be shared without express written consent. But I love when you share! Feel free to share, without altering, one image with proper credit and a link to the original post. All free printables are for personal use only.

Everyone loves proper credit- if you ever notice something improperly credited, please please shoot me an email and I’ll fix it lightning fast.

Find all my policies right here.
This includes my privacy policy, info on the GDRP compliance and information on affiliate links (Including Amazon Affiliates).

Visit Colleen Pastoor’s profile on Pinterest.

colleenpastoor

My house is never this clean
-
DIY + Home Decor Blogger
Mama of 4 👶🏼🧒🏼👦🏼👧🏼
Renovating our 🏠 the DIY way
🖤 Lettering & ☕️
-
✉️[email protected]

colleen pastoor/lemon thistle
Let’s talk about coffee! This is my coffee ‘st Let’s talk about coffee! This is my coffee ‘station’ and the second photo is my dads! I’m talking aaaall about them over on YT today!
Also... see how nice that fresh silicone looks?! 😉 IYKYK
The hallway is finally finished and I’m so stink The hallway is finally finished and I’m so stinking happy! 

It’s felt like such a long time coming for such a small space. Since we moved in 2.5 years ago, this space has seen new doors and hardware, new trim, new floors... twice😅, we changed the boob light to a pot light and I hated it and now it’s got the most beautiful flush mount fixture I’m in love with (thanks @mymitzi!). It finally got some fresh paint and now frames on walls and last but not least... After this weekend, the new floors look like they were here all along (no door jamb gaps!) which was the last thing really bugging me since our flood last year. 

All this to say that home takes time and sometimes getting it right might take a couple tries. Also- the spaces we don’t really think about (hallways) can totally help a house feel like home with some love (and family photos 🥰)
ps. I partnered with #mymitzi to create a tiktok for This makeover... are you following me over there yet?! I’d love if you popped over and said hi!
It’s done! It works! And I’m calling it a grea It’s done! It works! And I’m calling it a great use of my afternoon the other day. Did you catch the stories? These projects both cost me under $10 by using pieces I already had in my home (yay for scraps!) and one package of drawer slides).
You can find the full video about these two kitchen organization projects over on YouTube in collaboration with my friend @love_create_celebrate and her #scrapsmademodern challenge! But for now... I’m rejoicing this coffee maker is off my counter for good 🎉
How’s your January going? Full speed or are you How’s your January going? Full speed or are you taking it a bit slow too? 

I’m not going to lie, I’m easing into this new year thing pretty slowly. All my decorations are still up (we always leave them up til Ukrainian Christmas which is later this week) and I I’ve yet to respond to my emails since before Christmas 😅
I’m enjoying the slowness of it all.
Happy Christmas Eve from our fam to yours 🥰 Happy Christmas Eve from our fam to yours 🥰
Yes, I made the paper bag snowflakes too. Have you Yes, I made the paper bag snowflakes too. Have you? 😅
This year has been one of a kind and I know so man This year has been one of a kind and I know so many people who are taking this year as the push they’ve been waiting for to start a side hustle, start an new career altogether or to just get creative about how they’re making money. So today I’m excited to partner with @kregjig to share some rad projects to make and sell this year! 
Like this rolling storage system I made for my office, that rad dollhouse and the gorgeous bath toy storage. All of these projects are things that I’d personally love to buy for our family and look like they’d be a great return on your time making them! And yes, all of them use #Kreg tools to make them easy to assemble and quick to make! Plus, they’re having a great sale on right now with deals on their K4 and K5 jigs, Rip-Cut and even a hardware jig bundle! There’s never been a better time to get your workshop set up!  #sponsored
Just a peaceful moment and then a real life moment Just a peaceful moment and then a real life moment for ya 🙃 
My #holidayhometour is on the blog and YouTube (I’ll put links in my stories) as part of the #seasonalsimplicity holiday home tour series. I’ll share those too so you don’t miss any!
My holiday home tour will be up tomorrow, but for My holiday home tour will be up tomorrow, but for tonight... I’m just enjoying the lights. And possibly a hallmark movie with some more custom order lettering 😅 what are your plans?
#christmasdecor #christmastree #holidaylights
Load More... Follow on Instagram

Copyright © 2021 · Lemon Thistle · All Rights Reserved · Powered by Mai Theme