• Skip to main content
  • Skip to header left navigation
  • Skip to header right navigation
  • Skip to site footer
  • Shop
  • Get The Email
  • Work With Me
  • About
  • Search

  • DIY
    • DIY Home Decor
    • With Power Tools
    • Renovation
    • For Kids
    • For Parties
    • Wearable
    • Organization
    • Cricut Crafts
  • Home Decor
    • Room Reveals
    • Kid Friendly
    • DIY Home Decor
    • Renovation
  • Lettering
    • Hand Lettered Printables
    • Free Practice Sheets
    • Handlettered DIY
    • Free Brush Lettering Quickstart Guide
Lemon Thistle

Lemon Thistle

Rad DIY, Lettering and Design for Real People

  • Printables
    • For Cricut
    • Party Printables
    • Home Decor Printables
    • Bachelor Bingo
    • Handlettering Practice Sheets
    • All Free Printables
  • Entertain
    • Party Printables
    • Party DIY
    • Tablescapes
    • Kids Parties
  • Blog

Simple DIY Easter Bunny Hoop Wreath

Mar 23

Modern DIY Easter Wreath... love this easter bunny hoop wreath!

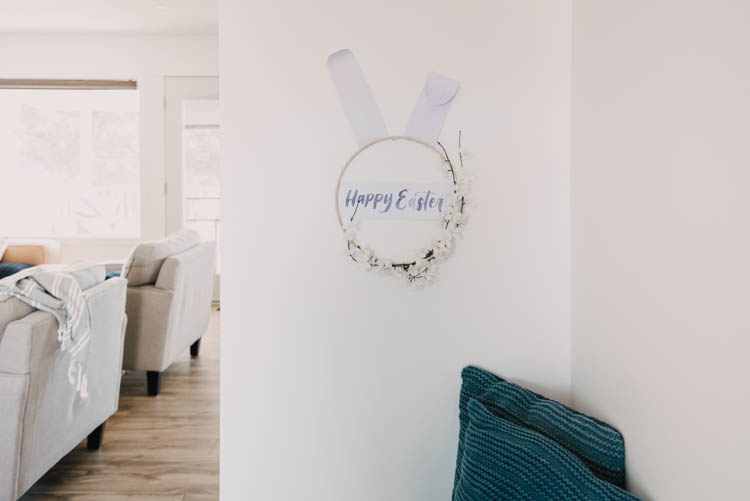
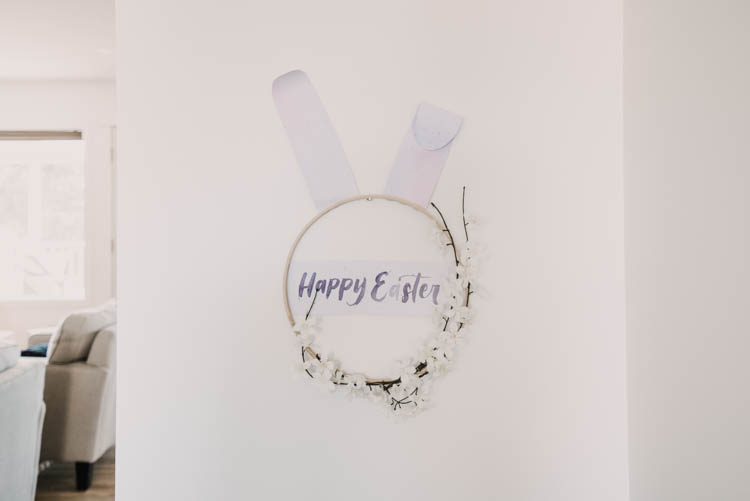
Spring is finally, actually, really in the air and today I’m excited to be joining up with The DIY Mommy’s Youtube Spring DIY & Decor Challenge to share this fun Easter Hoop Wreath! This is such a playful Easter wreath compared to my normal decor but the modern hoop and wild faux florals help keep it on the modern side. 

I don’t have much for seasonal decor (I still haven’t found my boxes of spring holiday decorations since moving last year!) so these challenges are a great way to create some seasonal decor that fits with my style with what I have in my house or craft stash already. Too bad it wasn’t done in time for my spring home tour this year– ha!

I just bought the one stem of faux florals (are these apple blossoms?) and the rest was already sitting here, waiting to be made into something! I’m not going to lie… I love this wreath so much that when Easter is over, I’m planning to take the watercolour details off and just use the floral hoop wreath for decor. It’s so pretty and wild. 

Modern DIY Easter Wreath... love this easter bunny hoop wreath!

Alright so this DIY is pretty darn simple- it’s a good afternoon craft. I am sharing all the details in the video below but if you’re working or a baby is sleeping on you or whatever- I’ve also photographed the steps and wrote them out below for ya!

PS… if you aren’t already following me on YouTube, would you? I’d so appreciate it!

Supplies needed for a simple easter wreath

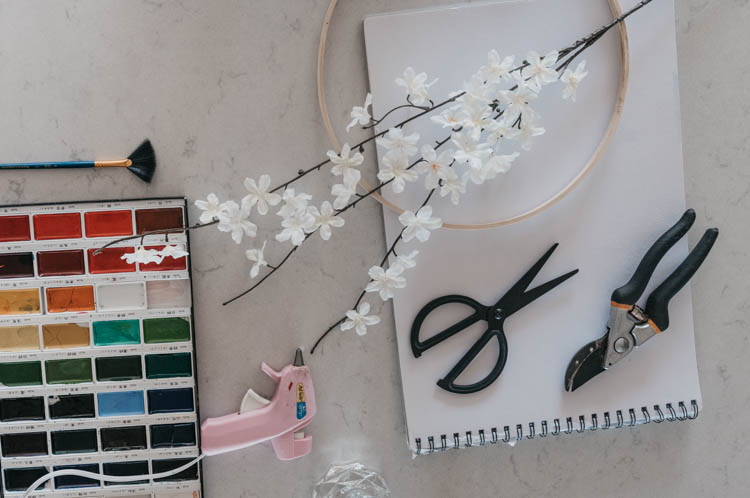
Alright! For this project, you’ll need:

  • an embroidery hoop (just the inside hoop)
  • a stem of faux florals
  • watercolour paper
  • watercolours
  • a wash brush (I recommend a flat brush NOT a fan brush like I’m showing)
  • a small round brush for lettering
  • Scissors
  • Wire cutters or garden shears
  • Hot glue gun

How to create a watercolour wash for bunny ears on this easter wreath

The first thing you’ll want to do is create a watercolor wash on your paper. This gives it time to dry while you craft the rest of the wreath. If you can- I would totally recommend using real watercolour paper for this. It holds the water SO DARN WELL and you can get a really beautiful flowing wash. To get a wash, wet your paper, then start adding in watered down pigments. You can see how I do this in the video. Just make sure to keep your paper wet as you paint on the color! Then set that aside and get to making the wreath.

How to make an easter bunny hoop wreathPretty minimal wreath for easter

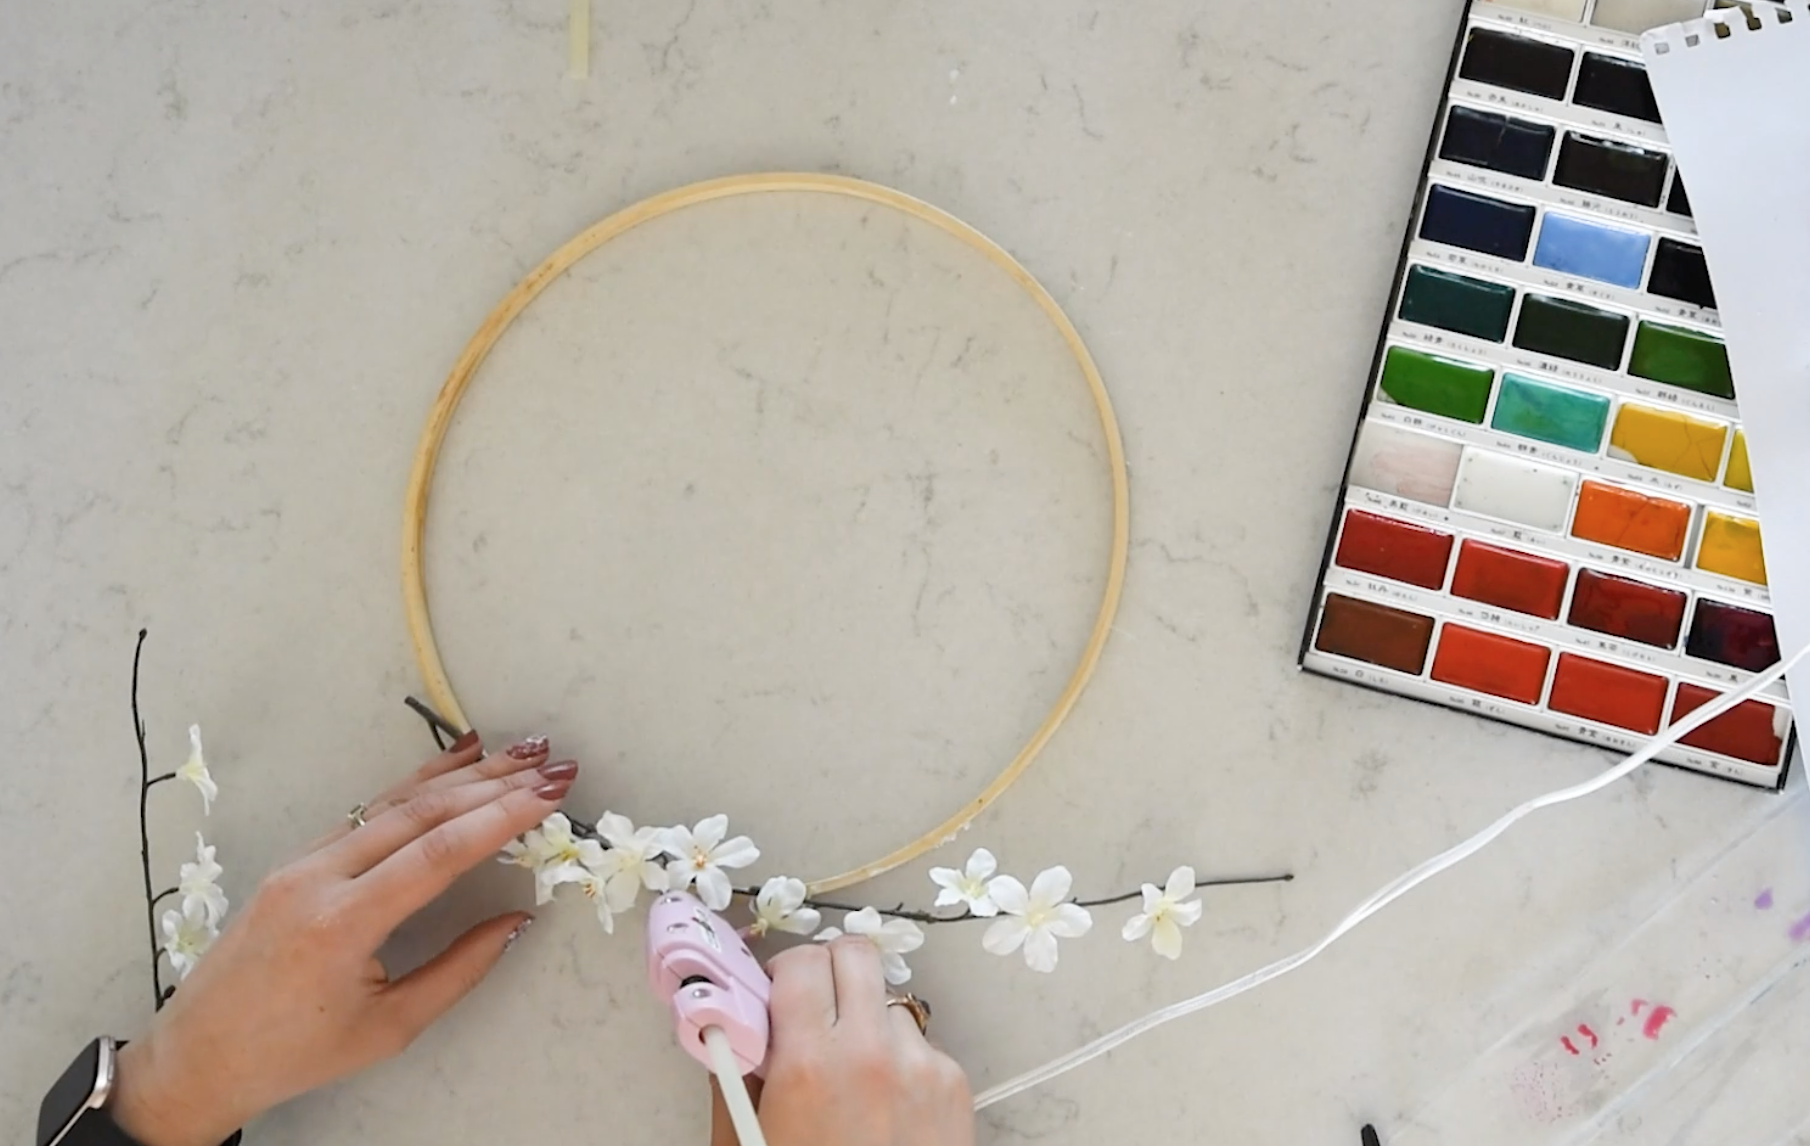
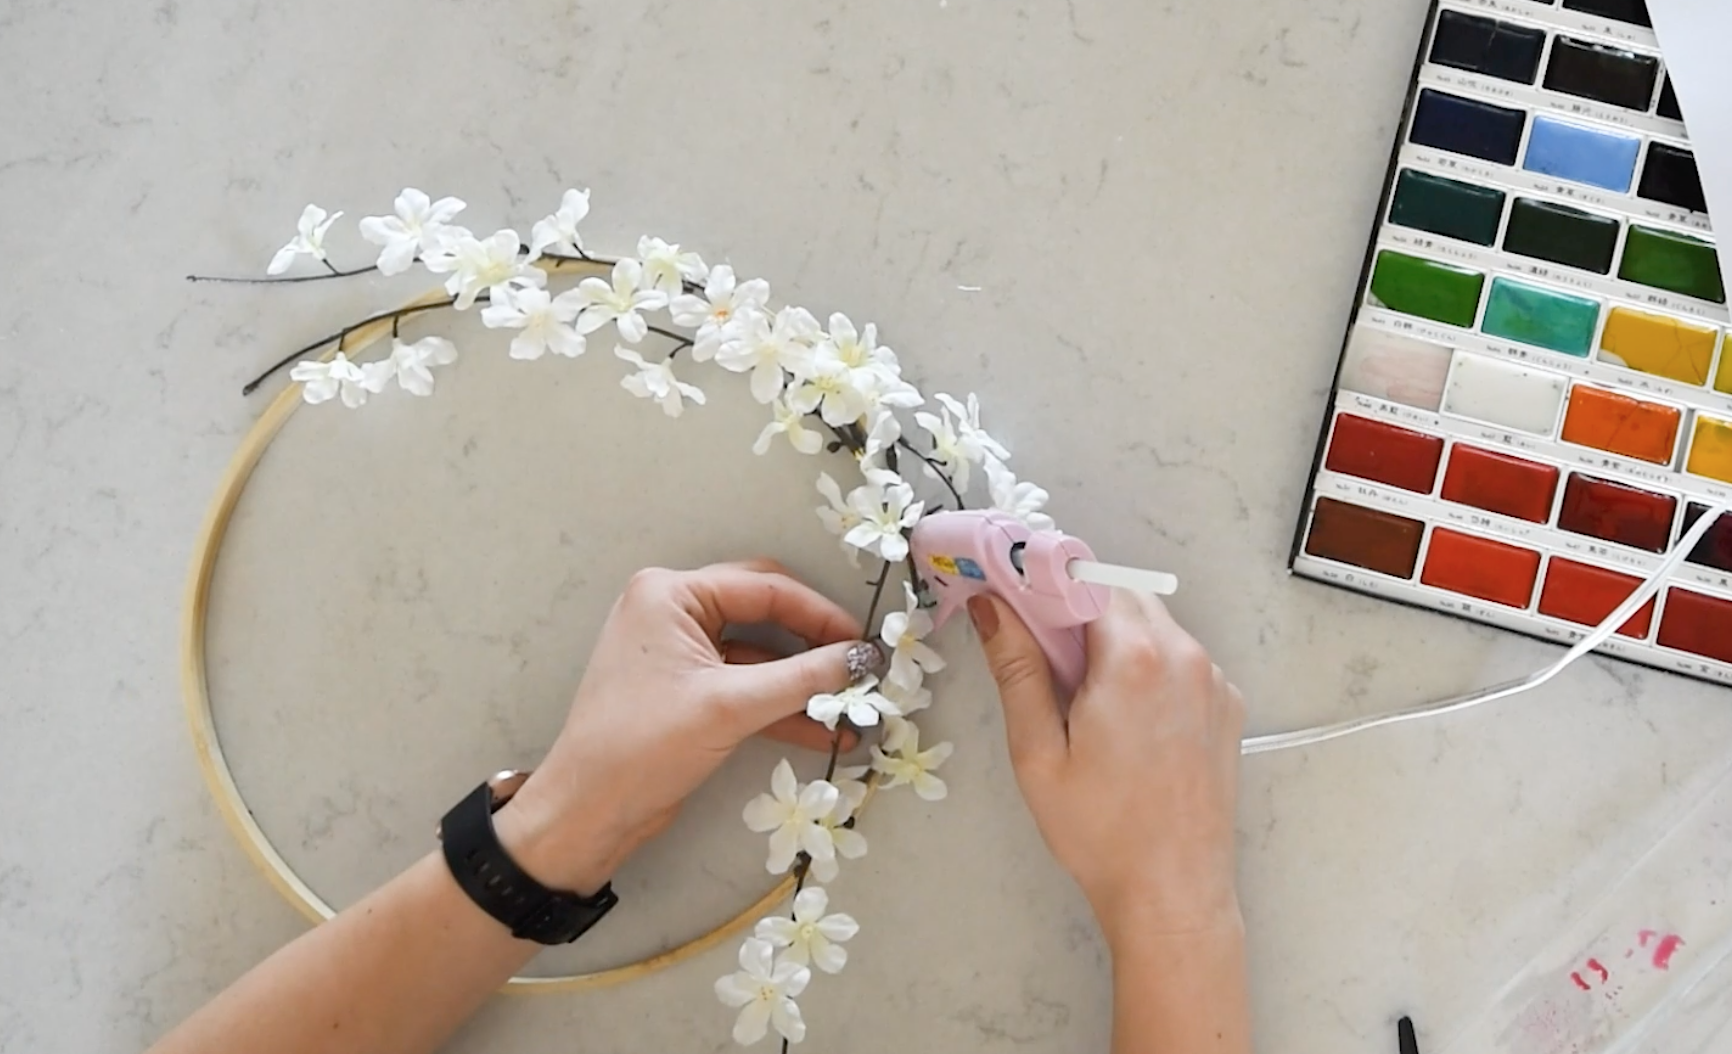
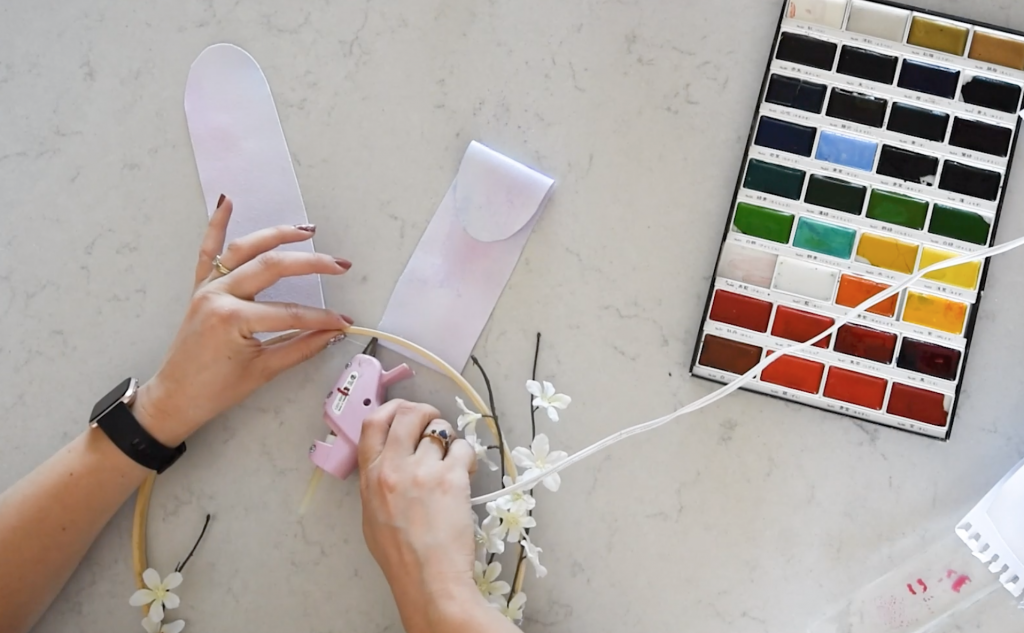
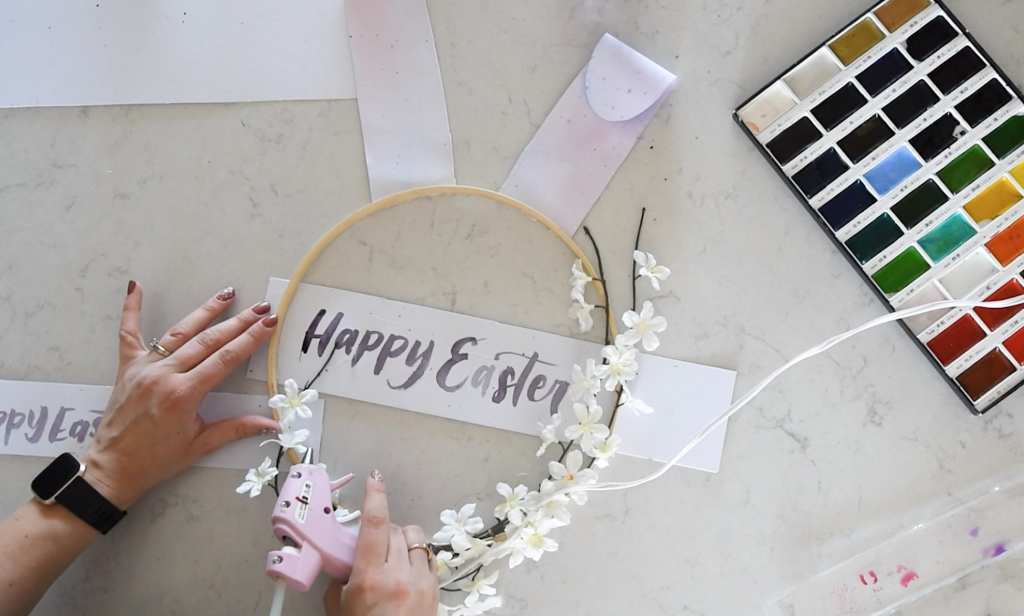
Next, cut your stem of faux flowers. Mine cut into three pieces. I use garden shears to do this, but wire cutters would be best. Use your hot glue gun to clue them onto your hoop wreath, making sure to hold them in place until the glue totally sets. The wire in faux flowers is usually pretty strong so they like to spring back to their original shape if the glue hasn’t set to hold them in place. Add as many or as little florals as you like. I was happy with the three pieces. I left the ends loose so it had a more wild look and ran one of the stems almost through the hoop to give it an asymmetrical look. 

Cut bunny ears out of watercolor for an easter bunny wreath

Adding bunny ears to a hoop wreath

Adding bunny ears to a hoop wreath

Adding bunny ears to a hoop wreath

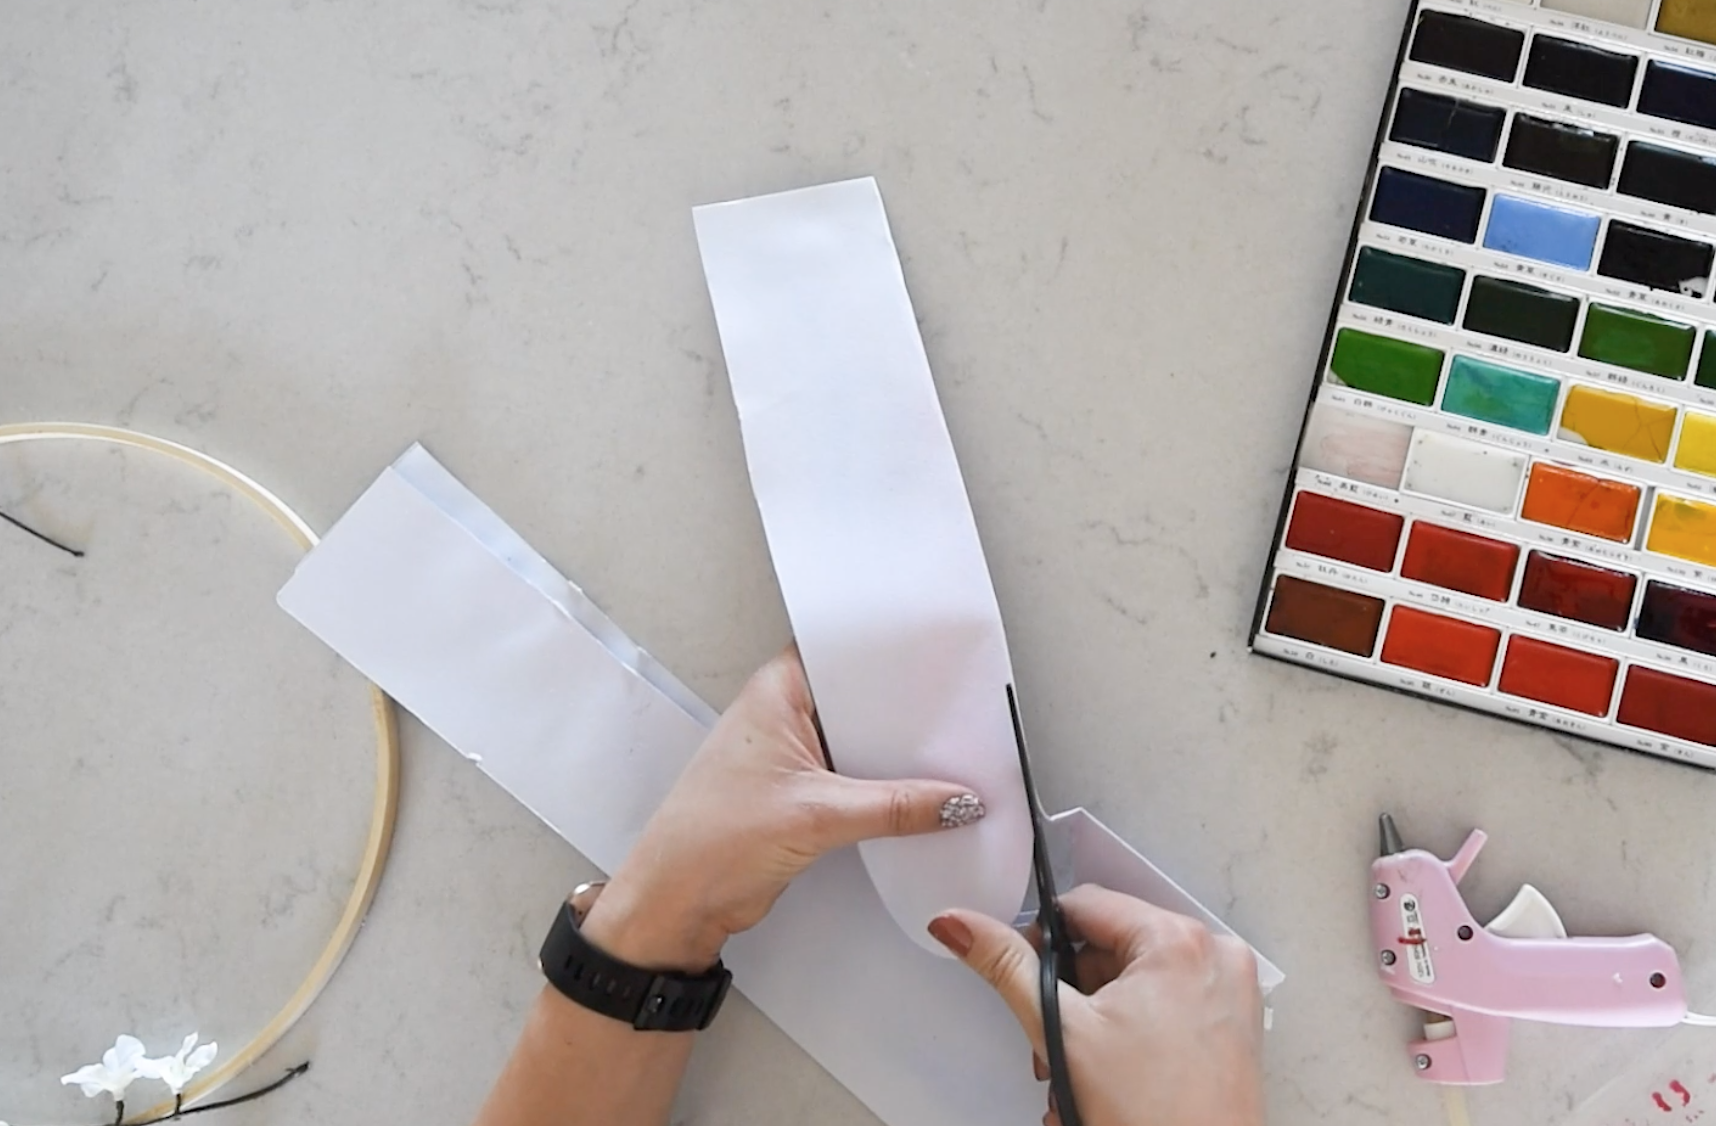
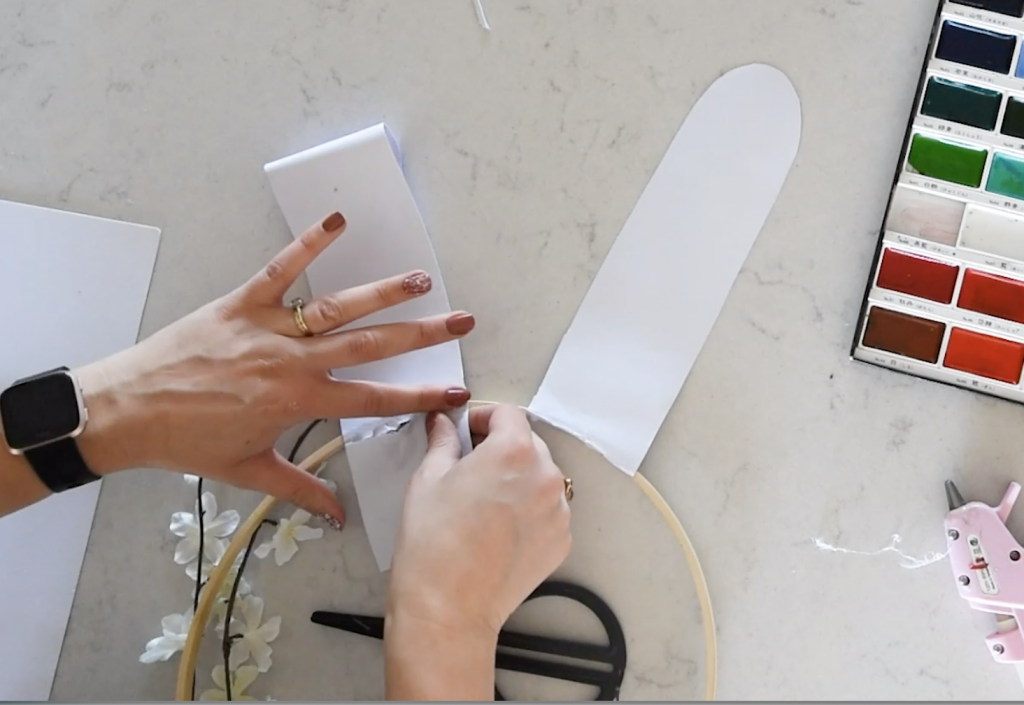
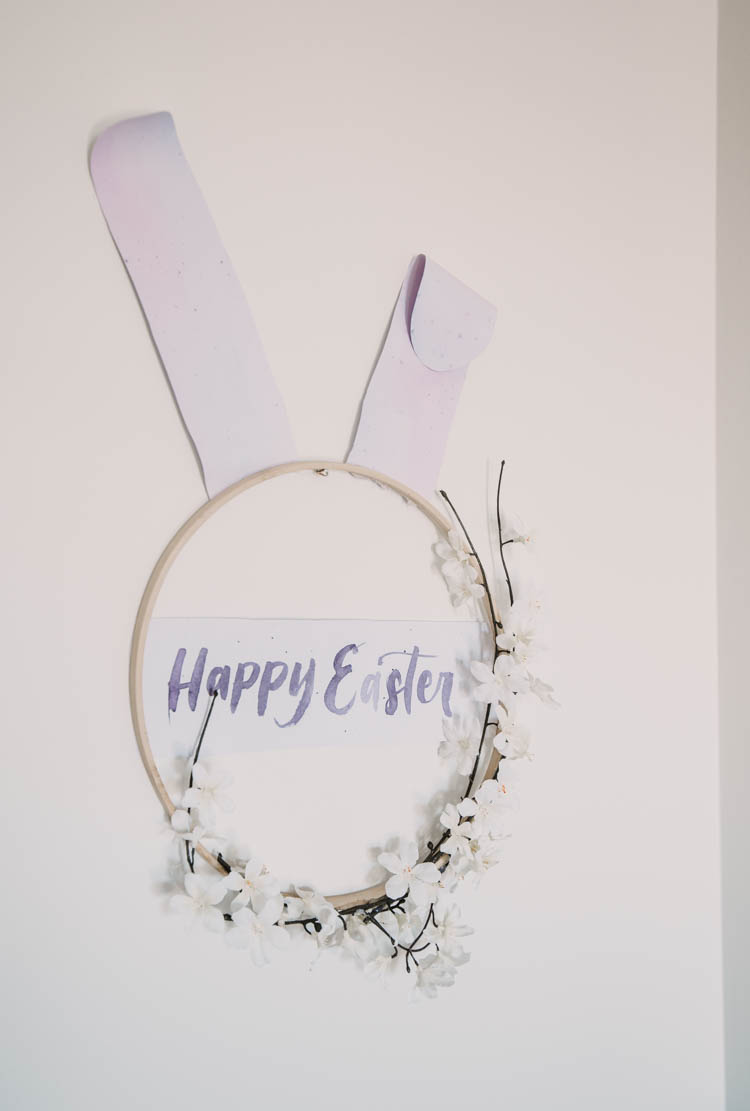
Once your hoop wreath is made- it’s time to give it some Easter touches! Grab your watercolor wash and fold it in half to cut out your bunny ears. I just did this freehand, you just want long pieces with rounded tops. Easy peasy! I decided I wanted one of the ears to flop over but didn’t want it folded. The dampness of the paper from the watercolour made it easy to roll it. I added a watercolour wash to the back of the ear and then glued them in place with my hot glue gun. When the glue was dry, I flipped it over and cut/tore the excess paper from the inside of the hoop.

Adding a Happy Easter banner to a hoop wreath

Adding a Happy Easter banner to a hoop wreath

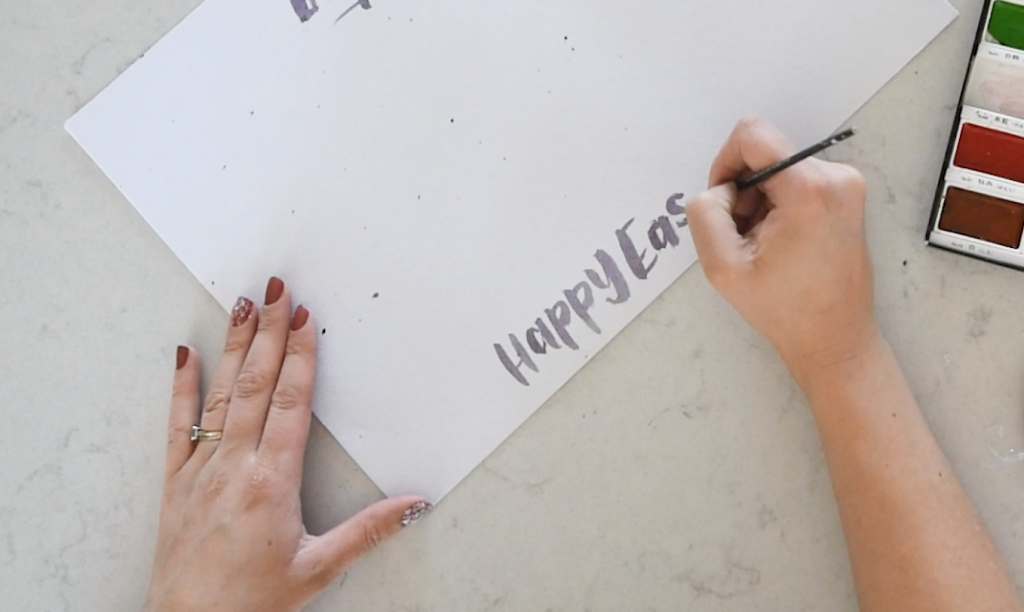
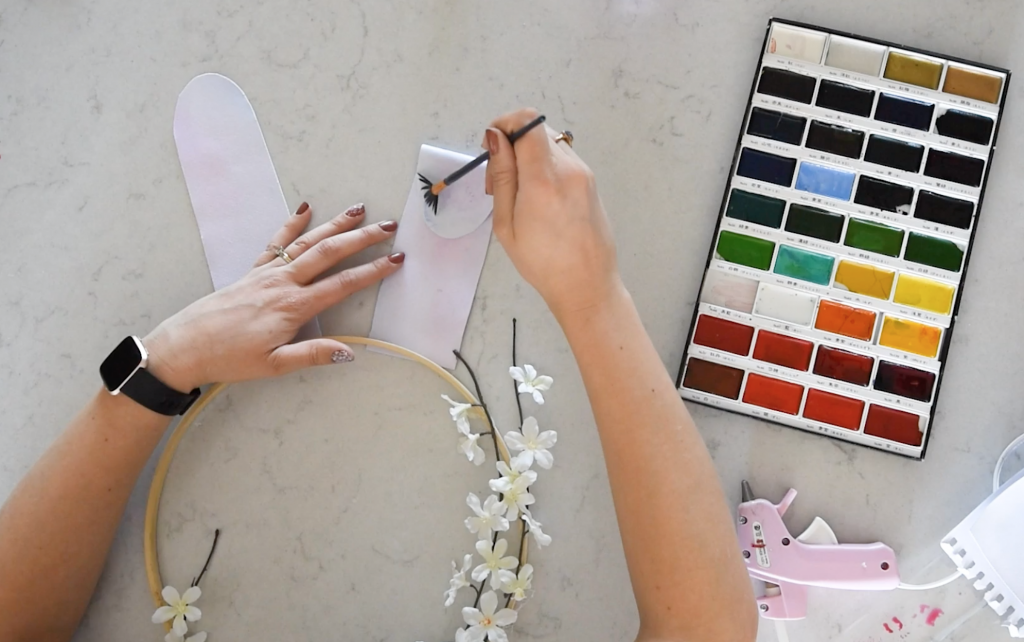
Then I decided I wanted to add a hand lettered banner. I took another sheet of watercolor paper and a small round brush and brush lettered ‘Happy Easter’. I didn’t share too much of the HOW to brush letter in here because I have so many other posts on it. If you’re looking for more tips on brush lettering, check this one out! Then, just cut that to size and glue it, tearing off the excess on the outside. 

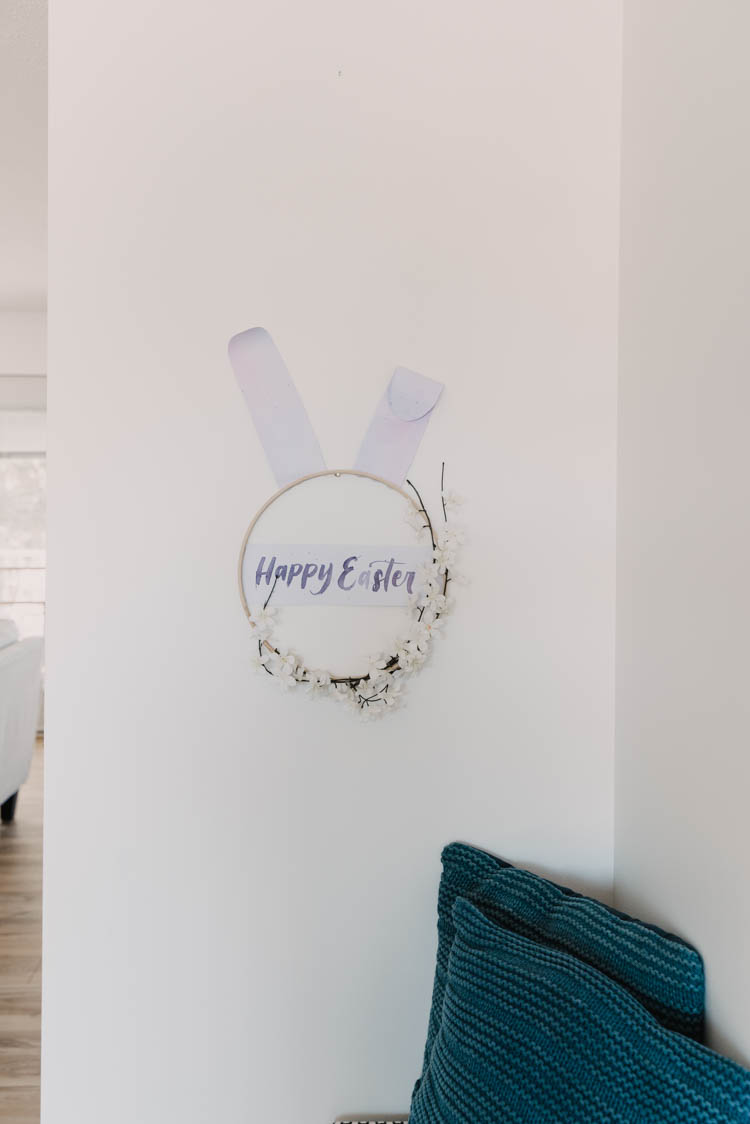
For hanging, I just hung it on a small nail (actually… I use my earrings that I’ve lost matches to lately… I love the shine. They’re like pretty push pins) and used sticky tack to hold the ears up. You COULD attach chipboard to the back of the ears to hold them up but I felt like for a holiday decor piece, this was the perfect simple and cost effective solution for decor. 

Modern DIY Easter Wreath... love this easter bunny hoop wreath!

Modern DIY Easter Wreath... love this easter bunny hoop wreath!

Modern DIY Easter Wreath... love this easter bunny hoop wreath!

I hope you enjoyed this DIY! If you’re looking for more seasonal wreaths… I have a bunch! You can check them all out right here. And if you’re looking for more spring inspiration, you can check out the whole DIY + Decor Challenge on YouTube right here. 

Category: DIYTag: Collaboration, Craft, Easter, Spring, Video, Wreath
Facebook0Tweet0Pin0LinkedIn0
Previous Post: « How to use the print then cut feature in cricut design space How to Use Cricut Print Then Cut
Next Post: DIY Planner Stickers with Cricut how to design and make your own planner stickers! »

Reader Interactions

Leave a Reply Cancel reply

Your email address will not be published. Required fields are marked *

Sidebar

WOOHOO!

Check your email to confirm!

(+ get your freebies + discounts)


Thanks for dropping by!
I’m Colleen: wife; mom to 4 wild ones; and DIY blogger behind Lemon Thistle. You can expect to see rad DIY, modern home decor, renovations, hand lettering and the occasional party on Lemon Thistle. Read More…

email facebook youtube instagram pinterest

Unless otherwise noted, all content and images are mine. Full posts may not be shared without express written consent. But I love when you share! Feel free to share, without altering, one image with proper credit and a link to the original post. All free printables are for personal use only.

Everyone loves proper credit- if you ever notice something improperly credited, please please shoot me an email and I’ll fix it lightning fast.

Find all my policies right here.
This includes my privacy policy, info on the GDRP compliance and information on affiliate links (Including Amazon Affiliates).

Visit Colleen Pastoor’s profile on Pinterest.

colleenpastoor

My house is never this clean
-
DIY + Home Decor Blogger
Mama of 4 👶🏼🧒🏼👦🏼👧🏼
Renovating our 🏠 the DIY way
🖤 Lettering & ☕️
-
✉️[email protected]

colleen pastoor/lemon thistle
I’ve been doing some polls in my stories (thank I’ve been doing some polls in my stories (thank you for your responses!) and one that totally surprised me? 
Almost half of you don’t know I blog! That’s my job, guys 😂 IG is just a fun little part of that! So tell me... is this new information to you or are you team ‘knew that!’? 

Also... Should I do a blogging Q&A? 🤷🏼‍♀️
Happy Valentine’s Day, friends 🥰 Happy Valentine’s Day, friends 🥰
Anyone else feeling the balance between work and f Anyone else feeling the balance between work and family and rest and keeping your house liveable has all just toppled this year? I keep seeing articles about pandemic fatigue and long term stress and burnout and while it’s totally relatable, I really just want tips on how to actually deal with that. I thought I’d share some things that are helping me if you’re in the same boat... and I’d love if you shared your tips in the comments! We could all use them 🥰
-I’ve been going for a walk every day by myself. Even when it’s freaking cold like today, I just bundle. It’s the only time I get truly to myself with no kiddo asking for something and that I don’t have to try squeeze in an email or something else.
-I’ve been putting the instant pot to work and leaning on cheater meals (local soup mixes are amazing), Costco dinners... whatever
- I’m prioritizing friendships with phone calls, zoom games nights and group chats about the bachelor (with matching snacks!)
- I’ve given myself a schedule that has downtime to play with the kids and to read... even when there’s things I feel like I ‘should be’ doing
- I’ve realized exactly how much time I’ve been spending on my phone and that it’s become my response to stress. Have you ever looked up your screen time analytics? 🥴 look at how many times you pick it up in your day. I’m setting app limits for myself and trying to break this habit, but I’d really love tips!
Can you believe that address sign is a DIY?! I'm s Can you believe that address sign is a DIY?! I'm sharing the whole tutorial in partnership with @OfficialCricut today over on my blog! I'd originally made it as a place holder for a metal one but after having it up for 4 months... we totally love it long term! What do you think? Would you try it? #cricut #cricutmade #ad
What are your Sunday plans? Mine are to sit right What are your Sunday plans? Mine are to sit right here for the first half of the day drinking coffee, then the second half of the day it’s to clean this house so it looks like my Instagram feed again 😂
Who has DIY projects on their mind this year?! 

👏🏻CLOSED 👏🏻 congrats @kelseycford ✨
@ryobi_canada and I want to help you start knocking those projects off your list by giving away a new nailer and battery set! #ad 
This tool is what we used for this accent wall and all the trim in our home. It’s the one I used to trim out my built in shelving and add the decorative moulding to my geometric barn door. What I’m saying is this thing is a workhorse and I want you to have one too 😉
To enter:
✨Follow me @colleenpastoor and @ryobi_canada 
✨like and save this photo 
✨ tag some friends who’d love to win in the comments! One tag per comment, each is an entry. 
✨ share to your stories for a bonus 5 entries!

Open to Canadians only this time (sorry US friends!) and not associated with Instagram. Closes Friday Jan 22 at noon PST!
Let’s talk about coffee! This is my coffee ‘st Let’s talk about coffee! This is my coffee ‘station’ and the second photo is my dads! I’m talking aaaall about them over on YT today!
Also... see how nice that fresh silicone looks?! 😉 IYKYK
The hallway is finally finished and I’m so stink The hallway is finally finished and I’m so stinking happy! 

It’s felt like such a long time coming for such a small space. Since we moved in 2.5 years ago, this space has seen new doors and hardware, new trim, new floors... twice😅, we changed the boob light to a pot light and I hated it and now it’s got the most beautiful flush mount fixture I’m in love with (thanks @mymitzi!). It finally got some fresh paint and now frames on walls and last but not least... After this weekend, the new floors look like they were here all along (no door jamb gaps!) which was the last thing really bugging me since our flood last year. 

All this to say that home takes time and sometimes getting it right might take a couple tries. Also- the spaces we don’t really think about (hallways) can totally help a house feel like home with some love (and family photos 🥰)
ps. I partnered with #mymitzi to create a tiktok for This makeover... are you following me over there yet?! I’d love if you popped over and said hi!
It’s done! It works! And I’m calling it a grea It’s done! It works! And I’m calling it a great use of my afternoon the other day. Did you catch the stories? These projects both cost me under $10 by using pieces I already had in my home (yay for scraps!) and one package of drawer slides).
You can find the full video about these two kitchen organization projects over on YouTube in collaboration with my friend @love_create_celebrate and her #scrapsmademodern challenge! But for now... I’m rejoicing this coffee maker is off my counter for good 🎉
Load More... Follow on Instagram

Copyright © 2021 · Lemon Thistle · All Rights Reserved · Powered by Mai Theme