This drab basement rec room got a $100 refresh in this modern kids playroom makeover! Sharing all the DIYs that made this space the cozy neutral dream it is with a hidden dress up closet and lego station.

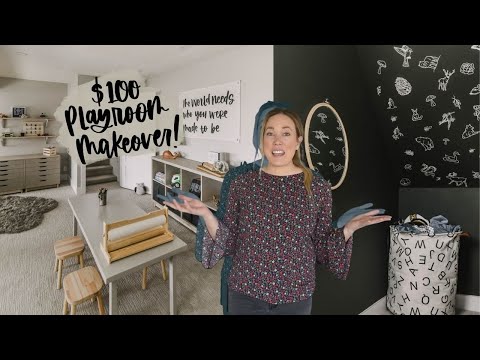
This playroom makeover is one of my favourite budget spaces we’ve created… ever. Over on YouTube, my friend Christina and I challenged each other to make over a space with pieces and supplies we already had on hand, plus a $100 budget (there’s always something you need to complete a space!).
I chose this playroom in our basement. This playroom has seen a lot of changes since we moved in, but it still had so far to go. Let’s take a walk down memory lane before we get into the DIY, shall we?
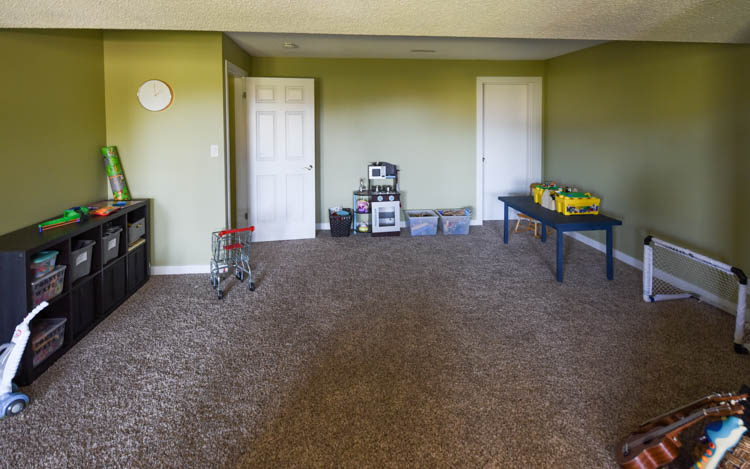
When we moved in and moved our things in- here’s what the playroom looked like. Totally dark green, brown plush carpet and the organization wasn’t working very hard.

I painted part of the room when I painted this mural and added this guitar storage, but left it be after that. Last summer, we had a flood in our house that resulted in quite a bit of the drywall down there being removed and replaced as well as the carpet. We decided to go with a lighter, brighter carpet and fresh paint on the walls. We also closed off the hallway you see in the above photo.

But then… I didn’t finish the space! There’s always something else happening and painting trim down here didn’t scream fun. So this was the push I needed to put some time into this space to get it looking how I knew it could. I love challenging myself with a deadline (and budget!) like this. There’s nothing like a little friendly pressure to get a space done in a hurry.
The biggest change in this space is the furniture but we actually didn’t change any of the furniture out, just updated it! We had quite the collection of IKEA storage that didn’t match. We had a black IKEA Kallax unit, a blue IKEA Alex Drawer unit, and a grey IKEA Alex Drawer Unit. Plus a navy DIY craft table that we’d built for our last playroom. I knew it wasn’t in our budget to replace the furniture, plus it really did work well for the space.
I decided to paint all the furniture to coordinate. To help it look less cluttered, I chose a tone on tone pallet. I’ve had a few suggestions to add colour to this space but I love it without because it’s never actually this clutter free. We have art creations happening on the table, LEGO creations happening on the drawers. Usually a train track or tower of some kind. We have plenty of colour and life in this space without the decor also being bright.

I painted the IKEA furniture with Fusion Milk Paint. It was my first time using it, it’s actually a powder you mix up into paint which is fun! They had sent me a sample pack when they launched this new line so that didn’t affect my budget. I chose the Oyster Bar colour and made sure to sand the furniture lightly before painting. It took three coats to get good coverage and I definitely ran out of paint so only did the three coats on the faces that you will see (the back edge only got two, for example).
I added a Tough Coat finish to the top coat and an oil to seal it and am impressed with how it’s holding up to our kids months later! If you’re thinking about painting furniture- while the Milk Paint does look beautiful, I definitely prefer working with Fusions Mineral Paint. It only takes me two coats and I can skip the mixing. I used this on the boys bedroom furniture if you’re curious to see that one.


Once I’d finished painting, we brought them back downstairs and they still looked… a little blah. I decided to add some bases to them and this is really what made me love them! I used dowel and a poplar 1×3 for this (this was a part of my $100 budget). I braced the corners and used dowels with wood glue to secure the legs. I’m sure there’s a more effective way to do this, but this worked well for us and is holding up! We screwed the two smaller IKEA Alex drawers together to keep the kids from pulling them around since they were used to them being on wheels.

The play table was painted with our vanity paint (Grey Mist by Behr in an Enamel). It’s a very similar colour but as I’d mentioned, we ran out of the Milk Paint so were using what we had. Here’s some more of the best greige colors.
We also had to paint all the doors and trim (we’d replaced doors this past year too! They had been sitting in our garage waiting for us to install them). I had plenty of help from my toddler on this part.

Okay, let’s keep talking storage before we get to the decor! Around the corner from the LEGO drawers is a small under stairs closet. It was totally useless before, but somewhere along the way, my kids had dragged their bin of dress up clothes in here and it became a changing room. We thought that was so fun so we ran with it.
We took off the door to this closet and trimmed it out, then we painted the space this Dark Olive colour (by General Paint, it’s very similar to Black Bamboo by Behr). I let my daughter pick from all the paints that we had and she chose this dark green so that we could do a fun woodland animal type theme for the faux wallpaper on the ceiling. I was honestly so surprised. We had pink, light blue… and she chose this! I actually love it so much, it’s definitely more my style than the other options, but I wasn’t expecting it from a 7 year old! The kids helped paint these walls, it also took three coats but I think that’s due to the painting more than the paint ;)


Once the walls were painted, we added the faux wallpaper to the ceiling of the space. The kids helped pick which animals and install it. You can see a full tutorial for that right here. We also swapped out the bare light bulb for this gorgeous pendant from a local lighting store. Essence Lighting has such beautiful pieces, when I saw they were clearing things out on their IG stories, I snagged this one for $25 in a hot second!
In here, we also added those wooden dot hooks. Those are from CB2 years ago but they actually still carry them. We had bought them for our last house mud room, you can see that here. I hung one of my hand lettered pennants in here for them as well. It’s the same design as the bathroom art upstairs in our house.
We had ordered this hamper a couple years ago for costumes, it’s the same one we have in the Boys room, it’s held up so well to their use and it’s so cute! And that mirror was a DIY I’ve had in our storage room since we moved! You can see the tutorial here.


Out of this little nook, back into the playroom, we decided we’d love to put some shelves above the LEGO drawers. The kids love to build creations and want to keep them safe, so this is the perfect place for them to display all of those. I used shelf brackets we’ve had for years from our utility room and old bathroom. If you have shopped at IKEA forever, you might recognize these- they used to sell them for $1 a piece! I painted them with the wall paint to help them blend right in.
As for the shelves, I thought I had plywood left from the boys bedroom desk, but Shane reminded me it got tossed in the flood. I thought for sure I’d break my budget getting more (have you seen lumber prices lately!?), but after wandering the hardware store aisles, I found pressboard shelving with a wood pattern meant for closets for $18! The piece was long enough to cut into two shelves and I was able to use the edging tape from the boys desk to make the edges look finished. I actually turned the round edge of the shelving towards the wall and lined the edging tape up on the top edge, but it does hang over the bottom of the shelf a bit. It makes them look thicker and more modern.


The LEGO man storage on that shelf was also a DIY. I used a wood panel from the Dollar Store I had leftover from my Dollar Store DIY challenge. You can see a DIY tutorial to make this minifigure LEGO storage here. I love seeing which they choose to swap out and create, it’s such a fun piece of decor that lets them show off their favourite LEGO people.


Over on the other walls, it’s all DIY decor! The large photo canvases with stitching and paint were a DIY I made last summer. You can see the tutorial for those photo canvas crafts here. I love how grouped together they make such an impact.
Above the toy storage, I wanted to do something large and was deciding between some abstract art I would have had the kids help me make or a large flag like this. I left it until the last minute so decided on this flag so I could make it myself… in the middle of the night ;) I chose the quote ‘the world needs who you were made to be’. You can see a tutorial for this handlettered DIY hall hanging here.


It’s made with a piece of curtains I had cut off when hemming (the bay window curtains), so the material cost me nothing. I hemmed the raw edges and hand lettered the quote, ‘The world needs who you were made to be’ on my iPad. I cut that out of heat transfer vinyl with my Cricut Maker and after weeding it, I ironed it on. It looked so good but definitely reminded me of one of those muslin baby blankets that were a trend to hang on the walls a couple years ago. I dug in my craft stash to find rivets from this craft (I actually hosted a workshop for!) years ago. These rivets totally bring the piece together.
I loved this DIY so much, I recreated it with a Winnie The Pooh quote for my friend’s nursery makeover I shared a couple weeks ago (this playroom was done back in March, I’m just slow to blog about it!). For hers, I used a flour sack tea towel to save time hemming fabric. See that Winnie the Pooh Nursery here!


Other than that? I used the whale lamp (discontinued) we have been storing since we moved, from this whale themed nursery and the faux fur rug from our last house bedroom (it looked so so very small in this bedroom). We’d bought the little stools for under the craft table from IKEA a year or so ago, but they’re still available as well. The little ‘Today is a Great Day to Learn Something New’ art is a free printable I shared last year – it’s available in 3 colours, find that here!
That’s it! It was such a simple makeover in a lot of ways, but it was also so much work. Budget makeovers usually are a bit more work, but they’re so darn rewarding! This transformation for only $100?! I’m just so pleased. I’m already brainstorming what space I could make over next for a small budget ;)
LIKE IT? PIN IT!

 Popsicle Printable hand lettering practice sheet
Awesome content and room makeover that every home owner can refer and follow it.
I am so inspired by this reno! I want to copy it exactly! Can you tell me more about the carpet? Where it was from, and the process of replacing it?