Looking for gift card ideas for men? Here’s a fun one you’ll want to record the reaction to! This DIY Gift Card Wrapping Idea for Fathers Day gets kids involved and makes a last minute gift for dad so much more fun.
A few years back, I made a gift guide for Father’s Day full of things I thought weren’t lame. In that post, I talked about how I don’t love to gift a gift card because it’s no fun to open. I really DO love to give gifts but honestly- we have more than enough stuff in our home and we’re saving up for a few home projects that will need some new tools.
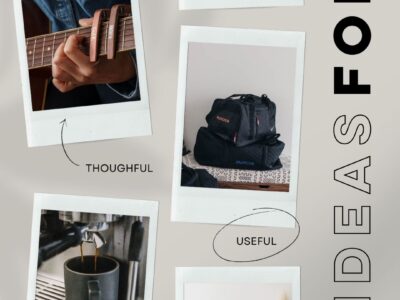
Sometimes a gift card is really the most thoughtful gift. For my husband, that’s a Home Depot Gift Card right now. But giving a gift card for father’s day in an envelope isn’t very much fun.
So here’s a fun gift card presentation idea for you to steal if you’re looking for creative gift card ideas for men as we head towards Father’s Day!
This post was originally published in 2017 in partnership with Home Depot, it was updated and republished in 2024 to include affiliate links at no cost to you. See all of my policies here.
We wrapped a Home Depot gift card in this fun gift card box, but if that’s not the perfect gift card for your giftee, you could gift any different gift cards or gift voucher. Whether it’s basic mastercard gift cards, a netflix gift card, xbox gift card for the gamer, apple gift card (or google play gift card!), starbucks gift card for the coffee lover(yes please!), or even print off a digital gift card to pop in the box… there’s endless options depending what’s on their wish list.
This makes it a really great idea for last-minute gifts but more fun than a note in the card saying what you’re getting them! Plus, you’ll have them guessing as they unwrap their crate. It would also be the perfect way to wrap up experience gifts where there’s no physical gift to open up- just gift vouchers of some kind. Really, these gifts that give us some fun memories are the best gifts, especially for Father’s Day!
I know I’m writing this post with Father’s Day in mind and talking about gift card ideas for men, but I know so many women and even kids who would have a kick out of receiving this creative gift card box. Even if it’s a last minute gift, this creative gift card wrapping shows you’ve put a little thought into making it fun and memorable for the gift recipient.
Actually, any of my kids would really love to receive this. My son has been making his gifts that he brings to birthday parties extra difficult to break into with duct tape and layers of protective wrapping. So if you’re looking for a gift ideas for tween boys… maybe give this a go!
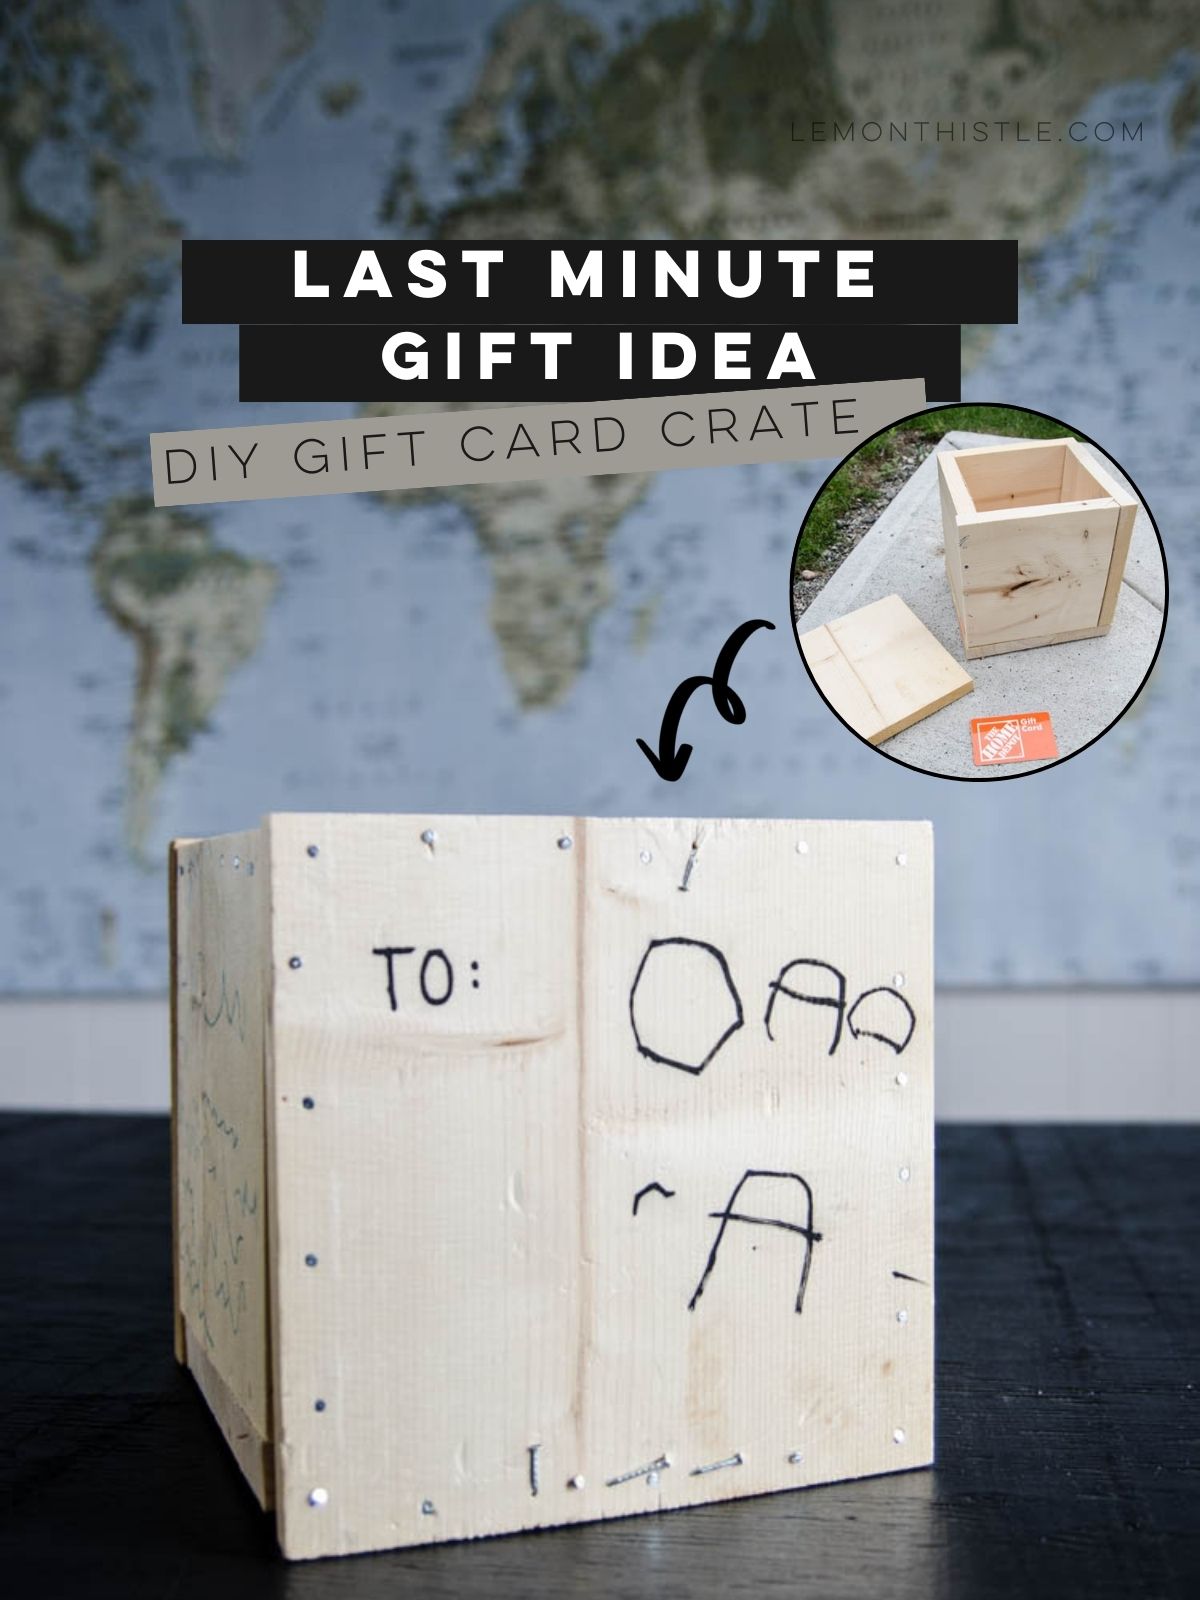
How to make this DIY Gift Card Box
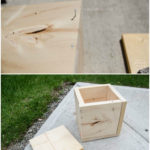
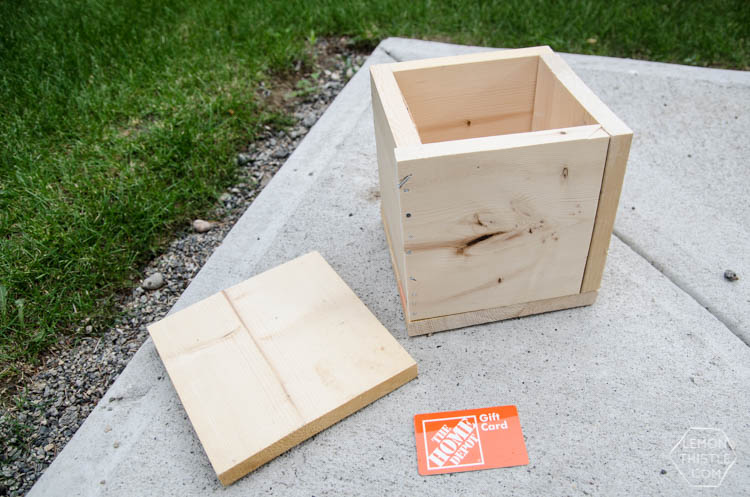
You can easily use scrap wood for this quick gift card box if you have it on hand like I did, but if not, this project uses a 1×8 board cut into square pieces.
This was the right size for a gift card, but if you wanted to package up a small gift, some snacks to go with a movie gift card or a luggage tag to go with travel gift cards… you can make this crate a custom size to make sure your gift is the perfect fit. Just be mindful not to put anything in this crate that could be easily broken because you never know what methods they’ll resort to as they work to open this gift card crate!
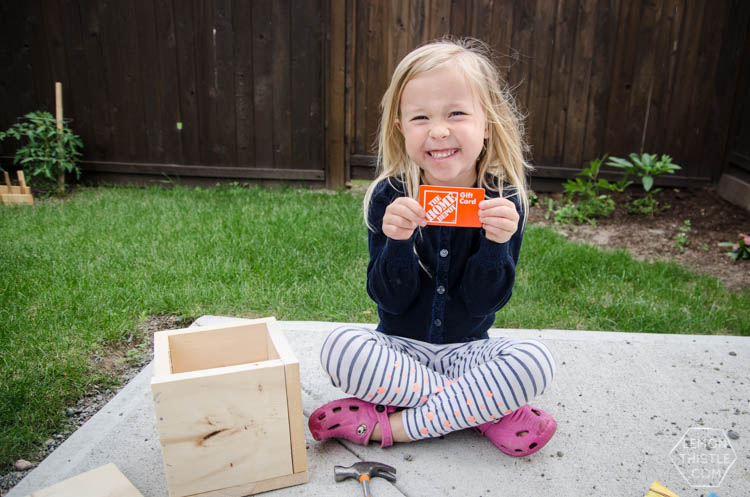
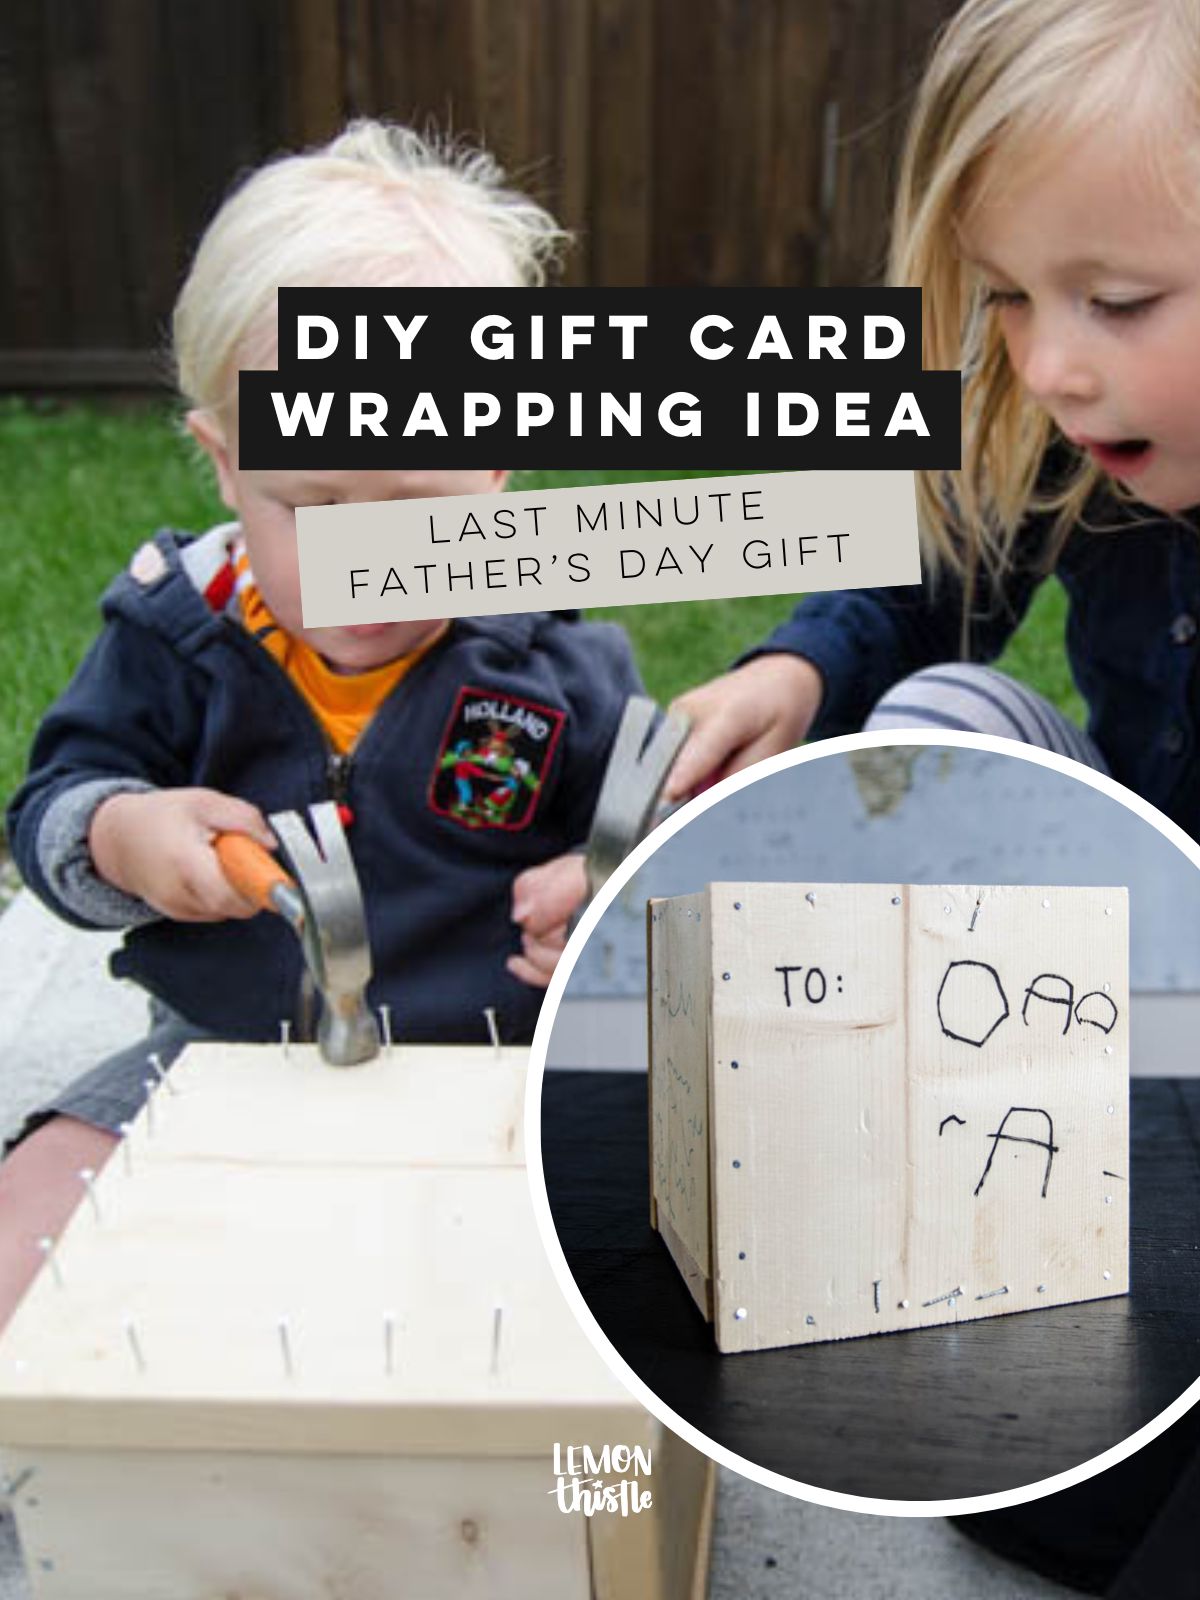
You’ll also need some nails and a hammer… but that’s it! I always like to make sure the kids are a part of whatever gift they are giving. So the kids and I teamed up and made it a bit of a challenge for him to get his hands on his gift this year with this DIY Gift Card Crate!
This gift card crate would be best gifted with a small pry bar if you aren’t sure that he has one. A small pry bar like this is so helpful in DIY projects, honestly it’s one of our most used handheld tools whether we’re replacing baseboard, working on a deck build (it fits in the little gaps to help pull boards tight!) or disassembling a pallet. If you want to see his wheels spin for a minute, gift it as is and let him decide how to break into this DIY gift card box!
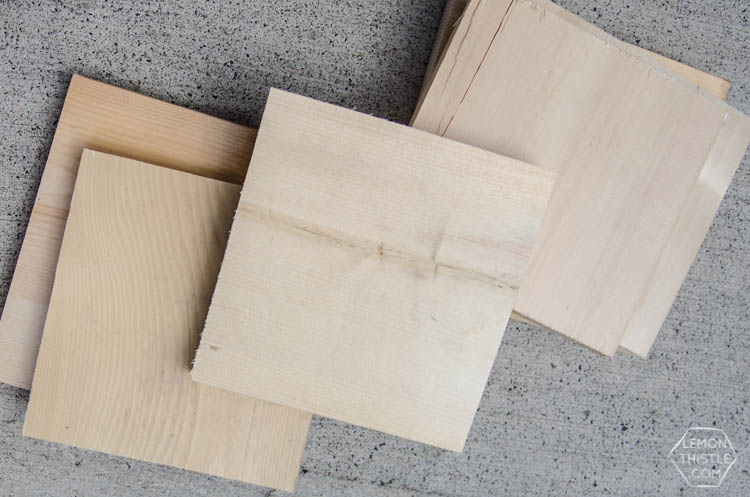
Making this DIY box for a gift card is really simple! Even if you’re not one to use tools, you can head to Home Depot and ask for a 1×8 cut into pieces. They’ll actually cut it for you, I think they have a limit of how many cuts they’ll make or they’ll add a small charge for extra cuts. This is a great way to get wood for your DIY projects if you’re just starting with DIY or don’t have access to a saw!
Since the nominal width of a 1×8 board is actually 7.25″, you can get 4 pieces cut that length then two cut to 5.75″.
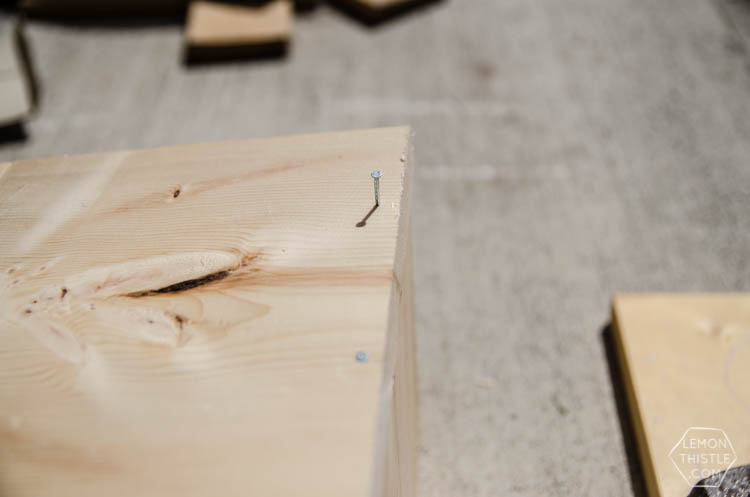
When you get them home, you’re just nailing them together! You can use any type of nails, we used some finishing nails we had on hand but whatever type you choose, just make sure that they’re more than 3/4″ length since that’s the thickness of the boards.
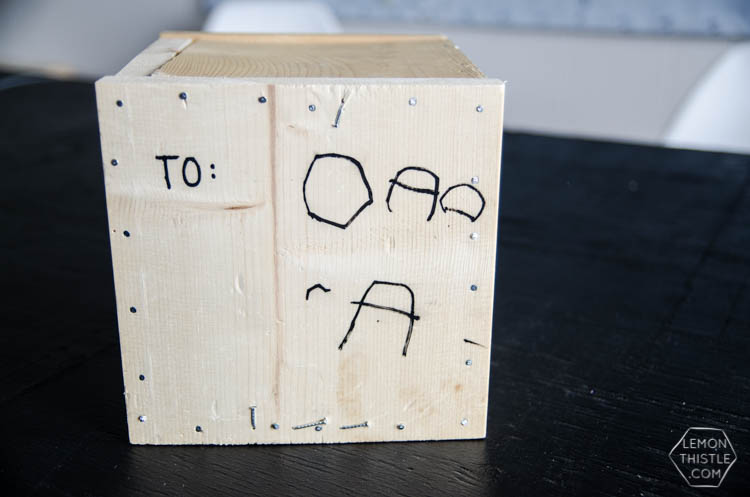
We used a LOT more nails than you need to since the piece of wood we had was a tiny bit warped and half the nails didn’t get nailed in quite straight- but the hammer operators were sure cute, so it was worth the patience ;). It also makes watching Dad unbox this gift card even more fun as he decides which nail to try next since half of them weren’t actually holding anything together!
I had planned to build the box myself and let them hammer on the lid, but they were too excited to help, so they helped with all sides (which took a reaaaally long time).
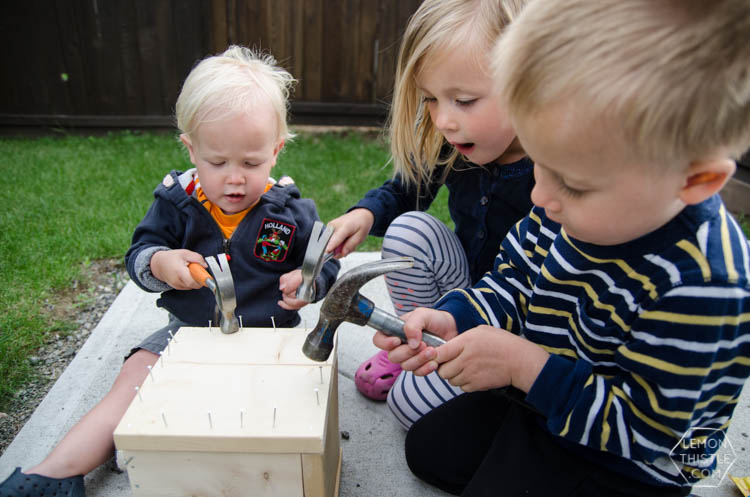
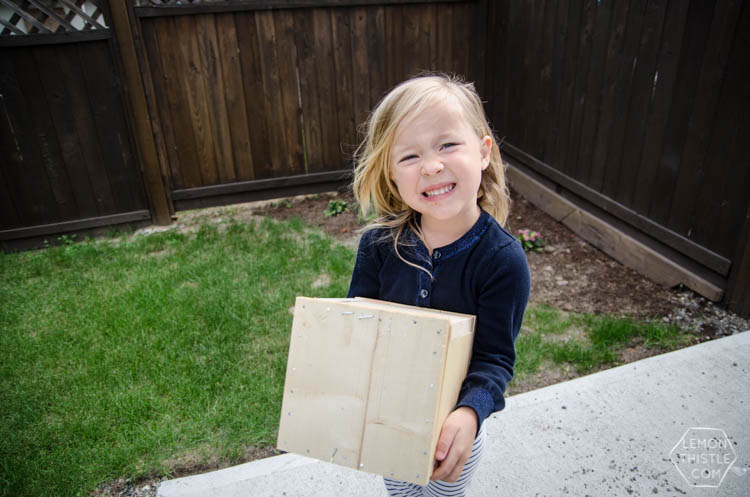
If you are having kiddos help build this and they are young enough that they need a little help or if this is all new skills for them, I found it was easiest to nail the corners in myself, then to start all the other nails and let them go at it, they totally loved it! My daughter was actually the star of this operation, little miss stuck around until it was completely finished and nailed the most out of everyone.
Make sure you take photos of the kids building this gift card box, that will be a great memory to look back at alongside of photos of your family member opening the gift card!
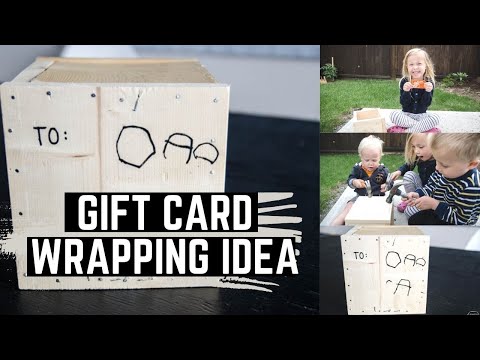
I also shared a short video of how we made this DIY gift card box on YouTube (have you subscribed?!), I’ve added that in below for you.
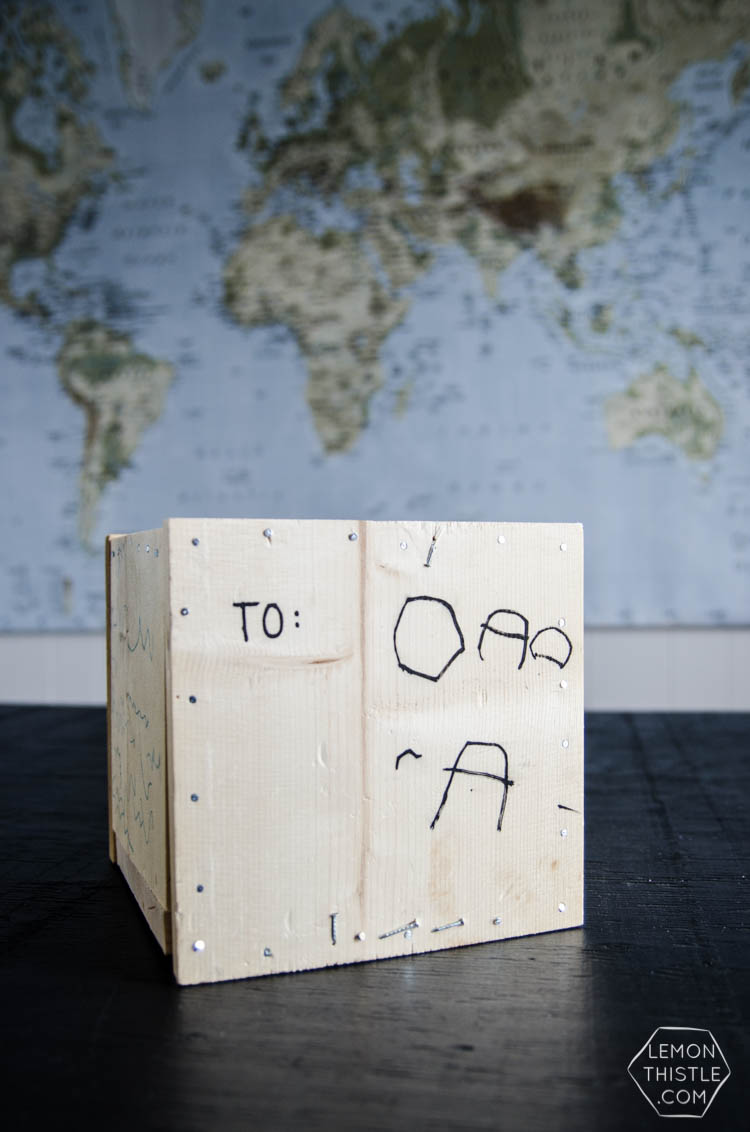
When your DIY gift card box is all done, you could gift it as is, give it a nice stain to make it look classy which would really leave the giftee puzzled as to what you’ve given them… or you can give it to the kids to decorate for dad or grandpa or whoever is on your gift list.
I let my kids decorate this gift card crate. I took photos after they wrote his name on, but they decorated all sides with all colours within minutes after. If you were doing this ahead of time, you could let them paint the box as well, we just used sharpies as an easy way to decorate this in a jiffy to make it a quick last minute gift idea for Father’s Day gift cards.
This really is such a fun gift card wrapping idea for Fathers Day, I am going to have to pull out this great gift idea for my dad too one of these days! Tell me… do your family members love physical gifts or is a perfect gift usually a gift card?
If you make one of these, I’d love to see a photo! Share with me on social media @colleenpastoor or by email colleen@lemonthistle.com
Pin this for later!
Don’t have time to take on this gift card wrapping idea right now? Pin this so you can come back to it! Plus, pinning or sharing on FB helps this post reach more people which helps me be able to keep sharing with you. Thank you!


 40+ Best Neutral Rugs For Your Home Decor in 2024
Leave a Reply