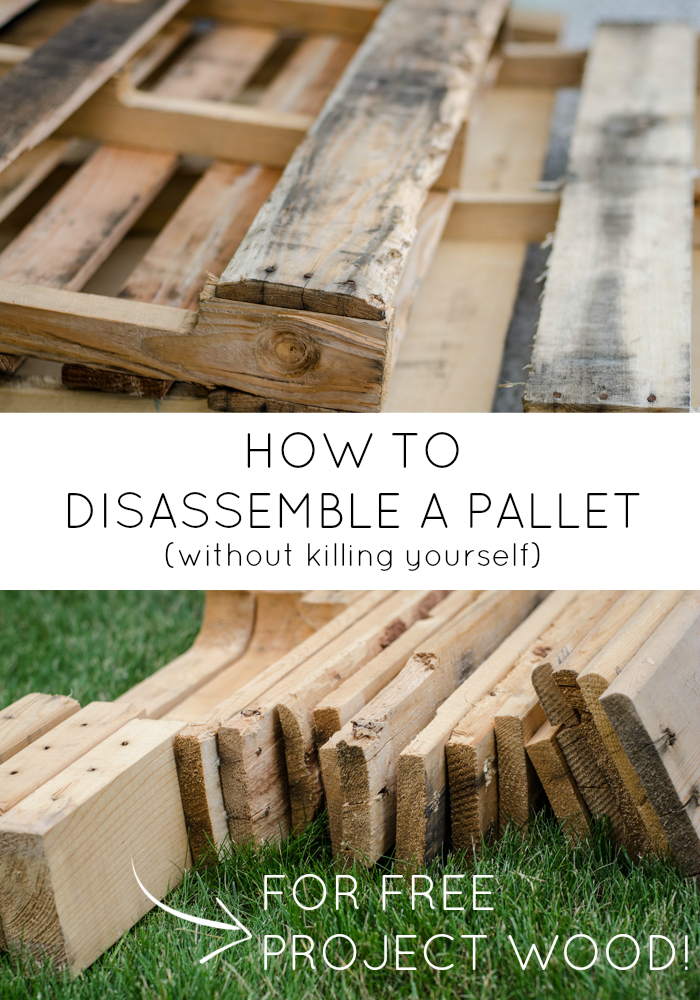
Curious how to disassemble a pallet without a saw- this video tutorial will walk you through tips and tricks on how to take apart a pallet without hurting yourself… using NO power tools! Pallet disassembly for free wood can be tricky but these basic tools can make it easy to dismantle a pallet without a saws-all.
Today I’m sharing a Video DIY tutorial- how to disassemble a pallet for free project wood (without killing yourself). I know, I know- it’s not the most fun DIY, but it’s gotta get done to get to the fun part!
I’ve been asked how I disassemble a pallet more than anything else- by friends (if you walk by the side of my house, I’ve got a few waiting for the treatment) or by readers after I shared my Canadian Flag and Giant Party Chalkboard. And while it’s not rocket science… it can be hard work!
In this post, I’m showing the easiest way that I have found to disassemble a pallet without power tools. Why? Not everyone has power tools- the space to store them or the cash to buy them. And let’s be honest- one of the most appealing parts of pallet projects are not the beautiful clean wood… but the FREE WOOD! And if you want to do a cheap/free project, you probably don’t want to be buying fancy power tools.
This post contains sponsored or affiliate links which help support Lemon Thistle. As always, I’ll only recommend things I love, love. Full disclosure here.
So have you ever tried to dismantle one of these beasts? You’ve found the perfect inspiration for a pallet project on Pinterest, so you drive until you see a stack and stuff it in your backseat only to get it home and realize that they are SUCH a pain!
But that’s the price of free. So why are they such a pain?
What Makes Pallets so difficult to disassemble?
Those nails can be rusty, spiral, or ring shank (they have barbs). And since they’re made out of scrap wood- some of the pieces could have old nails that have just been bent over at the back.
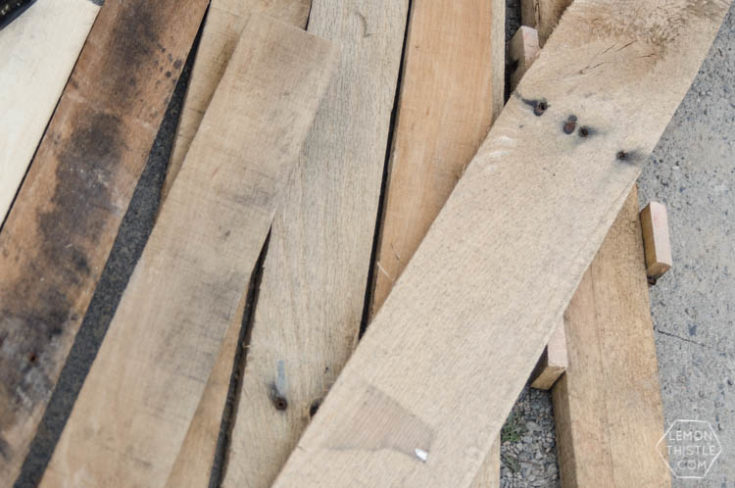
And the wood? It’s scrap wood, so it can have bark, hard knots, and most frustrating of all- it’s dry so it cracks so easily!
But it’s worth it!
Why do people like pallets for diy?
Free project wood, guys! Not only do you get the rustic looking wood from the front and back of pallets (what we see in most projects) but we get the supporting pieces which are basically 2 by 4s that are notched out for a lift.
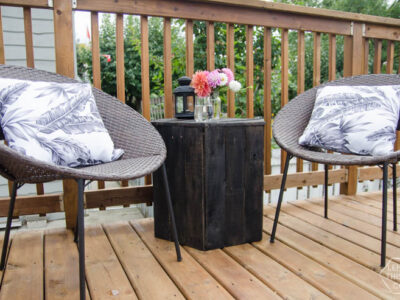
These are awesome if you’re building a piece of furniture for the supporting bits that you won’t see. I do that in this DIY end table.
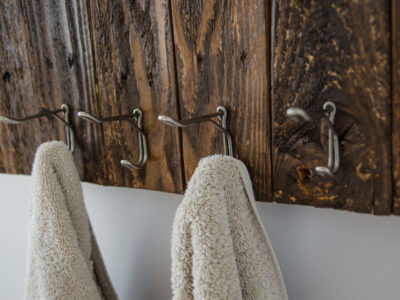
Now that we know why we have a love/ hate relationship with these guys… I’m going to show you what I do to get those suckers apart. And if you were wondering… this particular pallet was turned into a rustic towel rack (even in my finished bathroom renovation, this thing gets most of the compliments!)

*UPDATE* If you’re doing a large amount of projects, use a saw. If you’re not- or if you’re using pallets because you’re looking for a cost effective project (and a sawsall isn’t in your budget) then use this method. We lived in an apartment with limited storage for five years and only had a power drill, hammer, and pry bar- so this is what was best for me! And as for pallets not being the cleanest type of wood… we know, but it’s free and sometimes that’s the winning consideration. As with any DIY or project- do so with caution, at your own risk, while wearing safety glasses :)*
Like video tutorials? Subscribe to my YouTube channel for more!
How long does it take to disassemble a pallet without power tools?
Just so we’re realistic about this- it doesn’t take two minutes for pallet disassembly, it takes about 45 minutes.
I’m sure you realize that, but I thought I’d just make sure. I don’t want anyone coming back upset that it took them more than a few minutes to take apart a pallet without a saw.
Tools used for pallet disassembly without a saw:
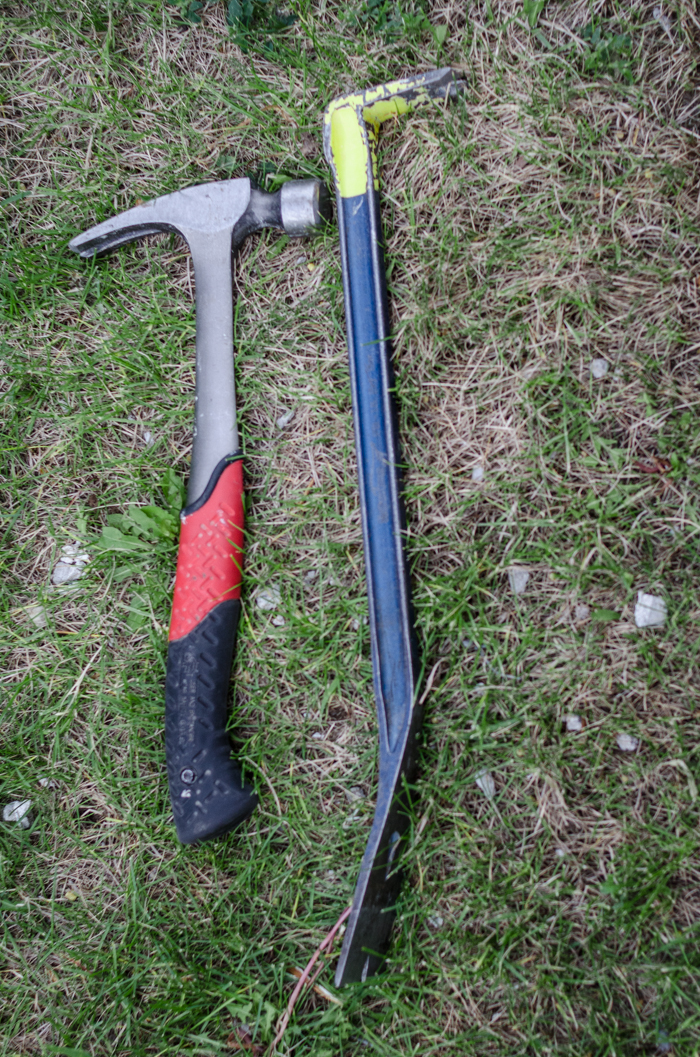
The two main types of tools you can use to make disassembling a pallet easier are a hammer and a pry bar. I’m assuming you have a hammer, but if you don’t- my papa always used to say a Plumb Hammer was the best and after using this one and so many others… I’d agree it’s worth the few extra bucks ;)
Okay, so in the video, you’ll see two different types of pry bars. One is a small pry bar![]() (shown above)- I love this thing. This one is great for getting between the pieces of wood. You’ll notice I tap it in with a hammer, then use one hand to hold it in place, and the other to hit it with my palm to rock it loose. It might seem a bit slower than just muscling it- but I won’t be cursing by the end if I do it this way.
(shown above)- I love this thing. This one is great for getting between the pieces of wood. You’ll notice I tap it in with a hammer, then use one hand to hold it in place, and the other to hit it with my palm to rock it loose. It might seem a bit slower than just muscling it- but I won’t be cursing by the end if I do it this way.
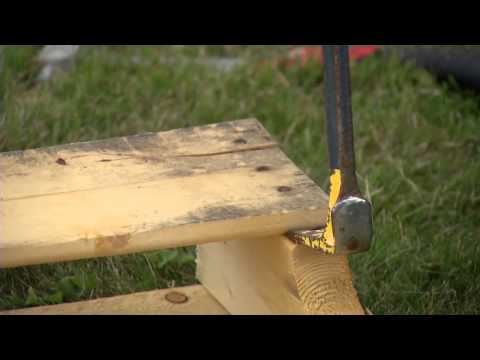
The other pry bar is a nail puller or claw bar.. This one gets hammered in right under the nail to pull it up. This is great for looser nails or if you can’t get any leverage with your pry bar. I use the same technique to rock the nail loose. The other plus to tapping it loose instead of just pulling on the pry bar is you’re less likely to have cracks in the wood when you take apart a pallet.
Theresa shared this tip as well- To add leverage pulling out the LONG nails, put a block of wood under the heel of the hammer as it keeps the nail straight. A bent nail gets harder to pull out because of added resistance.
*UPDATE* Since writing this, I’ve gotten my hands on a Mini FatMax Wrecking Bar![]() and it’s my new best friend. If you need to go out and pick a pry bar… this will be your guy to help in pallet disassembly!*
and it’s my new best friend. If you need to go out and pick a pry bar… this will be your guy to help in pallet disassembly!*
Tips for disassembling a pallet by hand:
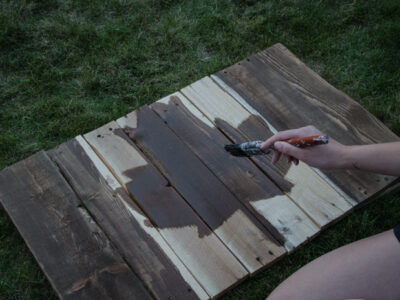
Something to keep in mind- I always prep my wood before I use it in a project. That means I sand it and clean it, so don’t worry too much if you get some splinters around your pry marks- you can sand those out.
Other than that, I did want to make a note about safety. This post was written when I was dipping my toe into DIY. Please choose to wear close toed shoes, use safety glasses and work gloves when working with tools, nails and wood like this :)
How to Disassemble a Pallet by Hand
Materials
- Salvaged Pallet
Tools
- Hammer
- Pry bar
- Nail puller
Instructions
- Tap the flat pry bar between two pieces of wood using the hammer. Rock back and forth to create space. Do this at all the points on one of the pieces of wood.
- Switch to the nail puller and tap that under the nail heads you've loosened. Pry the nails out. Stubborn nails may need to be removed by hammering the nail puller more into the board, these marks can be sanded out.
- Repeat for the remaining boards until the pallet is disassembled.
Notes
Take care to wear safety glasses and work gloves for this project.
Recommended Products
As an Amazon Associate and member of other affiliate programs, I earn from qualifying purchases.


I hope you enjoyed this tutorial on how to disassemble a pallet without a saw! If you have some pallets sitting to be used in DIY projects, here’s some tutorials that I’ve shared over the years using pallet wood! You could make so many more projects with pallet wood. Might I suggest DIY Yard Dominos?

 You’re Invited! Introducing the Halloween Cut File Bundle
So needed this! Sharing on Facebook! Thanks for linking up at Your Designs This Time!
Thanks so much Amber! I totally appreciate the share :)
To add leverage pulling out the LONG nails, put a block of wood under the heel of the hammer as it keeps the nail straight. A bent nail gets harder to pull out because of added resistance.
Yes! I definitely do that now and didn’t think to add to the post- adding that in there for other readers :)
You make it look so easy! We ended up cutting ours apart with a saw, cutting through the screws. Like a bad blogger I haven’t used any of it yet, probably because I still have to remove the portion of the nails that were left in. I need a personal training session on this apparently!
That would work too! Probably a bit faster than this too… did you have a bunch of waste to deal with?
I have a pile of it sitting to be made into something too… Always be prepared, right?
We also cut ours because we like the old nails in our projects. If the nail comes out then we are ok too as we will use that on a project that we may not want nails to show. I think it. Looks awesome with the nail heads showing
The old nails can look so cool!
I remove the nails and fill the holes with putty or sparkling. Leaving the nails behind might lead to the rust bleeding thru the paint
yes, I always take nails out too! Thanks for the tips Stacy
Hi Colleen- Saw this over at DIY by Design and would love for you to link it up to my party Friday Favorites that goes live tonight! Great blog too!!! laura
Thanks Laura! I’ll head over and check it out :)
I’m so glad you share this at Frugal Crafty Home Blog Hop! I have a pallet that I’m saving so I’ll have to remember this when I’m ready to disassemble it! I would totally be the kind of person that would get really injured taking one of these apart! Pinning this now!
I’m pretty sure I bruised my hand really bad the first time I disassembled one, so I get it! Good luck and hope this helps- xo
This looks fun! Thanks for sharing this!
Wow this is awesome information! I have always struggled with this. Thanks so much for sharing. I’m stopping by from the DIY Inspired link party and I’m glad I found your blog. Pinning this and following you on social media!
Have a great week!
Shelly
Thanks so much Shelly! I really appreciate it… hope your week is great too :)
I love the PALLET Post, its very unique and there is so much you can do with the wood! Love if you can share this on my Fabulous Friday Party Thanks Maria
http://www.simplenaturedecorblog.com/fabulous-friday-party-3/
Don’t know if it’s just on my ipad browser, but this comment form has no labels!? Just 3 unnamed short fields followed by a text box. I am only guessing which field is for my name, and email etc, and hope I didn’t just publish my email.
I Ijust had a look at your vieo, and while you do a god job of getting a pallet apart without a reciprocating saw (sometimes known as a sawsall),I have to say, that if you are doing this on any sort of regular basis, it is WELL worth it to invest in a reciprocating saw. As it turns a 45min (as you said) job into approximately 10 mins.
I use a mallet first and give the joins a good wallop with that to loosen them up. You need to have a little space between the sections of wood, so that you can easily slide your saw between then and cut just the nails. If it takes more than 2-3 seconds to separate each section with a saw then you probably aren’t just cutting nails and may need to loosen things up with a mallet first. You can also use a hammer, but a mallet does a faster, better job with less effort and leaves less indentations in the wood.
For anyone who is planning on breaking up more than one or two pallets, a reciprocating saw is well worth buying. It’s also a handy tool to have when making whatever you are planning to make with your pallet wood.
Also, on some pallets, whacking the top of the blocks that are used as supports, with your mallet, is useful to loosen them up when trying to get them off those last few planks of wood.
Seriously though….get a saw…. When you do you will ask yourself why you waited so long to do so. Then get a mallet and some blades which cut both metal and wood, so you aren’t changing them all the time.
I don’t bother removing most nails just cut them off with the saw. The ones I do removed I do so if they are loose or short cut off pieces that tend to stick out and catch when sanding etc they are usually easy to get out, by just hammering the wrong side of the name, or taking another nail, sticking it into where the end is sticking out and tapping it with your hammer to push the nail out the other side. On the pallets i get there are usually loads of nails which have been sunk down into the wood, so your u have to do this first anyways to be able to get any tool underneath the top of the nail to pull it out,
Hi Kim, Thank you for the comment! I am not sure what is happening with the comment form, but you have your email in the right place! My site is being moved to a new server right now so that could maybe have some glitches with it. It is a bit time consuming, but if you don’t have storage for a saw, or are looking to create pallet projects because there’s no cost (and don’t have the funds to buy one), this is the best way I’ve tried!
We’re working on a pallet wall for our basement and now that we have a house with a yard (and shed), we’ve invested in a saw to do exactly what you’ve said!
I think I just commented on about the exact thing you are saying. Using a saw is the way to go.
I tried that, but I have MS and limited strength in my arms and hands. I got a hold of my husbands reciprocating saw, bought some “deconstruction” blades, and I just cut through the nails. Then I tap out the nail pieces with a little pick and a hammer.
Thanks for the comment Krista! We’ve been using a saw on pallets for our basement pallet wall. With limited space in our previous apartment, our tools were limited (as was our budget!) so we stuck to a power drill, hammer, and pry bar. A saw is definitely handy.
Please be careful when working with these pallets! First of all they are very dirty (even if they are supposed to be cleaned), wear safety goggles. Our son was taking one apart, forgot his safety goggles and a piece from the pallet hit him the eye. He lost the sight in that eye. The foreign object was tested in a lab and had rat feces on it.
Hi Bon, I’m so sorry for your son’s experience! Safety glasses would definitely be a good idea. When we work with a saw we use them ever time, I haven’t working with a pry bar, but will think twice next time :) Thanks for the comment.
I find it odd that they would need to test the “foreign object” at all – given that they already knew what it was … & surely it’s common sense to use safety equipment when working with tools, or when re-purposing materials that that have had earlier lives outdoors? ..
Safety glasses should always be worn when hitting objects (either wooden or steel) with a heavy hammer or pry bar. My Father and I were splitten wood with steel wedges and a sledgehammer when a small piece of the wedge chipped off and flew right into my Father’s chest. Superficial wound, but could have been hit in the eye just as easy too! Always wear safety glasses, as you can’t replace an eye!
Also, you can use a multi-tool (like the Fein brand, or many others), Harbor Freight Tools sells them for less than $20 on sale, then use the carbide blades which cut through nails like a hot knife through butter! These tools oscillate at 20,000 to 35,000 rpm and make a lot of noise, but they are pretty small, lightweight and easy to use. The blades are thin and will slide between the boards with ease to cut through the nails. They also make smooth cuts so the cut nails feel like they have been sanded smooth to the surface of the wood.
Doing motel maintenance for the past 38 years, I have found this tool to be the most versatile, useful tool I own!
Thanks for the information in your article. Very useful.
YES to safety glasses! I’ve since gotten myself a pair ;)
I’ve heard of some multi tools like that (dremel makes them too I believe) and have one on my wishlist!
The pallet wood is treated to last longer when heavy things are shipped on them. It is not good to inhale this. Please wear a mask whenever working with them. I know someone one who didn’t wear a mask and he has been diagnosed with lung disease and the doctor says that’s probably where it came from. I know the wood is free but how much is your health worth. I myself have never worked with pallets but I had thought about it. Some pallets are new untreated wood so you guys might want to look for the untreated ones
I was wondering if you wear gloves or anything whilst doing it to avoid getting splinters in your hands? :)
I definitely should! But no, I have been lucky so far :)
So I have tried a similar method and found that my lack a patience and grace with a hammer leads to me breaking boards that could be used. The quickest and easiest way and I have experienced is to use a sawzall (reciprocating saw)with a long metal cutting blade. The blade is thin enough to work its way between the boards with out cutting them (a little scuffing is to be expected) and I just cut right through the nails holding them together. On average it takes me about 3-4 minutes to completely disassemble a pallet.
Definitely a good point! When we started DIYing we were using a hammer and a drill- that was our budget (and all our apartment closet had room for) so this was my go-to method. We’re working on a pallet wall in our basement right now and will definitely be turning to a sawzall :)
Y’all are crazy. Dont make this complicated. Call a local recycled pallet company. Offer them $.25/board for boards 40″ and longer and $.50/stringer–they’ll be happy to sell you some. I’ve been in the pallet industry for 12 years, let people with the correct machinery do the work.
If you need a ton that’s a great idea! It takes away the ‘I made this for $0!’ satisfaction though ;)
I don’t understand the infatuation (other than they’re free) with using dirty pallet wood for projects. Most of the pallets are either chemically treated or have some other poisons/filth in or on them. Folks are putting themselves at great risk handling, sawing and sanding this dirty wood. I cringe seeing pallet wood ending up as indoor projects. I’m a hobbyist woodworker and would never touch the stuff nor have it around the inside of my home. Yuk.
There’s definitely two sides (love and hate!) to the pallet trend. This year is the first year we would have been able to afford purchasing lumber for any projects so we are team pro-pallets for the price tag alone.
I’m so glad to have found this, Maybe I can finish the christmas gift for my bestie on time for her birthday :)
I had her favorite picture enlarged in black and white, had the pallet dried and ready and couldn’t take it apart in useful pieces. Argh! Hopefully this helps me dismantle it! Thank you so much!
Marian
If you put a 1 inch thick piece of wood (say a 6 inch long 1×2) under the “rocked” portion of your pry bar, you will get significantly more leverage.
Yes! I use that trick a lot now, I wish I’d learned that sooner- I should update the post with that tip, thank you for chiming in!
Thanks so much for sharing this! I just got home with two pallets and tried to take them apart with just the claw on a hammer lol – the pry bar makes WAY more sense :) Heading out to get one now!
Haha! I totally did that too… having the right tools makes all the difference. If you were doing a ton for some reason, I’d buy a saw even- but the point of free wood means not spending a ton on tools, right? ;)
Thanks for the tips!! I have my first 2 pallets waiting to be disassembled. As far as the dirty chemically treated wood, I was advised to only get pallets (and mine are very clean) that are stamped with HT, that means that they were heat treated instead of chemically treated. If it doesn’t have HT on it, I wouldn’t get it~you never know what chemicals the wood has in and on it. Better safe than sorry :)
Great point! Thanks Candy, best of luck with disassembly, let me know how it goes :)
Lot of good ideas in here. If you use a wrecking bar (sometimes called a crow bar or, if you’re in Appalachia, a “pries bar”) it already has built in cantilevers. It sort of looks like a shepherd’s crook. Might find one at a yard sale, but they’re not that expensive new. They come in different lengths, so maybe you’ll need more than one. NB: don’t pry one side completely off; go back and forth from side to side so the wood has less of a probability of splitting!
Great tips! Thanks for the comment.
Car jacks are amazing for this!!!
I have never heard that one before! Something new to check out :)
This is what I use. It is a back saver for those who have bad backs. ;)
I’m sorry, This is what I use.http://aax-us-east.amazon-adsystem.com/x/c/Qm7LT3sdw6PR2m2q_Es5RvkAAAFZs601JgEAAAFKAcFjsuI/https://www.amazon.com/Forrester-Manufacturing-Co-Duckbill-Wrecker/dp/B003F6TLYM/ref=sm_n_ma_dka_US_pr_pub_0_0?sigts=1484778190152&sig=f51ff8664d6e48d8de1074f0a92c32dd12d17d0a&adId=B003F6TLYM&creativeASIN=B003F6TLYM&linkId=5ae9d14b9ba6244bf52b83cd4aa90c0a&tag=apieceofrainb-20&linkCode=w43&ref-refURL=http%3A%2F%2Fwww.apieceofrainbow.com%2Fall-about-pallets%2F&slotNum=0&imprToken=.PqiTvoTJM90OEBJE0I3mg
OK Colleen go here :)
https://www.amazon.com/dp/B003F6TLYM/?tag=apieceofrainb-20
This will save your back. I know it will. It saved mine. ;)
Thanks for the tip Will :)
How do you deal with all the splinters? My pallets have a lot of split wood and splinters.
Great question! I’ve had a few that are nasty like that as well. I think it’s just about picking the ones that are more solid. Also, a good sanding (and picking off the big splinters) will help.
Dismantling the wood..So far, I don’t mind, dispite the fact I have a physical medical condition .. it’s a hobby I have recently started. It’s been a year..I learned on my own how to work with the wood without smashing every board .. but will still work with the broken peice .. I had no idea about Pinterest until a friend of mine told me about it. . It makes me laugh because I did mine the same way.
Regardless I’m not afraid to get my hands dirty. I’ve experienced breakouts rash.. splinter’s cuts hitting my hand with my hammer .. now.. im bit more careful how I handle the wood. Still alive.. I’m sure not all wood is dirty. However I do clean mine up even though they look clean. I take the time to work on projects, I do live on tight budget so far it’s been working out. Most projects I always pass on to a friend or family member as a gift. Since I’m not able to work due to my disability I had to find something that makes me happy. My family gets a kick out of me because I get excited over sticks, wood. You can’t take the bush life of this lady just because she lives in a big town. ;-)
Yes! Always clean them up- I agree. I usually sand with a 60 grit to knock stuff off to start. I love the idea of making projects to pass along to friends and family- you have some lucky people in your life!
Hello, didn’t see this tip in the other comments.. Using a rubber mallet with the pry bars deaden the loud sound and vibration on your hands. The claw part of the pry bars will also cut through the nails when hitting them with the mallet.( for the stubborn nails that don’t want to loosen up) Also I re-use the old nails to give more characters to each piece and plus they’re free!
A rubber mallet is a genius tip! The vibration on my hands bugs me the most about the whole process. Thanks for the tips!
awesome!!! i have several!! thank you Dona Smith
Thank you for showing this. I don’t have a pry bar. I just used my hammer and I must say it turned out pretty good. Since I was limited on nails every board I pulled off I was able to salvage some of the nails for reuse. I made myself a gate to close off my fence so that I could let my dog Roscoe roam around in the front yard. When I am able I’m going to get myself a circular saw for future projects. So look out for my next project a screen door so that I can open my doors and let in fresh air.
That’s awesome! You’ll love the circular saw- it’s so versatile. It’s what we used for pretty much every project for the longest time.
I have tried pry bars and sometimes it works.
Instead get a good hacksaw with a fine tooth blade, only slightly loosen the board, then cut the nail with saw, its a piece of cake. Three-four cuts and the nail is done. With practice, you can do a pallet in 12 minutes or less. Very little effort and all wood is good, no splitting as happens when using a pry bar.
I have a deck wrecker. So much easier and you don’t have to bend over. Home Depot and Lowe’s have them.
great tip!
I used a saws all. Cuts right through those nails. Easiest way that I have found.
Totally! That would be the preferred way if you have the tool.
Hi, I just wanted to say that I didn’t come here looking for a way to easily dissemble a pallet. I did click on this post however, due to the unsettling fact that you had the desire to add in “without killing yourself”. Whether or not it is joking about suicide, some people may take it that way. It was very inappropriate to add. The title could’ve been anything else but you chose to say that. Being someone who suffers from depression and suicidal thoughts, it was very triggering and upsetting to see this All I ask is that you change the title and think of something else. “Killing yourself” is not a joke and never will be one so please, for me and other people who suffer, change the title. With all good intentions, have a nice day.
I think she meant that someone could injure themselves greatly without some good technique, tips, etc. Either in trying to use tools in unfamiliar ways or in twisting their bodies while trying to pull the nails out….any combination there of could injure someone so their life could be at stake. I am sure her wording had nothing to do with suicide.
Thank you so much for this video! I love the aesthetic of wooden pallet pieces and I have a stockpile of projects I have been working up the courage to tackle. Up until your video, I have only seen step-by-step instructions; a how-to video is much more effective for visual learners like myself.
I live in a small apartment with limited space and not a whole lot of money for for power tool investments, much like you have described your 5 years of apartment life in this post. With space and money limitations, accompanied by a 4-year-old running around, I need some sturdy pallet decor to stand up to our lifestyle.
Thanks so much!
I have found using a tool called a “deck wrecker” is much easier than a hammer and crowbar. And easier on the back.
I have. A much easier way I can dissasemble a pallet in less than 3 minutes you get a( longer than your pallet) peice of pipe and out it in between each price of wood on your pallet and with it laying flat on the ground you can pry each peice up start at the left side of the pallet and stay o the left of each 2×4 and simply use leverage to pry them up so easy and less hurt hands and no mess to clean up and less breakage hope this helps
Iighten up, Frances
I use a 2 lb hammer with a flat bar place the bar claws in toward the nails and wack hard typically this cuts the spiral nails off or pushes them out. I have the pallet standing on their side and do all along the 2×4 then rotate the pallet 90 degrees and clear all the nails down the center 2×4. I then pop the sides the same way or lift the board up and out this pulls the nails out. A standard 40 x 42 pallet will take 10 minutes with minimal cracking. I choose the pallet for the job so if there is loss I am ok with it. For the scrap pieces I use for outside fire pit and clean the nails later.
Hi there, I watched the video and read a few comments. A recip saw would be useful but not necessary. I would like to suggest that a person should have a pry bar like the one used in the video or a thinner wider one to pry the nail up. Then get a longer pry bar to pull the nail up. If you don’t want to buy another pry bar, you should put a piece of wood under the pry bar to give you a bit more leverage. I take out all the nails so that I don’t ruin any of my power tools or hurt myself.
Even this method would kill me ??♀️
I found this so helpful – Thankyou. Like all posts, you end with negative comments, which is more a reflection of the world we live in now, but kudos to you for handling them so smoothly. I’m an upcycler and love the idea of reusing products – great for the environment, you end up with something original and it costs next to nothing once you have the basics. Thanks so much for your tips – so appreciated !!
Thanks Kylie!
This is way too unnecessarily tedious, time consuming, And most of the wood cracks and breaks and so do the nails! This wood is hard and very strong, use a saws-all to cut through the nails and it takes about 5-10 minutes to break down the pallet and you don’t have to deal with the nails at all!
Definitely an option if you have the tools :)