Tutorials for 3 simple DIY Yard Games: Yahtzee, Dominoes, and Jenga. From measurements to tips and quick reference guides, I’ve got you covered.
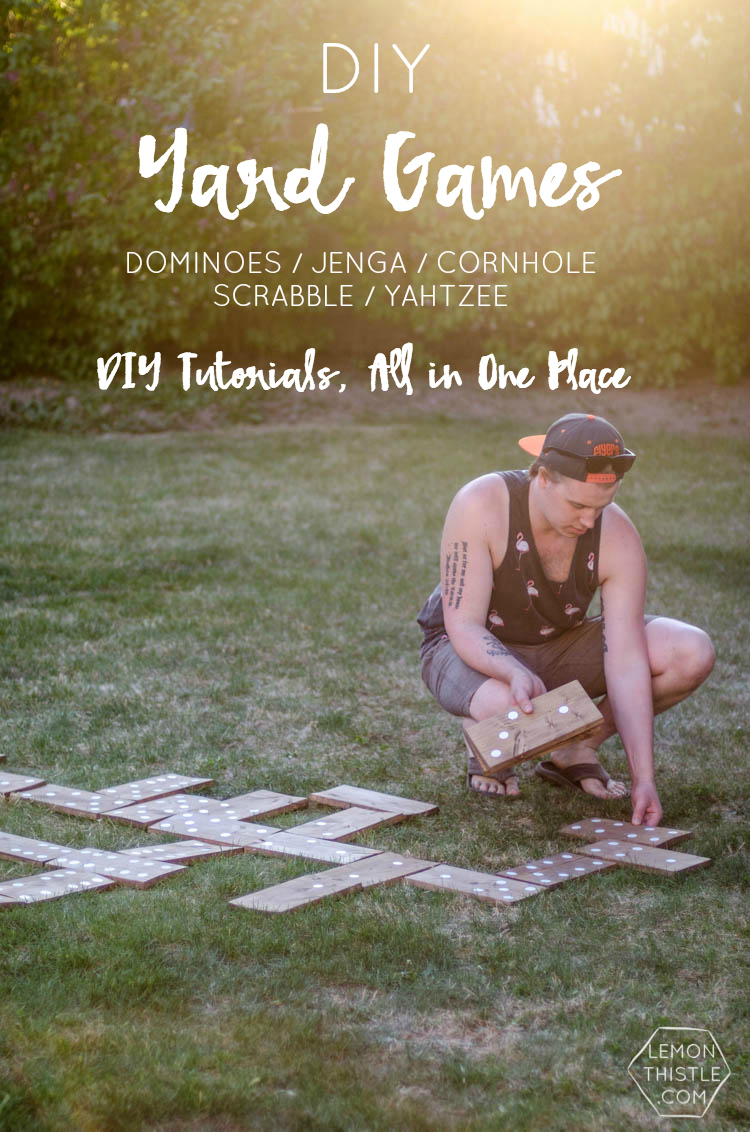
This weekend we hosted our first barbecue of the season (woohoo!) and the weather was SO beautiful. We actually came inside after a few hours because the kids weren’t used to the heat- it was that nice out. We had some of our family over to test out our new DIY Yard Games and I’m so excited to share the tutorials for them with you today!
I’ve got five awesome giant yard games coming your way, and that’s a lot of tutorial talk, so I thought I’d split it into two posts. I’ve got Jenga, Dominoes, and Yahtzee today for you and you can find Scoring Anagrams/Speed Scrabble and Cornhole here!
These projects are featured in my DIY Backyard Games book, published April 2022! Featuring 13 fun projects plus a really great introduction to tools and materials for beginner and intermediate DIYers. Find it anywhere books are sold now!
I’ve been dealing with some serious Pinterest envy over massive Jenga games and other back yard games for a while now. I decided that it had to happen as soon as we possibly could and when I mentioned it to Shane, he not only loved the idea but suggested we make a whole suite of DIY yard games. So far we’ve made five but we have plans to make a few more later this summer as well.
Since making them last week (*ahem, finishing them right before our barbecue*), Shane’s work has already called dibs on them for their summer work party. It’s safe to say we’re loving these DIY yard games!
I’m hoping by giving you all of the tutorials in these two posts, that you won’t have to do a ton of digging around the web to do the same. It took a lot of research to find all the information to make these games! If you’d like to have 13 DIY yard games all in one spot- I also have a book! You can find that here.
There’s about 100 tutorials on giant Jenga- but only one I found recommended a sealer for the wood. We are building shelves on the outside back of our shed and want to store our games outdoors. That means we NEED to seal our wood if we want it to last. All of these games are sealed (I’ll tell you which I chose and why), all of these tutorials have measurements, and I even managed to snap photos of some of the steps. And that’s an accomplishment when you have 100 Scrabble tiles to paint (yep, there’s 100!).
I also hope by putting it all in one spot for you that you’ll only need to take one trip to Home Depot to get everything you need (I may or may not have had to go back once or twice to get it right). So let’s hop to it.
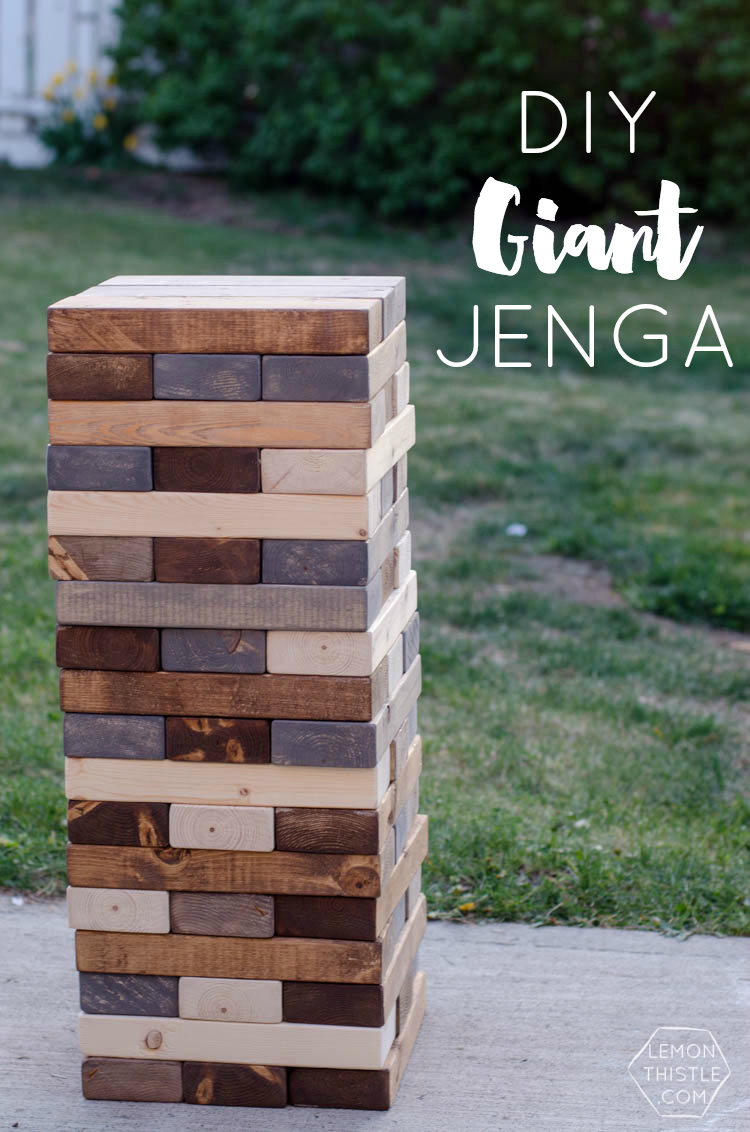
DIY Giant Jenga Tutorial

Let’s start with the most popular/ everywhere you look game, shall we? Jenga is such an easy playing game and it gives the thrill of faster paced games (it could fall at any time!) but you can still carry on a relaxed conversation as you play. I’m a fan.
Here’s what you’ll need to make your own DIY Giant Jenga:
- 54 Feet of 2×4 (try pick ones that are relatively straight- harder than you think!)
- Measuring Tape and Pencil
- Chop Saw (preferably, if not- a skill saw or hand saw should work fine)
- Sanding Block and 100 or 120 Grit Sand Paper (and a lot of it…)
- Damp Cloth
- Stain of Your Choosing, Rags to Apply, Rubber Gloves
- Minwax Finishing Paste
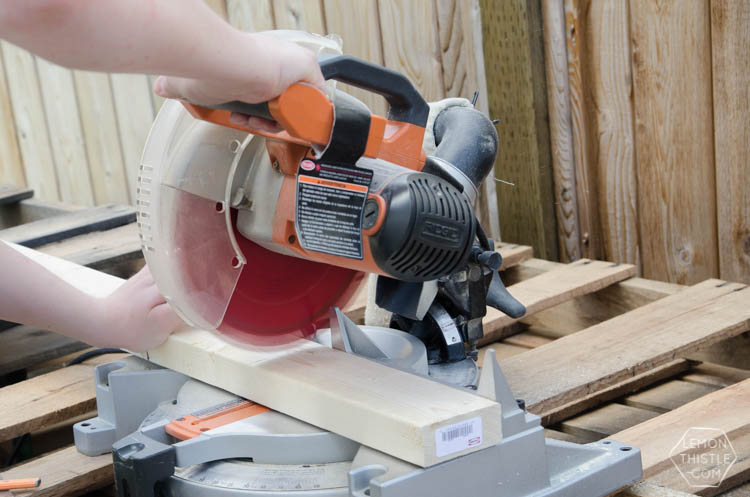
Start by marking out your two by fours a hair over 10.5″. Jenga towers are square if you look straight down at them. Since there are three 2x4s wide, they need to be cut to that length. The tricky part is that 2x4s are not actually 2″ wide, they’re only 1.5″ wide. So the measurement is 10.5 but your saw blade will take off a bit too, so try mark just outside your 10.5″ measurement along the boards. When they’re all marked, go ahead and chop your 2×4 into 54 pieces!
Make sure you have a sharp blade on your miter saw to cut down on the amount of splintering (and sanding!) you’ll have. You can set a block with a clamp to make cutting quick and skip measuring each individual piece.
Once they’re all cut, the fun part… sanding! I say the ‘fun’ part because this is what we did with the majority of our free time last week. We even invited some friends over for pizza to help us. It takes longer than you’d imagine since it’s nice to have them super smooth so they slide easily!
You could use a palm sander, but we enjoyed chitchat while sanding by hand. The idea is to get the sides all smooth enough that the slide when you’re playing Jenga. Additionally, sanding helps the wood take the stain more evenly. When they’re all sanded, wipe them down with a damp cloth to get the sawdust off.
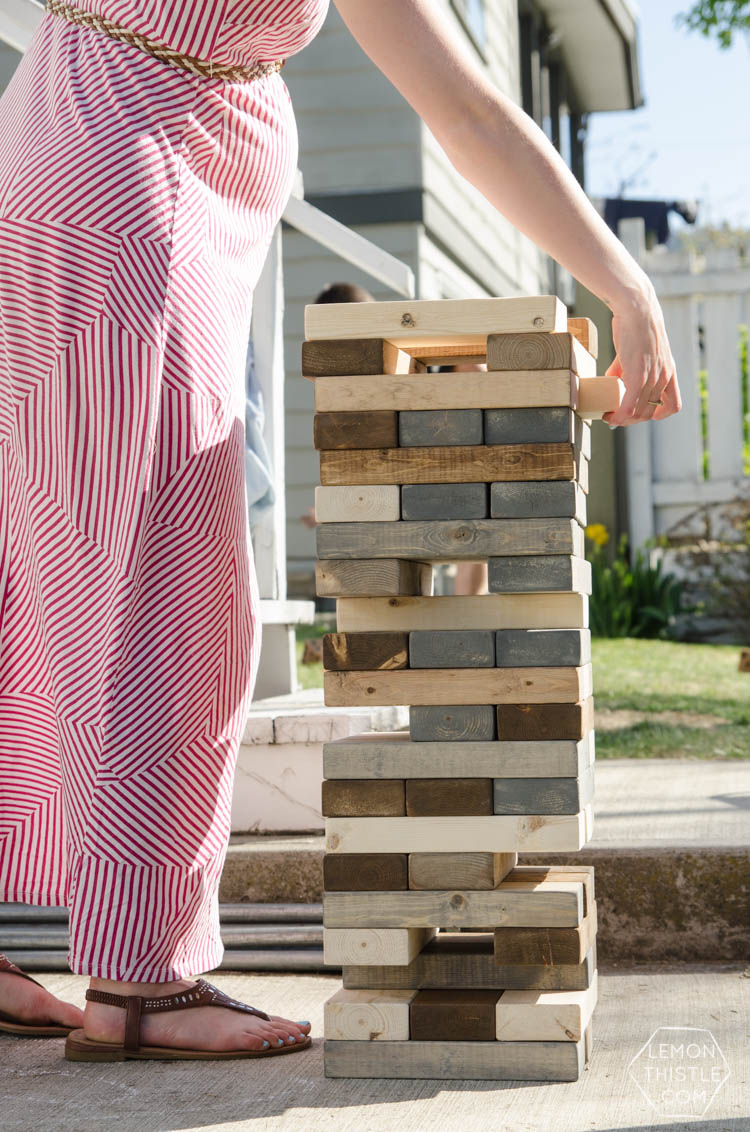
I chose to stain my Jenga pieces with three different colours of stain and left some natural. The stains I chose were all from Minwax Wood Finish: Early American, Classic Grey, and Weathered Oak. The Early American is my new favourite colour, it is the darkest one! You could also choose to leave your wood natural and skip this step.
To stain, work by staining (wiping on with a rag) one of the large sides, plus all the edges in one go. Then, flip it over and stain the final side. You’ll need a large space to lay them out while they dry. You can see a photo of the staining process under the Dominoes tutorial.

When that’s all dry, you can go ahead and apply Minwax Finishing Paste. The only other recommendation I found to seal the wood is Hemp Seed Oil.
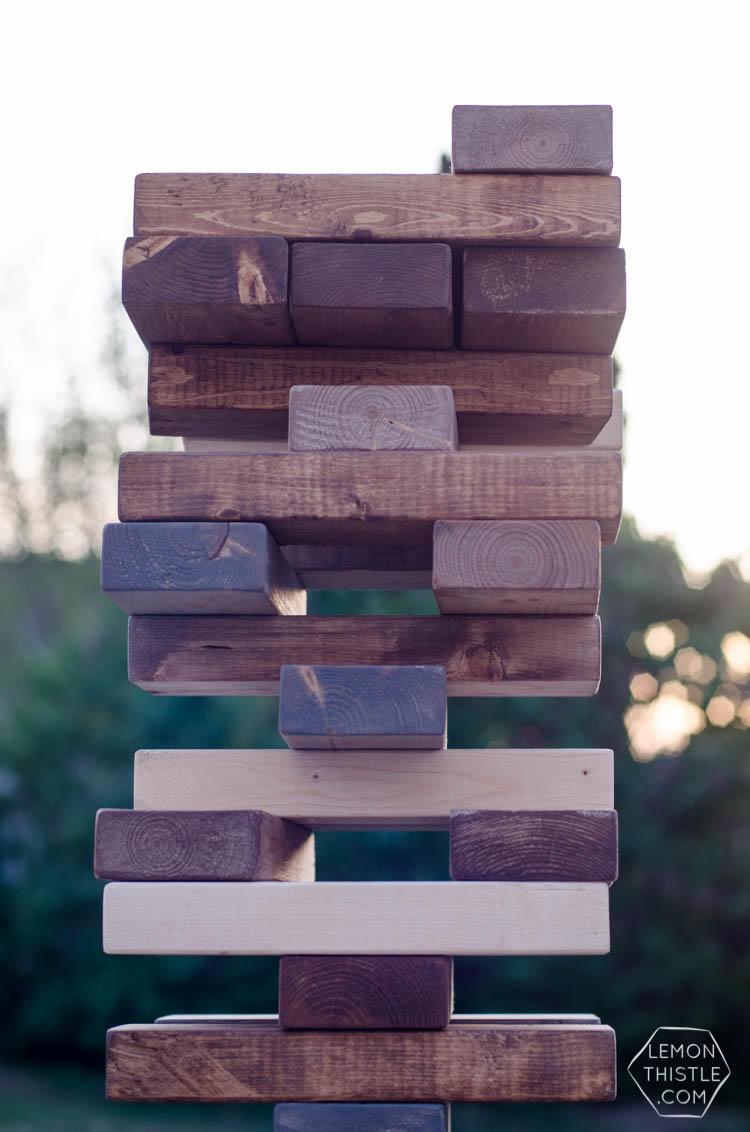
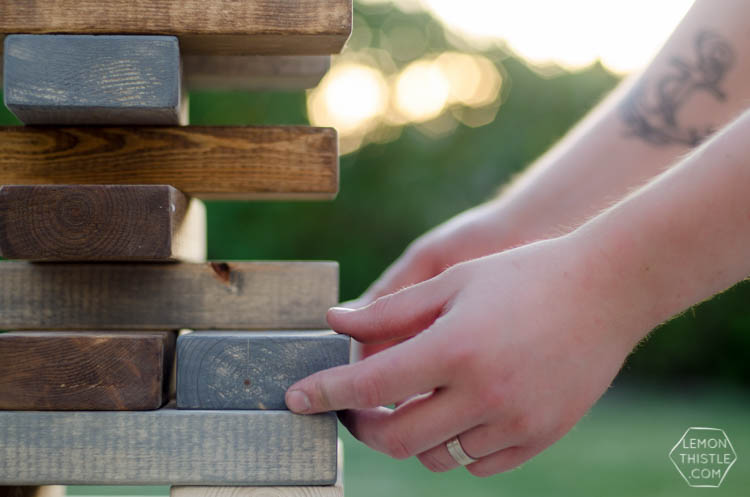
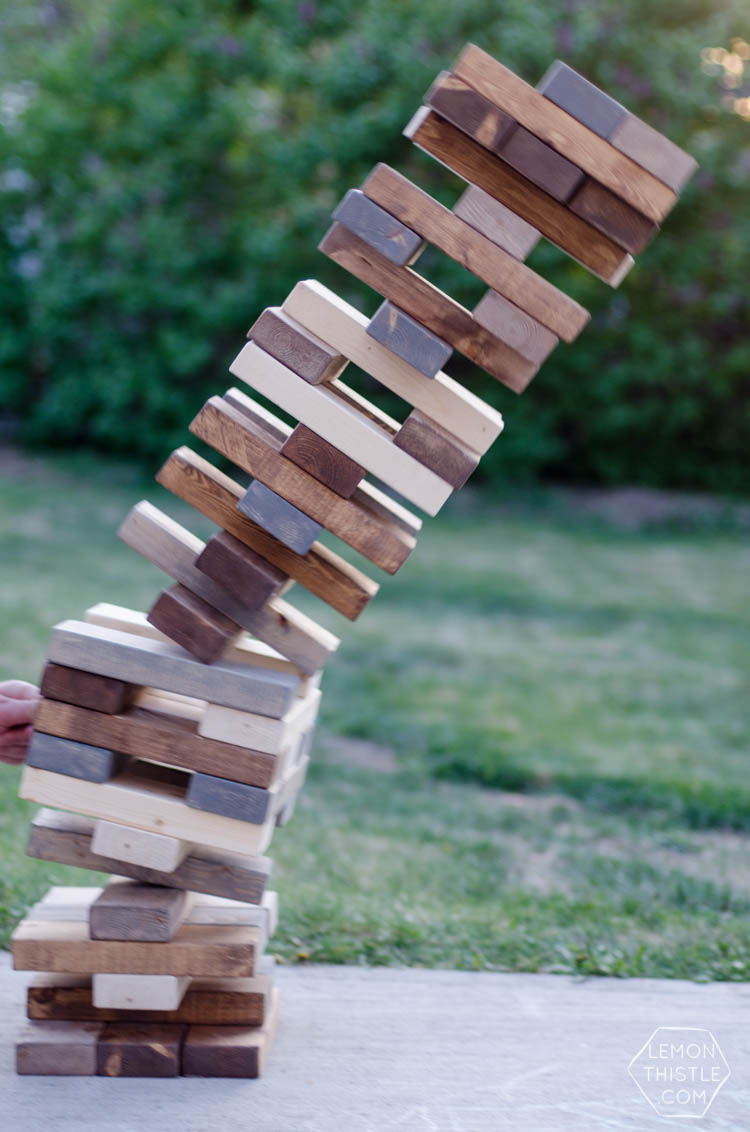
If you’re not sure how to play Jenga, the general idea is that you stack the blocks (as shown in the first photo) three wide, alternating directions. Then, players take turns removing a block by only touching that one block and stacking it on top of the growing stack. It will slowly get more wobbly and difficult to remove pieces as you go. When the tower topples, that player is the ‘loser’ but really, the toppling is the best part! See?
DIY Giant Dominoes Tutorial
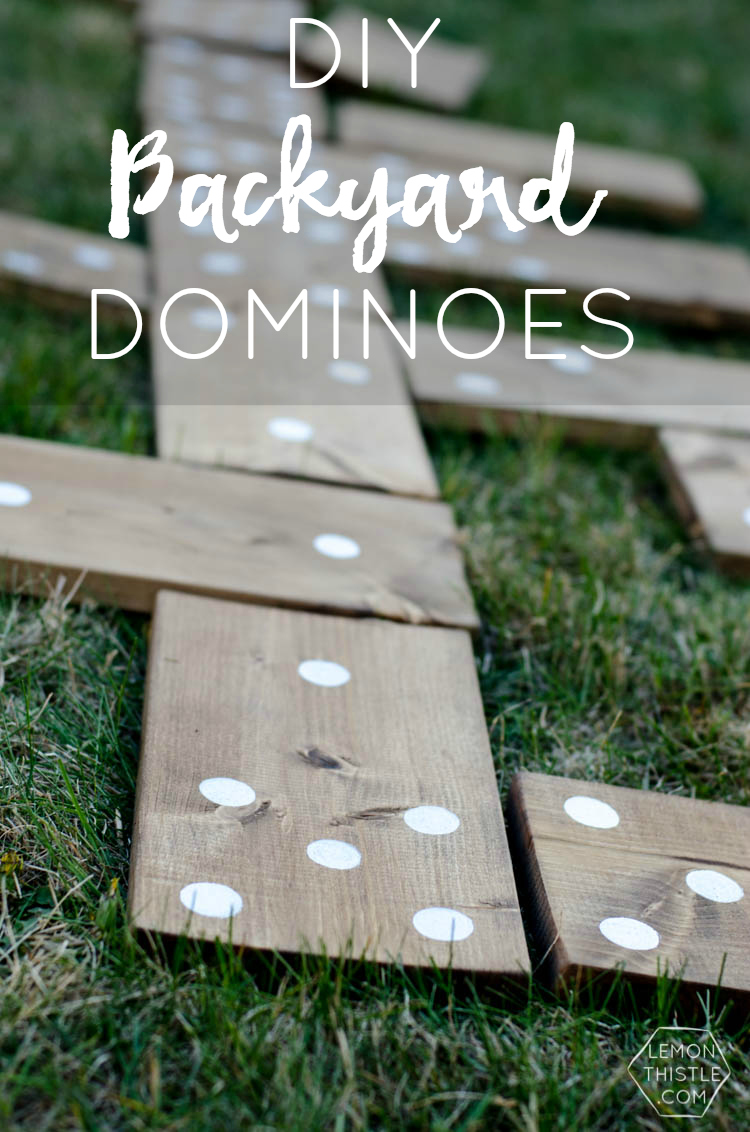
Next in the DIY yard games series? Dominoes! Before making these dominoes, my hubby (and his brothers) had never played an actual game of dominoes (have you?). They had only played that game where they stand the dominoes up and make a long trail that collapses (also fun). If you have never played ‘real’ dominoes either, you can find the Basic Rules here, but there are 101 games to play with them. So these should never get old!
Here’s what you’ll need to make your own DIY giant dominoes:
- 28 Feet of 1×6 (Try to pick straight boards again!)
- Measuring Tape and Pencil
- Chop Saw (preferably, if not- a skill saw or hand saw should work fine)
- Sanding Block and 100 or 120 Grit Sand Paper (told ya’ you’d need lots…)
- Damp Cloth
- Stain of Your Choosing, Rags to Apply, Rubber Gloves
- White Indoor/ Outdoor Paint
- 3/4″ Spouncers (Circle foam ‘brushes’ or dabbers)
- Clear Spray Sealer
Start by marking and cutting your 1×6 boards in 1 foot pieces. The math here is that dominoes are twice as long as they are wide. You will need 28 pieces. When they’re all cut, get to sanding. Although they don’t need to slide (like the Jenga pieces) sanding is still good to have a smooth surface, and help the stain penetrate more evenly. 1×6 Boards seem to be a bit smoother than 2x4s so this should be an easier job (plus there’s less of them!). Wipe them clean of any sawdust with a damp cloth.
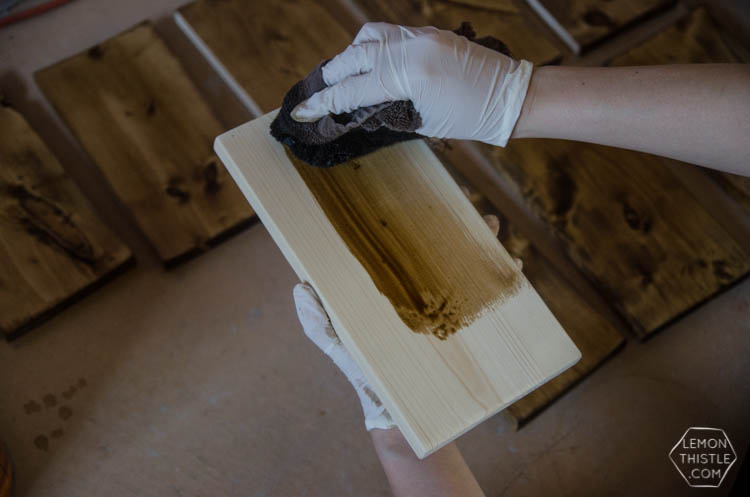
You could choose to leave your dominoes natural colour, or you could choose to stain them as I did. I love the look of white dots on dominoes and the natural wood just wasn’t dark enough for that. I used Minwax Wood Finish Early American Stain. Wipe it on with a rag (make sure you’re wearing gloves!), following the same process as the Jenga: stain one of the sides plus all edges; let dry then flip and stain the second side.
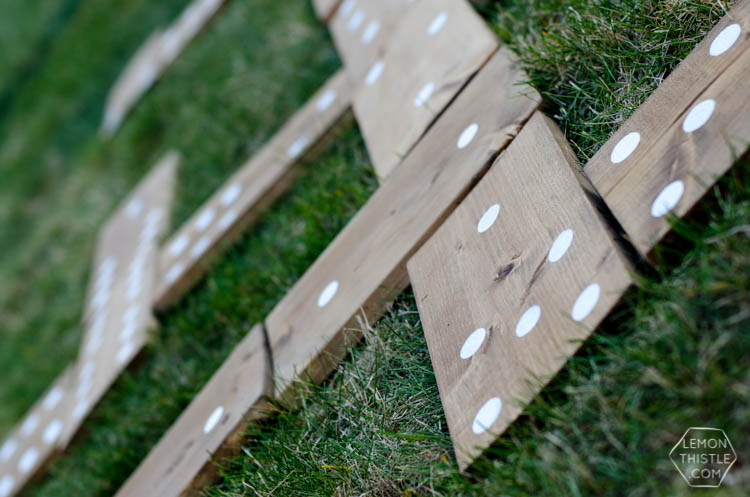
When the stain is cured (you wont be able to smell it anymore and it will be dry to the touch), you can paint your domino dots. I used Rust-Oleum Ultra Cover and love that I only had to do one coat. I used a 3/4″ spouncer (basically a round sponge brush for dabbing- I like the Martha Stewart brand) to create the dots. To track which tiles I’d completed, I made a handy printout. You can download it if you’d like to do the same!
The gist is you make one tile for each combination of 0-6 for a total of 28 pieces. This goes quickly, I got it done in one episode of Friends on Netflix. It can be confusing to keep track of which you’ve done so the printable is helpful to cross off as you go.
When the paint is dry, you’ll want to seal your dominoes. I chose a spray on sealer for ease. I use Rust-Oleum Painter’s Touch Clear in Satin for almost everything.
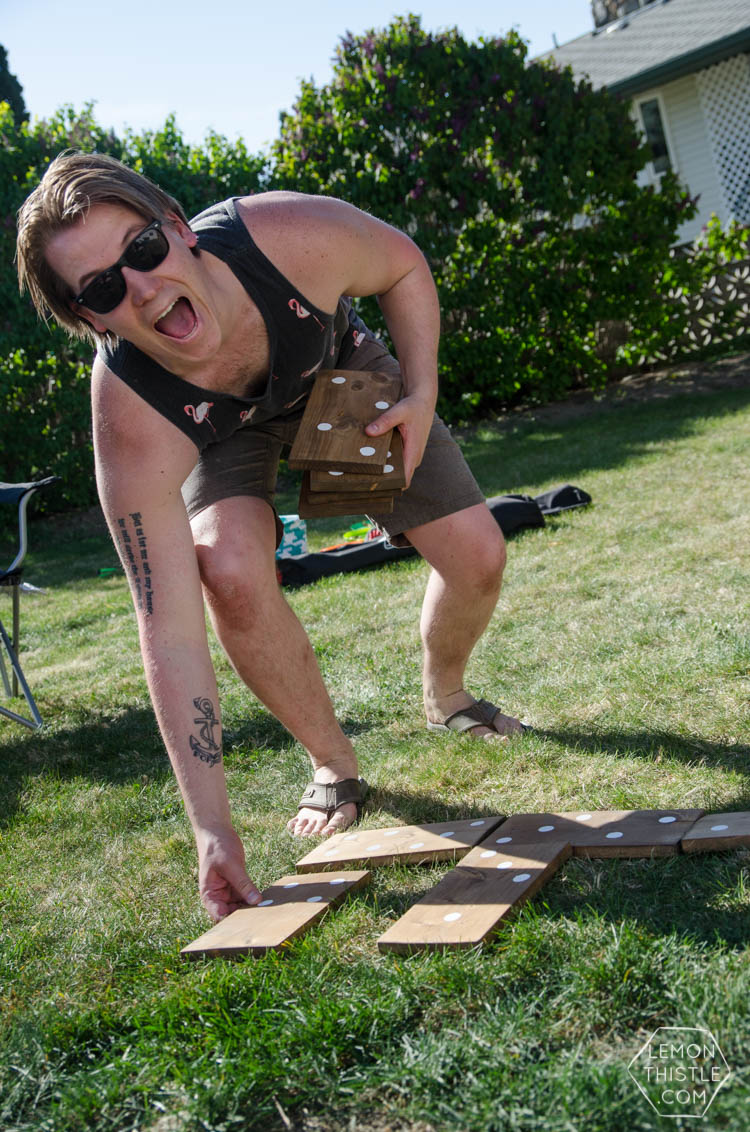
That’s all there is to it! Then teach your husband or friend how to play dominoes and enjoy beating them ;)
DIY Giant Yard Dice Tutorial for Yahtzee and Farkle
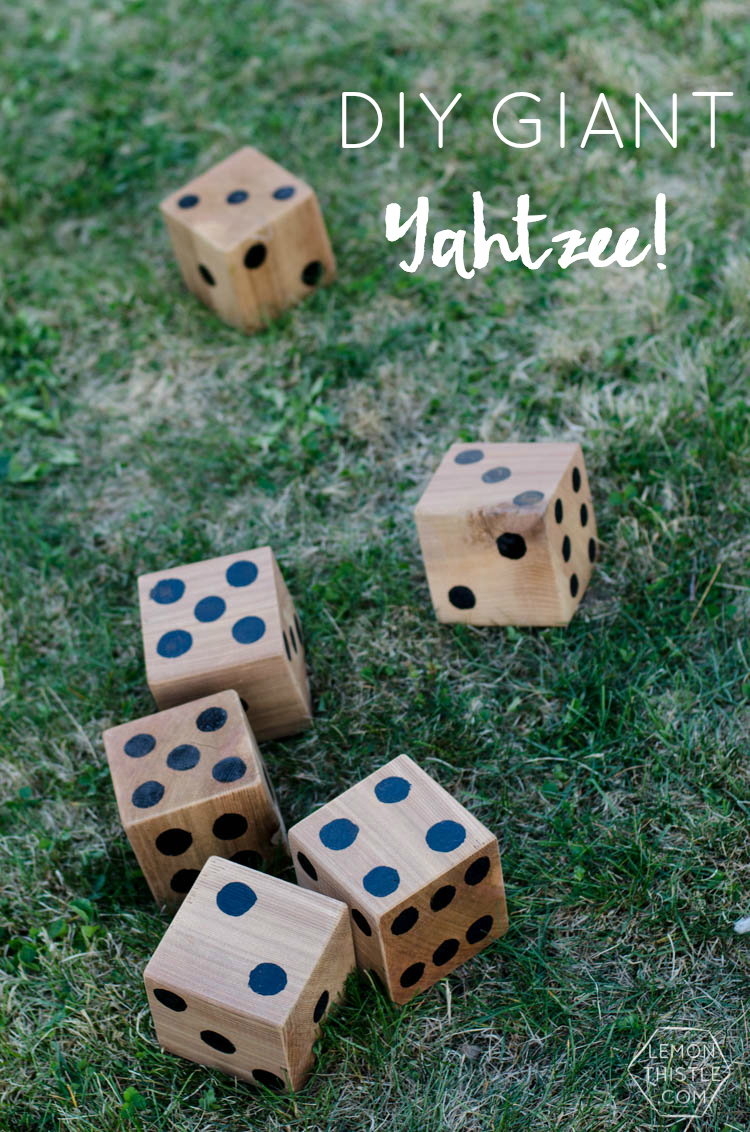
Yahtzee was one of my favourite games as a kid. It was complicated enough that I felt like it was an ‘adult game’ which makes anything cooler (I also loved Canasta, if that tells you what kind of nerdy kid I was!). We did have a Disney version though which made learning the rules easier. When I suggested this game to Shane he was mostly excited to have giant dice- he didn’t care much about the game rules *sigh*. We went really basic on this one.
You can also use the giant yard dice to play Farkle. I created a handy printable for you to refresh the scoring points for both Yahtzee and Farkle. Download it below!
Here’s what you’ll need to make your own DIY Yard Dice:
- 4 Feet of 4×4 (the smallest size is 8 ft, so you will have extra- we chose cedar because we love it, but you could get traditional lumber if you prefer)
- Measuring Tape and Pencil
- Chop Saw (preferably, if not- a skill saw or hand saw should work fine)
- Sanding Block and 100 or 120 Grit Sand Paper (told ya’ you’d need lots…)
- Damp Cloth
- Stain of Your Choosing, Rags to Apply, Rubber Gloves
- Black Indoor/ Outdoor Paint
- 3/4″ Spouncers (Circle foam ‘brushes’ or dabbers)
- Clear Spray Sealer
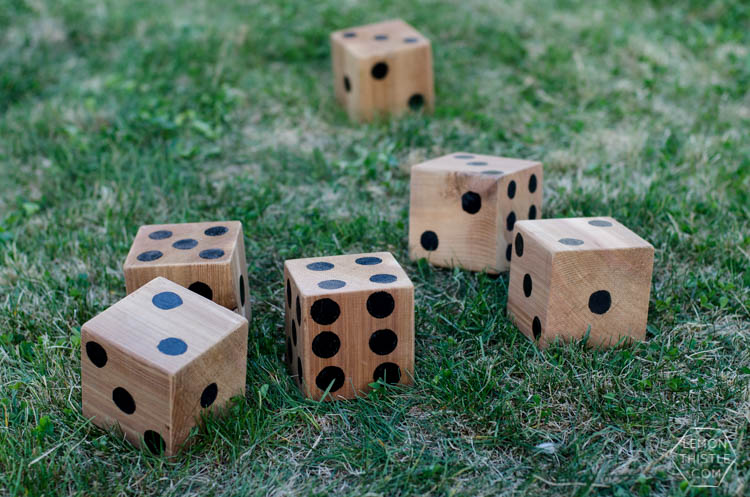
Start by measuring and cutting your 4×4. To make 6 square dice, cut them in 3.5″ pieces (for the same reason as a 2×4… a 4×4 is actually only 3.5″ by 3.5″). When they’re chopped, give them a light sanding and wipe them clean with a damp cloth.
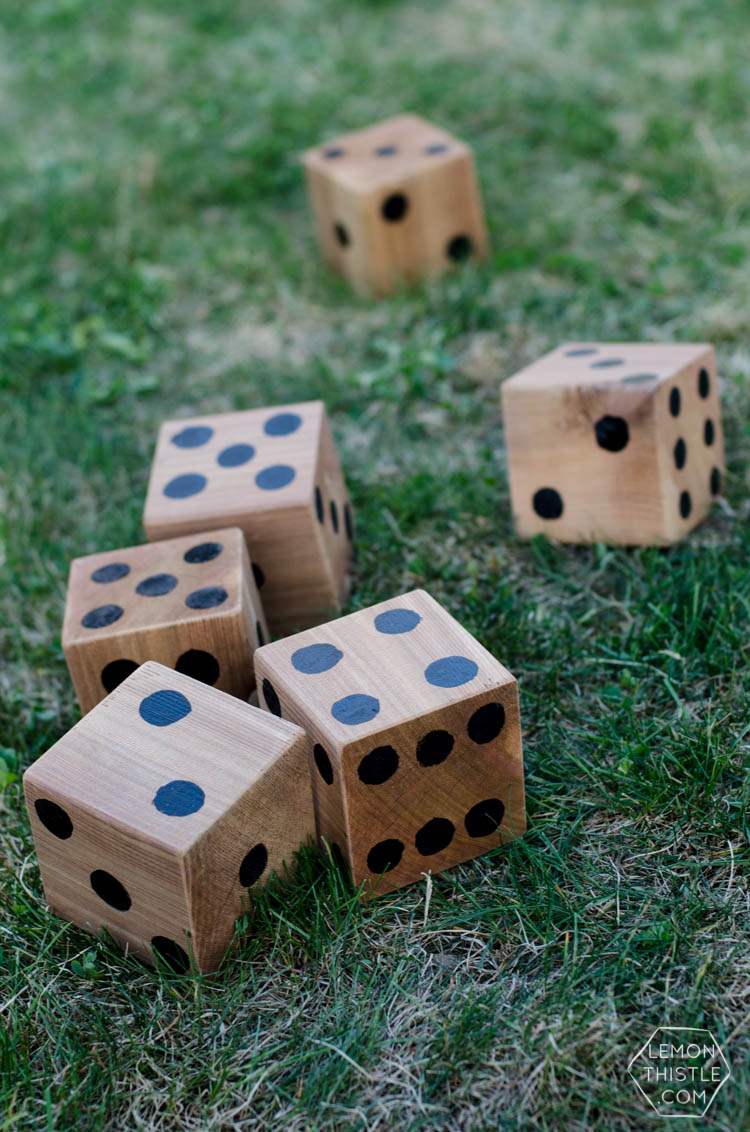
To paint your dots, I recommend using spouncers (the round foam dabbers), I started painting the circles on with a regular paint brush and realized how much of a pain this was halfway through. So I switched and kicked myself for not thinking of it sooner! I used Rust-Oleum Ultra Cover in Black Gloss for this and again, I love that I only had to do one coat. I’m used to craft paint where everything takes more than one coat so this was a treat for me. To map out which sides of your dice get which number, just remember that opposite sides of the dice should equal 7. 6 is opposite of one, 2 is opposite 5 and 3 is opposite 4.
Then, I gave them a spray with my Rust-Oleum Painter’s Touch Clear Satin to seal them.
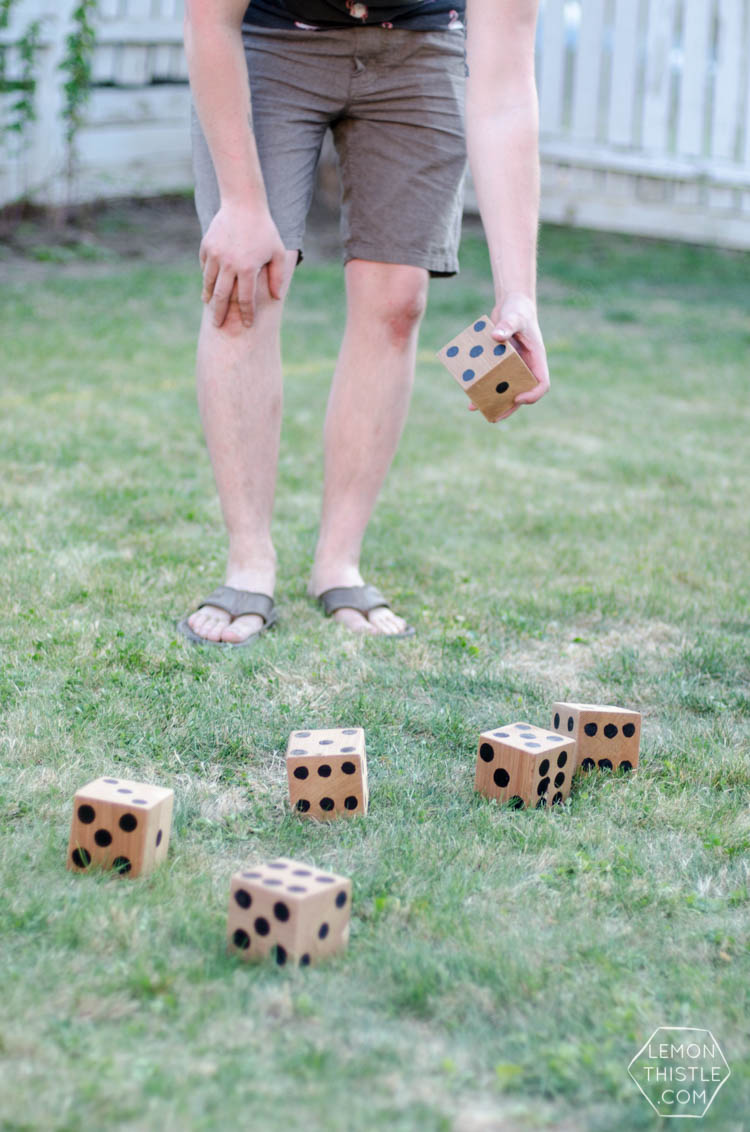
We just rolled the dice with our hands and kept track of points on paper BUT there are some options for you here. I’ve spotted that the dice can be rolled in 5 gallon buckets (that you can get for just a couple dollars from Home Depot).
Whew- that was a long post! Aren’t you glad I’m breaking it up into two posts? I know we’re going to have many summers full of these DIY yard games ahead of us, and I can’t wait! I’d love to hear from you if you have made any yard games or if you ever would? After living in an apartment for the better half of our marriage, we’re so excited to have a yard that we pretty much want to live in it now. We also want to do something about our grass. But it’s only April, so there’s hope… right?
Make this? I’d love to see! Tag me @colleenpastoor on social.
Want to make more DIY Yard games? I actually wrote a full book of tutorials! You can find it right here.
 Chocolate Chip Banana Nutella Pie For One
Colleen! This are fantastic!! You are so wonderfully creative…thanks for the gift ideas ;)
Thanks so much Troi! I think you’re pretty wonderfully creative yourself ;)
Wow. What a great blog. And we share the same name !
I love love love these!! My husband is going to get a total kick out of all of these. (Might get me out of a few indoor board games too!)
Haha! I’m pretty sure my husband was thinking the same thing when I suggested them. He’s not nearly as into board games as I am. Thanks for the love Karisa!
This. is. awesome!!! I’m totally doing one of these ASAP. Now, I just need to pick one…. so many choices :)
Way too many choices! Or you could do them all ;) Thanks for the sweet comment, LZ!
I love these! Thanks for sharing! And seriously, what perfect Christmas presents.
Thanks so much Bonnie! They would absolutely make an awesome Christmas present… or Fathers Day!
These are PURE GENIUS!! Love these ideas, and totally making some!
Thanks so much Virginia! You definitely should… and then send me a pic or two :)
Thank you for the awesome ideas. Can’t wait to make some for my daughters bday party this summer. Plus that would make some great gifts
One question though how can I find yhe second half to this post. I ran into it on Pinterest
Doh! I can’t believe I missed adding the link in! Thank you for letting me know, I’ve updated the post. You can find them here:
https://www.lemonthistle.com/scrabble-cornhole/
Does the minwax paste give the Jenga some slippage? We saw the hemp oil suggestion as well, but can’t find it anywhere.
Yes! It definitely does. Your other option is walnut oil which can be found at your grocery store :)
What are the rules you play by for the yard dominoes?
Ohh I think every person in my family has different rules! Haha, I just play that you draw tiles and have to match them up with what’s already laid down.
Oh my gosh these are fabulous! I NEED that Jenga game in my back yard.
Thanks so much Marie! We absolutely love having it. Now we just need to have people over to enjoy it more often ;)
Must build a Jenga – I love that game. Great ideas and what great gifts they would make.
The jenga is a ton of fun! We’ve played that one the most.
That is way too much fun!! Definitely pinning this for later. I’ve been wanting backyard Jenga for a while, I didn’t even know I wanted the others until I saw them here! haha
Thanks so much Jamie! All of the games are so much fun and it’s nice to have a variety so a group isn’t waiting to play with the one game.
I love jenga. Thank you for joining the Small victories Sunday Linkup please join again. Pinned to the group board.
Jenga’s always a great party game! Appreciate you stopping by Gail :)
Love this! It looks like so much fun. I am so pinning this, we love to play outside games and your tutorials are awesome! Thanks!
Thanks so much Nikki! There’s something 10x more fun about playing a giant game outdoors :)
These are the coolest of the cool! I want a set of each and have the carpenter boyfriend to help me make them! Pinned :)
Wahoo! It sounds like these were made for you :) I’d love to see photos if you do try them out!
I had such a great time making these, EVERYONE loved and enjoyed them. I made the Jenga, Dominoes. Yahtzee, a LCR (Left,Center,Right since I had extra 4×4’s) and a Portuguese Horseshoes (a local favorite here in Hawaii, something very similar to corn hole). I made this all in a 1 week and a day span of continuous sanding and non stop staining and wood burning simultaneously. I had a deadline because these were a gift to my other whole for his birthday. Aaaand because it all looked like so much fun, I couldn’t just do one! It lead me to a love and respect for wood I never knew I had :) Thank you Colleen! I’d send pictures but I’m not sure where to send them?!?
This makes me SO crazy happy to hear! We made them in one week too… and continuous sanding is right!! You can send photos to colleen@lemonthistle.com. Thanks so much Vera-ri!
I love Yahtzee and this idea, would love to get a set of this if I can afford it.
Meanwhile I play it online at: http://www.yahtzeeonline.org/
You definitely should! a 4×4 is under $20 and you will have leftovers :)
These are great! I think I need to make all of them :) How are you storing them when they aren’t in use?
You definitely should! We have them in large totes in our shed- I’d love to make some carrying crates though!
Hi Colleen, I am running out today as fast as my legs will carry me to get whatever I need to make Jenga and Yahtzee! Thank you so much for a great, easy to understand tutorial. Hopefully I can finish them for Memorial Day weekend. 1 questions though, the original Yahtzee game has 5 dice and yours calls for 6, is there a difference because it is an outdoor game?
Smilingei
So much fun! There is not a difference! I think we’ve been playing wrong all along… and now that you say that I question myself- why have I never noticed a full house is so much easier with these dice! Haha- so no… you just need five :)
Just wondering what you use to store jenga pieces?
Great question! One day I’d like to make a crate, but for now I’m using one of those giant Ikea bags :)
What a great idea! We’re always losing dice, maybe having ginormous ones for parties will help us lose less of them. Thanks for sharing, definitely giving the husband a project now!
Haha It would be hard to lose these ones!
Love all of these! I made Jenga and Yahtzee for an upcoming outdoor wedding *no rain no rain no rain*, but I’m having difficulty with the Minwax finishing paste on the Jenga. I tried applying it like how the can says, but some of the stain is coming off on my staining rag. Is this normal? I know we need to seal the wood because the pieces aren’t sliding out… like, at all haha. How did you apply your finishing paste? Any suggestions? Cheers!
Hi Meg- I’m sorry to hear that! Did you use minwax brand stain? I haven’t had this issue at all! Was it perhaps not dry? If you use a LOT of stain to get a darker look, it does take quite a while to dry (more than the 2 hours they suggest).
Good luck!
Do you have any giant jenga for sale? If so, how much? Thx!
I don’t! I have spotted many sellers on Etsy selling similar games though :)
Hi there! Absolutely awesome posts. I am curious if you’d be willing to share what the overall cost of building the jenga blocks was? I know it varies depending on where you get materials and such but just wondering if you could provide a ball park!
Thanks in advance!
Hi Sarah, Taxes in the 2x4s came to about $35 (I’m in BC) and I had most of the stains/ tools on hand.
These are such great tutorials! I used them to make jenga and yatzee for my wedding. Thanks so much for sharing!
Congratulations on your wedding! I’m so glad they came in handy :)
Hello,
That’s great !
Can you give me the dimensions of a piece of jenga in centimeters, please ?
Thank you very much !!
10.5″ is about 26.7 cm :)
I love the look from the variety of stains you used for the giant jenga. I’m going to tackle this project next week. I’ve read in other tutorials online that staining or painting the jenga pieces causes them to stick while playing…like the blocks won’t slide out very easily or sticks to other blocks. Do you experience this issue or know of a work around so they don’t stick? Thank you
SO I found they totally don’t stick… but I sanded really well. That said, I did buy Minwax finishing paste which makes them extra smooth so there was no issue but I haven’t kept up the maintenance on them and haven’t found THAT much of a difference. That said, we just use them in our backyard- not at weddings and big events.
Thank you so much! A few more questions…for the Jenga, what type of 2×4 did you use? Pine? Douglas Fir? Untreated? Can you provide a link? There’s so many options at Home Depot. Also, do you think an 8 oz. can of each stain would be enough for all the peices? Or do you recommend 1 qt. ?
Thanks again for all the info!
Hi Seth! We just used standard building SPF- nothing fancy. I just used the little can of everything except the Early American but I used that one to make the Dominos and Yahtzee as well so I couldn’t say for sure!
Colleen I am making your Jenga but want to add a hole in the middle of some of the pieces so that I can put a 2 inch cup with lid a.k.a Giant Jello Shot Jenga. Can you tell me what tool I would use and what size it would need to be? I have searched for hours online looking for the instructions to make it but can’t locate them. I found your Jenga and I am hoping to blend the two together. THank you
You bet! You’d need a holesaw bit :) You’d just need to measure your cup for the size!
In the Jenga description Should this be 4″ and 3.5″
“The tricky part is that 2x4s are not actually 2″ wide, they’re only 1.5″ wide”
Yes! Absolutely
Where can you get the paper to keep score on for yahtzee?
I’m sure amazon would have the pads!
This is awesome!! I’ve been wanting to do life size jenga for a while now and this is definitely giving me some motivation…I even have some glow in the dark paints and never would of thought of those for it! Thanks!
thanks alot
thanks a lot
Awesome post. Thanks so much for the info. I am going to the lumber yard now!!
Do you have the dimensions for where to place the domino dots?
We love to see fans coming up with their own versions of the game! Great job!
These are fantastic! I had no idea about the yard sized dominoes although I have played the Yahtzee game myself.