So, Guys! I have exciting news. If you’ve been following along on Twitter or Instagram, you’ve probably heard- I’m so excited to be doing some DIY videos for a local EP show here. What? I know, basically that means I’m getting to do some video DIYs for Shaw TV, one of our local channels and they’ll be posted here for you as well! Rockin’

The first one in the series is this super festive confetti wreath. I used this one for the Fiesta I hosted a while back, but my front door is the worst so I only have a photo of it finished inside, but I’m sure you get the idea. This wreath cost me about $5 but if you need to buy adhesive it will run you a bit more. The thing I love most about this wreath (other than… well, confetti) is that you could change the colours and make it suit pretty much any occasion. Halloween? Black and orange. Valentines? Pink and Red. Canada Day? You get the picture.
So let’s start with the video then we’ll share my step-by-step if you’re reading this somewhere like work where videos are taboo (don’t worry, I know you’re a hard worker- we all deserve breaks).
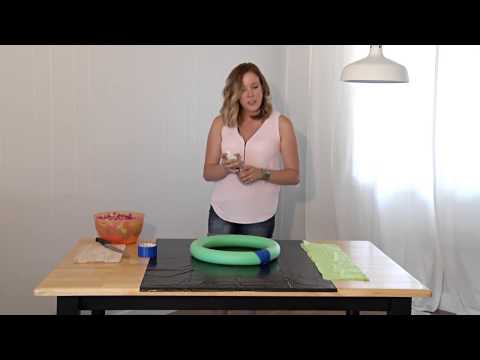
What did you think!? I’m a bit awkward in real life, aren’t I? I bet you thought I was super smooth. Maybe one day.
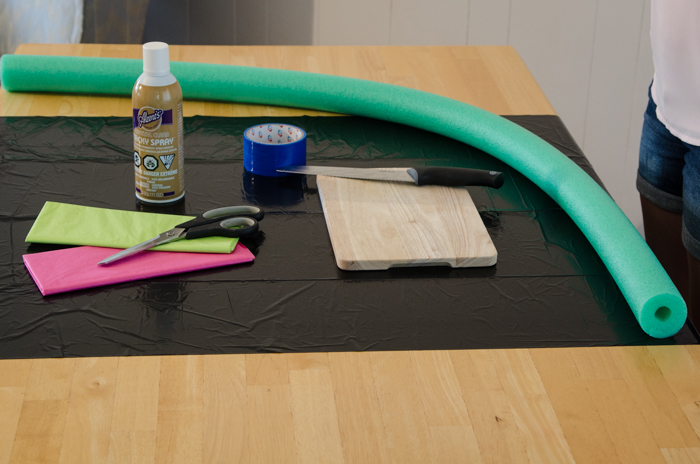
Anyways, enough about me- let’s talk about confetti! To make this colourful wreath, you will need:
- Pool Noodle
- Cutting Board and Serrated Knife
- Spray Adhesive and Garbage Bag (to protect your surface)
- Tissue Paper in Assorted Colours
- Scissors
- Duct Tape
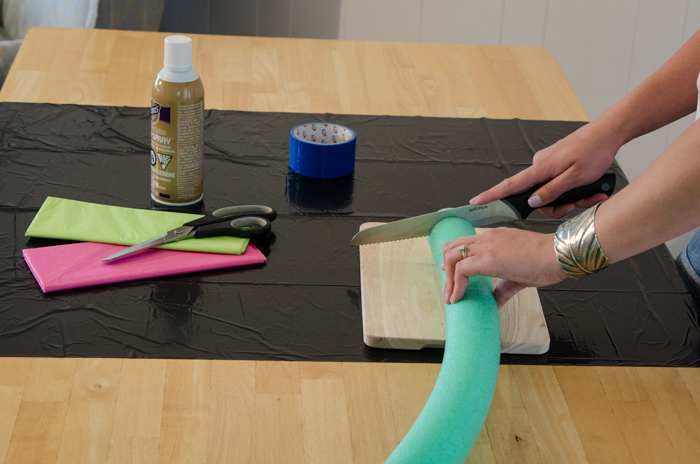
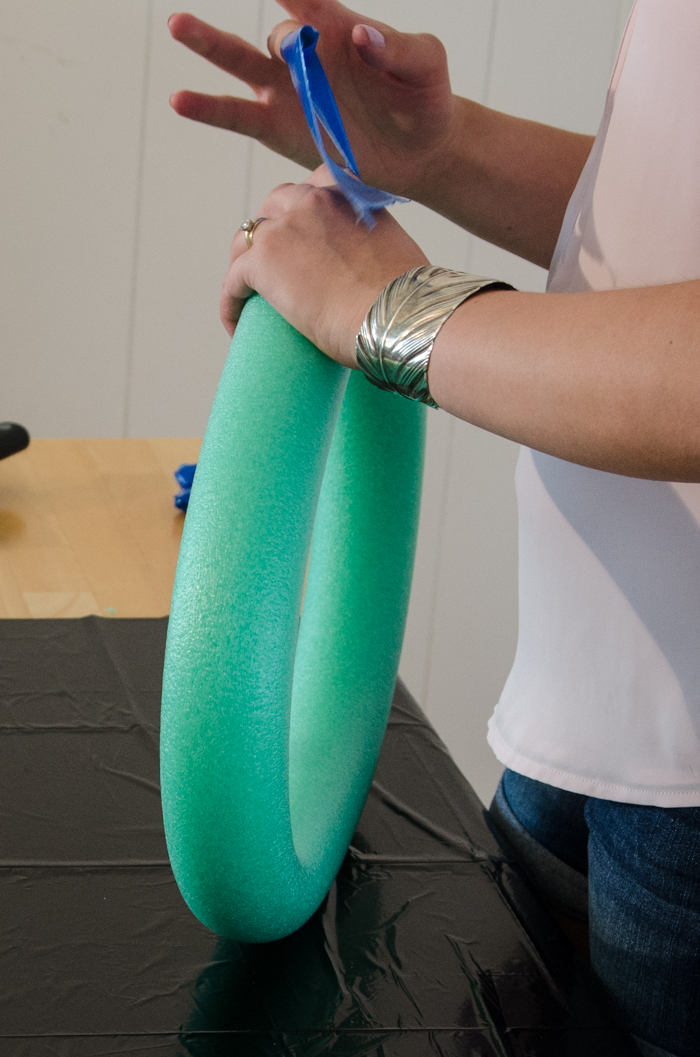
Got it all? Good. Start by cutting your pool noodle to length then tape it to make a circle. You might have to play a bit and duct tape more than you think to get it to look like a circle and not a tear drop. Pool noodles are one of the most affordable ways to get a wreath- who can beat a buck?
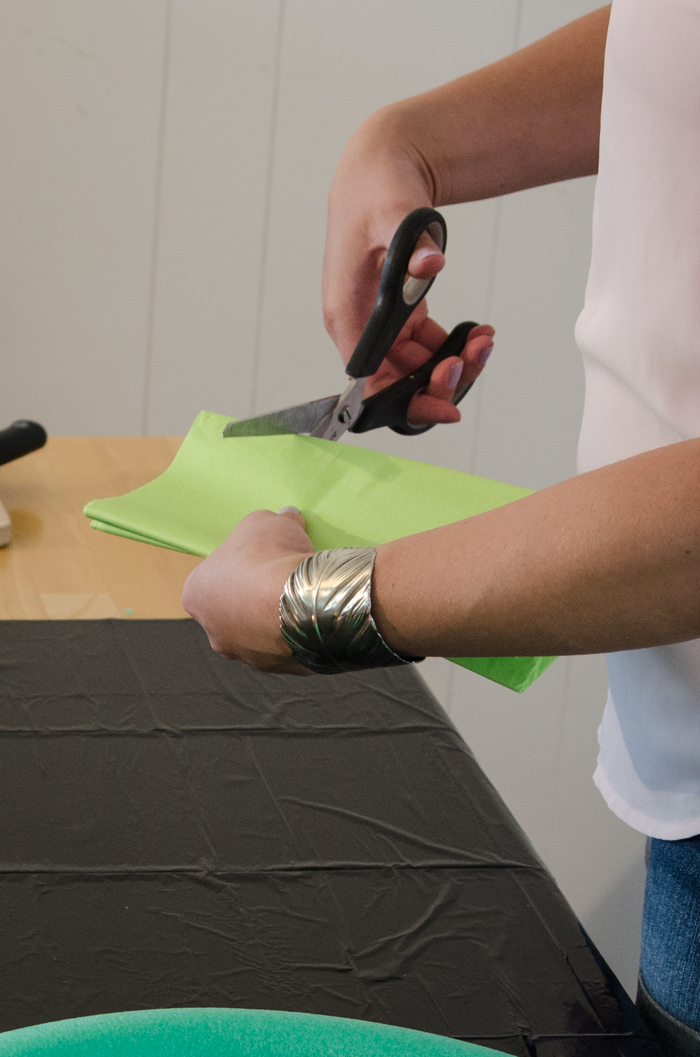
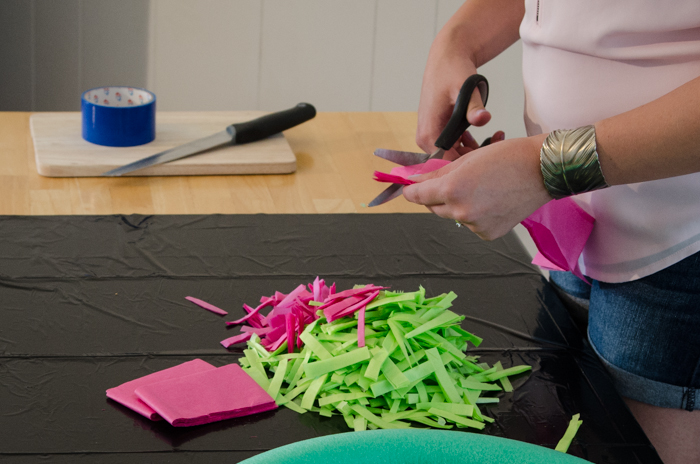
Marvel at your perfect wreath form. Then get busy making confetti. Leave it folded how it is when it comes out of the package and cut a strip a couple inches wide, then cut thin strips from that to make your confetti. This is best done while watching some trash TV. My favourite is Big Brother and since you know my secret, I’d also like to say that Derek is running that house (it’s a safe place- I won’t judge you if yours is Bachelors in Paradise).
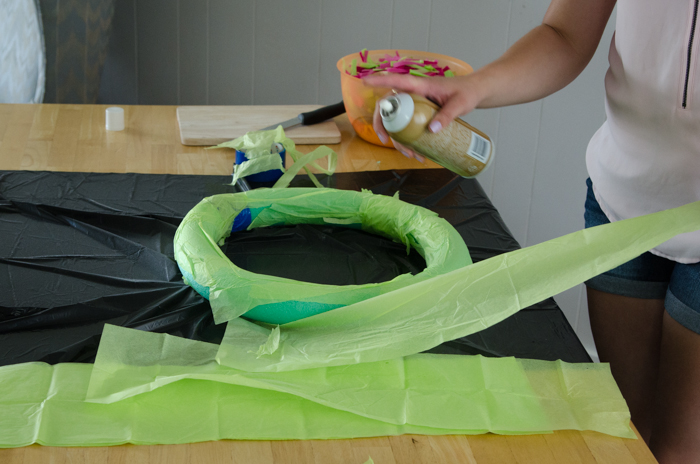
This next part sucks, I won’t lie. spray the leftover pieces of tissue you have and wrap it around your wreath to cover up your lime green or orange pool noodle. This way if some shows through, it won’t be a pool noodle, just more of your confetti colour. They cut a lot of this part out of the video- I got that spray all over my hands and then my hands stuck to the tissue paper, it wasn’t pretty. So don’t get over confident with that spray adhesive, it’ll spite you.

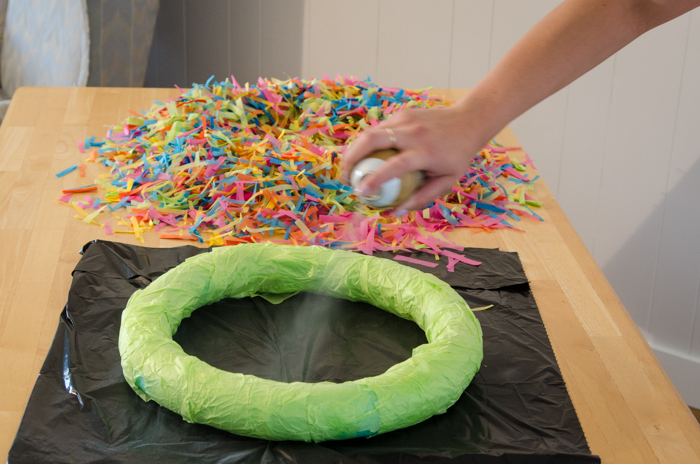
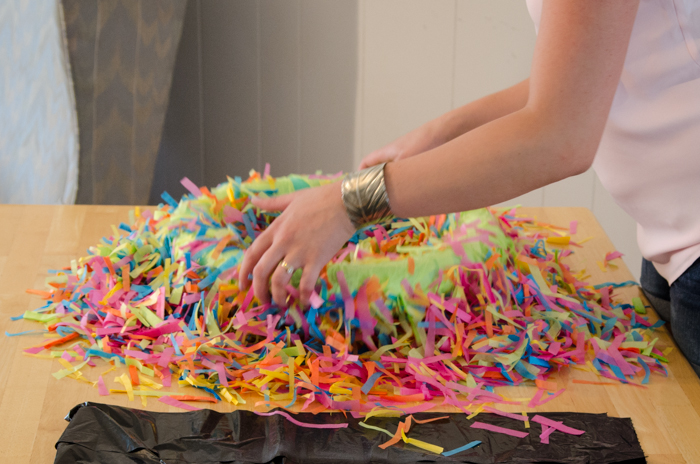
Now the fun part. Fluff all that confetti! Mix in all the colours so you don’t end up with patches of each colour. Then spray your wreath all over (make sure you get the insides and outsides, anything that will show once it’s hung) and dip it in! Spend some time making sure every bit of the wreath has confetti on it before you pick it up and shake off the excess.
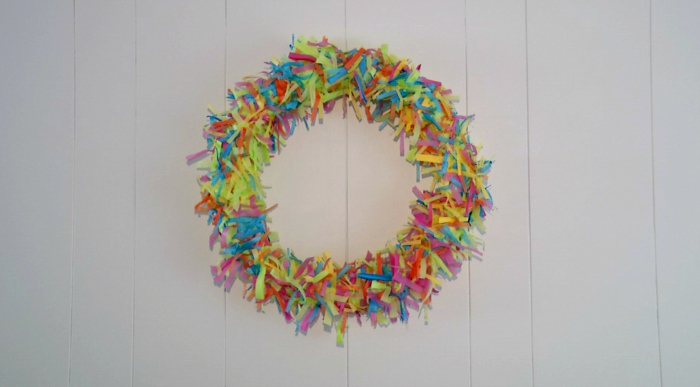
That’s it! Easy peasy, and oh so fun. When you’re done you can use all that extra confetti to surprise someone in your life when they come in the front door. They’ll love it. So, what do you guys think!? Want to thank Shaw for me? I’m pretty darn thankful and I’d love if you tweeted them if you like it so they’ll keep inviting me back! Oh, also- this is the first video I’ve had taken of myself- ever. So I’d love feedback/tips but please be kind :) And as for the wreath… would you make one? What would you use it for?
 Over Here: Frugal Fringe Garland
Great job!! You look adorable-love the hair too :)
Aw thanks Jana! It’s been a few months but I’m still getting used to the shorter hair :)
So fun! I’m excited you are doing these segments. I can’t wait to see more!
Yay! Thanks Shambray, I’m so excited too :)
That is ridiculously easy!
Our local Shaw channel is great, and you did awesome! I’m a hot mess on camera; thank goodness that their editing team is wonderful ;)
You did an amazing job! Seriously, I am so impressed. Plus this tutorial is great! It is super cute and looks easy.
Aw thanks so much Megan! You’re always so encouraging!
Okay seriously, that video was super professional looking. And now I need an email with all the details of how you made such a great video. What did you use to film? How did you get the different shots (close up, angles, etc)? How did you make it so great?! I’m seriously impressed!
Ahh thanks Kala! That’s all Shaw- they filmed and produced it (awesome, right!?), I just showed up with crafts :) My camera was set up to the side taking stills- that’s what the photo tutorials below are from.
Love this! Super original and fun!
Thanks so much Danielle! Glad to have you here :)
This is so cute and easy,i am going to try it for Christmas….Thank you for a simple but pretty wreath!!!
It would look so fun for Christmas! I’d love to see a photo when you do!
Woohoo!! You are great. The wreath is pretty awesome too ;0)
Woohoo!! Thanks Erin :)