Can you believe we’re more than halfway through August!? Time is flying by so quickly lately! I’ve taken a few days off to enjoy some wineries with my sister-in-laws while Shane kept the kids (woo hoo!) and today I’m headed away for another two nights to run (probably run/walk) a half marathon! So I’m going to make it short and sweet friends.
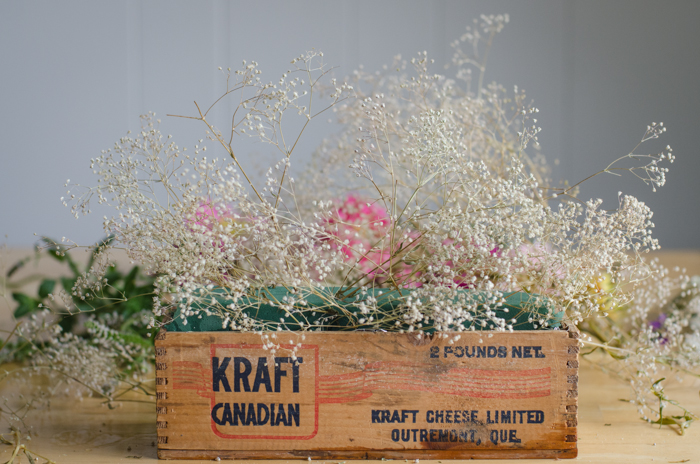
I bought this vintage cheesebox months ago and have been using it in my kids room to hold ultrasound photos (we have a bazillion) and although it will probably go back there after it’s done being used as a vase- I really wanted to test out using it as a floral container. The result? So sweet! I love how wild and natural it looks, it pairs so well with these farmers market flowers I snatched up- I couldn’t help but share it with you.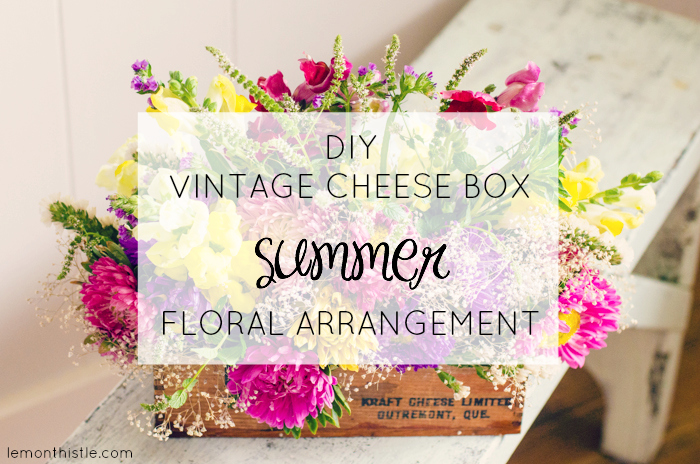
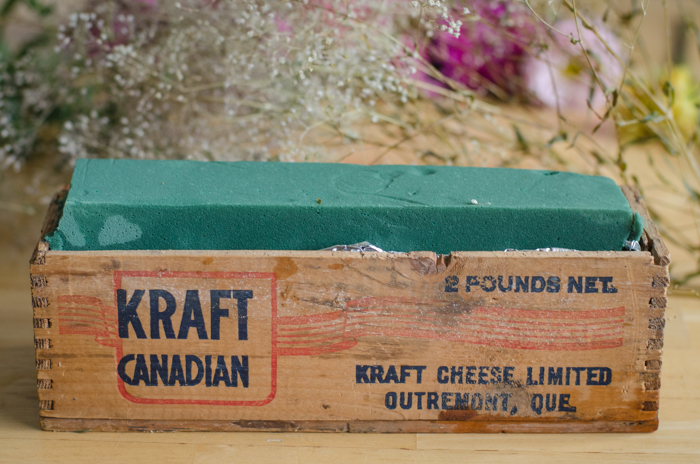
So keeping with the florals series I’ve been loosely following, this arrangement is super affordable and it’s pretty easy to put together. I’m by no means a florist so I’m sure it’ll be easy to follow along! I started by lining my cheese box using a dollar store loaf tin- the disposable kind. It was a bit big so I just squished it in there and folded the edge in so none showed on the outside. Then I added my soaked wet floral foam (I had the hardest time finding wet foam this time- it was all the dry kind for silk flowers at stores this week).
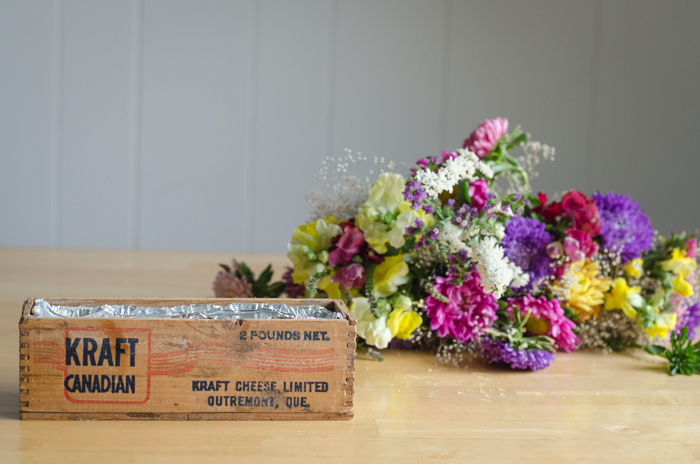
I picked up two $5 bouquets of flowers at the farmers market this weekend so I had plenty of flowers to work with. I find that I always use more flowers than I think I’ll need when I make an arrangement. So if there’s a tip to take from this today it’s to get more than you think you’ll need because I’m always glad when I do! I used all of these flowers in this little bitty cheesebox.
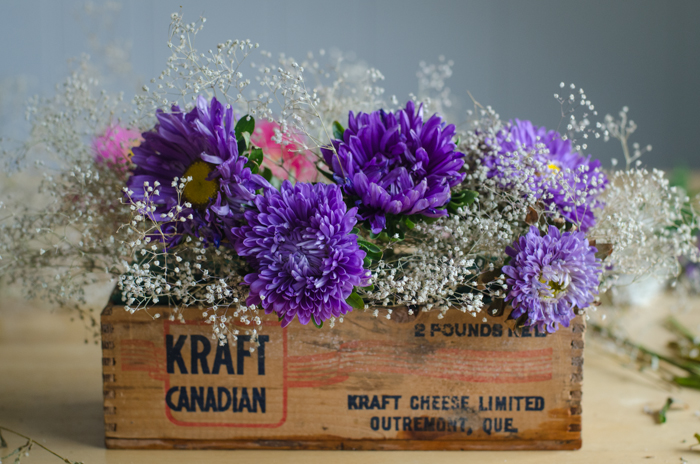
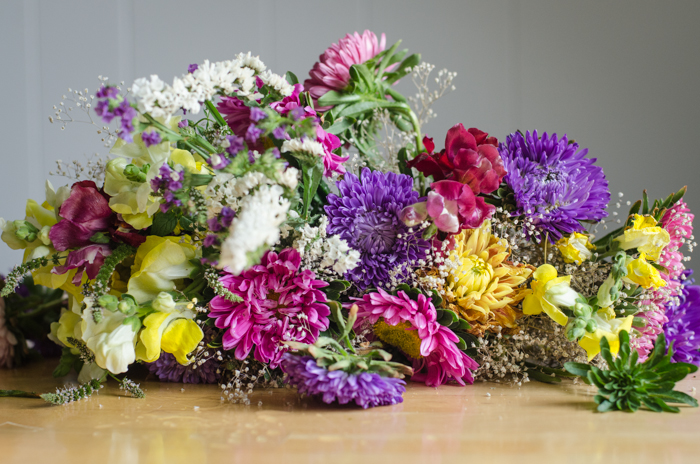
I started by sorting out what I had and this time I ended up with a bunch of assorted mums, some snap dragons, statice, some baby’s breath looking filler, and some mint. I started with some of the filler just to cover the foam a bit. I wanted it to poke out from behind the other flowers. Then I added in the biggest blooms I had which were the purple mums.
I went on to add the pink and yellow mums, making sure both sides of the arrangement looked nice (I usually forget to turn it around and then one side looks great and the other looks so sad). Next I added the white and purple statice to add some height.
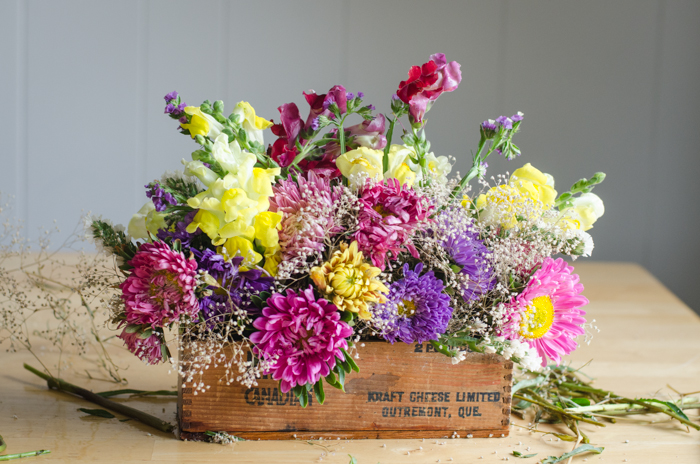
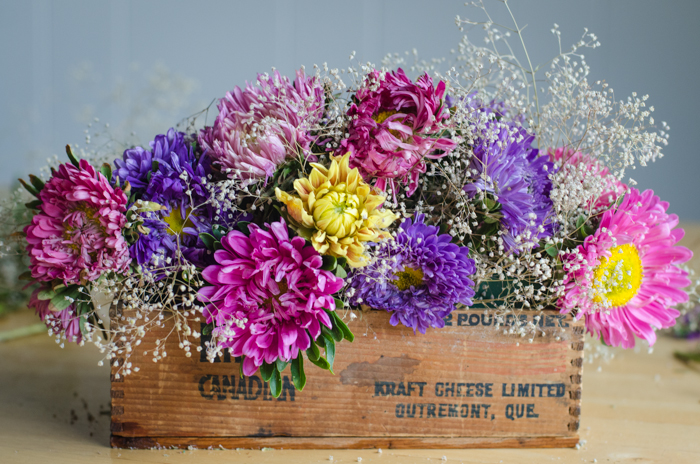
The last flower I put in was the snapdragons, and I know they can get a little floppy, so I stuck them in on top so that they could lay on the other flowers and still build height. I really don’t like when they hang down the sides- I think they just look wilty. Other than flowers? My bouquet included mint! I love that- the smell was so sweet and the little leaves and flowers it produces were such a nice addition! I definitely recommend adding mind to your bouquet- I couldn’t believe how nice it made everything smell and how cute it looked added into the bouquet.
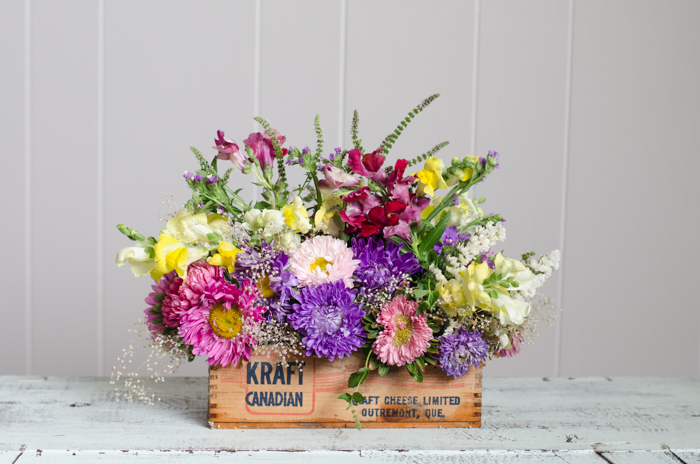
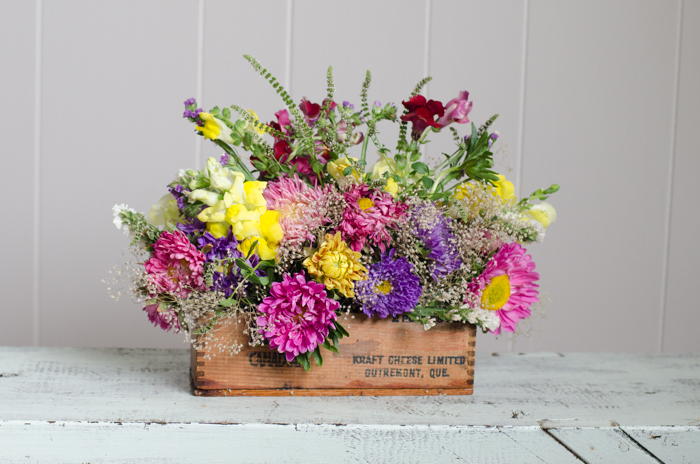
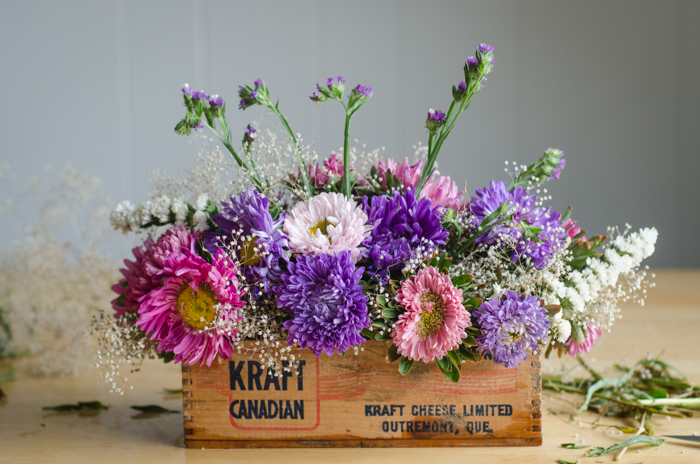
So here’s the final result from both sides- I’m usually more happy with one side but I think I did a pretty good job making both sides equally awesome this time. Small victories make me a happy lady! So before I head off to *hopefully* survive 21K… what fun containers have you used for florals? I’ve used cork, this cheesebox, a water pitcher and candle holders now. I’d love to hear what you’ve played around with!
 Video DIY: Confetti Wreath
Beautiful! I love it! That box is amazing.
Thanks Shambray! I picked it up when I was pregnant for just a couple bucks. I would love to get more but my house can only fit so much before it’s cluttered. So I’ll just love this one and leave the rest;)
LOVE this!!! I did something similar a week or two ago with an old Port box and varied herbs – looks fab on the kitchen window ledge
Flowers are beautiful
Sarah @ EDEA Smith
http://www.edea-smith.co.uk
I am headed over to check that out now! I plan to grow herbs, but really- I kill everything, so I’m not sure when it will happen.
Very pretty. I am going to have to play around with floral foam…something I’ve never done! Do you water it like a normal bouquet or pull the foam out to soak it?
I can’t wait to see what you create! I’m expecting photos ;)
I think soaking it is best, but usually by the time you cram it in there it’s near impossible to get out in one piece, so I just keep watering it like normal. But I soak it before I use it the first time.
This is so stunning! I have a few vintage boxes, but none so narrow. I will have to keep an eye out my one so I can try this:)
I’m sure you could make any box work! But any excuse to hit antique stores, right?
Just gorgeous. :-)
Thanks Bre :)