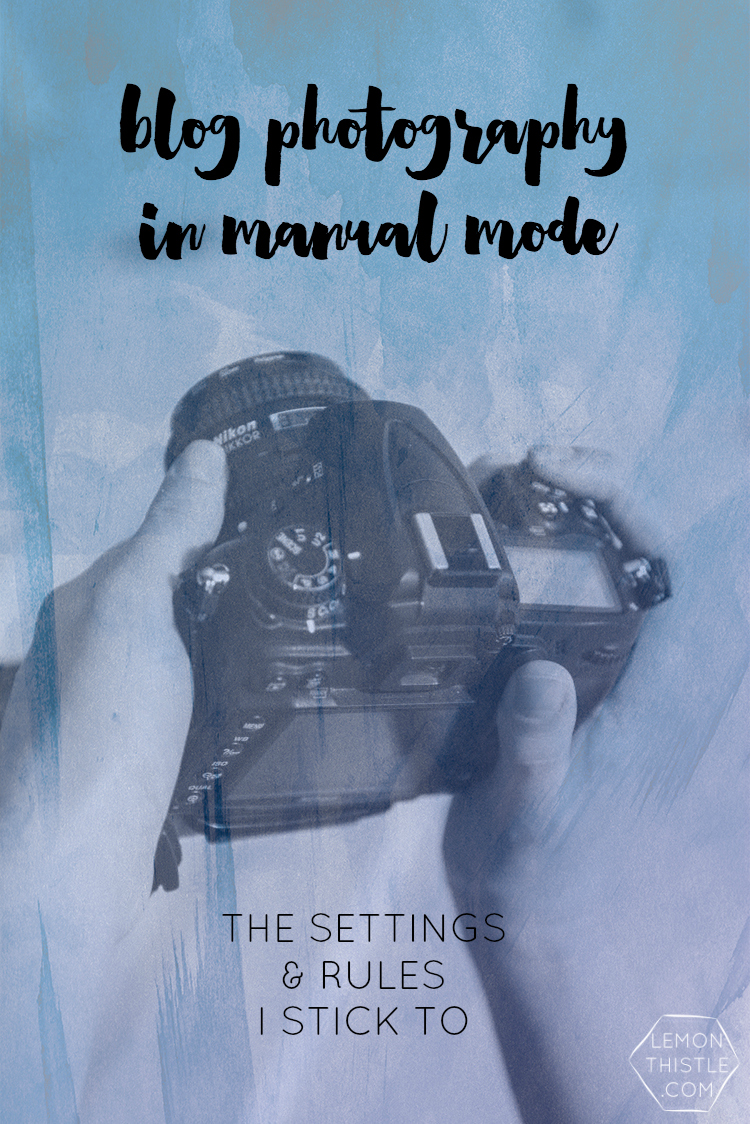
It has been a LONG time since I’ve posted a ‘blogging tips’ post. When Troi shared how to take better photos of your kids a couple weeks back, a lot of you spoke out asking for more photography tips. I’m excited to finally do that today!
SO this post is all about the settings I use, the ones I ignore, and finding those ‘magic numbers’ when you’re photographing for your blog. But really… since I photograph small crafts (products), whole rooms (interiors), and plenty of photos with my kiddos (portraits/ lifestyle), you can apply these tips to almost anything you’re doing.
The three settings we are caring about here (honestly, I ignore the rest) are Aperture, Exposure and ISO. You can download this handy cheat sheet to remember which numbers mean what.
DOWNLOAD THE MANUAL CAMERA SETTINGS CHEAT SHEET HERE.
These three settings are all used to balance each other to get the exact shot you want. So play around with them. If you stay within these ‘guidelines’ I’ve laid out- you can’t go too wrong. I’d print off the cheat sheet and write on these guidelines if you’re just starting out. Carry it in your camera bag (I totally had a cheat sheet for my first few years- YEARS).
The first thing I thought I’d do is give you a quick rundown of the biggest basic that you’ve probably heard before but that I can’t agree more with.
Turn your lights off and open your curtains. I do have off camera lighting and reflectors that I use on occasion… but it’s rare. The best photos are with natural light. If you only have windows on one side of your room (like most rooms), grab a piece of white foamboard or posterboard to use as a ‘reflector’ this means that it bounces the light off towards your project.
In the ‘2016’ image below, you’ll see a white background and that’s foam board. The window is behind me. This is most often. If the window is beside me (second most often), I use the foam board on the other side of me to take care of pesky shadows. Also… no light means no flash. Ever.
Now, before I get too into things I should say that these ‘guidelines’ will give you great web quality photos. If you’re wanting to blow them up and have them as a poster on your wall… there’s a couple things you might want to change and I’ll note those as we go. The first thing I’ll mention is ISO. ISO or sensitivity (how much the camera compensates for light) is awesome in dark spaces BUT it can make a photo look really grainy. My general rule of thumb had always been no higher than 800 MAAAAYBE 1000.
BUT this fall I was at Blog Podium and Tracey Ayton (helloooo beautiful interiors) mentioned that she never ever goes over 400. She also accounts for print (magazine) quality. So I’ve challenged myself to stick under 400 now- but it’s not always possible. If you stay under 1000 you really won’t notice the grain for web quality. You might if you blew it up in print over 8×10.
Aperture (the f stop) is one I like to keep low. I generally like the background to be out of focus. That said, there’s sometimes a low f stop just doesn’t cut it, so then I’ll bump it up. Most lenses will go down to 2.8f which is where I tend to hover but I do have one that goes down to 1.4f. At that point, if you’re taking a photo of a cupcake, not even the whole cupcake is in focus though. I hardly ever go above 5f because of how much I would need to compensate for light with my other settings. The higher the f stop, the less light the camera lets in. One thing to keep in mind is your plane of focus. That’s what will be in focus- to better understand, take a sheet of paper and hold it up facing you. Move it back slowly. This is a plane of focus. It’s not angled, it’s flat. That means if you focus on the front of a 3 dimensional object, the plane of focus will drop off as you get to the back of it. SO if you have a lot of supplies and you want to get them all in a shot before you start a DIY, think about doing a flat lay and shoot from above- they will all be on the same plane (the table) so you can lower your aperture to let more light in without sacrificing clarity.
As for shutterspeed? I like to hover around 1/100. That’s generally fast enough that it can grab photos of people clearly and always fast enough for still objects. When I’m photographing toddlers I’ll often bump it up to 1/250 or 1/400 to avoid blurry hands and feet but for blog photos, I’ll bump it down if I need to. The faster the shutter speed- the less light gets in to the camera. So for still objects, I’ll go as low as 1/60 without a tripod (although it’s risky- but I’m lazy like that) to get the light that I need without raising my ISO. Keep still by resting your elbows on a table and holding your breath (you can hold it for 2 seconds- I promise, you’ll be okay).
So here is some examples of blog photos I’ve taken in the past and I’ll write a few sentences about each that give you an idea of why I would choose these settings.
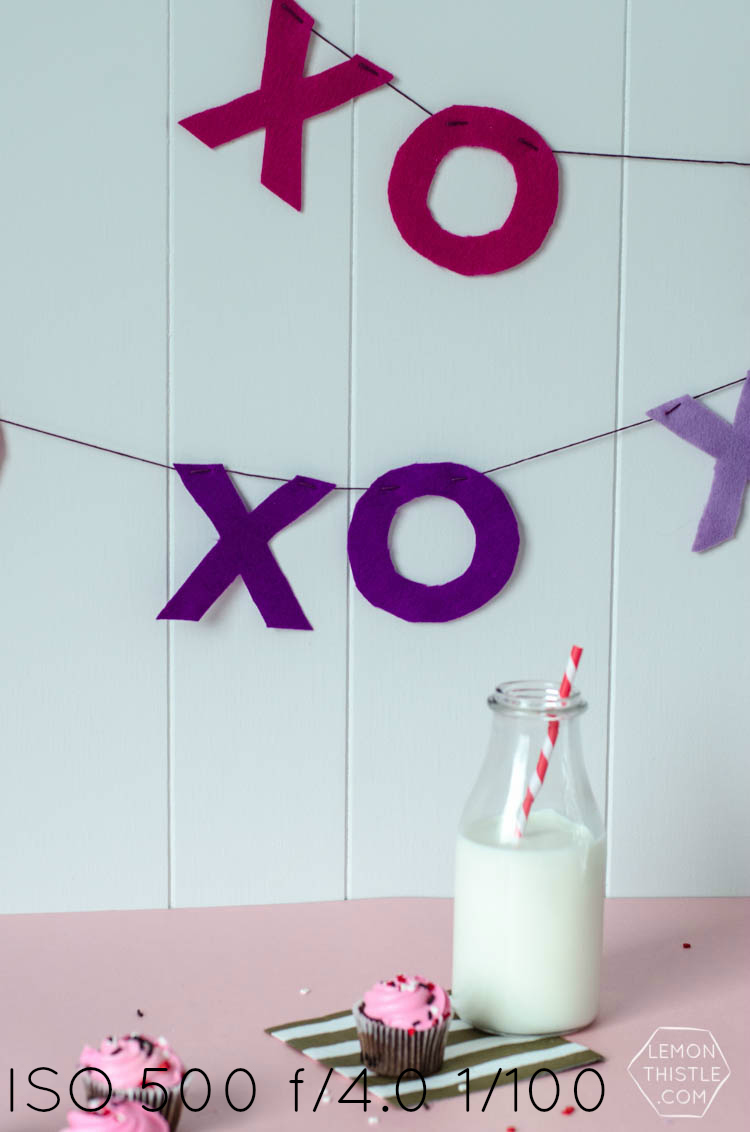
Photo from the post: DIY Felt XO Garland
This is a pretty good place to start as far as settings. I always start at 1/100 for shutterspeed, and my aperture usually starts at 2.8f. I bumped it up because I wanted the props in front to be recognizable- not straight blur and the project was actually the garland in the background. ISO accounted for the lack of light (this was shot in february last year, and february is dark, dark, dark). I’m right beside a window (on the left) so you can see the shadows a little bit. I was using a white posterboard to bounce light (on the right) or they would have been much more prominent.
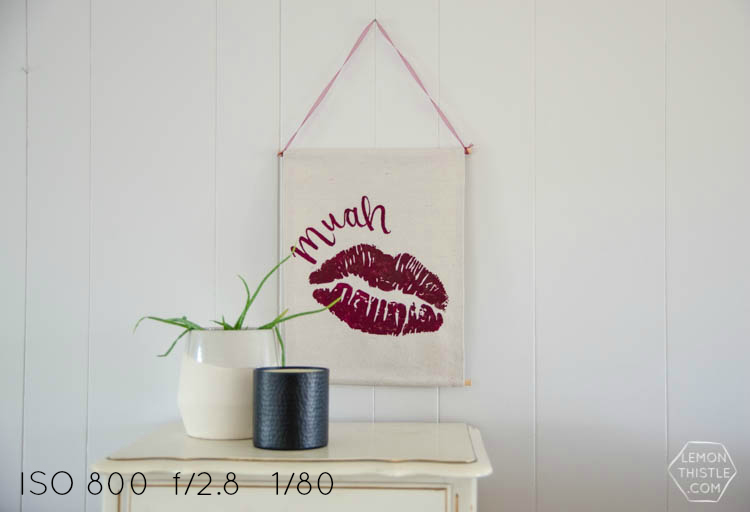
Photo from the post: DIY Hand Lettered Muah! Wall Hanging
Okay, so this one was shot in December (I know- valentine’s in December! It’s a bloggers life) so it was really dark as well. It’s also in the middle of my house (the only wall I could use to hang something without moving furniture), so I’m not right by a window. Since it was so underlit (and I was too lazy to grab a reflector) I had my f stop down to 2.8f and my shutterspeed down to 80. I tried lower and this day I was just too shaky without the tripod. So I compensated with ISO. Does it seem grainy to you? Probably not- so feel safe to go up to 800.
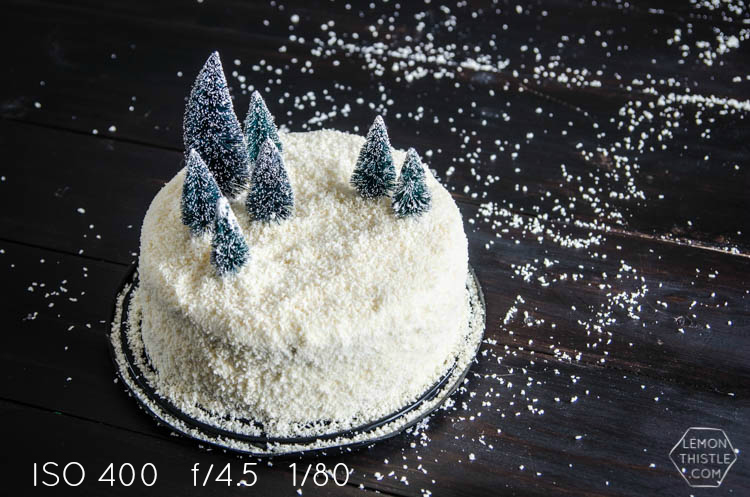
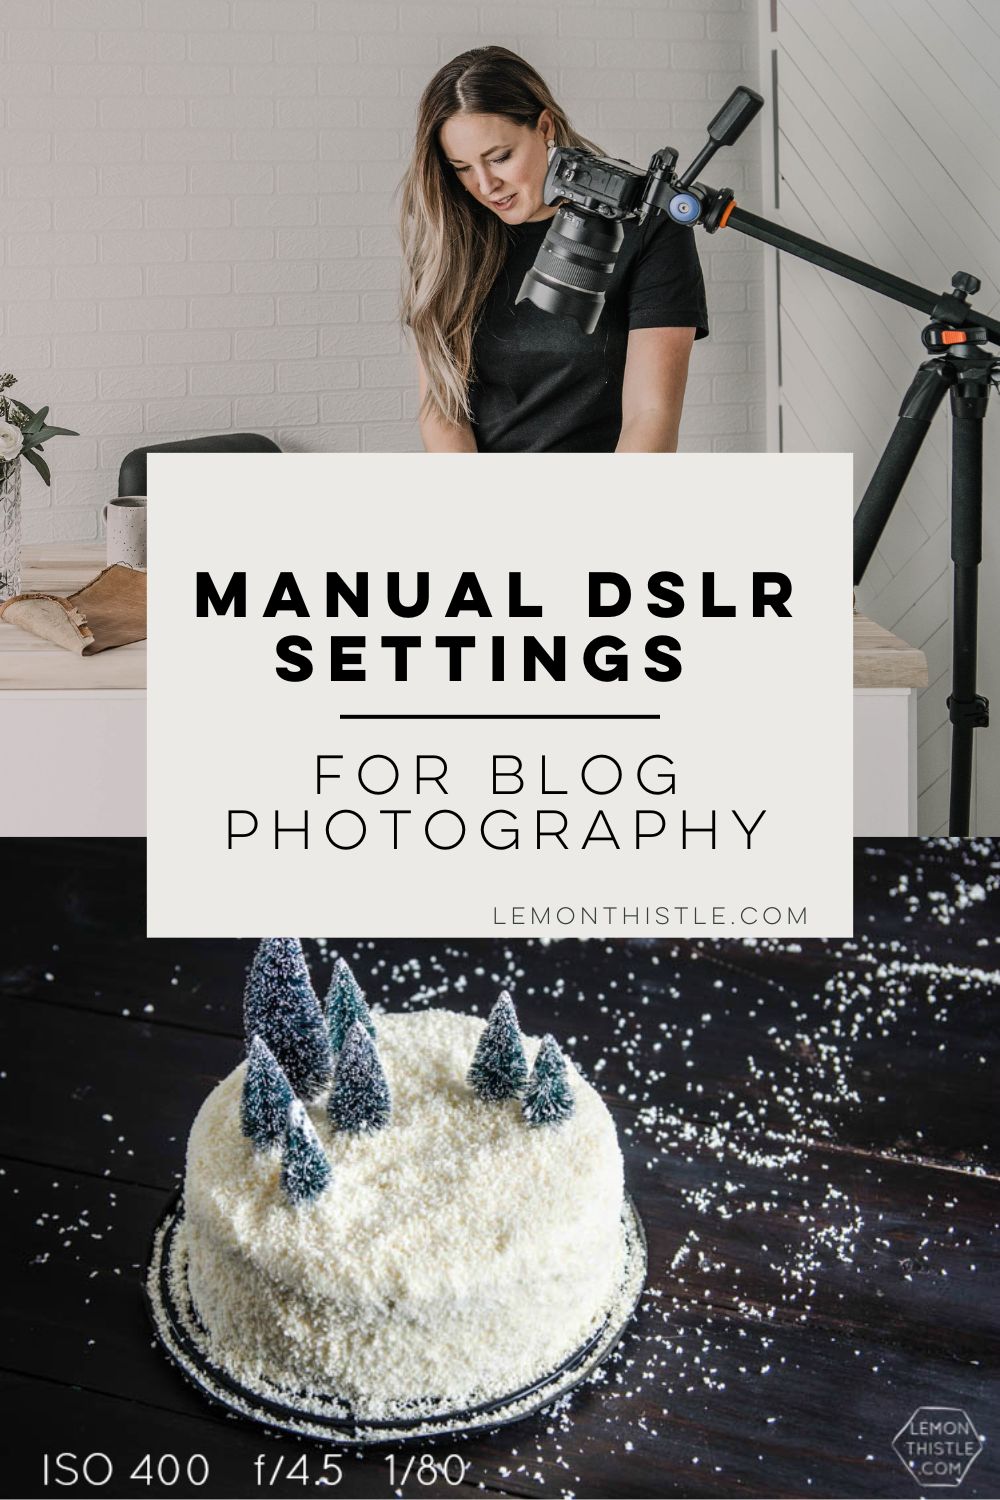
Photo from the post: DIY Winter Scene Cake Makeover
This is one of my favourite shots I’ve taken lately. It was near a window (right) but shot in December (low light). I managed to keep the ISO at 400 with a 4.5f aperture (I wanted all the trees in focus and any lower it was not happening) by lowering my shutterspeed to 1/80. I chose NOT to use a reflector on the left of this image because I liked the more dramatic shadow in the shot. If it wasn’t food, I probably would have used a reflector to take care of those shadows.
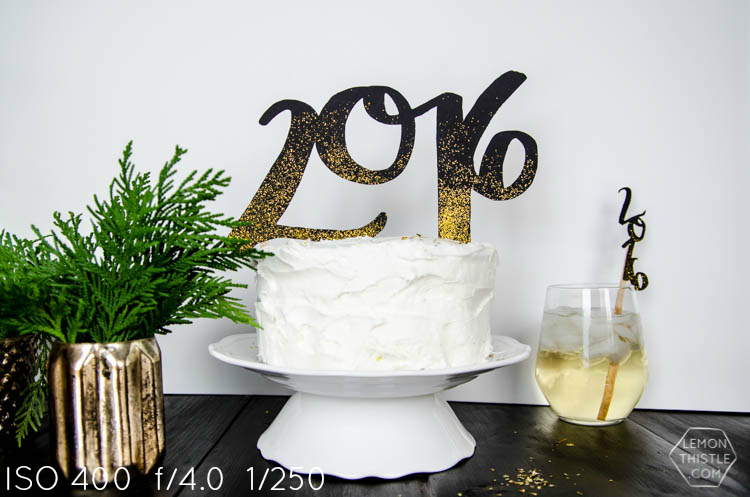
Photo from the post: DIY 2016 Black and Gold Toppers
Ah, another low light shot (November). As I mentioned above, for this shot, I have my back to a window and am using a white posterboard for the backdrop and as a reflector to take care of some nasty shadows. Since there is a lot going on in this shot (both 2016s needed to be in focus), my f stop was higher than usual (4f). I had my ISO at 400 and shutterspeed at 250. In hindsight, I probably could have bumped down my ISO and gone with a slower shutterspeed BUT that’s the beauty of manual- there’s no ‘perfect’ recipe, it’s what works for each shot.
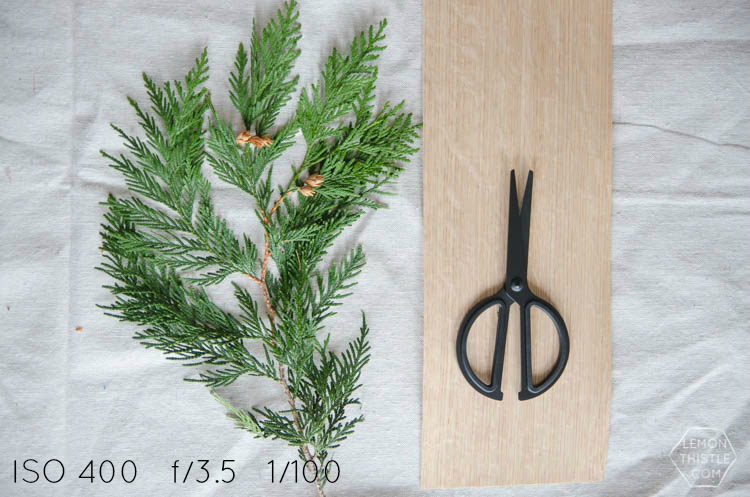
Photo from the post: DIY Wood and Greens Garland
Okay, remember what I said about plane of focus? This is why most bloggers choose to use flat lays for supplies shots. If I took this shot from beside the cedar, the scissors would for sure be out of focus. I could up my ISO, but I would really need to make extreme adjustments to my other settings to get that shot. SO learn to love the flat lay ;). If the cedar was flat, I could have gone with a lower aperture but it looked funny only having some of it in focus. This right here… this photo is a representative of most of my blog photos. These settings, this set up (back to window, reflector in front of me, shooting from above).
Alright, I’ve probably chatted your ears off. If you have any questions, feel free to pop them in the comments and I’ll do my best to answer! I’m not at all an expert on this stuff, but I’ve practiced enough that these are the settings and guidelines I have found work best for me- so I hope they’ll work great for you too. If you’re curious about getting photos from the camera onto a blog… I’ve got a post walking through my process on that as well and then I made a video showing my whole lightroom editing workflow– this will save you SO much time!
LIKE IT? PIN IT!
 2 Minute DIY: Kisses Wall Art
My big goal for 2016 is to improve my photography. This was super helpful!! Thank you!!
Neither of your linked posts work. I get a 404 not found error. :(
All fixed up! Thanks Leanne :)
Hi Colleen! Such a great blog you are running!!! I really enjoy to read your tips! Many thanks:)) I would like to ask you what kind of camera you used? Maybe you can recommend some particularly models for beginners? I’m interior designer and decorator and really need to improve my portfolio:) From Russia with love:) Natali
Hi Natali, thanks so much! I use a Nikon D7000 and LOVE it. The only downside is it won’t do fully manual VIDEO. But the rest? Amazing!