• Skip to main content
  • Skip to header left navigation
  • Skip to header right navigation
  • Skip to site footer
  • Shop
  • Courses
    • Course Login
  • Get The Email

  • DIY
    • DIY Home Decor
    • With Power Tools
    • Renovation
    • For Kids
    • For Parties
    • Organization
    • Cricut Crafts
    • DIY Yard Games
  • Home Decor
    • DIY Room Makeover E-Course
    • Room Reveals
    • Kid Friendly Home
    • DIY Home Decor
    • Renovation
    • Shop My Home
  • Lettering
    • Hand Lettered Printables
    • Free Practice Sheets
    • Handlettered DIY
    • Steal My Lettering
    • Free Brush Lettering Quickstart Guide
Lemon Thistle

Lemon Thistle

DIY, Hand Lettering + Home Decor

  • Printables
    • For Cricut
    • Party Printables
    • Home Decor Printables
    • Bachelor Bingo
    • Handlettering Practice Sheets
    • All Free Printables
  • Entertain
    • Party Printables
    • Party DIY
    • Tablescapes
    • Kids Parties
  • Blog

DIY Shoe Storage for a Split Level Entry

Mar 03

What a great storage solution for a split level entry home! DIY Built in Shoe Storage Drawers

This project is totally life changing for us, you guys! A couple weeks ago I shared the DIY handrail we put in on our split level entry stairs. But this… well, this is better. If you’ve lived in a split level entry… you’ll know the biggest challenge is that stinkin’ entry way. It’s usually cramped and you’re REALLY lucky if you get a closet there. We did not. So you basically walk in and if there’s more than one of you (say three kids), you cram onto the entry landing and try close the door (before one of three runs out the door) , then take off your shoes and try not trip on the now 8 shoes in your path to get up the stairs. #perfect

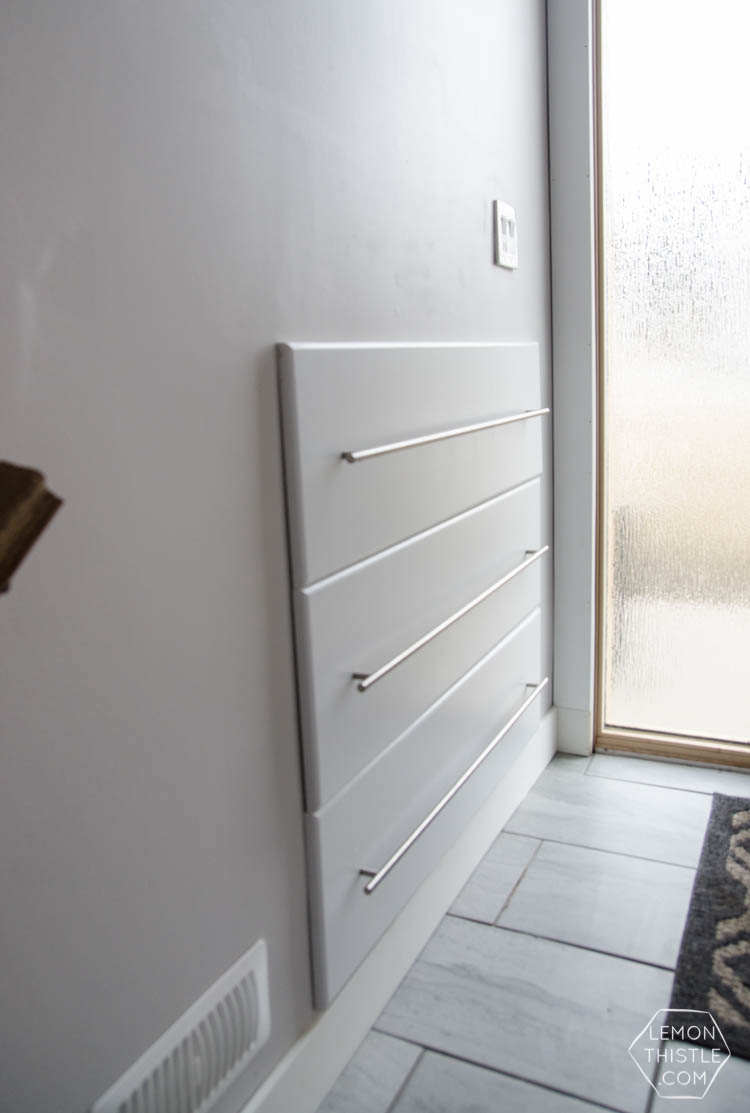
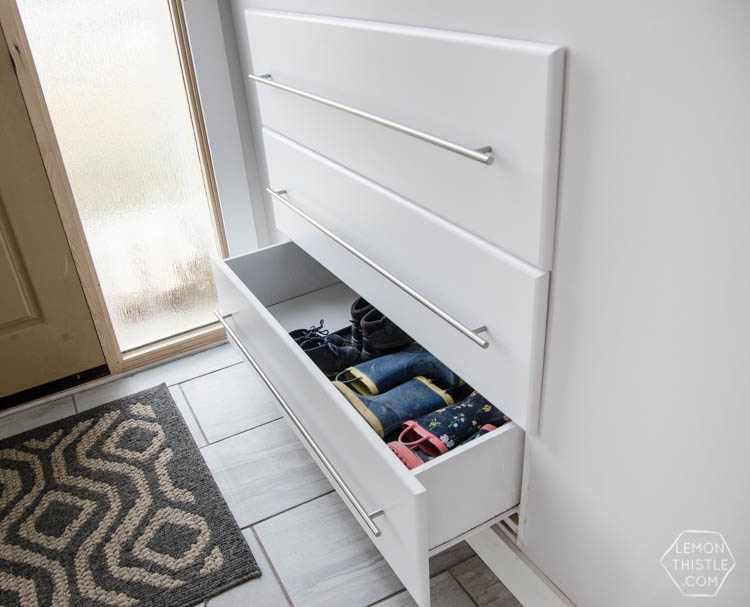
And shoe racks could work, but when it’s this cramped and you need to be able to carry laundry baskets up and down these stairs several times a day (I wish I was kidding), there’s really not room for a nice one. So since we had an unfinished basement to play with, we decided to use that to our advantage and build in some shoe storage. And friends, it’s the best. It is the most shoe storage we have ever had… and I actually had a bookshelf for shoes in our last place. These drawers really hold SO much! And we didn’t lose any space to make them. In the basement, we built closets on either side, so that shoe storage cubby is actually level with the closets instead of having an awkward dead space on between the closet and wall. So really… why wouldn’t we have used it for this?

What a great storage solution for a split level entry home! DIY Built in Shoe Storage Drawers

What a great storage solution for a split level entry home! DIY Built in Shoe Storage Drawers

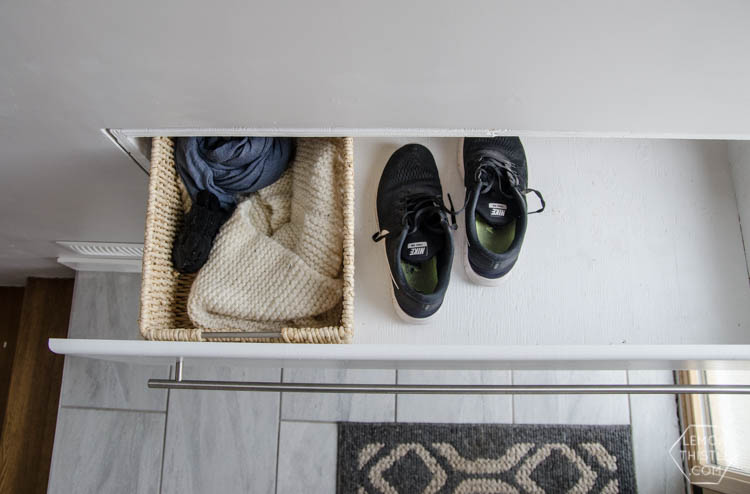
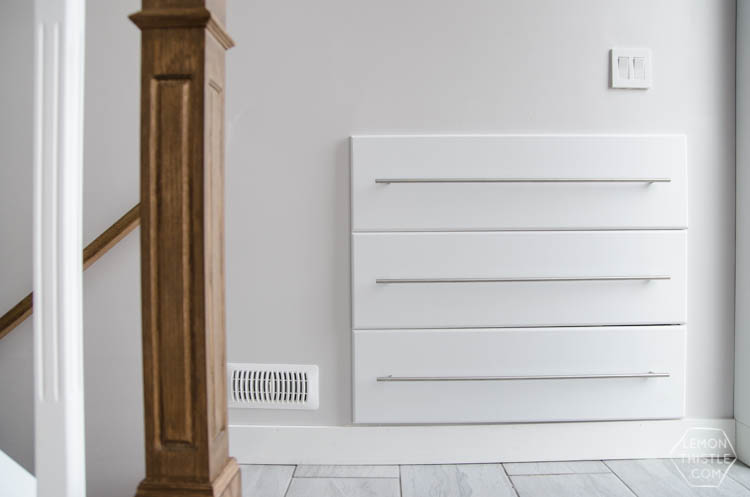
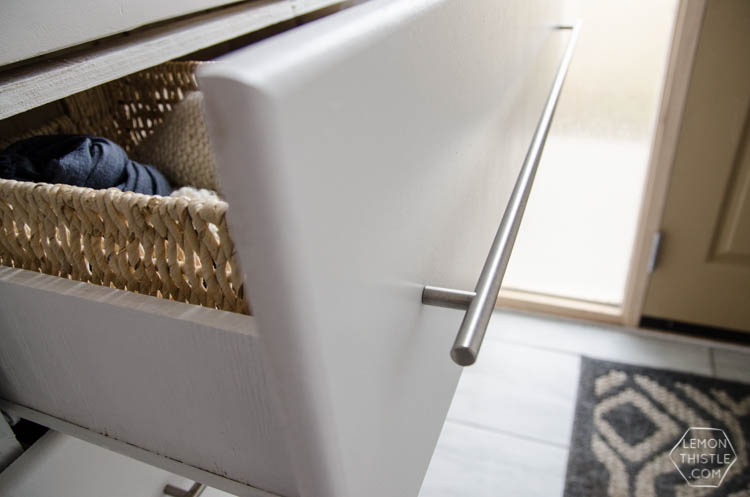
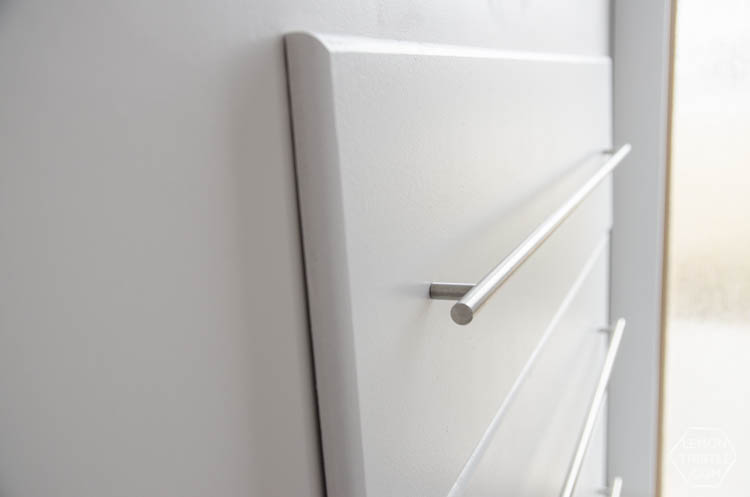
What do I love about these? Well, I Love that there is NO wasted space. Not only do we keep almost every inch of floorspace for little feet to sit and get shoes on BUT these look pretty darn nice (if I do say so myself). As per usual, we built these drawers using supplies from one of my fave partners- Home Depot but those pulls I ordered special from D. Lawless Hardware and I’m in love! They really finish off the drawers perfectly. Now that the drawers are in and the railing is updated it kind of makes us want to go all traditional and do a full wall moulding treatment to the entry. Buuuut we’re thinking that done is better than taking that on ;) Ready to learn allll about how we did it? And how you can put drawers in your walls too!?

I’m not sure I’m going to do the BEST job explaining it, so again… I’m turning this one over to the brains and the guy that did *most* of the work on these (I did a top notch job painting them). But before that… remember the Before?

entry way before

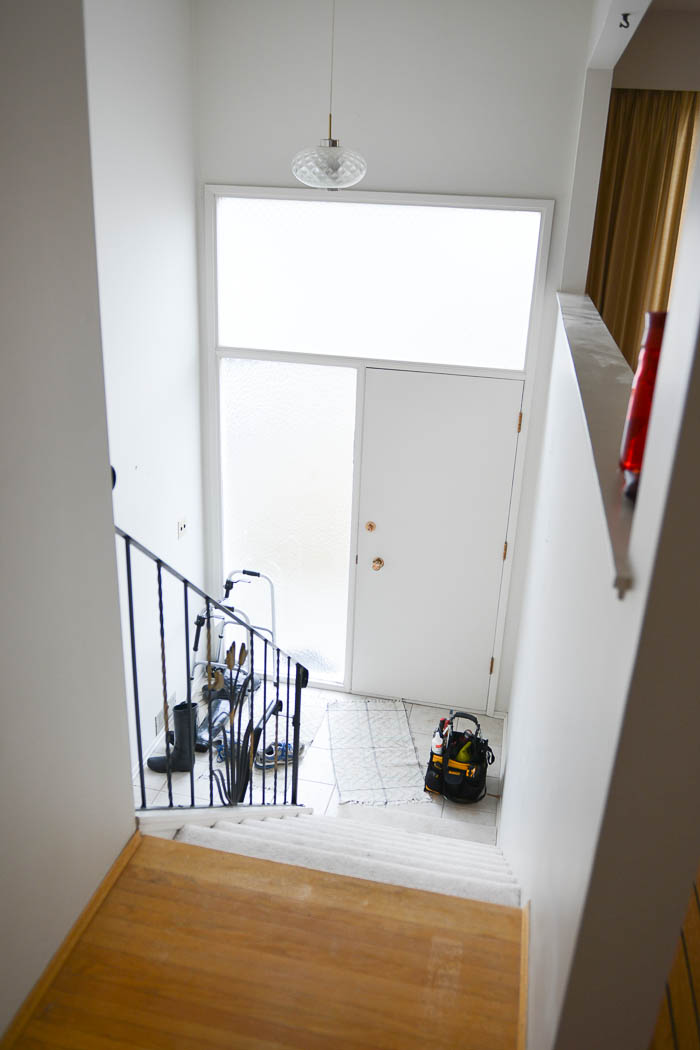
Suuuuch an improvement already! Can’t wait to show you guys the final!

Materials:

  • 3/4″ plywood, 4′ x 8′ quantity of two (for the cabinet box). In hindsight, for the sake of esthetics I would prefer MDF
  • 1/2″ plywood, 4′ x 8′ quantity of two (drawer sides, back, and bottom) Again, next time I would definitely used MDF for a cleaner, more finished look
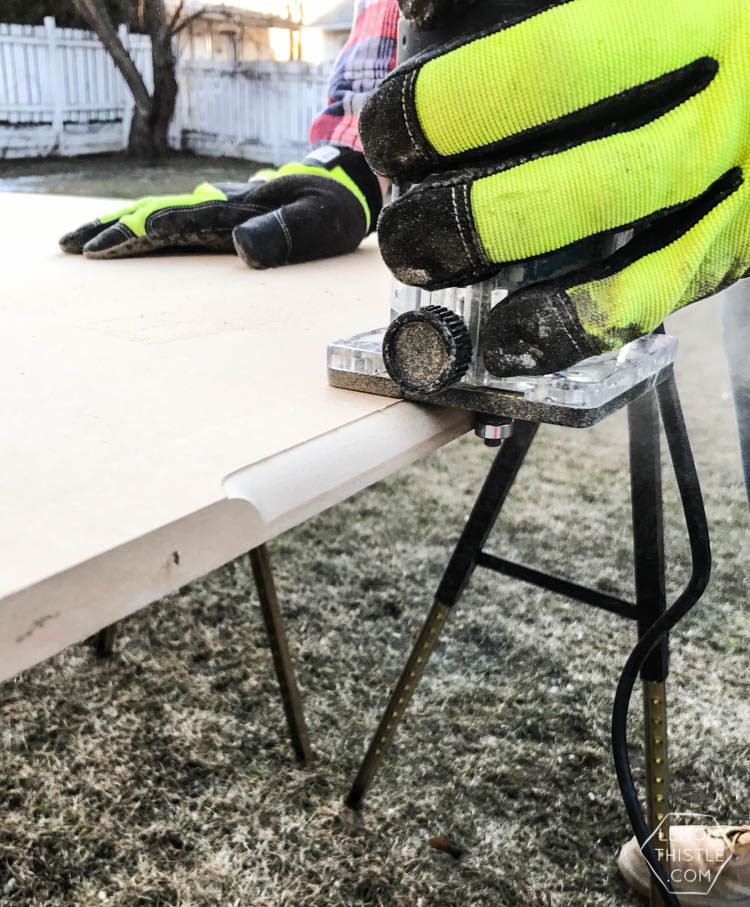
  • 5/8″ MDF (for the faces). We were able to rip all the drawer faces from one 4′ x 8′ sheet
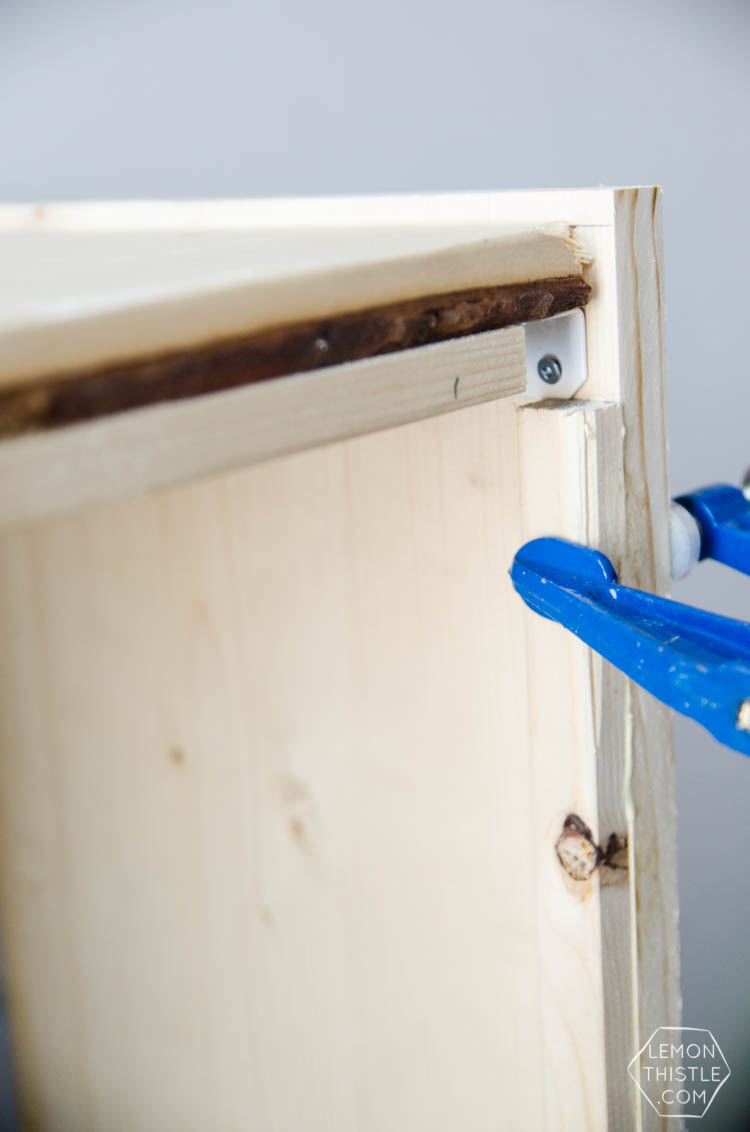
  • L brackets
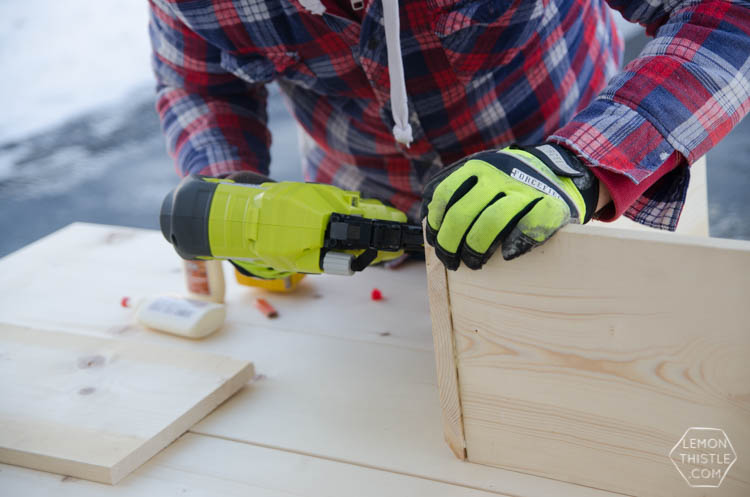
  • Brad Nailer (for assembling drawer bodies)
  • #6 screws, 1/2″ and 5/8″
  • Wood Glue, Clear construction adhesive
  • Drawer slides
  • Hardware (these are the ones we used)

What a great storage solution for a split level entry home! DIY Built in Shoe Storage Drawers

1. Build in ‘cubbies’

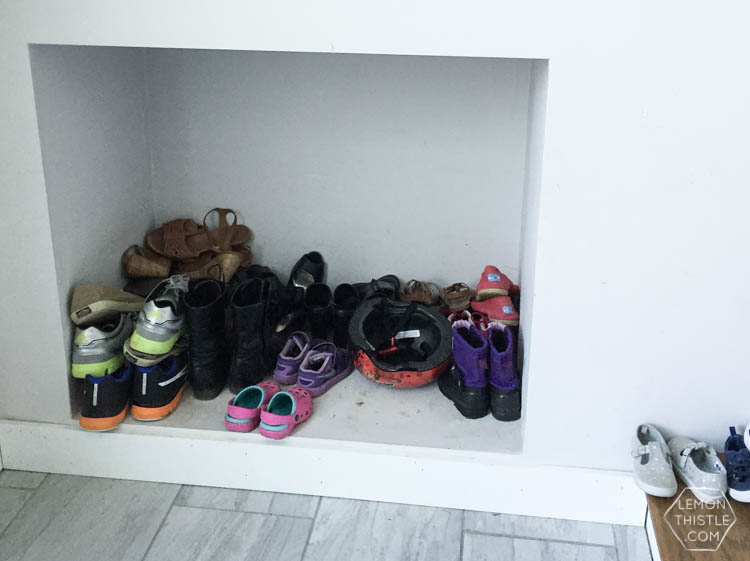
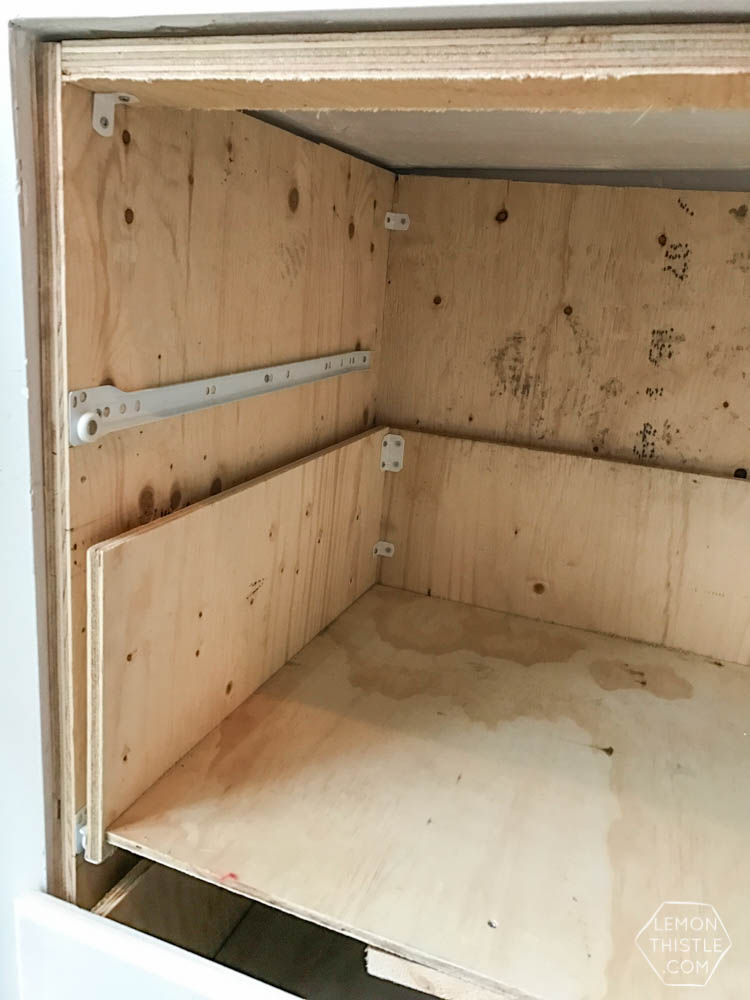
We did this so long ago, you guys so I don’t have photos and instructions- but essentially, you need a place to put these drawers in. We left them just as the cubbies for way too long (so messy!). Cut a hole in your drywall and frame a box (like you would a closet). If you have an unfinished basement, this is pretty easy to do. If not, you’ll need to add drywall on the back (in the basement) to conceal this. Drywall it and slap on some paint to seal it. We had finished ours as if it was going to be open shelving but you don’t need to make the seams all pretty since it will be hidden. We just decided open shelving would look too cluttered too easily.

What a great storage solution for a split level entry home! DIY Built in Shoe Storage Drawers

What a great storage solution for a split level entry home! DIY Built in Shoe Storage Drawers

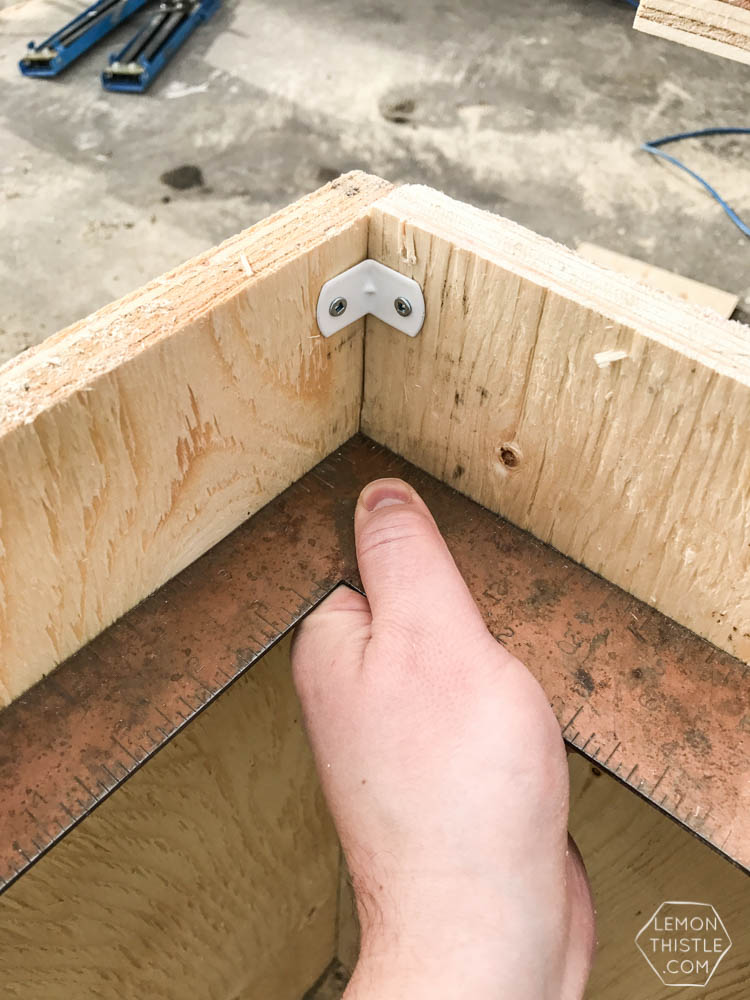
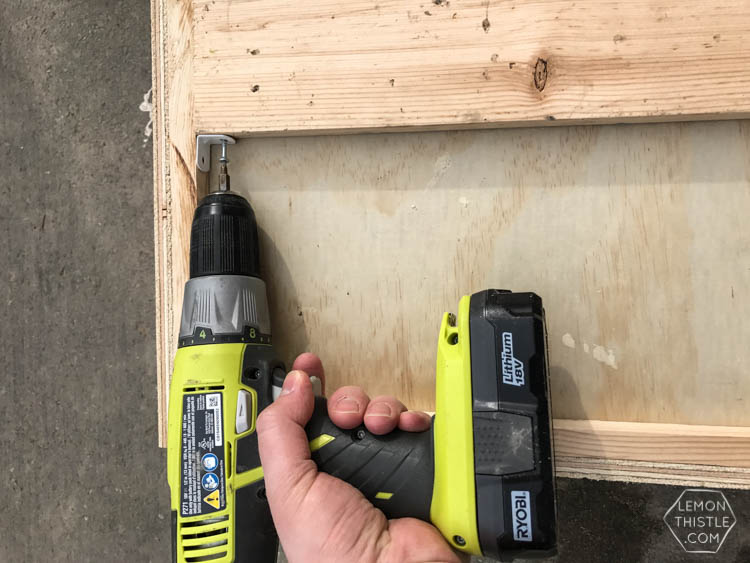
2. Build your inserts

Let me start by saying we tried to do this project without inserts and it flopped. Why? Well… walls aren’t square in this 1965 house. In fact, they’re totally warped. We got to installing the slides and since they weren’t totally square, the drawers couldn’t shut the whole way or they’d fall off the tracks half way. Totally angering. Unless you’re confident in your squareness of walls… save yourself a headache and build an insert.
The first thing you will need to do Measure and record inside dimensions of the box/cubby. Measure multiple spots to find the smallest measurement of each dimension (width, height, depth) so that the box isn’t larger than the smallest part (so it fits!).  Then, go ahead and build the box to insert into the closet opening. Think of this box as the individual cabinet that houses the drawers (just like your kitchen has) that is just inserted into the wall opening. I used “L” brackets at each corner and made a three-sided box (sides and back only), then added small strips along the front (top and bottom) to ensure the front stayed square.
A note from Colleen- TP is NOT the prettiest stuff but you mostly will not see this box. However, I wish I’d given it a sand and painted it before it was installed. You can patch the cut edge of the TP with drywall mud and sand it down for a more even, smooth edge. Or you could just use MDF and be done with it ;)

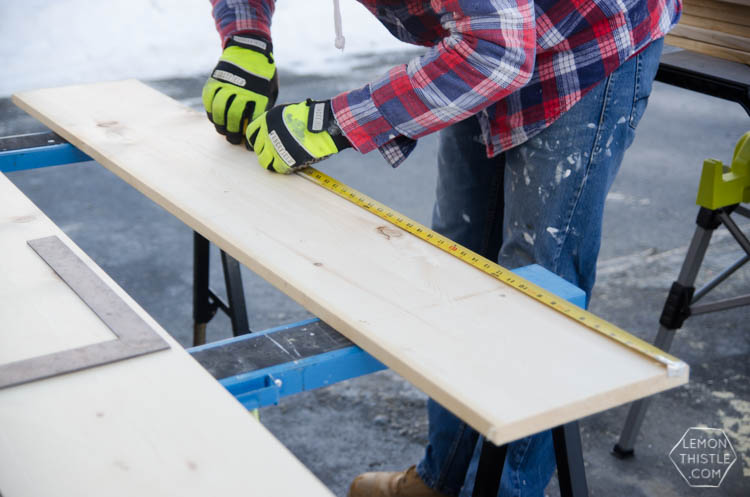
3. Build your drawers

Cut the pieces for your drawers- depending on the size of your cubby/box this will be different than ours, but for reference our measurements are in the materials section. We just built standard drawers BUT since they’re giant (and heavy) and due to lack of proper joinery tools/experience, I assembled the sides and back using L brackets at each corner. I love L brackets… they’re kind of a cheat but they give me confidence that when my kids decide to climb in, the bottom won’t fall out. Because I know that will happen.
 What a great storage solution for a split level entry home! DIY Built in Shoe Storage Drawers
What a great storage solution for a split level entry home! DIY Built in Shoe Storage Drawers
When determining the width of the drawer boxes to be built, ensure to allow clearance for drawer slides (will vary depending on type/style of drawer slide used). In our case we required 1/2″ on either side of the drawer for the drawer slide . The overall inside height of our box was 31″; I built the drawer boxes at 9″ height originally to allow for the drawer face the overhang the drawer box top and bottom and prevent the issue of the drawer boxes rubbing on one another. I also ended up building the top drawer box for each side at only 7″ high to allow for plenty or clearance around the support piece running side-to-side in the box (as mentioned above, this piece is to ensure the box sides stay square and solid). Assemble just the bottom, sides and back of your drawer. Leave the drawer face off for now. We Built the drawers using wood glue and brad nails, then re-enforced with the L brackets.
Our faces were made out of MDF and we routed the edges which give them a more custom look.
What a great storage solution for a split level entry home! DIY Built in Shoe Storage Drawers
After you add the drawer face (when you’re doing the slides), keep this in mind: Since they’re giant, I also ripped supports strips for the bottom to rest on out of 2 x 6 SPF and glued and brad nailed these to the sides and back of the drawers. The bottoms were made out of 1/2″ sanded plywood, and the these bottoms were brad nailed to the support pieces underneath to add extra stability and avoid the bottoms moving around at all inside the drawer boxes.
Once the drawers were assembled (aside from the faces), we painted the drawer boxes and then attached the drawer slide (flush to the front of the drawer box).

4. Install Drawer Slides

We just used the most standard drawer slides available at Home Depot and they work great. I installed the cabinet-mounted portion of the drawer slide on each side of the cabinet box (starting with the bottom drawer), using a level to ensure the slides on the left and right sides of the box were mounted at the same heights. These were mounted flush with the front edge of the cabinet box and about a 1/2″ above the support piece that runs side to side inside the cabinet box.
After installing the drawer in the slides and ensuring smooth opening/closing, it was time to install the drawer face. Insert your assembled drawer on the slides for this step.Drawer faces were cut to be slightly larger than the opening in the wall, so the drawer faces rest on the wall on the sides and at the very top and bottom. Because there was a baseboard (which was level to the floor on its bottom edge and the cabinet box on its top edge), we had a great starting point for spacing the drawer faces. I used a 1/8″ spacer (ie paint stir stick) and rested the drawer face on the paint sticks, on the top edge of the baseboard. Note: The drawer faces were cut at 39″, while the width of the opening in our wall is 38″. This allowed for a 1/2″ of the drawer face on each side to rest against the wall when the drawer is closed) hiding any imperfections on the drywall edge when closed.
 What a great storage solution for a split level entry home! DIY Built in Shoe Storage Drawers
I had a second set of hands for this part: person one held the drawer face in place,  then person 2 measured to ensure the 1/2″ overhang on each side was accurate, and ran a level along the top of the drawer face to ensure it was level still. Person two then ran a pencil line on the inside face of the drawer front, tracing where it rested against the drawer sides and bottom.
Using the outline marked out in the step above, run small bead of adhesive (we used a clear, construction grade adhesive applied using a caulking gun) just on the outside edge of the pencil line on the inside of the drawer face. The drawer face can then be set in place and attached using L brackets and #6 5/8″ screws.
Repeat these steps for the next drawer up, now resting your spacers on the top edge of the bottom drawer to ensure even spacing for the face of the next drawer up. Repeat for the top drawer, only this time in order to trace out your drawer face location, you will need to open the middle drawer and trace the outside of where the drawer face rests on the drawer box sides and bottom, working from the opening underneath the top drawer that was created by opening the middle drawer.

5. Hardware!

What a great storage solution for a split level entry home! DIY Built in Shoe Storage Drawers

What a great storage solution for a split level entry home! DIY Built in Shoe Storage Drawers

Now it’s time to install your hardware in desired location. We installed the hardware centered on the drawer face. Ours were large pulls with two screws to mount, so we measured the width of the handle (centre to centre from each mounting hole on the handle) and determined the mounting location accordingly on the drawer face.
Colleen again… these drawers are GIANT and I wanted to choose hardware that balanced that. These pulls are perfect and I love how easy they are to open for my kids. You can get them in lots of different lengths at D. Lawless if your drawers aren’t so huge.
What a great storage solution for a split level entry home! DIY Built in Shoe Storage Drawers
That’s it! I know, I say that like it wasn’t a ton of work. But it’s SO worthwhile in a split level. If you’ve ever lived in one you KNOW the pain that these entry ways can be. In fact, we installed them Monday night and Tuesday morning I had a client stop by the house to pick up a custom sign and she commented on them straight away. She wanted to know who built them so she could have them put in her house as well! It’s SO helpful. Since they’ve been done, we walk down the stairs and our entryway feels huge without all the boot mats and shoes piled. It’s unreal the difference it has made.
Now we just have some finishing touches (filling and painting, lighting, painting our new door, adding hooks etc) before we will share the whole entry way reveal and you guys I’m way too excited to reveal such a small space.

LIKE IT? PIN IT!

What a great storage solution for a split level entry home! DIY Built in Shoe Storage Drawers

  • Facebook
  • Twitter
  • LinkedIn
Category: DIY, Home DecorTag: Building, DIY Furniture, Entry Way, Sponsored, Storage, Wood
Previous Post:Ok, You love home decor too!
Next Post:Spring Hand Lettering Practice SheetSpring hand lettering practice sheet free printable for brush pens or watercolor
Avatar photo

About Colleen Pastoor

Colleen is the DIY blogger and author behind Lemon Thistle blog where she shares hands on DIY tutorials, home renovations, hand lettered designs, and projects to simplify your life… beautifully.
If you enjoy modern home decor (that’s totally cozy for your family!), saving money through DIY and simplified lifestyle- you’ll love the tutorials Colleen shares on LemonThistle.com. Find her @colleenpastoor everywhere else!

Reader Interactions

Comments

  1. Avatar photoKara

    Mar 03 at 7:57 pm

    This is a brilliant idea!!! I’m turned off by tight entryways because of the traffic jam of shoes that usually happens, but this is such a smart way to save space!

    Reply
    • Avatar photoColleen Pastoor

      Mar 13 at 6:11 pm

      The shoe traffic jam! It’s a real thing and it’s the worst!!

      Reply
  2. Avatar photoJason

    Mar 06 at 9:39 am

    Ok, standing at our entry saying, hmmm, I wonder what’s behind that wall. Amazing job you guys!

    Reply
    • Avatar photoColleen Pastoor

      Mar 13 at 6:13 pm

      Haha! Right? We were lucky (?) that our basement was unfinished so it was easy to see what was back there!

      Reply
      • Avatar photoNick

        Mar 21 at 10:36 am

        I was not so lucky. I bought everything to have this done and when I called for help the guy told me it’s not possible because there is a stud right in the middle. So bumped ?

        Reply
  3. Avatar photoJayne

    Mar 08 at 3:35 pm

    Brilliant !!!!
    …and looks great too !
    Jayne

    Reply
    • Avatar photoColleen Pastoor

      Mar 13 at 6:17 pm

      Thanks so much Jayne!!

      Reply
  4. Avatar photoThalita

    Mar 10 at 10:27 am

    This is seriously so genius and amazing. I LOVE!!!!

    Reply
    • Avatar photoColleen Pastoor

      Mar 13 at 6:20 pm

      Thanks so much Thalita!

      Reply
  5. Avatar photoshelagh

    Apr 02 at 9:22 am

    I’ve been thinking of doing this as well. What does it look like on the other side of the wall? We have a curved wall so probably can’t do both sides. The other side goes into our garage. Thanks!

    Reply
    • Avatar photoColleen Pastoor

      Apr 25 at 11:08 am

      Hi Shelagh, we are SO glad we did it! The other side of the wall we built out a closet (it’s a rec room space on one side and a suite bedroom on the other)- this helps it not look like a random box floating on the top half of the wall. It would be great in your garage!

      Reply
  6. Avatar photoSuzanne

    Feb 20 at 6:10 pm

    This is what would make the difference to tip me over the edge when buying a home. Great for resale value!

    I have a split ranch and a finished basement so cannot put in full drawers but you’ve given me an idea to add built-in shoe cabinets like this one: https://www.ikea.com/us/en/images/products/stall-shoe-cabinet-with-compartments-white__0246842_PE385713_S4.JPG. There should be plenty of room in the wall itself.

    In fact, I currently use one of these shoe cabinets successfully but I am greedy and want MORE storage. And, as a bonus, I want the little touches (big touches) that will make people get excited about buying my house when it’s time to sell.

    GREAT JOB!!

    Apologies if I triple posted. I had some issues. Please delete duplicates. :D

    Reply
    • Avatar photoColleen Pastoor

      Feb 27 at 9:29 pm

      Thanks so much! I was totally looking at those cabinets before we did this- we just couldn’t fit one with the stairs there!

      Reply
  7. Avatar photoChannah Katz

    Apr 21 at 1:46 pm

    I have an entryway that has a small landing of tile in a half circle. There is no space to leave Anything. To the left there is a wall that kind of obscures the living a bit. To the right, we are already in a dining room. I have a small stand that makes a place to leave my purse. It’s a small basket on legs of the stand. It is a beautiful wooden stand. What can I do or add to this uncomfortable entry way. I do take off my shoes when entering, so some of the landing space is used and cluttered looking. Plus someone might trip on the shoes. Help!I do not know where to leave a question, so I left it here.

    Reply
    • Avatar photoColleen Pastoor

      Jul 11 at 12:14 am

      Hey Channah, That sounds like a tricky one! I would try keeping as many shoes as possible (the occasional uses!) as well as jackets and other things in your bedroom closets- it’s definitely helped us in our current home!

      Reply
  8. Avatar photoMelody KirkWagner

    Jun 16 at 8:00 am

    This are amazing. Part of what bowls me over is how professional the finish is. This has NOT been my experience when painting MDF. May I ask what you kind of paint you used and what technique?

    Reply
    • Avatar photoColleen Pastoor

      Jul 12 at 12:17 am

      Thanks so much Melody! Always make sure to use an oil based primer first and you should be good!

      Reply
  9. Avatar photoBrian

    Jul 20 at 11:06 pm

    Awesome job Colleen! I am just wondering how your husband mounted the framed box to the cubby? Or did it just fit snuggly into the already cut out square in the wall?

    Reply
    • Avatar photoColleen Pastoor

      Jul 23 at 9:49 pm

      We built the box to fit snugly in the cubby- then just screwed it in place :)

      Reply
    • Avatar photoColleen Pastoor

      May 25 at 7:26 pm

      I’m pretty sure we would have shimmed then used long screws!

      Reply
  10. Avatar photoTracey KATZ

    Apr 05 at 3:56 am

    I’m sorry, I’ve looked everywhere but cannot find where your shots are that shows how you did it? It looks lovely and I’m just moving into a older split, very small entry. I know the shoes will drive me insane.

    Reply
    • Avatar photoColleen Pastoor

      May 26 at 6:50 pm

      Hi Tracey, these are all the photos we have of the project in this post!

      Reply
  11. Avatar photoTeresa

    May 09 at 12:55 pm

    Love this idea! We would really like to do something similar.
    I think I understood the cubby was 38″ across and 31″ high. How deep was it?
    The drawers seem large in the photos.

    Our entry way is very much the same as yours, but basement is already finished. We have lots to think about now. Thanks so much for posting!

    Reply
    • Avatar photoColleen Pastoor

      May 26 at 6:59 pm

      They were very deep! We made them deep enough to line the walls on the reverse up with the closets we put into those rooms :) We’ve moved out so I can’t measure but I think 2′ is the depth of the closets.

      Reply
  12. Avatar photoSarah

    Sep 13 at 8:24 pm

    Do you have any pictures or a link to the project where you built out the closet? We have a split entry and shoe problem is KILLER! The other side of our wall would be the kids’ playroom so a closet there would be a great scattered toy solution!! Talk about killing two birds with one stone!

    Reply
    • Avatar photoSarah

      Sep 25 at 11:15 am

      Hi Sarah, you can see the whole makeover here: https://www.lemonthistle.com/diy-split-level-entry-makeover/

      Reply
  13. Avatar photoMichelle Campbell

    Sep 09 at 5:47 pm

    How awesome is it that i was cruising Pinterest and find the exact thing I was looking for, a split level entryway ideas and the nicest one is from Kamloops?! How awesome is that?!

    Reply
    • Avatar photoSarah

      Sep 10 at 7:09 am

      That is just meant to be ;)

      Reply
  14. Avatar photoZs Mama

    Feb 10 at 12:28 am

    I’ve read through this so many times. We have a split level and this would be so great! I am confident in all of it except- how did you deal with the studs in the wall before building the cubbies? I would LOVE to have details on how you built those cubbies before the drawers.

    Reply
    • Avatar photoColleen Pastoor

      Mar 26 at 4:07 pm

      Hello! We built these like we would exterior windows, running a header across the top and supports down to the base plate.

      Reply
  15. Avatar photoJess - KY DIY

    Aug 22 at 8:53 am

    Hello, love your blog. I noticed the date just read March, was this 2023? We just bought our first home, which is a bilevel. I was curious about what the bumpout on the other side looked like? I read that you integrated it with the closet in the basement. I have an idea of what to do, but was curious if you had any pictures of the basement closet and what you did on the other side. I also watched the reno video and Suite reveal but didn’t notice the cubie bumpout. Thanks for being inspiring!

    Reply
    • Avatar photoColleen Pastoor

      Dec 18 at 11:20 am

      this was quite a few years ago, we no longer live here but you can see both sides in these posts!
      https://www.lemonthistle.com/basement-rec-room-before-after/ (oar is on that wall)
      https://www.lemonthistle.com/house-update-basement-suite-done/ (bedroom)

      Reply

Leave a Reply Cancel reply

Your email address will not be published. Required fields are marked *

Sidebar

2025 free printable calendars are here- text over image of 5 free printable calendar formats printed


Thanks for dropping by!
I’m Colleen: wife; mom to 4 wild ones; and DIY blogger behind Lemon Thistle. You can expect to see affordable DIY, cozy modern home decor, renovations, free printables, hand lettering and the occasional party on Lemon Thistle. Read More…

WOOHOO!

Check your email to confirm!

(+ get your freebies + discounts)

email facebook youtube instagram pinterest

Search

Copyright

Unless otherwise noted, all content and images are mine. Full posts may not be shared without express written consent. But I love when you share!

Feel free to share, without altering, one image with proper credit and a link to the original post. All free printables are for personal use only.

Legal

Everyone loves proper credit- if you ever notice something improperly credited, please please shoot me an email and I’ll fix it lightning fast.

Find all my policies right here.
This includes my privacy policy, info on the GDRP compliance, and information on affiliate links (Including Amazon Affiliates).

Copyright © 2025 · Lemon Thistle · All Rights Reserved · Powered by Mai Theme