Guyyys! I’ve been so excited to share this with you- and today’s the day! Well, actually- this week’s the week! This week I’ve teamed up with seven of my favourite party people on the internet to bring you a DIY (but classy!) Saint Patrick’s Day Party. Each day this week, we’ll be taking turns sharing DIYs, free printables, recipes and tutorials from this party. We hope that it will inspire you to class up your Saint Patrick’s Day Party this year (the DIY way, of course!).
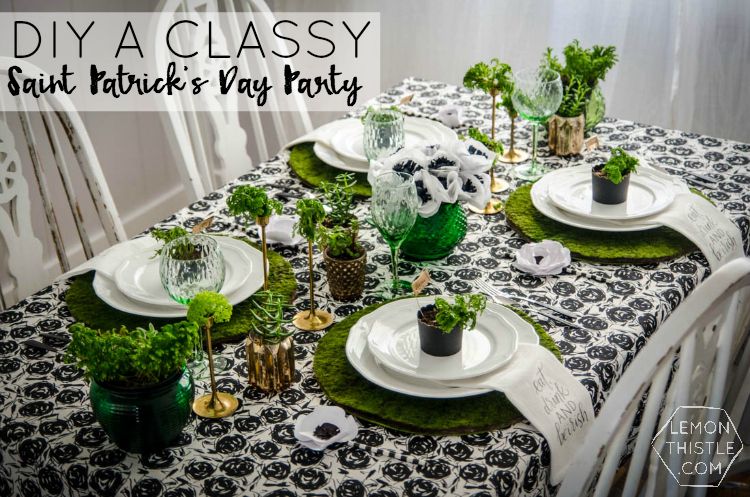
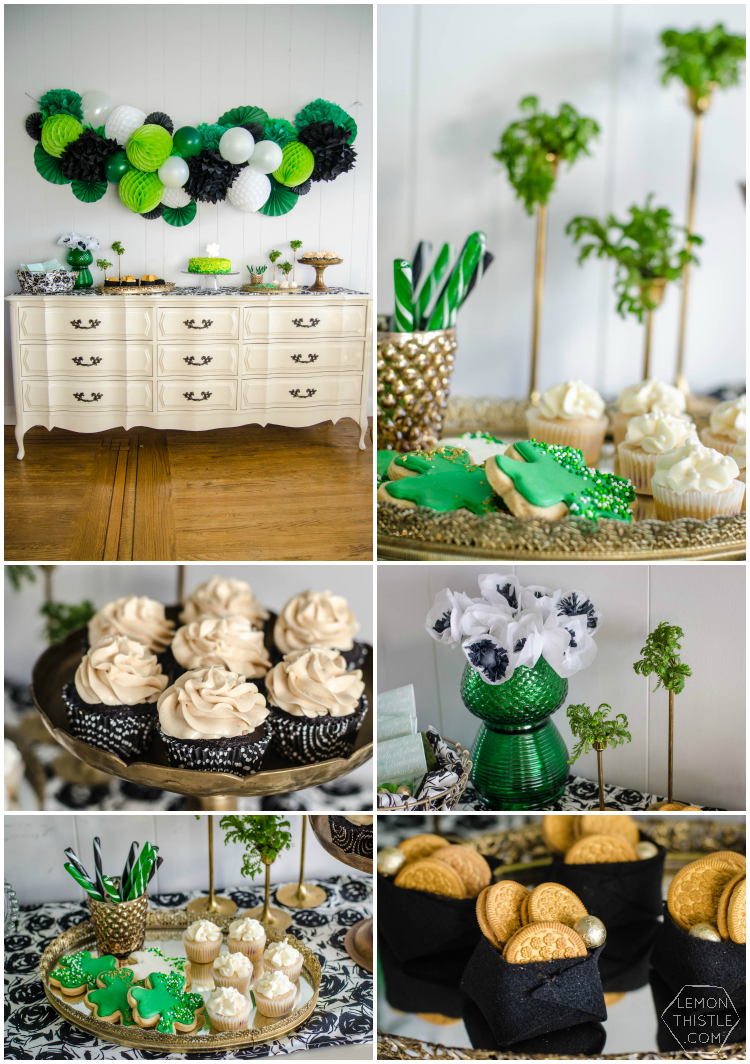
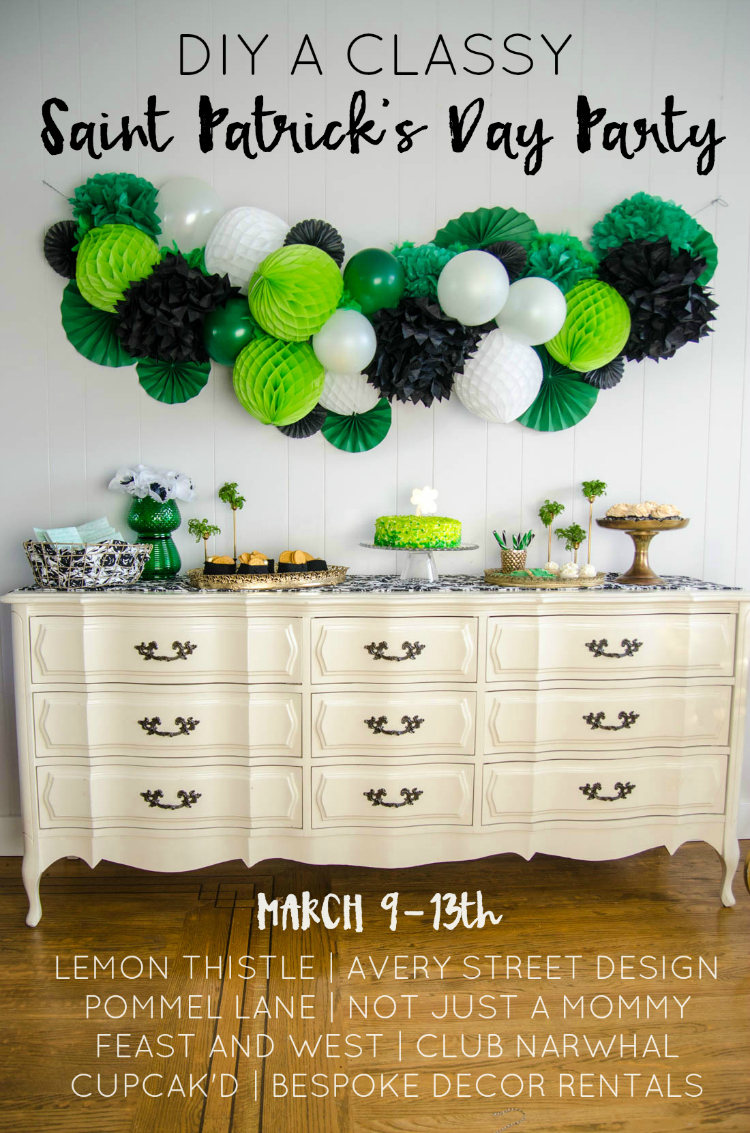
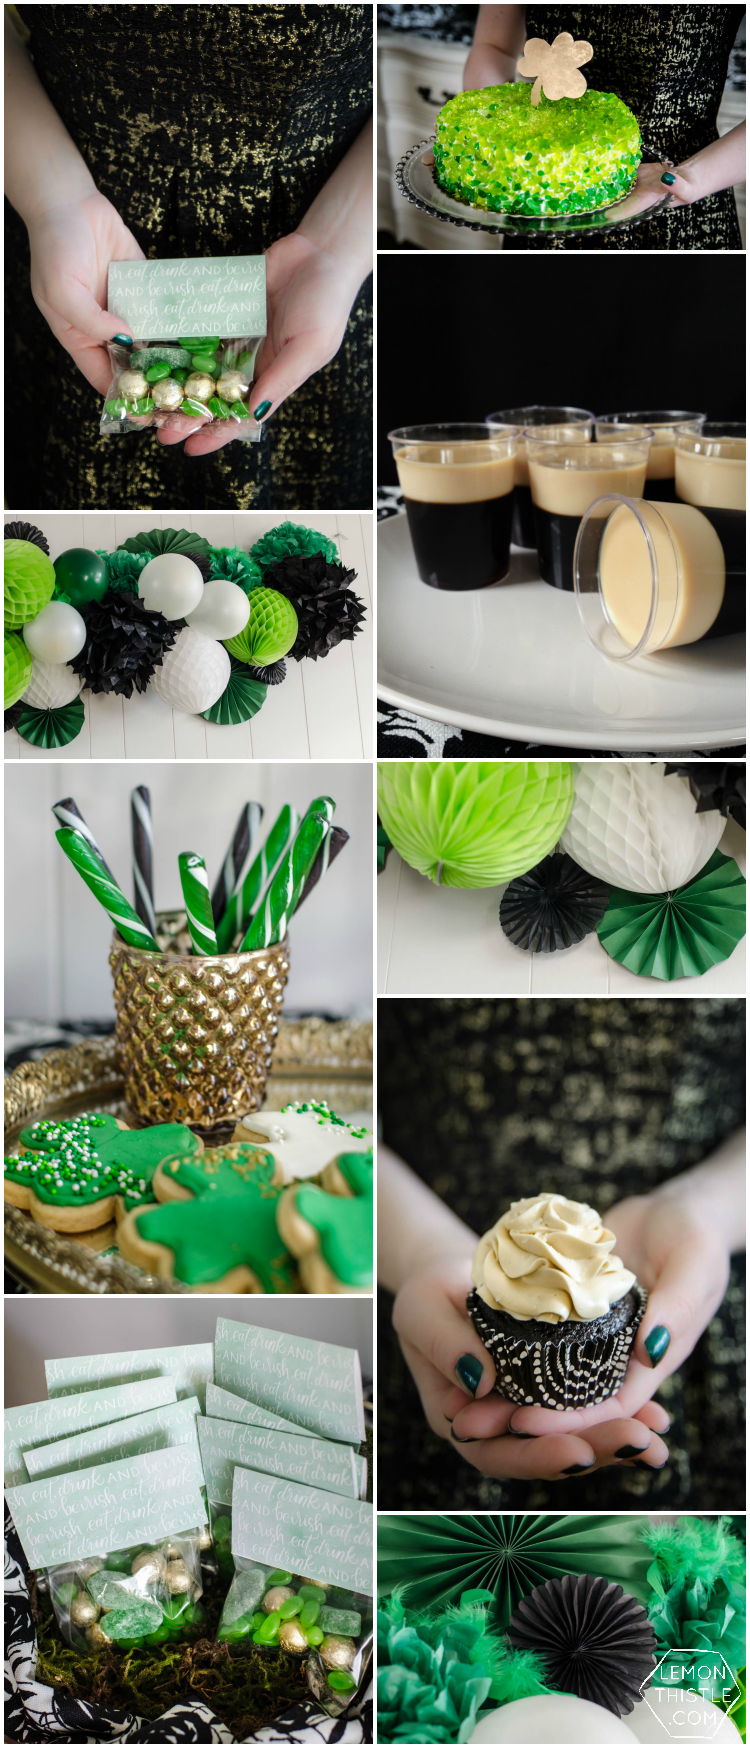
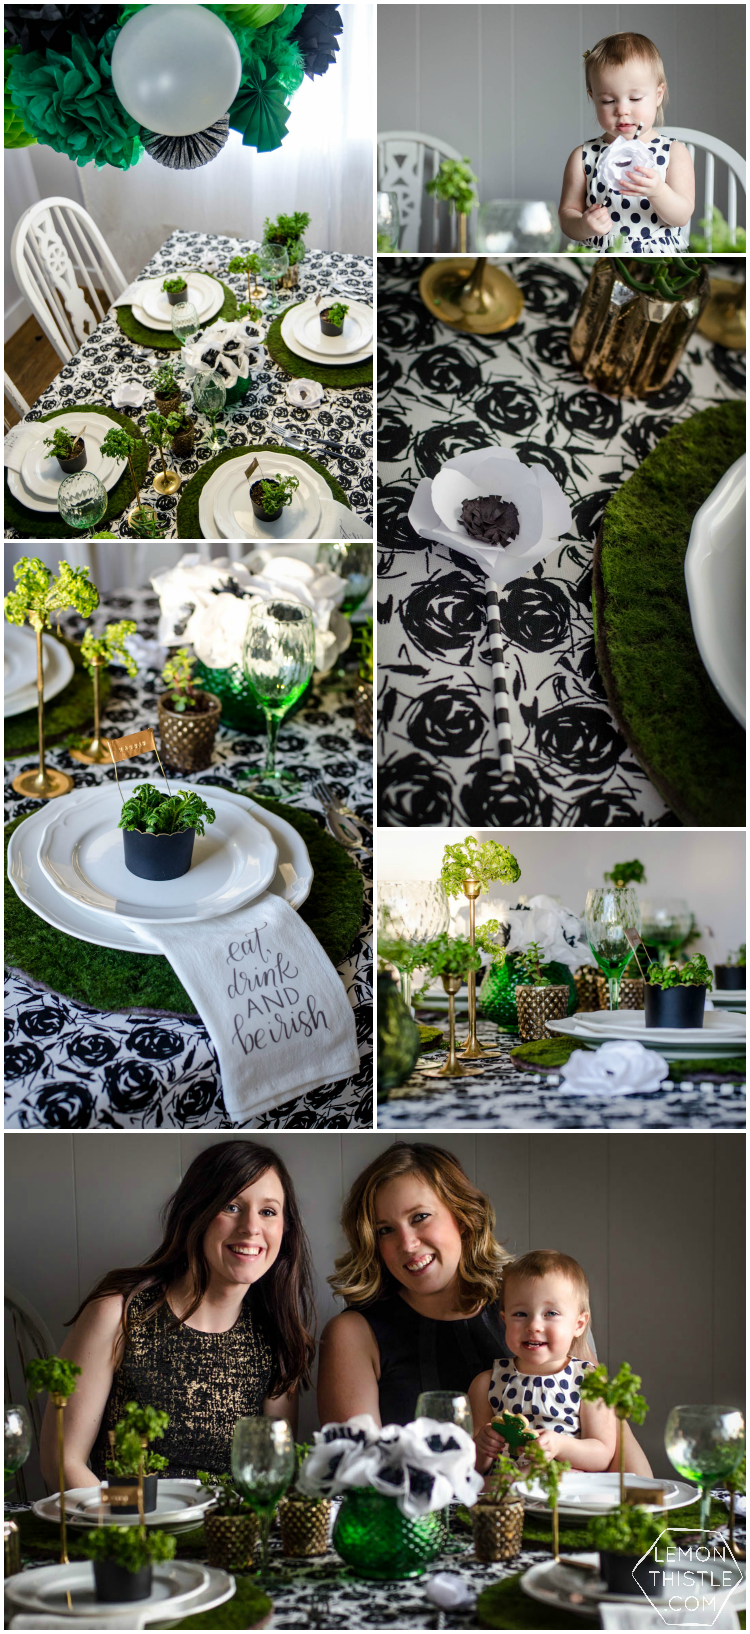
I am so pleased with this party (like, I’m giddy pleased), I don’t think I’ve ever seen my dining room looking so spiffy! When we set out brainstorming for this party, the only thing we were set on was keeping the green and gold from Saint Patrick’s Day, and adding in black and white for a modern take on the holiday. Everyone created their own projects and shipped them on over, without seeing what else we were working on. I’m so impressed that everyone’s projects work so well together- it’s like they read my mind!
CLICK HERE for a video tutorial of this giant honeycomb garland and 12 more modern DIY Dollar Store Party Decorations that you can make for your next party!
Here’s where you can expect to see the goods:
Monday: Lemon Thistle– DIY Giant Honeycomb Garland (scroll down)
Tuesday: Bespoke Decor– DIY Moss Placemats | Not Just a Mommy– Felt Cookie Cauldrons & Glittered Mini Champagne Bottles
Wednesday: Lemon Thistle– Hand Stamped Gold Place Card Markers | Feast & West– Baby Guinness Jell-O Shots
Thursday: Club Narwhal– Sassy Sugar Cookies | Avery Street Design– DIY Paper Flowers
Friday: Lemon Thistle– Candy Coated Grocery Cake Makeover | Pommel Lane- Printable Candy Bag Toppers & Napkin Transfers
Bonus! I shared how I made the Paint Dipped Silverware here.
*Blog names link to blogger home pages, Post titles will be updated with links as the posts come available*
Because I love you- I’m going to tell you that those gorgeous looking cupcakes were delicious too. They’re from my friend Shara of Cupcak’d (she’s in Kamloops local friends, and she makes the most scrumptious cupcakes you’ll ever eat). And just so you can imagine how good they tasted- they’re Salted Caramel Chocolate… and the minis are Strawberry.
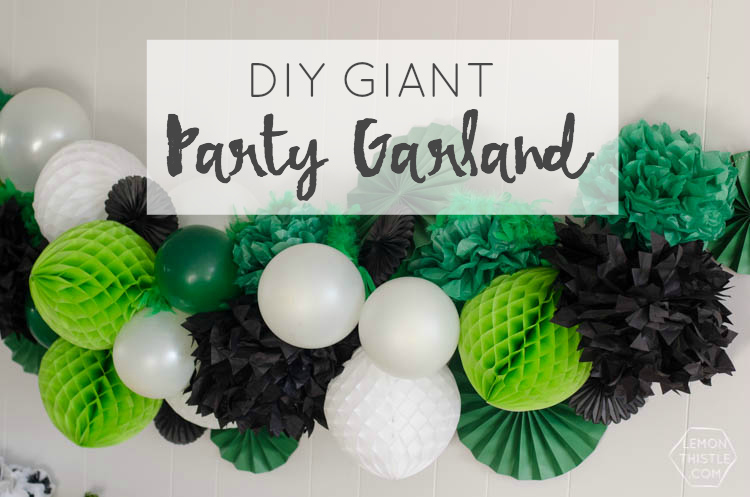
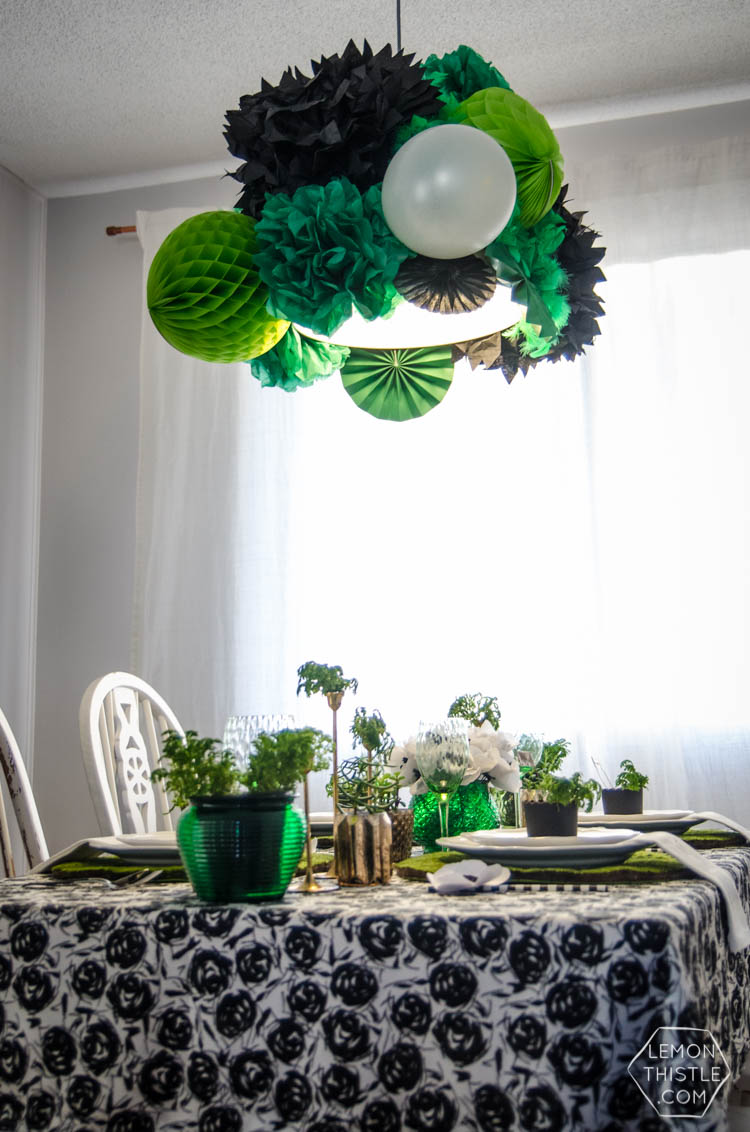
Alright, now for the DIY tutorial for that giant honeycomb/balloon/awesome garland!
There’s not really too many instructions I can give you for this… but I’ll do my best. The short instructions are: tie all these things together. But the longer instructions… they’re below:
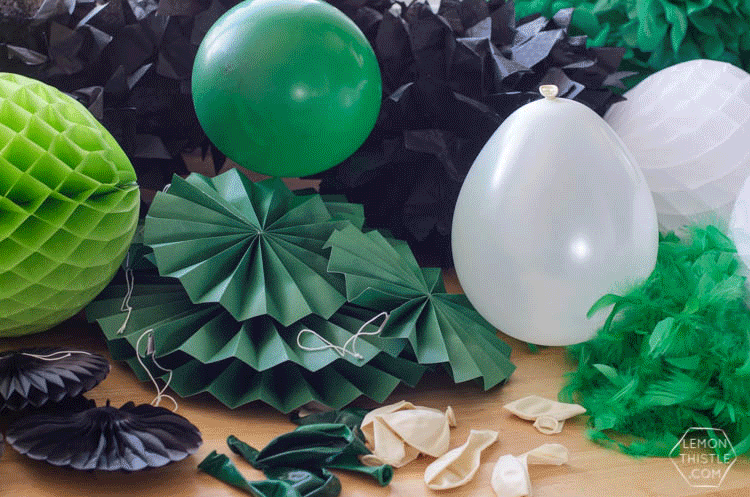
To make this garland you’ll need:
- Bakers twine and darning needle (that’s the big needle)
- Balloons (I used 4 white, 3 green)
- Honeycomb party balls (I used 4 green, 3 white)
- Tissue Paper Pouffs (I used 3 large black, 4 medium green)
- Pinwheels (I used 3 large green, 3 small green, and 5 small black)
- Feather boas (I used 2 green)
- Scissors and nails for hanging
All supplies can be bought at Target or a dollar store. We couldn’t find the right colour green tissue pouffs so we made our own. This tutorial is great if you’ve never made them.
Start by threading balloons blown to various sizes onto your string- I used black and white bakers twine. I threaded them on using a large needle, poking through the end of the balloon. I did the balloons first since they’re the most affordable- so they make a great base to fill out the garland. Next, we added the biggest pieces we had. This was the black pouffs. We tied these on with short pieces of bakers twine. Tie them loose enough that you can push them around a bit. Next biggest were the honeycomb party balls. We tied these on using the hanging string they came with. We hung it up (on nails- it’s heavy!) at this point, and adjusted it to have the best parts facing forwards. You’ll want to push everything into a big bunch on the string to make it look fuller.
Once it’s on the wall, go ahead and add in the pinwheels. We tied some of these on, placed some in without tying, and taped some to the wall to get the effect we liked. Last but not least, weave in your feather boas- We like them best poking out in places, without seeing too much of them. Fluff, tweak, and you’re done! We love the big impact this makes.
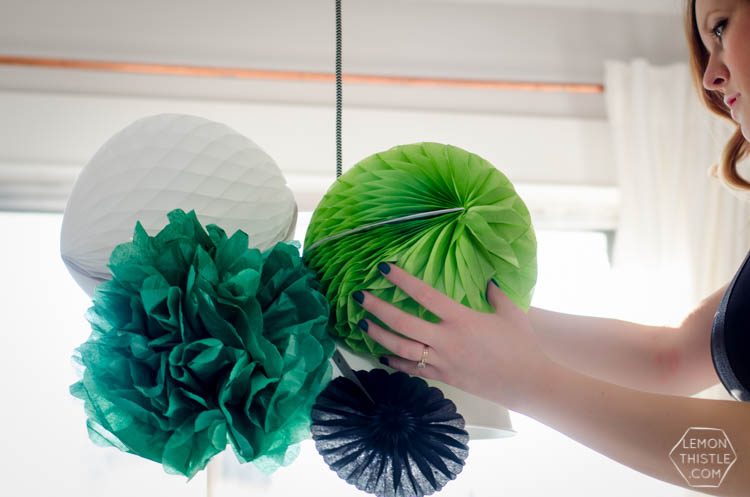
We copied the look for the light over the dining table. We used the same supplies, but instead of stringing them together, we just used clear tape and attached them to my dining room light- it completely brings the two spaces together!
Thanks so much for reading to the bottom of this super long post- we’d love for you to stop by the rest of the tutorials this week! We’ll be sharing them all on social media, so if you don’t want to miss out you can give me a follow (links in sidebar!). A HUGE thanks to my friend Ashton from Bespoke Decor Rentals (that’s the gorgeous gal in the black and gold dress) for not only bringing down some of her rentals for the party, but also driving the 4 hours to come and help set it all up! She’s the best. You should probably hop over to her blog and tell her that. Thanks friends!
Sources: Dresses: Vero Moda | Cupcakes: Cupcak’d | Baby Guinness Irish Coffee Jell-O Shots: Feast & West | Tissue Paper Garland, Candy Coated Cake, Paint Dipped Silverware, Table Cloths, & Dresser: Lemon Thistle | Candy Bag Toppers, Napkin Transfers: Pommel Lane | Chairs, Mirrored Trays, Barcart, Decanters, Trumpet, Dice, Green Vases, Moss Placemats, Wine Glasses, Gold Cake Stand: Bespoke Decor Rentals | Felt Cauldrons with Gold Cookies, Gold Glitter Champagne Bottles: Not Just a Mommy | Paper Poppies: Avery Street Design | Shamrock Sugar Cookies: Club Narwhal | All Photography by Lemon Thistle
 DIY Extra Long Custom Design Shower Curtain
This is absolutely gorgeous! I love how everything came together, especially that ridiculously awesome party garland :) So glad to be part of this celebration!
Thanks so much Amy! I’m crazy happy you were in on it, your cookies turned out so fantastic! Can’t wait to get the recipe (I may or may not have eaten the lions share of those babies).
Wow – y’all do St. Patrick’s Day better than I can do birthdays! I’ll pin this in hopes the craftier people in my house see it and do things up right this year.
Thanks so much Eli! Thanks for sharing with your family :)
Absolutely fabulous!! All 3 of you are so cute! It came together and I love it all!
Aw, thanks so much Dawn! Your champagne bottles and felt cauldrons make it that much better! XO
Oh my goodness this is AMAZING! This seriously looks like it just came out of a magazine. You’re making me want to throw a St. Patrick’s Day party now :)
You’re so sweet, Erica! Thanks so much :) I never have before, but it was a fun challenge- we decided it was the one holiday we’ve never seen look really classy!
Where is that beverage cart from? I may need it.
Isn’t it awesome? Ashton rents it out (bespokedecor.ca)… but she found it at a thrift store and replaced the wood with glass… what a huge change!
Eeep!!! Your photos turned out so beautiful Colleen!! And seriously, I can’t believe you took all of that and made it come together so seamlessly. What a gorgeous party- thank you for inviting me to be a part. And I’m glad you got to eat the cupcakes. Have another for me! :)
Thanks so much Laura! You’re so kind… and I’m crazy happy you jumped on board- I have your paper flowers keeping me company on my desk right now, I love them so much :)
Love the garland and the entire party! Your pictures look SO great and I love the layout of your pics as well :) One talented girl!
Thanks so much Deonna! It was a ton of fun to put together, I’m glad it turned out so well :)
Love it! I am hoping you will be able to tell me where you got the table cloth and runner on the buffet?
Hi Jennifer, they are just made of material I snagged in the clearance section at my local Fabricland!