• Skip to main content
  • Skip to header left navigation
  • Skip to header right navigation
  • Skip to site footer
  • Shop
  • Get The Email
  • Work With Me
  • About
  • Search

  • DIY
    • DIY Home Decor
    • With Power Tools
    • Renovation
    • For Kids
    • For Parties
    • Wearable
    • Organization
    • Cricut Crafts
  • Home Decor
    • Room Reveals
    • Kid Friendly
    • DIY Home Decor
    • Renovation
  • Lettering
    • Hand Lettered Printables
    • Free Practice Sheets
    • Handlettered DIY
    • Free Brush Lettering Quickstart Guide
    • Learn Brush Lettering E-Course SALE
Lemon Thistle

Lemon Thistle

Rad DIY, Lettering and Design for Real People

  • Printables
    • For Cricut
    • Party Printables
    • Home Decor Printables
    • Bachelor Bingos
    • Free Monthly Wallpapers
    • Handlettering Practice Sheets
    • All Free Printables
  • Entertain
    • Party Printables
    • Party DIY
    • Tablescapes
    • Dinner Party
    • Kids Parties
    • Party Eats
    • Baby Showers
    • Wedding + Showers
  • Blog

DIY Extra Long Custom Design Shower Curtain

Mar 06

DIY Extra Long Custom Design Shower Curtain- I love how high end this looks!

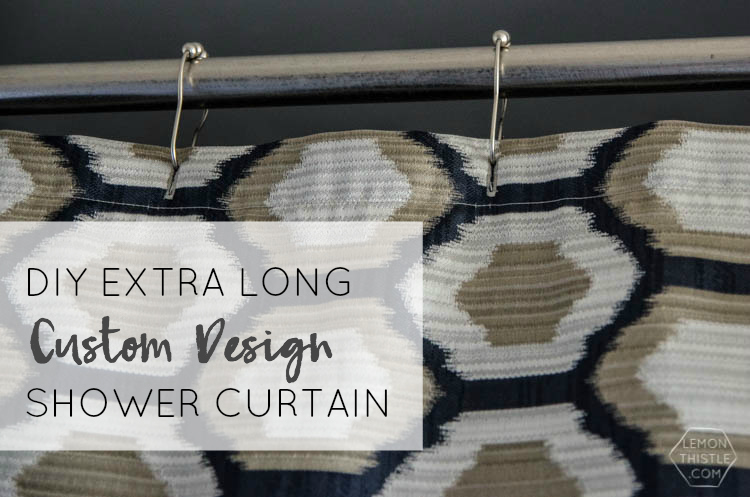
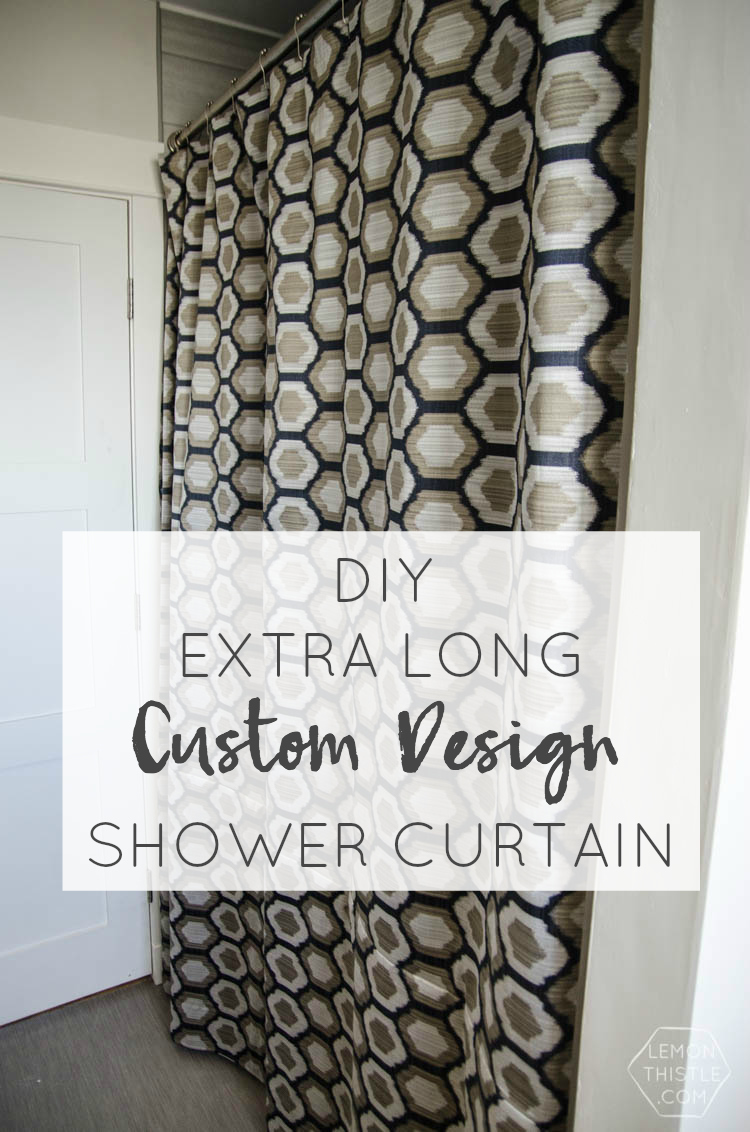
Phew, it’s been a big week friends! Did you catch my post yesterday sharing my big news- I’m excited to be contributing to two excellent sites, Remodelaholic and Honest to Nod! I shared my full bathroom makeover on Remodelaholic yesterday (well, at least Phase 1!) and as promised, today I’m sharing the DIY instructions to make your very own Extra Long Custom Design Shower Curtain! Let’s start with- why on earth you would want a longer shower curtain than normal (if for some reason, you don’t already see how AWESOME that would be).

DIY Extra Long Custom Design Shower Curtain- I love how high end this looks!

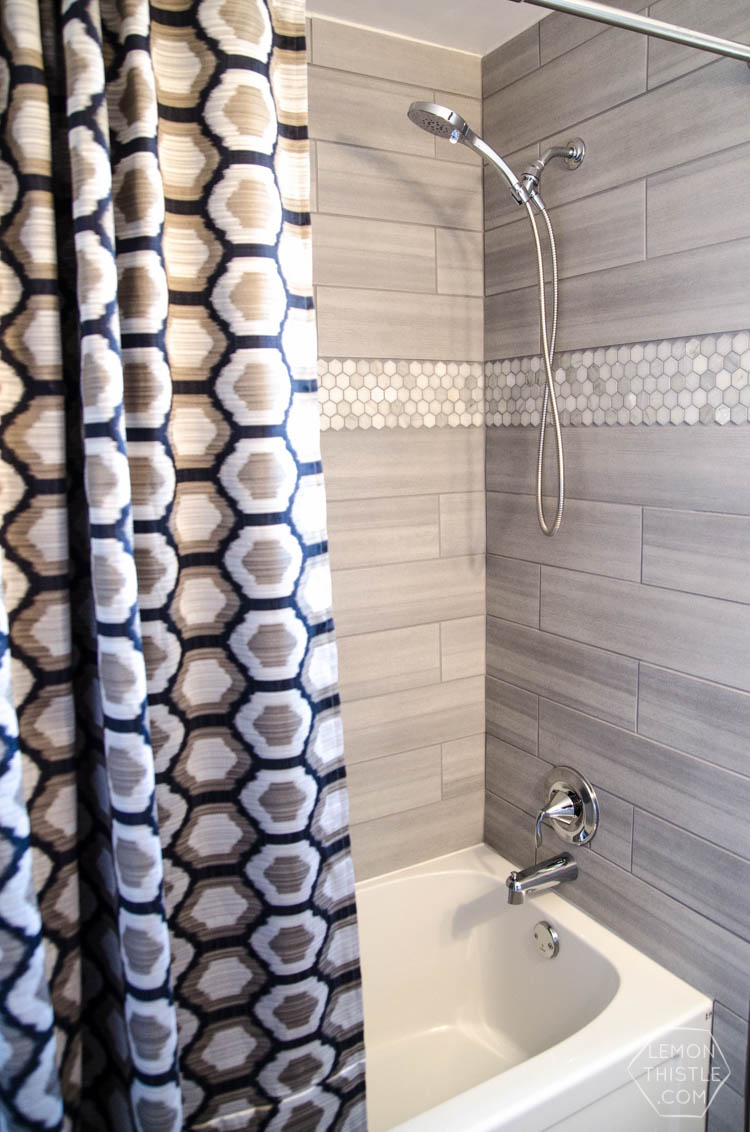
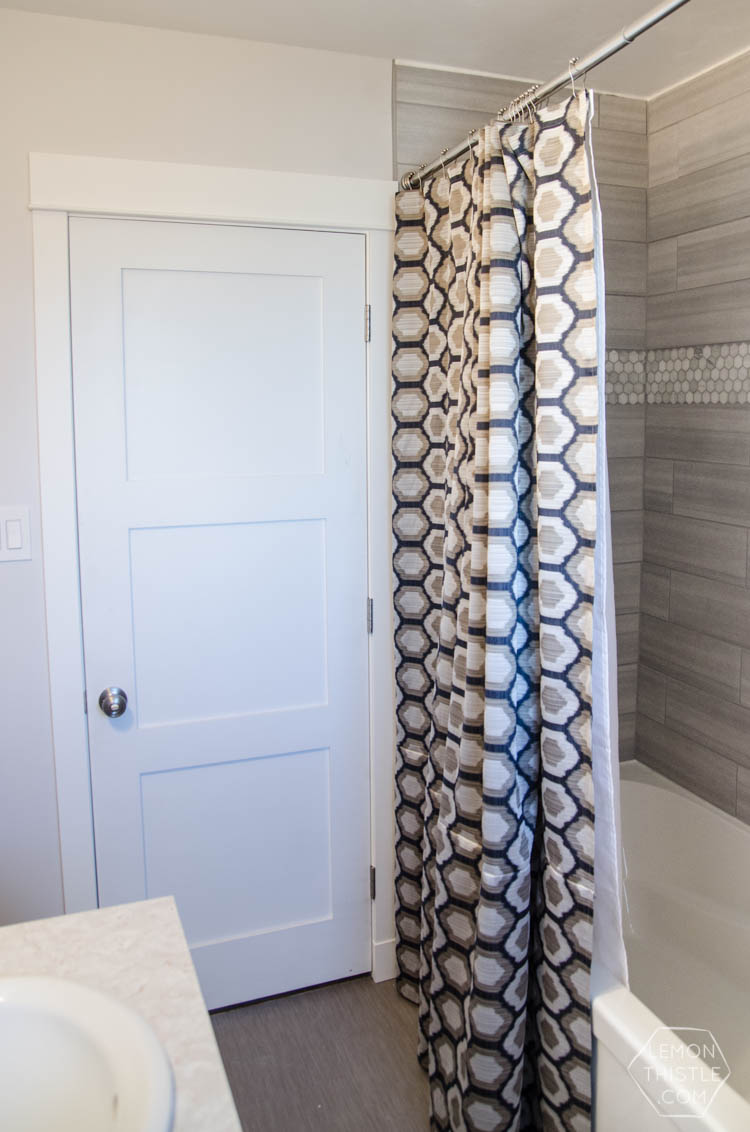
One of the things that drove us completely crazy with our old shower is that the shower head was SO low. Both my hubby and I are fairly tall, so having to bend down to wash our hair was a pain. We put our shower head higher than average (such a good decision!) and tiled right to our ceiling. We love the way this looks, but a standard height towel bar and shower curtain looked silly with the change. I couldn’t find a longer shower curtain anywhere, so I decided to make one. The longer curtain looks custom and high end in comparison to a standard short shower curtain. I love the way it turned out- the look of the longer curtain pulls the whole bathroom together. Plus- I wasn’t limited in patterns, I could pick from any fabric because we use a shower curtain liner inside the tub.

Here’s what you’ll need to make your own:

  • Fabric of your choice (you’ll need enough to cover 5 ft wide by approx. 7 ft long (this accounts for seams)
  • Coordinating Thread
  • Sewing Machine with Button Foot (this things the best- I can’t wait to show you!)
  • Iron
  • Scissors

I wanted to do a fun printed shower curtain, but we only have one real fabric store in town, so the options are limited. I was excited to find this fabric that has the navy we are using everywhere in the house plus the cool grey matched the tile shower, and the warm grey the floor- I am so pleased with how well it pulls the room together! If I could have picked anything in the world though… I probably would have picked something with greens like this pillow (which apparently isn’t too popular- there was nothing in green at our store!), or I would have tried out indigo dye (that white and navy looking tie dye pattern). But this was on clearance (score!) and Shane loved it- so we were sold!

DIY Extra Long Custom Design Shower Curtain- I love how high end this looks!

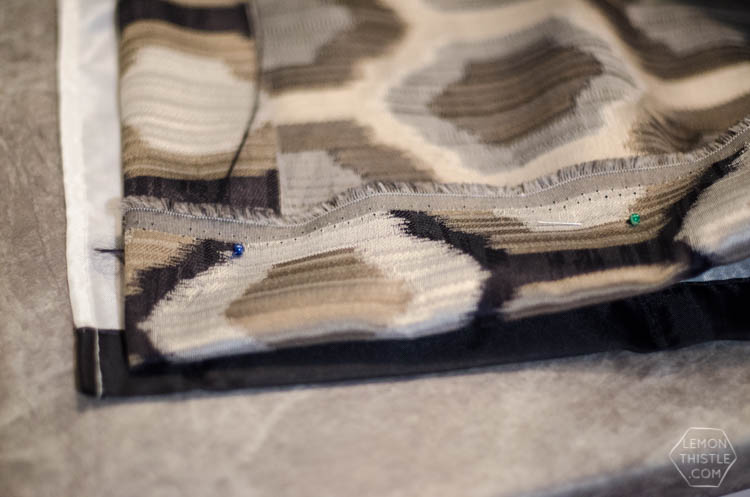
You’ll need to buy enough fabric to cover approximately 5 ft wide by 7 ft long depending how long you’d like it- this accounts for seam allowance. This is standard width, and the height is based off of a standard height shower curtain liner being used on the inside. There were no fabrics that were wide enough, so I pieced mine together with a seam at knee height. Just take care to line up your patterns and it won’t be too noticeable. You could also use a contrasting or solid fabric on the bottom bit. Cut your fabric to size, using your old shower curtain as a guide for width. Pin the seams and iron before sewing around the edges (making one big panel with edges turned under). Make a wider seam at the top and bottom of the curtain- the wider seam at the bottom adds some weight so the curtain will hang straight, and at the top you just need enough room to sew the button holes in for hanging.

DIY Extra Long Custom Design Shower Curtain- I love how high end this looks!

DIY Extra Long Custom Design Shower Curtain- I love how high end this looks!

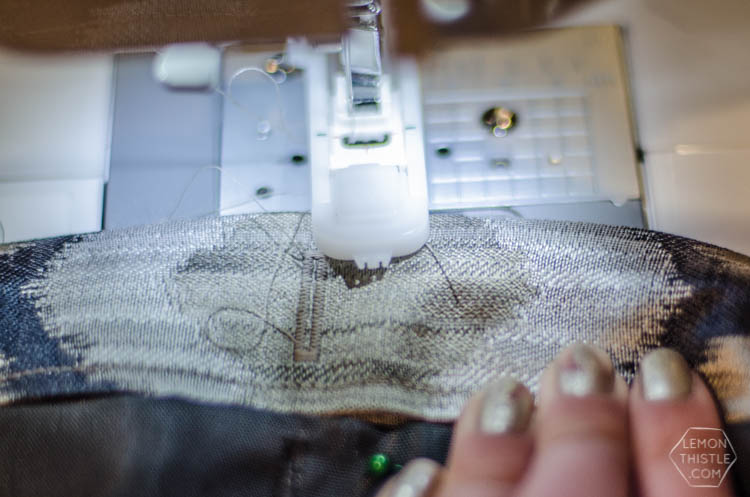
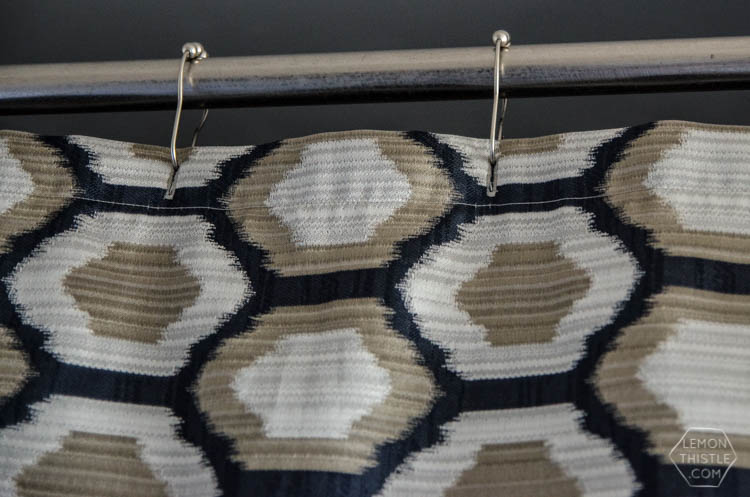
Once you’ve sewed all your edges under, you’re ready for the button holes. Making a curtain is nothing new- but I am really pleased that I figured out how to use a button foot to make the holes for hanging this baby! I followed this video on using a button foot and lemme tell ya- that thing’s a dream! If you’re keeping track, that’s the second new sewing machine foot I’ve learned to use in the last two weeks! To line up proper spacing of your holes, lay your old shower curtain on top of the new one, and pin it just under your top seam as a guide. You can see mine in the photo above- it’s the black thing pinned under my fingers (with horribly chippy nail polish! Oops). My only tips on using the button foot to make the holes are to practice on scrap fabric first- it took me a bit to get the hang of it, and to use snips to cut the hole open, not a seam ripper as she suggests as you’ll have a few layers of fabric to cut through.

DIY Extra Long Custom Design Shower Curtain- I love how high end this looks!

DIY Extra Long Custom Design Shower Curtain- I love how high end this looks!

That’s seriously all there is to it! I feel a bit silly leaving you this tutorial- it’s so darn simple. I’m not sure why I thought it would be so difficult to make, it really wasn’t! One evening (and a Friends on Netflix Marathon) later and I have this beauty in my bathroom! So tell me- am I the only crazy person who NEEDS an extra tall shower curtain, or are you the same? I’d love to hear if this is something you’d think of trying out!

Category: DIY, Home DecorTag: Bathroom, DIY Home Decor, Sewing, Tips and Tricks
Facebook0Tweet0Pin0LinkedIn0
Previous Post: ← DIY Gold Foil Hand Lettered Wall Art- two free printables for you to foil over! These sayings are perfect for a classy saint patrick's day Over Here! And Here!
Next Post: DIY a Classy Saint Patrick’s Day Party! (Giant Honeycomb Garland) DIY your way to a classy Saint Patrick's Day Party! →

Reader Interactions

Comments

  1. Jocelyn Boulega

    Mar 06 at 11:59 am

    I love it Colleen! We are having the same debacle with our shower curtain! We are using a curved bar which of course doesn’t help the length situation! I love the fabric you decided on. I may have to hit up Fabricland next time we’re in town!

    Reply
    • Colleen Pastoor

      Mar 09 at 7:50 pm

      Thanks so much Jocelyn! And great to hear from you :) Our bathroom is so narrow a curved bar just wouldn’t fly!

      Reply
  2. Julie (Being Home)

    Mar 10 at 10:07 pm

    Yep, I prefer an extra tall shower curtain. I like the way it adds height to the bathroom. Thank you for sharing your tutorial.By the way, I chuckled when I saw the hexagon pattern on the fabric. That is definitely your style. :)

    Reply
    • Colleen Pastoor

      Mar 15 at 2:55 pm

      Yay for height! And haha, I do have a thing for hexagons! I didn’t realize it was so obvious… although I do put them EVERYWHERE!

      Reply
  3. Leslie

    Mar 14 at 5:09 am

    Great idea! I like the look.of a little drape at the bottom, but the standard purchase size always looks too.short. Thanks for sharing.

    Reply
    • Colleen Pastoor

      Mar 15 at 3:11 pm

      Thanks so much Leslie! I love the drape too, but have a hard time convincing my hubby that that’s what they should look like :)

      Reply
  4. Ansley @ Vivaciously Vintage

    Mar 30 at 11:48 pm

    For the love of all things pure in this life…please provide the link to that fabric!!!!!!!!!!!!!!!

    It’s so beautiful! Thank you!!

    http://www.VivaciouslyVintage.com

    Reply
    • Colleen Pastoor

      Mar 31 at 9:39 pm

      Ahh I so wish I could Ansley! It came from my local Fabric Land in the clearance section… I have absolutely no information on it :(

      BUT I’m so glad you like !

      Reply
  5. Valerie Wade

    Jan 16 at 3:22 pm

    Colleen,

    I love the shower curtain idea, but more than that, I absoutely LOVE the tile. What is the brand and any idea where I might find it? I’m getting ready to update my master bath and it’s exactly what I’m looking for.

    Thanks!

    Reply
    • Colleen Pastoor

      Jun 17 at 10:18 am

      Thanks so much Valerie! I got it from a local tile place- Kamloops Tile, but most of the flooring stores around here at the time were carrying it. San Marco brand, viva tile, linen colour.

      Reply
  6. Virginia Fynes

    Jan 18 at 9:31 am

    Beautiful! Love the pattern, and your tile work is stunning!

    Reply
  7. Kerry

    Jun 08 at 6:58 pm

    I just love what you did w the horizontal tiles in the tub. I was looking for some clarity. I have s tub with surrounded tiles, can I lay tile over the tile in the tub? Where were the tiles purchased? Thank you for the gorgeous ideas.

    Reply
    • Colleen Pastoor

      Jun 09 at 12:55 pm

      Hi Kerry,

      Thanks so much! I would tear out the tiles that you already have. We replaced the boarding behind the tile altogether since we had leaks but That’s not necessary if you do a good job of removing the tiles. We got ours from a local tile place but most of the companies around here were selling this brand (san marco viva linen) Good luck!

      Reply

Leave a Reply Cancel reply

Your email address will not be published. Required fields are marked *

Sidebar

WOOHOO!

Check your email to confirm!

(+ get your freebies + discounts)


Thanks for dropping by!
I’m Colleen: wife; mom to 4 wild ones; and DIY blogger behind Lemon Thistle. You can expect to see rad DIY, modern home decor, renovations, hand lettering and the occasional party on Lemon Thistle. Read More…

email facebook youtube instagram pinterest

Unless otherwise noted, all content and images are mine. Full posts may not be shared without express written consent. But I love when you share! Feel free to share, without altering, one image with proper credit and a link to the original post. All free printables are for personal use only.

Everyone loves proper credit- if you ever notice something improperly credited, please please shoot me an email and I’ll fix it lightning fast.

Find all my policies right here.
This includes my privacy policy, info on the GDRP compliance and information on affiliate links (Including Amazon Affiliates).

Visit Colleen Pastoor’s profile on Pinterest.

colleenpastoor

My house is never this clean
-
DIY + Home Decor Blogger
Mama of 4 👶🏼🧒🏼👦🏼👧🏼
Renovating our 🏠 the DIY way
🖤 Lettering & ☕️
-
✉️[email protected]

colleen pastoor/lemon thistle
The hallway is finally finished and I’m so stink The hallway is finally finished and I’m so stinking happy! 

It’s felt like such a long time coming for such a small space. Since we moved in 2.5 years ago, this space has seen new doors and hardware, new trim, new floors... twice😅, we changed the boob light to a pot light and I hated it and now it’s got the most beautiful flush mount fixture I’m in love with (thanks @mymitzi!). It finally got some fresh paint and now frames on walls and last but not least... After this weekend, the new floors look like they were here all along (no door jamb gaps!) which was the last thing really bugging me since our flood last year. 

All this to say that home takes time and sometimes getting it right might take a couple tries. Also- the spaces we don’t really think about (hallways) can totally help a house feel like home with some love (and family photos 🥰)
ps. I partnered with #mymitzi to create a tiktok for This makeover... are you following me over there yet?! I’d love if you popped over and said hi!
It’s done! It works! And I’m calling it a grea It’s done! It works! And I’m calling it a great use of my afternoon the other day. Did you catch the stories? These projects both cost me under $10 by using pieces I already had in my home (yay for scraps!) and one package of drawer slides).
You can find the full video about these two kitchen organization projects over on YouTube in collaboration with my friend @love_create_celebrate and her #scrapsmademodern challenge! But for now... I’m rejoicing this coffee maker is off my counter for good 🎉
How’s your January going? Full speed or are you How’s your January going? Full speed or are you taking it a bit slow too? 

I’m not going to lie, I’m easing into this new year thing pretty slowly. All my decorations are still up (we always leave them up til Ukrainian Christmas which is later this week) and I I’ve yet to respond to my emails since before Christmas 😅
I’m enjoying the slowness of it all.
Happy Christmas Eve from our fam to yours 🥰 Happy Christmas Eve from our fam to yours 🥰
Yes, I made the paper bag snowflakes too. Have you Yes, I made the paper bag snowflakes too. Have you? 😅
This year has been one of a kind and I know so man This year has been one of a kind and I know so many people who are taking this year as the push they’ve been waiting for to start a side hustle, start an new career altogether or to just get creative about how they’re making money. So today I’m excited to partner with @kregjig to share some rad projects to make and sell this year! 
Like this rolling storage system I made for my office, that rad dollhouse and the gorgeous bath toy storage. All of these projects are things that I’d personally love to buy for our family and look like they’d be a great return on your time making them! And yes, all of them use #Kreg tools to make them easy to assemble and quick to make! Plus, they’re having a great sale on right now with deals on their K4 and K5 jigs, Rip-Cut and even a hardware jig bundle! There’s never been a better time to get your workshop set up!  #sponsored
Just a peaceful moment and then a real life moment Just a peaceful moment and then a real life moment for ya 🙃 
My #holidayhometour is on the blog and YouTube (I’ll put links in my stories) as part of the #seasonalsimplicity holiday home tour series. I’ll share those too so you don’t miss any!
My holiday home tour will be up tomorrow, but for My holiday home tour will be up tomorrow, but for tonight... I’m just enjoying the lights. And possibly a hallmark movie with some more custom order lettering 😅 what are your plans?
#christmasdecor #christmastree #holidaylights
We finished decorating yesterday and I’m just si We finished decorating yesterday and I’m just sitting here enjoying every minute of it 🤩 have you decorated yet?
Ps... talking more about hand lettering in my stories tonight!
Load More... Follow on Instagram

Copyright © 2021 · Lemon Thistle · All Rights Reserved · Powered by Mai Theme