• Skip to main content
  • Skip to header left navigation
  • Skip to header right navigation
  • Skip to site footer
  • Shop
  • Get The Email
  • Work With Me
  • About
  • Search

  • DIY
    • DIY Home Decor
    • With Power Tools
    • Renovation
    • For Kids
    • For Parties
    • Wearable
    • Organization
    • Cricut Crafts
  • Home Decor
    • Room Reveals
    • Kid Friendly
    • DIY Home Decor
    • Renovation
  • Lettering
    • Hand Lettered Printables
    • Free Practice Sheets
    • Handlettered DIY
    • Free Brush Lettering Quickstart Guide
Lemon Thistle

Lemon Thistle

Rad DIY, Lettering and Design for Real People

  • Printables
    • For Cricut
    • Party Printables
    • Home Decor Printables
    • Bachelor Bingo
    • Handlettering Practice Sheets
    • All Free Printables
  • Entertain
    • Party Printables
    • Party DIY
    • Tablescapes
    • Kids Parties
  • Blog

NYE Balloon Memory Wall

Dec 28

DIY Balloon Memory Wall for New Years Eve!

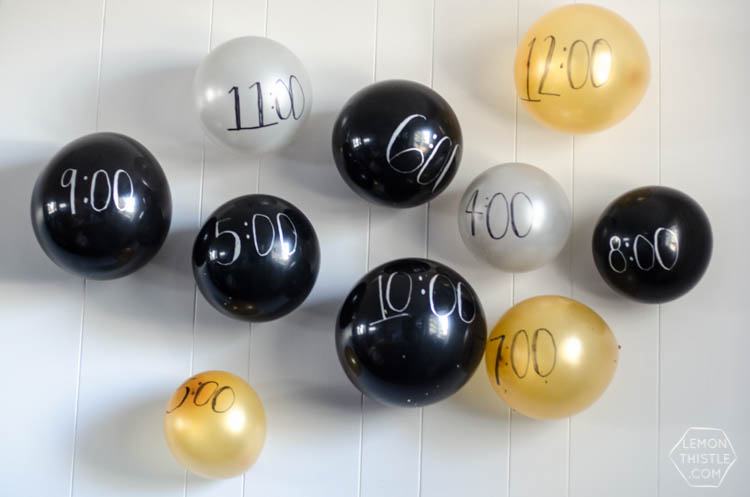
Do you have big plans for your New Years’ Eve? Usually we head up to a family friends’ cabin, but this year we’ll be at home snuggling. One of my favourite things to do to welcome the new year is to reflect on the memories from the past one. Last year I created this DIY Balloon Memory wall for NYE and shared it over at The Little Umbrella. I thought it’s the perfect time to bring it back out and share it with you all this year!  Each of the balloons is filled with a fun pop of confetti and a memory. Every hour, pop a balloon to read what’s inside or see a favourite photo from the year. This is a great activity just for the family, or if you’re hosting a party, have guests send in a favorite memory.

DIY Balloon Memory Wall for New Years Eve!

This activity is just as much fun to put together as it is to enjoy with your friends and family throughout the evening. It costs hardly anything (my kind of DIY!) and can match almost any party decor scheme (but really, it’s NYE… who isn’t going black and glitter?). Oh, and one more plus… anyone, I mean anyone can pull it off.

Here’s what you’ll need to make your own DIY Balloon Memory Wall:

  • Balloons
  • Funnel
  • Paint pens
  • Confetti
  • Tape
  • Memories! Cardstock to write them on or photos

DIY Balloon Memory Wall for New Years Eve!

DIY Balloon Memory Wall for New Years Eve!

DIY Balloon Memory Wall for New Years Eve!

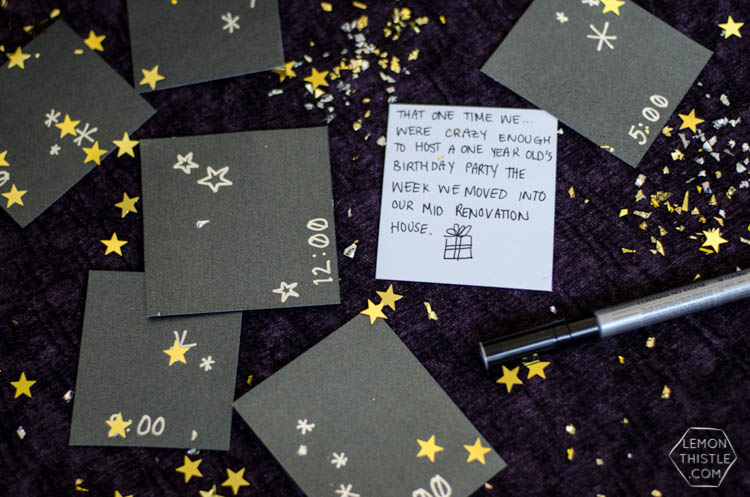
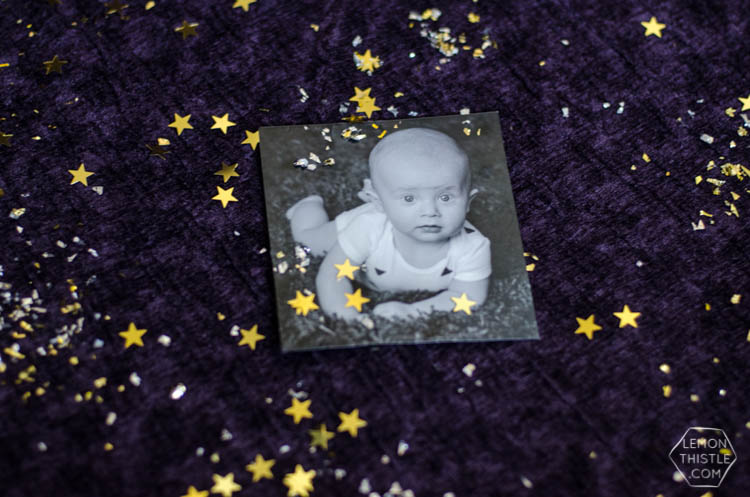
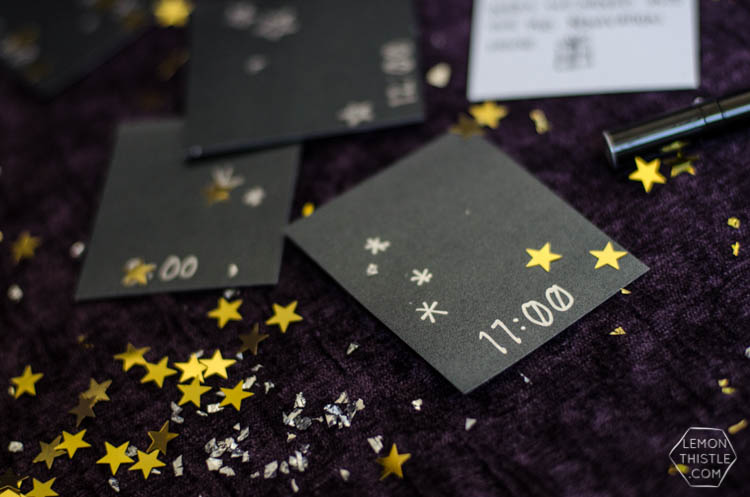
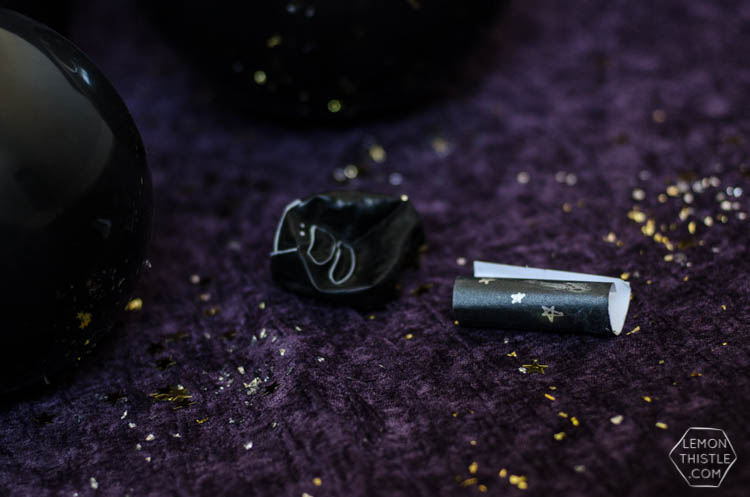
Start by collecting memories. If you’re doing this with your family- that’s easy. If you’re hosting a larger party, have guests send memories in ahead of time. You could even have a game where guests guess who’s memory it is that they are reading. I used a shiny black cardstock and a silver paint pen to write the memories on. Try picking memories that will bring a laugh or have a good story. And might I suggest that in your 12:00 balloon your ‘memory’ be: “That time we… kissed as the clock struck midnight, excited to fill 2015 with new memories.” I also had some black and white photos I added in to each because… well, I love reminiscing over photos.

DIY Balloon Memory Wall for New Years Eve!

DIY Balloon Memory Wall for New Years Eve!

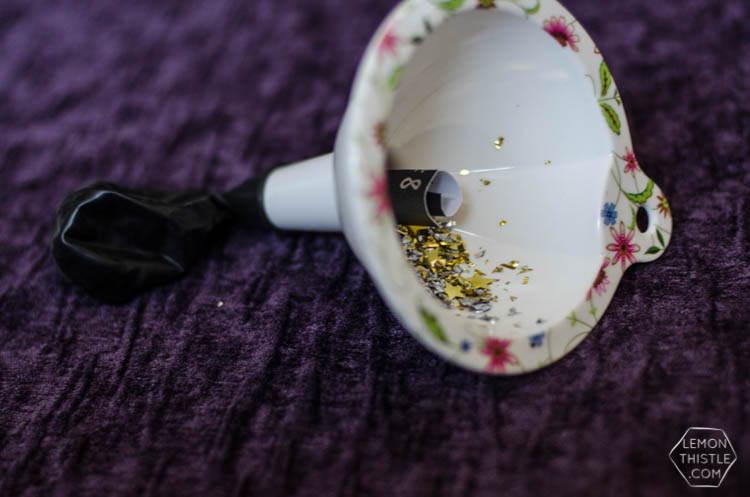
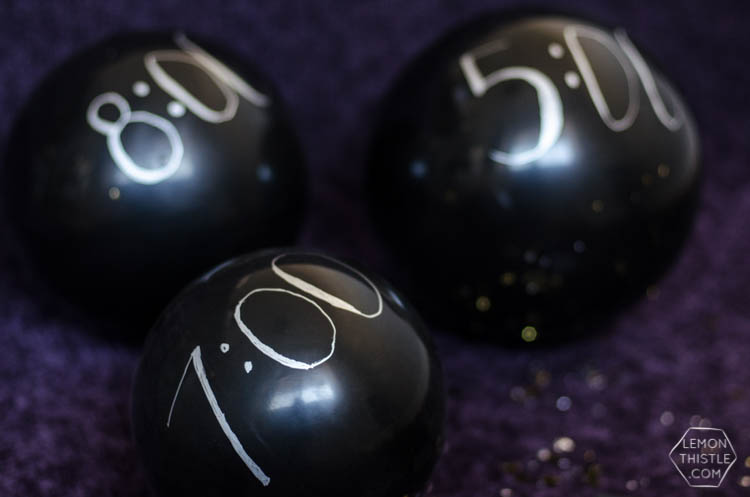
Roll your memories up and then, using a funnel, slide them into your balloons along with some confetti. Now inflate them, either all the same size or in a variety of sizes as shown. The hardest part of this DIY is to write the hours on the balloons! They’re tricky suckers. By the way… I’m loving the word ‘tricky’ right now. If my kids need help with something it’s always because ‘it’s a tricky one’… zippers, shoes, getting a door open… it’s adorable. Back to the DIY though, paint pens like these ones work best because you don’t need to apply pressure to get them to write, they just flow metallic ink and it’s wonderful. The larger the balloon the easier it is to write on (it’s firmer). Make sure to write on the side opposite to the tie off so when you tape them to the wall you won’t see the tie.

DIY Balloon Memory Wall for New Years Eve!

DIY Balloon Memory Wall for New Years Eve!

DIY Balloon Memory Wall for New Years Eve!

DIY Balloon Memory Wall for New Years Eve!

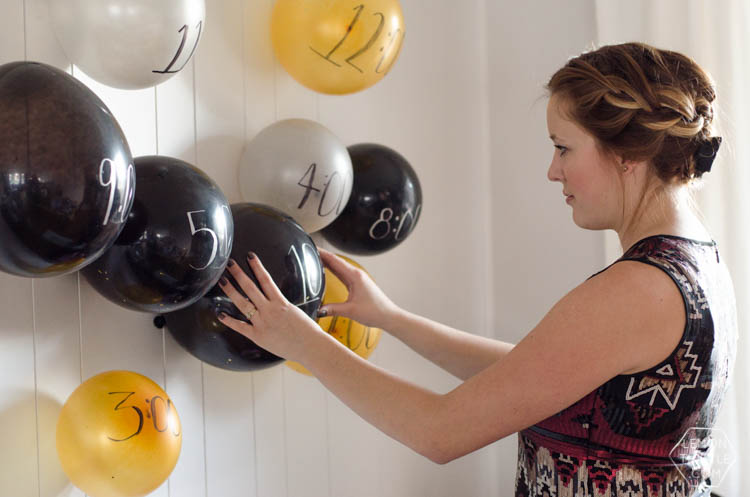
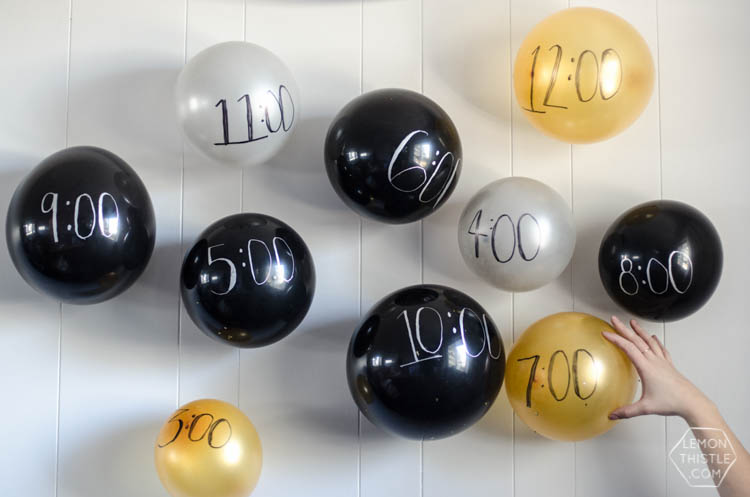
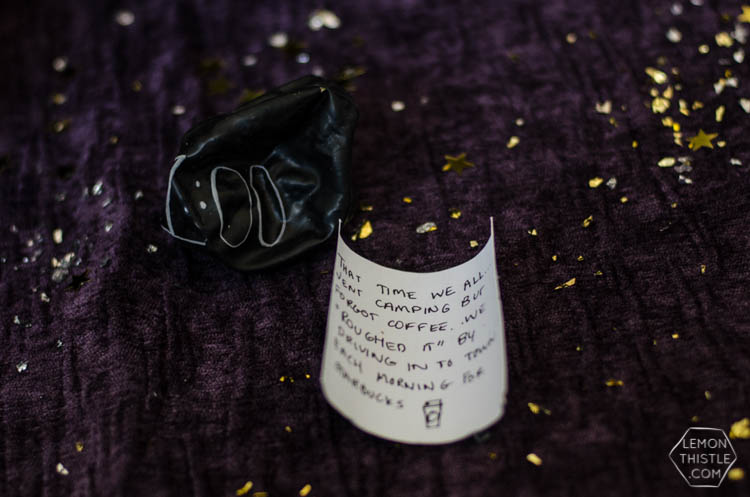
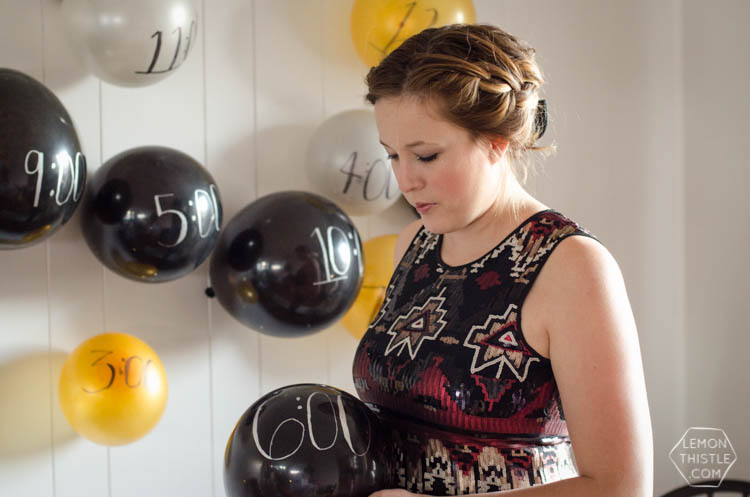
Tape them to the wall (I just rolled masking tape for this) as a fun party backdrop, then every hour on the hour have fun popping the balloons and reading the memories aloud!

Category: EntertainTag: Activity, Balloons, Games, Holiday DIY, Holiday Party, Holidays, NYE, Party, Party Decor, Party DIY
Facebook0Tweet0Pin0LinkedIn0
Previous Post: « merry christmas to you Merry Happy
Next Post: DIY Decoupage Desk Calendar DIY Decoupage Desk Calendar »

Reader Interactions

Comments

  1. Lee

    Jan 03 at 2:32 am

    There is no higher calling in life than caring for the children that God has trusted in your care. Congratulations.

    Reply
  2. the cape on the corner

    Jan 07 at 10:40 am

    so cute! would be a great idea for shower or any occasion, really. an anniversary! something from each year you were together. oh man.
    b

    Reply
  3. megin

    Jan 08 at 8:46 am

    What a fun idea! I will have to save this for next year. Great tips on how to get the glitter and memories in the balloons, too!
    I’m visiting from My Turn For Fun’s Freedom Fridays Blog Hope.
    I would love to invite you to join us and share each week at Brag About It link party on VMG206 (Mondays at Midnight).
    ~ Megin of VMG206

    Reply
  4. Lori Nicolson

    Jan 08 at 10:40 am

    That is an adorable idea! Love it….

    Reply
  5. Becky

    Jan 09 at 7:28 pm

    Such a beautiful memory wall! Thanks for sharing with us at The Creative Corner

    Reply
  6. Quinn Caudill

    Jan 13 at 12:06 pm

    Pinned! Thanks for sharing with us at #Throwback Thursday. Can’t wait to see what you bring to the party this week.

    Reply

Leave a Reply Cancel reply

Your email address will not be published. Required fields are marked *

Sidebar

WOOHOO!

Check your email to confirm!

(+ get your freebies + discounts)


Thanks for dropping by!
I’m Colleen: wife; mom to 4 wild ones; and DIY blogger behind Lemon Thistle. You can expect to see rad DIY, modern home decor, renovations, hand lettering and the occasional party on Lemon Thistle. Read More…

email facebook youtube instagram pinterest

Unless otherwise noted, all content and images are mine. Full posts may not be shared without express written consent. But I love when you share! Feel free to share, without altering, one image with proper credit and a link to the original post. All free printables are for personal use only.

Everyone loves proper credit- if you ever notice something improperly credited, please please shoot me an email and I’ll fix it lightning fast.

Find all my policies right here.
This includes my privacy policy, info on the GDRP compliance and information on affiliate links (Including Amazon Affiliates).

Visit Colleen Pastoor’s profile on Pinterest.

colleenpastoor

My house is never this clean
-
DIY + Home Decor Blogger
Mama of 4 👶🏼🧒🏼👦🏼👧🏼
Renovating our 🏠 the DIY way
🖤 Lettering & ☕️
-
✉️[email protected]

colleen pastoor/lemon thistle
What’s next on your project list? Spring is teas What’s next on your project list? Spring is teasing us so we’re starting on outdoor projects around here!
$100 play room makeover is DONE! This room has se $100 play room makeover is DONE! 
This room has seen so much change over the past year (swipe over to see it 2 weeks ago, 10 months ago and 1 year ago!). I took this last week to make over this space with mostly pieces we already had and I’m so so happy with the results! It’s a good reminder that some hard work, creativity and of course paint can work magic.
I’m sharing all the details (and that under stairs space!) on YouTube today (link in my stories!) and so is my friend @thediymommy (she made over her daughters bedroom for $100!).
Do you think dried grasses are only for fall decor Do you think dried grasses are only for fall decor? I used to think so, but these bunny tail grasses are too cute to put in a bin until next year. Plus the name sounds like spring decor to me ;) What do you think?

Ps. Today’s going to be a full day of playroom progress! I’ll share as much as I can in stories as I go :)
Paint is honestly magic.✨ I am so excited to sha Paint is honestly magic.✨
I am so excited to share this kitchen makeover with you guys! These are the same cabinets, just painted (countertops too!) And some updated finishes. I blogged the full before and after if you’d like to check it out!
Big thank you to @schaubhardware and @wagnerspraytech for partnering to make this space possible!
Ps. Most of the work done here was by the homeowners so if you’re thinking about taking on a makeover in your own home, maybe this is the encouragement you need 😘
As I’m sitting here staring at the dishes on the As I’m sitting here staring at the dishes on the counter while I try to focus on editing a video, I thought it’s as good of time as any to share this reminder 😘
I feel like I’ve lucked into the best job out th I feel like I’ve lucked into the best job out there, but then I’m also so aware of the amount of work it took to get here. Today I chatted with two of my blog friends in an Instagram live about DIY blogging as a job and answered some questions we get asked all the time about our work and the balance of it all! I saved it as an IGTV so you can watch it if you missed 🥰

Big thanks to @love_create_celebrate and @thediymommy for chatting with me today! One of the biggest perks of this job is all the talented ladies I’ve had the privilege of meeting and calling friends- these two are top of that list!
I’m having some fun in stories with a little giv I’m having some fun in stories with a little giveaway guessing game. I’d love if you played along!

I put up a question box and you can guess my next room makeover and the guesses are all over the place. Some are projects on my dream list, some are rooms I wish to even have in my house and some are spaces we’ve already tackled! Like our main bathroom ✨ these photos are from my spring home tour I shared over on the blog earlier this week. Hung up a pennant and called it decked for spring 🐣
Who is ready for spring?! I know we totally are- w Who is ready for spring?!
I know we totally are- we’ve been soaking up outside time this week with the kids home on spring break but over on the blog... it’s spring home tour time! I am sharing my home all ready for spring along with some amazing bloggers as part of the #seasonalsimplicity spring series!
You know I love a touch of DIY decor in every spac You know I love a touch of DIY decor in every space in my home, so I’m so excited to be partnering with @HGTVCanada to celebrate #$aveMyReno being back TONIGHT! #partner
 
My favourite thing about $ave My Reno is that they encourage home owners to get involved and DIY to maximize budget. They even help kids get involved- it’s everything Shane and I work towards in our own projects. You can catch it every Tuesday at 9/9:30PM EP on @HGTVCanada or catch up on episodes on STACKTV through @primevideoca!
 
PS. I made those tie dye pillows, similar to the ones featured in tonight’s episode! You can catch my stories to see the super speedy how-to :)
Load More... Follow on Instagram

Copyright © 2021 · Lemon Thistle · All Rights Reserved · Powered by Mai Theme