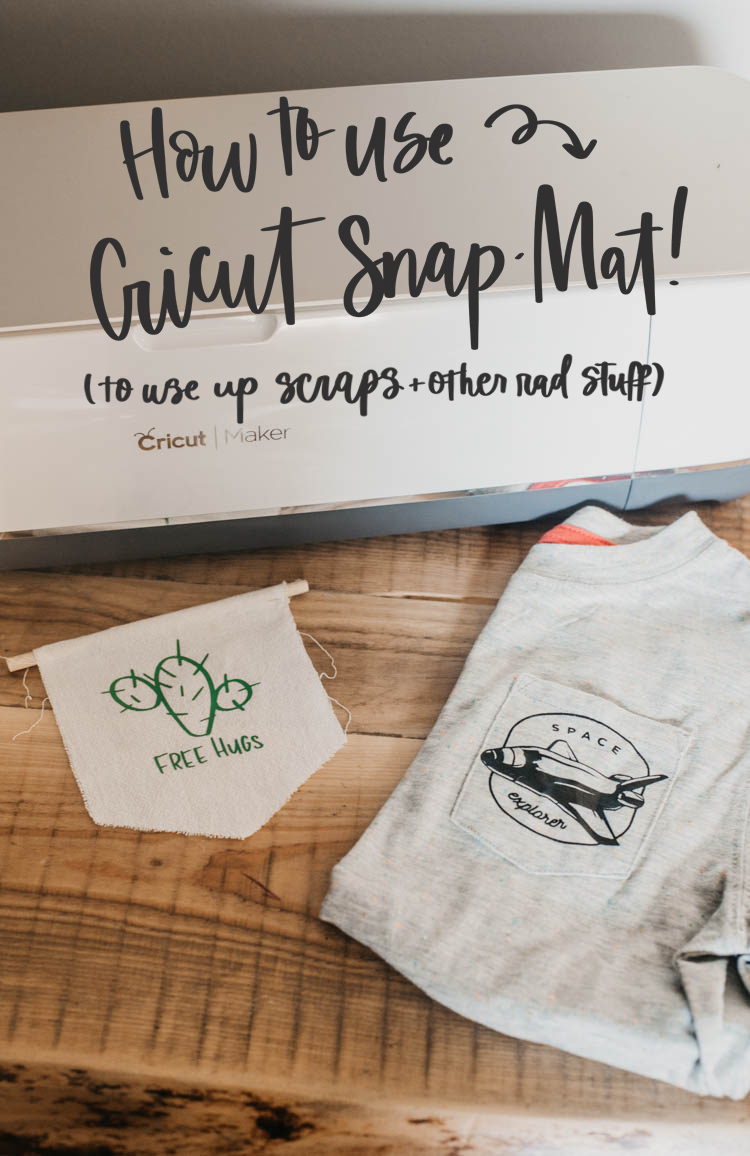
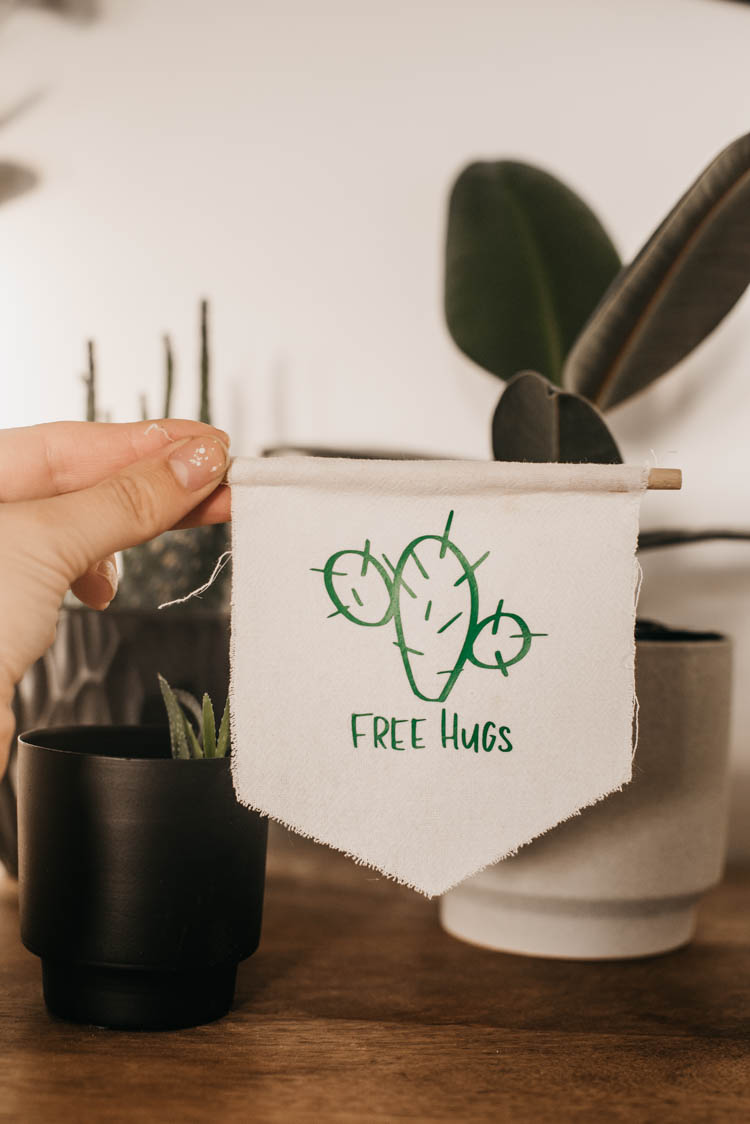
Today I’m talking about Cricut SnapMat- the feature that lets you take a picture of your mat and place your designs exactly where you want to (you know, for scraps of materials or cutting out photos!).
It’s been a while, but Alexis and I are back with another Silhouette VS Cricut series video! And this is one feature that I hadn’t spent too much time playing with before diving in for this video. I’ve learned so many things and hope that you do from this video too! For this video, I wanted to try a bunch of different applications that I could think of- and some that I was asked. I cut on scraps (my fave way to use the feature!), drew on already shapes/items, and cut photos in silhouettes and shapes.

Cutting scraps is something I’ve used SnapMat for a bunch of times, but beyond that? This was fun to test out. It’s really only ONE function. But applied in different ways. The photo is the one that gets a bit tricky. I shared my different attempts at that in the video- and then I share the things I’ve learned (tips, tips, tips!) along the way.
If you haven’t been following the Silhouette VS Cricut series is just a challenge where Alexis and I take on different functions, features or materials that the Silhouette and Cricut can take on- and then we test them out. I’m team Cricut so use my Cricut Maker for all of these projects. Alexis from Persia Lou will be using her Silhouette for all of her projects. The feature? Being able to move your designs around on your mat to place them exactly where you want them- on the material of your choice. Cricut calls it SnapMat and Silhouette’s is called PixScan.
SO Let’s talk about SnapMat. What is it? How does it work?
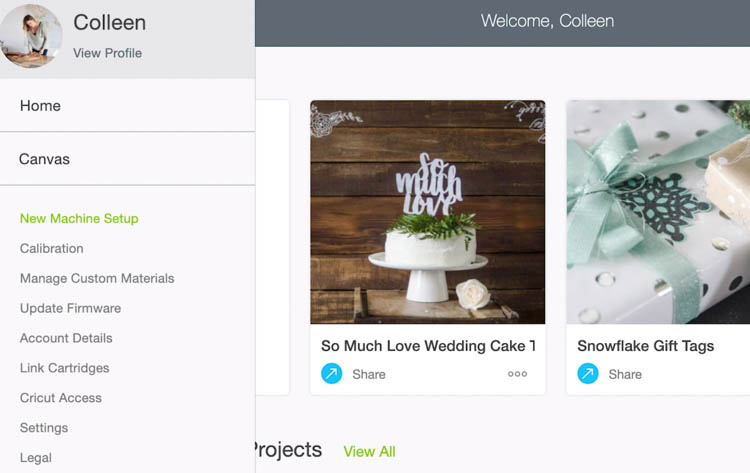
SnapMat is only available on Cricut Design Space for MOBILE. It’s available on my iPad and my phone. As far as I can read- it’s not available for Android devices yet. You design your project as per usual and then after sizing it (this HAS to be done first), when you hit ‘Make It’… you will see the option for ‘SnapMat’ or a small camera in the bottom left corner of your mat. If you tap this, it will bring up a screen for you to take a photo of your mat. Once you take your photo, your ‘mat’ on screen will be replaced by your photo so you can drag around the designs and place them exactly where you want on your materials. You can also rotate designs to make them best fit.
Use Cricut SnapMat for Scraps
Why would you want to do that? Scraps, friends! At least… that’s my biggest reason. If you have scraps you want to use up- you can place them aaaall on your mat at once (providing they use the same cut settings) and then drag your designs around to make sure you’re using the best of the scraps.
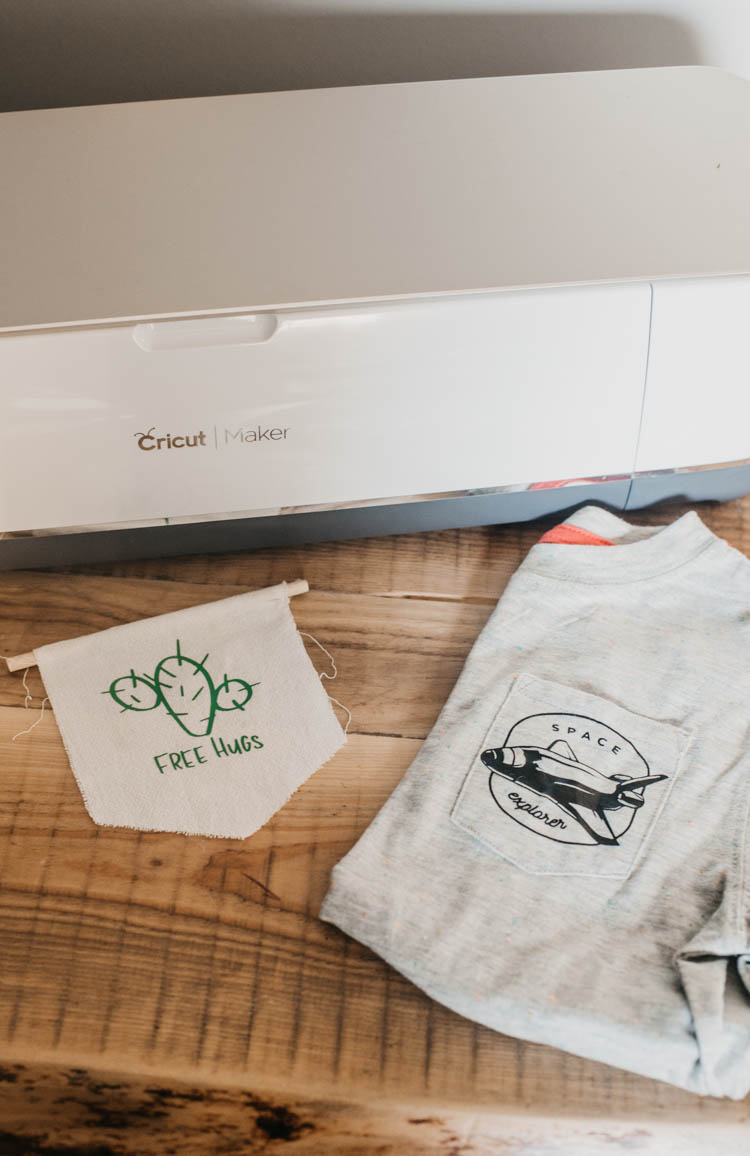
But scraps is just one of the ways to use the SnapMat feature. In the video, I used scrap heat transfer vinyl to make a pocket design tee for my son and a tiny pennant. The space ship is a design from Cricut Access and the ‘Free Hugs’ is one I drew on my iPad Pro just for this. If you don’t know how to upload your own images to Cricut Design Space… I made a whole video and blog post on that RIGHT HERE.
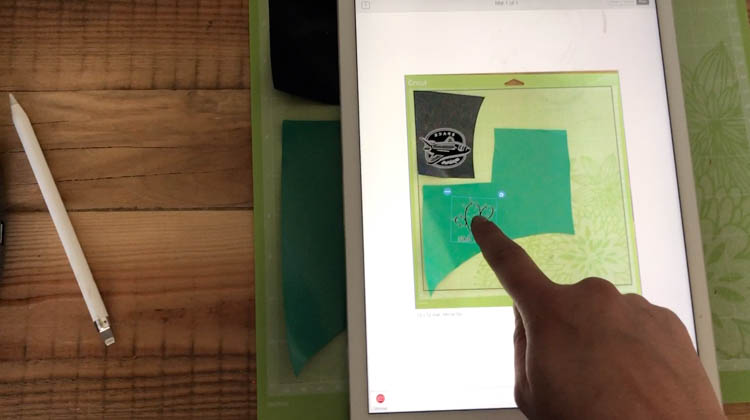
Some tips on using scraps with Cricut SnapMat? Make sure to use only materials of one cut setting at a time. Cutting glitter vinyl and iron on lite and flocked iron on would just make you irritated that none of them cut quite right. Also make sure that your designs are all set to the same colour. You can do this by clicking colour sync on the right hand panel and dragging all of your colours to be the same. Colour sync is a great way to notice if you’ve missed anything.
The final tip is sizing. I’d mentioned it before but it really is so important if you don’t want a headache. Size your designs to the size of your scraps before you hit ‘Make it’ and do your SnapMat photo. Why? Because you can’t resize after this. So if your design was a 1/4″ off in size, you’d have to cancel the cut and go back to the project canvas to resize. I like to use a measuring tape and measure my material to make sure I’m sizing it appropriately.
Use Cricut SnapMat to Cut Photos
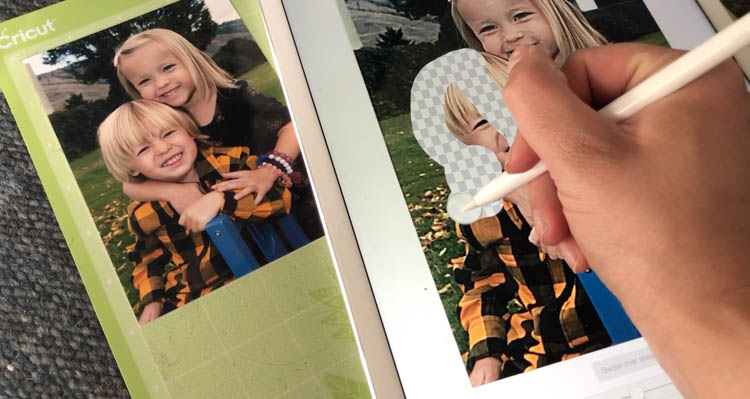
The next thing I wanted to try was cutting photos or a pre-existing design. I had received a comment on one of my YouTube videos asking for tips cutting out ‘the tiger off the cereal box’ and I wanted to give my suggestion a try. My suggestion was to upload a photo of the surface you want to cut (in my case, a photo… but in the case of the comment, the cereal box) and then cut it out with SnapMat.

The EASIEST way to cut out a photo would be to use a basic shape, like a circle and then put that photo on the mat and use SnapMat to drag the circle exactly over your photo. If you want a silhouette, however… this long section should address that!
If you haven’t uploaded your own photo before, this video will be really helpful for you. But when you’re taking a photo, you’re going to have a .JPG design. This means that if you did no editing in Cricut Design Space, it would just cut out a box the shape of your photo. It wouldn’t cut out detail. SO you need to either outline the shape yourself with the eraser OR use the magic erase tool to erase the background. If you’re using a photo like I am, the eraser is your best bet, but if you have a cartoon image that’s really clear outlines and colour differences- the magic eraser would be a great option for you.
One of the things you’ll run into if you erase the background and leave your shape is that when it comes time to drag it over your image on the snap mat- you can’t see it. So I found that erasing the photo you want cut out and leaving a border as your cut lines worked best for me. I share more about this in the video.
If you do use the magic erase tool specifically… To smooth out the lines and thicken the cut to make sure it cuts around the design, use the ‘smooth’ option a few times. This option is like taking away points in a SVG design in Adobe Illustrator. You can see this in action in the video.
NOW once you’ve inserted it and sized it, you might run into a couple things as you cut. Let me be clear… I’m pretty sure I ran into it all. First- I cut my design really close to the design so it would cut out perfectly. But it didn’t. My first recommendation is to cut a bit of a border around your design. Don’t erase too closely to what you care about. This way if it’s a bit ‘off’, you won’t be upset that you… lose your nose in the photo or something. Yeah, that happened to me ;)
One thing that I want to really highlight in this post is that unlike Cricut Print then Cut, Cricut SnapMat is largely reliant on YOU lining things up right.
What? Yeah. So Cricut Print then Cut (I have a whole post about that here) tracks where to cut exactly on the mat by printing a black bounding box that a sensor then detects to line up before cutting. It’s pretty darn accurate and that’s because of this. Cricut SnapMat on the other hand, gives you the imagery (that hopefully you took level and even) and you then place your cuts on that mat the best you can. There is room for human error in every single one of these steps.
But mine was cutting off even more than I expected considering human error. I tried a couple times that I didn’t show in video and decided something was up. BUT there’s no way to calibrate your machine for SnapMat! I called tech support and was told to ‘set up new machine’ on my machine to reset it. This definitely helped. I show you where to find that in Design Space in my video. Once that was reset, things cut a lot better and it was just troubleshooting how to get the very best cut.
So after trying this a few too many times, here are my best tips using the steps above.
I actually found it easier to erase the photo that you are cutting out, leaving only the outline. This is to make placement on your SnapMat easier. You can see what I mean in the video. Remember to leave a bit of a border around the edge for error.

Take care that every photo you take is from straight above. This is easiest if you put your mat on the floor and stand.
Look for the border of the mat to see if there’s any slivers of the surface behind your mat showing or any bits of your mat cut off. This will affect your cut.
Last but not least, take time to do a few practice cuts before cutting out your project. Getting familiar with SnapMat might take a little trial and error!

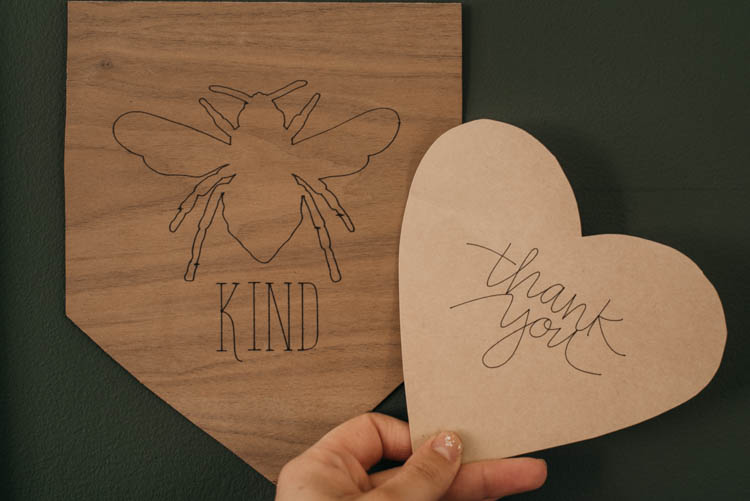
Drawing on Surfaces with Cricut SnapMat
The last thing I tried with Cricut SnapMat for this video is drawing on surfaces. In the past, I’ve used Cricut SnapMat to cut things out of other shapes. For example, cutting letters out of an already made garland (the pennant style ones). Both of the designs I used are straight from Cricut Access. I’ve saved the Bee Kind project for you RIGHT HERE if you like it- I used a combination of fonts and edited images so thought it was worth saving!
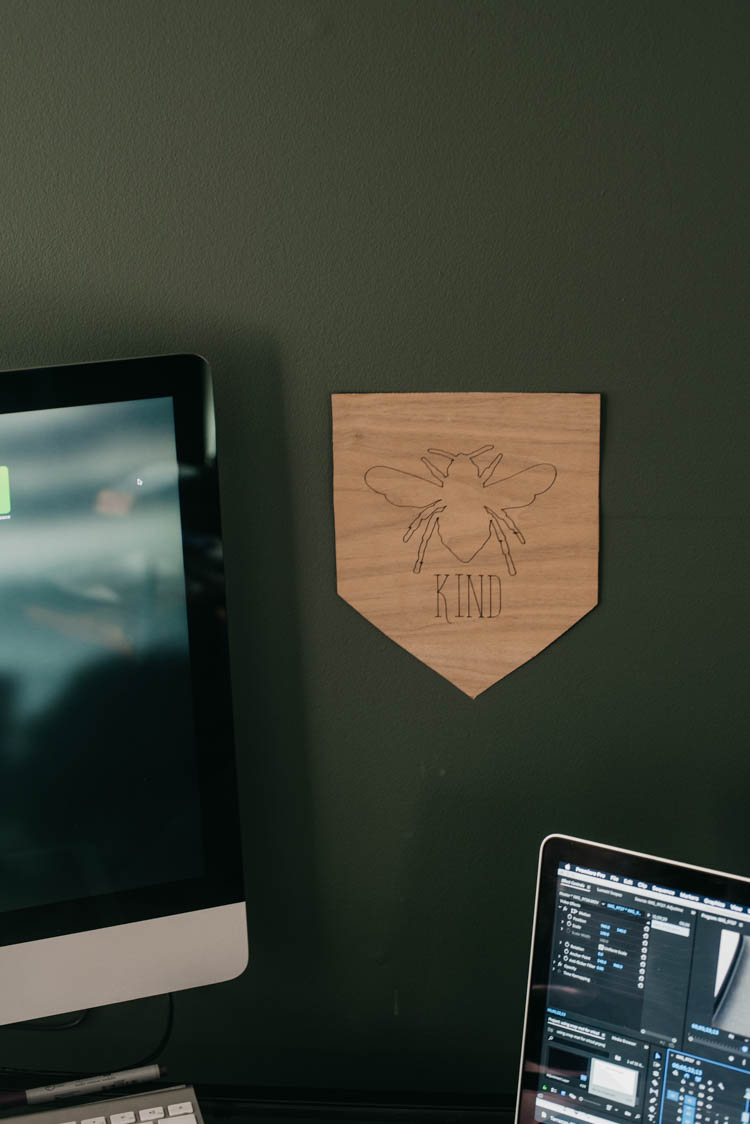
This one is SO similar to the rest so I won’t say all the same points again. Once you’ve made your designs, you can drag them onto your surfaces. Only choose flat things (like this precut thin wood pennant or the heart sticker). Then load it up! I used the fine tip Cricut Markers for this. It didn’t take any troubleshooting to do this once I’d learned how Cricut SnapMat works with my other projects!
Alright! I’m going to leave it at that- I can’t wait to see any projects you guys make using Cricut SnapMat! Make sure to share them on social and tag me @colleenpastoor :)
 Easy DIY Vertical Shiplap Wall
Leave a Reply