• Skip to main content
  • Skip to header left navigation
  • Skip to header right navigation
  • Skip to site footer
  • Shop
  • Get The Email
  • Work With Me
  • About
  • Search

  • DIY
    • DIY Home Decor
    • With Power Tools
    • Renovation
    • For Kids
    • For Parties
    • Wearable
    • Organization
    • Cricut Crafts
  • Home Decor
    • Room Reveals
    • Kid Friendly
    • DIY Home Decor
    • Renovation
  • Lettering
    • Hand Lettered Printables
    • Free Practice Sheets
    • Handlettered DIY
    • Free Brush Lettering Quickstart Guide
Lemon Thistle

Lemon Thistle

Rad DIY, Lettering and Design for Real People

  • Printables
    • For Cricut
    • Party Printables
    • Home Decor Printables
    • Bachelor Bingo
    • Handlettering Practice Sheets
    • All Free Printables
  • Entertain
    • Party Printables
    • Party DIY
    • Tablescapes
    • Kids Parties
  • Blog

Hello Pumpkin! Free cut file + Matte Metallic Pumpkins

Oct 01

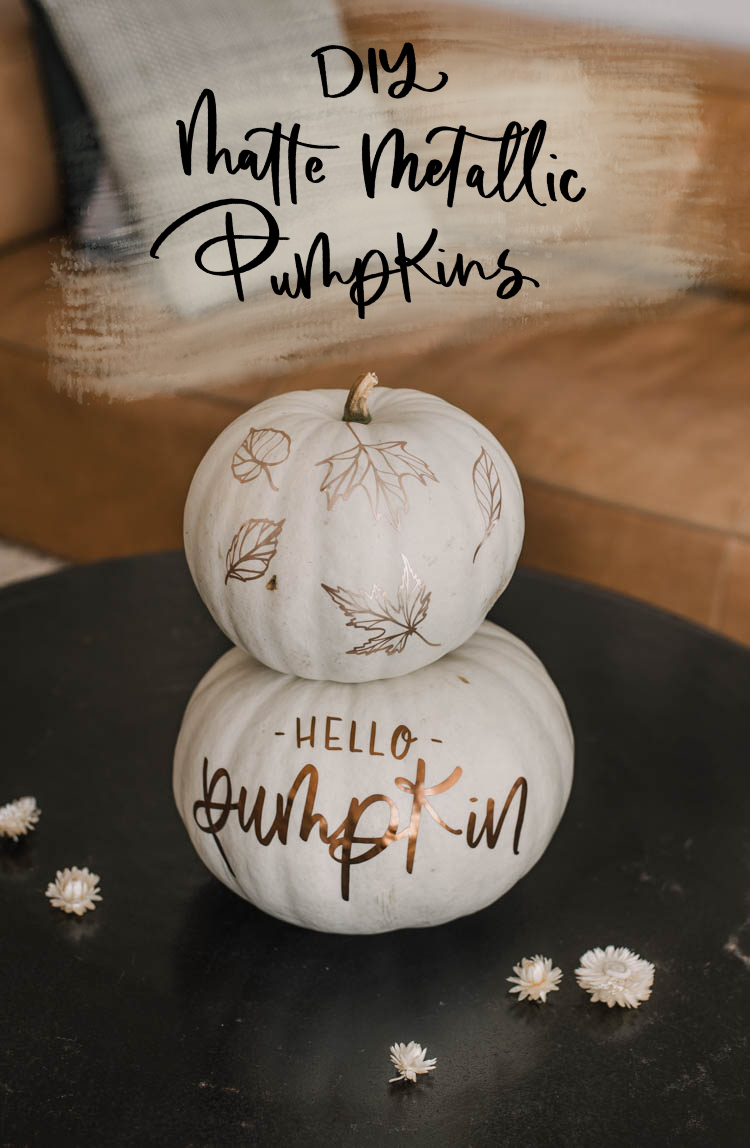
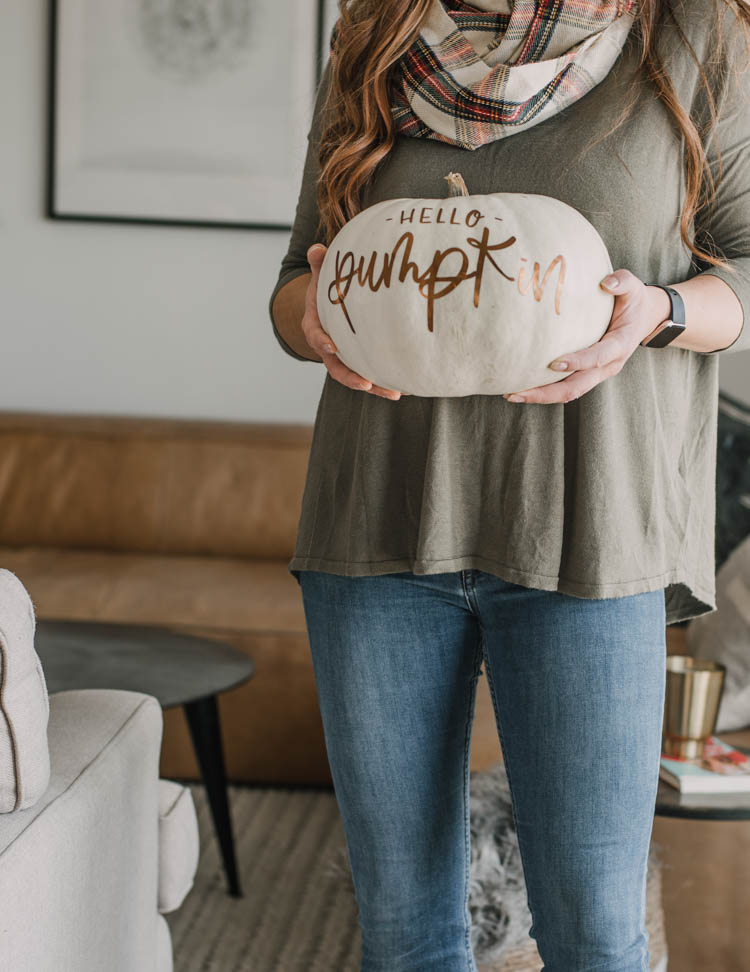
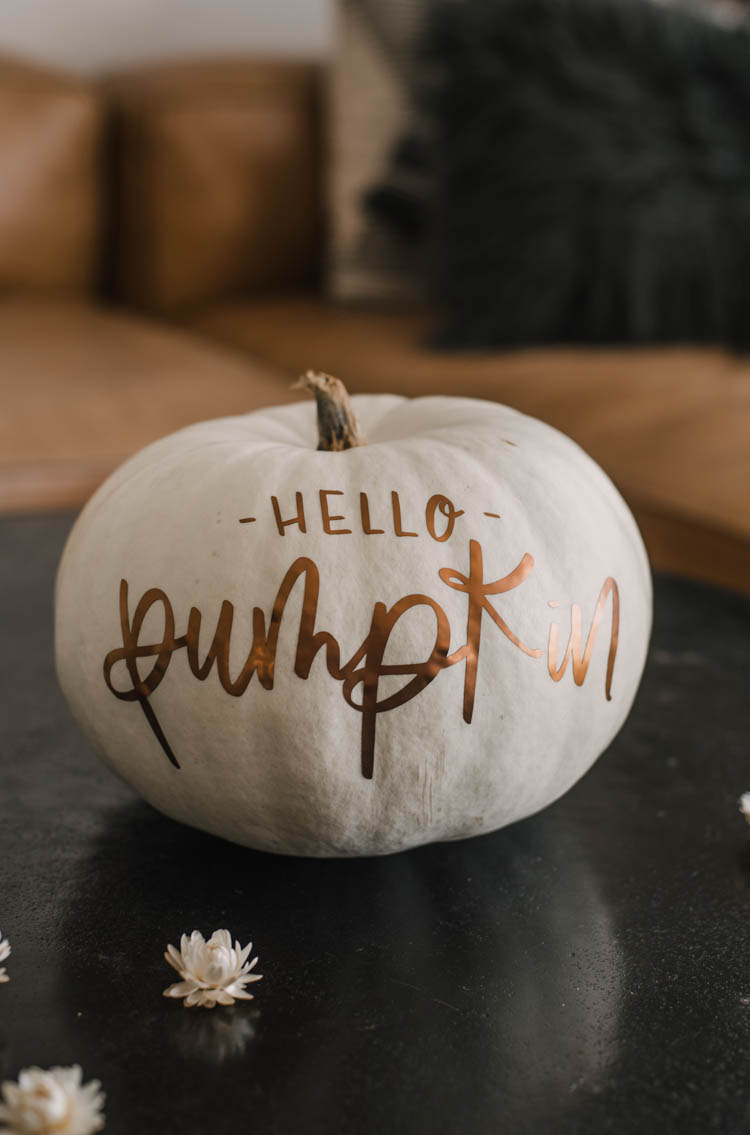
Beautiful matte metallic pumpkins? Heck yes! Plus I’m sharing my hand lettered ‘Hello Pumpkin’ Cut file for free!

image of stacked matte metallic pumpkins with text overlay

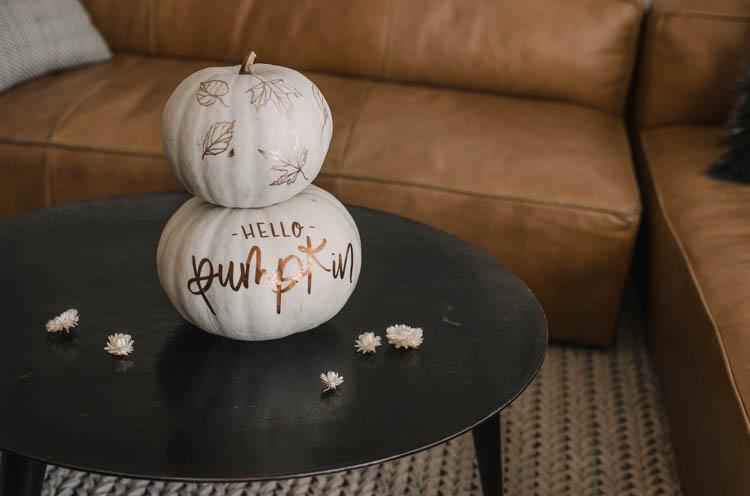
In the middle of major renovations a craft is such a rewarding way to spend a few minutes because then… it’s DONE. It doesn’t take weeks of work to get to a point that it looks unfinished still. Nope… it takes just one afternoon. If that. And then you have something pretty to show for it! So today I’m excited to share these pretty matte metallic vinyl pumpkins with you guys! 

I’m joining forces with some incredible crafty bloggers for this one. Down at the bottom of this post, you’ll find 13 rad pumpkin projects using vinyl. So if Cricut or Silhouette craft is your thang, you’ll love these fun projects! I’m going to show you how I made these pumpkins, but also- you know I’m sharing a freebie! 
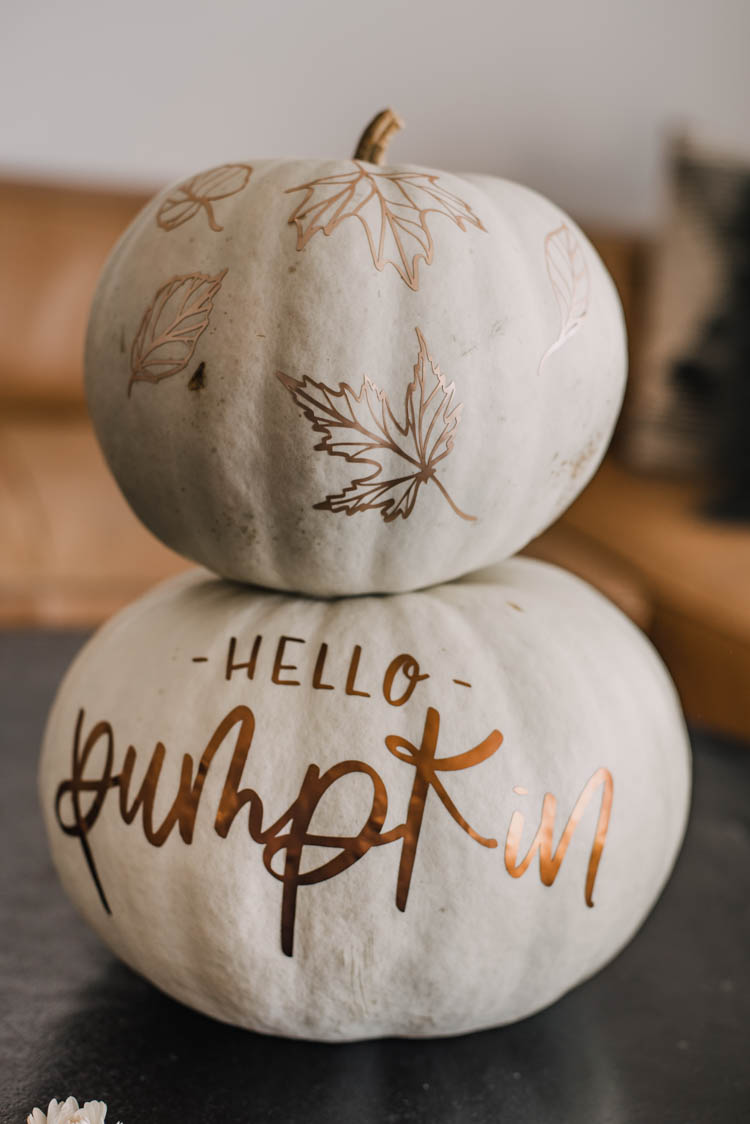
I hand lettered that ‘hello pumpkin’ file and am sharing that as a free download below. And then because I couldn’t stop at just one, I made a second pumpkin with matte adhesive foil using my SVG line art leaves. I’m putting them on everything right now. Did you spy the little tea towel from my home tour last week? 

Matte metallic pumpkins! Love the hand lettered 'hello pumpkin' design on this one! Plus free cut file

Before the tutorial…  YES, I used real pumpkins. If I would have used fake pumpkins, I could have saved them for next year too. I might do that next year. But I was at Home Depot, not Michaels and they have real pumpkins at Home Depot ;) They also have insulation… which is the reason I went there in the first place.

If you too want to use real pumpkins… Make sure you wash them suuuuper well. With vinegar. So that your vinyl sticks and they last longer! 

Pulled back shot of the Cute metallic pumpkin designs!

Alright- let’s get to the tutorial (and freebie!), shall we?!

The first thing you’ll need to do is decide on your design and get it loaded into your cutting software. If you’d like to use my ‘hello pumpkin’ hand lettered design, you can grab it for free at the link below. Polite reminder that it’s for personal use only :)

Matte metallic pumpkins! Love the hand lettered 'hello pumpkin' design on this one! Plus free cut file

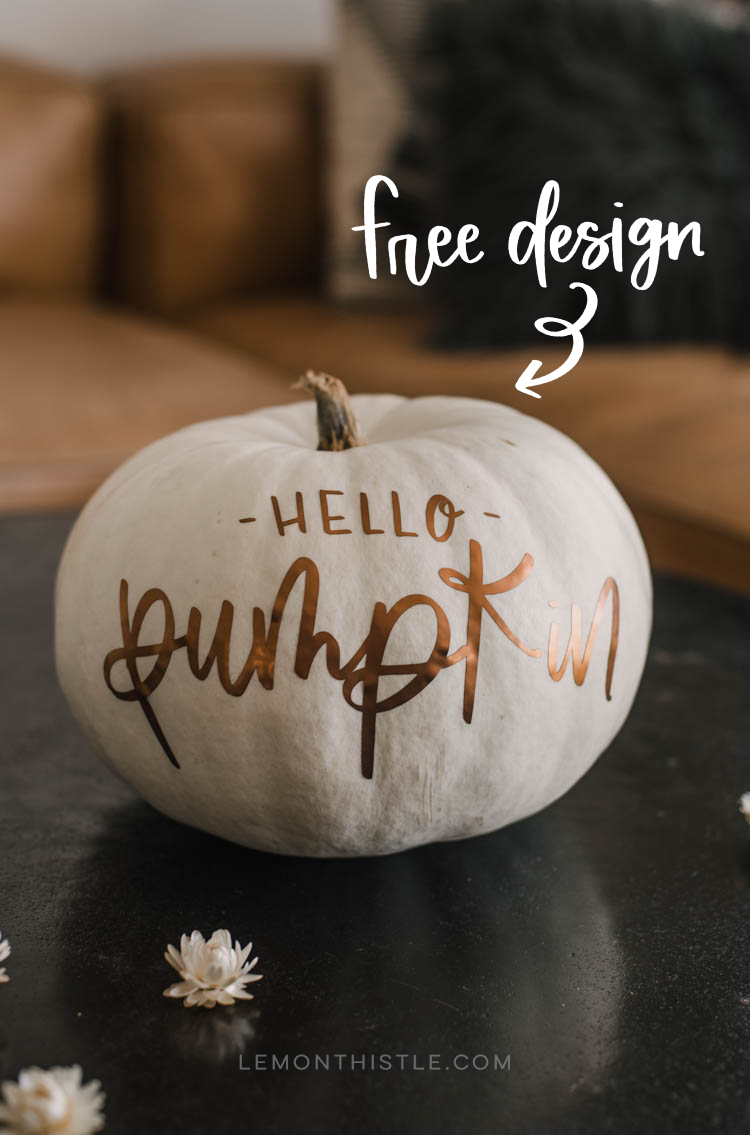
GET YOUR HELLO PUMPKIN FREE CUT FILE

If you’re loving the leaves (me too!) you can grab one of the maple leaves as a freebie right here or the whole pack of them in SVG format in my shop right here.

How to cut matte adhesive foil

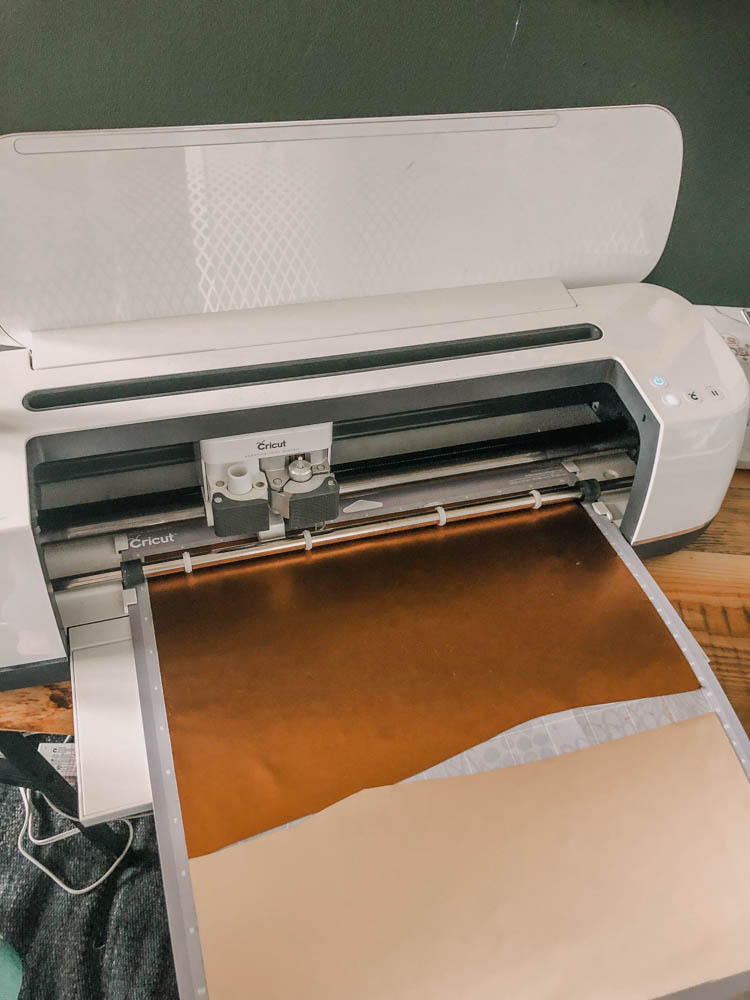
Alright, once you have your file… time to get cutting! If you’re new to cutting your own uploaded images on Cricut, I’ve made a whole video showing how to do that right here! If you’re a Silhouette user with that learning curve, my girl Alexis has you covered with this video right here. 

How to cut matte adhesive foil for autumn metallic pumpkins!

For these pumpkins I used the Cricut Matte Adhesive Foil. I’ve used this stuff for a few projects before and I’ll be honest, it’s kind of a pain to work with. But I keep using it because I LOVE the way it looks when all is said and done so darn much. You can see a fall sign I made with this stuff last year… and then this cute plant pot. I cut two different colours (the bronze and the rose gold) at once. Since it’s the same cut settings, you can easily do this and just drag the designs around on the matte preview to where you want them to cut.

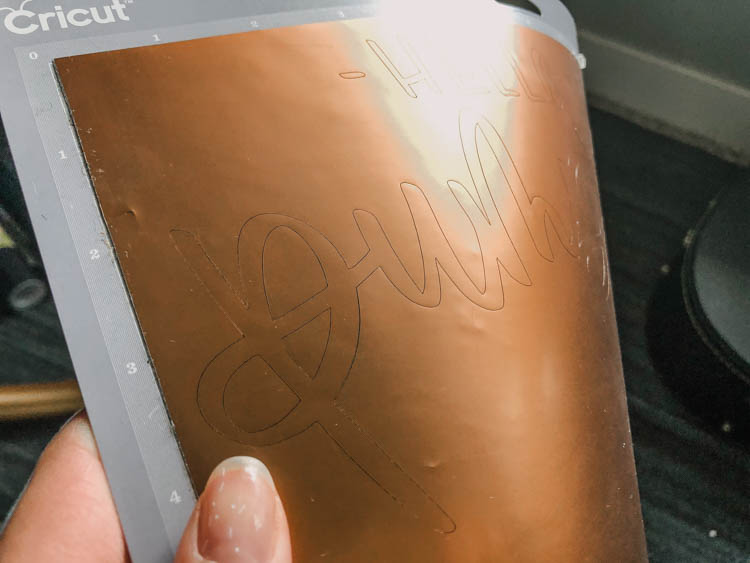
When you’re weeding your design, my biggest piece of advice is to go really slow with this material. It tears but also it scratches. It also sometimes doesn’t cut all the way through. I use a paper weeding tool (it’s super sharp) to poke where the cut didn’t quite make it and that helped me out. You could probably add a bit more pressure to the auto cut settings if your blade is getting a bit dull (like mine!)… but #hindsight. 

Using transfer tape for matte adhesive foil material... on pumpkins!

Using transfer tape for matte adhesive foil material... on pumpkins!

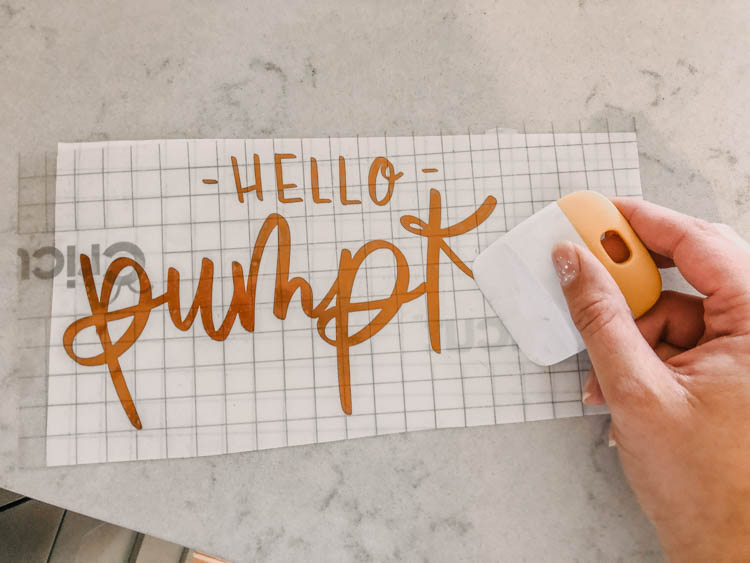
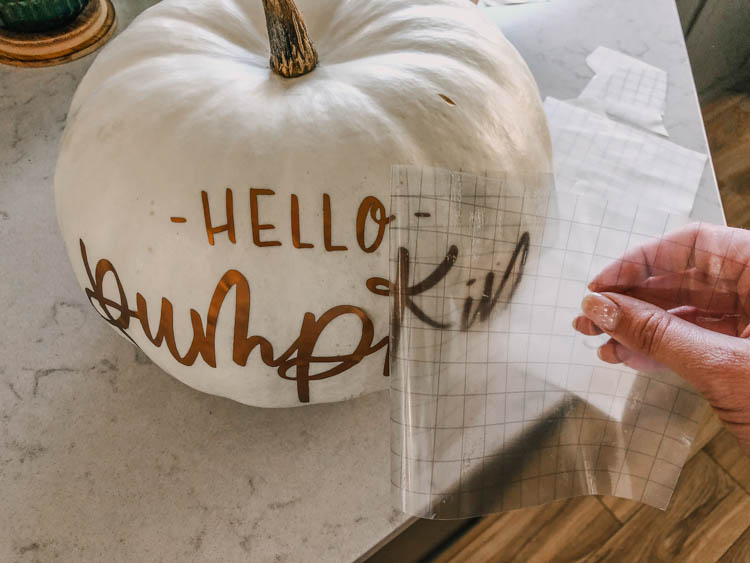
Once it’s weeded, use transfer tape as per usual (the Cricut standard stuff works well with this material!) and transfer it on to your pumpkin! I find to get a design straight on a curved surface, it’s really important to start at the middle. I like to lay half of the design down first and peel back that transfer tape before laying the other half down and peeling back the rest of the transfer tape. If you try to do it all at once willy nilly, you’ll end up with a curved and crooked design. Not that I have ever failed like that. Nope. Not once. 

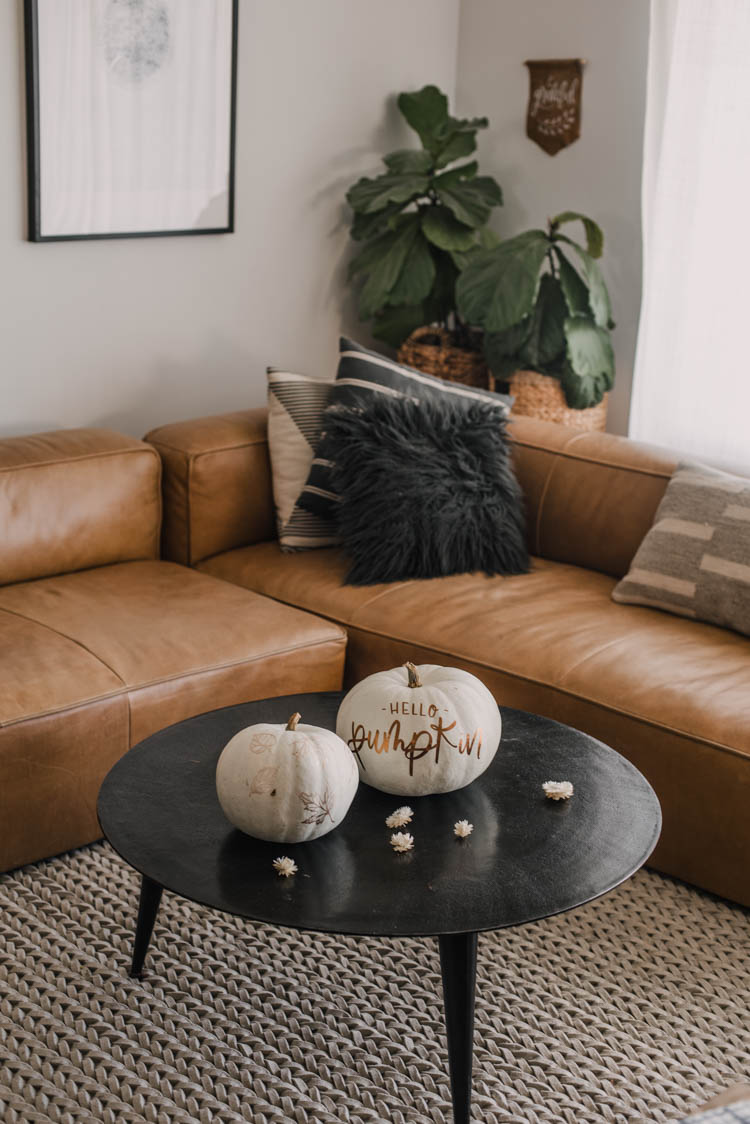
Once you’ve removed your transfer tape, take time to really smooth it down into the creases of the pumpkin. Then stand back and admire your work! Sprinkle with strawflowers for even more autumnal vibes. 

Matte metallic pumpkin with 'hello pumpkin' hand lettered design (free cut file)

Matte metallic pumpkins! Love the hand lettered 'hello pumpkin' design on this one! Plus free cut file

Matte metallic pumpkins! Love the hand lettered 'hello pumpkin' design on this one! Plus free cut file

Now… hop around and check out all the pumpkins because some of these ladies are so freaking creative. And all of them are very colourful, it has me feeling so basic- ha! Just the way I like it :) 

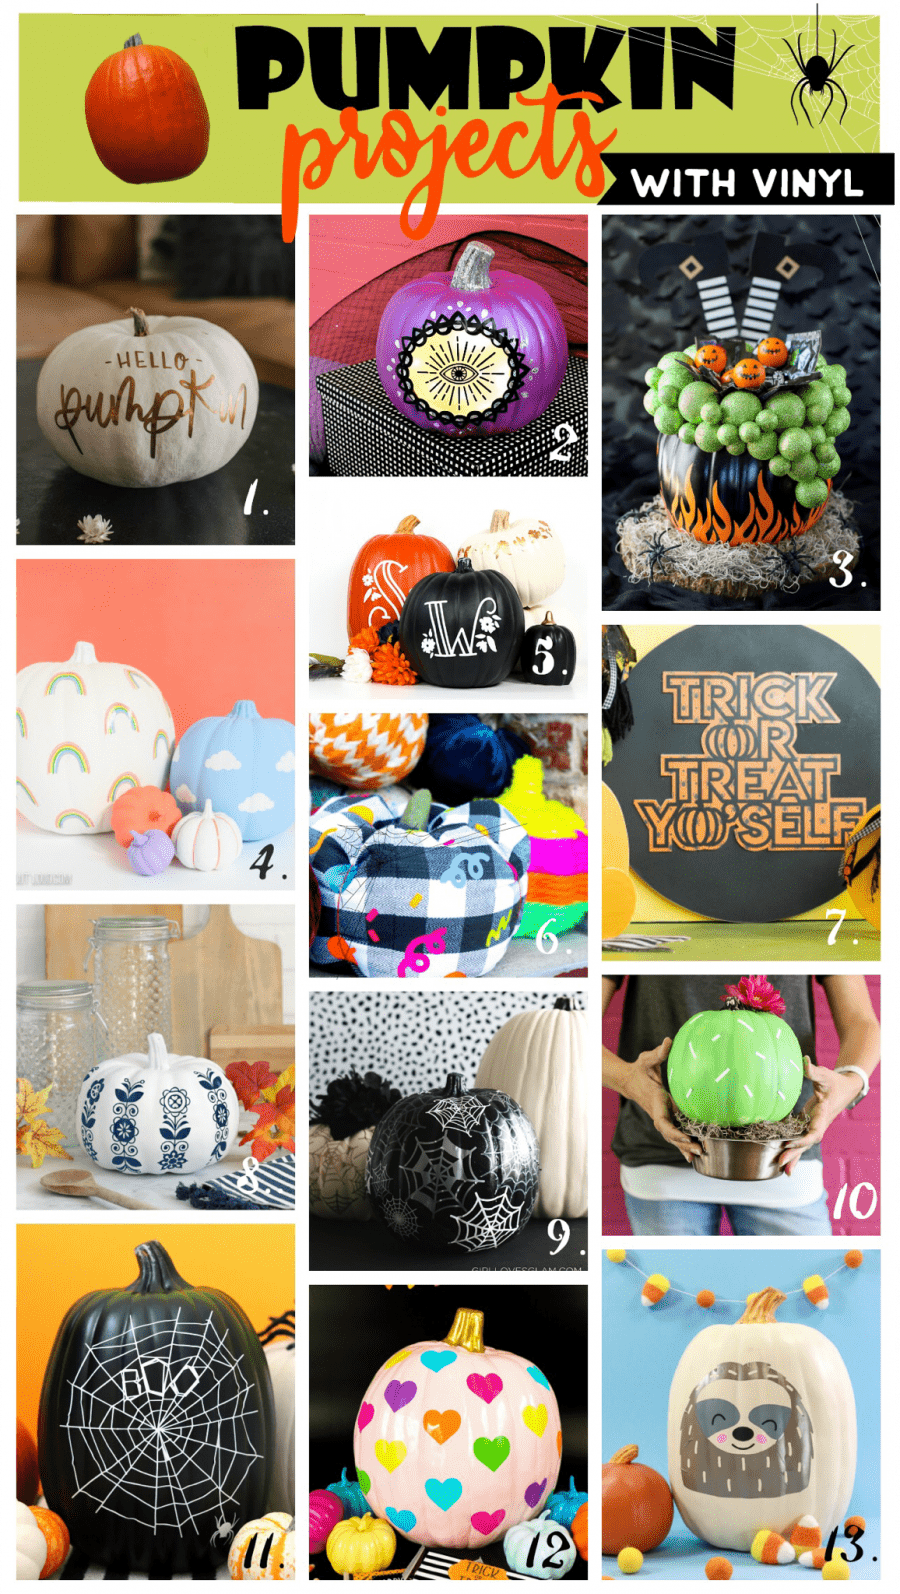
  1. Hello Pumpkin from Lemon Thistle
  2. Glowing Eye Pumpkin from Persia Lou
  3. Cauldron Candy Holder from A Pumpkin and a Princess
  4. Rainbow and Clouds pumpkin from Lydi Out Loud
  5. Monogram Pumpkins from Printable Crush
  6. Fabric Pumpkins from Sew What Alicia
  7. Trick or treat yourself from See Lindsay
  8. Folk art pumpkin from The Craft Patch
  9. Spiderwebs pumpkin from Girl Loves Glam
  10. Cactus pumpkin from Sugar Bee Crafts
  11. Boo Spiderweb from a Girl and a glue gun
  12. Rainbow hearts from Happiness is Homemade
  13. Sloth pumpkin from That’s What Che Said
Category: DIYTag: Autumn, Collaboration, Craft, Cricut, Cut Files, Pumpkins
Facebook0Tweet0Pin0LinkedIn0
Previous Post: « Modern basement kitchen with black hardware and white shaker cabinets Modern Basement Kitchen Reveal + 4 tips to decorate a kitchen
Next Post: Free Printable Last 90 Days Tracker »

Reader Interactions

Comments

  1. Valerie

    Oct 18 at 4:12 am

    Pretty! I got copper foil HTV to make a shirt, and I think ‘Hello Pumpkin’ would be perfect. Thanks for the file.

    Reply
    • Colleen Pastoor

      May 25 at 7:32 pm

      That would be so lovely!!

      Reply

Leave a Reply Cancel reply

Your email address will not be published. Required fields are marked *

Sidebar

WOOHOO!

Check your email to confirm!

(+ get your freebies + discounts)


Thanks for dropping by!
I’m Colleen: wife; mom to 4 wild ones; and DIY blogger behind Lemon Thistle. You can expect to see rad DIY, modern home decor, renovations, hand lettering and the occasional party on Lemon Thistle. Read More…

email facebook youtube instagram pinterest

Unless otherwise noted, all content and images are mine. Full posts may not be shared without express written consent. But I love when you share! Feel free to share, without altering, one image with proper credit and a link to the original post. All free printables are for personal use only.

Everyone loves proper credit- if you ever notice something improperly credited, please please shoot me an email and I’ll fix it lightning fast.

Find all my policies right here.
This includes my privacy policy, info on the GDRP compliance and information on affiliate links (Including Amazon Affiliates).

Visit Colleen Pastoor’s profile on Pinterest.

colleenpastoor

My house is never this clean
-
DIY + Home Decor Blogger
Mama of 4 👶🏼🧒🏼👦🏼👧🏼
Renovating our 🏠 the DIY way
🖤 Lettering & ☕️
-
✉️[email protected]

colleen pastoor/lemon thistle
What’s next on your project list? Spring is teas What’s next on your project list? Spring is teasing us so we’re starting on outdoor projects around here!
$100 play room makeover is DONE! This room has se $100 play room makeover is DONE! 
This room has seen so much change over the past year (swipe over to see it 2 weeks ago, 10 months ago and 1 year ago!). I took this last week to make over this space with mostly pieces we already had and I’m so so happy with the results! It’s a good reminder that some hard work, creativity and of course paint can work magic.
I’m sharing all the details (and that under stairs space!) on YouTube today (link in my stories!) and so is my friend @thediymommy (she made over her daughters bedroom for $100!).
Do you think dried grasses are only for fall decor Do you think dried grasses are only for fall decor? I used to think so, but these bunny tail grasses are too cute to put in a bin until next year. Plus the name sounds like spring decor to me ;) What do you think?

Ps. Today’s going to be a full day of playroom progress! I’ll share as much as I can in stories as I go :)
Paint is honestly magic.✨ I am so excited to sha Paint is honestly magic.✨
I am so excited to share this kitchen makeover with you guys! These are the same cabinets, just painted (countertops too!) And some updated finishes. I blogged the full before and after if you’d like to check it out!
Big thank you to @schaubhardware and @wagnerspraytech for partnering to make this space possible!
Ps. Most of the work done here was by the homeowners so if you’re thinking about taking on a makeover in your own home, maybe this is the encouragement you need 😘
As I’m sitting here staring at the dishes on the As I’m sitting here staring at the dishes on the counter while I try to focus on editing a video, I thought it’s as good of time as any to share this reminder 😘
I feel like I’ve lucked into the best job out th I feel like I’ve lucked into the best job out there, but then I’m also so aware of the amount of work it took to get here. Today I chatted with two of my blog friends in an Instagram live about DIY blogging as a job and answered some questions we get asked all the time about our work and the balance of it all! I saved it as an IGTV so you can watch it if you missed 🥰

Big thanks to @love_create_celebrate and @thediymommy for chatting with me today! One of the biggest perks of this job is all the talented ladies I’ve had the privilege of meeting and calling friends- these two are top of that list!
I’m having some fun in stories with a little giv I’m having some fun in stories with a little giveaway guessing game. I’d love if you played along!

I put up a question box and you can guess my next room makeover and the guesses are all over the place. Some are projects on my dream list, some are rooms I wish to even have in my house and some are spaces we’ve already tackled! Like our main bathroom ✨ these photos are from my spring home tour I shared over on the blog earlier this week. Hung up a pennant and called it decked for spring 🐣
Who is ready for spring?! I know we totally are- w Who is ready for spring?!
I know we totally are- we’ve been soaking up outside time this week with the kids home on spring break but over on the blog... it’s spring home tour time! I am sharing my home all ready for spring along with some amazing bloggers as part of the #seasonalsimplicity spring series!
You know I love a touch of DIY decor in every spac You know I love a touch of DIY decor in every space in my home, so I’m so excited to be partnering with @HGTVCanada to celebrate #$aveMyReno being back TONIGHT! #partner
 
My favourite thing about $ave My Reno is that they encourage home owners to get involved and DIY to maximize budget. They even help kids get involved- it’s everything Shane and I work towards in our own projects. You can catch it every Tuesday at 9/9:30PM EP on @HGTVCanada or catch up on episodes on STACKTV through @primevideoca!
 
PS. I made those tie dye pillows, similar to the ones featured in tonight’s episode! You can catch my stories to see the super speedy how-to :)
Load More... Follow on Instagram

Copyright © 2021 · Lemon Thistle · All Rights Reserved · Powered by Mai Theme