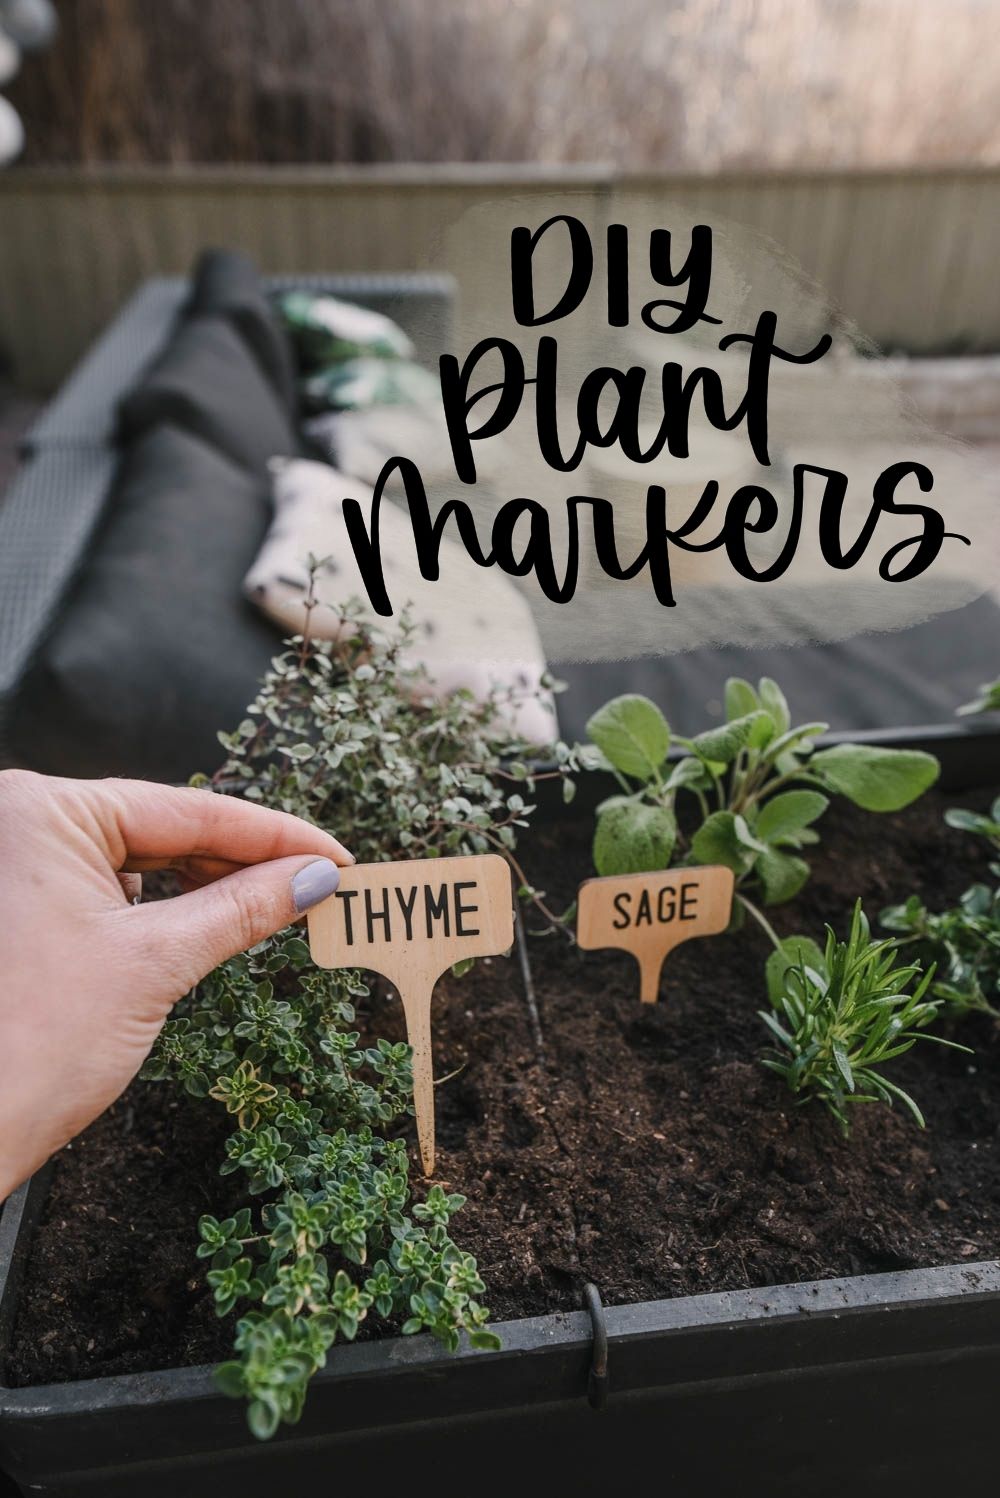
As part of my patio goals this year, I’m upgrading my container herb garden with these DIY wooden plant markers made with my Cricut Joy. See the full tutorial below!
If you’ve been following along with Lemon Thistle for some time, you might remember that last year we finished off our decks and finally got some gorgeous patio furniture out here.
Part of that was buying these planters to separate the spaces and while I totally loved them, halfway through the summer this girl couldn’t tell which was thyme and which was oregano. But also, my kids don’t know dill from cilantro and they love to help out by picking the herbs for dinner.
This year, I left the tags from the nursery in there but decided those had to go.
I am excited to partner with Cricut to make some modern plant markers for these patio herb gardens! I pulled out my Cricut Joy and got crafting and now… look at how cute these DIY wooden plant markers are!
I love the modern sans serif font and the black with the natural wood look. They were also really affordable!
Let’s get crafting!
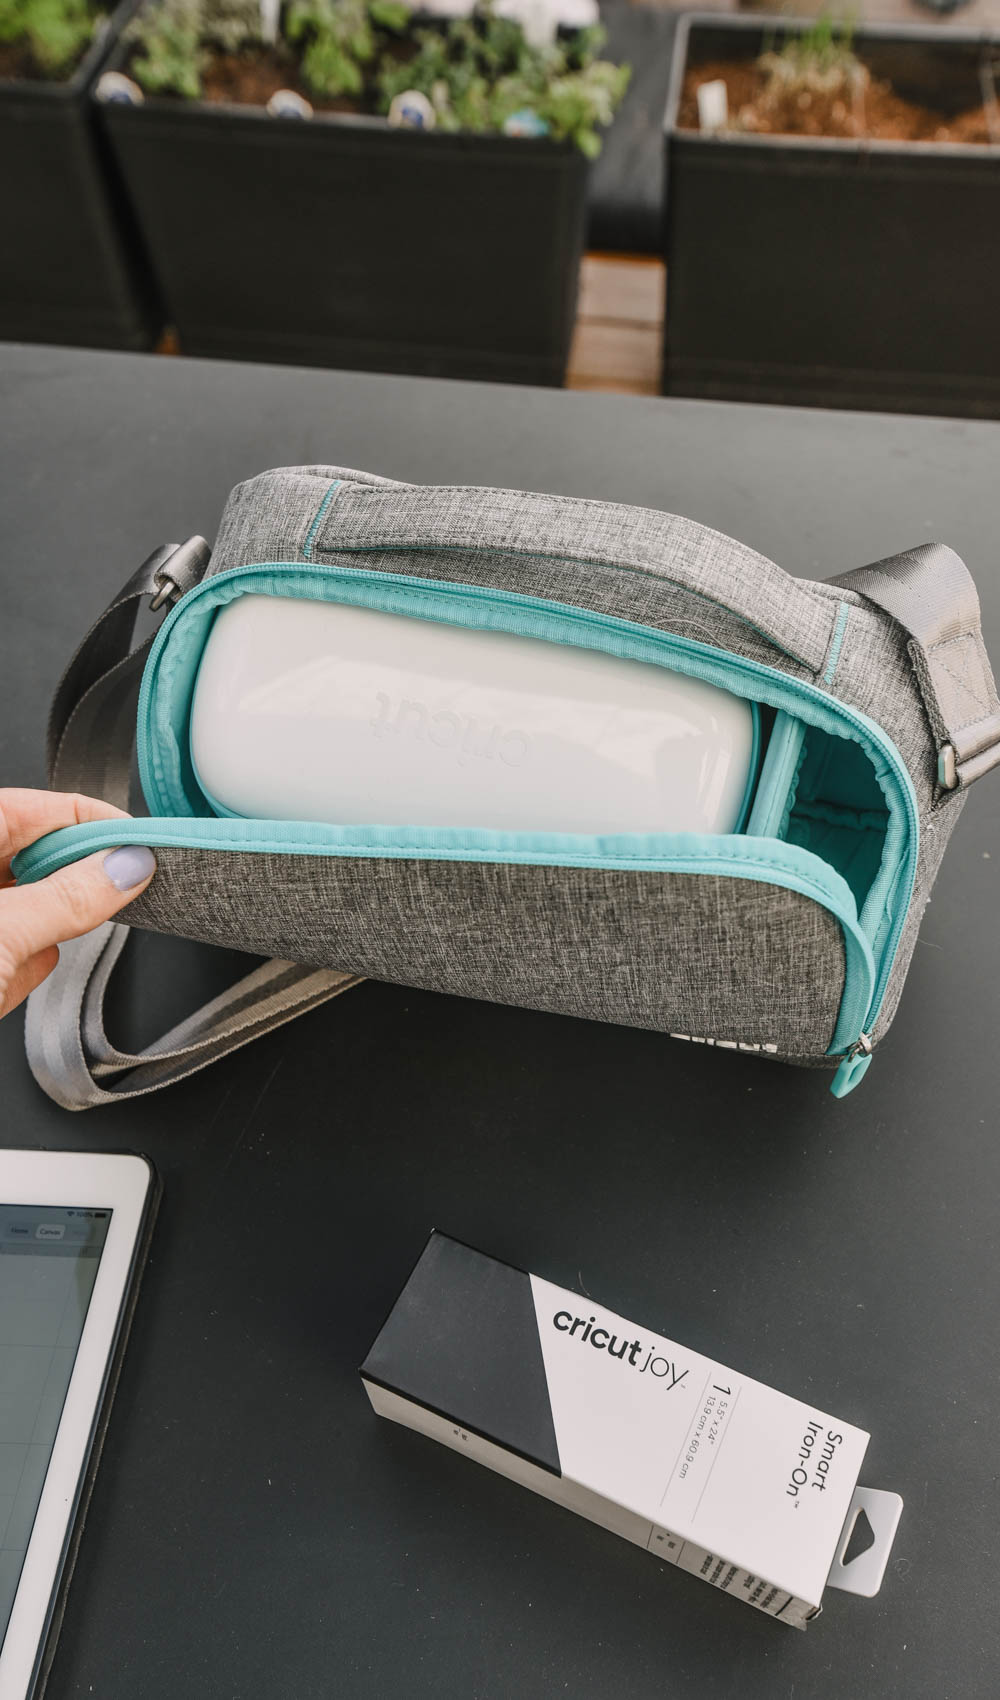
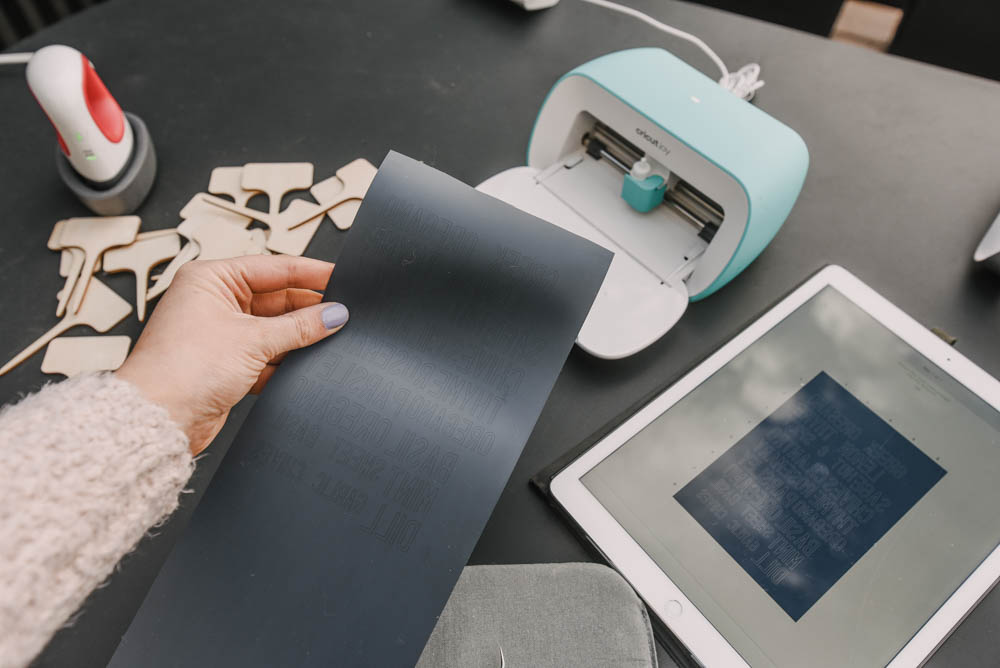
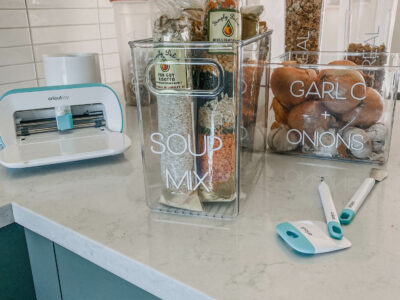
For this project, I pulled out my Cricut Joy and set it up on the patio with me. I love that this guy packs up and moves so easily! I chose to use Smart Iron On instead of Permanent Adhesive Vinyl for this as I love the matte finish of the iron on wood and it’s definitely durable.
I made plant picks like this for the holidays and they are holding up well in my indoor plants!
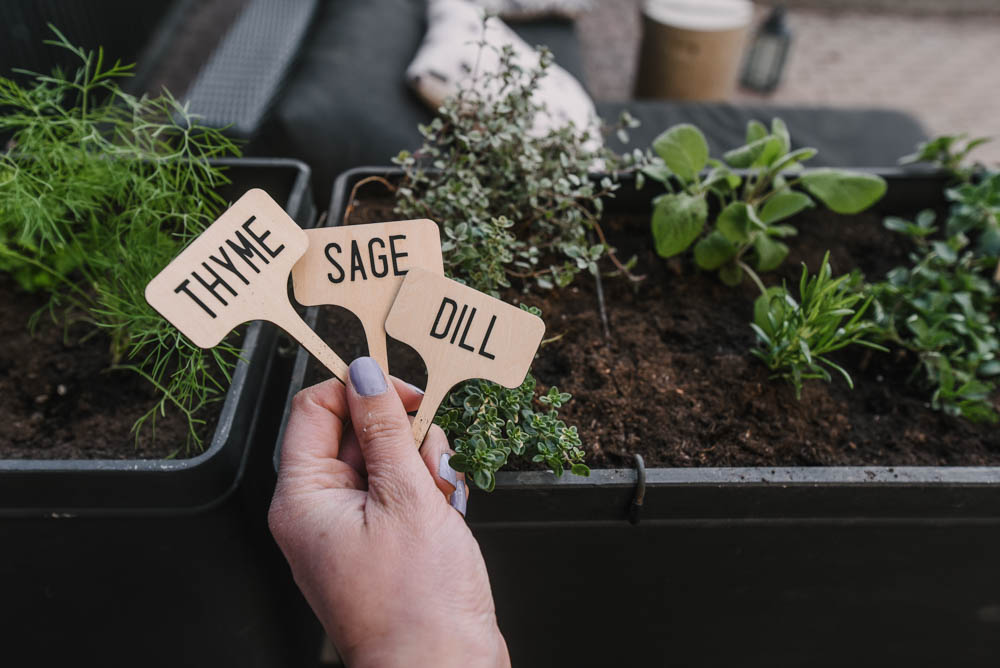
I used leftover bamboo plant markers from my holiday products. I love how simple and attractive these are even before the modern decals!
If you don’t have outdoor space for a full herb planter like this, you could definitely still use these on an indoor one like this easy tabletop greenhouse!
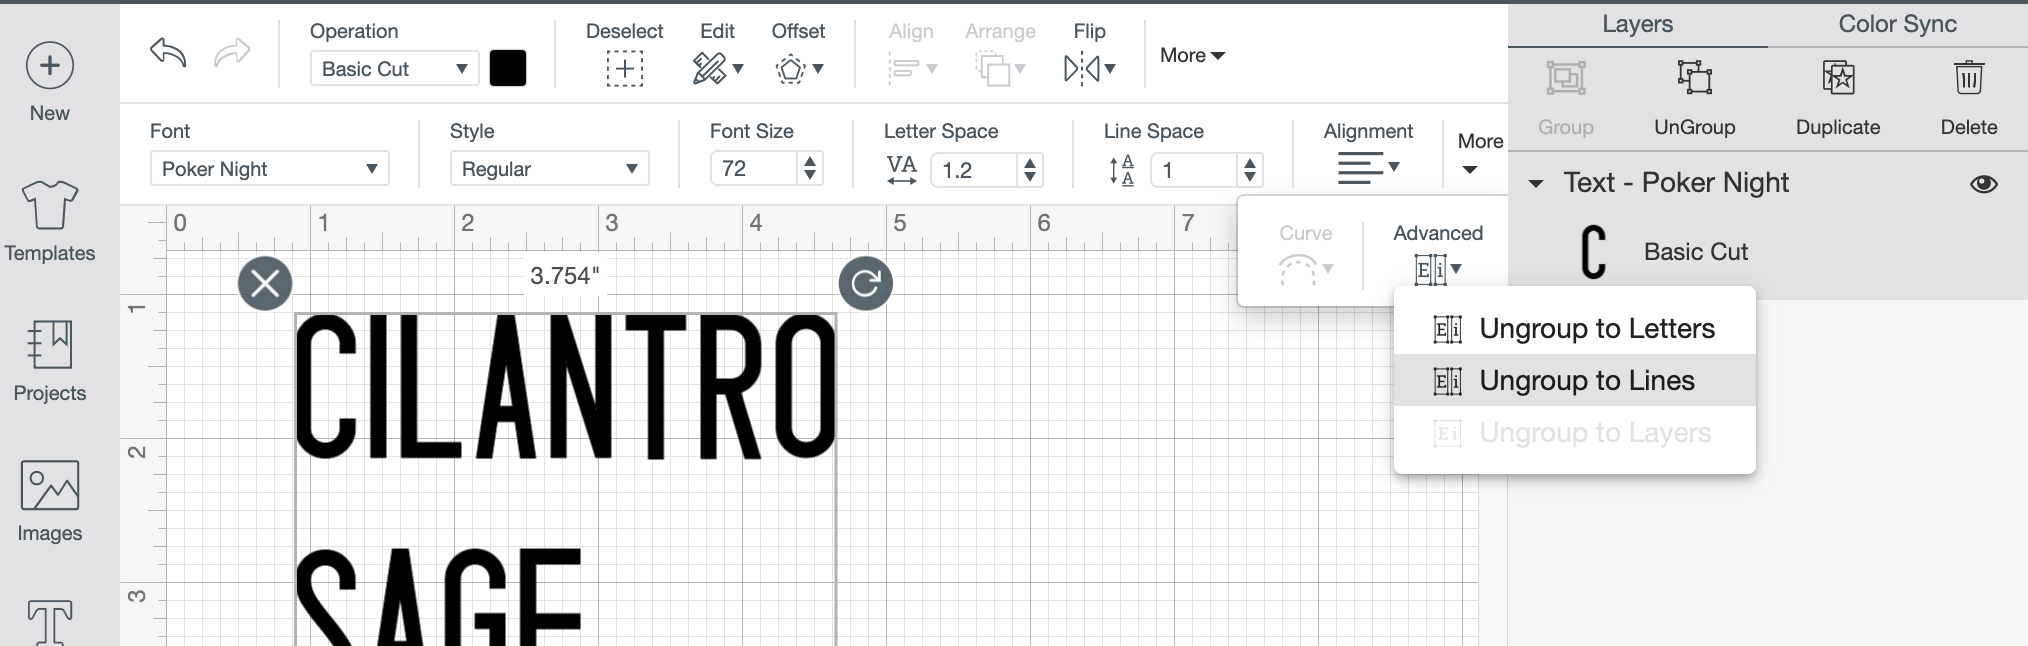
The first thing you’ll need to do is design your labels for the wooden plant markers. I just typed out my herbs and scrolled through the Cricut Access fonts until I found one I loved.
I ended up choosing an all caps font called ‘Poker Night’. You can save time by typing all of your labels into one text box, just enter between the words, then after choosing your font you can ‘ungroup to lines’.
You will want to resize the words to make sure they’re sized to fit on the picks (especially the longer ones like ‘rosemary’).
Then it’s time to ‘make it!’. Remember if you’re using iron on like I am, you need to mirror your design before cutting. I used the Smart Iron-On material which means I could skip the mat- it’s a little thing, but I love that it saves me a bit of time cutting and measuring and trying to line it up just so.

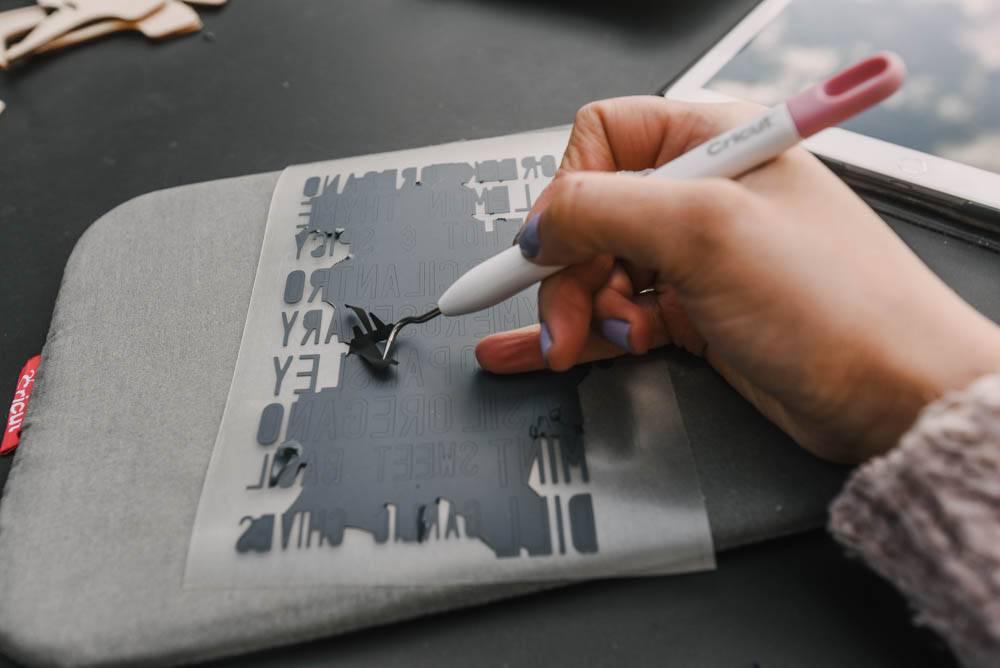
Load up your machine and let it work it’s magic! This baby cuts pretty quickly but of course, the more intricate your fonts, the more time it will take. While it’s cutting…
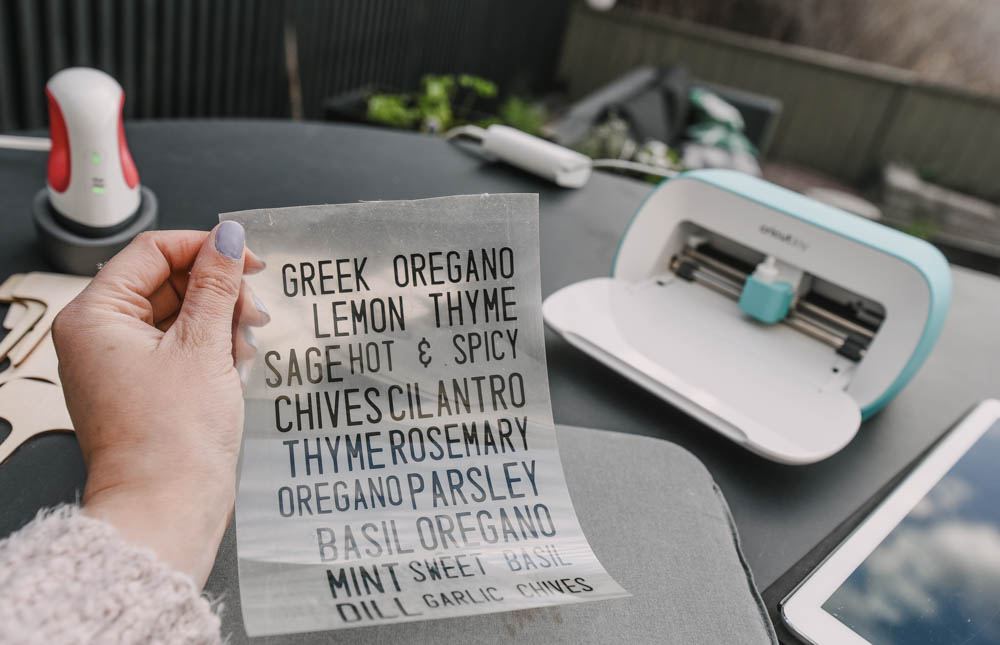
I set up my EasyPress Mini and let it warm up while I weeded the design out. When they were all weeded, I cut them into individual words to make transfer easy and got to transferring!
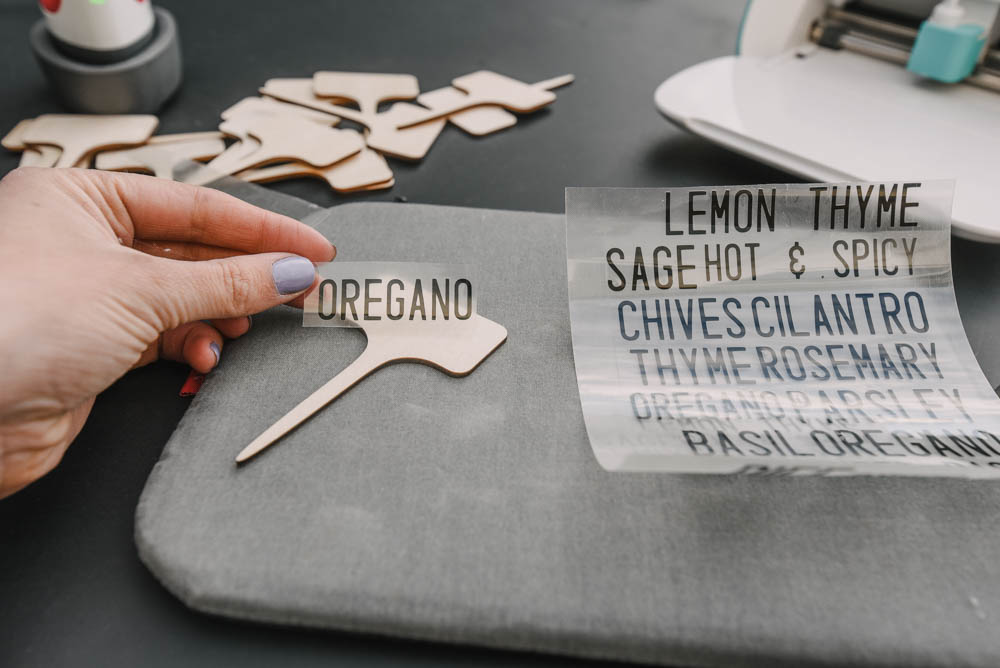

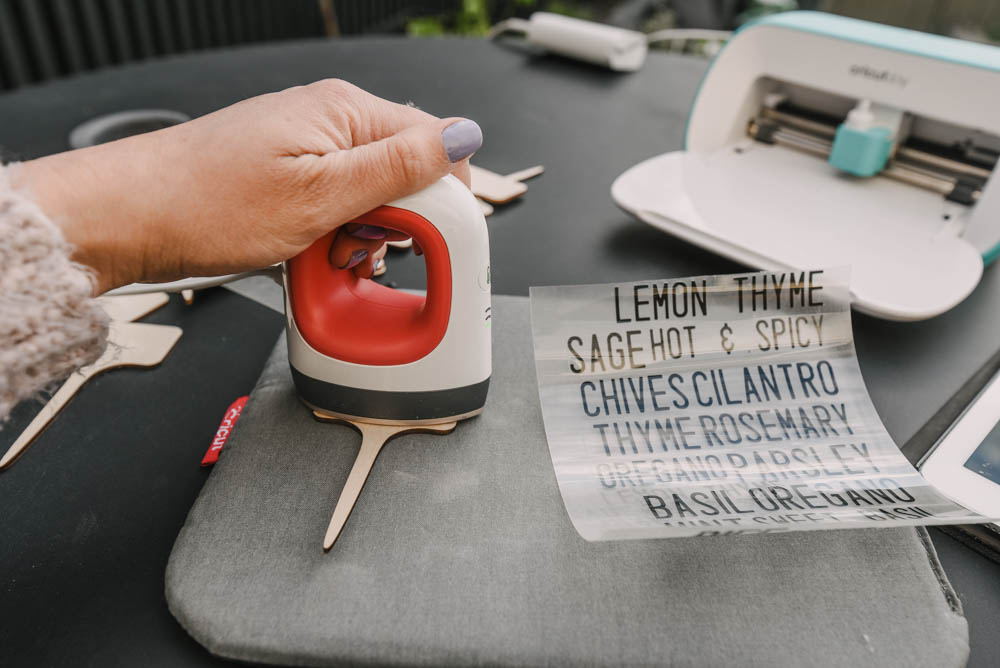
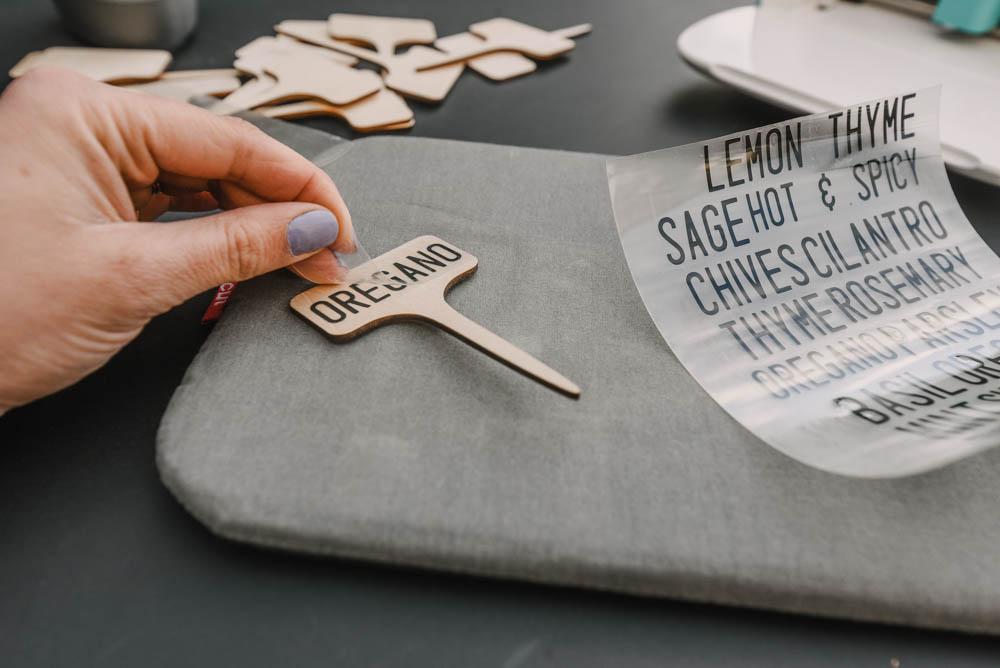
For wood, I like to use the lowest setting on the EasyPress Mini and I like to hold it on firmly for only 8 seconds. Then I let it cool and peel it back.
If it hasn’t fully transferred, I heat for another 3 seconds, then try again. If you heat wood for too long, the adhesive will ‘spill’ out the edges of the iron on material and you will get a shiny shadow that doesn’t look great. I used the EasyPress Mat to protect my table when I’m using the EasyPress.
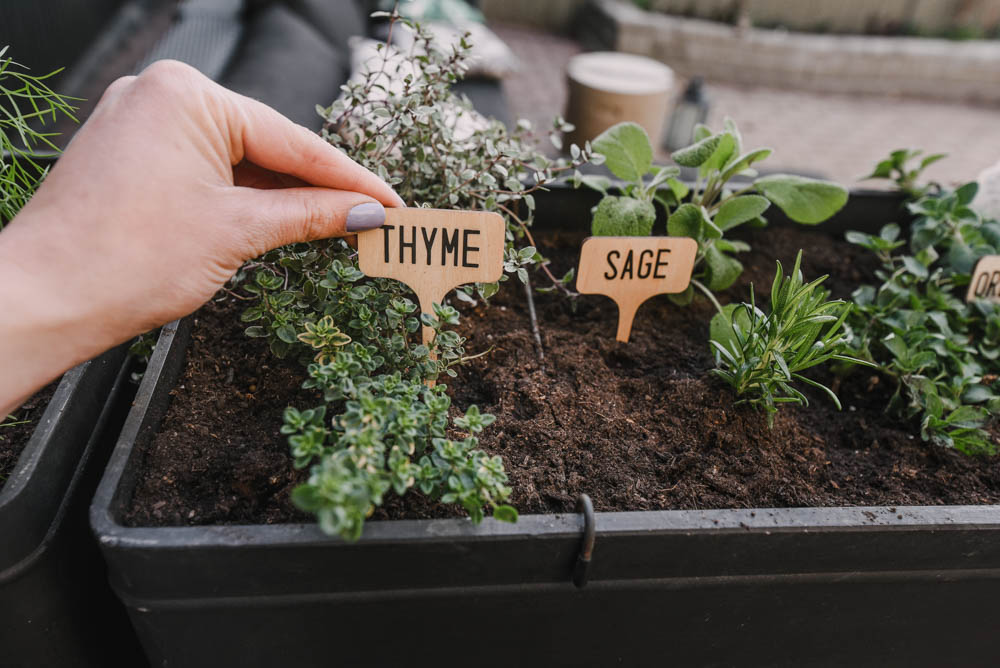
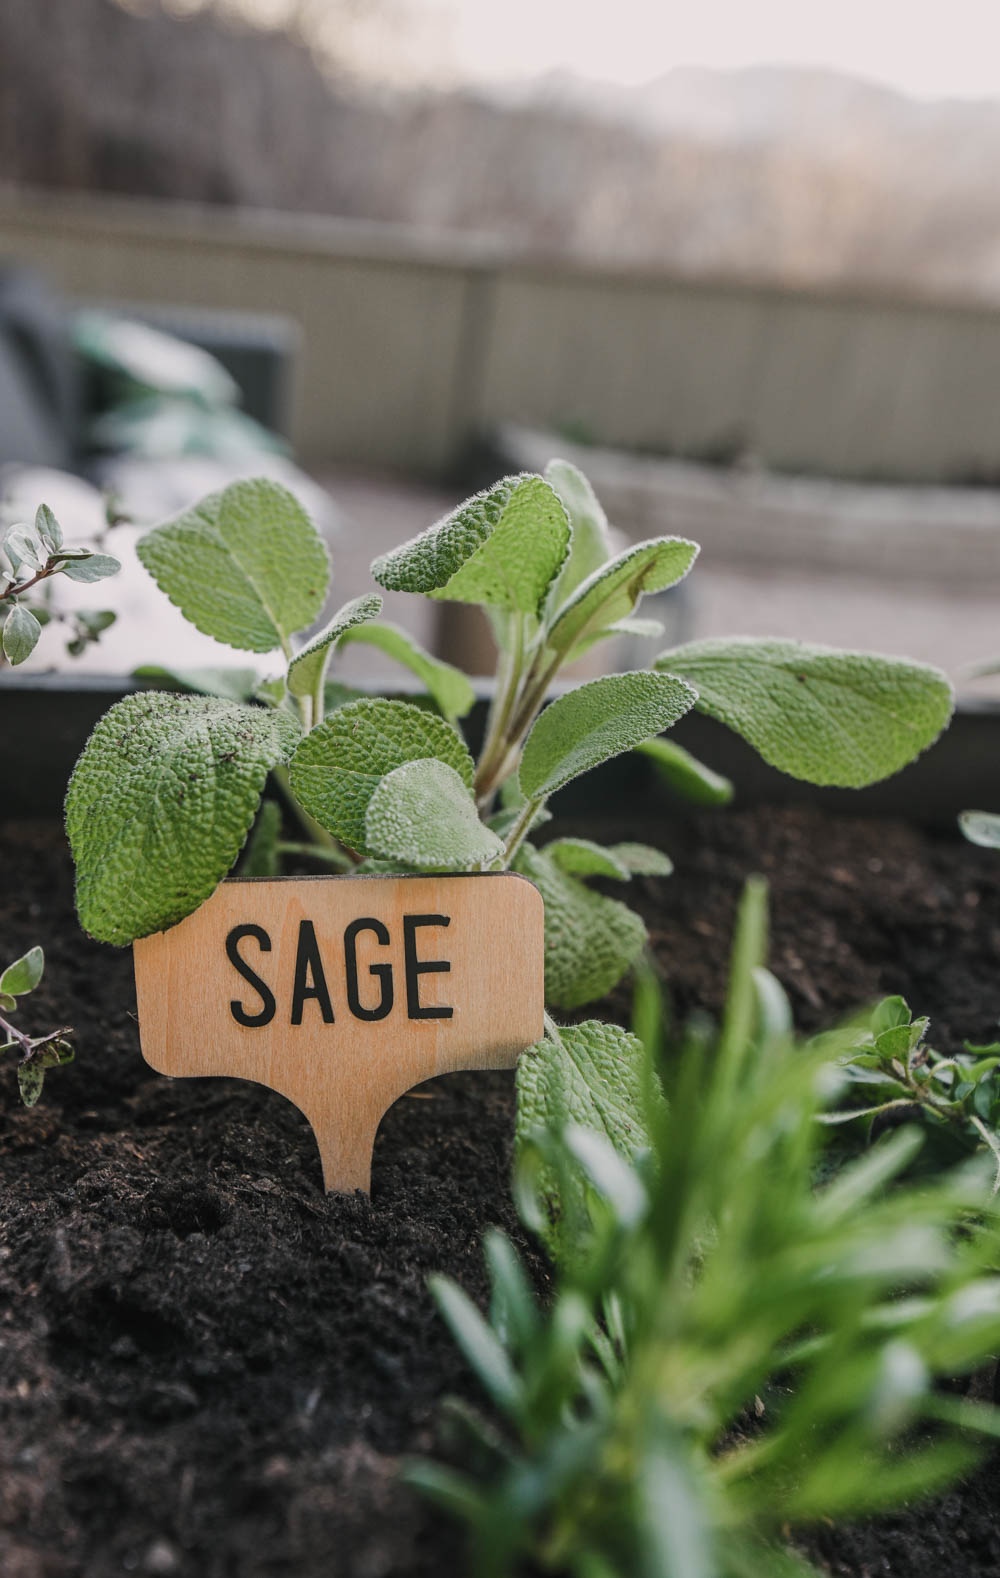
That’s it! Then you’re ready to place these wooden plant markers in your herb garden and enjoy! Check that off your patio goals pinboard! I love the little pop of light wood against the dark soil, pots and all that greenery.
I am thinking about spraying them with some clear spray paint (like this) to seal them and keep the wood looking bright. I will wait and see how they hold up with water and the elements! *update* Spray them! They will last so much longer!


 Growth Printable Hand Lettering Practice Sheet
This is a wonderful and helpful tutorial! Is there an alternative to using the EasyPress mini to apply the iron on labels to the bamboo markers?
You could try an iron! Just check the vinyl you’re using on the cricut website to find out the temperature.