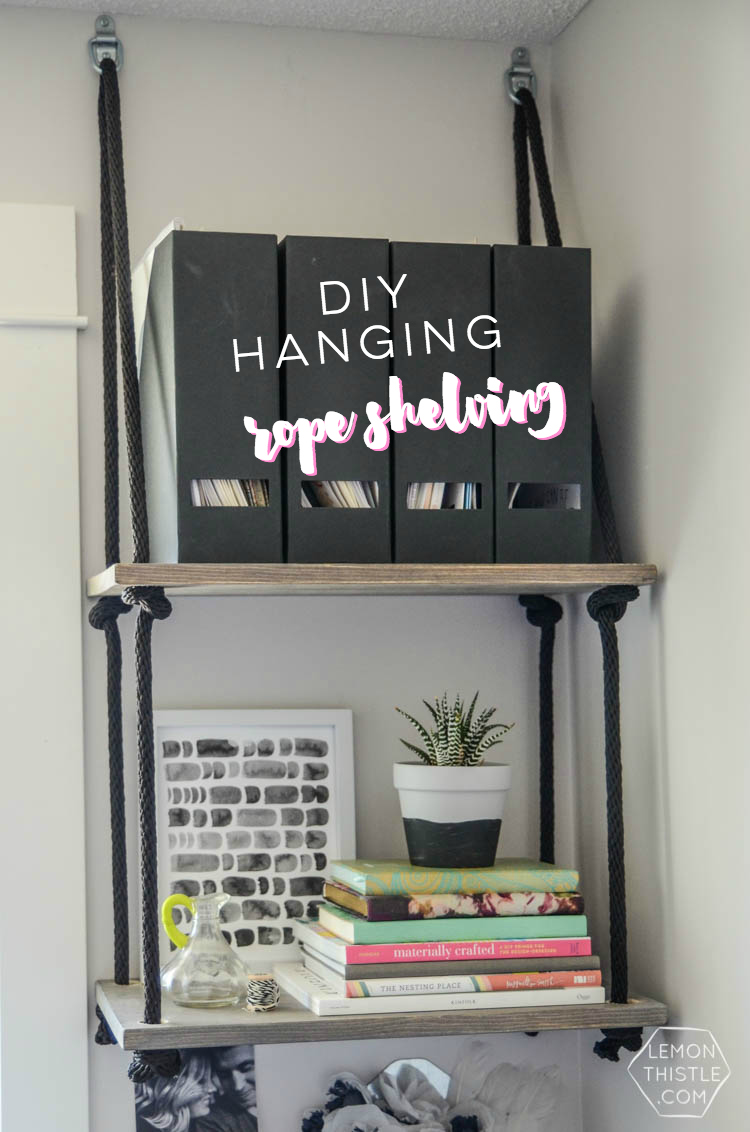
These DIY hanging shelves can be built in an afternoon with a few supplies from the hardware store. They make great creative office decor and are perfect open shelving for small spaces.
These shelves were built for my office space, but this room has now transitioned into a nursery and I loved the shelves so much I kept them as well. I’l, add some photos of both spaces in this post for you!
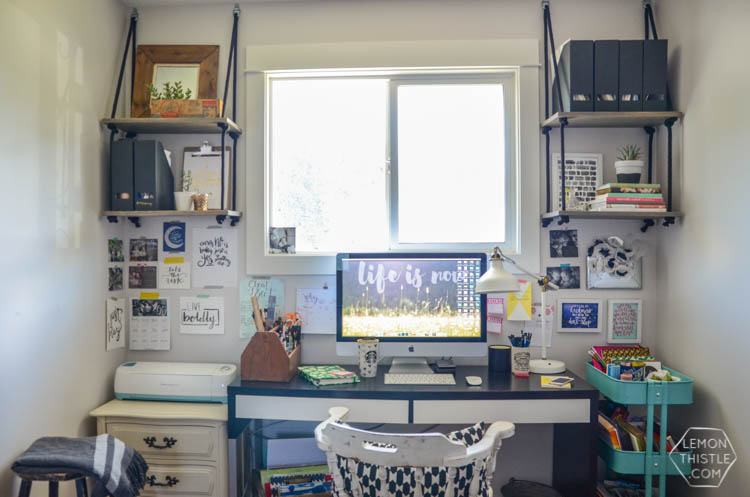
Now that I’ve moved out of this office… I thought it was the perfect time to share one of the DIYs that made the space a little more fun!
All of these photos were taken when we installed the shelves last year- before I knew I was pregnant… when I had big dreams for a dedicated office space. But a nursery is way better.
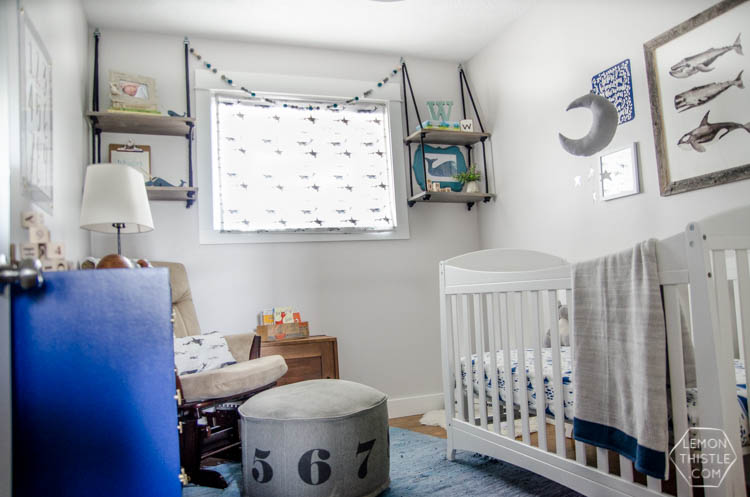
I’m not going to lie, as much as I’m LOVING his whale themed nursery, I’m not loving my desk being out in the open where little hands jump on and write emails for me. Not cool. I’m sure I’ll get more used to it though.
Enough about my nostalgia for an office space… let’s talk about these shelves, because they’re pretty rad. What I love about these shelves is that they’re a little more interesting than standard open shelving, but they don’t have brackets taking up shelf space. Which is really awesome because these shelves are both only around two feet wide (and cant really afford to lose room for brackets!).
They look like they take a bit of DIY skills but really, they’re crazy easy- pinky swear. Ready to learn how you can make your own (and yes, you can- as long as you have a drill).
Here’s what you’ll need to make your own DIY hanging shelves:
- 1×12″ boards the length is up to you
- Stain of your choice (I used Minwax Classic Grey mixed with Early American)
- Miter saw, chop saw, or circular saw to cut boards (or have them cut at the store)
- Nylon rope (I chose black 5/8″) length depends on size of shelves, calculation below… the link is deceiving, you don’t need to buy a whole roll, they sell it by the foot at the store, but this way you’ll know what to look for!
- Drill bit the width of your rope (a saw bit worked best for us!)
- Power Drill
- 2 Metal anchors per shelf (these are similar to what I used)
- Small level
Measure and cut your boards to length, you can get this done at The Home Depot for no charge if you like (It will be easier to haul them home if you get them cut there too!).
When your boards have been cut to size, you can make your holes for the rope to go through. It’s best to do this before staining so you don’t have a noticeably lighter edge around your holes (I mayyyy have done this backwards and learned the hard way- so learn from my mistakes).
Choose a drill bit that is slightly larger than your rope, but small enough that a knot would never slip through. I found a hole saw bit worked the best as it kept the wood from chipping (again after learning from my mistakes and trying other bits first). I left about an inch of wood to every edge to make sure the board didn’t split.
Sand these holes and apply a coat or two of stain. When mixing stains (I used two as you can see in the supply list), I like to apply one then apply another over while it’s still wet. I had always used rags before to apply stain, but Purdy sent me one of their stain brushes and I am finding I reach for those more than rags now.

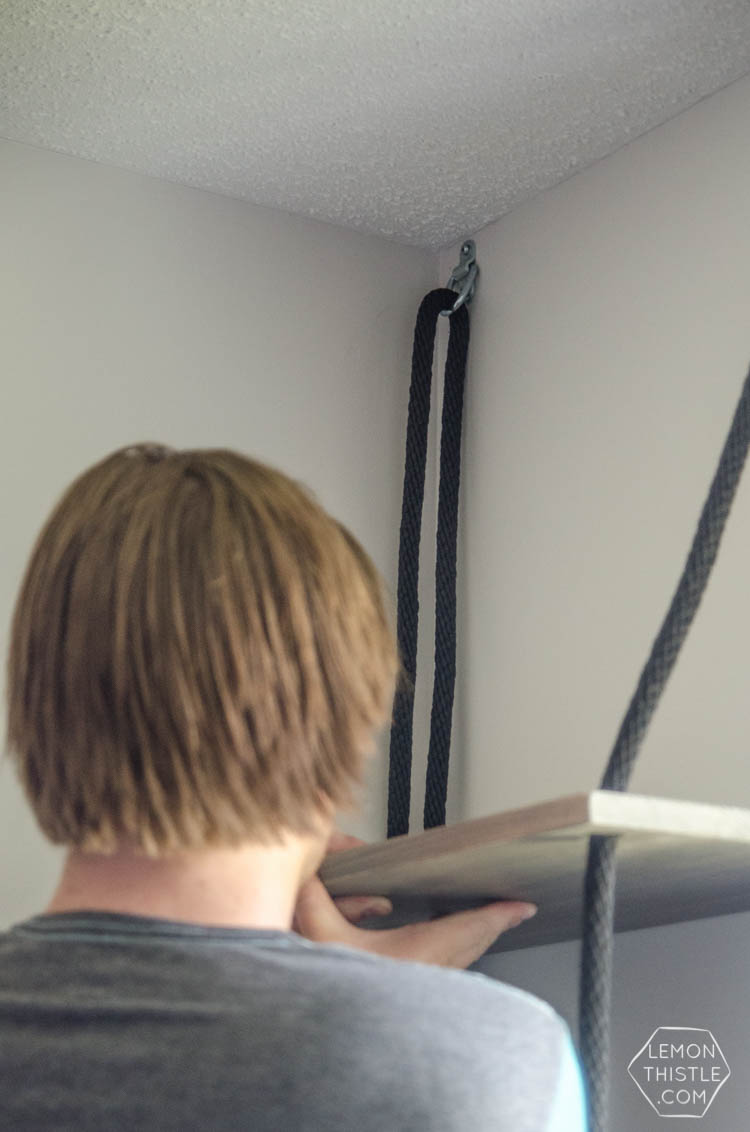
When your boards are prepped it’s the fun part! Measure how far apart your holes are and mark at the very top of your wall.
This is where you will attach your anchors. These are mounting brackets and have a great weight rating.
This allowed me to drop them down from being tight on the ceiling a little bit. I used one screw in the top and a screw with a strong drywall anchor in the bottom. The top screw needs to catch the header (the horizontal stud) of the wall.
When your anchors are attached, you can thread your rope through. To measure how much rope you will need, you will need to do some math. This formula is thanks to my number loving husband.
Measure from your bottom shelf to the ceiling. Double this and add 1.5 feet (the shelves are 1 foot deep plus knots) and that will give you one length of rope. You will need two per shelf. If you can have the hardware store cut your rope into lengths DO IT!
Rope can be such a pain to cut at home, then you need to use heat to seal the ends. The tool they use in store cuts through with heat leaving a perfect end. Again, from experience… *sigh*
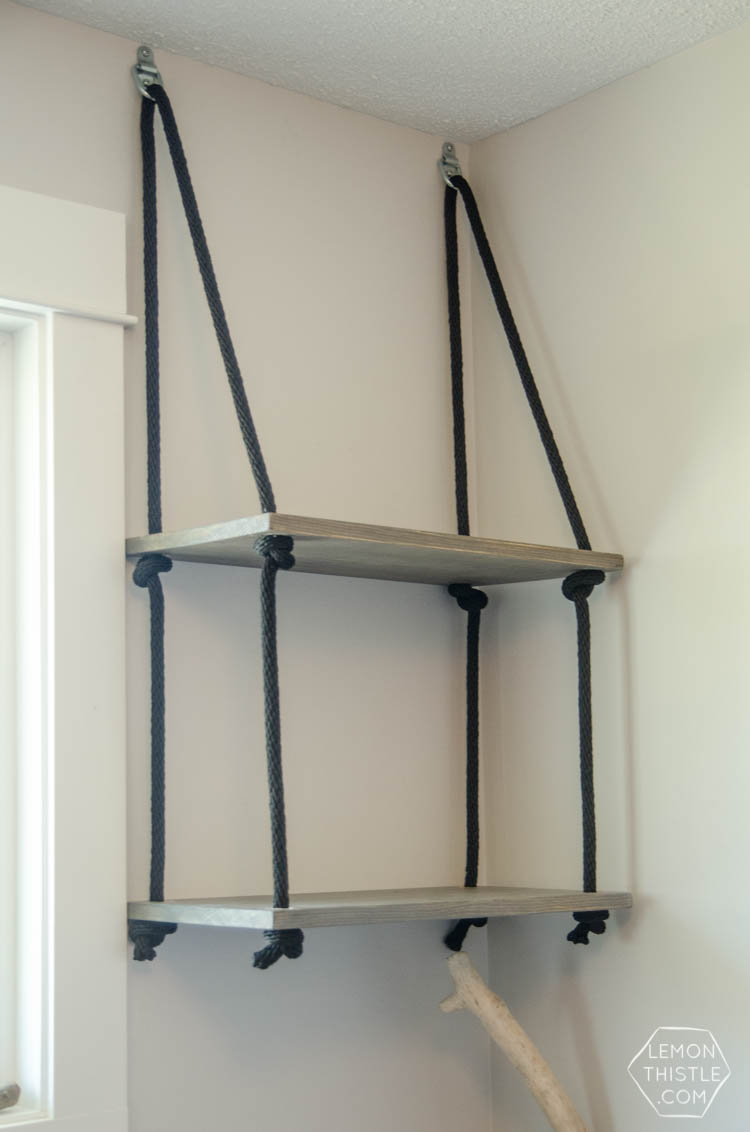
When your rope is through, thread your first shelf on to the rope, deciding on the approximate height you want it. Have someone hold it in place while you tie the four knots. These will take some adjusting to get the shelf level side to side and front to back.
When it’s pretty much level (don’t worry too much at this point), add your next shelf. If you have more shelves, keep going this way until you’re done! By now, your top shelf might not look level anymore. *sigh* Add some weight to it (push down if you like) and adjust the knots only if necessary.
Since the rope has a bit of stretch, it will take a week or so for you to be completely happy with how level it is.

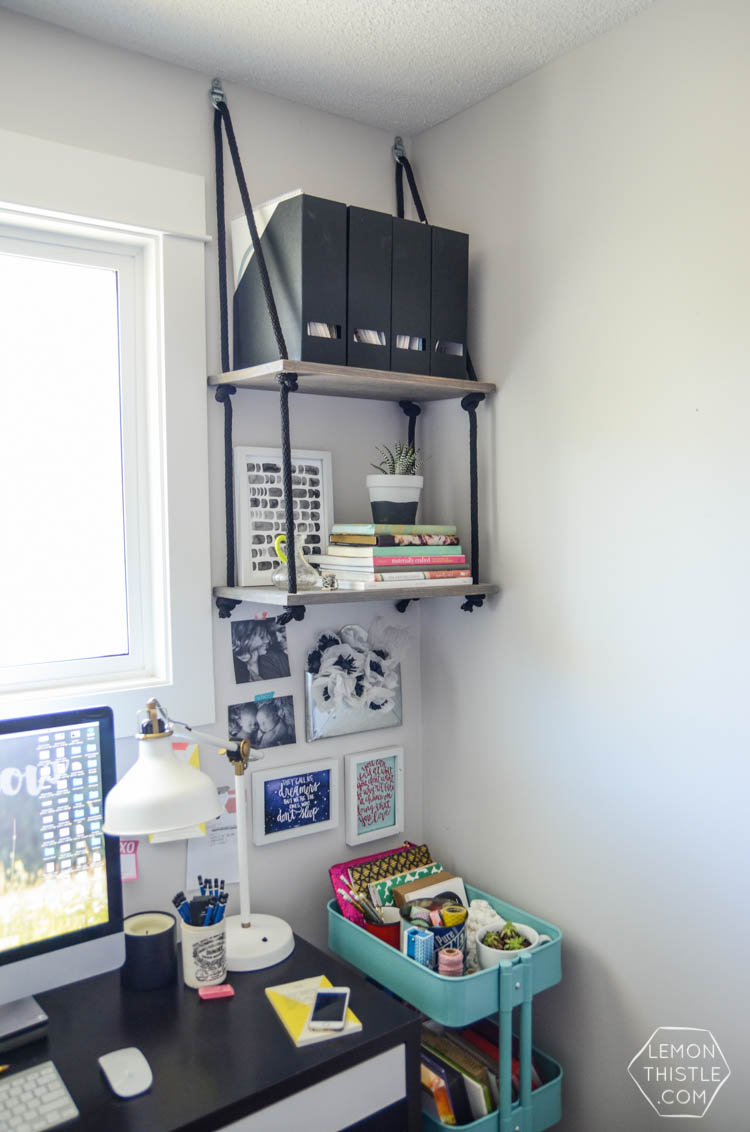
That’s all there is to it! Holes and knots, really. And I can tell you that these hanging shelves have been up for more than a year, with books and folders full of paper work… they’re sturdy as ever.
If you were worried about them tilting or slipping around, you could add a screw into the back (kind of like a peg system). I wouldn’t bother though… honestly I would probably sit on these. Would you be nervous to try hanging shelves from rope?
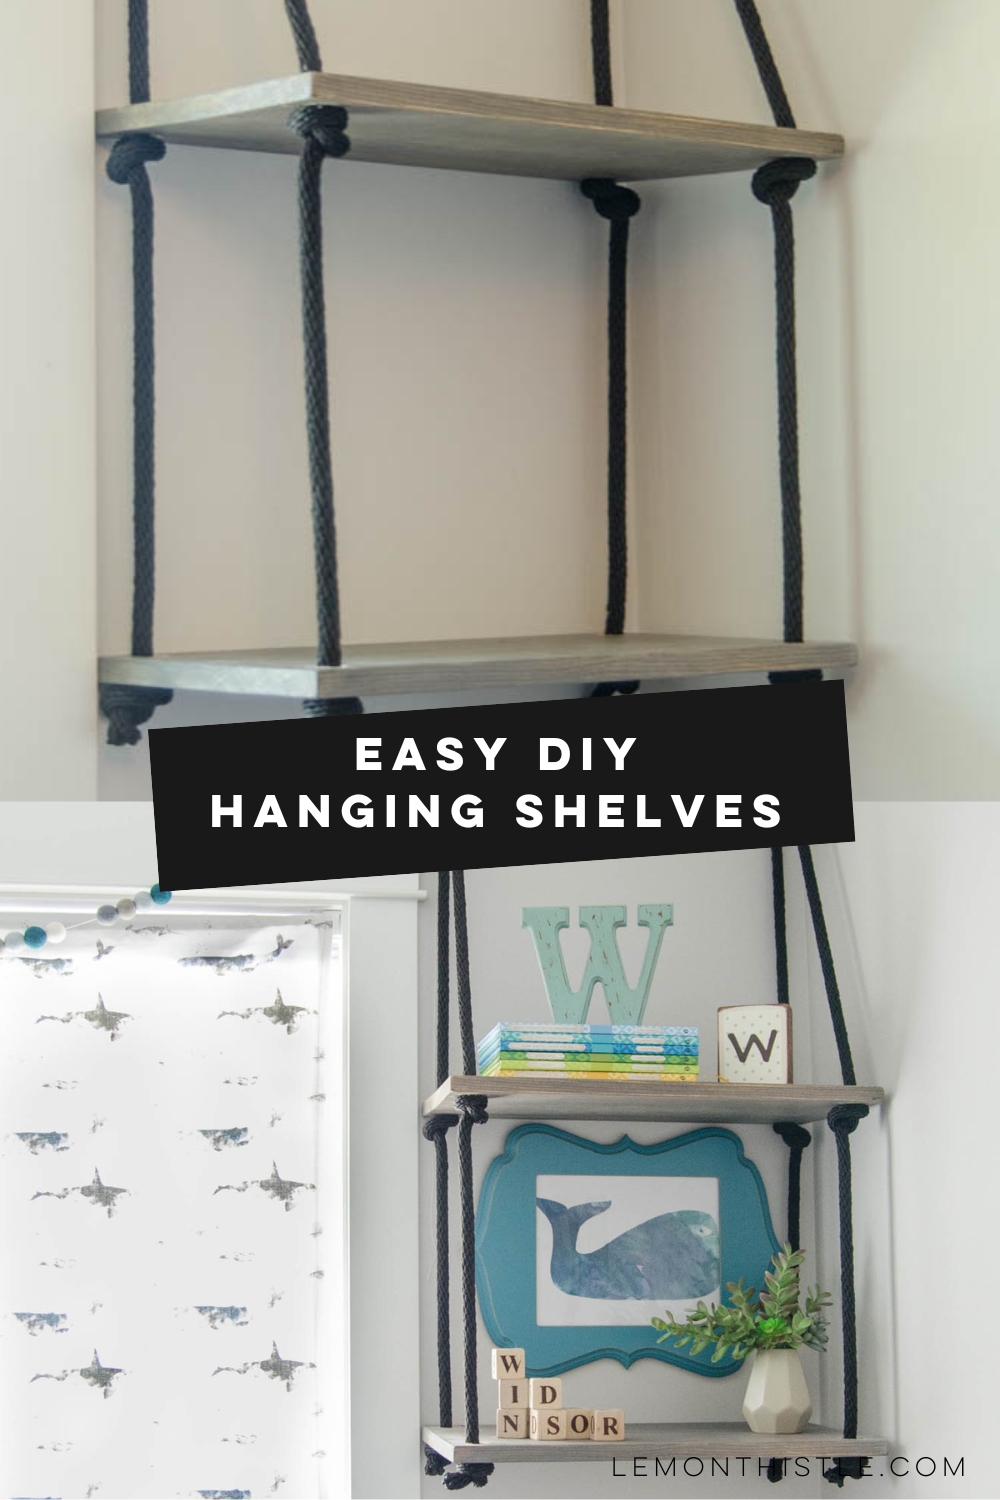
Pin these DIY Hanging Shelves for later!
Don’t have time to build these hanging shelves right now? Planning to make over your space and add some open shelving later this year?
Pin this so you can come back to it! Plus, pinning or sharing on FB helps this post reach more people which helps me be able to keep sharing with you. Thank you!
 Watercolour Kids Art for Your Walls
You are amazing! Looks so great. We’ll be over with dilly bars soon.
We always love seeing you guys!
I found the anchors you used online! :)
https://www.homedepot.com/p/CURT-1-x-1-1-4-Surface-Mounted-Tie-Down-D-Ring-1-200-lbs-Clear-Zinc-83730/205632979
Nice post
Thank you!
I just finished reading your DIY eBook on hoopla, luv DIY projects, etc. I’d have to say, your book has good details, straight forward information and easy to fallow along. though I haven’t made anything out of your book, but its in my favorites.
So glad to hear it Cori, thank you!