
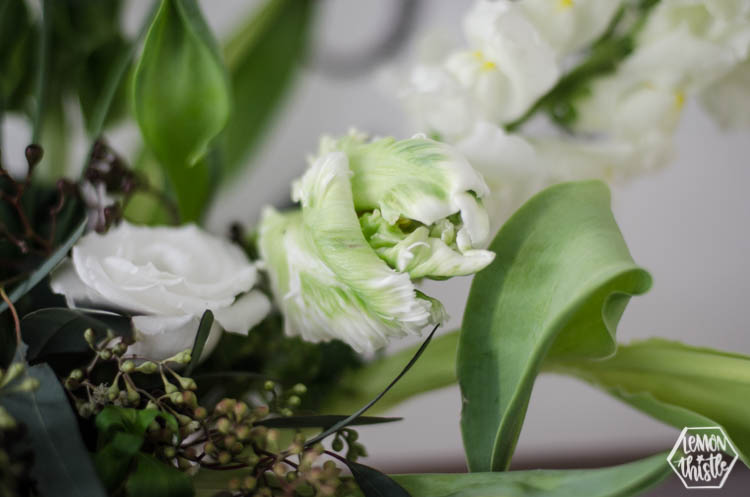
This post has so many photos you guys. I just couldn’t stop photographing these flowers! I’m officially smitten with parrot tulips and at $3.99 a bunch… they’re going to be a staple in my home from now on! Today I’m excited to be sharing a floral post with you guys- it’s been a while since I’ve done one of these- I used to have a whole category on my blog sidebar devoted to florals (you can still find all the floral posts in one place if ya like)… they really are one of my favourite things to play with! This post is from our monthly Modern Handmade Home Series and this month we’re so excited to be partnering with FloraCraft to share arrangements using their FloraCraft Wet Foam Bricks!
Lately I’ve been swooning over free form floral arrangements like the ones that Celsia Floral or Minim Designs and until I can attend one of their workshops one day, I’ve got floral foam to help make the ‘wild’ arrangements a bit easier to recreate. I love having fresh flowers in my house as often as possible. In the summer those blooms come from the garden, but in the winter (and early, early spring like now) I head to the florist. It’s one of the luxuries I love to indulge in and have found that by buying by the stem instead of by the bunch, I can have beautiful arrangements for less.

Usually, I try to keep my floral purchases under $10. For budget friendly blooms I love to get tulips, alstroemeria, and eucalyptus pretty regularly. Sometimes I will get just a couple single stems (like the florals in my spring home tour). This time around I spent a bit more than I usually do… because I’m posting about it, so that’s the perfect excuse, right? But it was still so much more cost effective than buying a bouquet… the TWO arrangements I’m going to share here cost $25. That’s the price of one nice bouquet from the grocery store! And it’s all blooms that I really do love!


I had planned to use these all for one arrangement, but it was way too many and surprise, surprise, I didn’t love the bright pink in with all my white, green and dark moody blooms. Aubrey sat patiently watching me and collecting all the pink ones as I pulled them out. She asked if she could have them for her own flowers. She picked out the little silver sugar dish and after I finished making mine, we made hers together. It was so sweet to have that time with her and teach her a bit about flowers and something that I love.
When I’m deciding what flowers to buy (or when I can justify to buy fresh cuts), it’s an easy yes to something a bit more special for dinner parties, house tours, baby showers (pretty much any party is a great excuse!), holiday, or whatever. Honestly, I’ll take any excuse to play with blooms! I love to mix in foraged greenery and branches to help fill it out at no cost as well, but I skipped that today (I didn’t remember until I was arranging this- doh!). I also love to buy by the stem and arrange flowers when I’m giving them as gifts. I always feel like it’s such a nice way to gift flowers- already arranged in a glass vase that they can keep. You can drop them on a doorstep if they’re not home and not worry about them dying too! Okay… enough about my obsession with flowers. You get it, right? I’ll take ANY excuse to go to the florist. If you live in Kamloops, my fave to buy from is Art Knapp, which is where all these are from!


Let’s chat about FloraCraft Wet Foam before we get into the arrangements, shall we? It’s pretty rad- it’s like a foam sponge that you can stick your flowers into. You soak it in water and it holds all that water to feed your blooms but it’s stiff enough that it holds them in the direction that you arranged them. That’s probably the worst definition of it… but really, it’s so handy! I especially love using it for really shallow or small vessels that are so beautiful but just can’t hold the flowers without them tipping out. Like this little sugar dish. I started using FloraCraft Wet Foam when I was in university and decorating for weddings and events. I don’t know when I even learned about it, but I’ve always loved it. I almost always have some blocks stored away in my cupboard of vases (yes, I have a whole cupboard… yes, it’s excessive) for when I’m having a hard time arranging a bunch of flowers. I’ve used it a few times in arrangements here on Lemon Thistle if you’d like some more inspiration for it! Like these mini ombre arrangements or this cheese box summer floral arrangement or this iris and modern grass number.
There are two kinds of floral foam that you can get in stores and if you’re using fresh flowers, you want to make sure to get the one that specifically says Wet Foam. And once you have your arrangement done- you’ll want to make sure you keep the water full just like you would with a vase of flowers with no floral foam. The flowers drink the water, sometimes really fast. I like to water mine every day while I have them.
Alright… Let’s chat about the arrangements/how to/tips, shall we? That’s a really great sentence, right?


Using the FloraCraft Wet Foam Bricks is really simple but it does take a bit of patience. The first thing you’ll want to do is fill up a larger container with water and soak your brick. If you’re impatient and push that brick into the water to submerge it, there will be pockets of foam that don’t get totally saturated and flowers that get stuck there will die (even though it looks totally soaked!) So make sure that you float it on top and let it sink to the bottom as it saturates. If you read that and are confused, you can check out a video about that right here. While that’s happening you can clean up your flowers.
Here’s the blooms I bought for these two arrangements:
- 1 stem of seeded eucalyptus
- 1 stem snapdragon
- 2 stems bells of Ireland
- 1 stem alstromeria
- 1 bunch of each ruffled tulips (the wine colour) and parrot tulips (the white/green) they both came in a bunch of 5 for $3.99
- 1 very full stem of lisianthus (2 if it’s not a giant stem with lots of buds!)
- 1 full stem of mini roses
Floral foam works best with flowers that have a tougher stem. Some of the really soft stems (like anemones) can be damaged when being put into the foam so if you want to use those, make sure to be really gentle. I just asked my florist which flowers are happiest in the foam.


When you get your blooms home, you’ll want to clean them up and get them in water right away- even if you’re not ready to make your arrangement. I did this and arranged them the next day. Cleaning them properly and getting them in water will help them last so much longer! Start by removing any leaves that will be under water. Then cut your stems with a sharp knife on an angle to make sure they get as much water as they need. If you have blooms that you want to encourage to open up, you can put them in warm water, otherwise room temperature water is good.
I’m going to show the same steps for both arrangements, because I don’t think it matters too much which flowers you’re using, the basics of using FloraCraft Wet Foam Bricks for arrangements is the same (to me!).


When your floral foam is totally soaked, you’re ready to cut it to size! You can use a knife to cut it down, making sure it fits snugly in your container and leaving one or two inches over the top of your vessel. This is to allow flowers to stick in from all directions! This is the magic of floral foam so don’t cut it level with the top of your vase! One brick was all we used for both of these arrangements. The mini arrangement ended up being the perfect size to use the foam we had left! Use your knife to cut some angles on the edges- think of these as the directions the flowers will face out from.

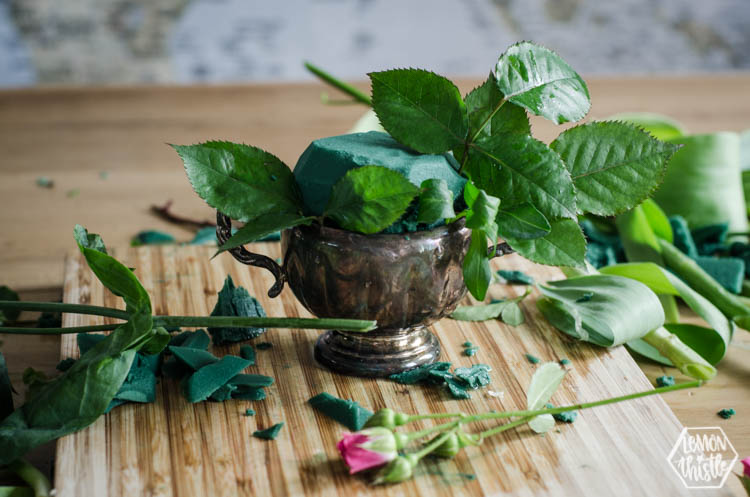
Alright, then it’s time to get adding! I always like to start by adding greenery in to layer all my flowers on top of. You can use something like seeded eucalyptus (like I did for the larger arrangement) or the leaves from stems that you’ve removed (what we did for the smaller arrangement since we were using mostly leftovers!). You can also use foraged greenery which is what I would typically do here!. The idea is to fill some of the space that will be between blooms so you don’t see the floral foam peeking through. I love how the seeded eucalyptus does this with all those seed pods!
If you’re thinking that it looks like I’ve used more than one stem of eucalyptus- that’s because it’s kind of like a branch of eucalyptus when you buy the seeded variety (not like the classic blue). You can use your branch cutters and cut apart your branch int smaller pieces to use.

The next thing I do is add in my longer stems or really large blooms. For the large arrangement, this meant my bells of Ireland (green), and snapdragon (white, longer) for long blooms. The rule is to generally work in threes of one kind of bloom but I thought three bells of Ireland would be a lot for this little arrangement, so broke the rules (as I do) and used a snapdragon for my ‘third’ long flower. I put these long ones in first because they kind of set the direction or shape of the arrangement that you fill in around. I also added in my stem of alstromeria. It’s one really thick stem but has a bunch of blooms off of it so I find they’re harder to add in later without breaking any of the blooms off of. Plus, they’d cover some of the smaller flowers if I put those in first.


After that… it’s really just adding in aaaall those other blooms until you’re happy with it! I don’t have a system. I sometimes move them around if it’s not working the way I’d like it to. My only tips would be to try balance the colours, fill the space down against the foam (to hide it) and to let some flowers droop over to add some interest. Oh! And don’t toss those buds- they’ll open up later on and are just so beautiful.


I really, really had so much fun creating these arrangements. Fresh flowers make me all sorts of happy and playing with them with Aubrey was really special. I hope that you learned a little bit more about working with wet floral foam and if you do end up trying out any of these tips, I’d so love to see some photos of it! I feel like I have so much to learn and really do want to go to a workshop one day. Fingers crossed I can make it happen!


Make sure to hop around and check out the other posts from the ladies in the Modern Handmade Home challenge! I love the arrangements they’ve created- each of them are so unique. Fresh blooms totally help liven up any home and it’s so fun to see the modern twist that these girls have put on their arrangements.

Left to right/ top to bottom:
Modern Floral Arrangements (for Mother’s Day): Love Create Celebrate
Blush & Eucalyptus Tea Party Florals: The Sweetest Digs
Hello Ranunculus! The Learner Observer
Free Form Florals With Floral Foam: This post ;)
 Cut out ANY Image | How to Upload Your Own Files to Cricut Design Space
Leave a Reply