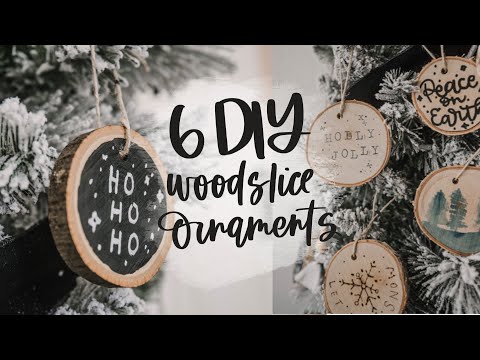
Sharing 6 Wood Slice Ornament DIYs – from watercolor painting to wood burning and hand lettering with a paint marker. Testing out all 6 wood slice ornament DIYs on both birch wood and basswood slices.

I’m so excited to share these ornaments with you today! I love the natural accent of wooden ornaments on my Christmas tree but there was so many options on how to craft them… I decided to try them all! Or at least 6 of them ;)
Today I’m partnering with Walnut Hollow (policies here) to share 6 DIY wood slice ornaments for you to try this holiday season. I’m using both birch wood slice ornaments and basswood slice ornaments. Some of the crafts I had a preference on the type of ornament, but for most of them, they behaved the same.
I’m so crazy happy with how these turned out. I’ve picked favourites and so have all my kids. Aubrey’s stolen the ‘ho ho ho’ one for her bedroom and I’m partial to that ‘Holly Jolly’ stamped one. But for gifting purposes, you know I’m going to be making more of the iron on ones! Ready to get crafting?!

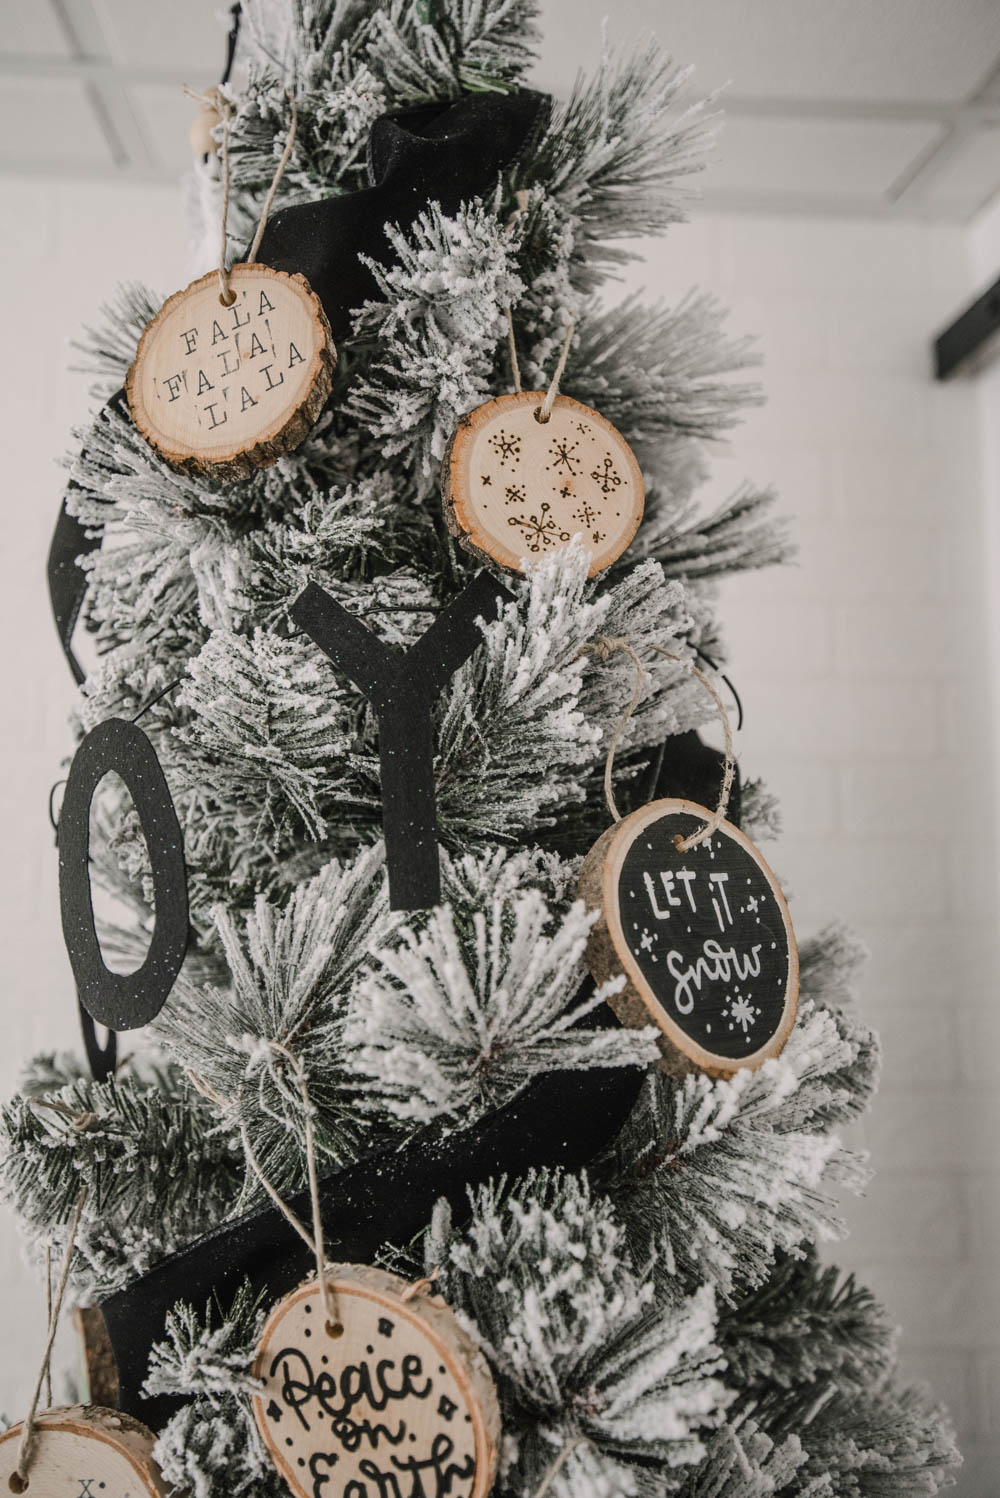
DIY Chalkboard Wood Slice Ornaments
Alright, let’s kick it off with these chalkboard look wood slice ornaments! They’re super easy to make and really make such a statement on the tree. I love adding black onto a Christmas tree but black ornaments are so difficult to find!
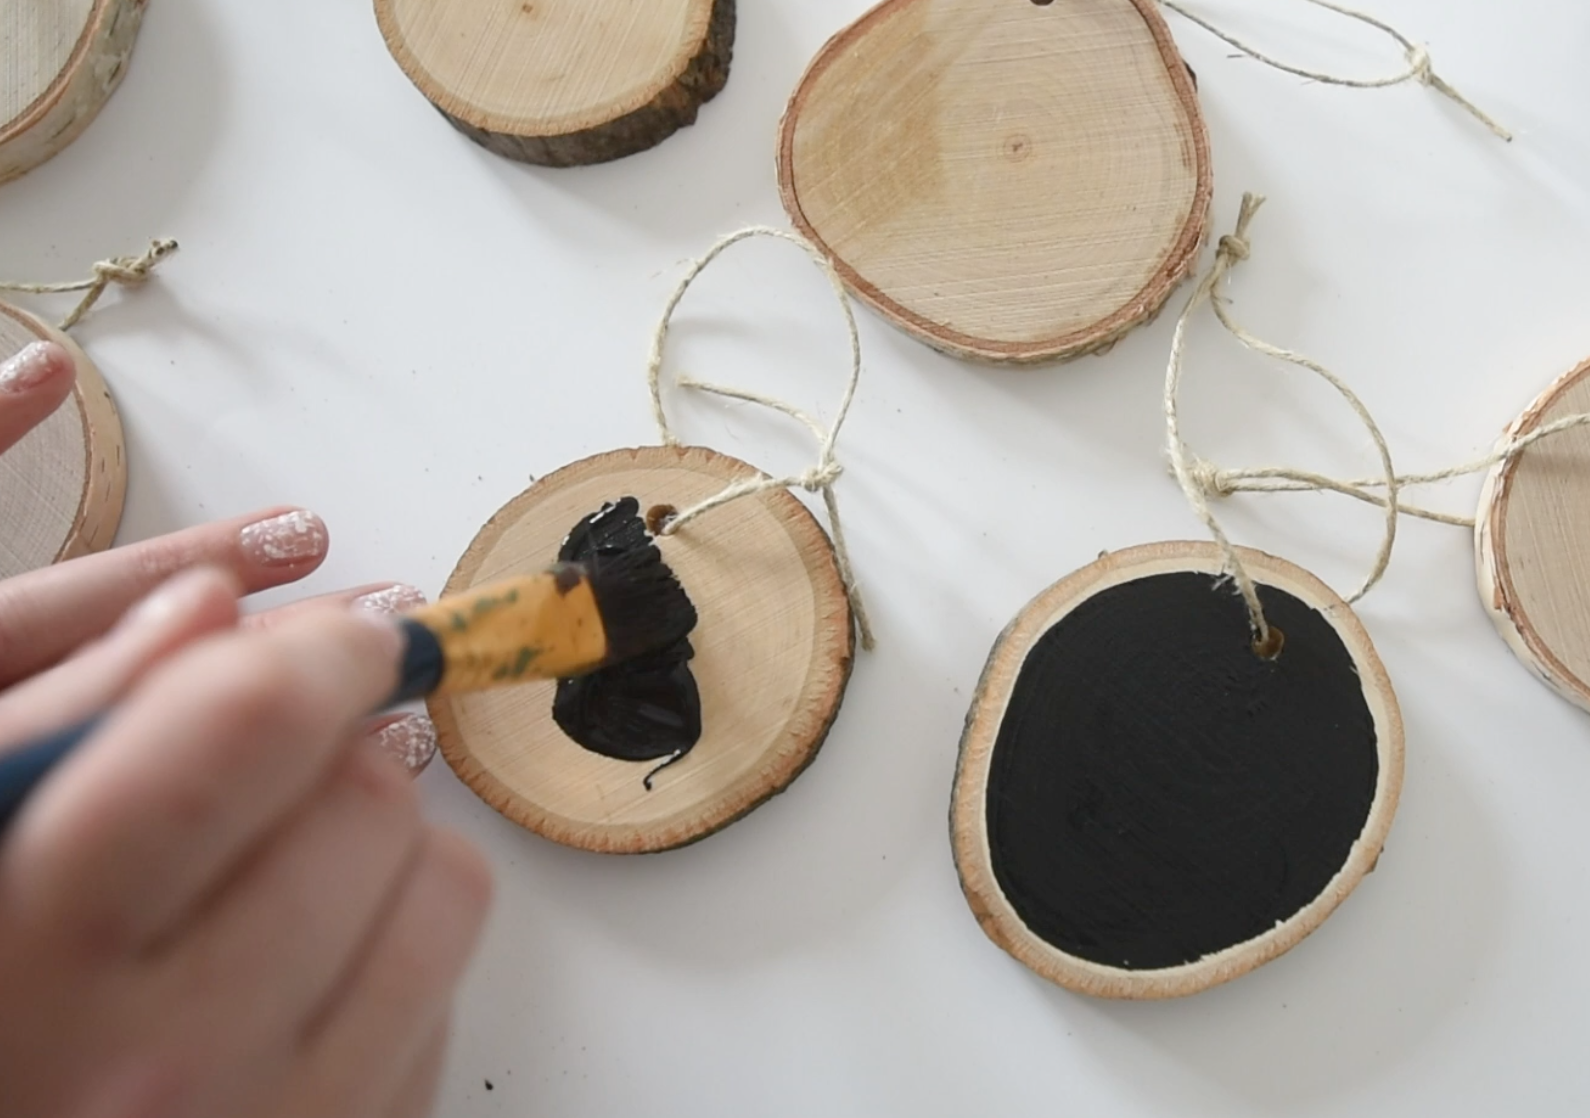
To make these ones, just paint the wood slice with black paint or chalkboard specific paint if you have it! I used a satin multi surface craft paint. Take care to paint around the hole for hanging without painting the string it hangs on. If you want this ornament to be a true chalkboard that you can erase and re-letter, you’ll want to use at least two coats of chalkboard paint then once it dries, prime it by rubbing chalk all over it and rubbing it off to fill the pores. You can see how I do that here.
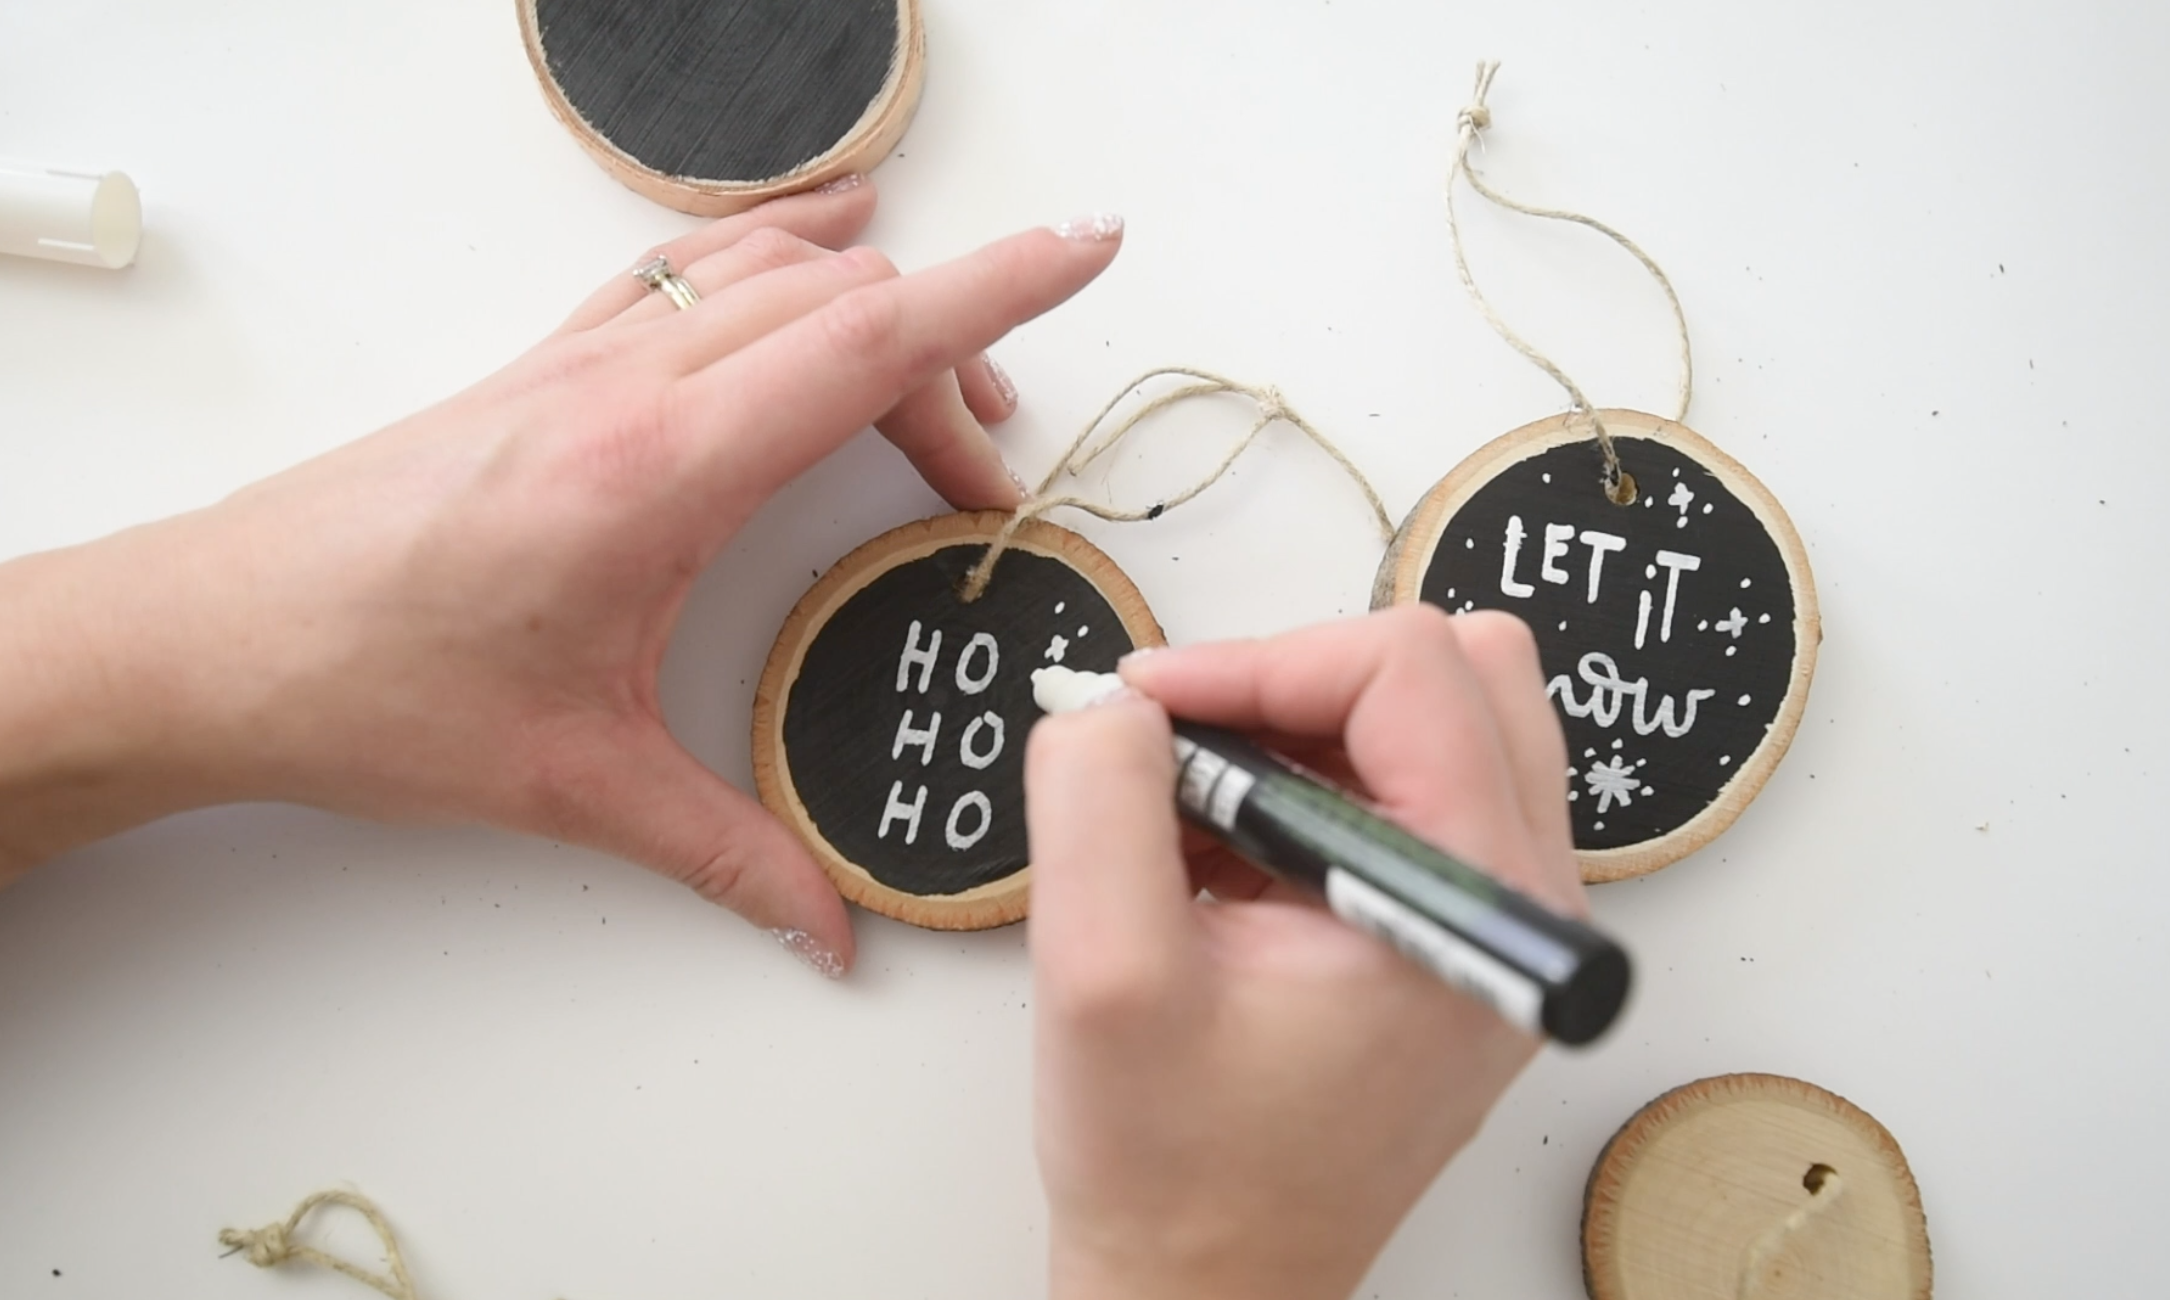
Let it dry completely, then letter on top of them. I used a chalk marker for this but you could use chalk, a chalk marker, paint marker or even paint. I love to add stars or dots around the lettering for a festive look. There really wasn’t a difference in the two types of wood for this type of craft.
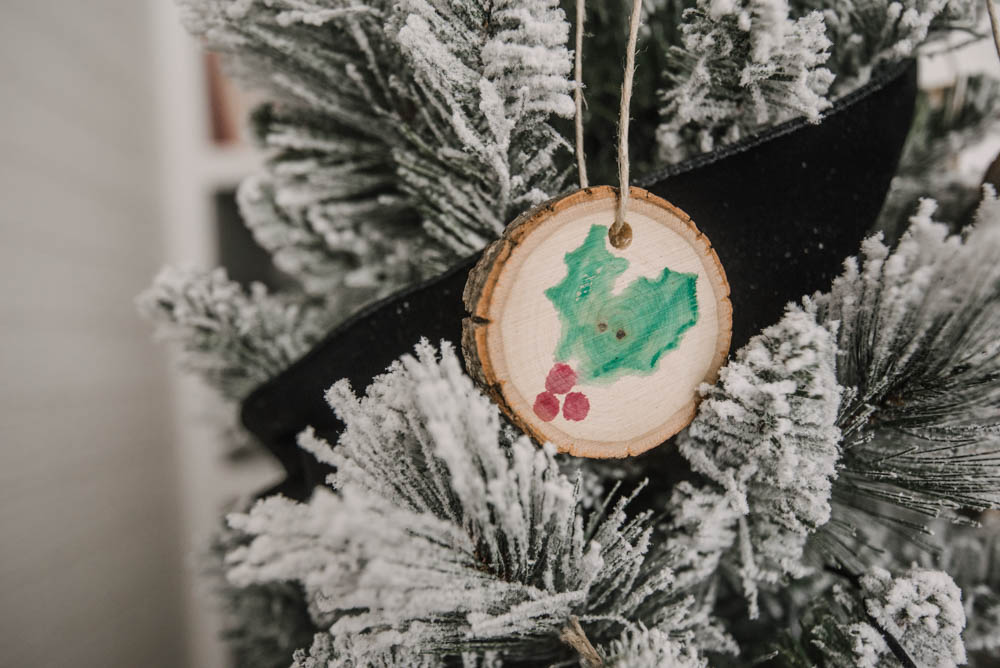
Watercolor wood slice ornaments
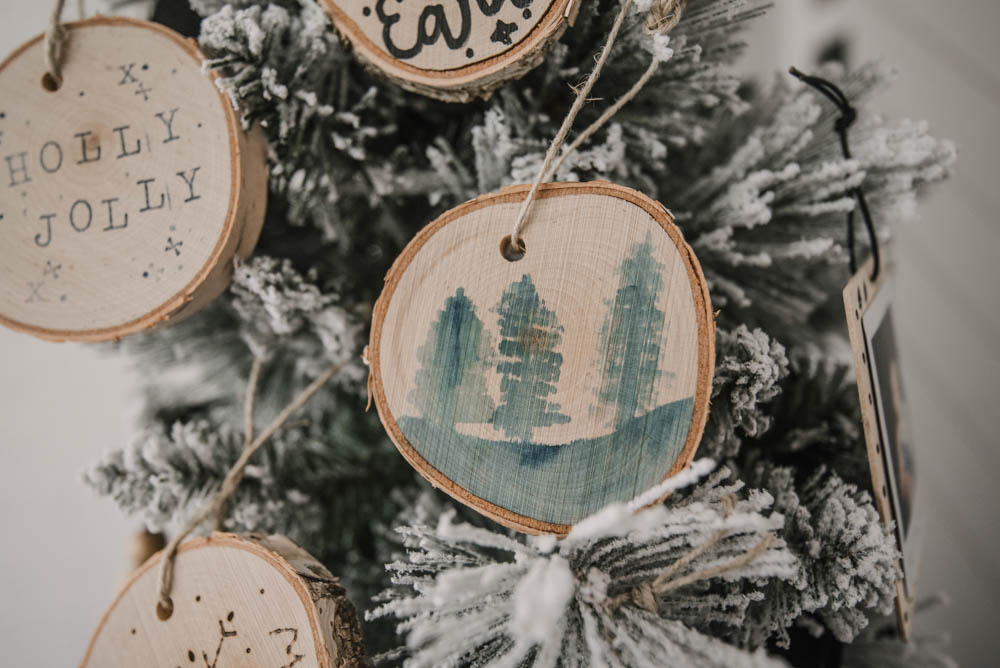
Okay, so this is one of my favourite ways to use wood slices lately. It’s not necessarily my style for my tree (black and white) but it’s so darn fun to create. Last year I made a tutorial for a foggy trees watercolor painting on wood and I’m still so in love with that. It’s up in my office. I thought I’d try recreating it on one of the wood slices, there’s a couple things to note compared to the original tutorial.
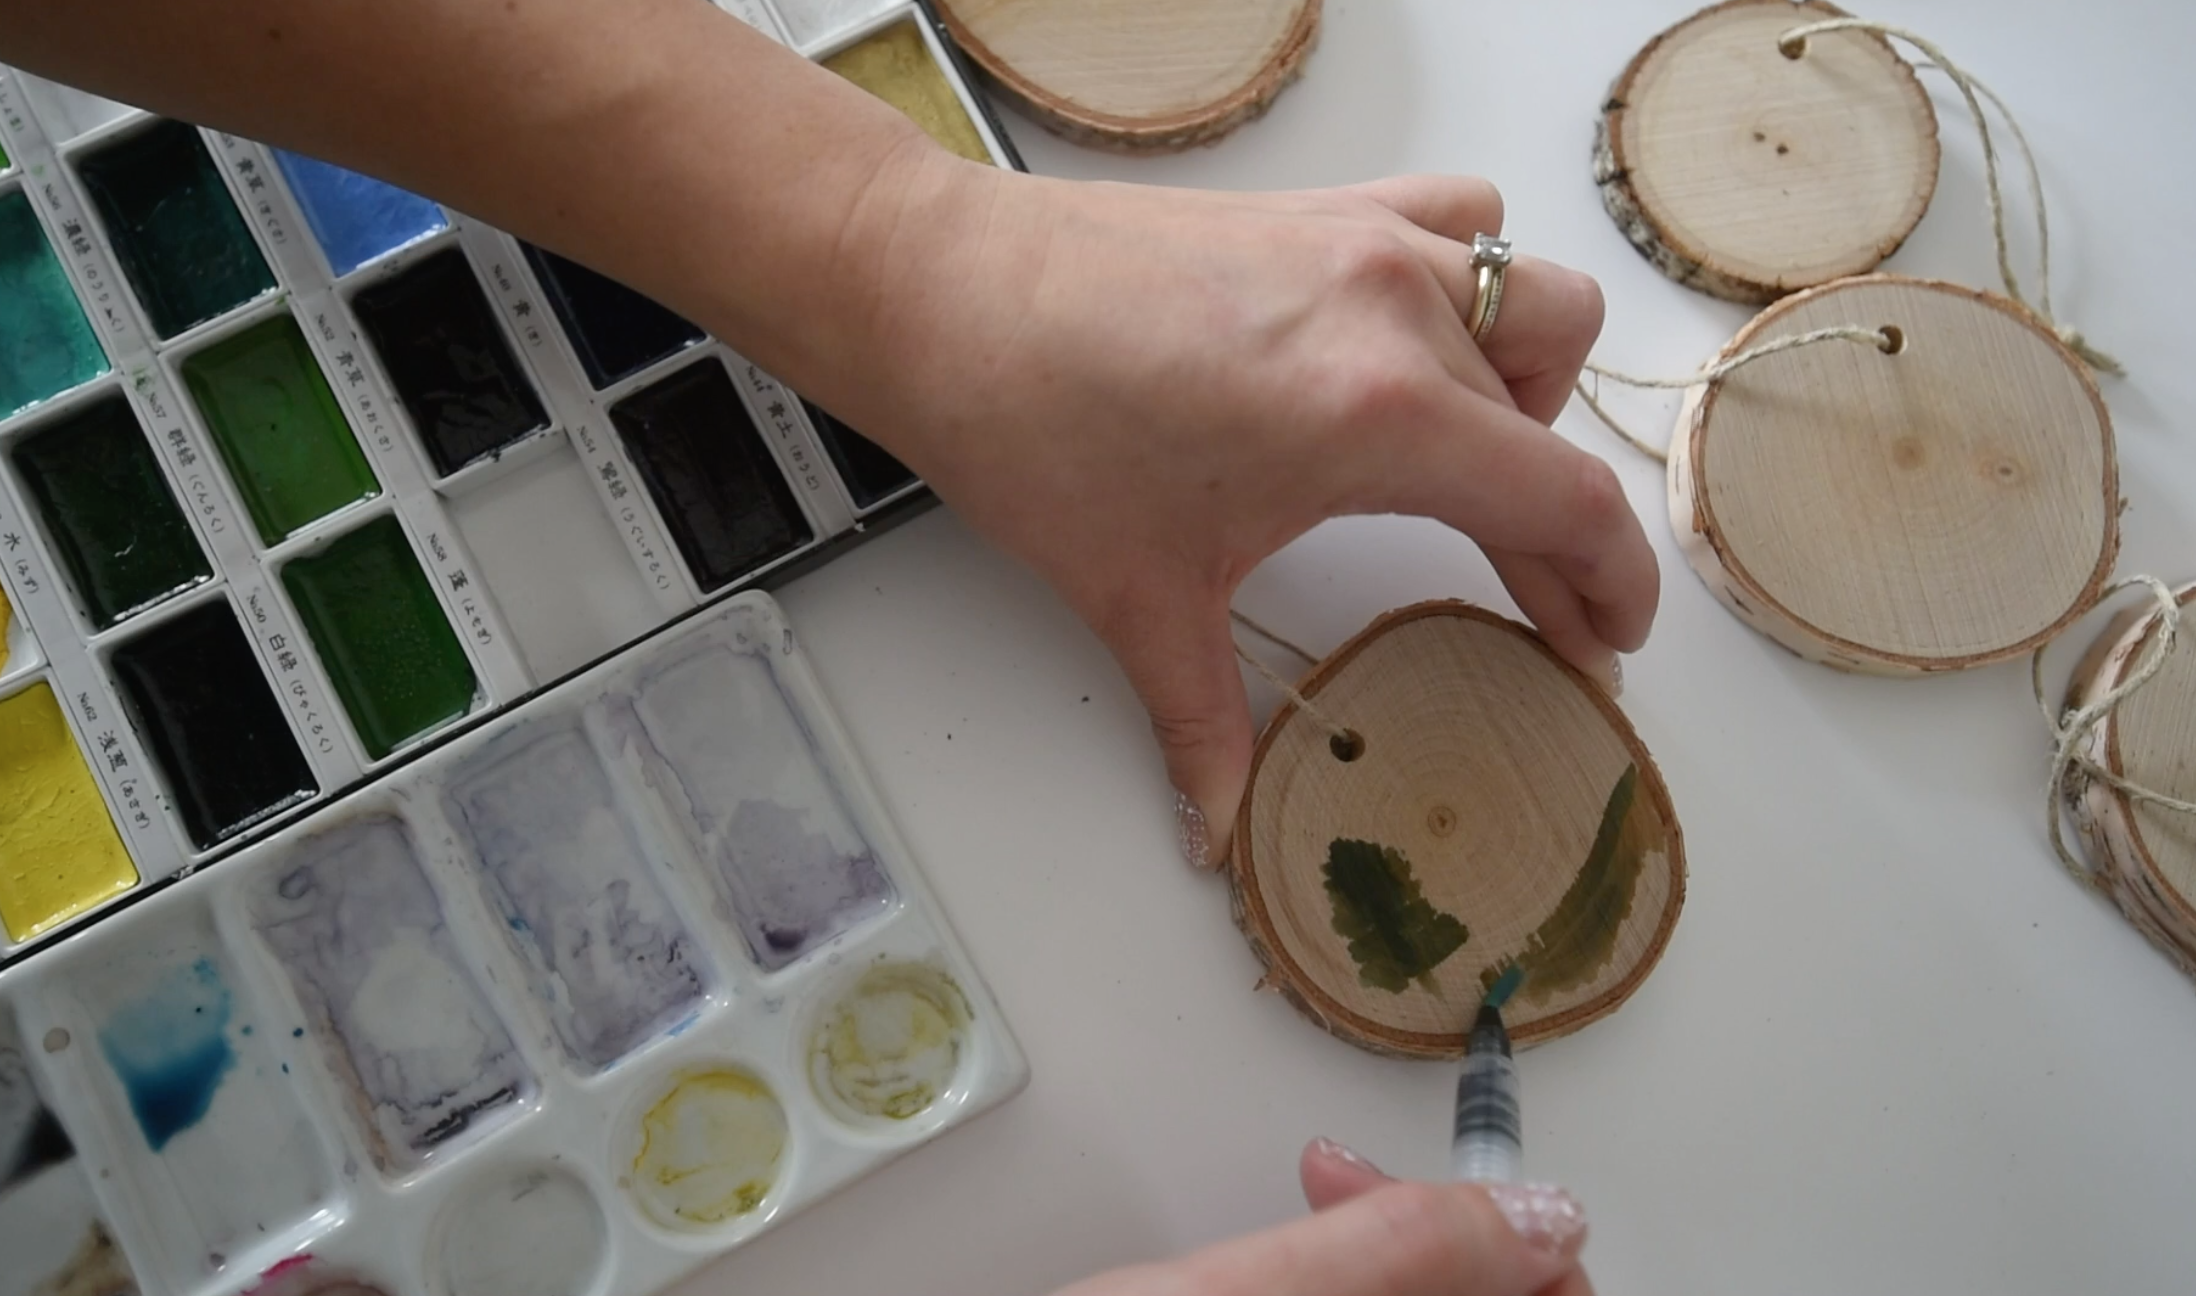
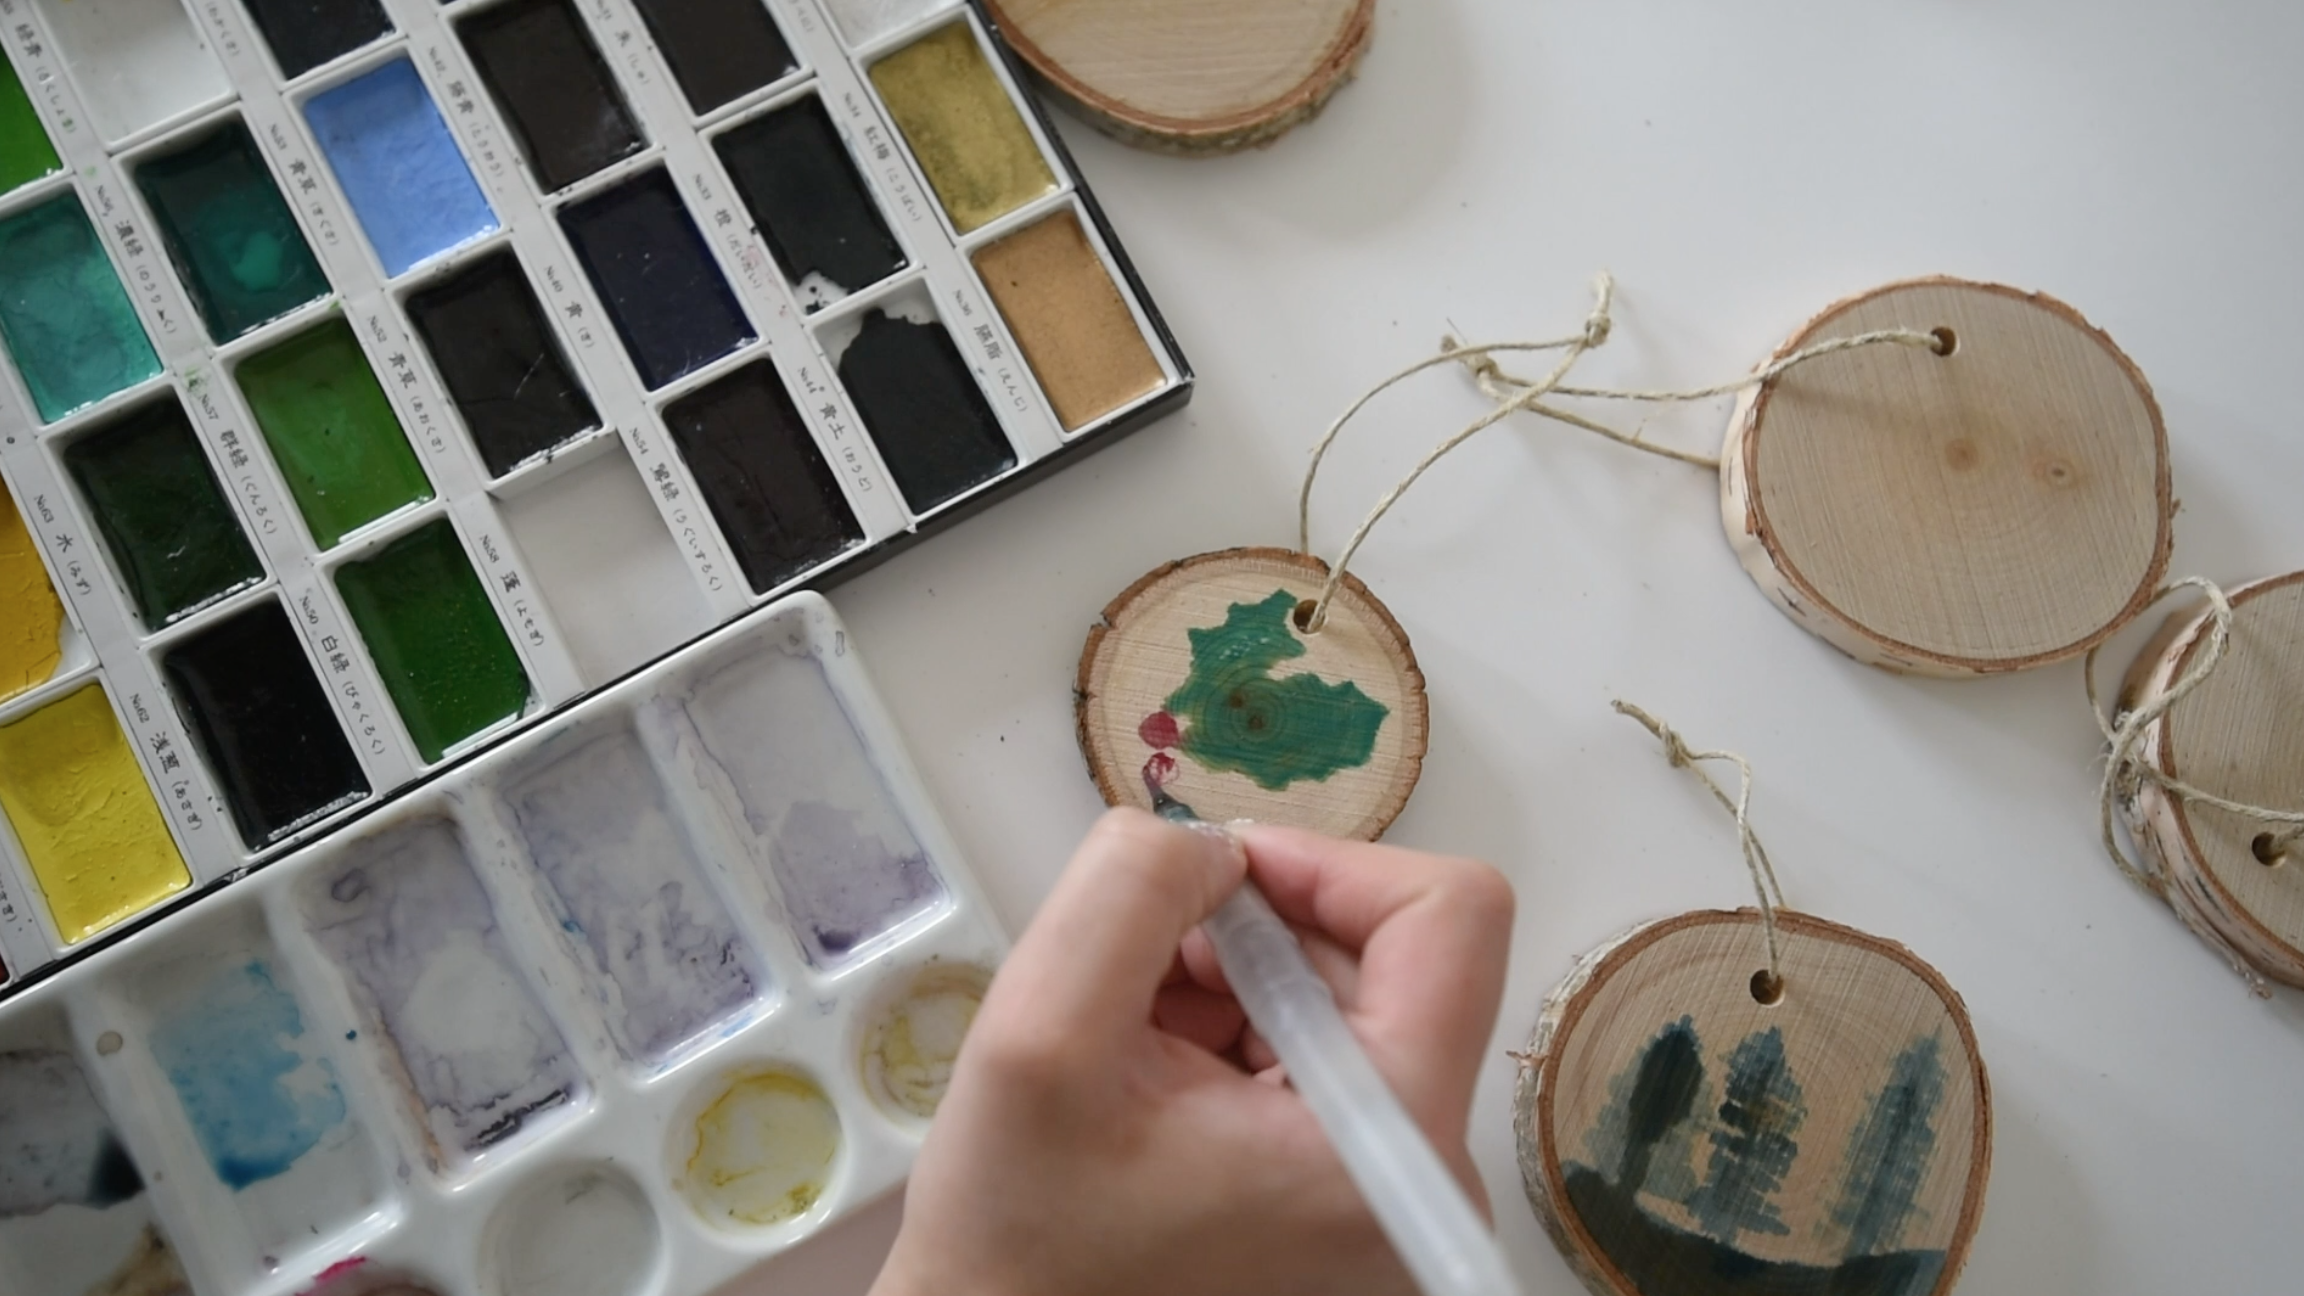
First off- the wood rounds seem to soak up soooo much more water than the wood panels or paper. It’s also difficult to see how much colour you’ve laid down while it’s wet so be patient, letting it dry before laying down more paint. I used a water brush and solid watercolors for this, but you could use a regular paint brush with watercolors too!

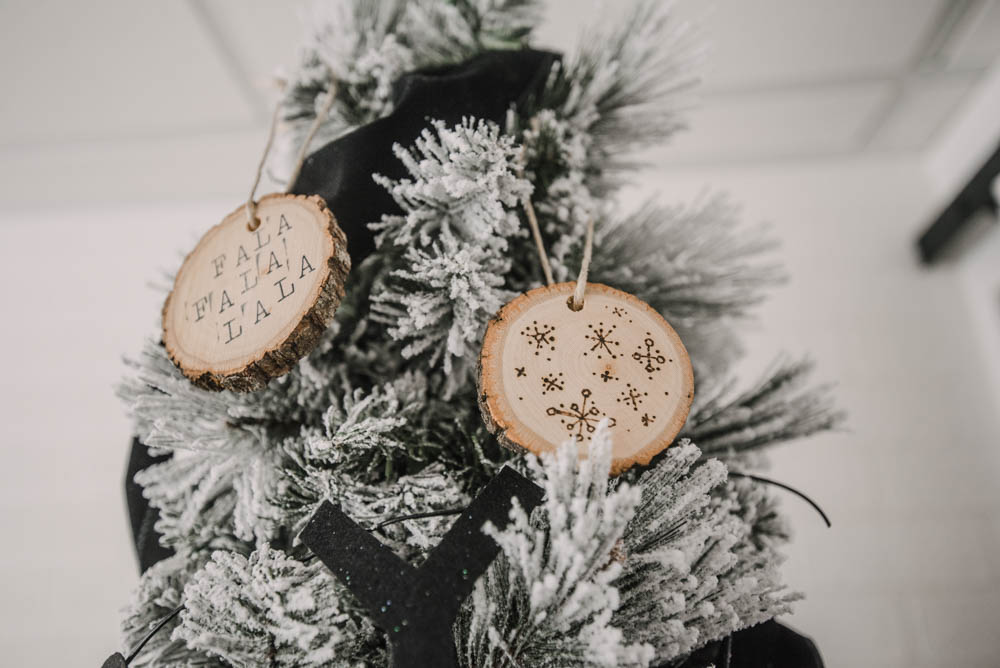
Stamped Wood Slice Ornaments
These ones I feel silly for even sharing a how-to for… they’re just that simple. But it’s the simplicity of the design that makes them stand out. They’re one of my favourites! I just used a standard set of typewriter alphabet stamps and an ink pad to stamp these out.
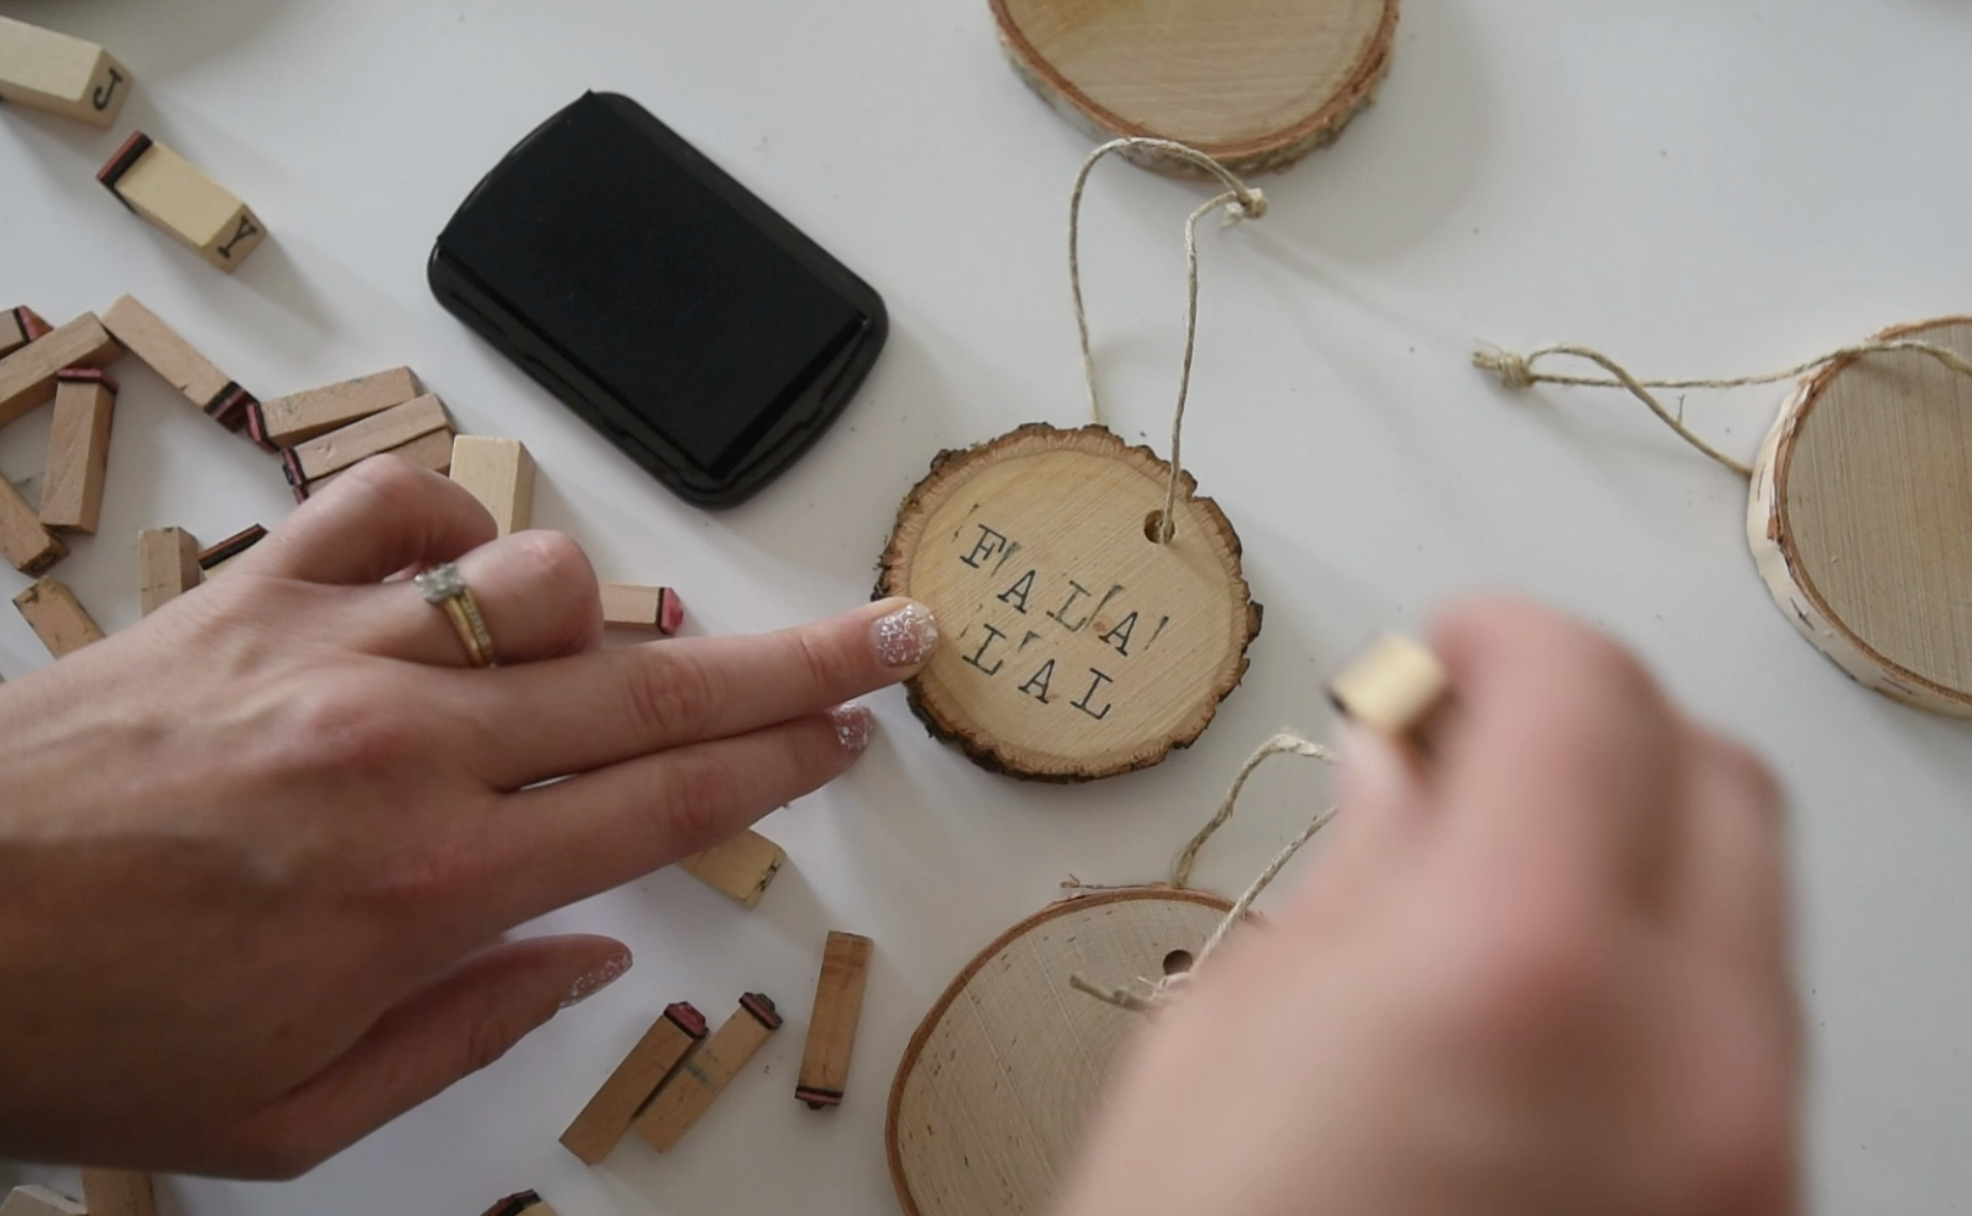
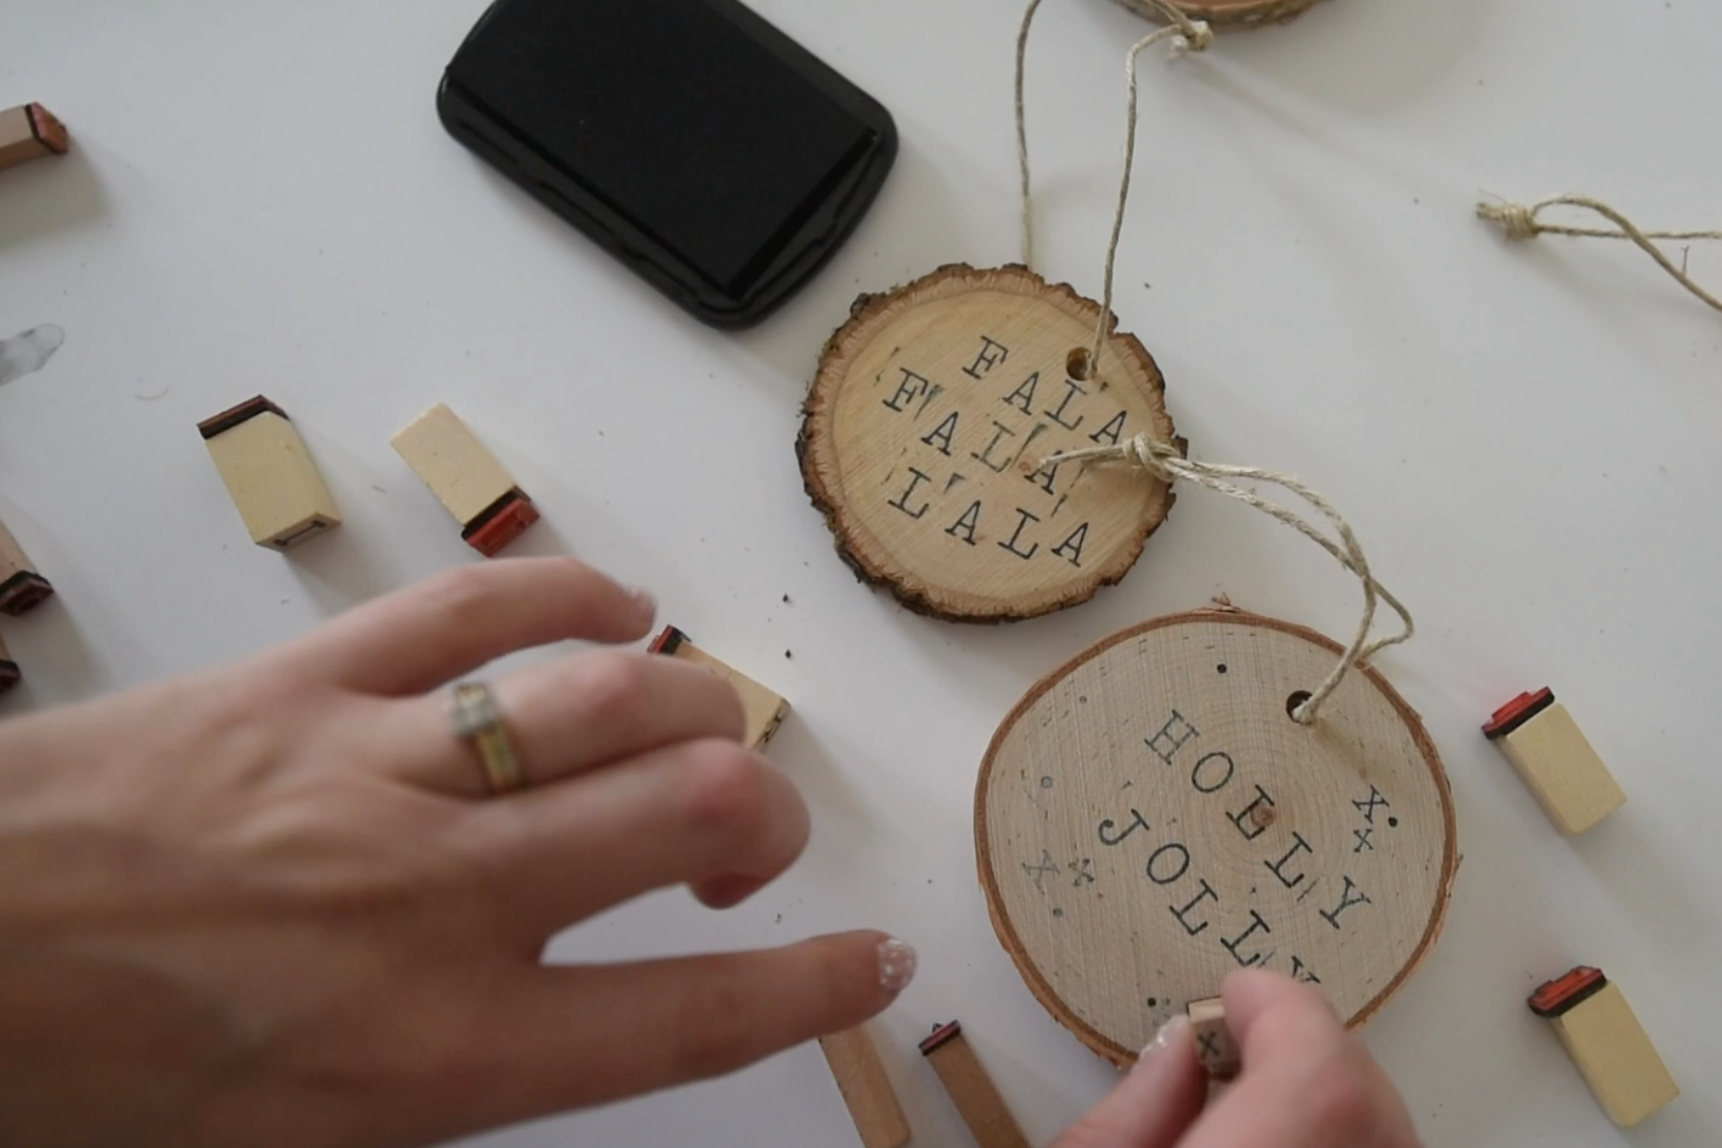
I did one that says Falala and one that says Holly Jolly. Again, I love to add extra dots and stars around, since there was no stars stamps, I used the little X stamp and the period dot. Both of the wood slices worked beautifully for this but my preference just based on how the stamps play with the light scandi colour of the wood is the birch slice ornaments for these.
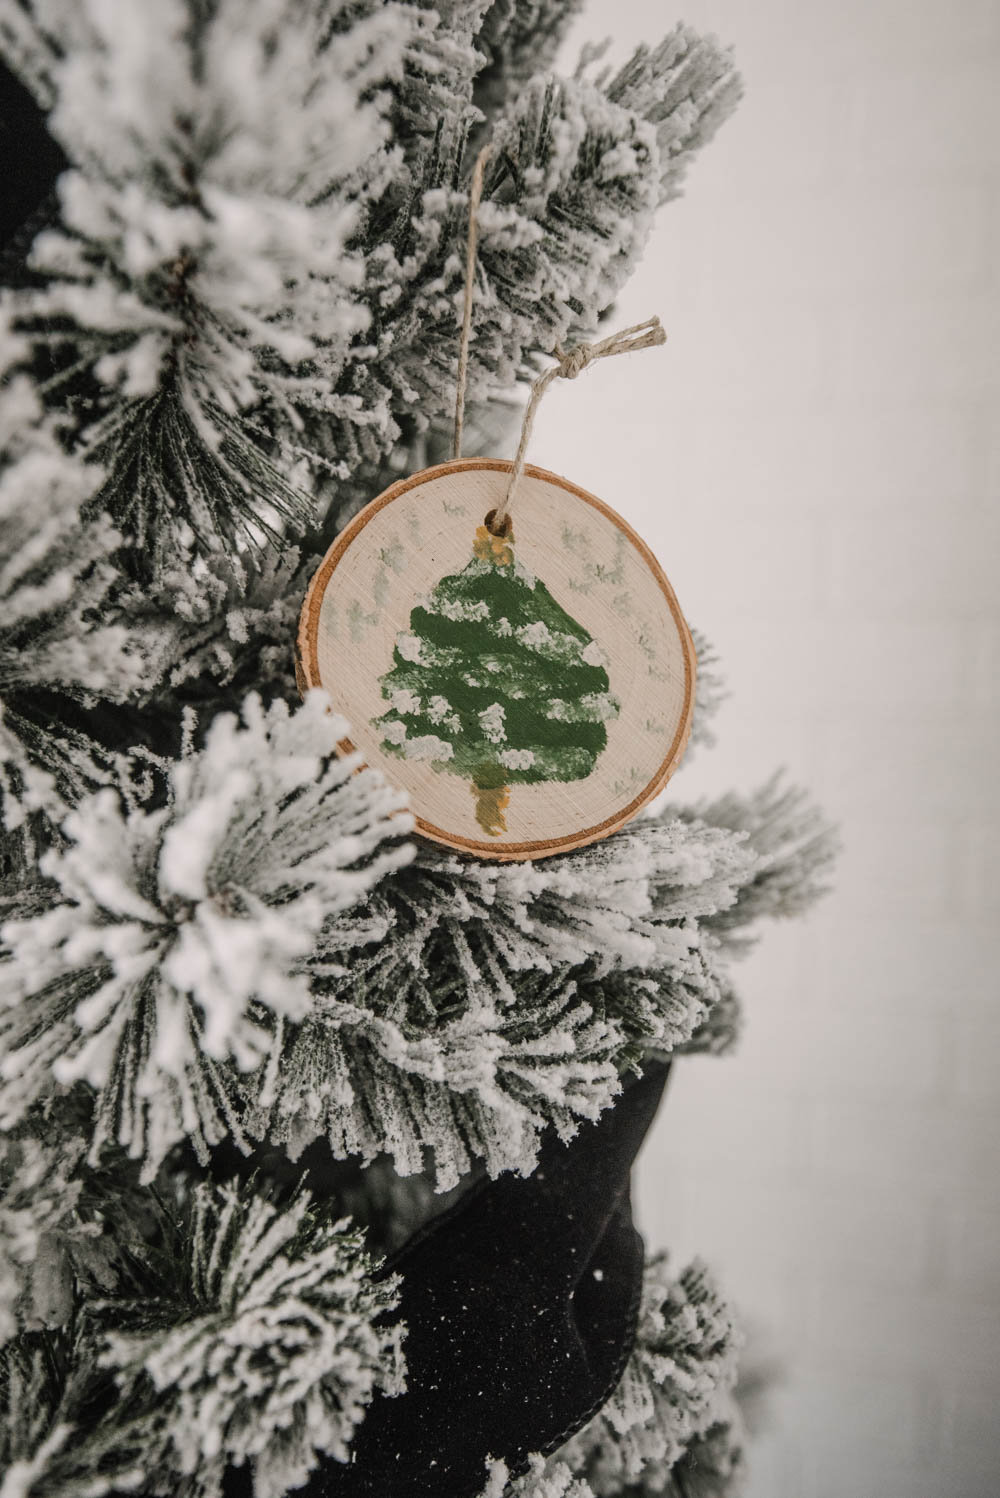
Acrylic Painted Wood Slice Ornaments
So these ones are really fun to create as well although, I’ll be honest… they didn’t turn out quite as *fabulous* as I had imagined and that is 100% due to my acrylic painting skills. I could use a tutorial or three on how to paint Christmas trees, but I present to you my very best effort!
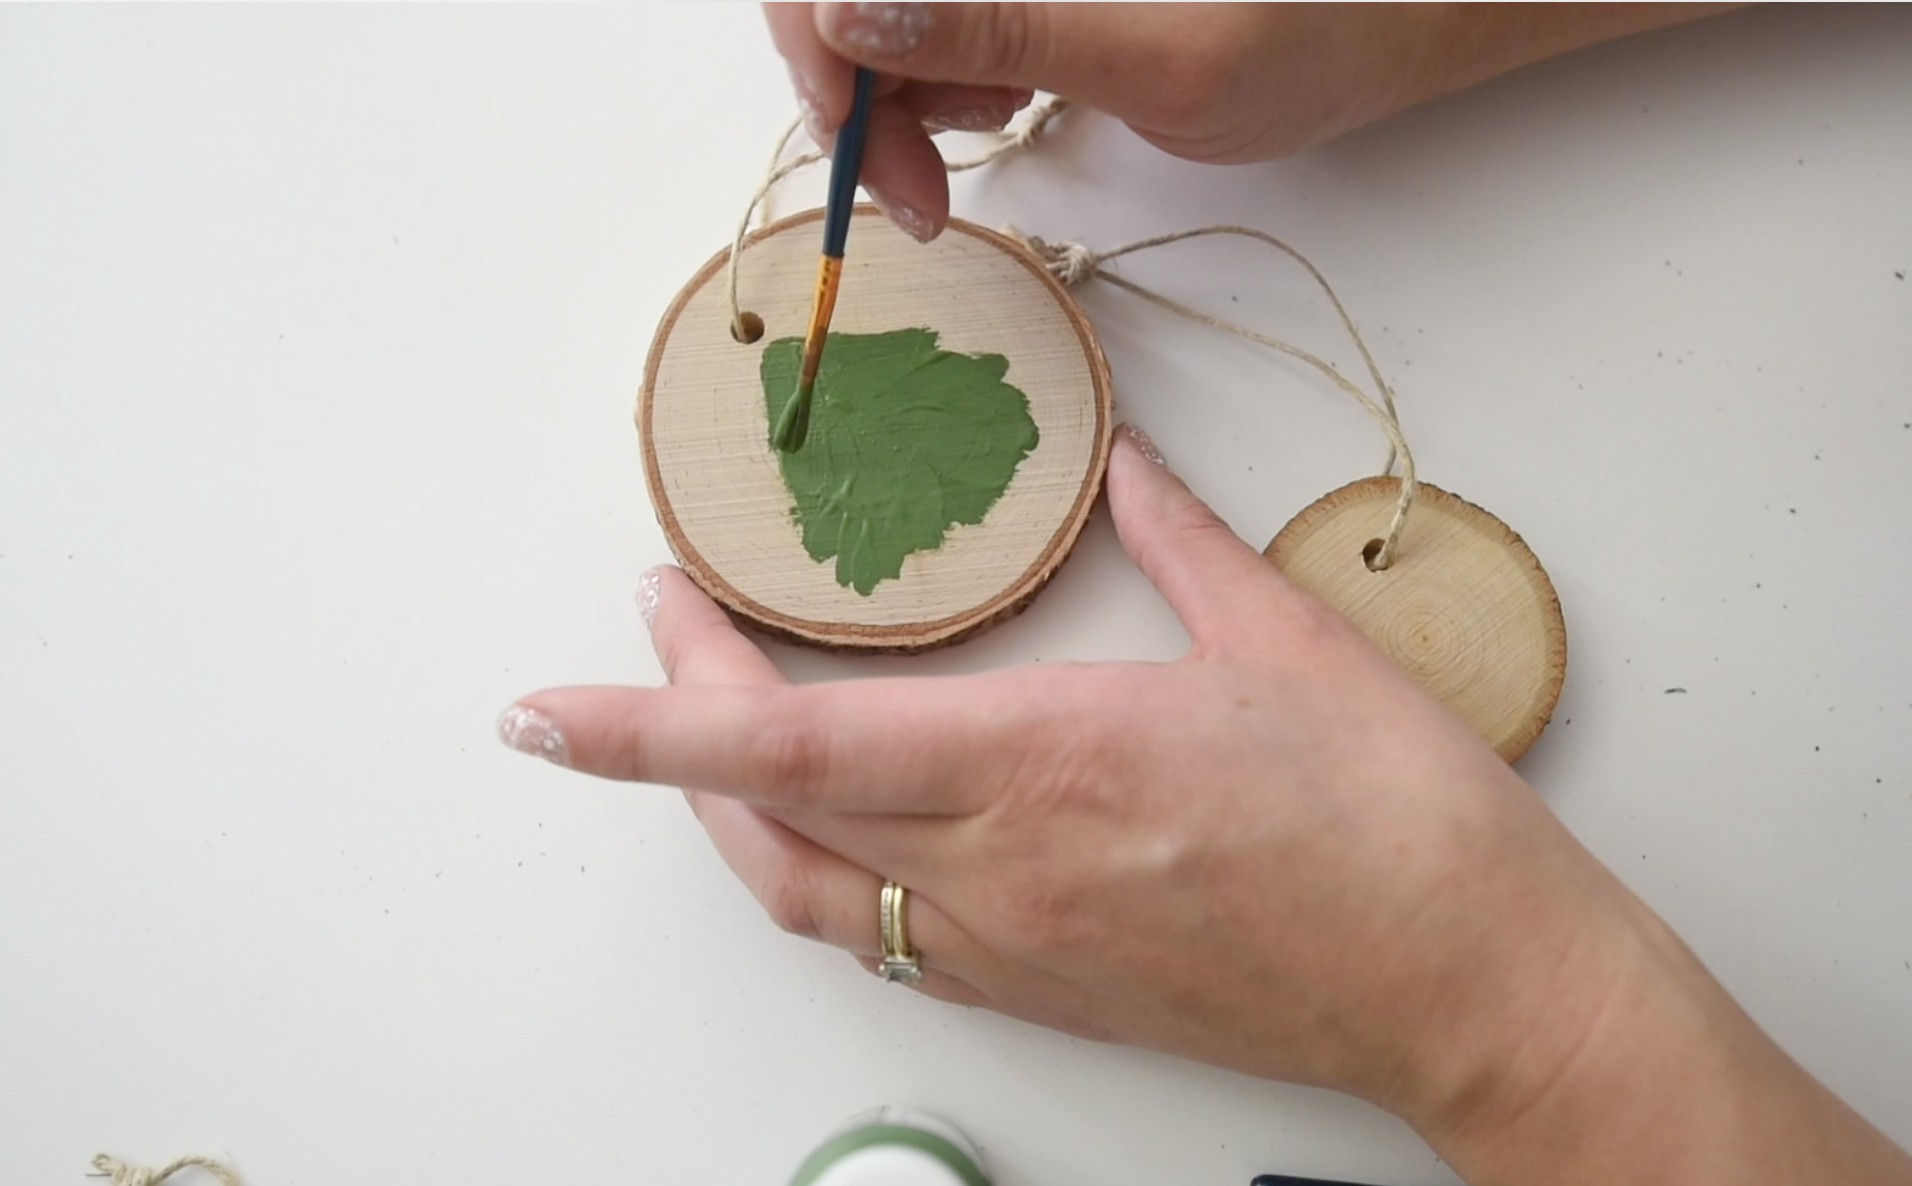
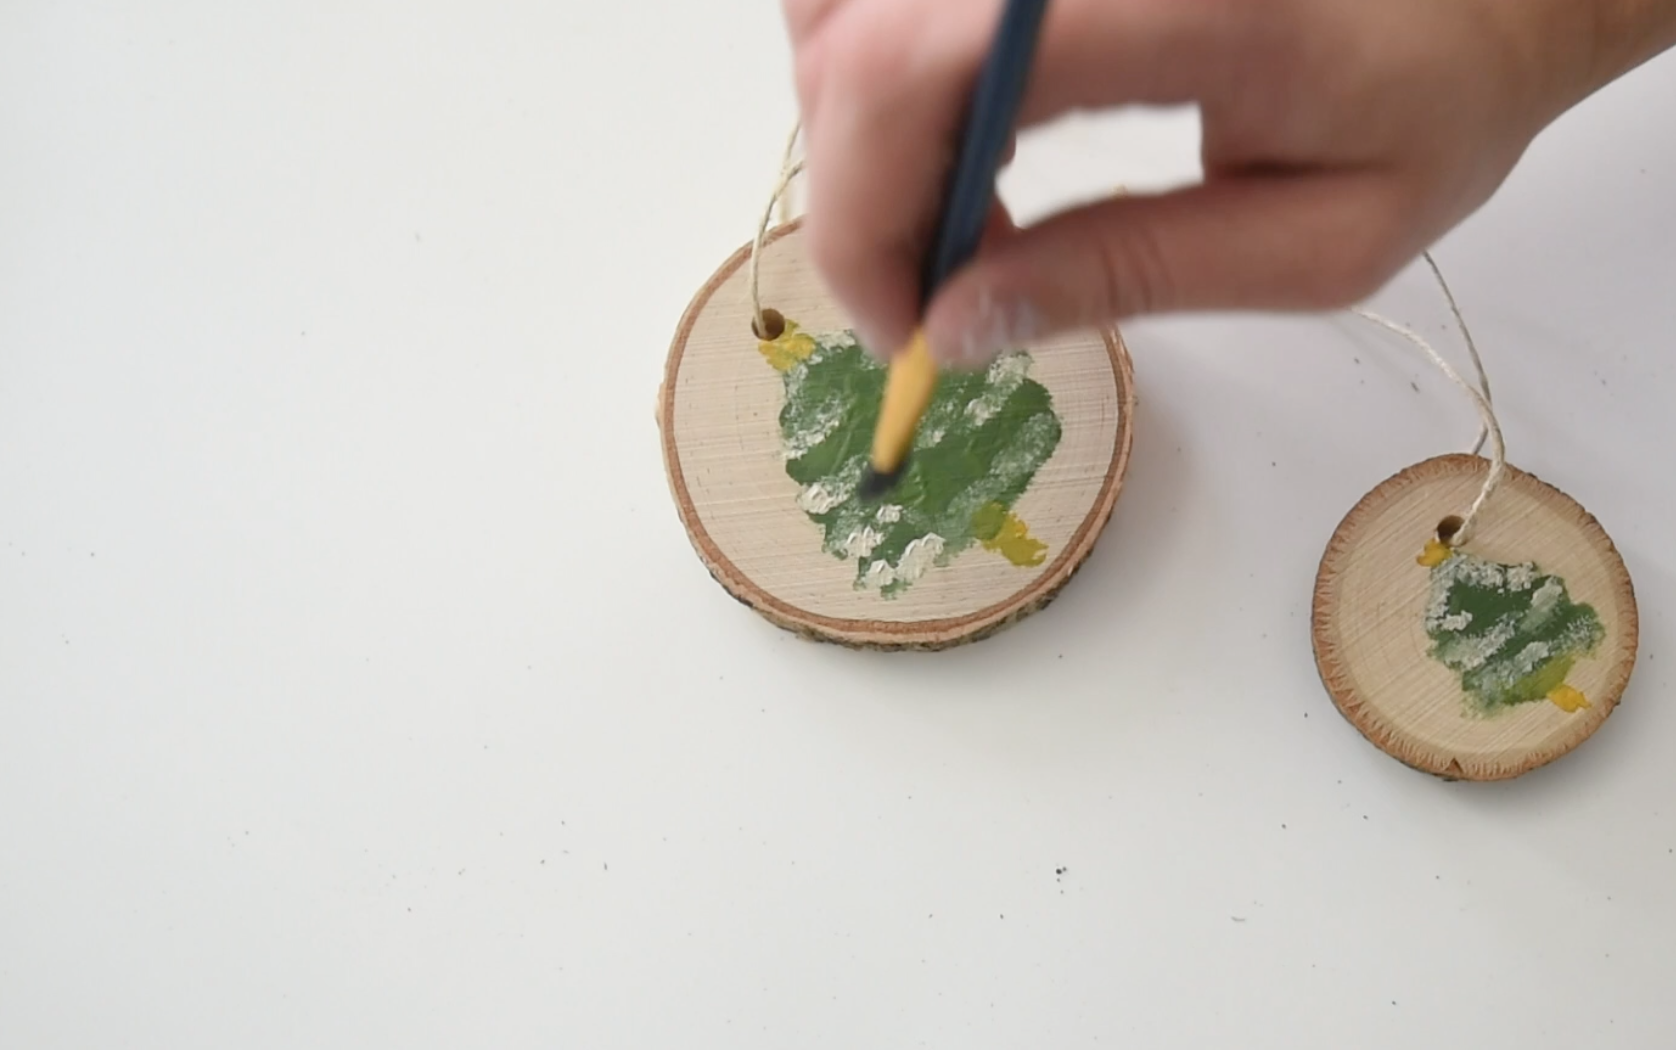
So for these ones, I painted the trees first with craft paint and then I added a stem and star in a golden ochre colour and once it was dry used a fresh brush to dab on snow to the branches and around the tree.

Hand Lettered Wood Slice Ornaments
You know I had to include this one in here! I love hand lettering. And I love lettering on ornaments. I couldn’t get the ones I typically make each year so these are such a fun alternative! I will definitely be ordering more of these wood slices to make them for my custom orders (I make some for client gifts for some local businesses each year).
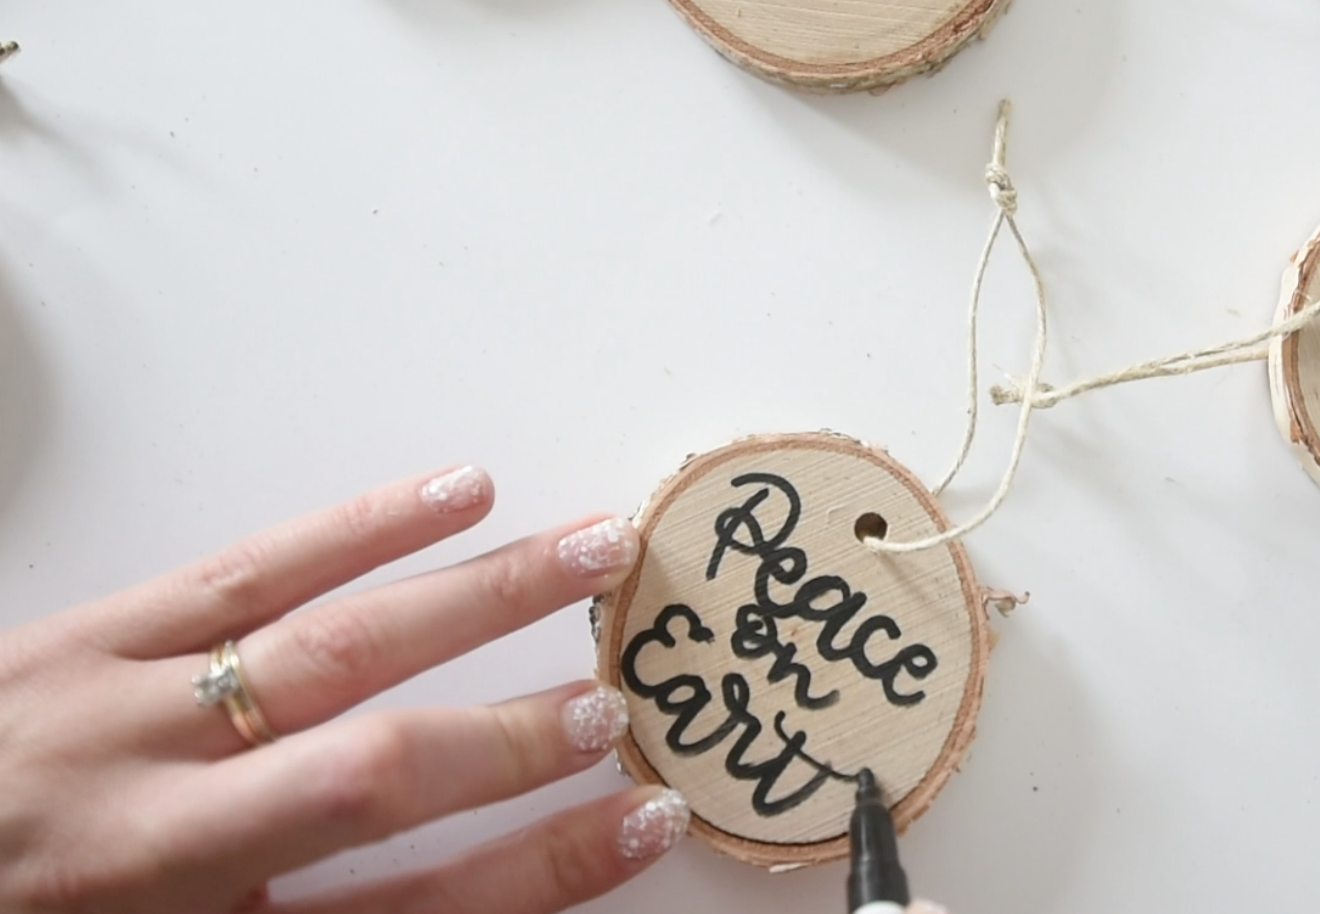
For these ones, I just use my paint markers and letter directly onto the wood. I would definitely recommend sketching your design before lettering and give your marker a good shake. Since the wood is rougher and soaks up a lot more paint than paper or other surfaces, make sure to get the marker flowing with ink before you start lettering and pick it up often to push the tip down on a scrap piece of cardboard before continuing. This will keep the marker paint flowing and from getting streaky where you’d have to go over to fill it in. You can see in the video I learned that the hard way ;)

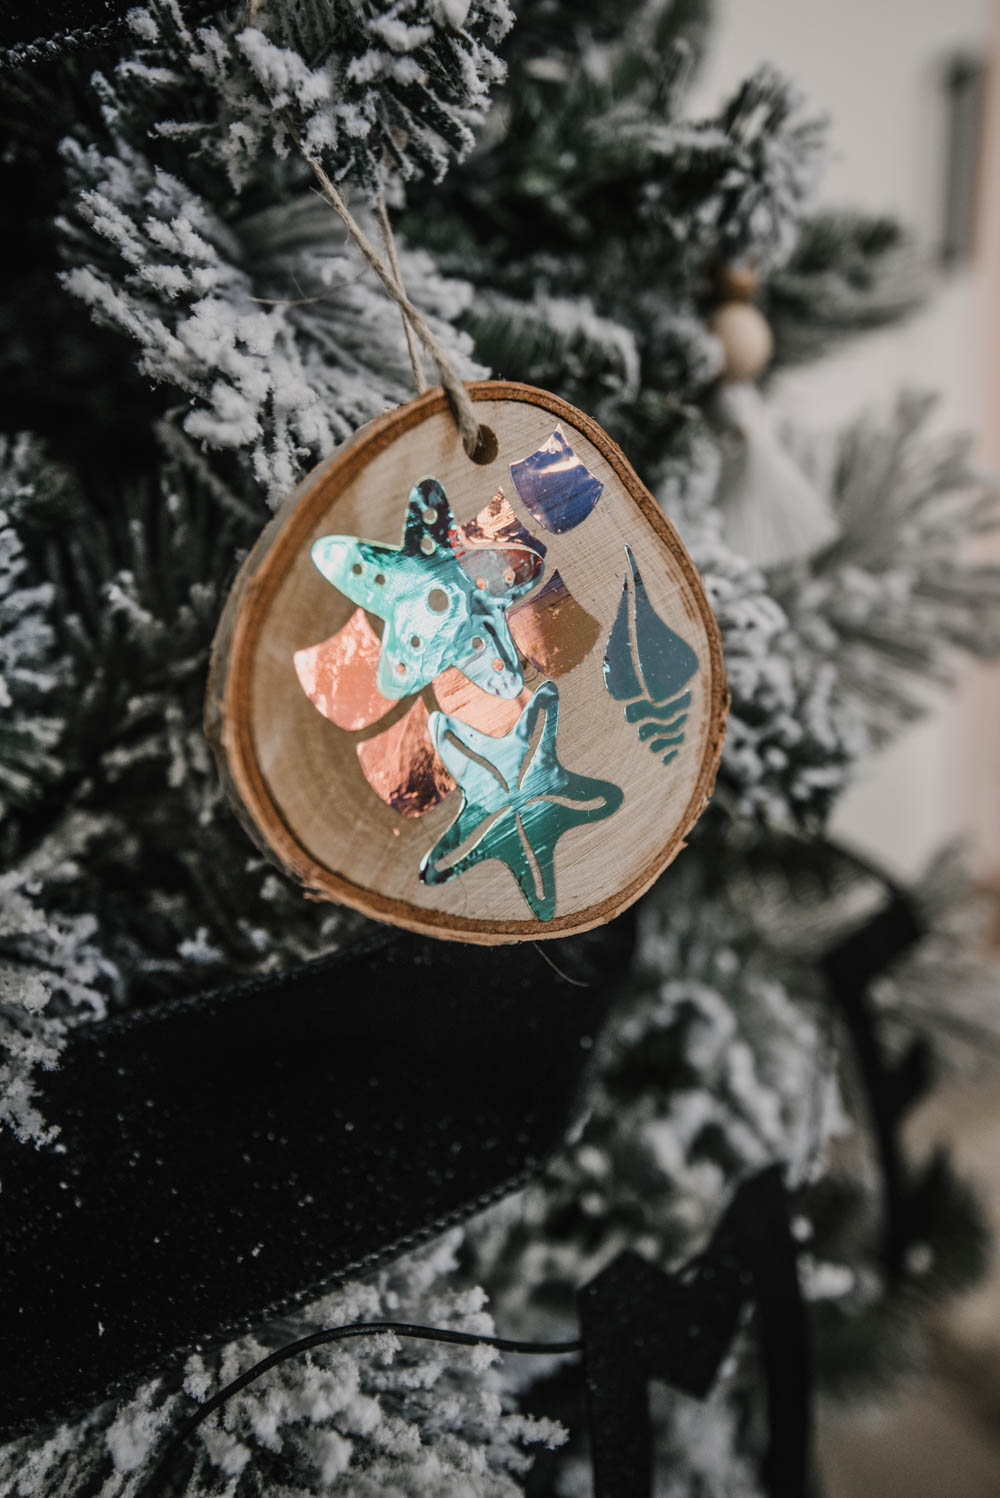
HTV on Wood Slice Ornaments
I love to cut out my lettering and designs in vinyl. I’ve used it on wood plenty of times before, in fact I have a whole blog post about it if you’re interested in learning more! The first one is a mermaid style holographic ornament. My daughter loves it and so it’s headed to her bedroom tree. I just cut the designs out with my Cricut and then ironed them on before peeling the carrier plastic back. These designs are the same ones I used for this backpack.


Next up was this ‘four’ ornament and I feel like I need to explain it a bit. Do you know what the enneagram is? It’s kind of like a personality test but so much more than that and you’re ‘typed’ by a number. I made these hand lettered enneagram numbers last year for t-shirts and decided to try the design on ornaments too! You can get the designs in this post. You make the same way, just cut your design out of heat transfer vinyl, peel the parts of vinyl that aren’t wanted in the final design (weeding) and iron it on! Let it cool then peel back the transfer plastic.
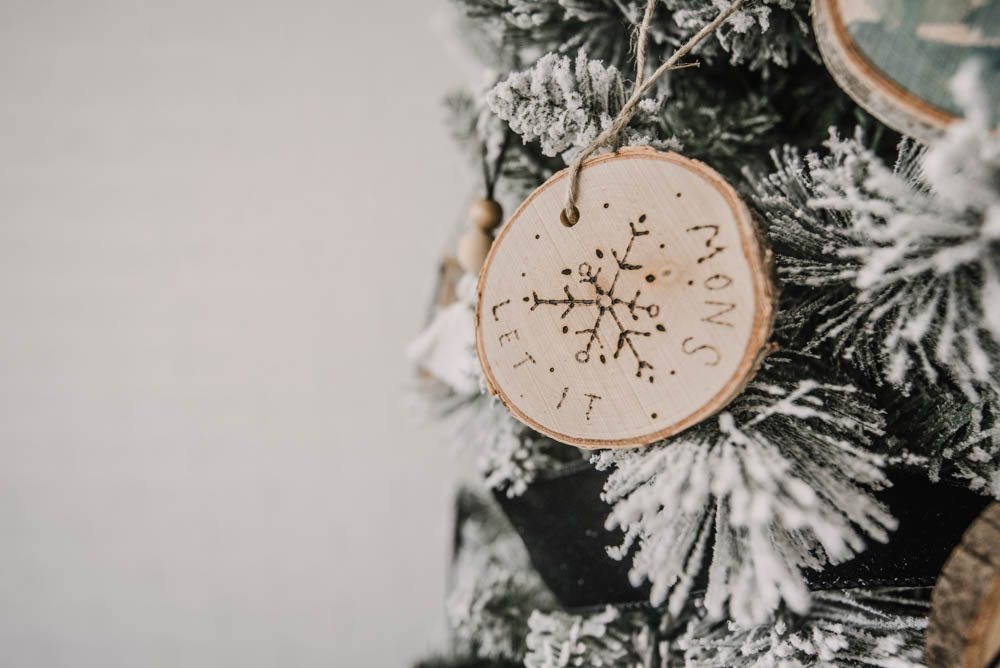
Wood Burned Wood Slice Ornaments
Okay, last but certainly not least… wood burned wood slice ornaments! I chose a snowflake pattern for these and they turned out so pretty. I am a beginner wood burner so if I could do these ornaments, I know you could do some too. I wrote a full post about wood burning for beginners right here if you’d like to give it a go for your first time! This is the wood burner I have.
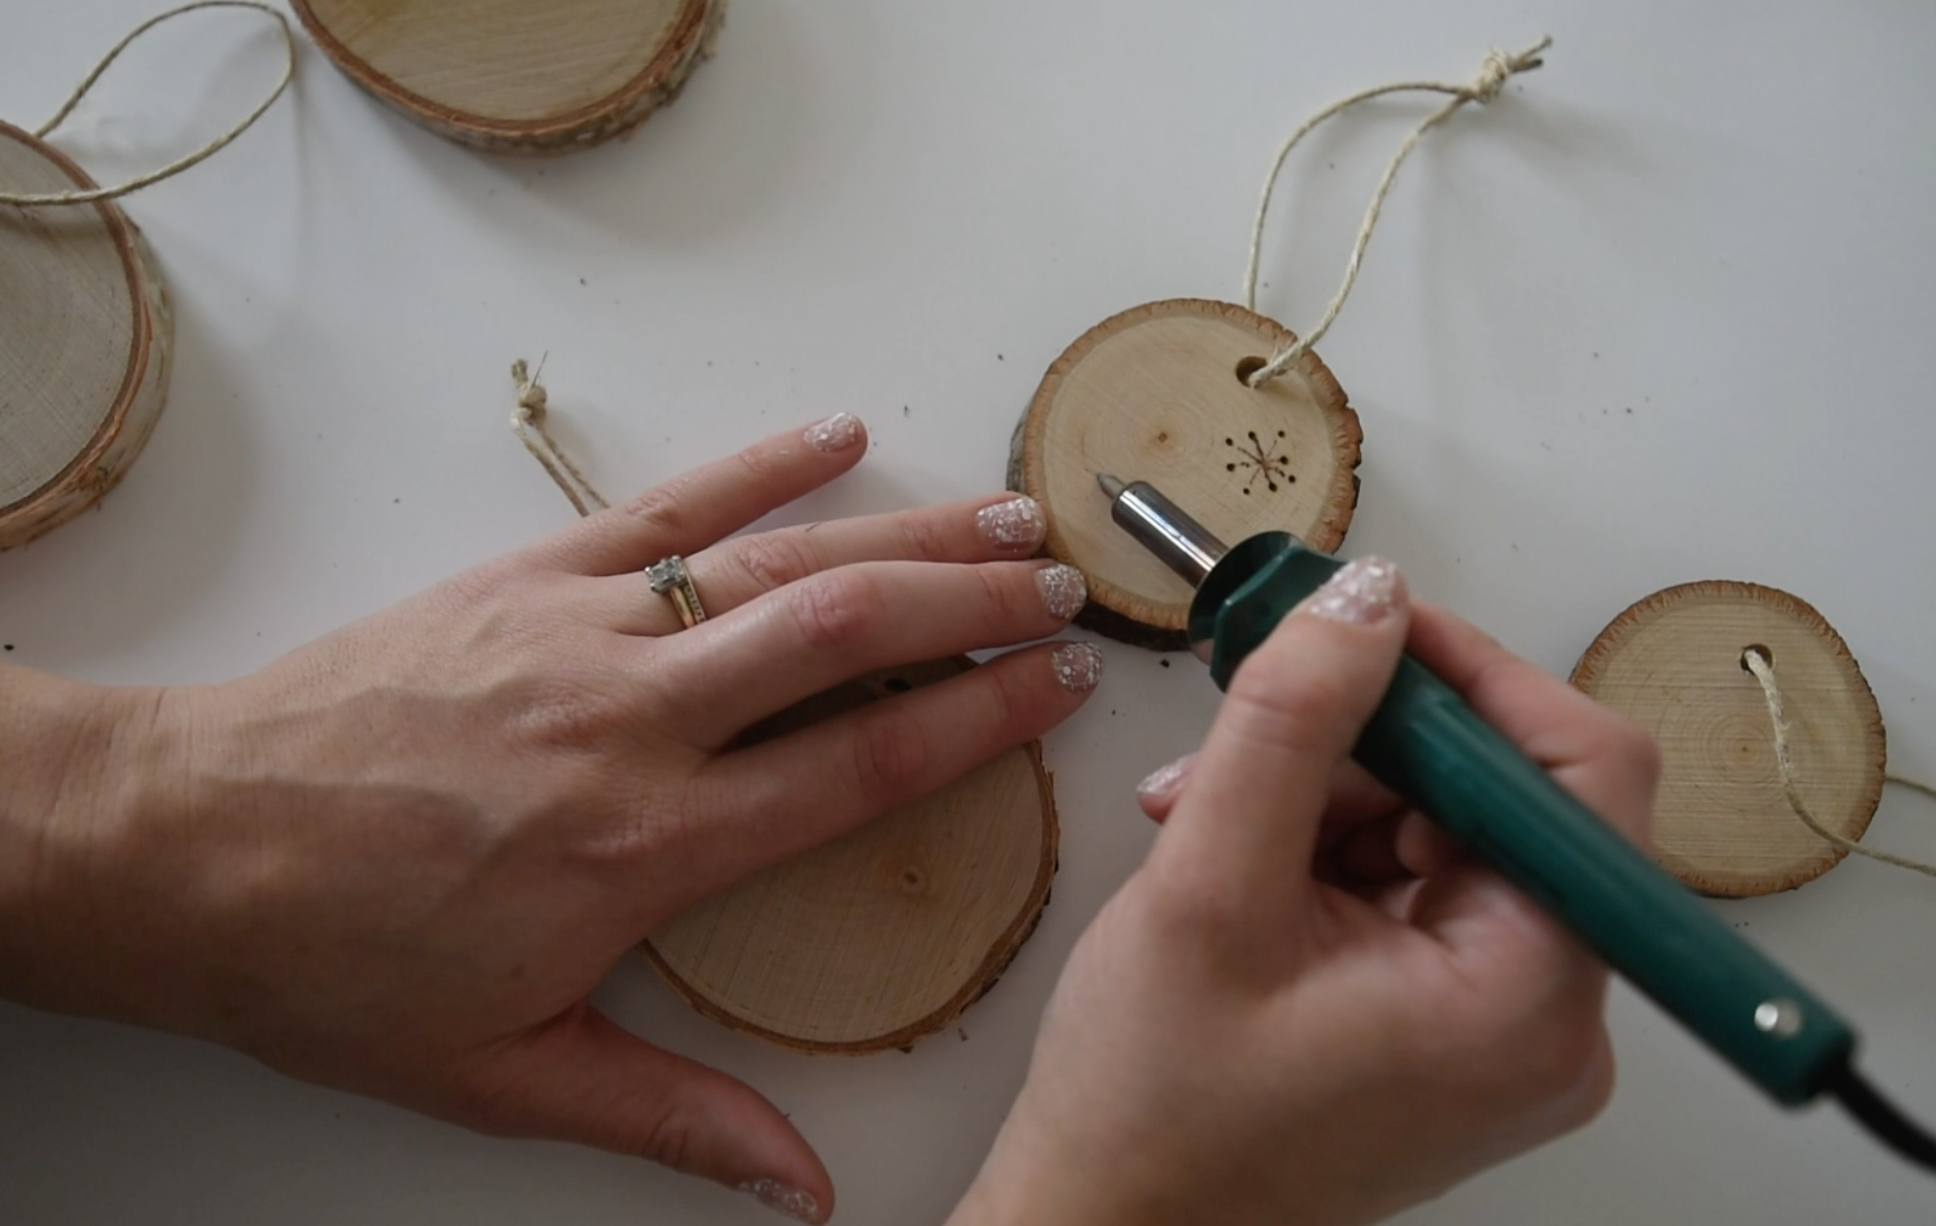
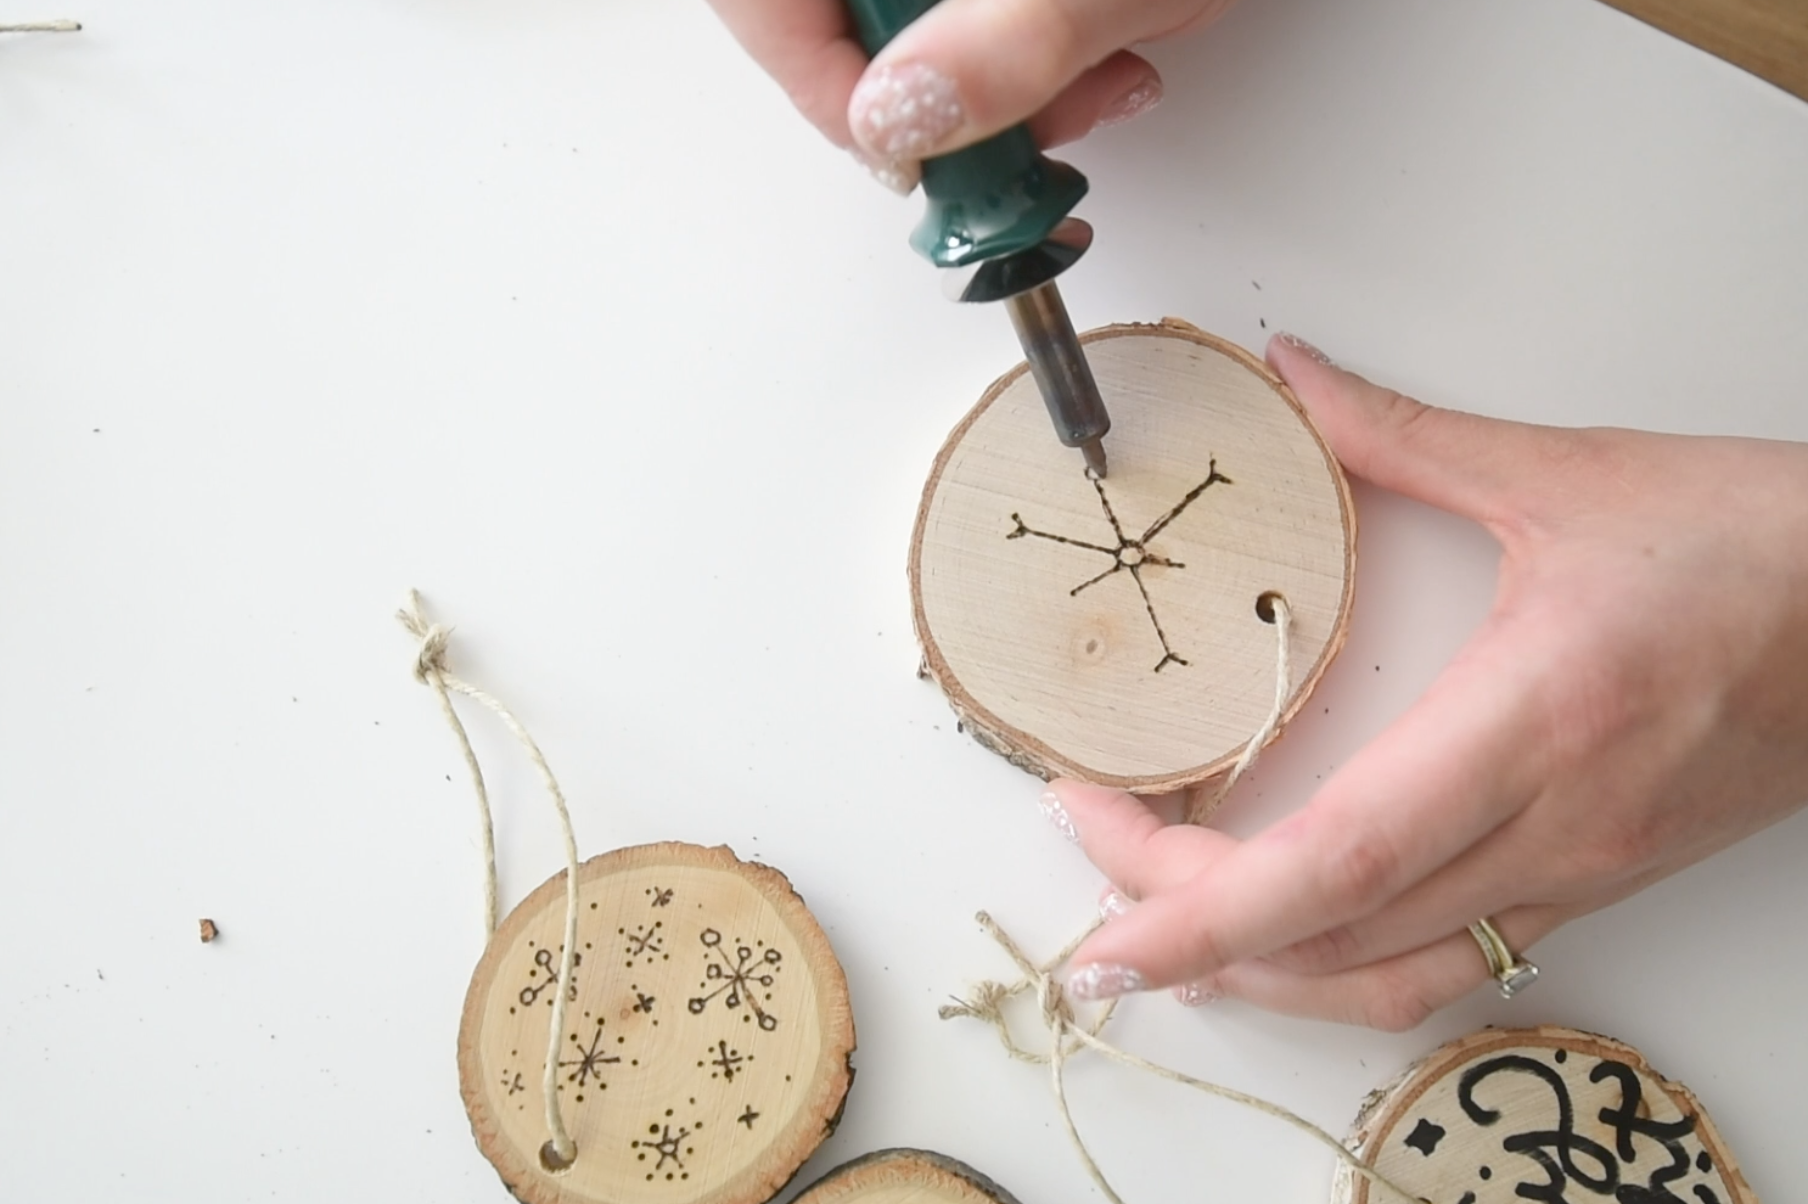
My biggest tips are to go slow and use a light hand. If you press hard, it’s easy to get caught in the wood grain and have a dark spot. I found the basswood burned quicker so was really nice to use a wood burner on. The birch wood seemed to take a bit longer and after trying both, my impatient crafting nature decided I’d rather wood burn the basswood.
That’s all of them! Honestly, every single one was so fun to create. I think I will make some more to use as gift toppers on presents I’m giving this year as well. If you’d like to get some wood slice ornaments from Walnut Hollow to craft with for yourself, you can find the birch slice ornaments right here and the basswood slice ornaments right here!
 Casual Black + White Flocked Tree Decor
LOVE these!! Thanks for sharing :)