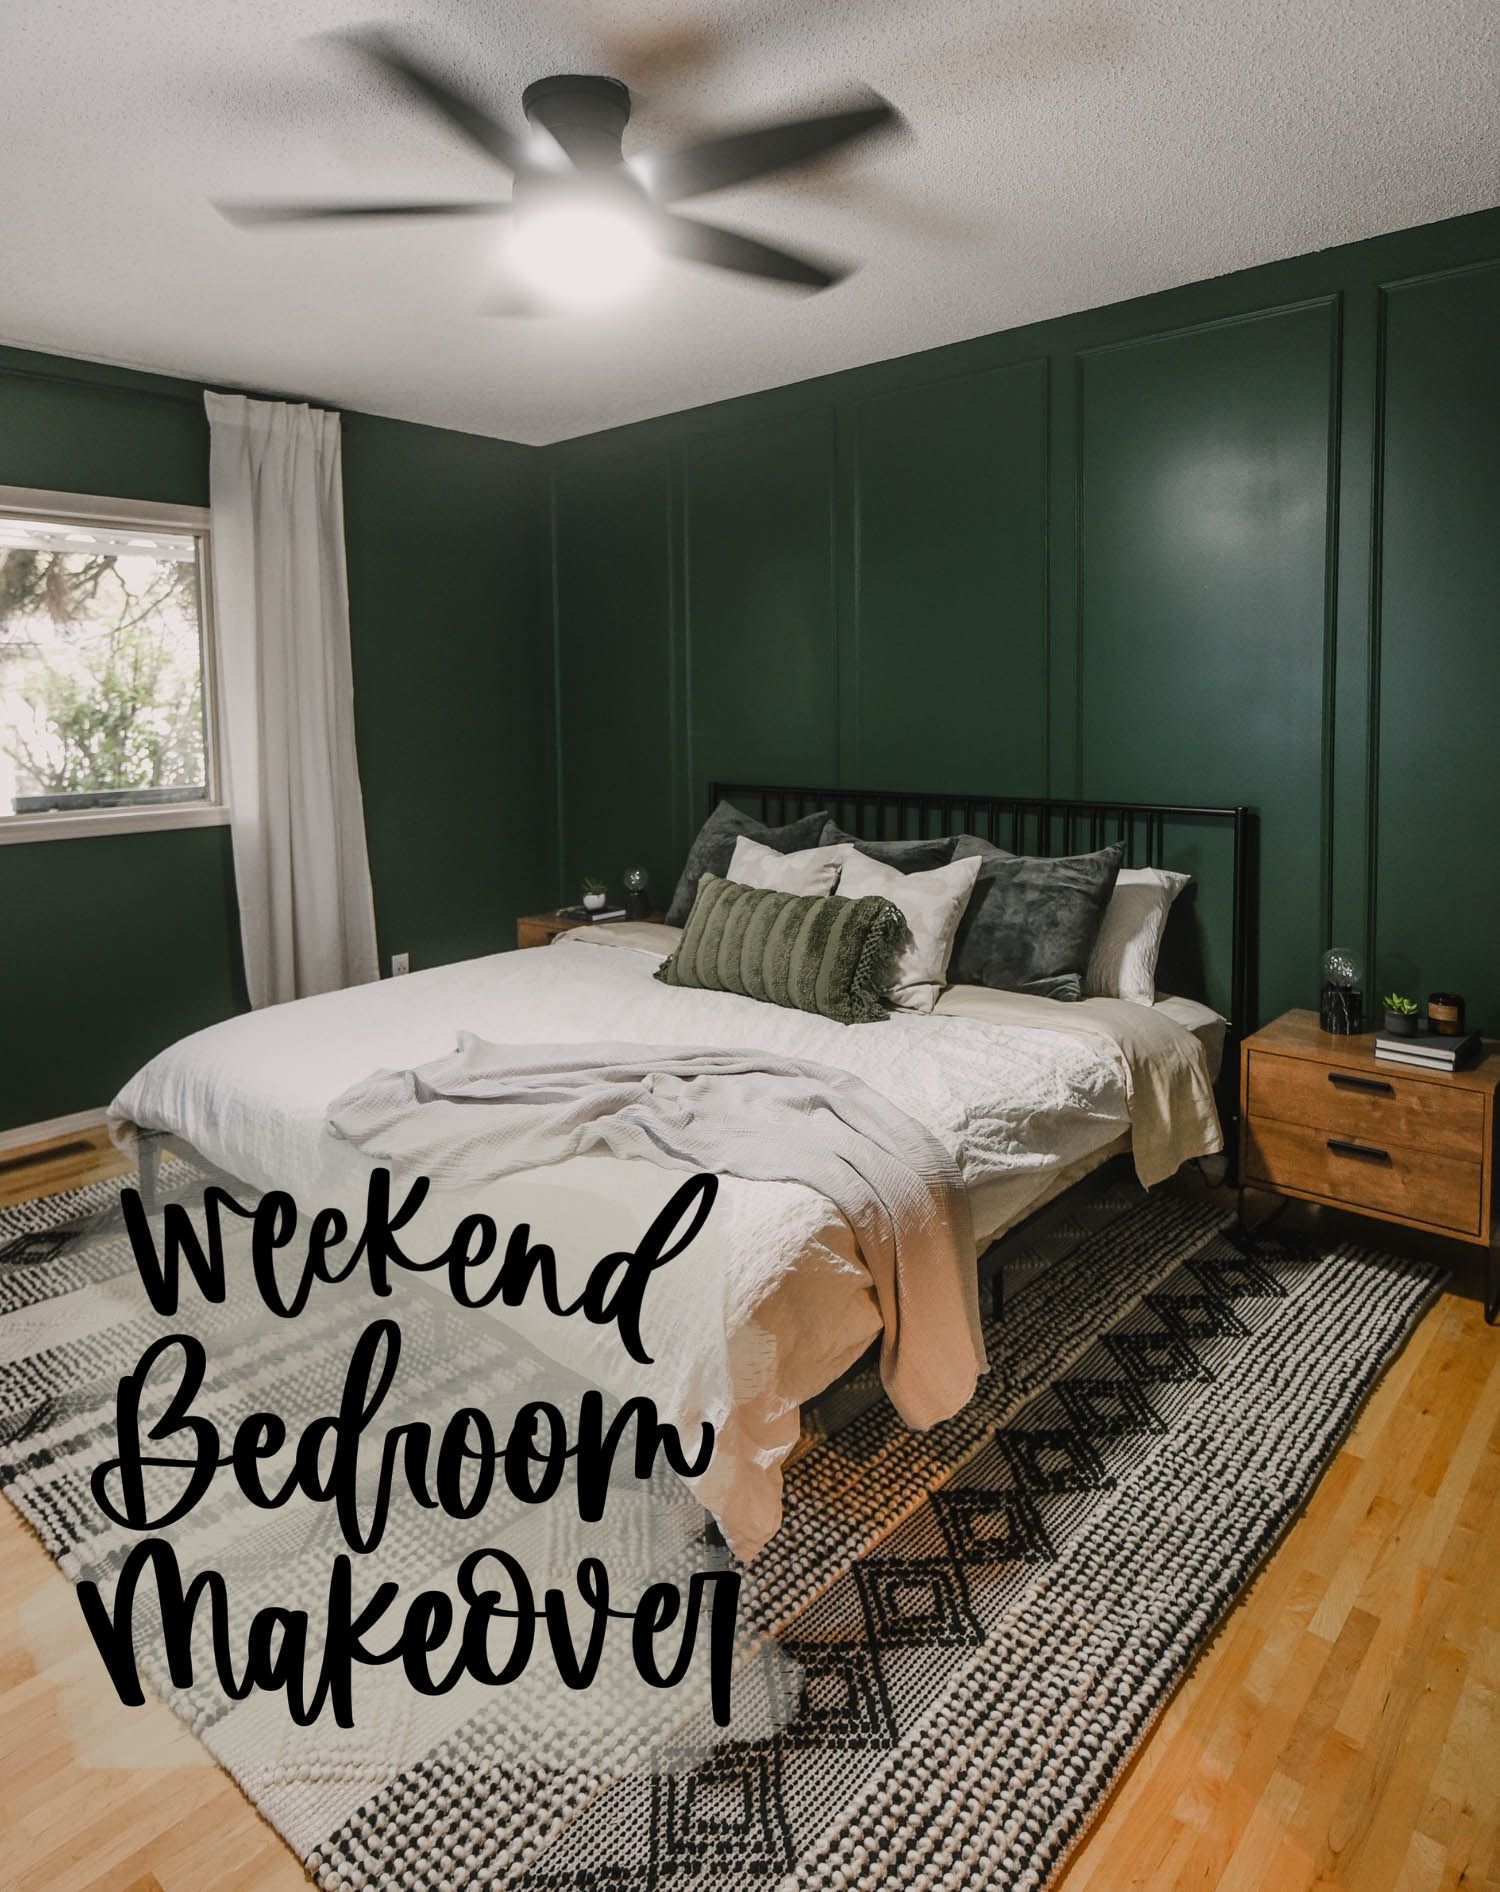
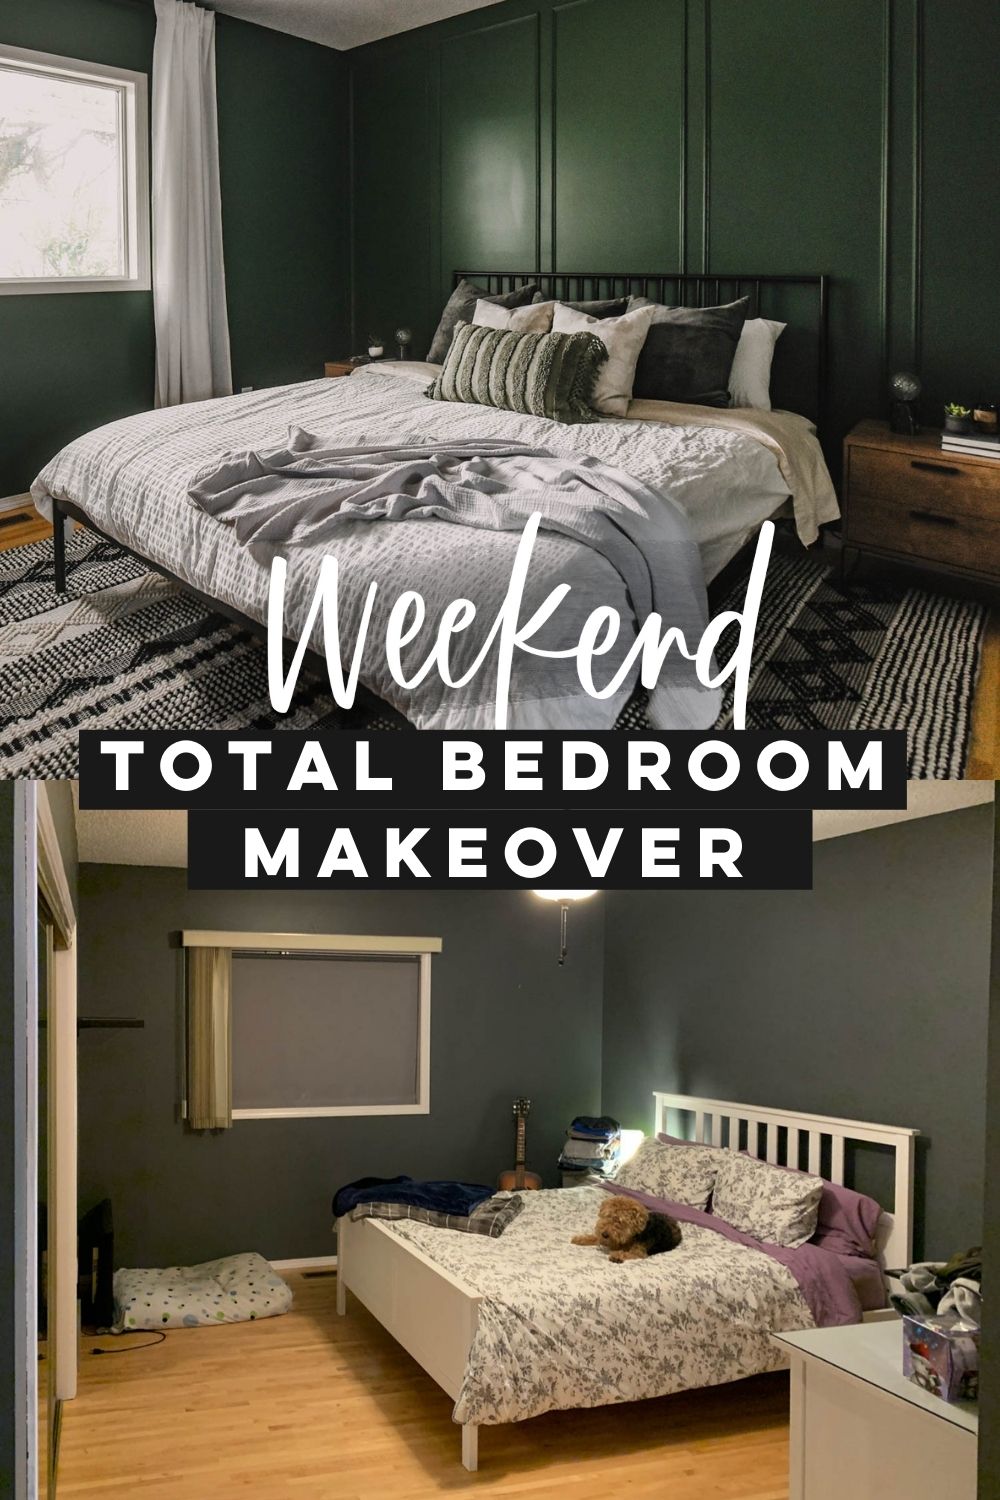
This primary bedroom was updated in just one weekend thanks to the power of paint and a DIY moulding wall. See all the details of this green bedroom makeover here!
Last month I took a trip to visit my sister and Shane and I spent the weekend helping her make over her bedroom and patio. I shared the patio back in August and now it’s time to share the primary bedroom! Looking back at these, I’m still shocked we were able to accomplish TWO room makeovers in just 3 days! With plenty of planning, of course ;)
The thing that takes so long that I think we underestimate is shopping. I know that sounds like a small part of a room makeover, but going to stores, standing in line, making decisions and all that? That can be done ahead of time. We had everything sitting in boxes, waiting for us to get going friday morning. Having a clear plan and direction thanks to a design board is really such a huge head start!
*This project is shared in partnership with Wagner Spray Tech. I’ve been working with them for years and truly love their sprayers. You can read more about my policies here.

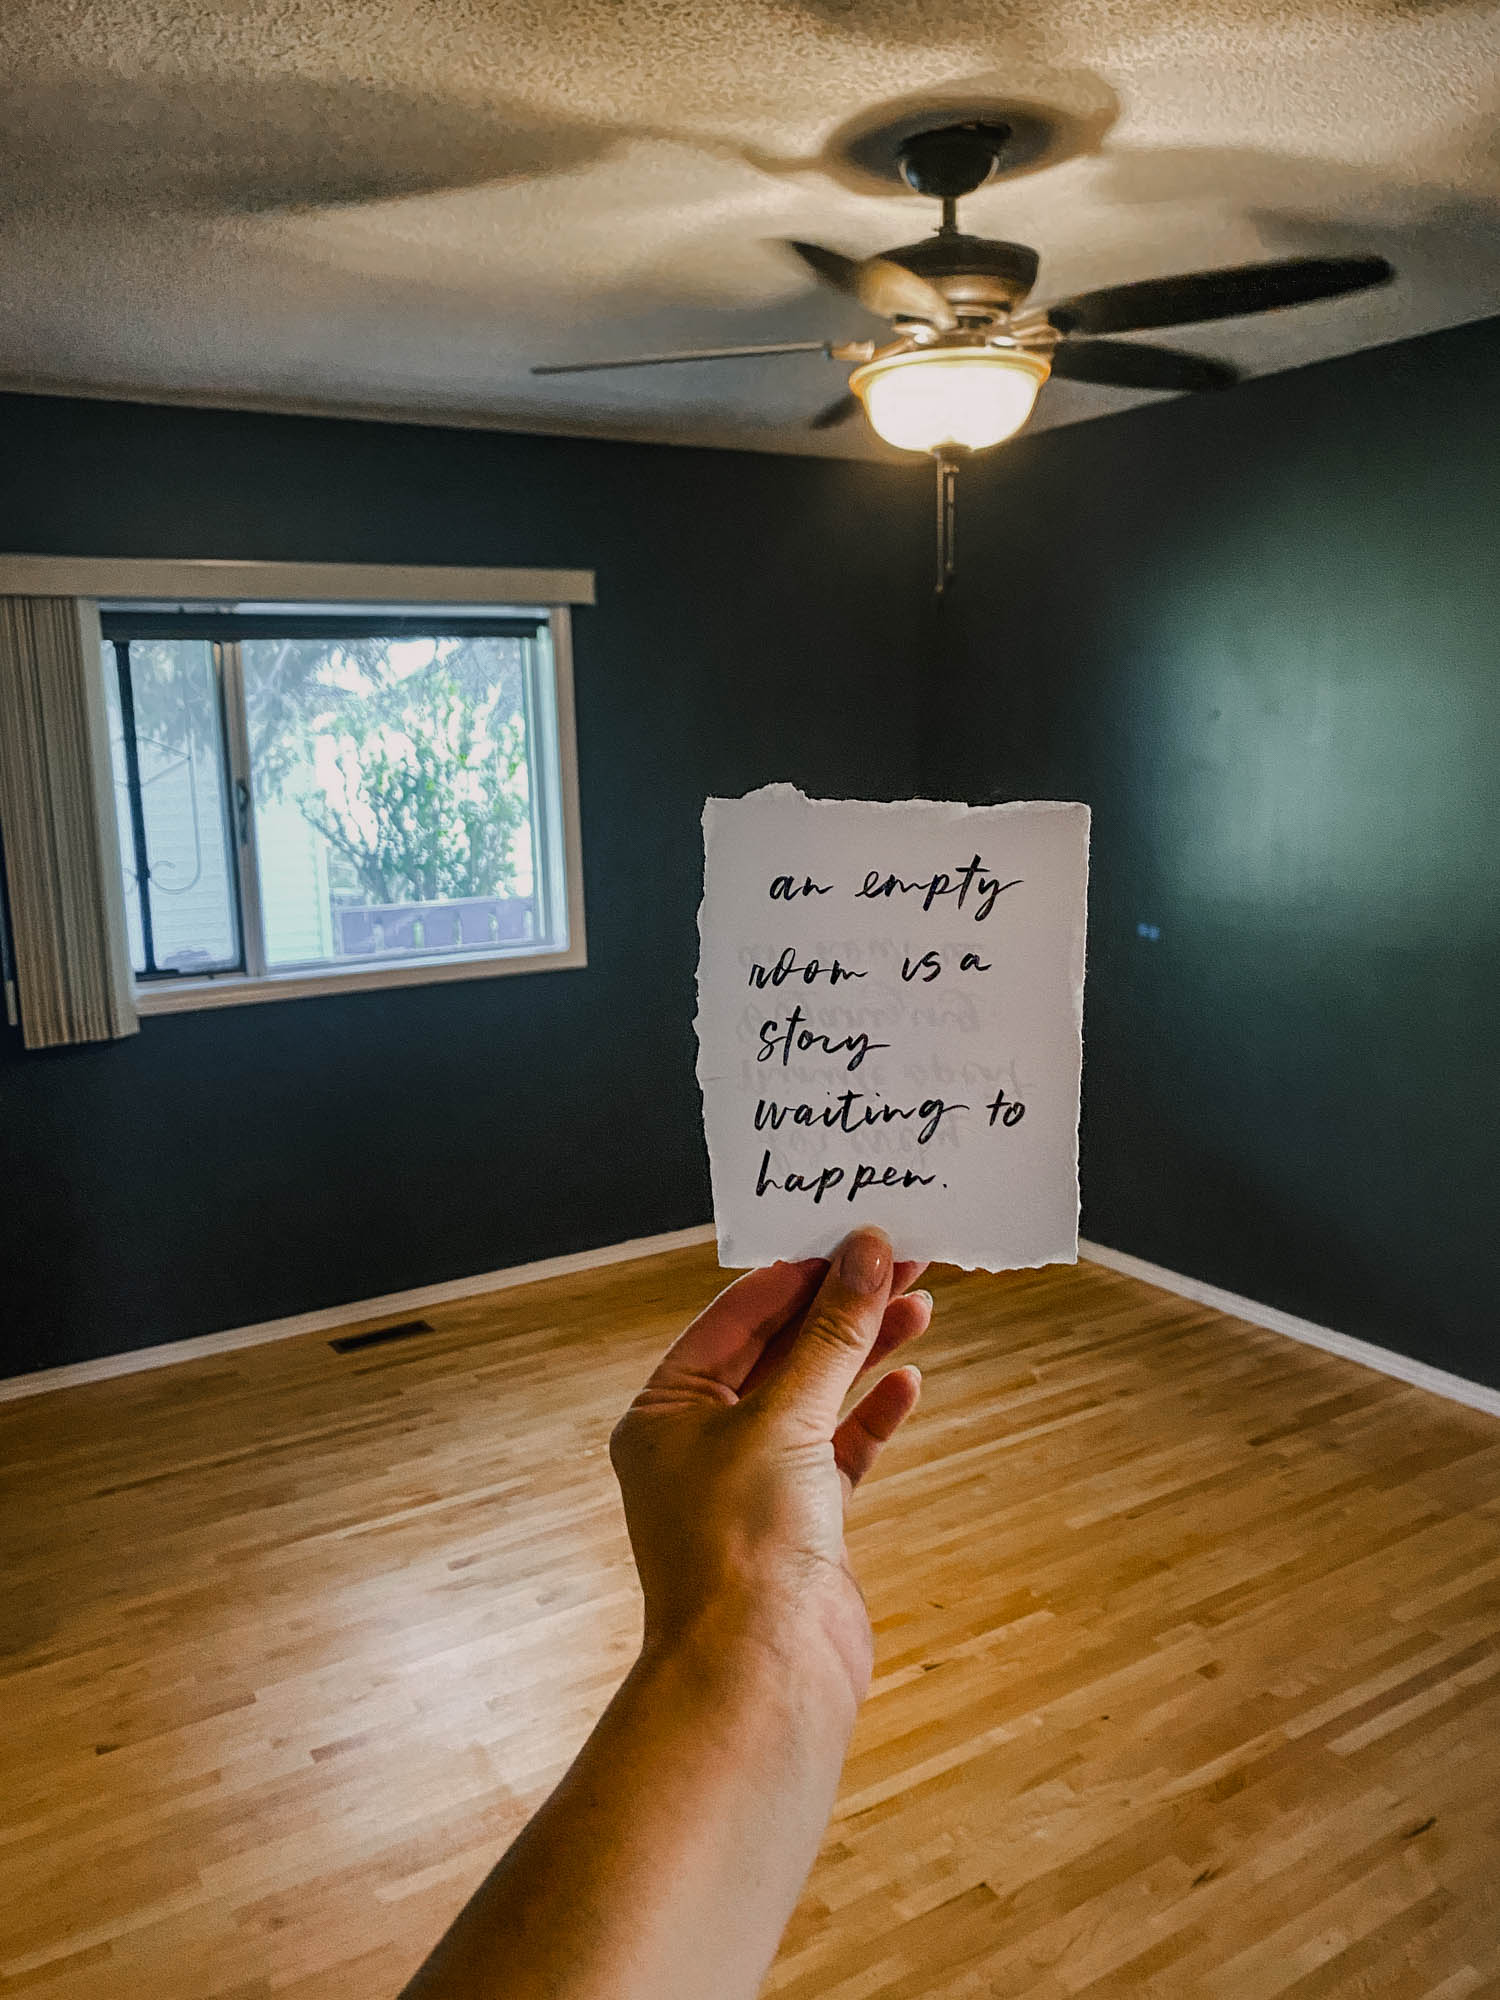
Before we get into the details and how we made it happen… let’s look back at the before!
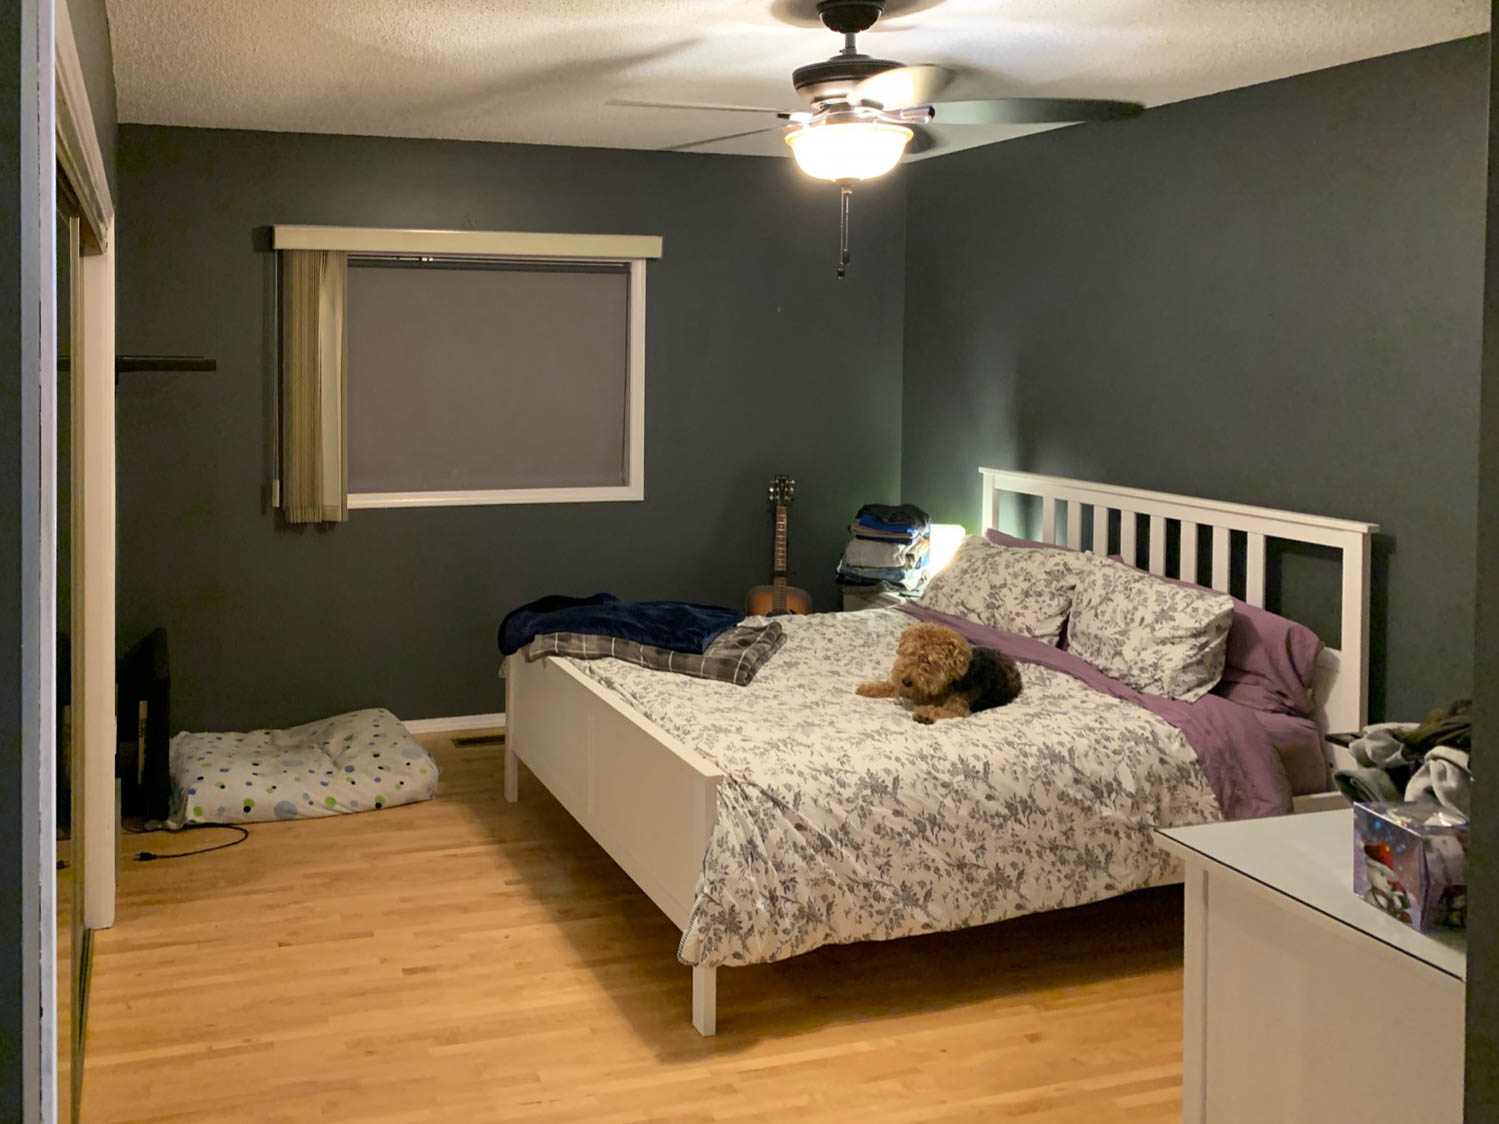
My sister recently bought her first home and it has so much character. But the primary bedroom is an addition that has… well, none of it. With this makeover we wanted to make the space totally functional for her but add some of that character back in without hurting the budget. This called for a lot of DIY picture frame moulding and even more paint!
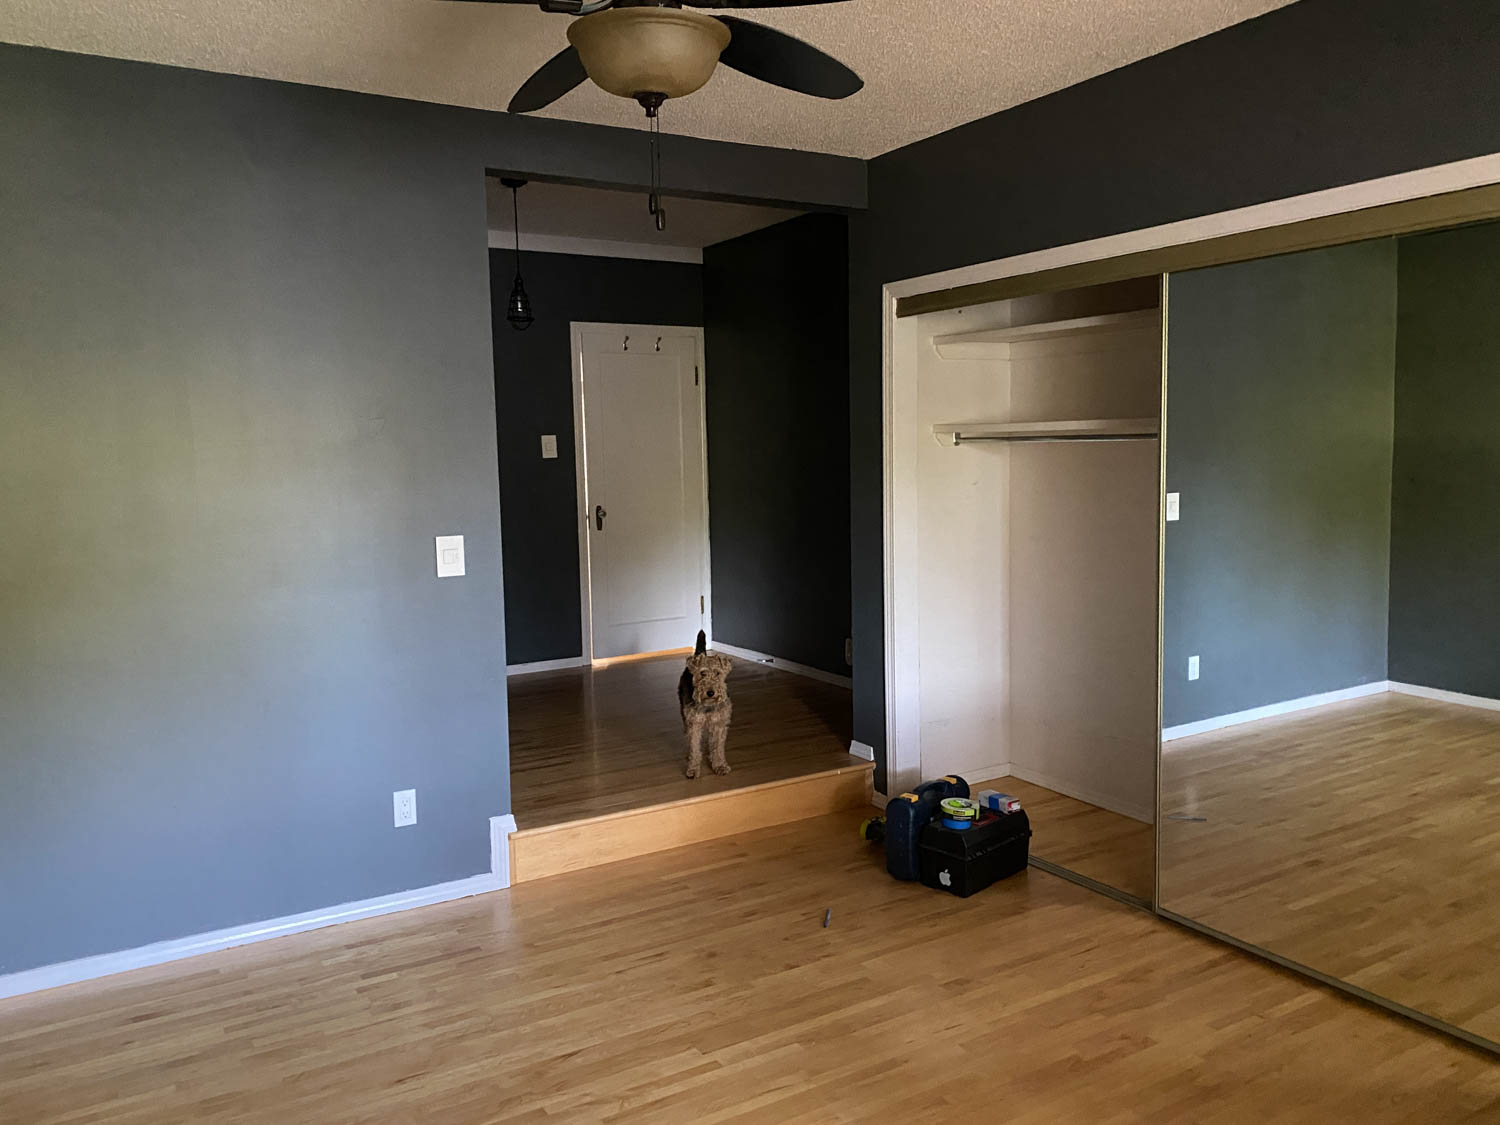
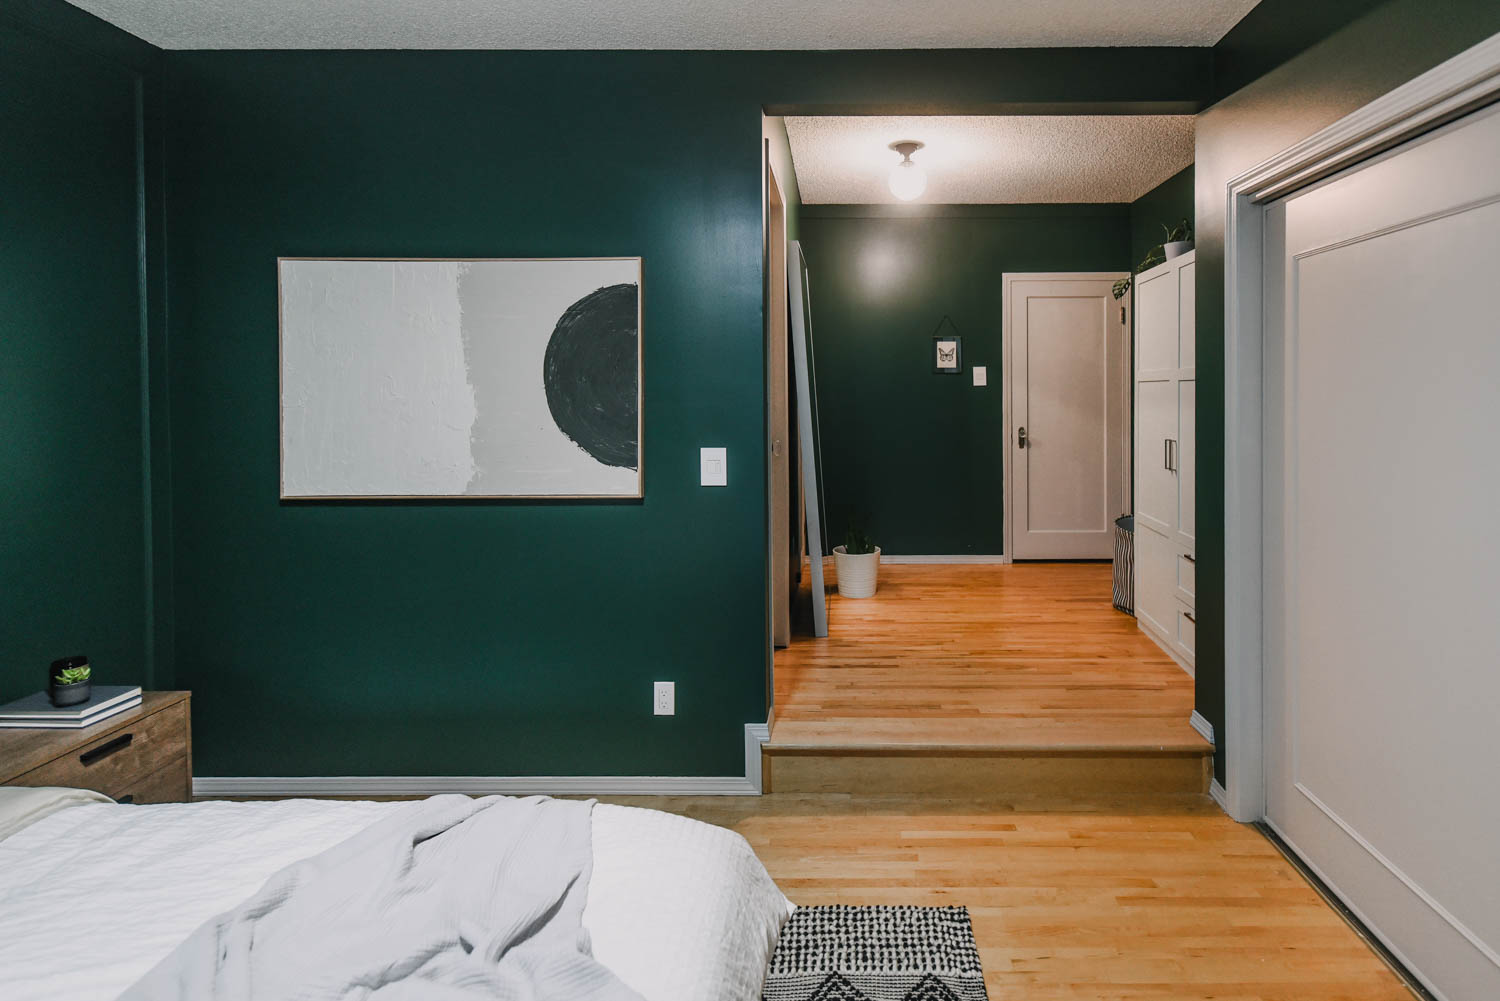
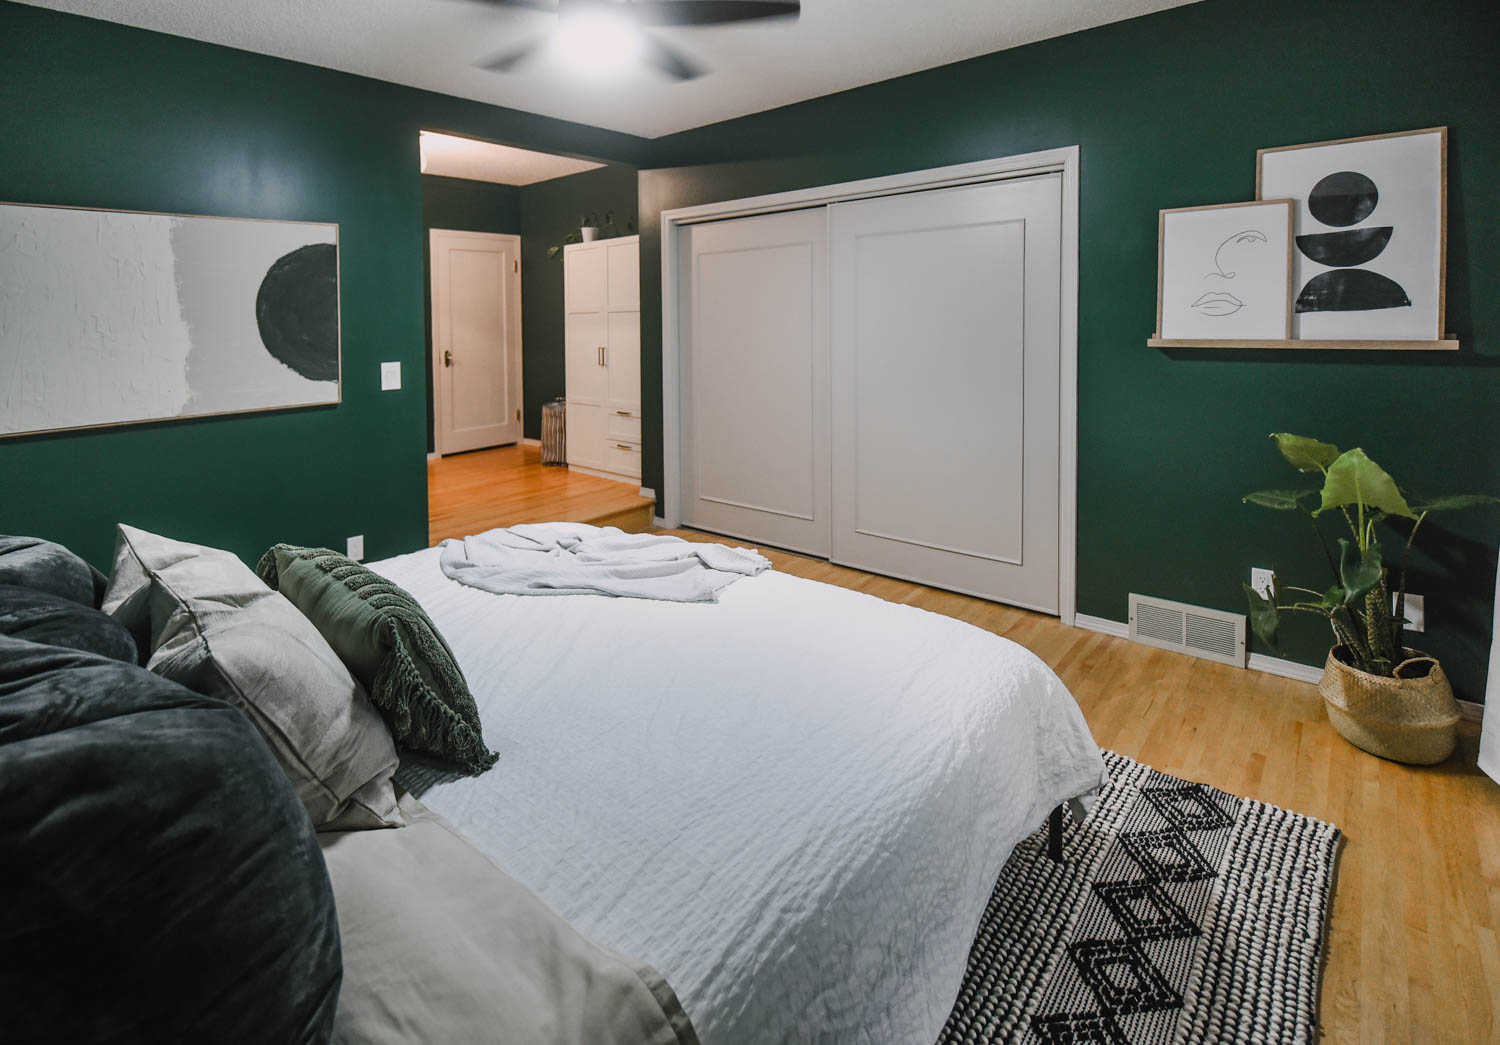
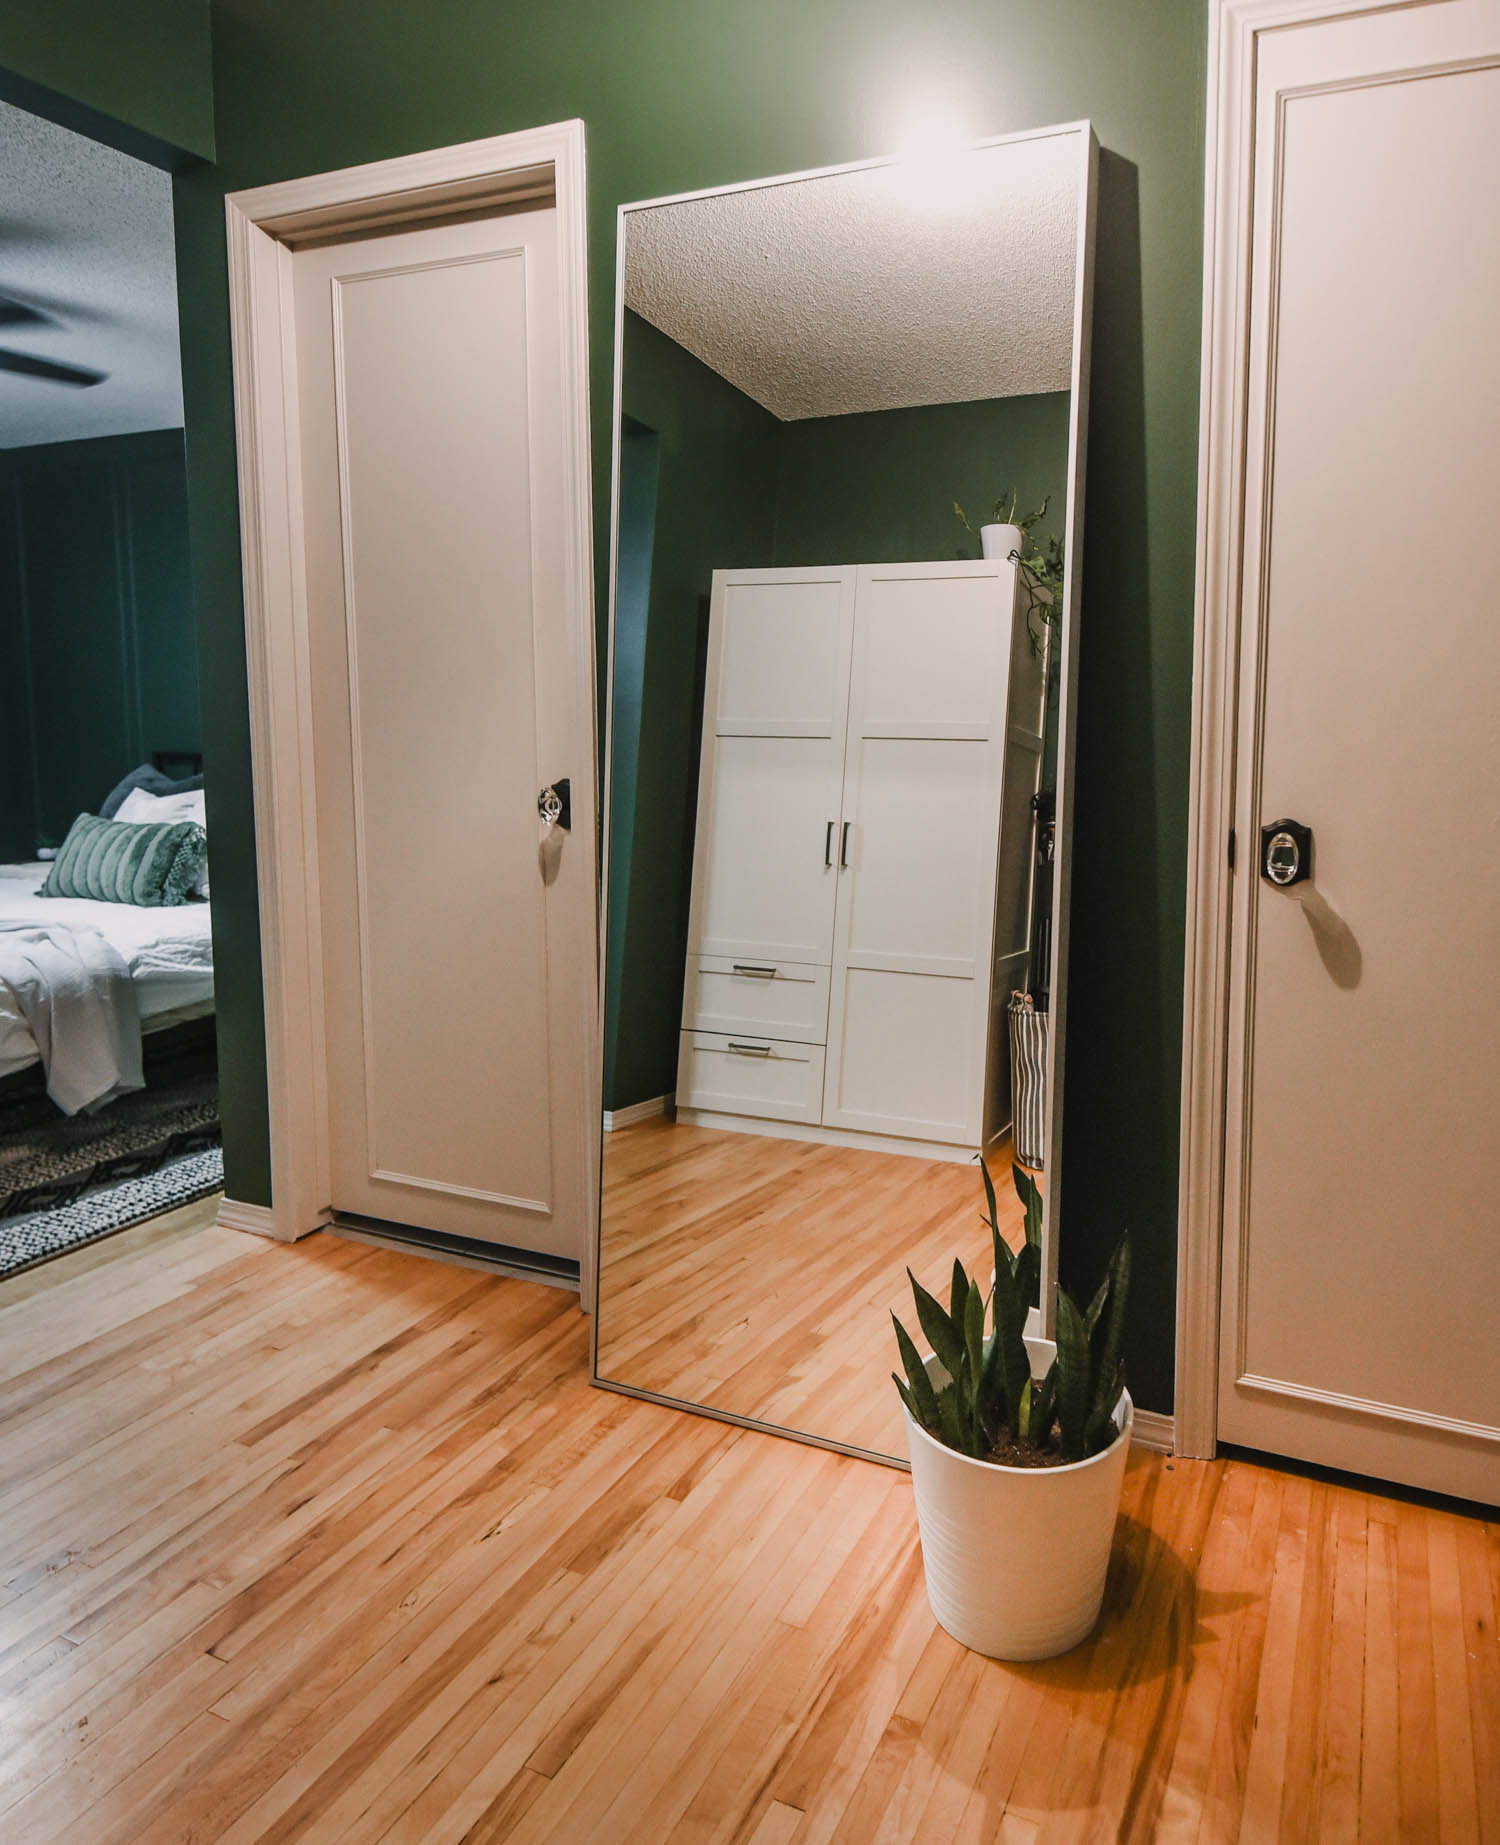
The room is actually pretty large- photos always make things look bigger, but in this case… they’re not lying. Since it’s an addition, there’s a step down from the old part of the house to the new and that makes a small entryway to the bedroom. I really don’t know what else to call it and it wasn’t being used for much before.
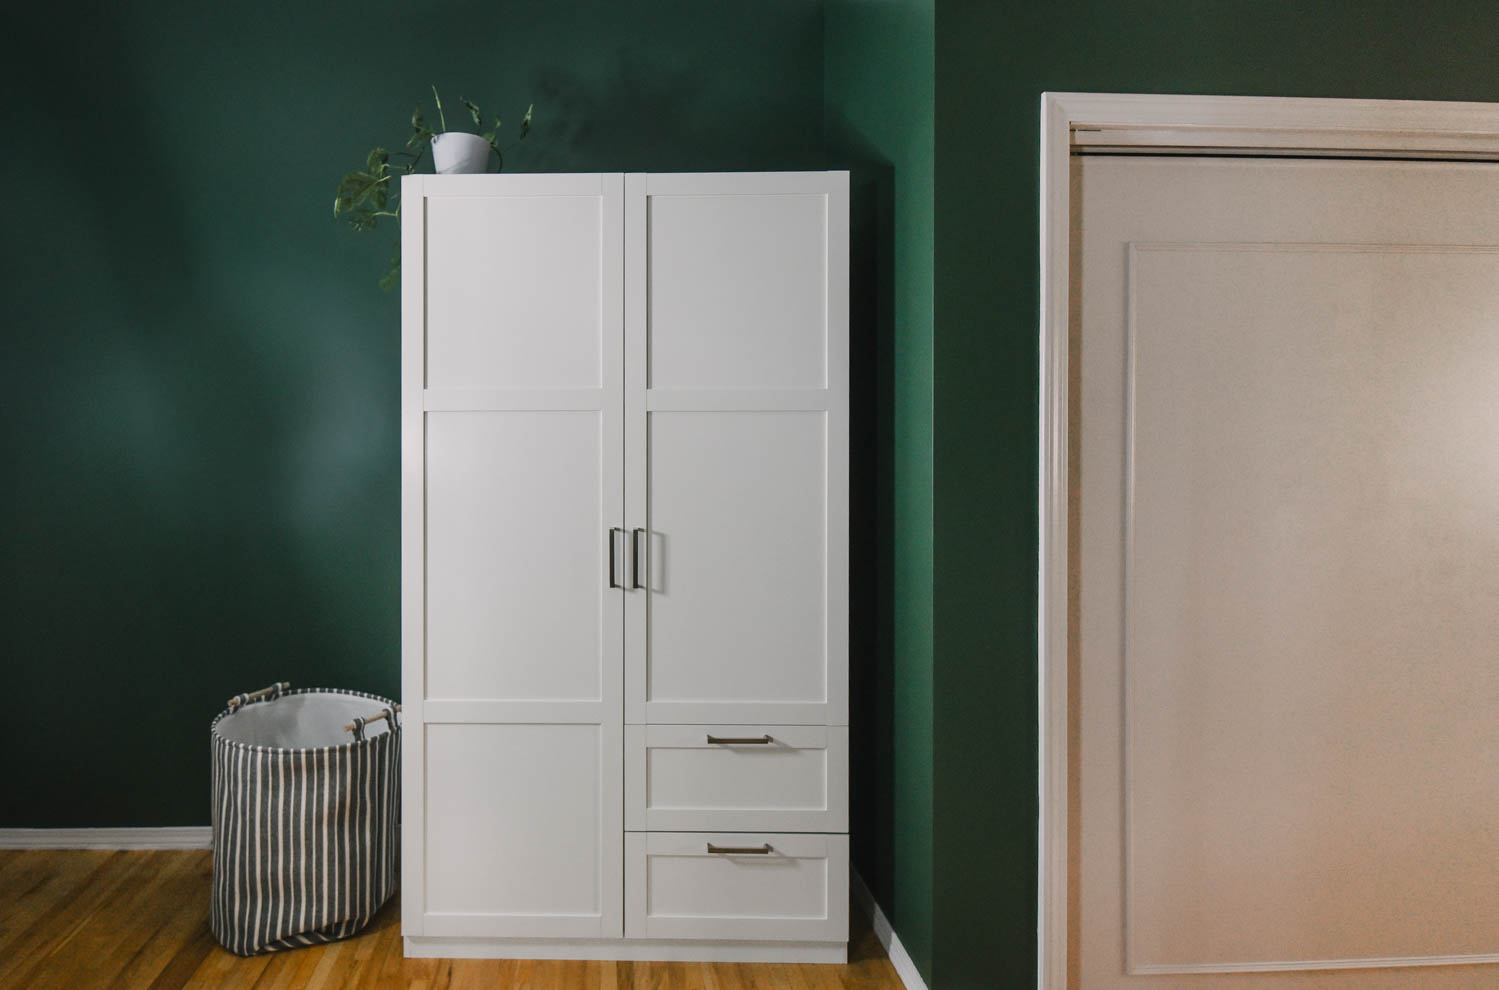
While I didn’t take many photos of this part, it also called for a great closet organization system. For something that didn’t even get a part of this blog post, it took a ton of our time and budget. With the goal of doing away with a dresser in the space to help it feel bigger and more calming (less surfaces to pile things on!), we installed closet organizers and found a wardrobe for the small entry space of the room.
Beyond addressing storage… the biggest change in this room is of course all the moulding and paint! Let’s chat about that.
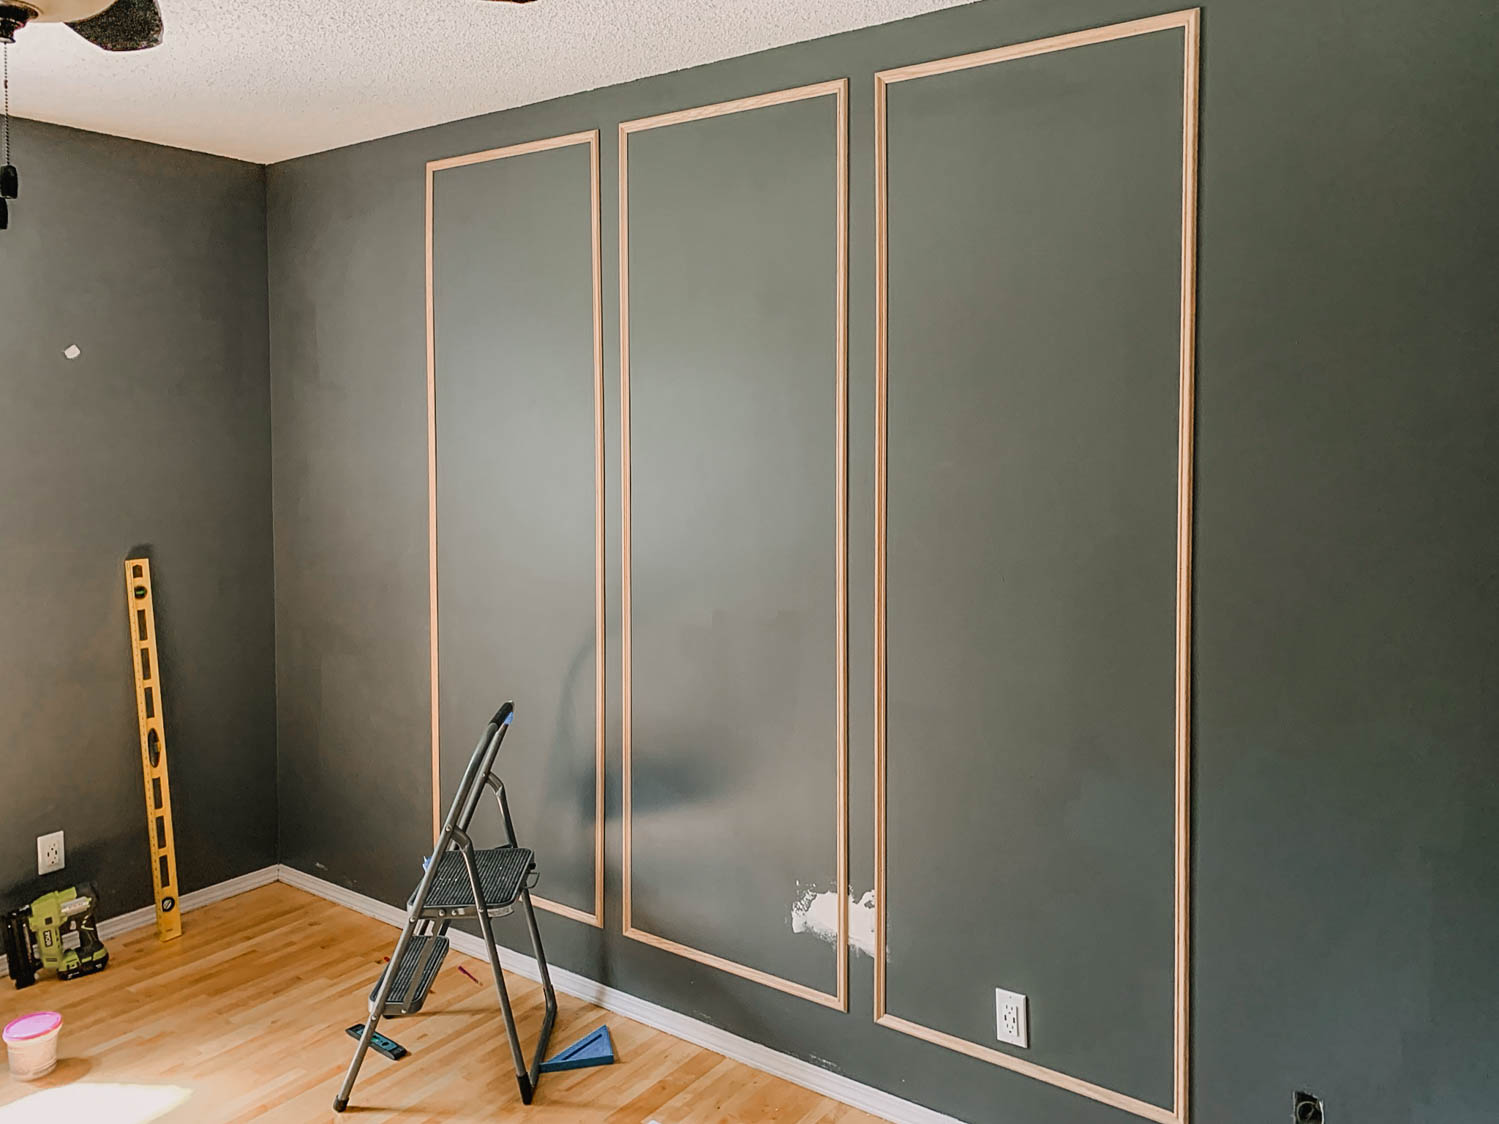
I love moulding walls in bedrooms. We have one in our current bedroom, one in our last house primary bedroom, and one in our boys bedroom. I also put one in the nursery I helped makeover earlier this year. They’re such a fun way to add character to a room without adding visual clutter.
I’m not going to go into the making of the moulding wall too much as we pretty much followed the tutorial that I wrote for my own bedroom moulding wall! You can see that right here, it goes into how to work out the math and the tools we used. The main differences here are that we chose a detailed moulding instead of the more affordable flat door stop that I used in my own home. This really matches the age of the home and helps bring some of the character the rest of the house has into this addition. Since it’s wood, we also primed the moulding to seal it before painting the whole room.
I’m pretty proud that I took on this moulding wall solo. I typically leave math heavy projects for Shane as he’s much more naturally gifted at that.
See the DIY Moulding Wall Tutorial Here

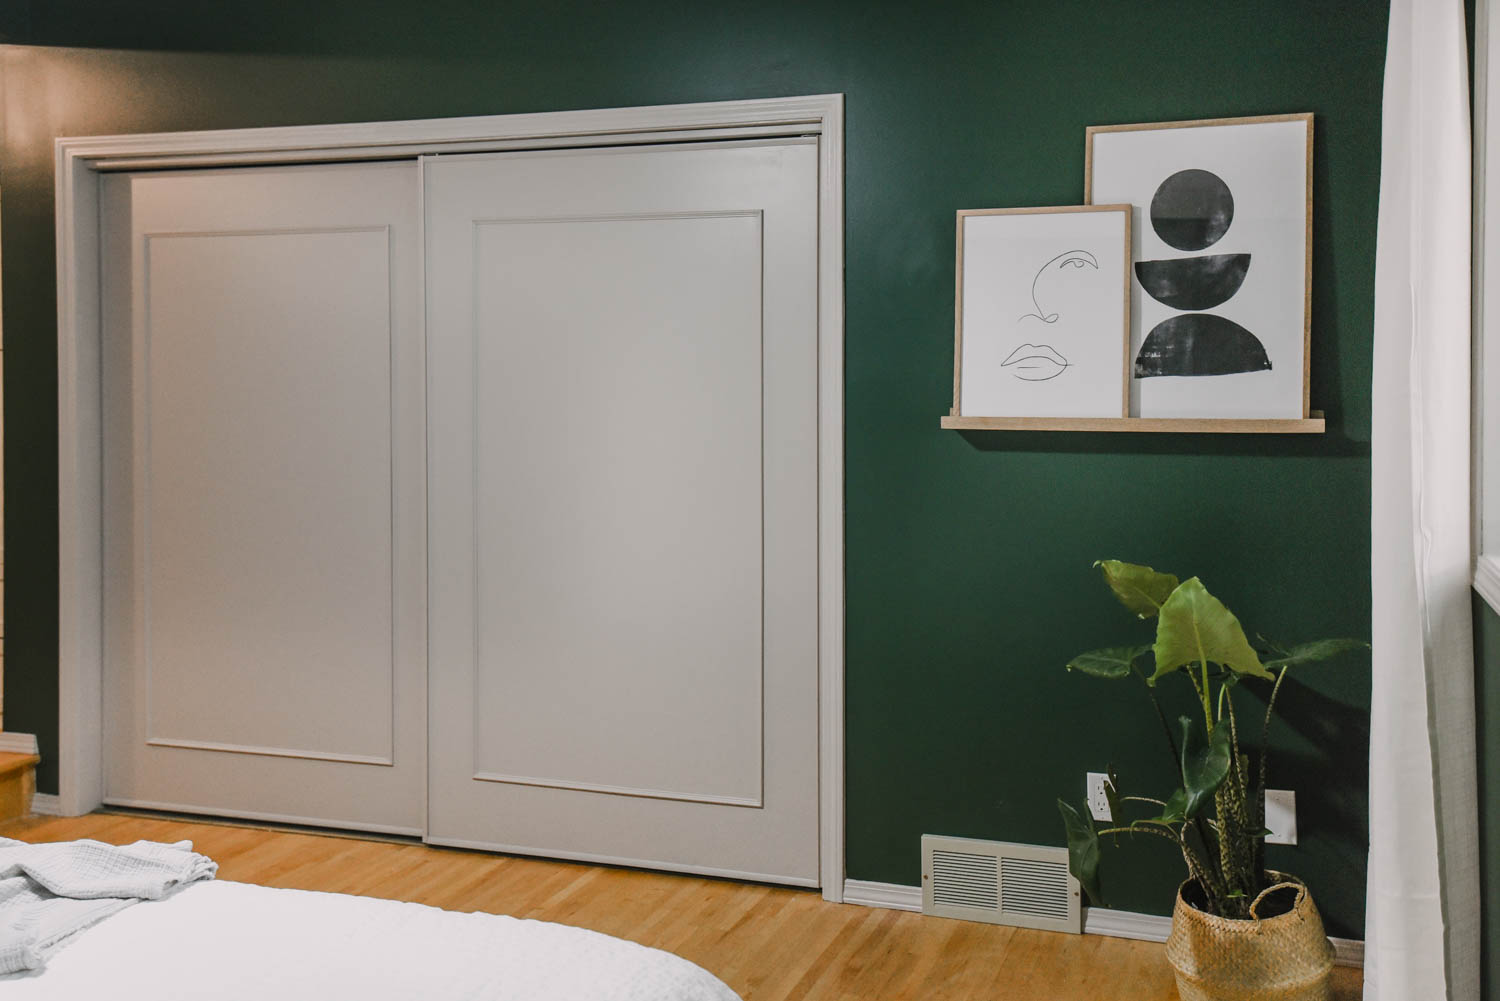
We did a similar treatment to the doors to add some character into them as well. I’ll share more about that once I get a blog post written and update with the link here! We swapped out the door knobs to be more consistent with the glass knobs the rest of the house features.
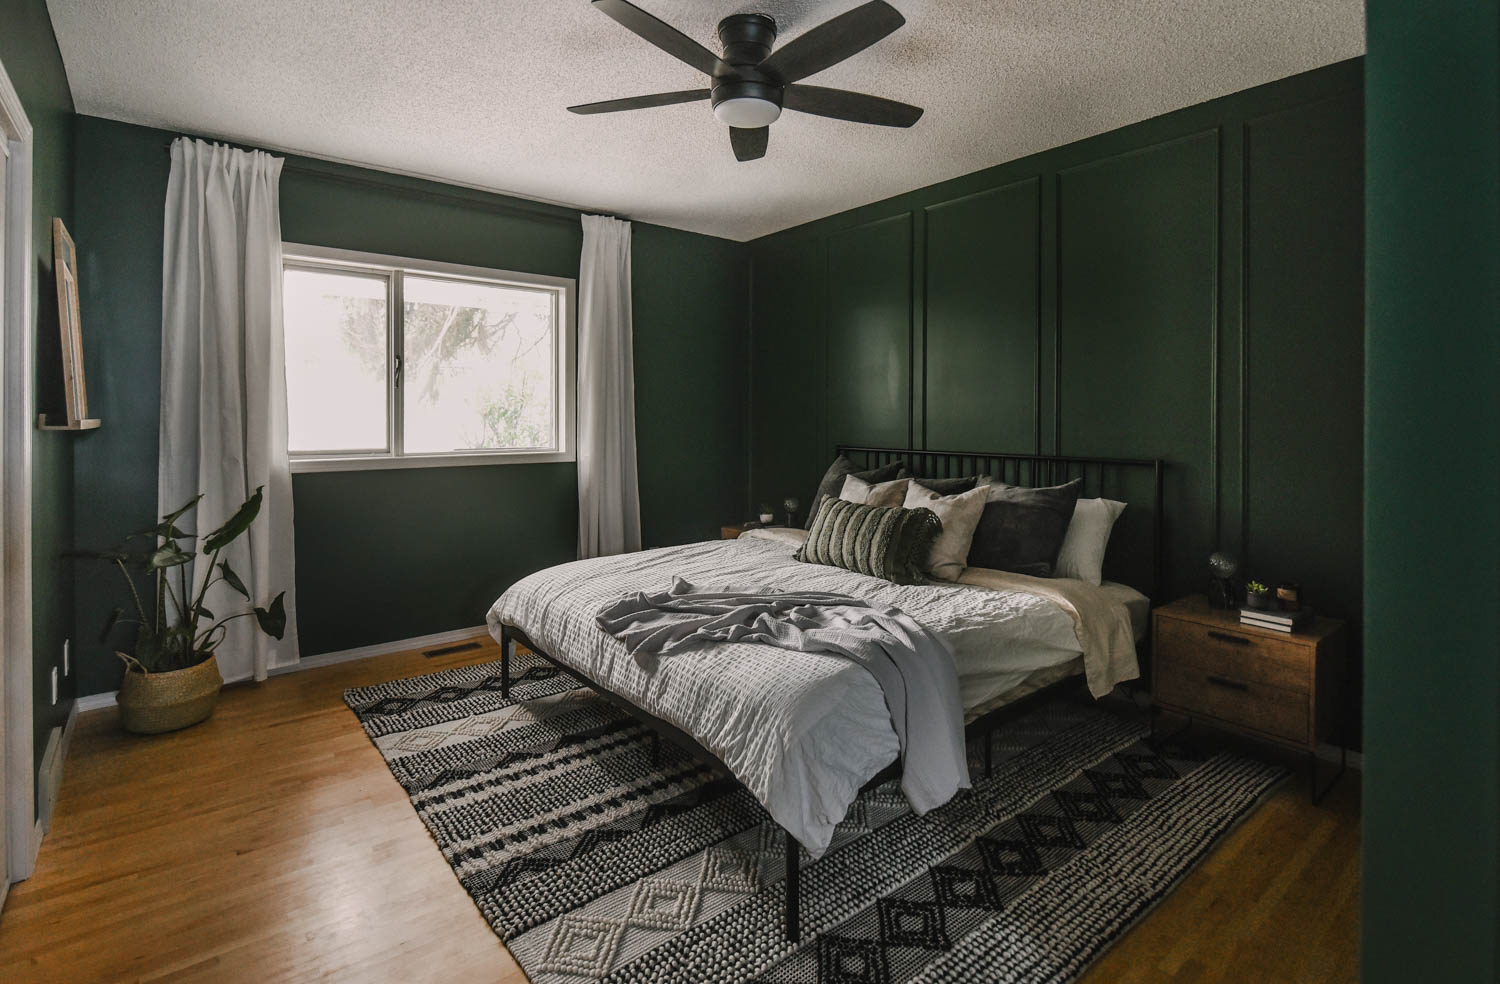
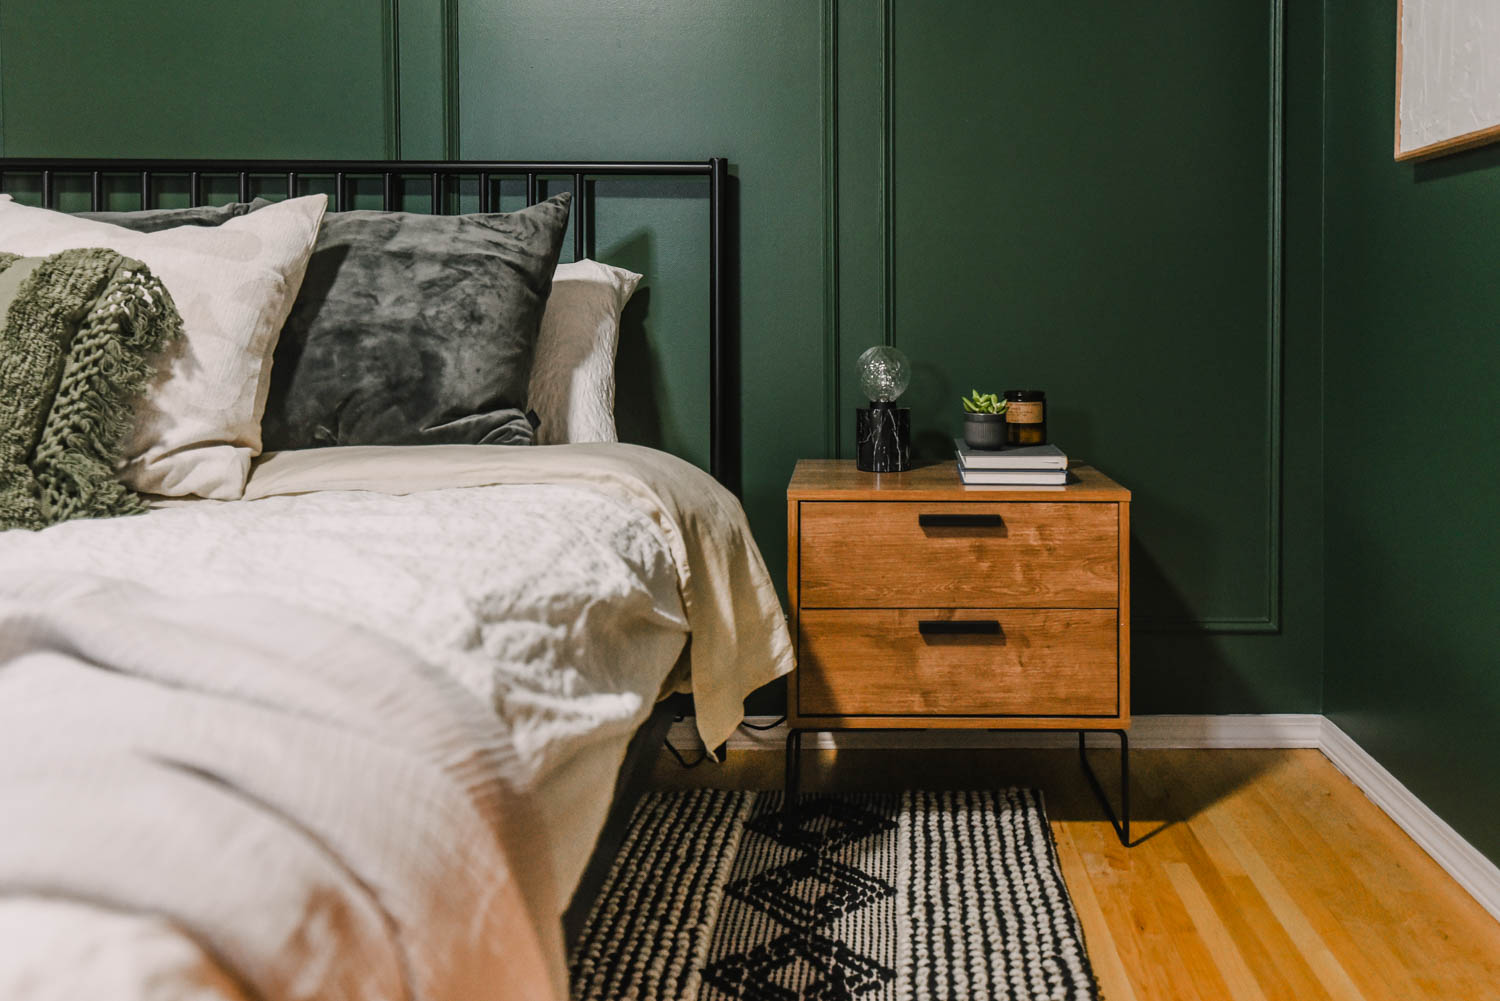
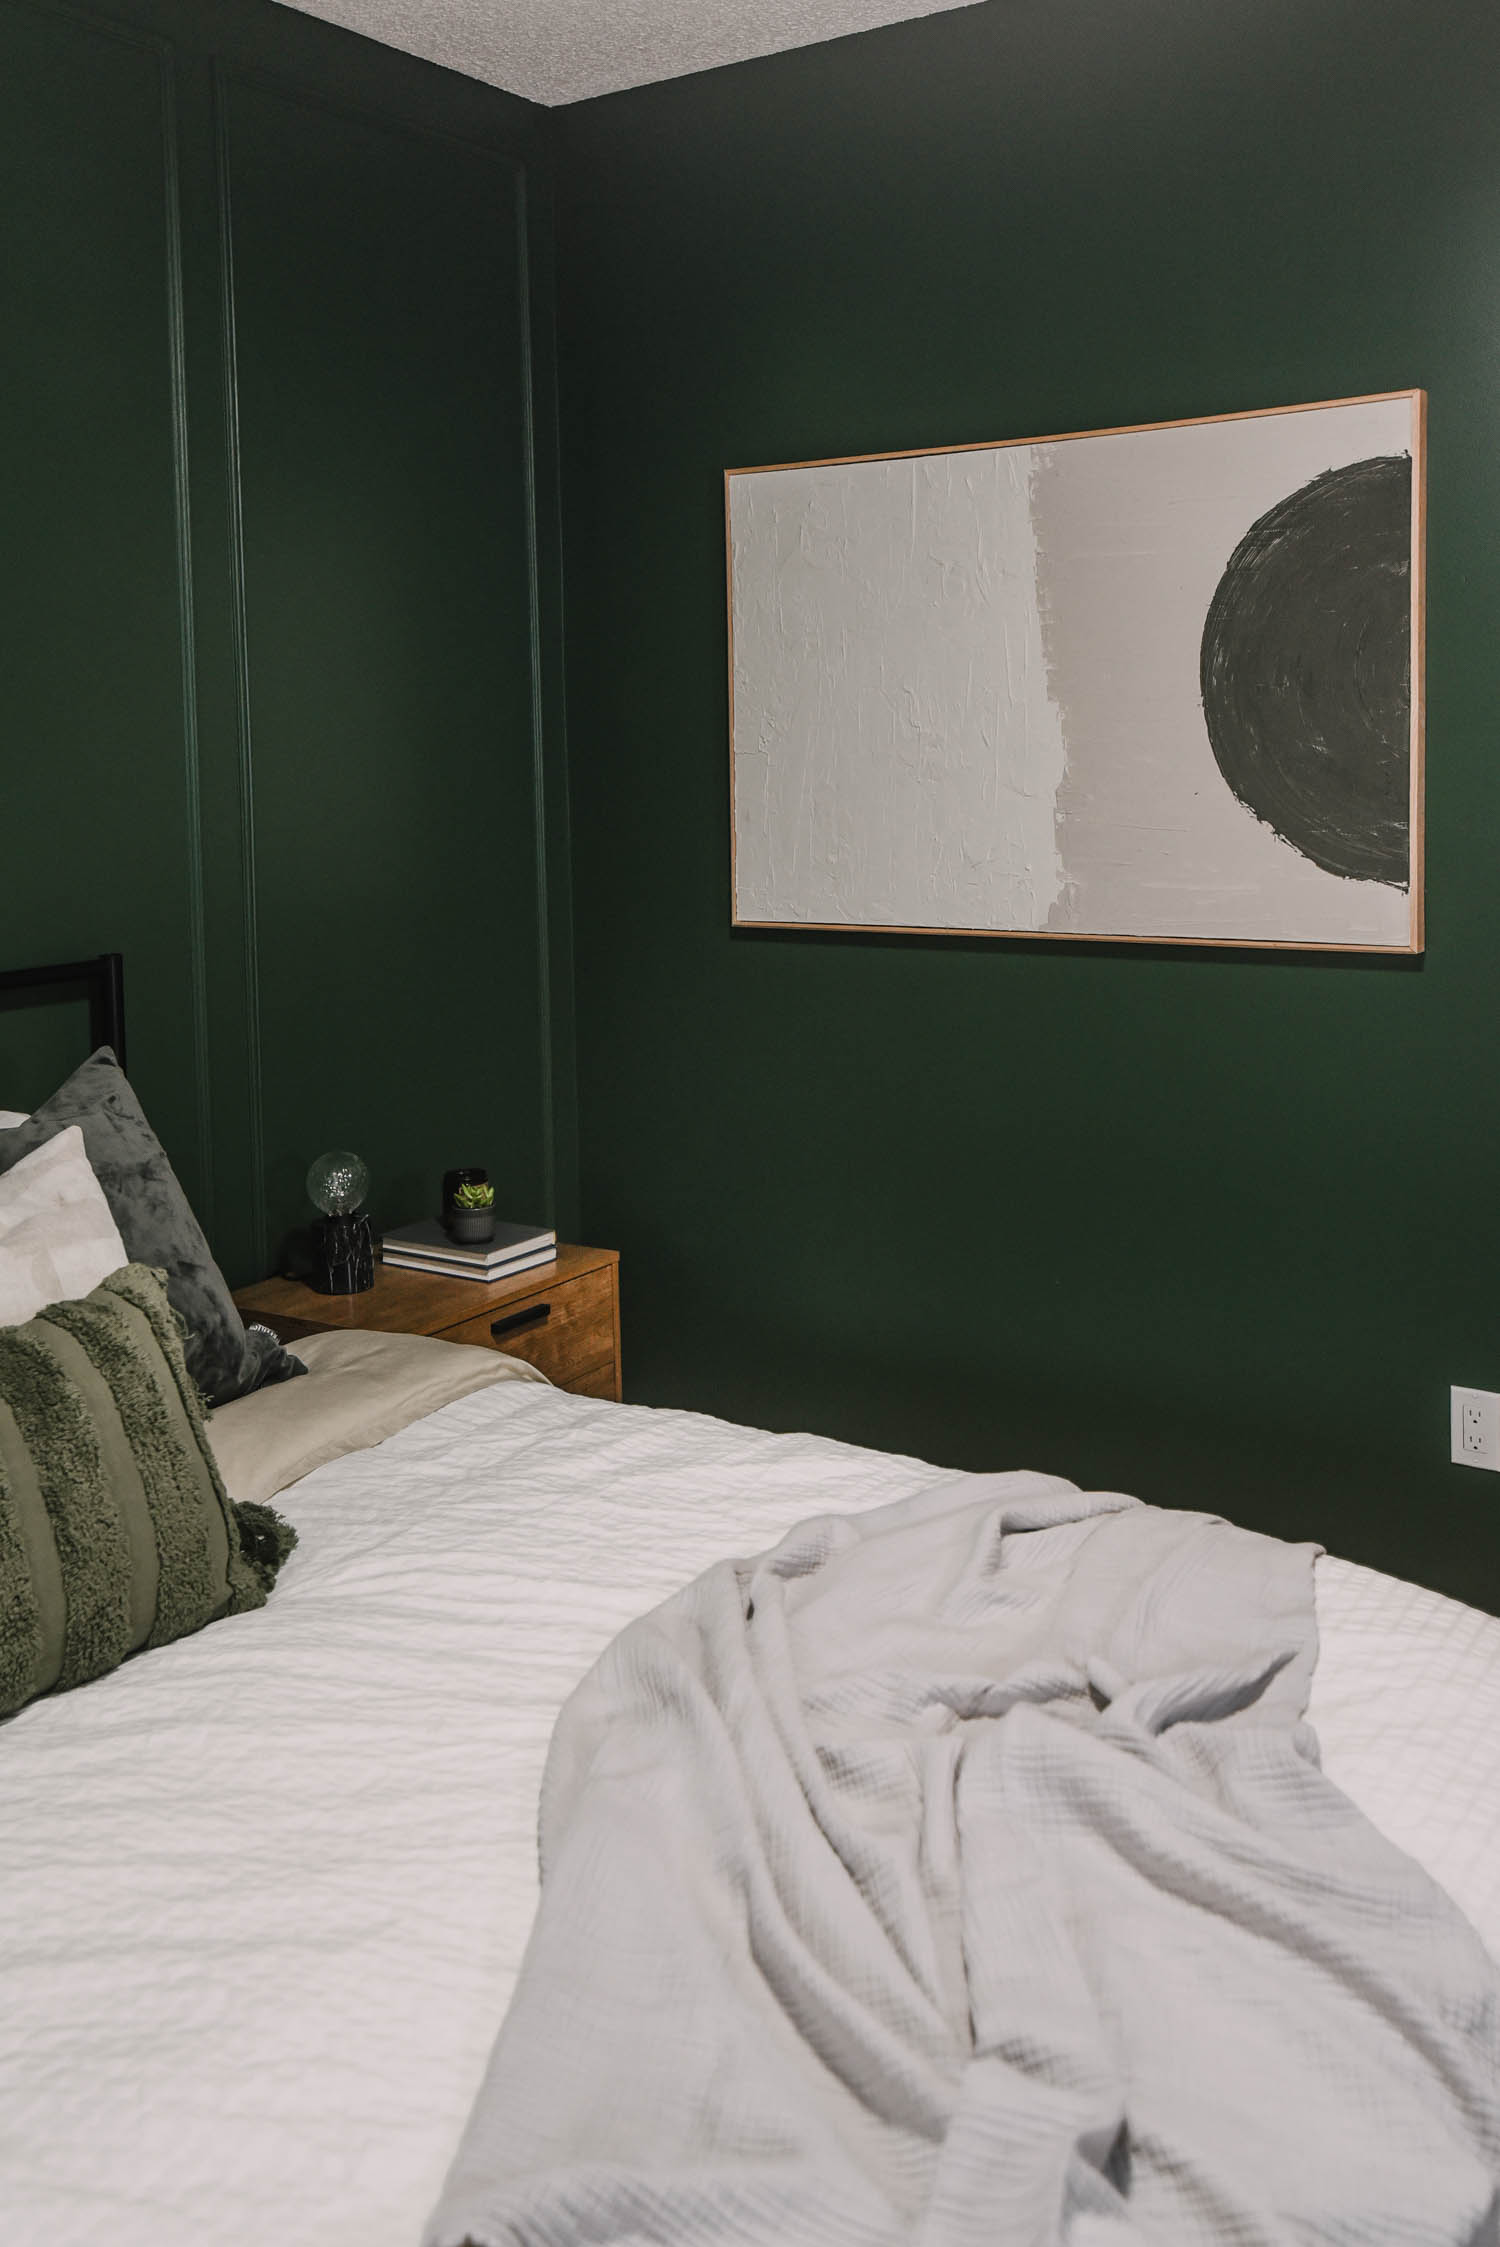
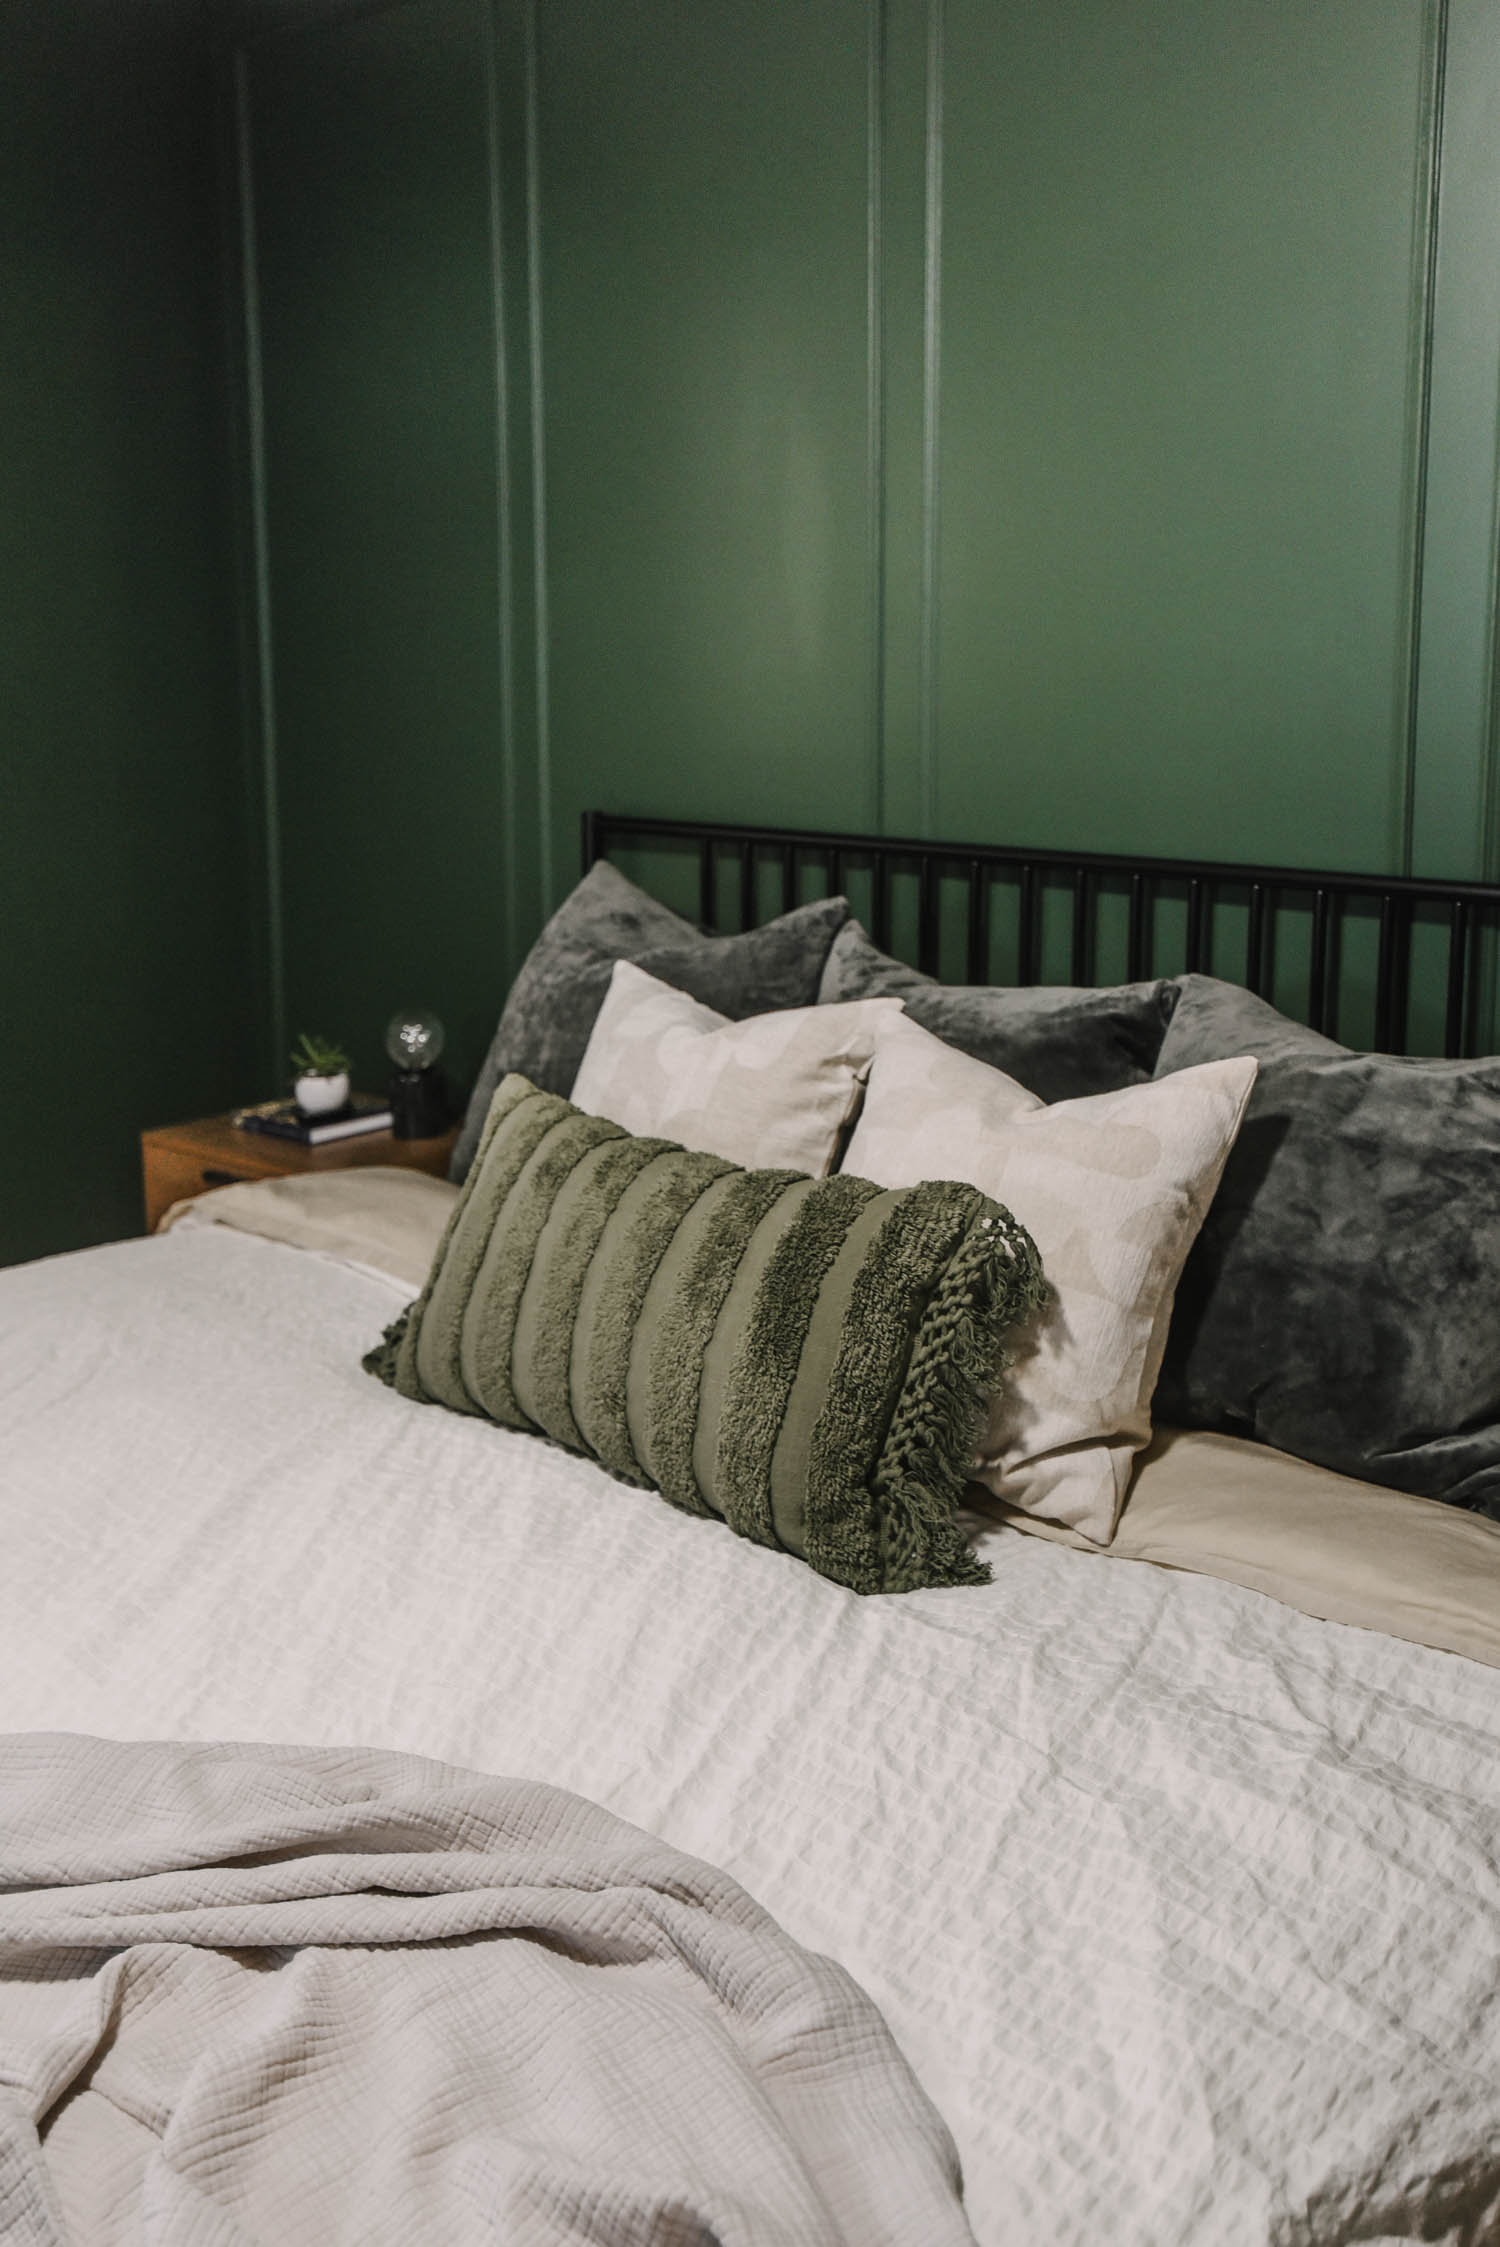
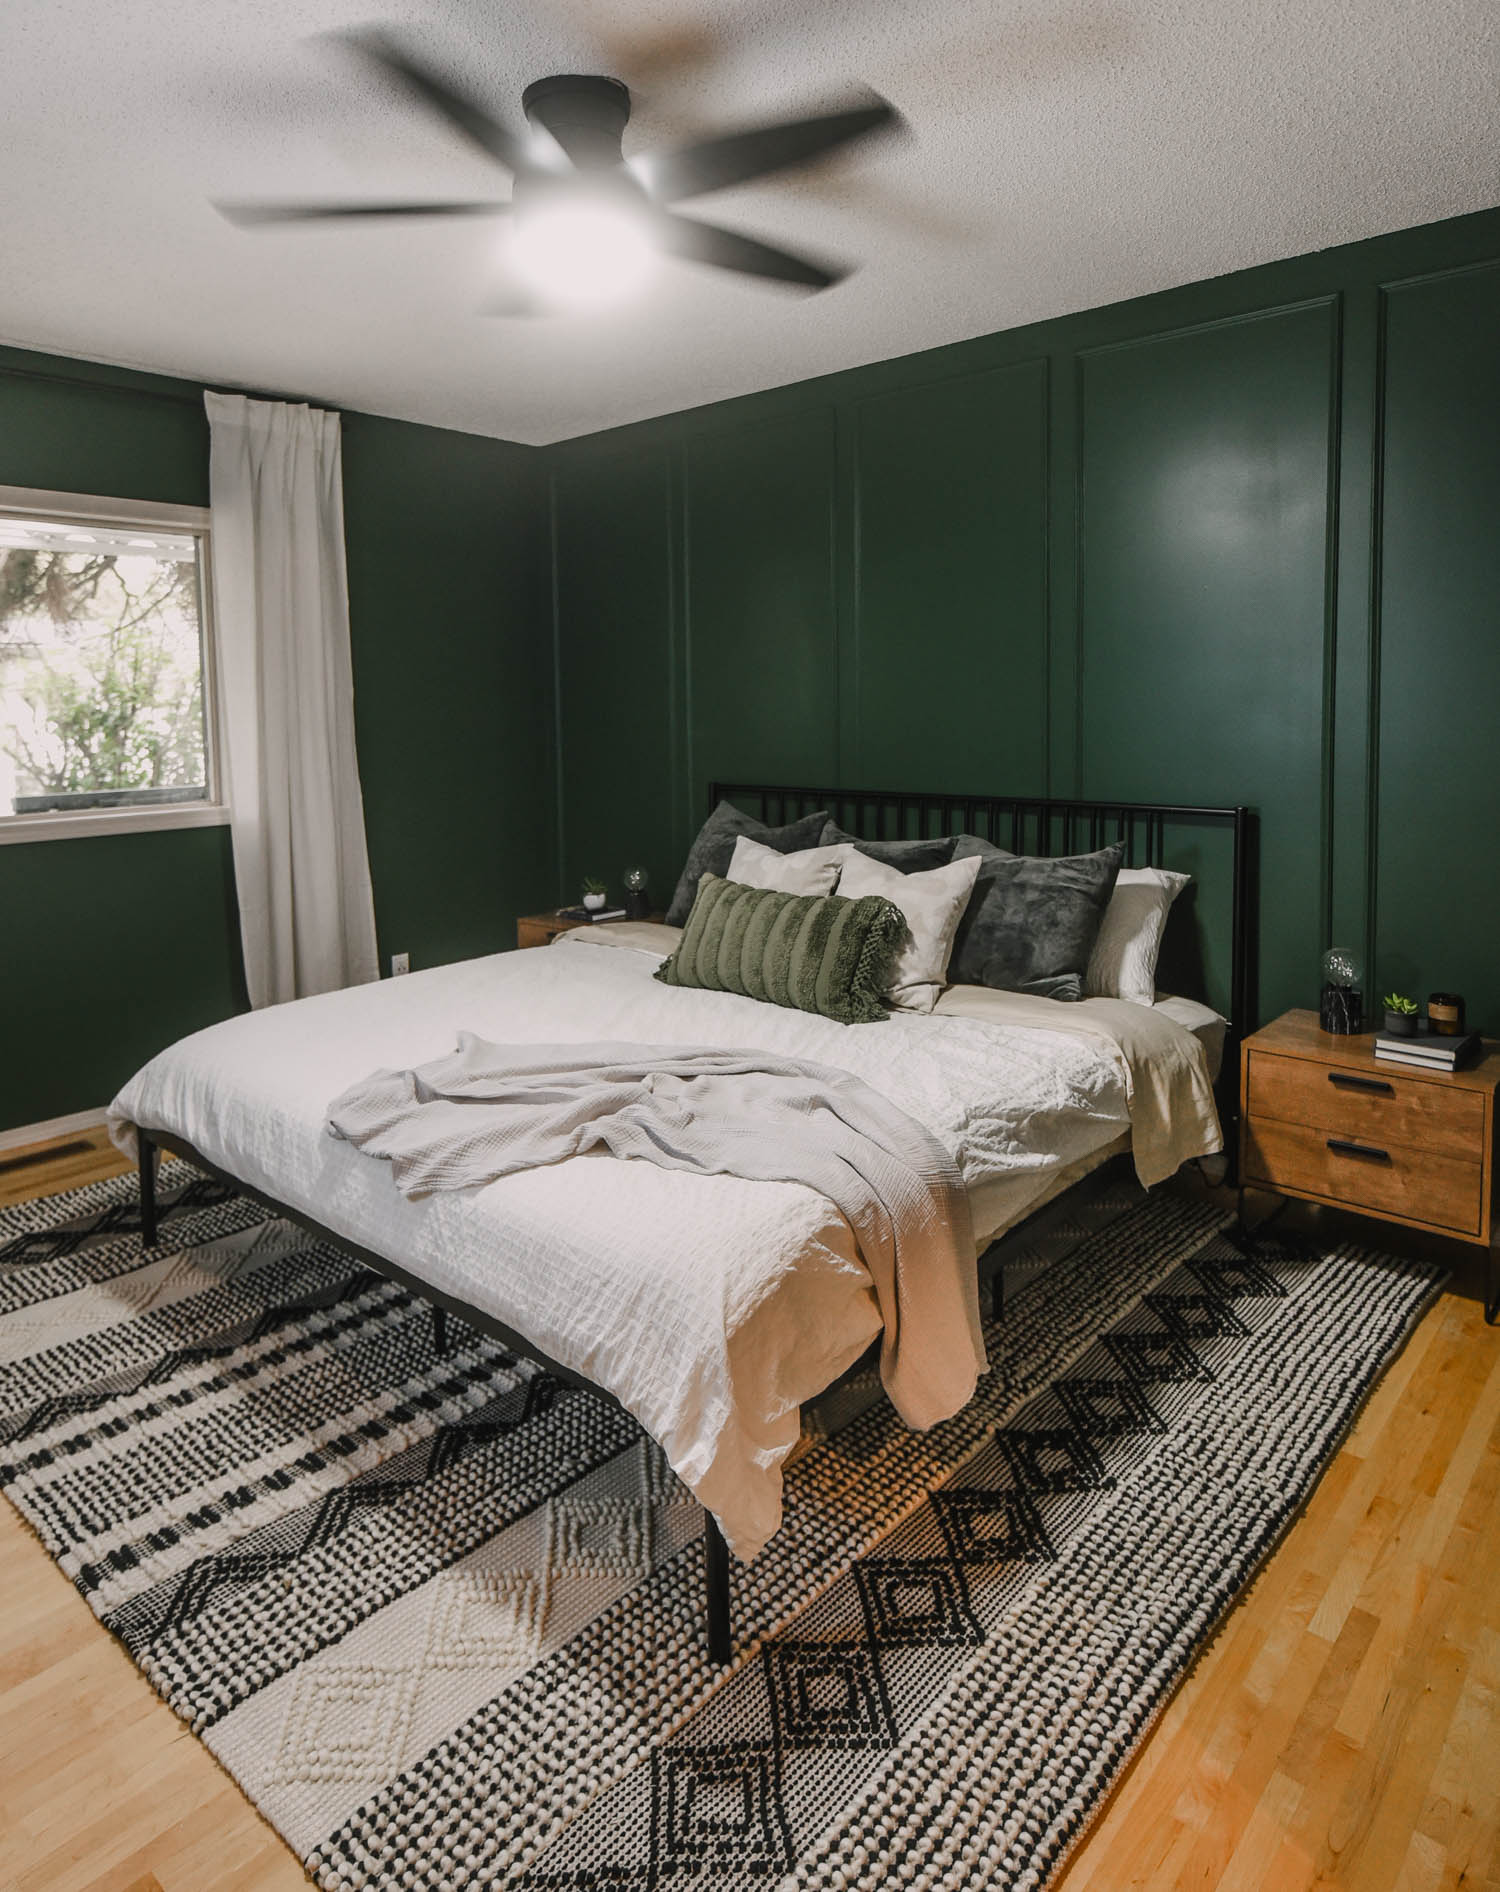
I say it all the time, but paint is always the power player when it comes to changing up a space. The room feels way more cozy and fresh now that it’s a beautiful deep green. It’s called Vine Leaf from Behr.
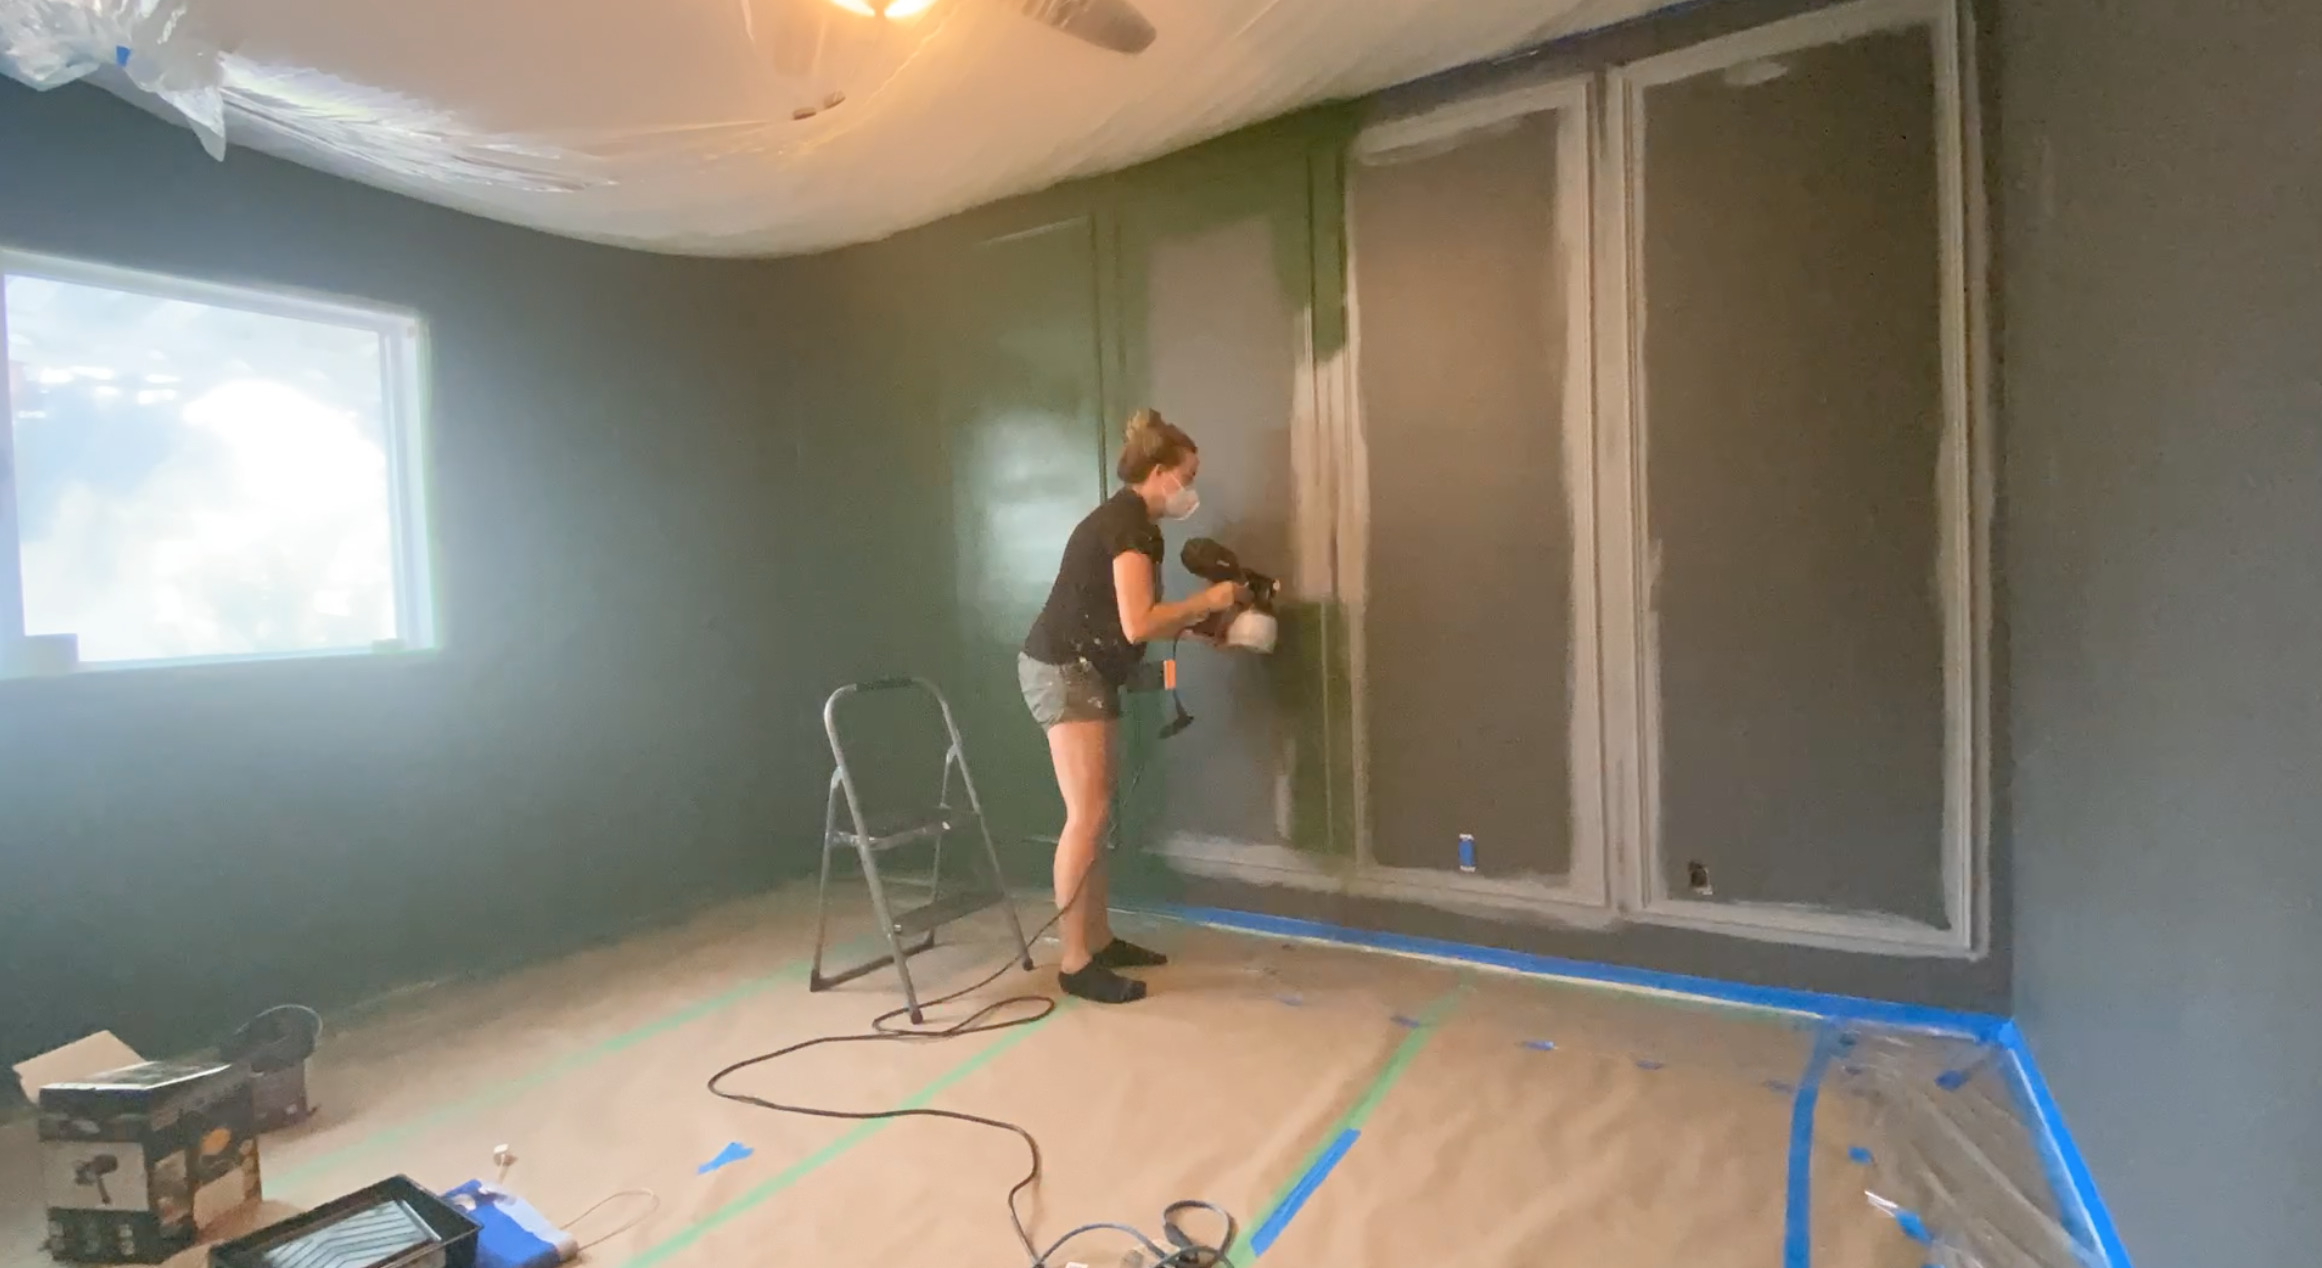
The other thing I say all the time? Painting this space with a paint sprayer saved us SO much time and made the finish on that moulding wall totally flawless.
For this project, I used the Wagner FLEXiO 2500. It’s an affordable hand held paint sprayer that powered through both this project and this deck project in the same day. It gave such a beautiful spray pattern and with simple settings, it was easy to operate and get a smooth finish.
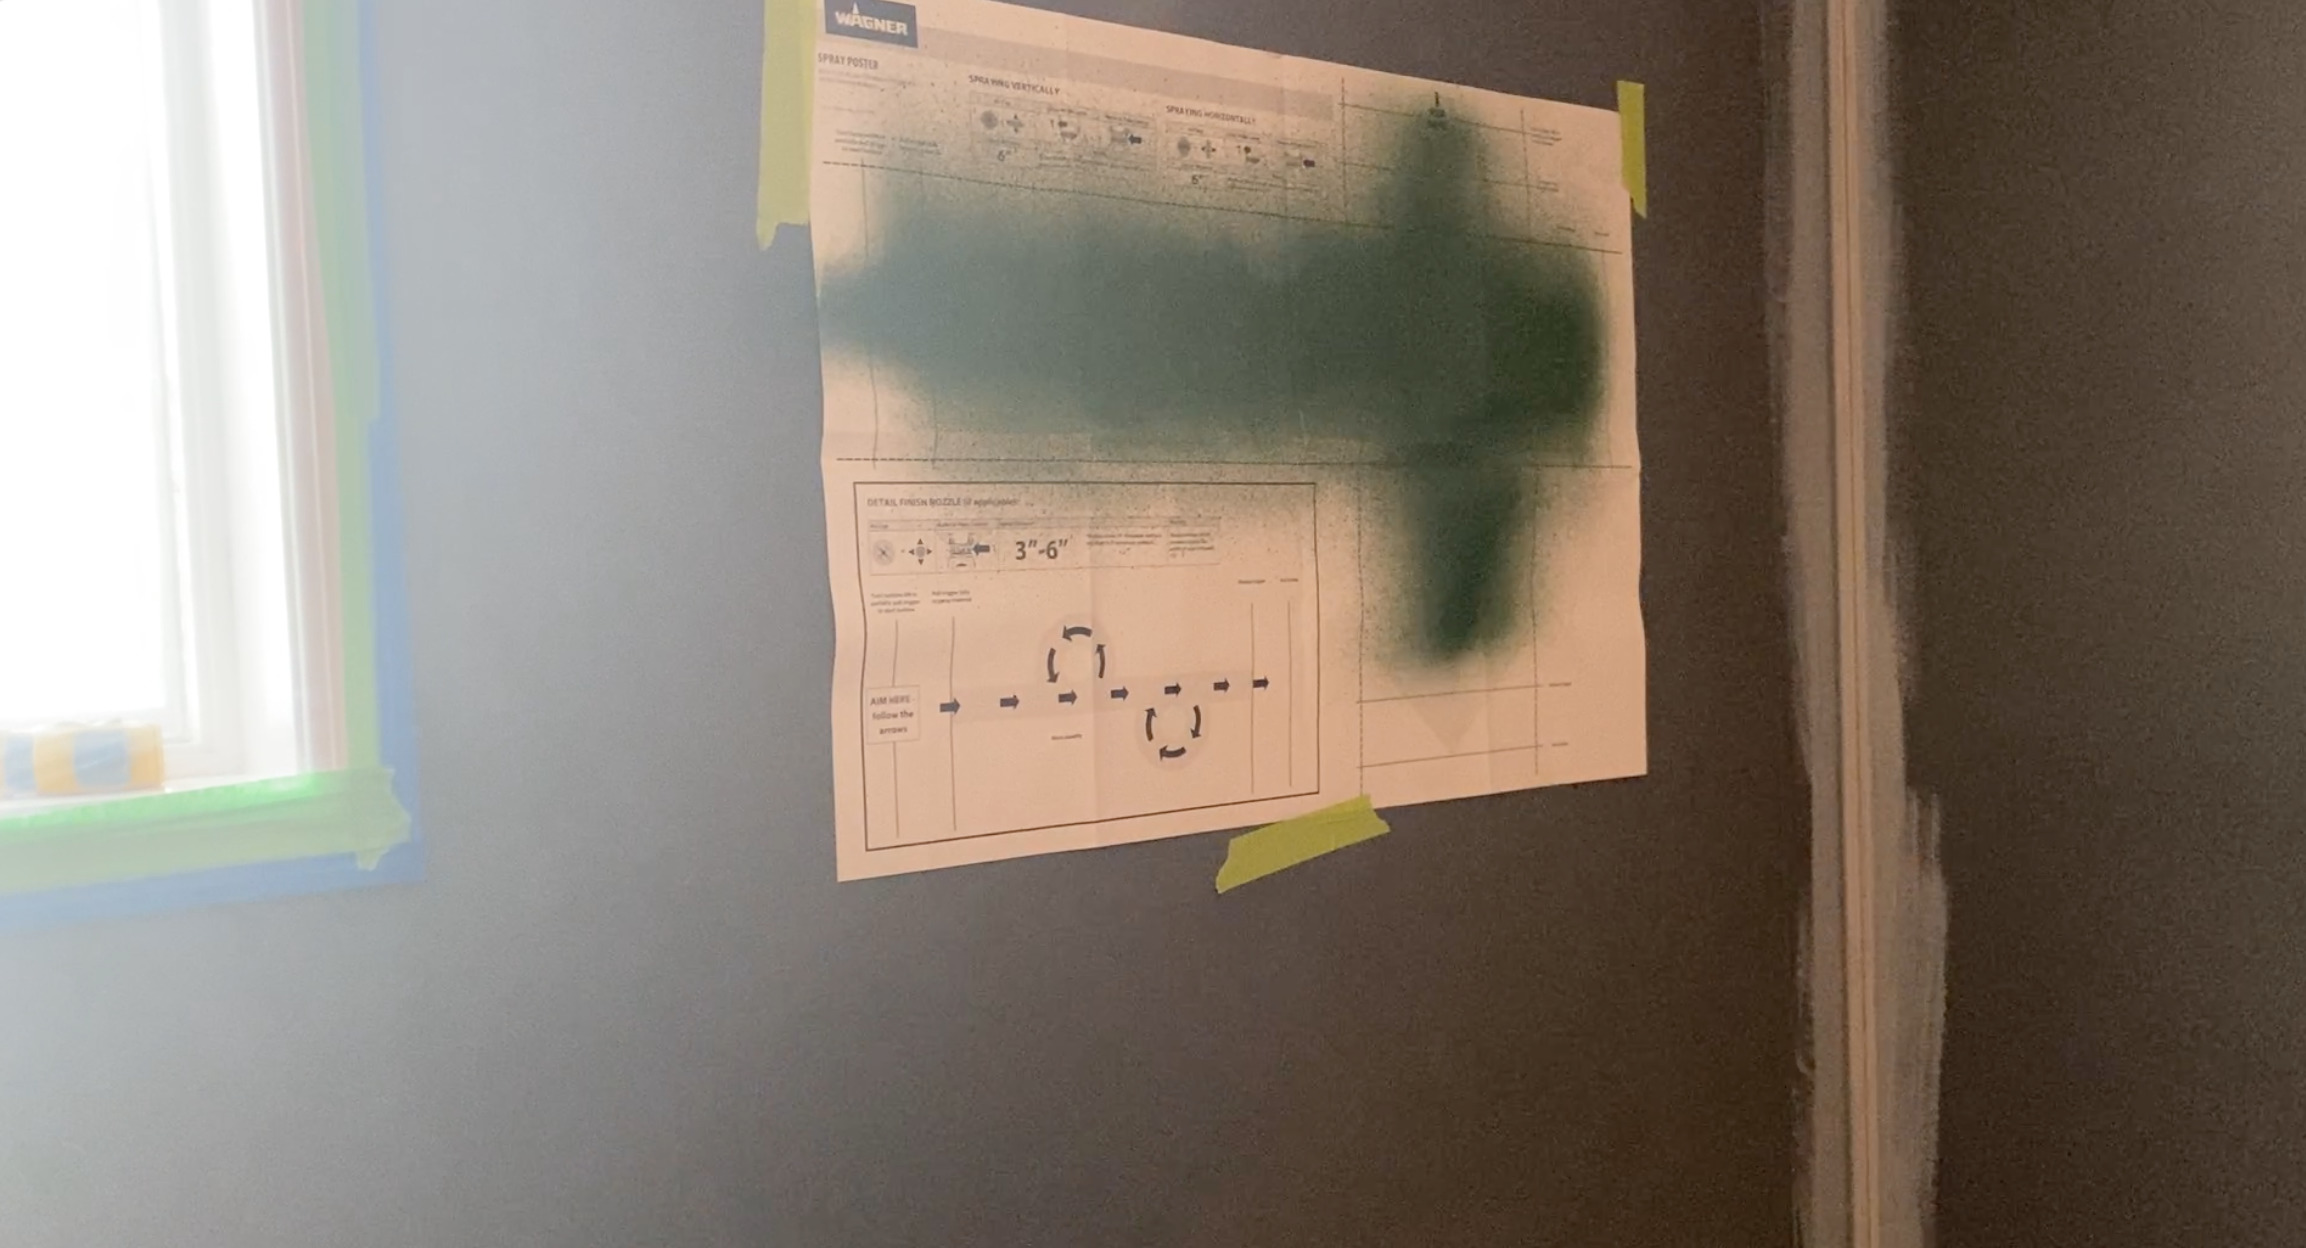

You can see the poster I’ve sprayed on in the photo above- this is sent with each paint sprayer, it’s so important to get all your settings dialled in before starting your project. I know I share this in every paint sprayer post, but I get emails and messages from first time paint sprayer users all the time with troubles and they almost all have skipped this step. I promise, the 4 minutes you spend here are worth it!
We used a high quality paint and didn’t have to thin it, we did two coats and were very happy with the coverage, even over big patches (see those in the video!).
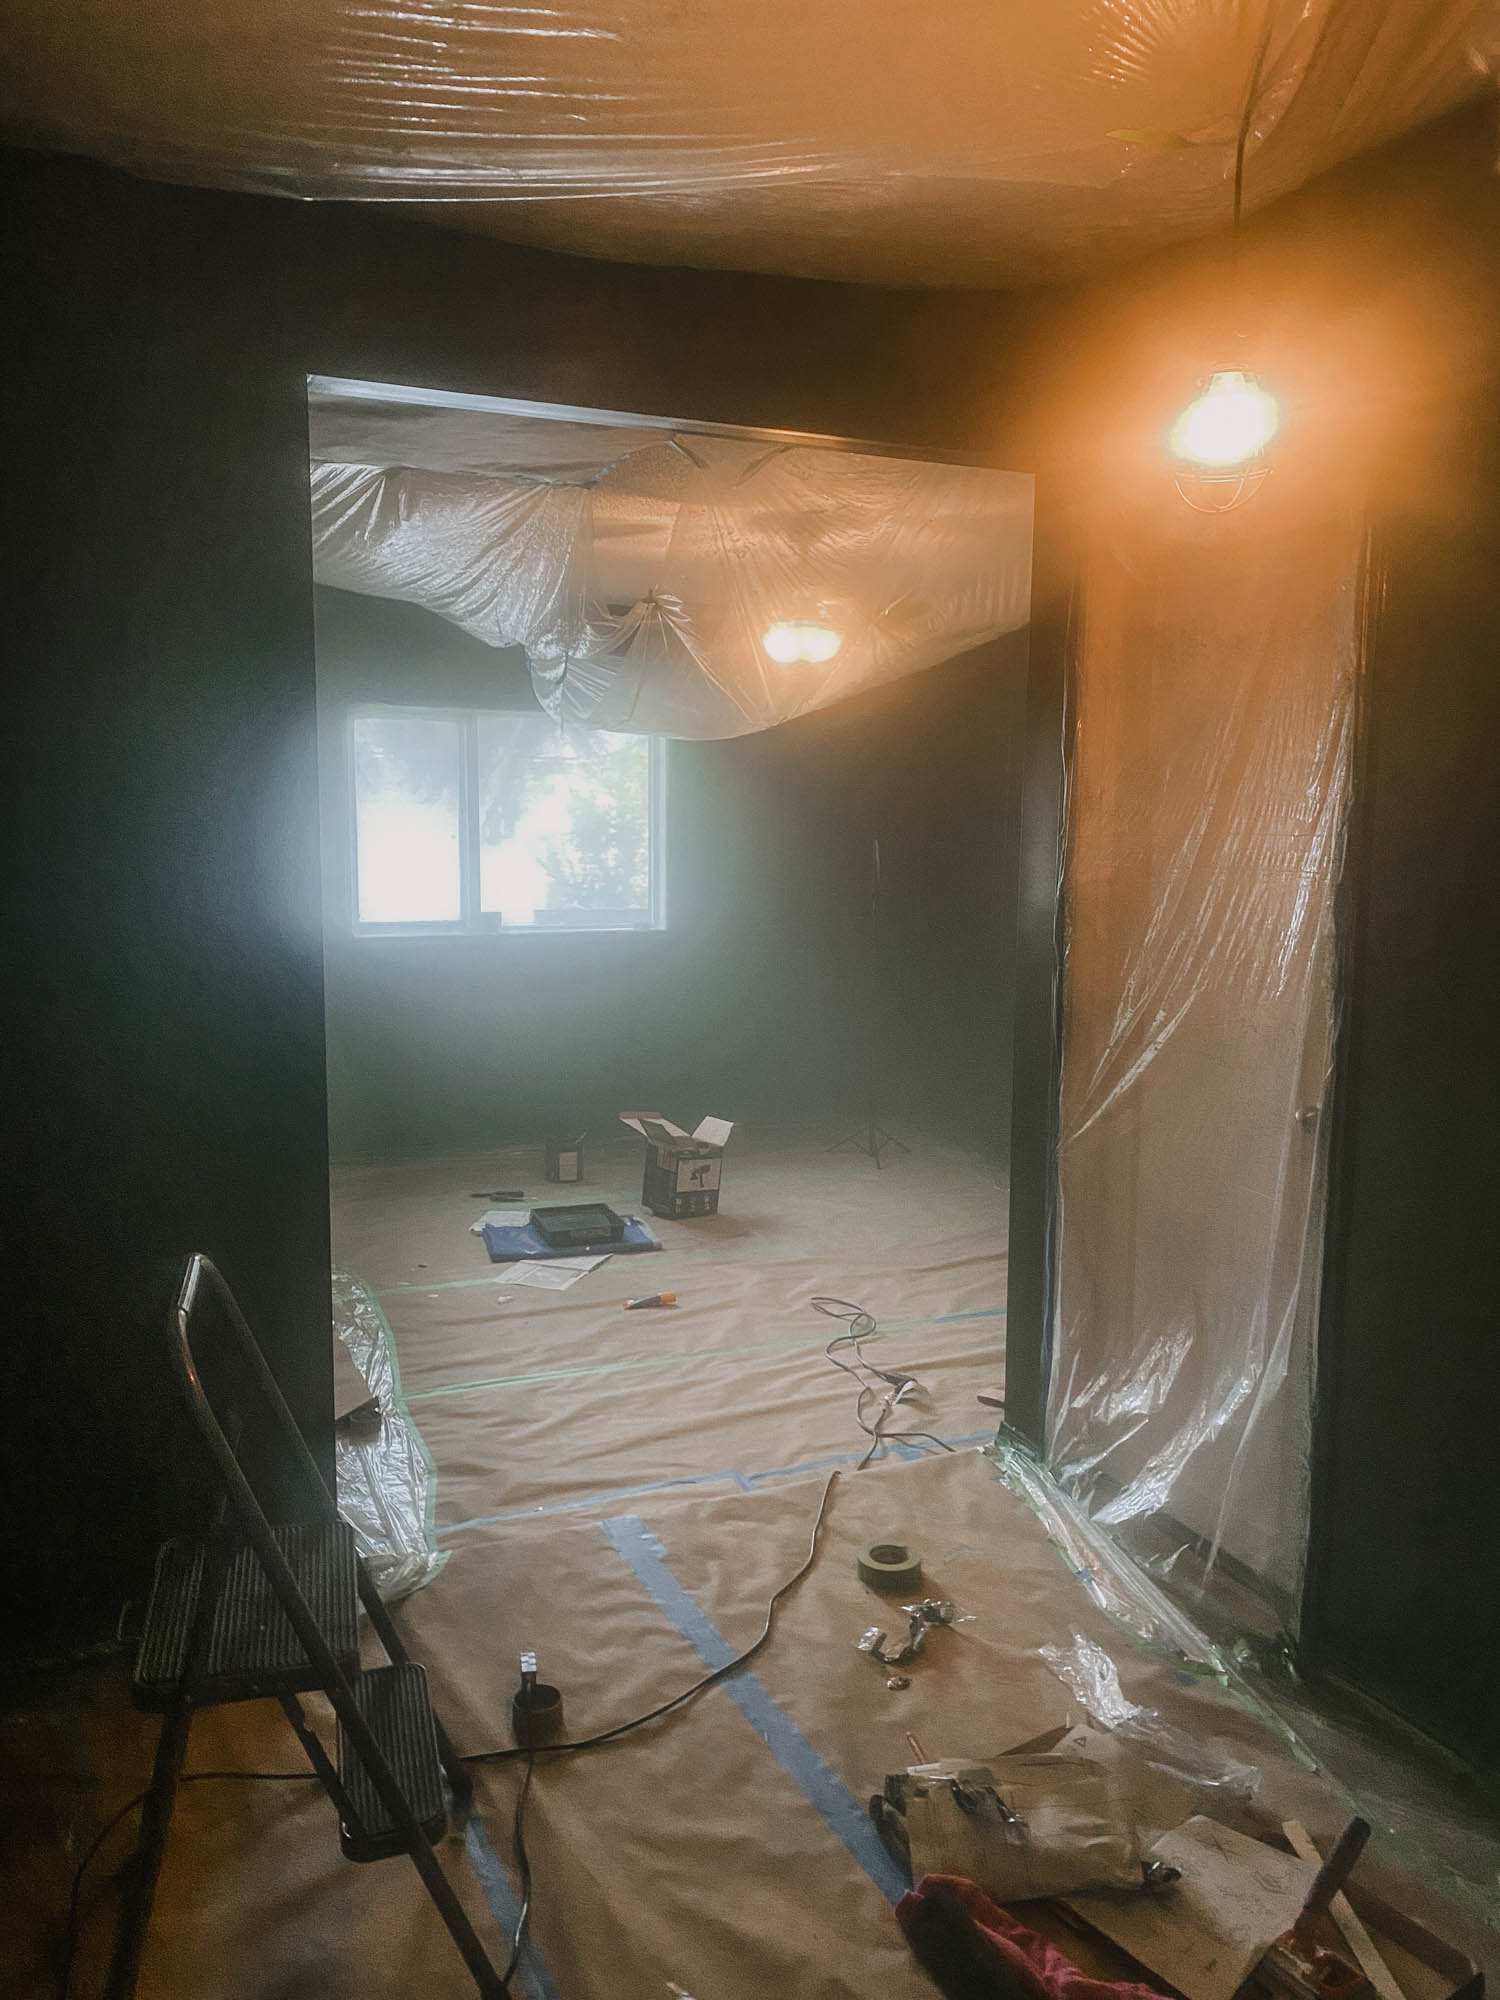
The one thing to keep in mind with a paint sprayer is that masking is very time consuming. I think that’s what keeps most DIYers from trying one, but if you put the time into masking, you’ll more than make it up when painting a room of this size. Especially if that room has a moulding wall! The time switching back and forth between a brush and a roller is gone. I like to mask the floors with flooring paper and the windows, doors and ceiling with plastic. I’m thinking I might make a full blog post about masking for painting with a sprayer. Let me know if that’s something you’re interested in!
After painting, I like to remove the masking while the paint is still wet. Take care to not touch your wet paint, but this will keep your paint from peeling with the tape.

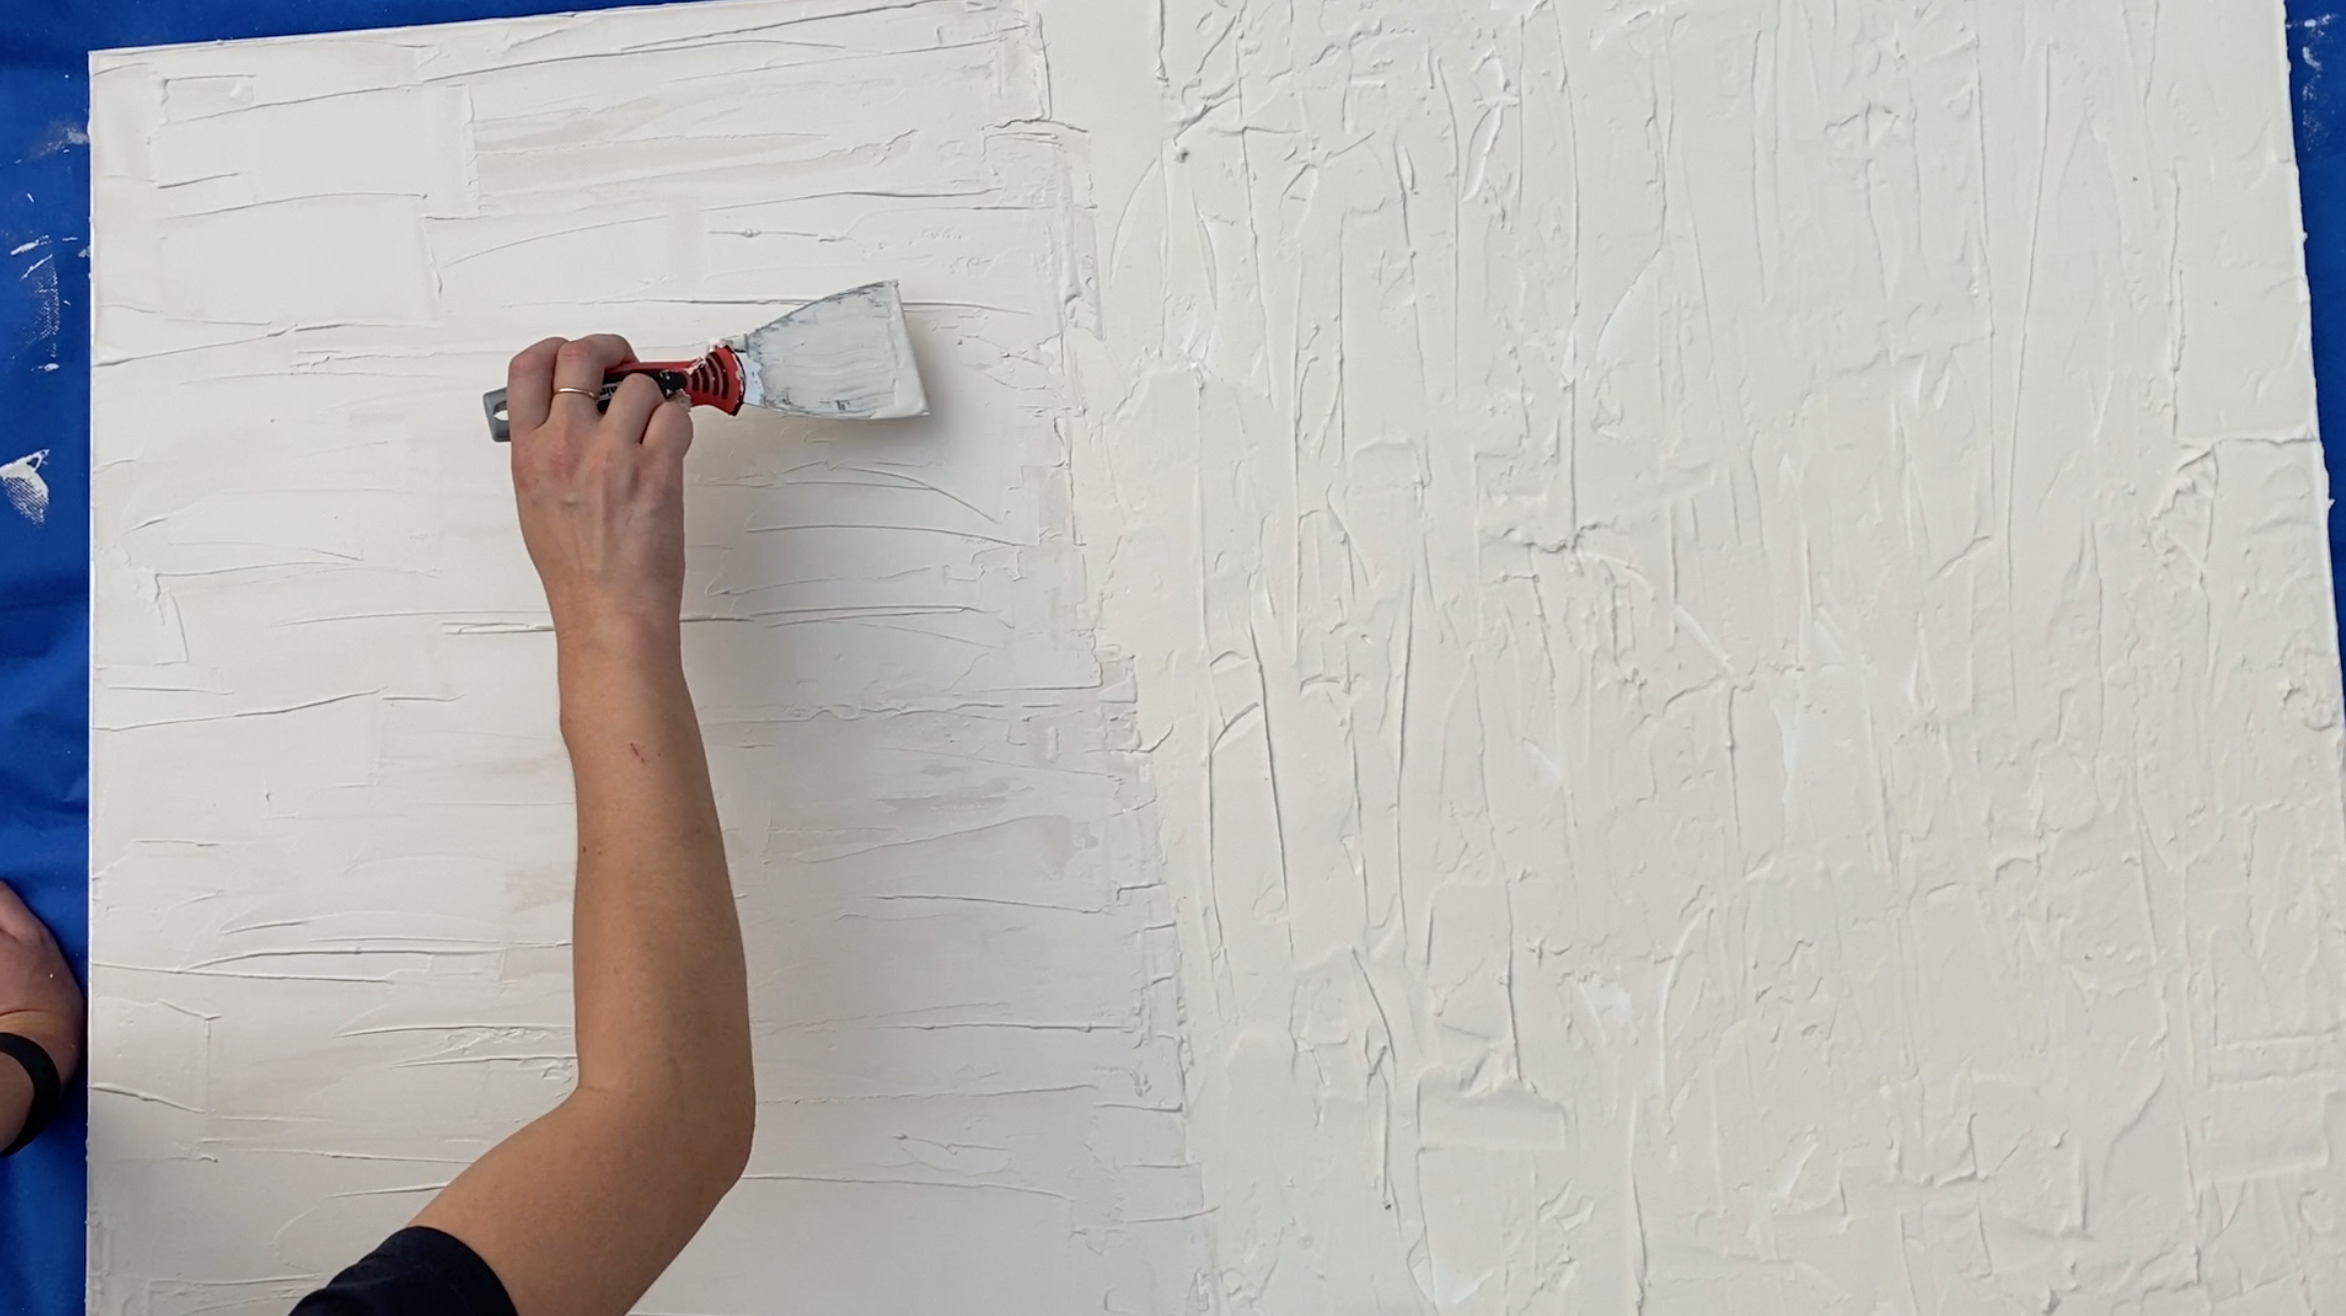
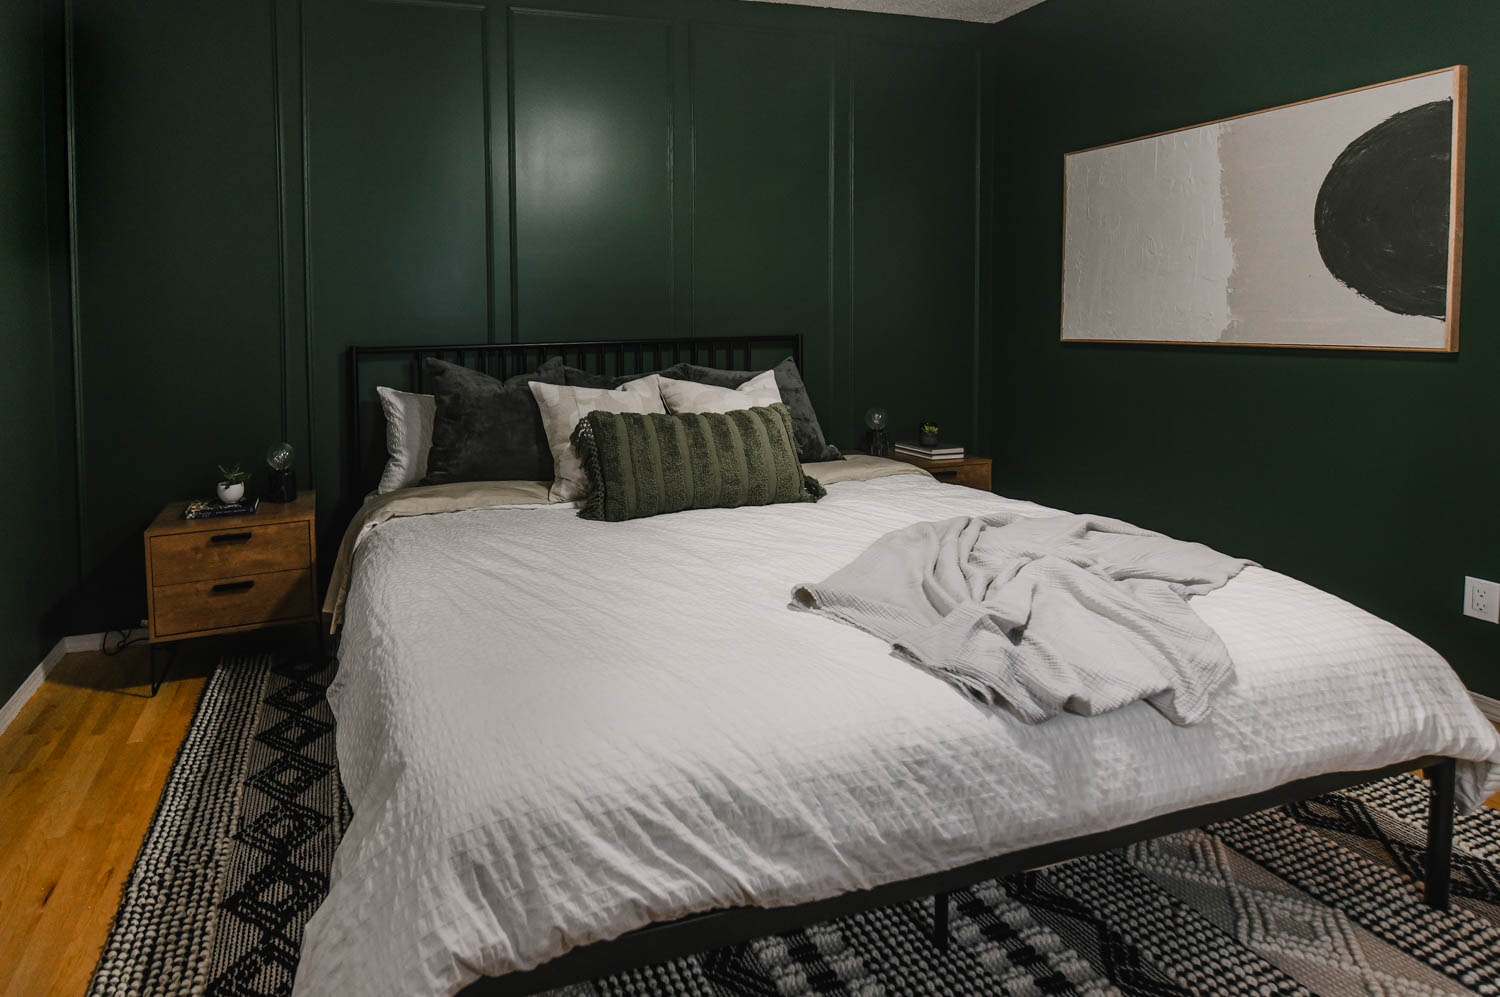
While the paint dried, we took on lots of smaller projects to take this room makeover from OK to Awesome. We cleaned the vintage door hardware on the original doors, replaced the other door knobs, replaced the fan, Added curtains, built all the new furniture and DIYed a large piece of art (have you seen the drywall compound art tutorials yet?! SO cool!). We worked through the night so I didn’t take a ton of photos, but the before and afters side-by-side are really so satisfying!
Okay side note- do the curtains bug anyone else? If this room wasn’t an 8 hour drive away, I would have re-shot the whole room just so I could even out the curtains on either side of the window… lol!
Other than the curtains… HOW AWESOME is this space?! I’m really so in love with that deep green my sister chose. It’s the perfect cozy but fresh shade and the green plays well with both her modern aesthetic and the vintage character in the home.
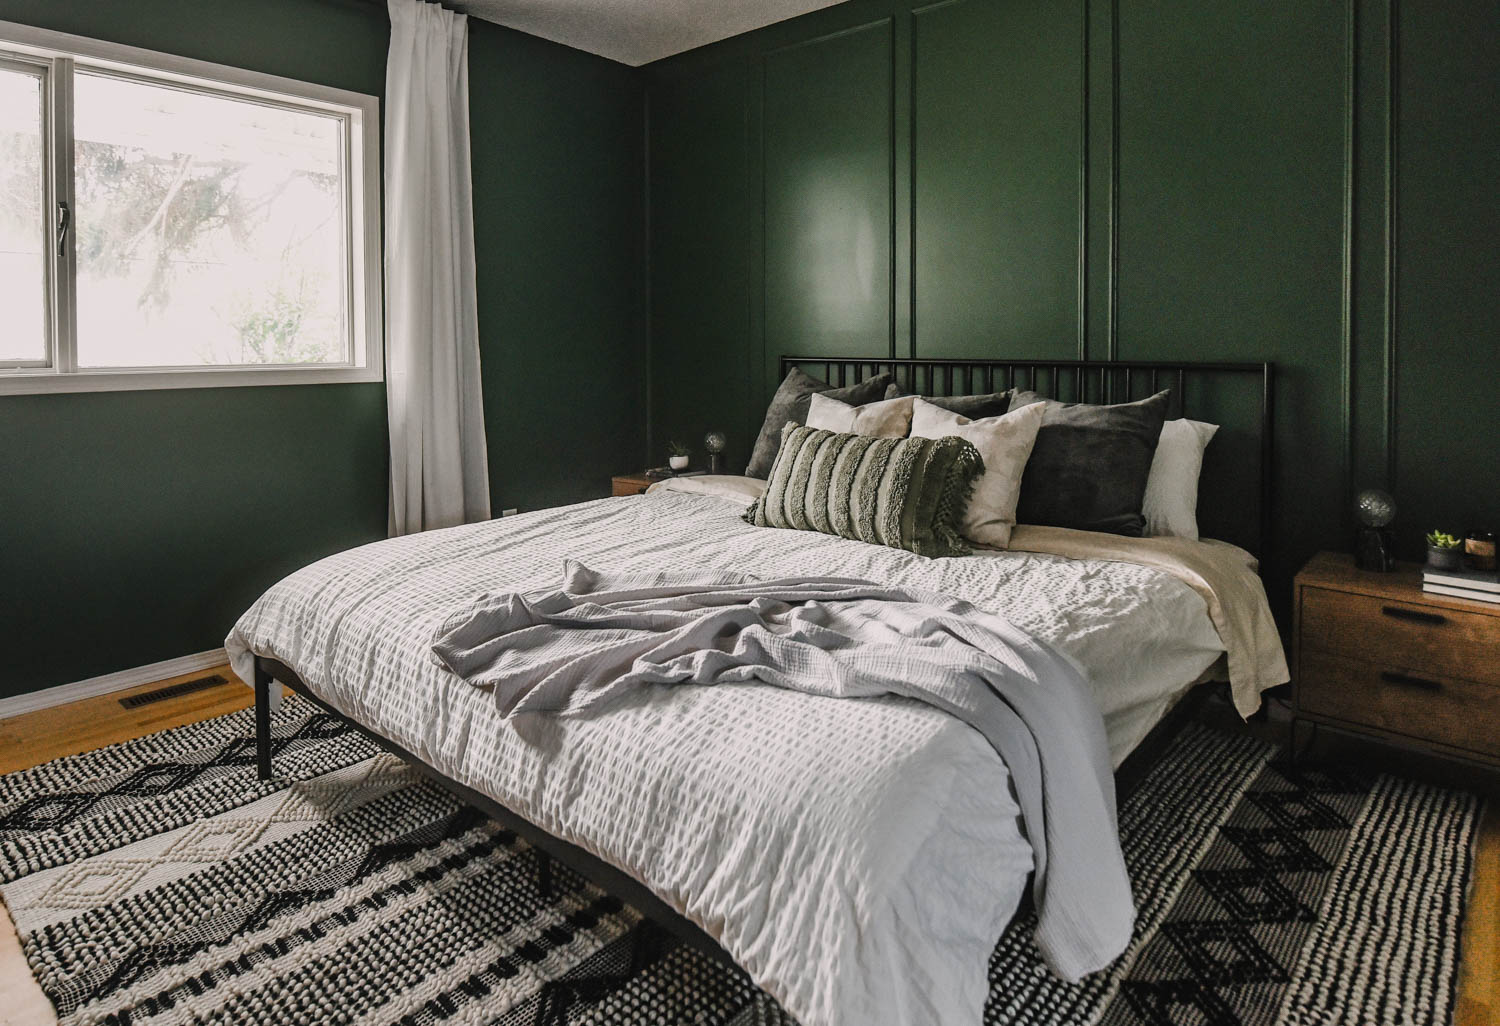
I know a lot of people are afraid of choosing a darker color for a room makeover, thinking it will make a space seem small or too dark, especially if there’s not a lot of natural light. I’m a big fan of dark walls in bedrooms. Like a really, really big fan. You can see that by my black bedroom and my last house’s navy bedroom. They’re just so cozy and calming. Balancing the dark walls with some contrast is key to keeping the space from feeling like a cave. White curtains, a white ceiling, light trim and doors, light or white bedding… this all plays such a big part in helping the space seem finished and intentional.
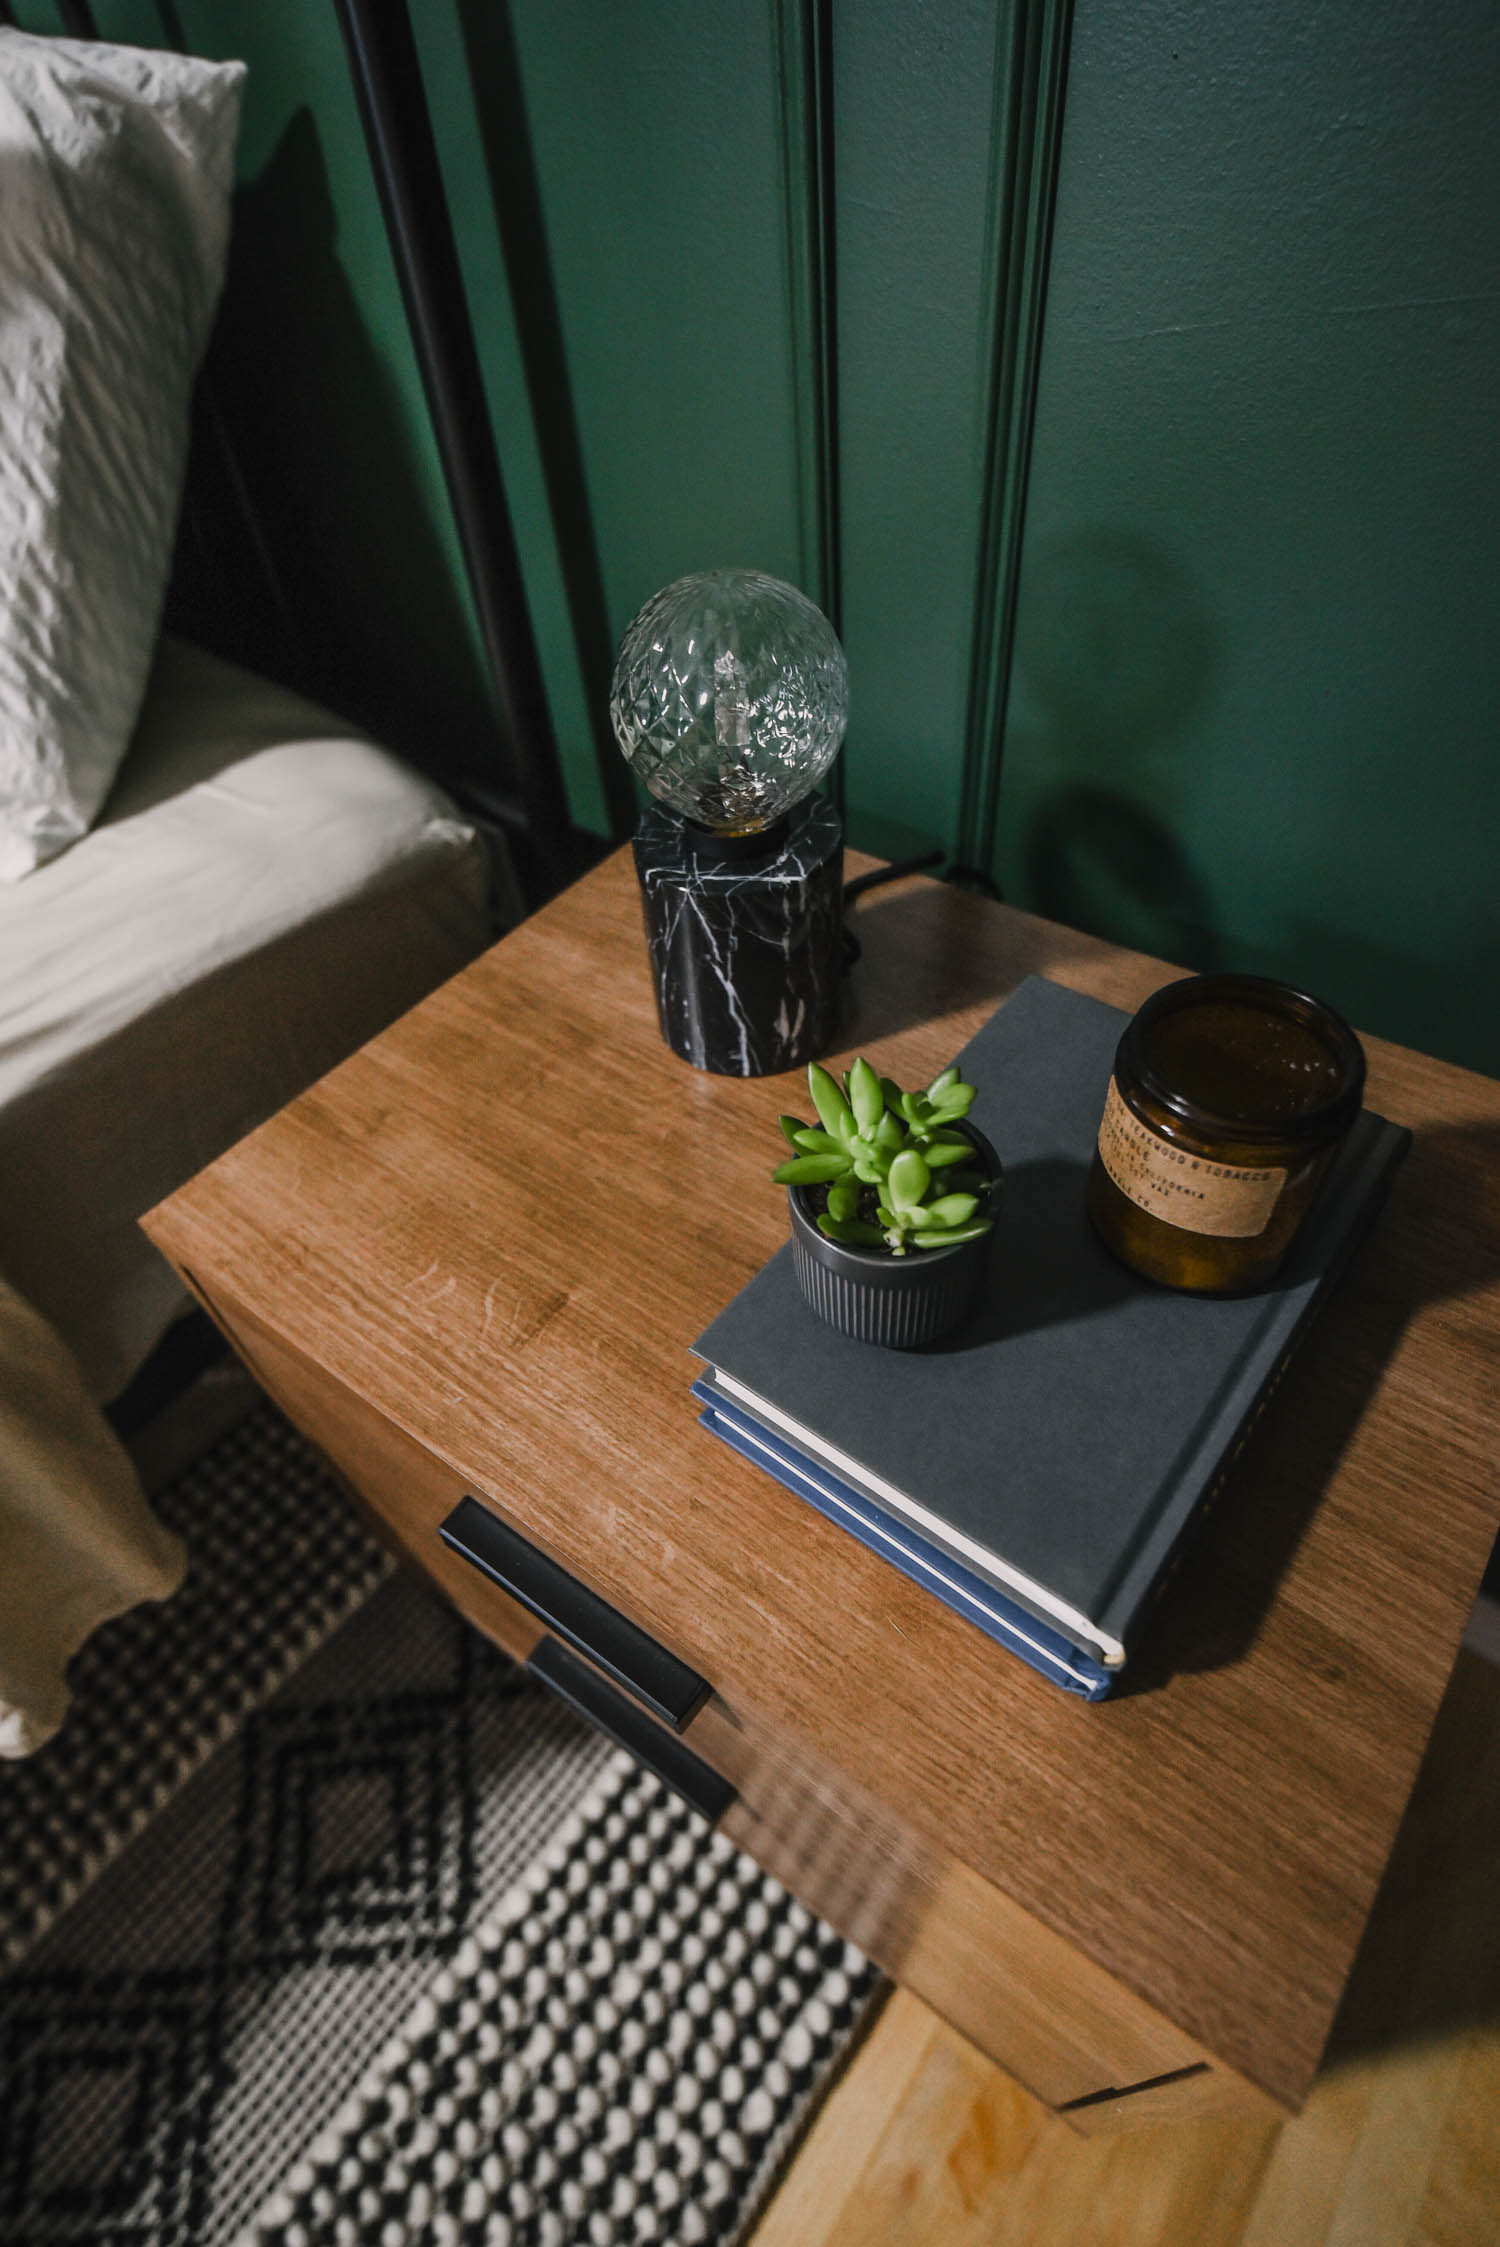
You’ll also want to consider lighting. Replacing my sister’s fan that had amber glass for a shade (very dark and yellowish) for one with a bright LED light made such a difference in evening light. Mood lighting on her nightstand is also super fun. Those crystal cut bulbs make such a fun pattern on the walls.
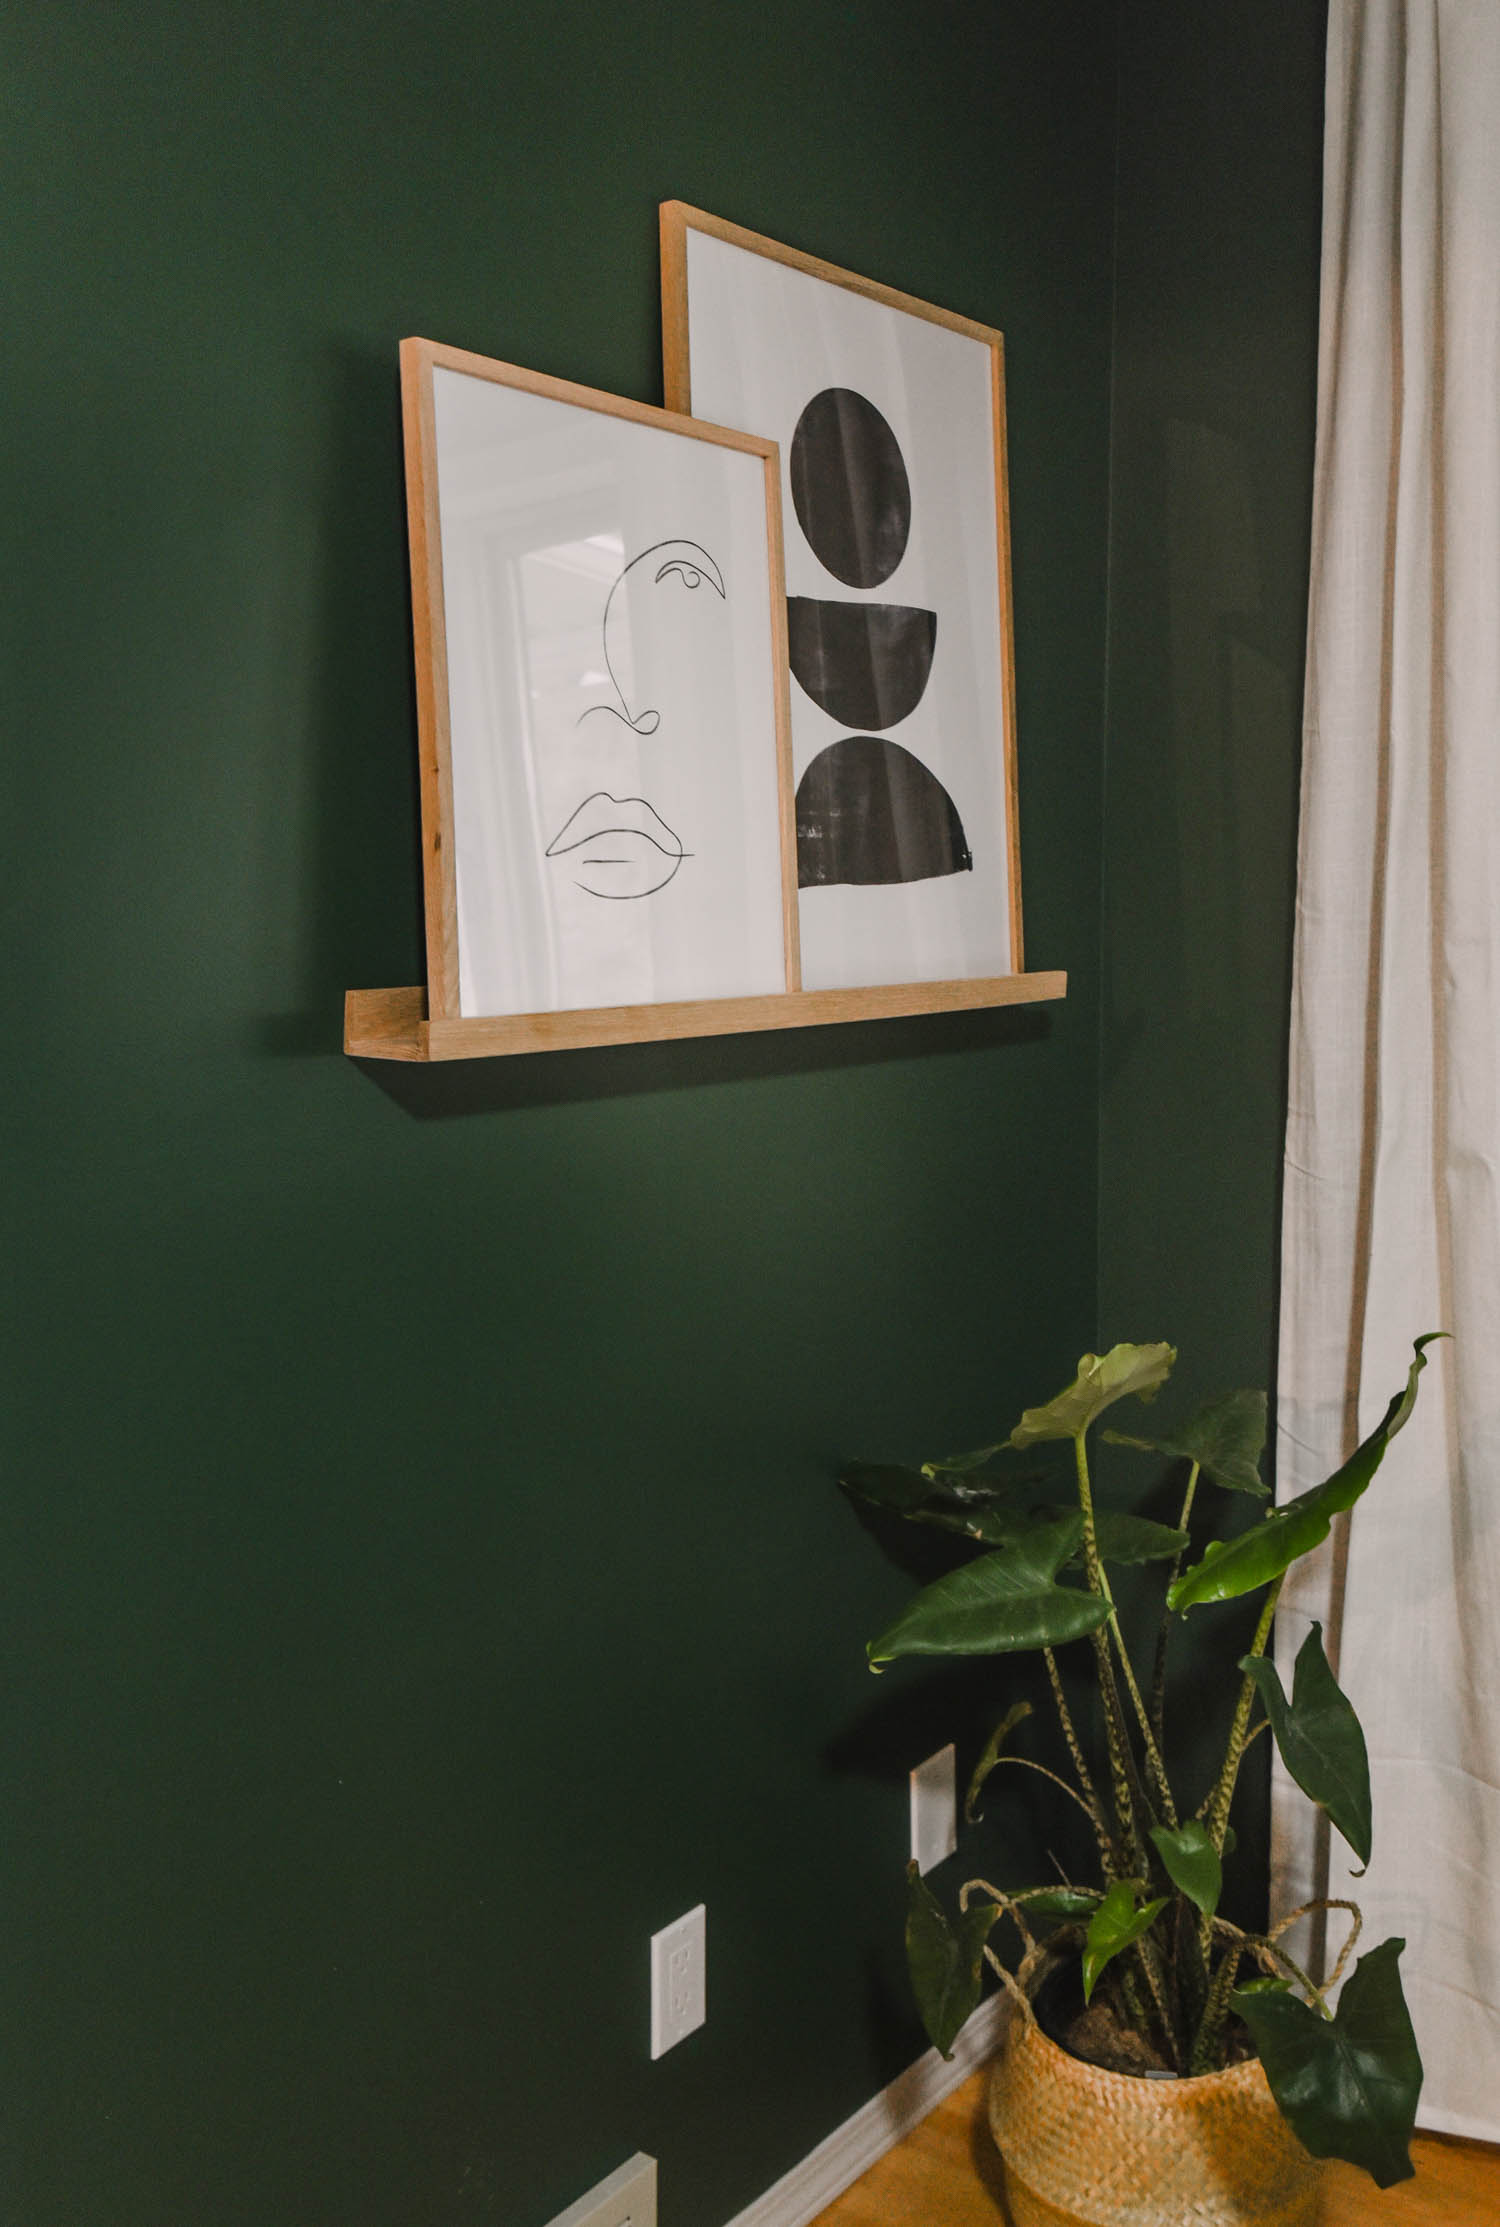
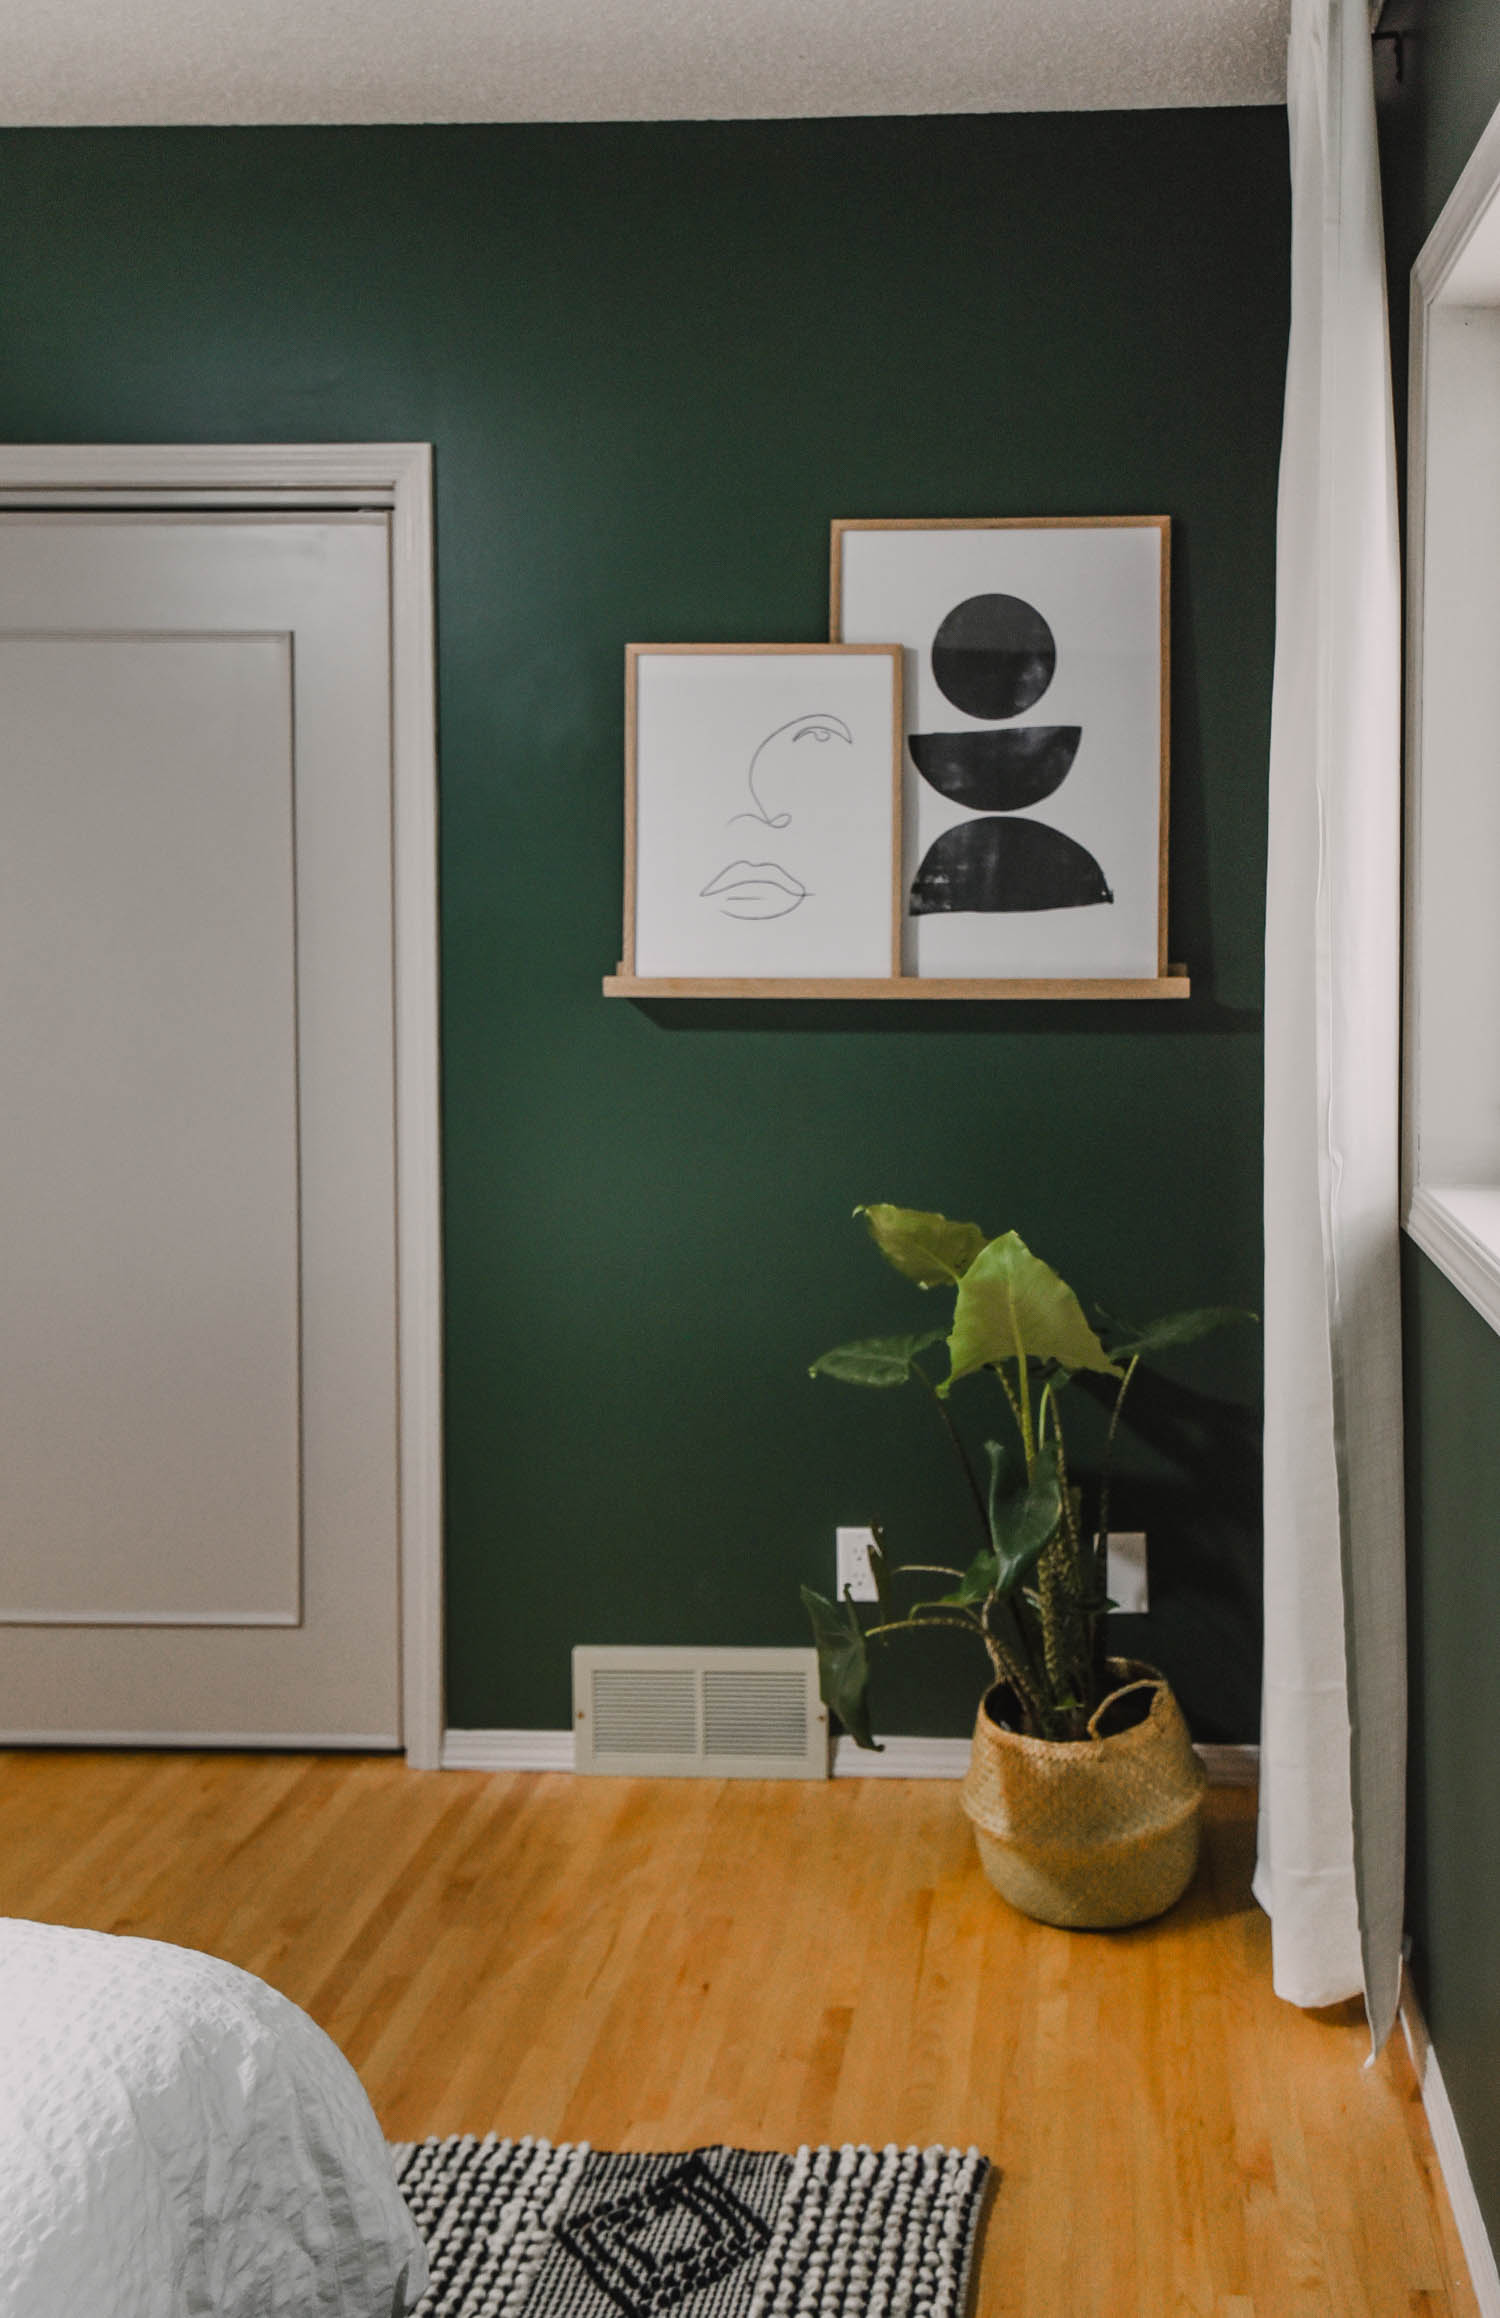
Let’s chat about art! Since learning more about home decor and getting intentional about my design choices, I’ve learned I actually like less art on walls than I would have expected. There’s no need for art on every single wall and surface.
I love to let the texture of a moulding wall shine and the details in bedding, rugs and whatever else is in a space be a focus as well. White space (or in this case, green space!) helps a room feel spacious and calm.
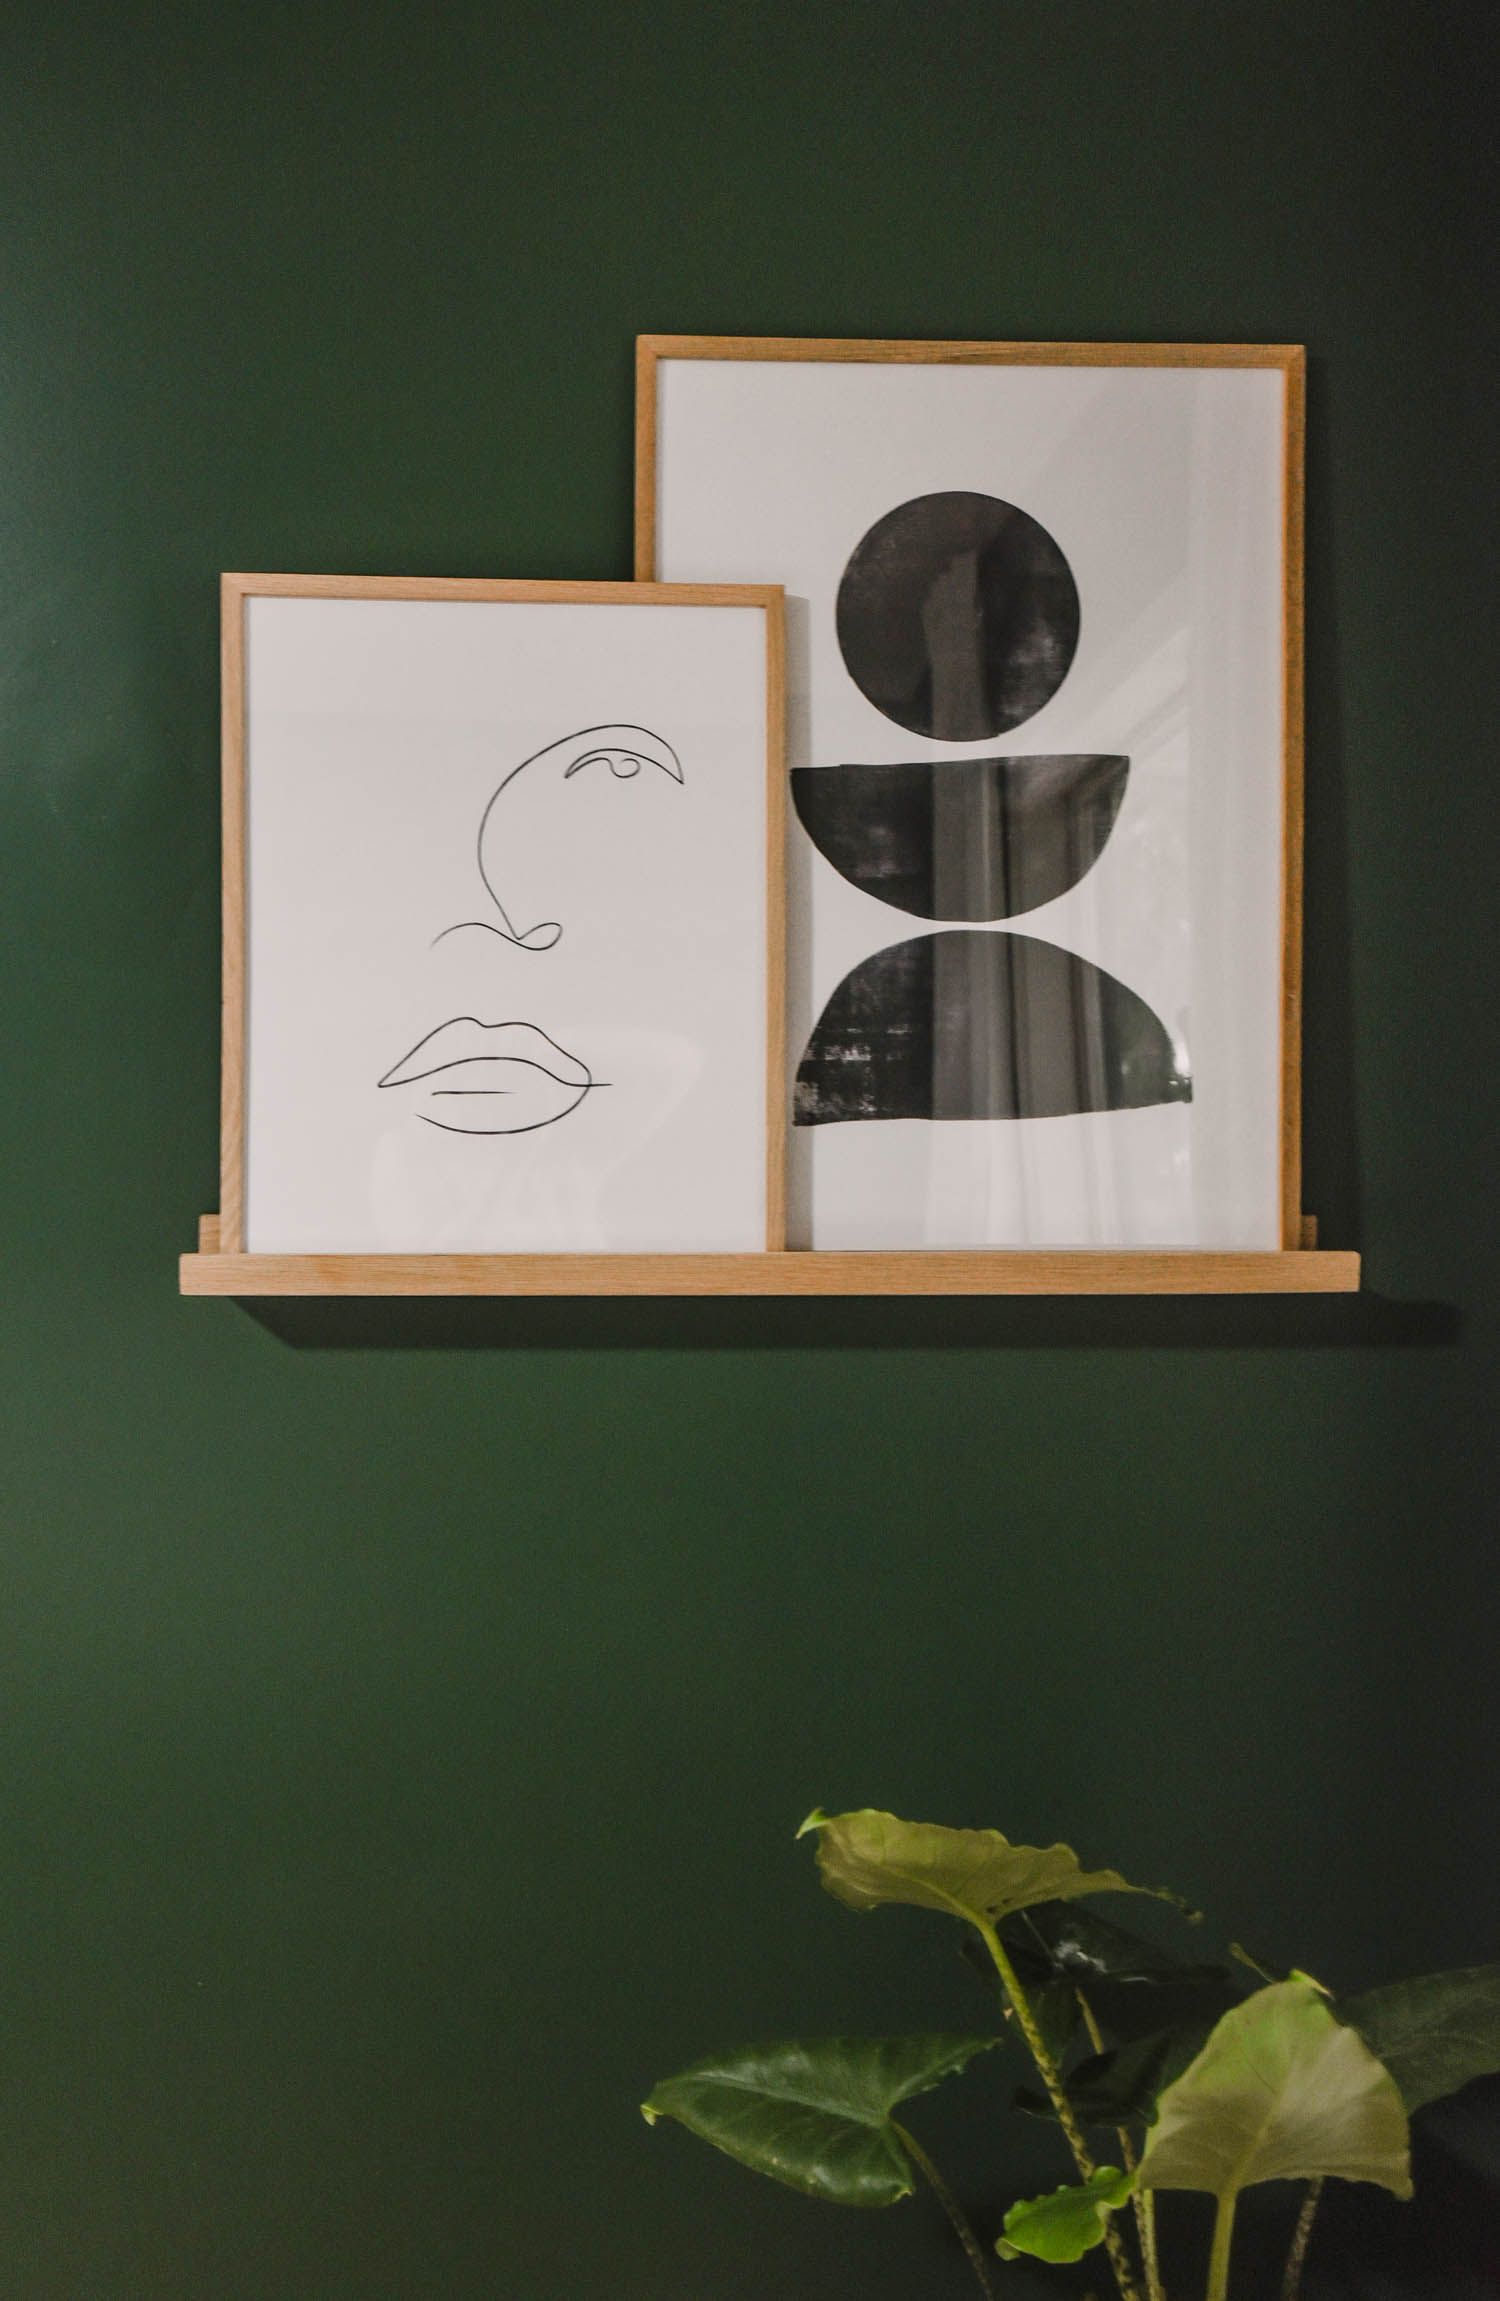
We chose to DIY a large piece of art for one wall and to add a photo ledge with some prints to the wall beside the closet. Other than that, we have one small piece of art in that little entry room.
I’m making a video tutorial for the DIY art, I’ll add that in here once it’s ready to go! The photo ledge details are in this video here.
My sister also chose to sell all of her furniture and purchase new pieces that were better suited for the space and her style. Since this is her first home, her and her partner had furniture that they’d taken with them from rental to rental. Now that they know they’ll be here for a while, it was a great opportunity to choose pieces that they felt like represented both of their styles. I’ll link everything at the bottom of this post.

I think that covers everything in this room! I’m so very happy with how it turned out and I know my sister is too. I was so much fun to be able to travel down and help them transform their space (even though it was totally tiring!). I can’t wait to see them transform the rest of their house into the home of their dreams.
Big thank you again to Wagner Spray Tech for partnering on this post – without the FLEXiO 2500 paint sprayer, we honestly wouldn’t have been able to tackle both the bedroom and the patio in the same weekend. It made painting so efficient!
GREEN BEDROOM SOURCES:
- Green paint: Vine Leaf, Behr
- Trim and door paint: Ashen Tan, Behr
- DIY Moulding Wall Tutorial
- Paint sprayer we used: Wagner FLEXiO 2500
- More about the mattress we chose here
- Modern metal bed: Wayfair, it’s no longer listed though
- Nightstands: Walmart
- Wardrobe: Canadian Tire
- More about the prints/photo ledge here
- Curtains, duvet cover bedside lamps, plant basket, mirror and butterfly art: IKEA
- Hamper, area rug, decorative pillow and throw: HomeSense
LIKE IT? PIN IT!
 Hey Pumpkin Printable Brush Lettering Practice Sheet
I AM OBSESSED ?
Mirrored closet doors …
What primer did you use on the metal? The mirror?
What type of paint for the metal and mirror?
Hi there, Colleen has it above, “For the mirrored closet doors, we primed everything first with a high adhesion primer. We used the grey Zinsser primer for this. Then once that was totally dry, we used an enamel paint tinted to the trim colour. We used a foam roller for this and a brush for the trim grooves. Two coats of the paint will make sure it’s even and letting everything dry in between will make sure it is as durable as it should be. Not only did we paint the doors themselves but all of the track faces and edges of the doors. Everything that was that soft gold colour is now beautiful Ashen Tan colour and I couldn’t be happier!”