• Skip to main content
  • Skip to header left navigation
  • Skip to header right navigation
  • Skip to site footer
  • Shop
  • Get The Email
  • Work With Me
  • About
  • Search

  • DIY
    • DIY Home Decor
    • With Power Tools
    • Renovation
    • For Kids
    • For Parties
    • Wearable
    • Organization
    • Cricut Crafts
  • Home Decor
    • Room Reveals
    • Kid Friendly
    • DIY Home Decor
    • Renovation
  • Lettering
    • Hand Lettered Printables
    • Free Practice Sheets
    • Handlettered DIY
    • Free Brush Lettering Quickstart Guide
    • Learn Brush Lettering E-Course SALE
Lemon Thistle

Lemon Thistle

Rad DIY, Lettering and Design for Real People

  • Printables
    • For Cricut
    • Party Printables
    • Home Decor Printables
    • Bachelor Bingos
    • Free Monthly Wallpapers
    • Handlettering Practice Sheets
    • All Free Printables
  • Entertain
    • Party Printables
    • Party DIY
    • Tablescapes
    • Dinner Party
    • Kids Parties
    • Party Eats
    • Baby Showers
    • Wedding + Showers
  • Blog

DIY NYE Cake Topper (With Fonts & Cricut!)

Dec 13

This post is sponsored by Cricut. As always, I would never promote a product I don’t love! Find my full disclosure here.

DIY 2018 Cake Toppers & Straw Decor... using fonts and a Cricut... this is amazing! I love this material- so much better than paper.

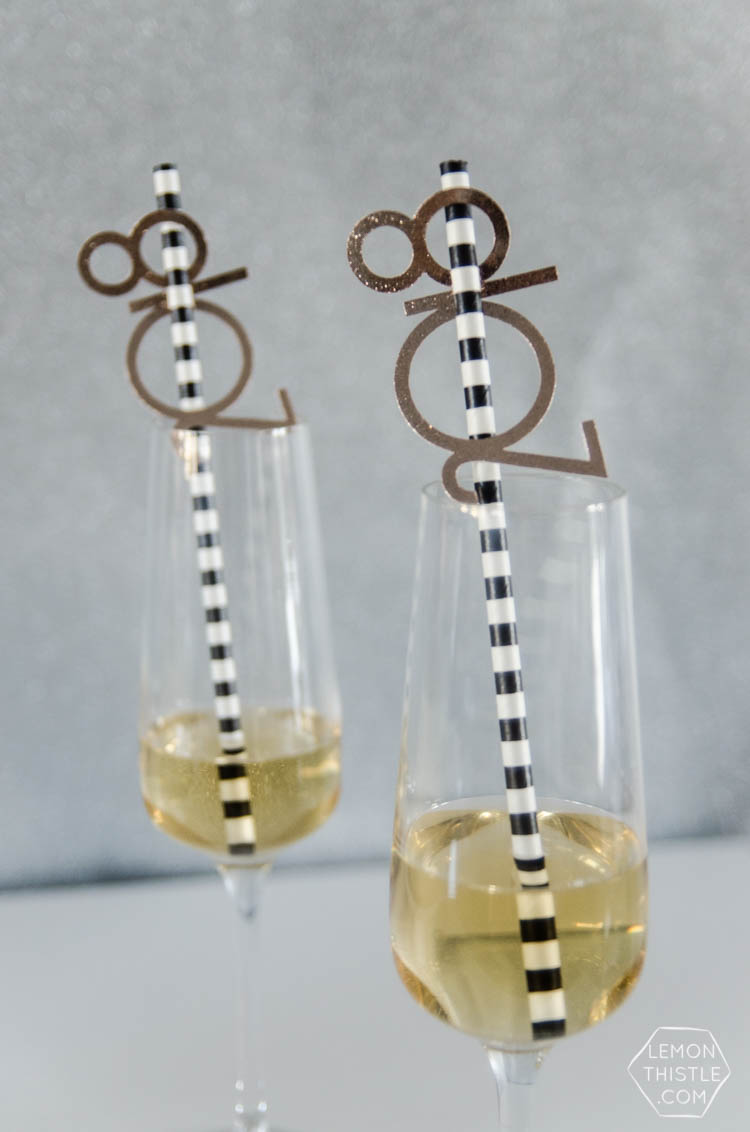
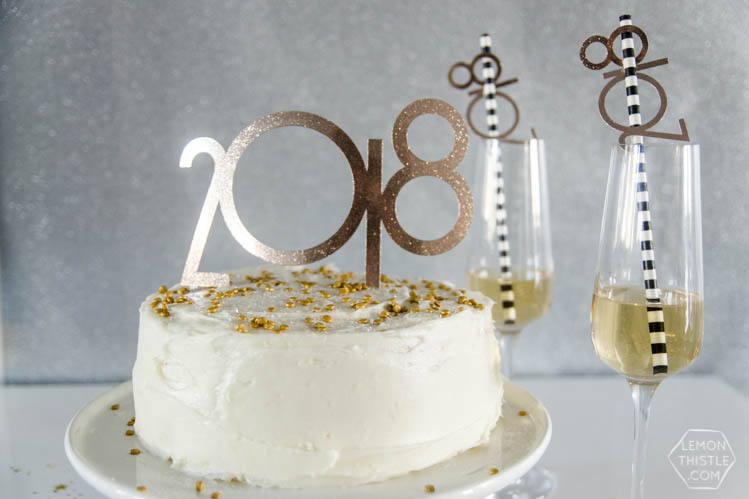
Can you believe it’s almost Christmas? And almost 2018?! Let me say that again… we are just a few weeks away from NEXT YEAR. I always let the buzz of the holiday season get the best of me and realize the day before New Years Eve that I’ve got nothing special prepared… and I love special little touches to celebrate every occasion! This year, I got ahead and created these fun little NYE cake toppers and straw decor for our 2018 NYE celebrations. Which at this point includes hanging out in jammies and eating cake. Sounds pretty fancy, right?

I thought that instead of just sharing the file with you guys- I’d show you exactly how to make your own so you can make not only these 2018 NYE cake toppers… but toppers for ANY OCCASION. And nope, you don’t need Photoshop (nomatter how much I love it- I know it’s not for everyone!). I’m going to do this whole tutorial right in the Cricut Design Space– so if you have a Cricut, you can follow along! And if you DON’T HAVE A CRICUT? Well… you can win one ;) Scroll down to the bottom of this post to check that out.

DIY 2018 Cake Toppers & Straw Decor... using fonts and a Cricut... this is amazing! I love this material- so much better than paper.

So I’ve made cake toppers with my Cricut before. But usually I will hand letter a design and convert it into a Cricut friendly file… and I’ve always just used paper. I tried wood veneer once but that was a disaster. So I’m extra excited to share this one with you. Not only how to hook letters (or numbers!) together in Design Space so you don’t have to glue anything AND show you how awesome this glitter paper is. It feels totally plastic on the front so it’s AMAZING for food stuff- it won’t show grease or wet splatters.

Ready for the tutorial?

DIY 2018 Cake Toppers & Straw Decor... using fonts and a Cricut... this is amazing! I love this material- so much better than paper.

If you ONLY want to make the 2018 NYE cake topper designs… I can save you some time and you can grab my design RIGHT HERE. If you want to learn how to make any design… here’s the tutorial!

DIY 2018 Cake Toppers & Straw Decor... using fonts and a Cricut... this is amazing! I love this material- so much better than paper.

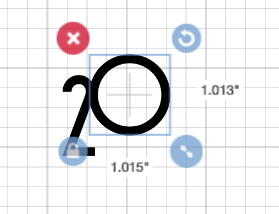
The first thing you’ll need to do is open up Design Space. Then you can start a new project and add text. To make it SUPER simple, I just put each letter in a new text box. Then I can move them around how I like and have some jump off the baseline like this 2018 one. I used a font called ‘Avenida Com’ which is included in Cricut Access and love how modern it looks. You can pick any font you like to suit your design. The biggest thing to keep in mind when you’re arranging your letters/numbers is that they need to be touching more than just one tiny overlap- this is how they hold together remember!

DIY 2018 Cake Toppers & Straw Decor... using fonts and a Cricut... this is amazing! I love this material- so much better than paper.

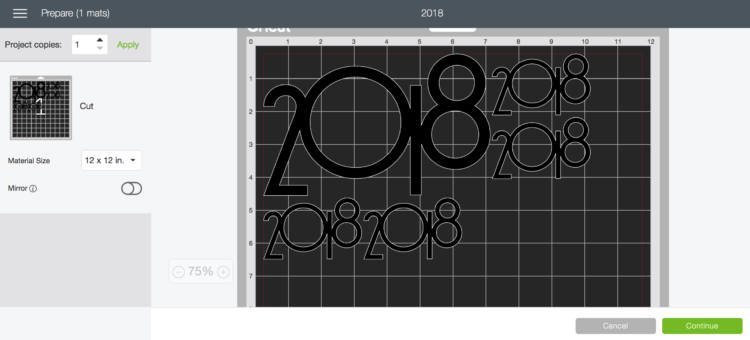
When you’re happy with how they’re arranged, you’ll want to select all the letters/numbers from that single design (drag your arrow to select all or hold down command and select them all from the layers panel) and hit ‘WELD’. This will join them all into one single design and they won’t move around on the mat when you hit ‘go’. Size them how you like and you’re ready to cut!

DIY 2018 Cake Toppers & Straw Decor... using fonts and a Cricut... this is amazing! I love this material- so much better than paper.

DIY 2018 Cake Toppers & Straw Decor... using fonts and a Cricut... this is amazing! I love this material- so much better than paper.

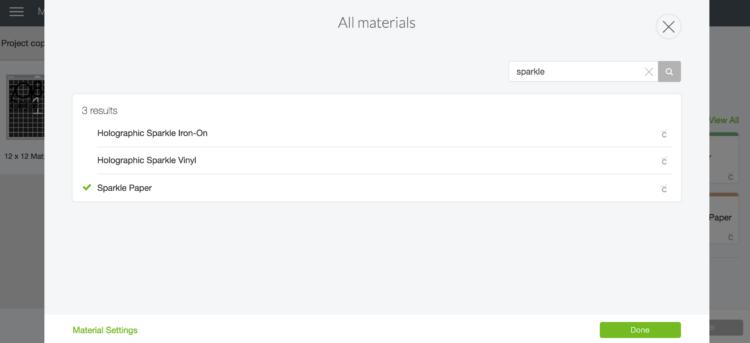
The paper I used for this is also made by Cricut– it’s called ‘Sparkle Paper‘. I’m not going to lie… I’m not usually a sparkle/glitter fan BUT for parties… and NYE specifically? I’m totally in love with this! I actually made another cake topper for a party the night I made this one. Because I figured the birthday girl wouldn’t like a 2018 cake topper ;) I’ll be sharing that file in the new year (it’s so pretty, you guys!). What I really loved is that even pushing the cake topper down to touching the icing, it didn’t bleed or get splotchy like paper does. I’ve actually saved it to use again which is unheard of with paper cake toppers!

DIY 2018 Cake Toppers & Straw Decor... using fonts and a Cricut... this is amazing! I love this material- so much better than paper.

DIY 2018 Cake Toppers & Straw Decor... using fonts and a Cricut... this is amazing! I love this material- so much better than paper.

DIY 2018 Cake Toppers & Straw Decor... using fonts and a Cricut... this is amazing! I love this material- so much better than paper.

DIY 2018 Cake Toppers & Straw Decor... using fonts and a Cricut... this is amazing! I love this material- so much better than paper.

DIY 2018 Cake Toppers & Straw Decor... using fonts and a Cricut... this is amazing! I love this material- so much better than paper.

DIY 2018 Cake Toppers & Straw Decor... using fonts and a Cricut... this is amazing! I love this material- so much better than paper.

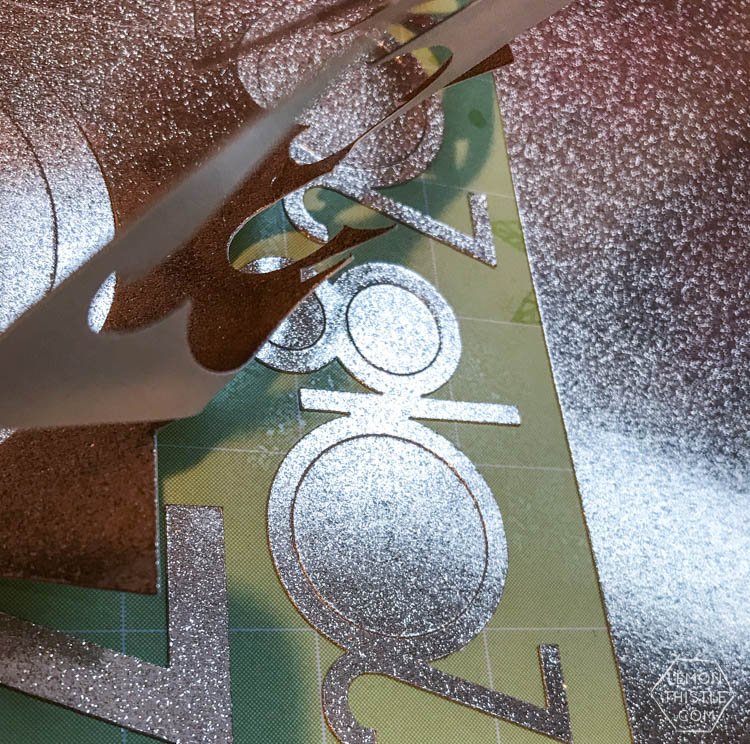
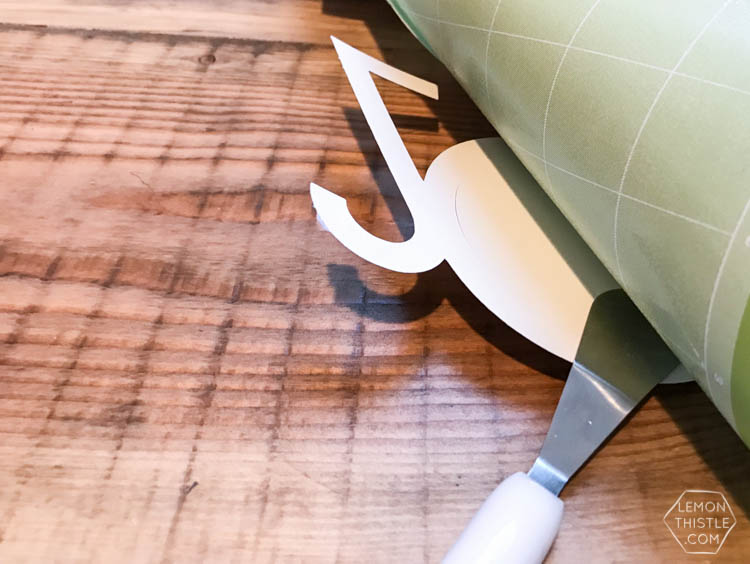
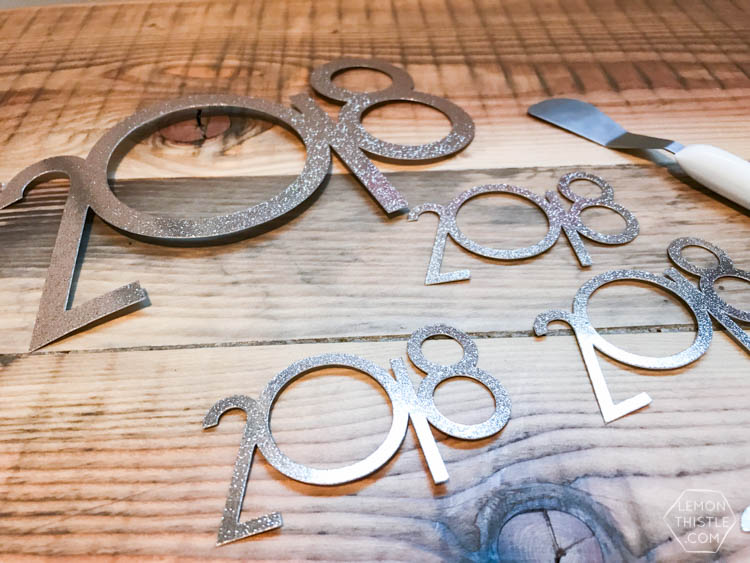
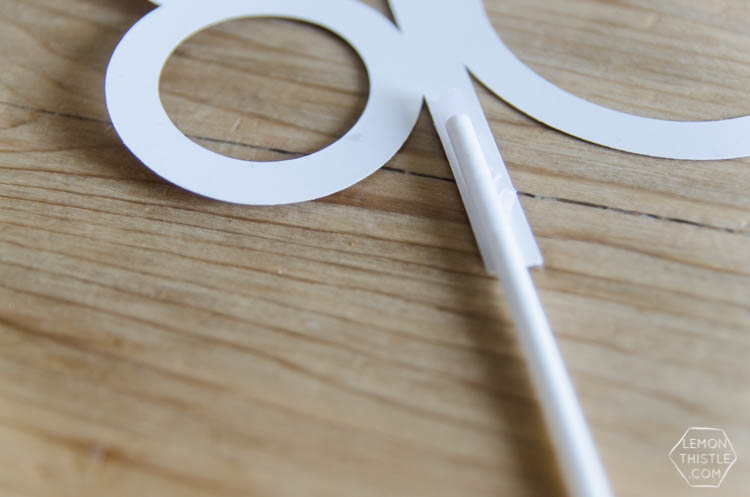
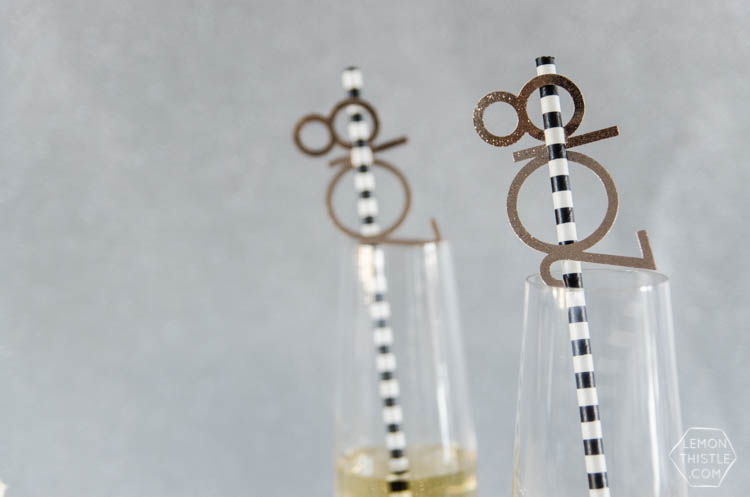
Once you have it cut out- weed it (I like to use the spatula and really bend the mat back when I’m cutting more thin designs like this) and add some sticks to the back for the cake topper. That’s it, that’s all! It’s such an easy project and it’s totally customizable. The straw designs are the exact same, just smaller and I popped the straw through the numbers. You would just need to make sure that they are large enough that the straw can fit through the loops in the letters/numbers.

DIY 2018 Cake Toppers & Straw Decor... using fonts and a Cricut... this is amazing! I love this material- so much better than paper.

Okay… now onto the giveaway (I KNOW this is what you were waiting for!). Enter using the Rafflecopter below!
a Rafflecopter giveaway

This is a sponsored conversation written by me on behalf of Cricut. The opinions and text are all mine.

Category: DIY, Entertain, GiveawayTag: Cake, Cricut, Holiday Party, NYE, Party, Party Decor, Party DIY, Sponsored
Facebook0Tweet0Pin0LinkedIn0
Previous Post: ← This handlettered Kraft wrapping paper is amazing! Now I want that brush so I can make some to wrap my christmas gifts DIY Hand Lettered Holiday Wrapping Paper
Next Post: 2 Free Printable Christmas Cards to Colour! Free Printable Holiday Colouring Cards- l love these designs! Perfect last minute Christmas card or advent activity →

Reader Interactions

Comments

  1. Gina Kleinworth

    Dec 14 at 8:10 am

    I LOVE THIS!!!!

    Reply
    • Colleen Pastoor

      May 19 at 1:47 pm

      Thank you so much Gina!

      Reply
  2. Blanca

    Dec 15 at 7:48 pm

    Love this topper and that paper is amazing!!!

    Reply
    • Colleen Pastoor

      May 19 at 1:49 pm

      Thank you so much Blanca! That paper is a total dream :)

      Reply
  3. Andrea Gardner

    Oct 03 at 12:52 pm

    Help, I followed your tutorial which was so easy to follow – but when it cut out although it was all joined it still cut out the letters individually?? what am I doing wrong. Please new to this and really want to do a topper for my Mother in Law’s 70th next week? thank you , new to cricut

    Reply
    • Colleen Pastoor

      Oct 03 at 4:07 pm

      By chance did you hit attach instead of weld? Weld is the key!

      Reply
  4. SHANA

    Dec 19 at 6:13 pm

    CAN YOU POST THE 2020 VERSION?

    Reply
    • Colleen Pastoor

      Dec 20 at 10:21 am

      Hey Girl, I didn’t make one for this year! I didn’t even think of it. I’ll add it to the list for next year to work on :)

      Reply

Leave a Reply Cancel reply

Your email address will not be published. Required fields are marked *

Sidebar

WOOHOO!

Check your email to confirm!

(+ get your freebies + discounts)


Thanks for dropping by!
I’m Colleen: wife; mom to 4 wild ones; and DIY blogger behind Lemon Thistle. You can expect to see rad DIY, modern home decor, renovations, hand lettering and the occasional party on Lemon Thistle. Read More…

email facebook youtube instagram pinterest

Unless otherwise noted, all content and images are mine. Full posts may not be shared without express written consent. But I love when you share! Feel free to share, without altering, one image with proper credit and a link to the original post. All free printables are for personal use only.

Everyone loves proper credit- if you ever notice something improperly credited, please please shoot me an email and I’ll fix it lightning fast.

Find all my policies right here.
This includes my privacy policy, info on the GDRP compliance and information on affiliate links (Including Amazon Affiliates).

Visit Colleen Pastoor’s profile on Pinterest.

colleenpastoor

My house is never this clean
-
DIY + Home Decor Blogger
Mama of 4 👶🏼🧒🏼👦🏼👧🏼
Renovating our 🏠 the DIY way
🖤 Lettering & ☕️
-
✉️[email protected]

colleen pastoor/lemon thistle
The hallway is finally finished and I’m so stink The hallway is finally finished and I’m so stinking happy! 

It’s felt like such a long time coming for such a small space. Since we moved in 2.5 years ago, this space has seen new doors and hardware, new trim, new floors... twice😅, we changed the boob light to a pot light and I hated it and now it’s got the most beautiful flush mount fixture I’m in love with (thanks @mymitzi!). It finally got some fresh paint and now frames on walls and last but not least... After this weekend, the new floors look like they were here all along (no door jamb gaps!) which was the last thing really bugging me since our flood last year. 

All this to say that home takes time and sometimes getting it right might take a couple tries. Also- the spaces we don’t really think about (hallways) can totally help a house feel like home with some love (and family photos 🥰)
ps. I partnered with #mymitzi to create a tiktok for This makeover... are you following me over there yet?! I’d love if you popped over and said hi!
It’s done! It works! And I’m calling it a grea It’s done! It works! And I’m calling it a great use of my afternoon the other day. Did you catch the stories? These projects both cost me under $10 by using pieces I already had in my home (yay for scraps!) and one package of drawer slides).
You can find the full video about these two kitchen organization projects over on YouTube in collaboration with my friend @love_create_celebrate and her #scrapsmademodern challenge! But for now... I’m rejoicing this coffee maker is off my counter for good 🎉
How’s your January going? Full speed or are you How’s your January going? Full speed or are you taking it a bit slow too? 

I’m not going to lie, I’m easing into this new year thing pretty slowly. All my decorations are still up (we always leave them up til Ukrainian Christmas which is later this week) and I I’ve yet to respond to my emails since before Christmas 😅
I’m enjoying the slowness of it all.
Happy Christmas Eve from our fam to yours 🥰 Happy Christmas Eve from our fam to yours 🥰
Yes, I made the paper bag snowflakes too. Have you Yes, I made the paper bag snowflakes too. Have you? 😅
This year has been one of a kind and I know so man This year has been one of a kind and I know so many people who are taking this year as the push they’ve been waiting for to start a side hustle, start an new career altogether or to just get creative about how they’re making money. So today I’m excited to partner with @kregjig to share some rad projects to make and sell this year! 
Like this rolling storage system I made for my office, that rad dollhouse and the gorgeous bath toy storage. All of these projects are things that I’d personally love to buy for our family and look like they’d be a great return on your time making them! And yes, all of them use #Kreg tools to make them easy to assemble and quick to make! Plus, they’re having a great sale on right now with deals on their K4 and K5 jigs, Rip-Cut and even a hardware jig bundle! There’s never been a better time to get your workshop set up!  #sponsored
Just a peaceful moment and then a real life moment Just a peaceful moment and then a real life moment for ya 🙃 
My #holidayhometour is on the blog and YouTube (I’ll put links in my stories) as part of the #seasonalsimplicity holiday home tour series. I’ll share those too so you don’t miss any!
My holiday home tour will be up tomorrow, but for My holiday home tour will be up tomorrow, but for tonight... I’m just enjoying the lights. And possibly a hallmark movie with some more custom order lettering 😅 what are your plans?
#christmasdecor #christmastree #holidaylights
We finished decorating yesterday and I’m just si We finished decorating yesterday and I’m just sitting here enjoying every minute of it 🤩 have you decorated yet?
Ps... talking more about hand lettering in my stories tonight!
Load More... Follow on Instagram

Copyright © 2021 · Lemon Thistle · All Rights Reserved · Powered by Mai Theme