This DIY Macrame Stocking is the perfect addition to your Christmas Mantel- the tutorial uses only 3 knots and basic sewing, you can finish it in an afternoon!

I made this stocking a couple years ago for a holiday macrame challenge with my friend over on YouTube. It turned out SO cute and it was really quite simple, so today I’m excited to make it into a written tutorial for you as well. I love macrame’s neutral colour but it’s so textured it’s still interesting and adds so much to a space.
I kept this one pretty neutral with a light grey base colour, but you could do any colour you like for the stocking- green would be so beautiful with the macrame cord! Or you could even dye the whole thing once you’re done so the macrame cord and stocking fabric matches.

If you’re new to macrame, I have a beginners macrame tutorial here. That post goes over the most common knots you’ll need to macrame and is super clear diagrams in a video so you can rock this project (and any other one you take on!).
For this project, we will be using the the square knot, double half hitch and larks head (to attach macrame to the dowel). Three basic macrame knots and you’re set to make this DIY macrame stocking! Those three knots are detailed, demonstrated and troubleshooted in this tutorial.
You can see the full tutorial for this DIY Macrame stocking right here, for photo tutorial, just keep scrolling ;)
Before we get started on the macrame, you’ll need to cut out your stocking base. I free handed this with a pencil and cut it out with a rotary cutter on a craft mat. Make sure to fold your material so you’re cutting out two pieces.


Once that’s done, we can use that template to make our macrame the correct size. I used a dowel to hook all of my macrame cords onto with a larks head knot, spacing them evenly. I like to make my cords two arms lengths just to make sure I have enough (and extra). Fold those in half to attach them with the larks head knot. I did 16 larks head knots for my size of stocking.
Attach that dowel to the top of your craft mat (or something else) to keep it in place while you work. I get my dowels from the dollar store but since this won’t be used in the final product, you could really use whatever you like here- a ruler, paint stick… whatever. You’ll need 3 dowels in total.
The macrame cord I’m using is 24 ply cotton twine. I bought this cone a year ago and haven’t made it through it yet, but of course this will vary if you’re doing larger projects.

Once you’ve set yourself up, time to get knotting! Start with square knots, spacing them down a little from the dowel. Spacing them down will just give you some extra cord to sew into the stocking when it’s time. A square knot is shown in the video, it’s the most basic friendship bracelet knot. For more troubleshooting, see this 4 basic macrame knot video.


Alternate square knots by splitting the cords from each knot in two, joining together the cords from two knots as shown.
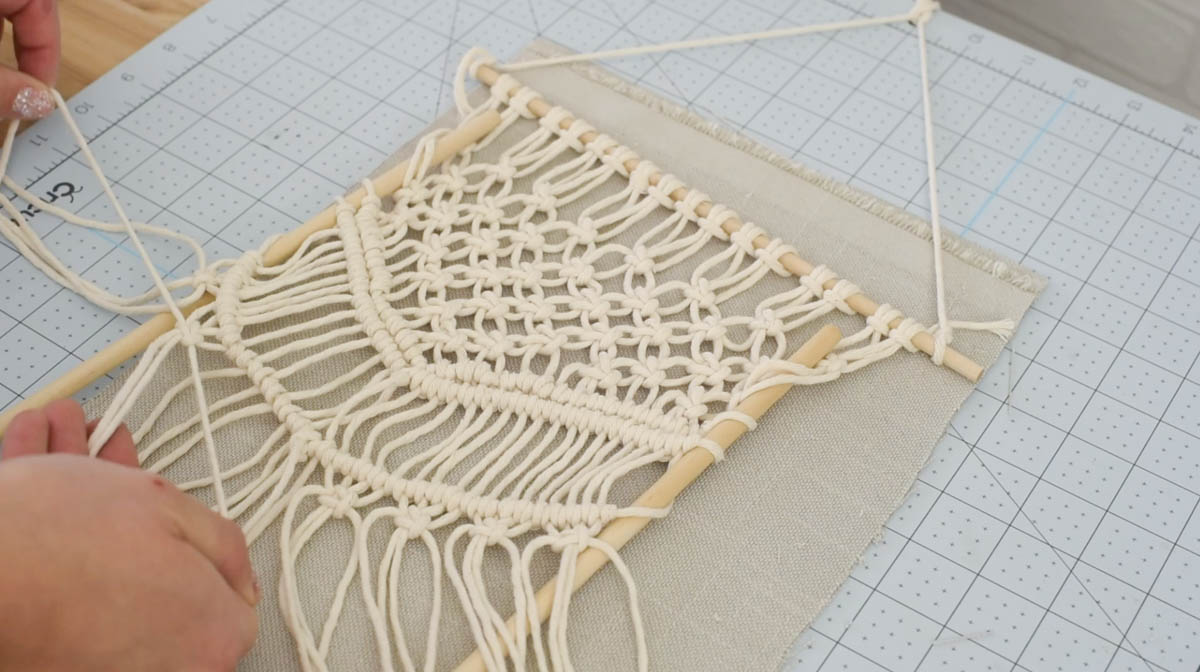
The outside cord can wrap around a dowel on the outsides. This again just gives some extra cord to make sewing the macrame into your stocking easier when it’s time.
Do this down to a point, dropping a knot on each end with each row, ending with one square knot in the middle.


Now that we’ve finished our triangle of square knots, it’s time to finish that triangle off with some double half hitches. These will create a nice, neat line.
Take the outside cord, wrap it around the outside dowel (again, just to leave some extra cord to make it easy to sew into the stocking later) and then hold it in your opposite hand. This will be your travelling cord and will end up in the middle at the point of the triangle.
You can see a double half hitch knot demonstrated in the video, knot each cord that’s hanging from your triangle until you get to the point of the triangle, then do it from the other side. knot the two travelling cords together to make the point of the triangle. Again, if you’re struggling with this knot, you can see a slower demonstration with diagrams and troubleshooting in this video here.

We’re going to keep going with those double half hitch lines! Add another one tight to the first, then leave a gap of about two inches before adding another line of double half hitches. This gap will be filled later with fringe.

Now we’re back to… you guessed it! Square knots! Because it was a triangle, to get it down to an even straight line, you’ll need to add some extra knots on the edges. Make sure again to alternate and loop the outside cords around the dowel for extra cord to sew later.
Once you have it level in a straight (ish) line (don’t be too stressed or picky here, no one will notice if it’s one knot off… macrame is very forgiving!), we add another two lines of double half hitches, joining in the middle.
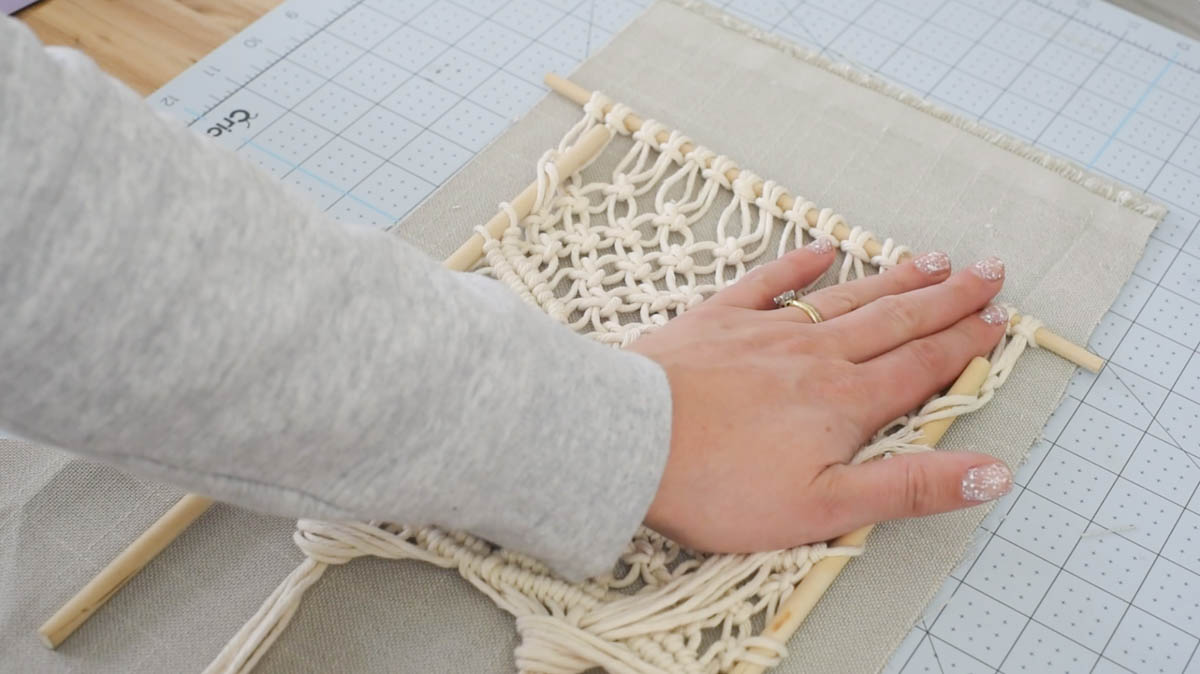

I loosely tied all the ends of the cord in a knot to keep them from getting tangled. At this point, we can remove the dowels. I held the macrame flat and wiggled the dowels out.


Then, we can get the stocking ready to sew. I folded the top edge of the stocking down two times, sandwiching the macrame cord in on the second fold. Make sure to pin both the fabric and the macrame cord. At this point, we are only working with the top layer of the stocking (leave the back layer of the stocking for now, just folding over the top hem edge for that one).
Pin all the macrame cord down the edges of the stocking and then head over to your sewing machine to stitch it on.


Now that we’ve stitched the macrame onto the front panel of the stocking, we can sew the stocking together. put the pieces face together (outside faces sandwiched together) and sew around the outside of the stocking, leaving the top open for stuffing with gifts. Make sure to backstitch at ends.

Now that it’s stitched together, we can turn it right way out and press it if needed. At this point, we can add the fringe and tassels! To make the tassels, get a card and wrap the cord around the card until you’re happy with the fullness. Slide it off the card and tie one end, cutting the loop of the other end to make your tassel.
Tie the tassels on right under the bottom row of double half hitches and trim all tassels and trailing cords to an even length. I made 5 tassels total, I recommend an odd number of tassels for this projects.

To add the fringe, take equal lengths of cord and tie them on (just regular knots are great) to the gap, I added one per cord, then trimmed them into a triangle. Then I flipped those up and added another layer of fringe, trimming those to a slightly longer triangle.


Last but not least, stitch a small piece of ribbon into a loop to hang the stocking by. Then stand back and admire your DIY macrame stocking… isn’t she lovely?!
If you’re interested in learning more macrame, you can see all my macrame projects right here:


LIKE IT? PIN IT!

 Cozy Holiday Bedroom Update
Leave a Reply