Sharing the four different methods I would use to make a monograms in Cricut Design Space and my Cricut Joy.

I’m joining up with my friend Alexis from Persia Lou for another Silhouette VS Cricut challenge video. In these videos, we take on a specific function or material that the machines can cut and then we both do individual tutorials or projects showing how we would do that with our machines.
I’m team Cricut (woo!), so this tutorial is how I make monograms using Cricut Design Space!

I’m sharing three different ways that I would make a modern monogram using Cricut Design Space- from accessing ones they offer in Cricut Design Space, to combining images and fonts to uploading my own design. I also missed sharing some ready made monogram builders Cricut has in their Design Space and how to knock out text from a monogram in the video so have included those in this post. Ready? Let’s do it!
I’m not going to lie… I rush a bit through this so the video isn’t an hour long. I got it down to 15 minutes BUT if you want me to go slower, YouTube has that little gear in the bottom corner of the video, you can tap it and select a slower speed. BAM. Slower.

In this video, I’m using my new Cricut Joy machine to make these monograms. I’m bringing this up because the update to Cricut Design Space has you select which machine you’re using while you’re designing so that it can warn you if you’re using incompatible materials (wrong pens for example) or sizes. The Cricut Joy is much smaller, so those warning exclamation points in the layers panel you’ll see as I’m working are just to remind me I need to make it smaller to fit on the Cricut Joy cut area. Nothing is wrong :) Want to see more projects with the Cricut Joy? Check this out!

Alright, the first way I wanted to share to make a Monogram using your Cricut… is to use the ones that Cricut has given access to! Cricut has SO many images and projects loaded into Cricut Design Space. If you don’t need something super custom… why not use those? There are three types of images available in Cricut Design Space. Free ones, ones included in Cricut Access, and paid images over and above Cricut Access (typically licensed images, like Disney). The images I used here are from Cricut Access. You can filter by ‘free this week’ or by ‘cricut access’ when you are searching.
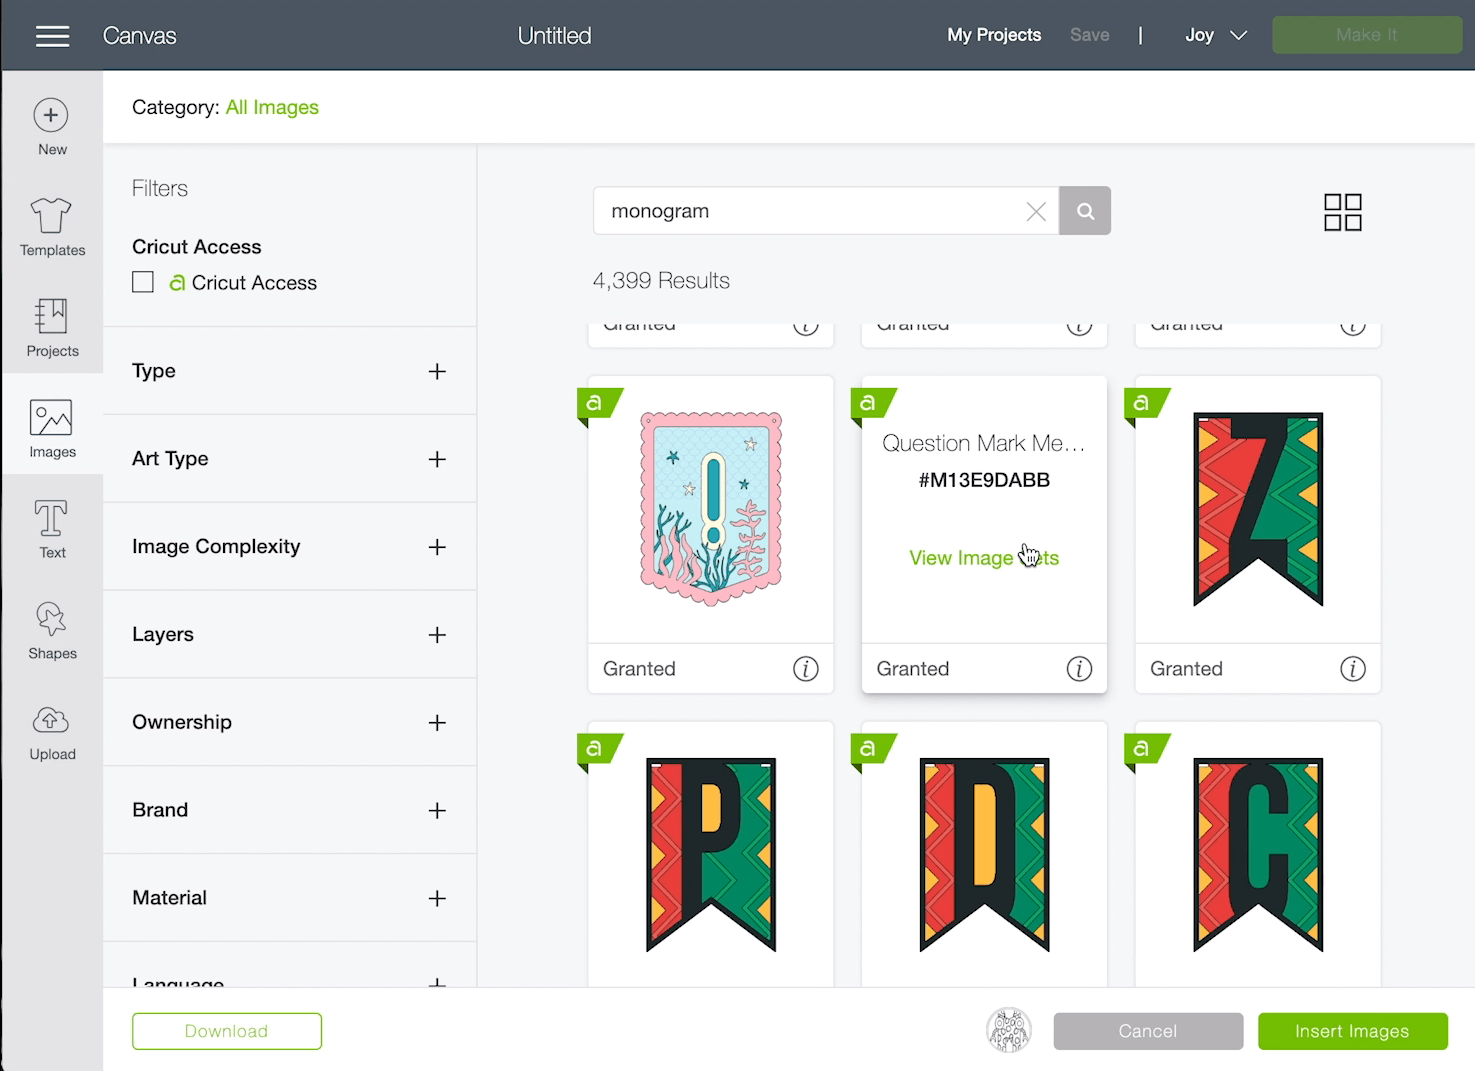
If you find a design you LOVE but it’s an ‘O’ and you need an ‘A’, you can click that little ‘i’ in the corner of the image and view image set to see allll the images in that series/set.


I made this stacked paper V and the Monster M using designs available in Cricut Design Space.

Some of the free files that I didn’t share in the video are these guys here. There are a couple premade monograms like this in Cricut Design Space for free.

Just insert all three letters you want, and in the case of those orange ones, just turn off the layers you don’t need, line the files up and attach or weld the layers you do need.


Next up is ‘attaching’ text and images! I used some botanical leaves from Cricut Design Space and a sans serif ‘C’ but wanted to cut them out of their own colours of paper. To keep them together on the canvas as I’m designing, I ‘attach’ them so if I resize or move them, they stay together but they will break up to cut on their own mats when I hit ‘make it’.

For the blue ones, I sized them to my preference then selected all the layers to ‘weld’ them into one design. This gets rid of any overlapping cut lines to make ONE design.
Alright, the second way I wanted to show is to combine images and and fonts to make a monogram.


I did this a few ways for example. The first is taking an image and adding a monogram letter to it, creating one layer out of them both. For this example, I took this playful unicorn design and added a curly little M.


I sized them where I liked how it looked, then selected all the layers of the design and hit ‘Weld’. Weld will make more than one layer allll one layer. Where the designs overlap, they will become one piece. So the machine will no longer cut all the way around the M, it will cut around the new welded design of the M and unicorn. together.


The next option is to use the slice tool. For this one, I added a monogram background badge from Cricut Access, then added my text on top. I sized it, then selected both layers and hit ‘Slice’. This tool cuts one layer out of the other. You’ll end up with three layers. You can delete all the layers you don’t want to cut out, leaving yourself with the monogram cut out of the background. I will note that you can only slice two layers at a time. You can keep going though, then selecting that slice result and the next layer, slice and so on.


Here’s another example I didn’t do in the video, but thought was worth adding after the fact. For this one, I took one of the free monogram ‘P’s and added the knockout text in the middle. For this one, I combined the slice tool and the weld tool. I added the rectangle shape where I wanted to cut out the name. You can make a rectangle out of a square shape that’s inserted to your canvas by clicking the lock on the bottom left corner of your shape, then sizing it to your preference.


Once you have that overlapped how you’d like, select both layers and click ‘slice’. Once it’s sliced, delete the layers you don’t need and let’s add those lines. I tend to use rectangles for lines so I can get them exactly how thick I like them, just copy and paste once you get the exact size you want and use the gridlines to line up the two lines. Then you can add your text, select all four layers and click ‘weld’ to make them into ONE cut design. If you wanted to cut them in different colours, you would only weld the ones you want in the same colour.
Okay! Flying through them, the next example is uploading your own design. This is what I tend to do. I love to draw my own designs on my iPad and then import them to Cricut Design Space. I have a full blog post and video tutorial about uploading your own images to Cricut Design Space so am going to run super quick through this one. If you want more information on this, check out this post!


To upload your own file, click ‘upload’, select your file and if it is very clear like mine, you can chose ‘simple image’ and ‘cut image’ before inserting it onto your canvas. I used a PNG file for this since it’s easier for me to create than an SVG. Since you only get one layer when uploading a PNG, I uploaded my monogram and my background shape as separate layers.

To get the Cricut to cut out ONLY the outline of the background shape, just click ‘contour’ and click the lines you would like to ignore in your cut.

The second design I made by uploading is this monstera leaf. I drew it out for the sake of this video but chose to use a version I already had that I liked more. I added the leaf into Cricut Design Space, then added the sans serif C over top and welded them together.


Phew! There’s a TON of examples in here. I hope you found it so helpful and if nothing else, opened up your mind to the possibilities of the Cricut Design Space software for your designs. I know when I started working with my Cricut, designing in the software intimidated me. It didn’t feel intuitive and while there’s been so many improvements to the software in the past five years that I’ve been using Cricut- I think my confidence comes with just playing in there to see what’s possible. I definitely encourage you to do the same!
 Floral Watercolor Monogram
Leave a Reply