
I shared this little kids floating vanity that we built in our kids’ shared room last year over at Remodelaholic and now that we’re busy on making this room a shared space for not just 2 but 3 kiddos (read about our announcement here!), I thought it was about time I shared this little DIY with you. These pictures remind me of how big my kiddos are getting! They were so tiny in these shots, it’s hard to believe that they’re almost 4 years old now. And speaking of the shared room… since we’re adding another kid into this space, we thought we’d give it a full makeover- paint and all. I can’t wait to show you what I have in mind for this room and this little vanity. You can see their room reveal for their current space right here.
I came up with this project after reading the Design Mom book… have you spotted it? It is packed full of rad ideas on how have a home that is truly designed well- function and style. I read it cover to cover twice when I got it for Christmas. I love the practical tips Gabrielle Blaire gives to make your home a happier place to be through organization and great design. One of the things she suggests is making space for activities that help relieve pressure points.
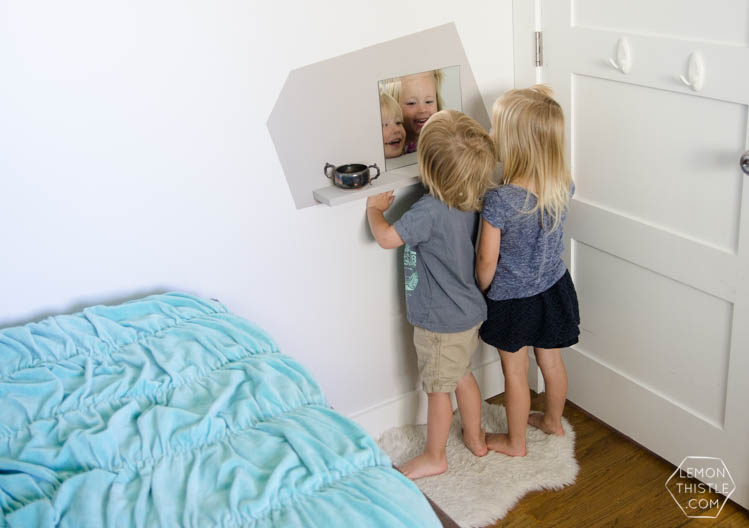
For example… we have one bathroom. I can’t install a toilet in my kids’ bedroom, but I can give them a mirror and a place to store a hairbrush so that they aren’t interrupting my pee break to brush their hair. Because you KNOW that it has to be done that very second, right?
Plus it just plain makes sense to give kids their own space to learn these grooming habits that don’t necessitate them climbing on the counter (although I’m not sure they’ll stop that). I love that when I braid Aubrey’s hair all fancy, she runs to her bedroom to look in the mirror. She doesn’t ask for me to hold her up to the mirror to see- she has that independence. Maybe it’s a little thing- but it’s meant so much to her especially to have a mirror of their own.


Okay, so I’ve established the WHY… but what about WHY THERE? I’ve had a few people tell me that it’s a terrible idea to put this behind a door. Keep in mind these lovely people are strangers on the internet. But I’ll indulge them and explain why we chose here. This room is cramped with two toddlers, you guys! There is NO space on the wall that we haven’t used except for this spot behind the door.
But that’s what makes it so perfect! You don’t need a ton of space to mount a mirror and little floating vanity. And the door stop takes care of the door before it would ever hit the mirror or shelf. Because the door’s usually open and protecting it, it’s actually less likely to get broken here than anywhere else in that room. You know, the room where three kids under 4 play all day.
So there ya go! Plus, it’s been over a year now and it hasn’t been broken yet. But they have managed to break the clock on the other wall, the garland over their window, and the decorations on the shelf above Emmitt’s bed (see all of those right here). Did I mention the picture frames they pulled down from above Aubrey’s bed? Kids are wild, friends.

On with the tutorial, done with the rambling? Alright, alright!
Here’s what you’ll need to make your own DIY Kids Floating Vanity:
- Small Mirror (Mine is from the dollar store, it is an event centerpiece mirror)
- 1×4 cut to size (I used oak, see notes below)
- Small L Brackets with screws (and heavy duty drywall brackets if no studs)
- Paint (I chose a grey that was slightly darker than what was on our walls *colours below*) and brush
- Level
- Painters Tape
- Silicone Adhesive (or PL or 3M strips if you’d like it removable)
Start by measuring the space you’d like your station to be. Cut your 1×4 to size using a chop saw or other saw. I used a piece of oak I had left from this minimal shelf I made recently. Why I chose this instead of a more affordable wood is… it’s got straight edges and true corners. I don’t have a table saw, when I want to use one I have to call around and go pick one up, bring it home, set it up, use it, pack it up and bring it back (to a family member of a family member no less). It’s not ideal. So saving the step of ripping down the edges was worthwhile for me. Plus I like the harder wood for stability with the short screws. Give the edges a light sand, you’re painting it so you don’t need to sand it crazy well.
Next, tape off the shape you would like to paint, press your tape down really well to prevent bleeding.
Then, use your level and hang your L brackets. We bought a giant pack of the tiny ones when we were building our built in shelving unit, so I used those BUT you could definitely get bigger ones if you rather. I put the two that would be hidden by the shelf (upside down) on at this step, then added the other one in the middle when I installed the shelf.


Paint out your shape including the installed brackets and screws. I did two coats. While you’re at it, paint your shelf two coats. The paint I chose is from Para Paint and it’s called F-Stop. I’d originally tried to use their ‘Dreaming in the Clouds’ but it turns out it’s an EXACT match to the custom colour we have on our walls. What are the chances?
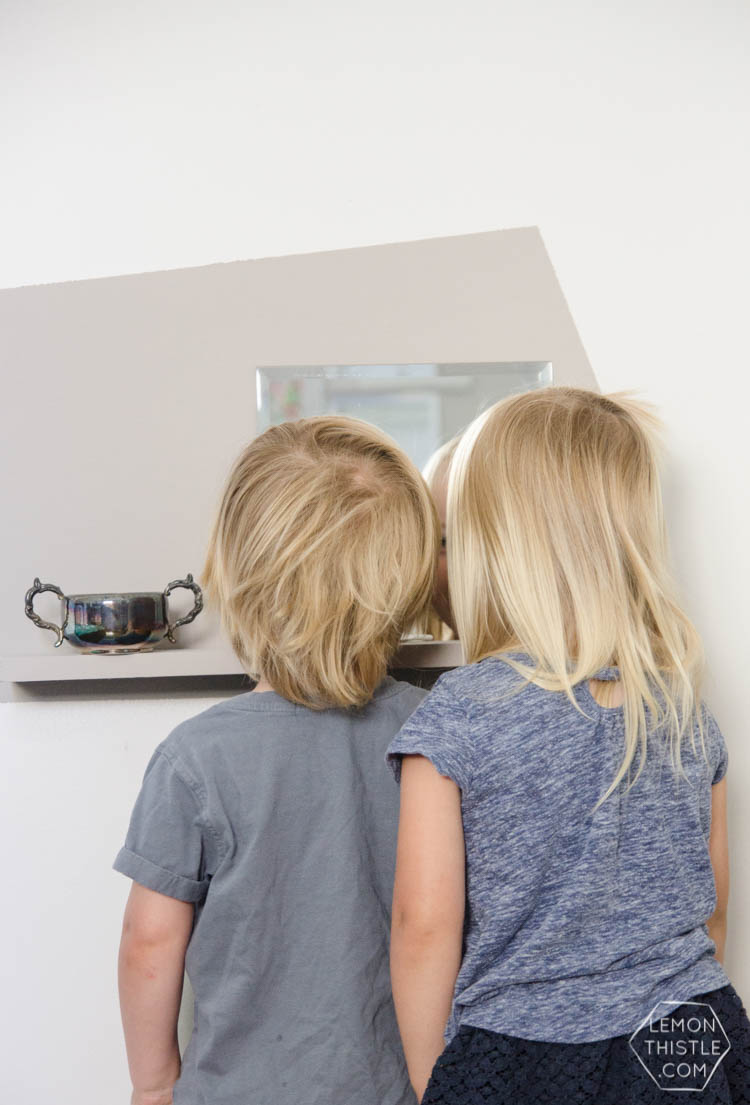
Give it time to dry, then install the shelf. Add extra brackets if you feel like it needs them. Then, paint over the screws if you want. I like that the L brackets leave a bit of space between the wall and the shelf (the thickness of the bracket metal) to slip the mirror in to look like one unit. I used this silicone adhesive to install the mirror. It’s the same stuff we used to install our hammered steel backsplash. Just make sure to apply pressure for 30 seconds to a minute before calling it done. I added a little silver creamer container for elastics and hairclips. I considered using the silicone adhesive to attach this to the shelf as well, and with how often that thing disappears, I probably should have.


That’s it! I’m really in love with this little addition to the kids bedroom. I can’t wait to show you the new paint job we’re working on for that space and how we’re making the little vanity stand out without the color blocking paint job!
LIKE IT? PIN IT!

 Navy Front Door Update
This is so perfect for small children and small spaces…or no spaces…I did this behind my bathroom doors and walls because I wanted shelves on my walls for extra storage for special guests…in my guest bath…a couple of decorative shelves..behind the door..for their extras..1×4’s work great…behind a door…
Yes! The perfect way to use all those little bits of space.
This is adorable! Can’t wait to add to my daughters room. =)
It really is so handy! If you do- I’d love to see a photo :)