So guys, I’m ‘sick’ again! I was so frustrated I started taking more vitamins until someone pointed out to me- hayfever! I’ve never had it- but apparently now I do… you’ll understand after my next post (hint: it includes hay). When my sister-in-law made the obvious connection I could have smacked myself! I have allergies already so it’s not a stretch. Oh well, now I know for next time. Just thought I should let you know.
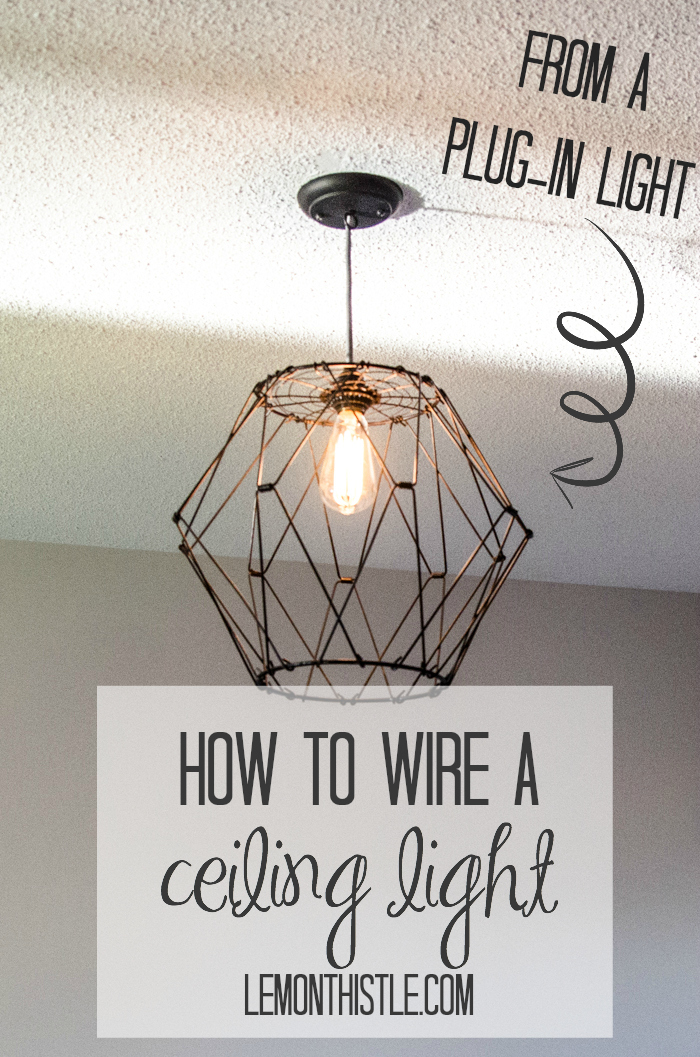
Today’s DIY does not take place on a ranch with hay- so you’re safe if you’re an allergic nut like me. Today I’m going to show you how we wired a plug-in pendant (you know the really funky ones you can find) into a ceiling light. I know every blogger out there (exaggeration) has posted how to turn some random object into a light- but what about the wiring!? This is that missing step (although not the most glamorous). There are a million tutorials online how to do this- but they confuse me, so this is the dummed down version (not that you’re a dummy).
Now just so we’re clear- I’m not an electrician or anything close. I’m probably not using the correct terms- but this is how we do it, and if it saves you a buck (from hiring an electrician) I thought it’s worth sharing. My Dad is pretty handy when it comes to all this electrical stuff, so we only hired an electrician to upgrade our panel- everything else in this house has been DIY but up to code (the ‘up to code’ part is the important part, right? No duct tape electrical here).
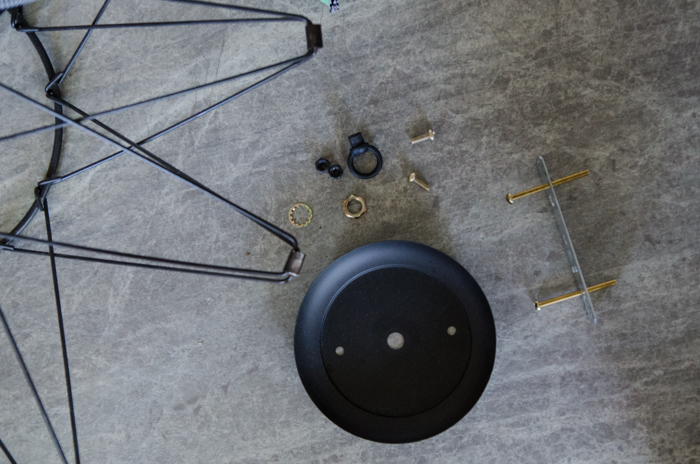
So let’s get on with it! Gather your stuff. To turn a plug in pendant into one that hangs from the ceiling, you’ll need a plate that hooks into the ceiling- it’s called a canopy. We got ours from Home Depot and it was a pretty perfect match in colour. The other light we did was a brushed brass colour, so I spray painted the plate to match (it looks like it came together- I’m so happy). All that small hardware comes with the new ceiling plate- we got ours from home depot at the back of the lighting section, they’re like five bucks. There’s a bunch of different types though and how they attach together is different. I like these ones the best- they’re straightforward and I like the look of them. I’ll show you how this type works, but yours might be a bit different.
Needed:
- Your plug-in light & bulb
- Ceiling canopy kit
- Voltage Detector (like this)
- Screwdriver
- 2 Marrette wire connecters (the little caps)
- Knife and cutting board
- Tape and Scissors
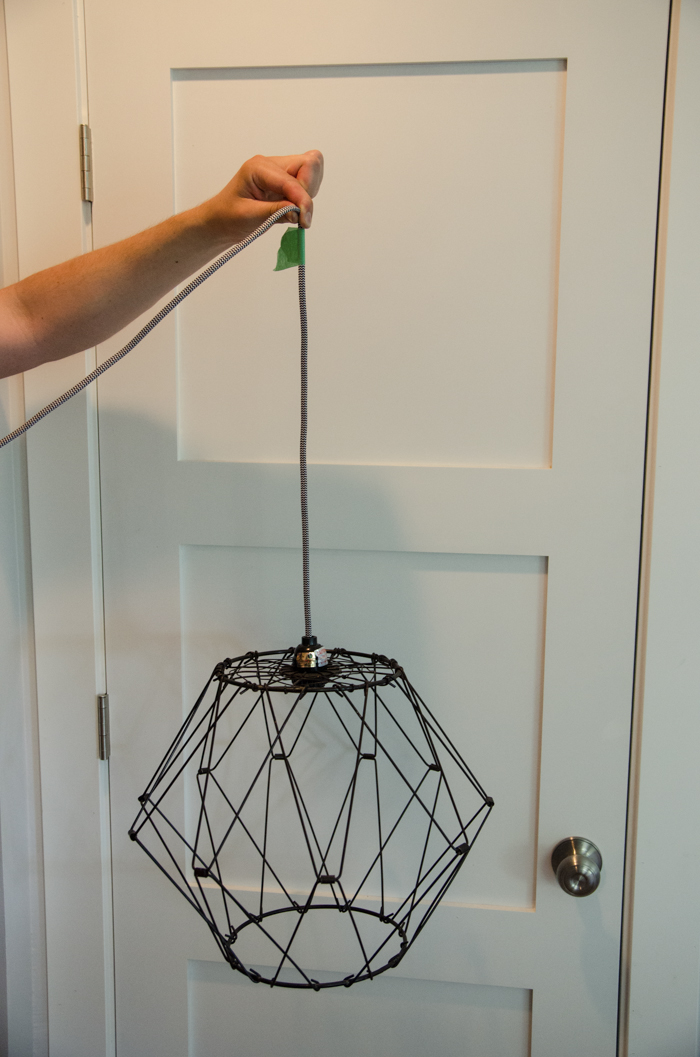

Okay, so let’s start with the fun part- decide what height you’d like your light to hang at and mark it with tape. Then cut that cord about six inches longer (we put another piece of tape for cutting). Now that your cord is cut there’s no going back! If your cord is cloth wrapped like ours, you need to cut that back. Tape it off so it doesn’t continue to fray (and to make easier to thread through the canopy).
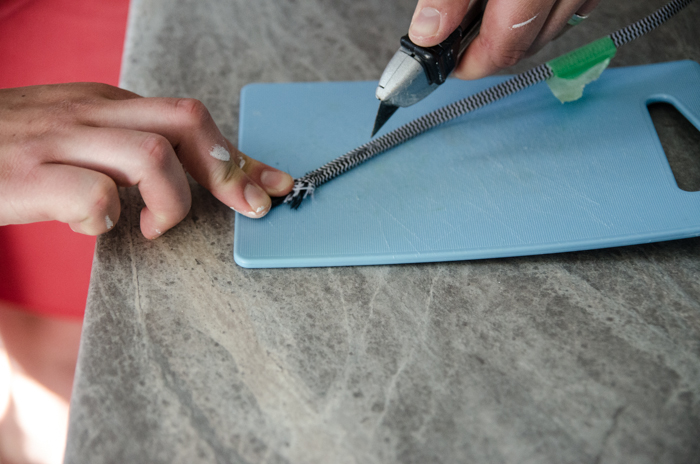
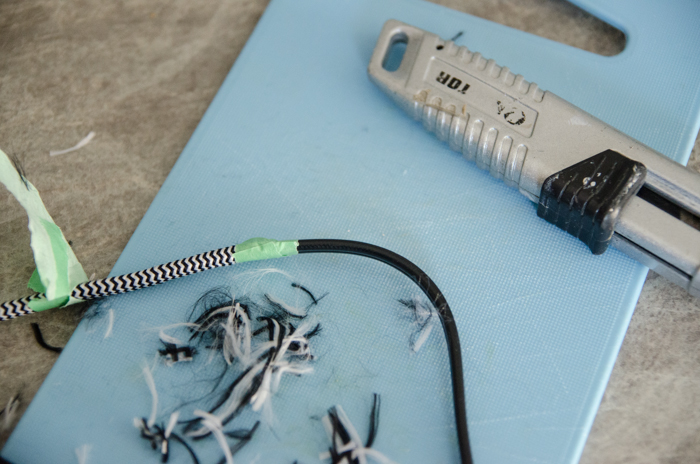
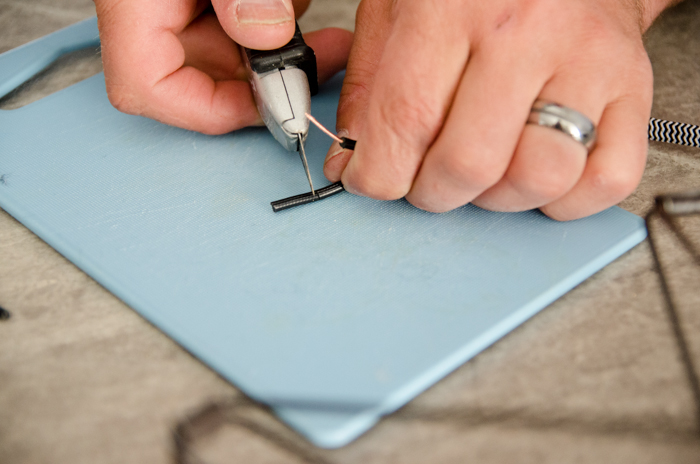
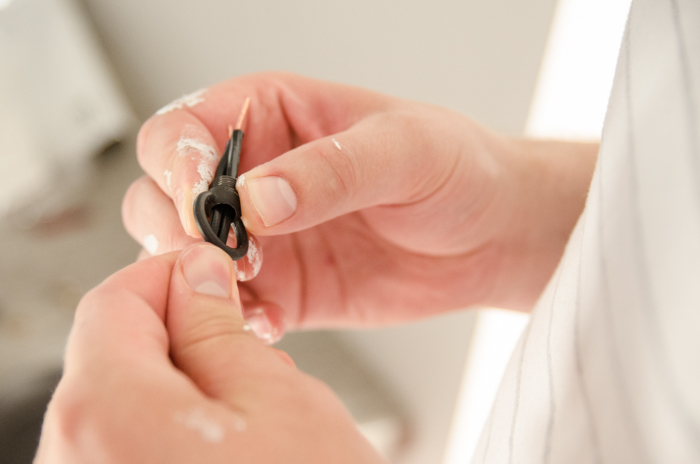
Now we’re going to strip the actual wire. Wire strippers would work awesome for this (because that’s what they’re made for…) but we didn’t have them so we used a knife. To use a knife, gently cut through the rubber coating and twist it off, careful to leave the wire in tact. You need to strip about two inches. Once your cord is all prepped, feed it through the ring/loop bracket/ middle piece (no clue what it’s actually called) until your tape is hidden. This can be tricky if your wire is cloth wrapped- it’s bulky! Then screw that ring into the canopy. Use the washers to secure it from the inside. You may want to add a zip tie or tie a knot to make sure your lighting fixture doesn’t pull the cord back through (ours was super light and the cord was really tight through the hole so we didn’t bother).

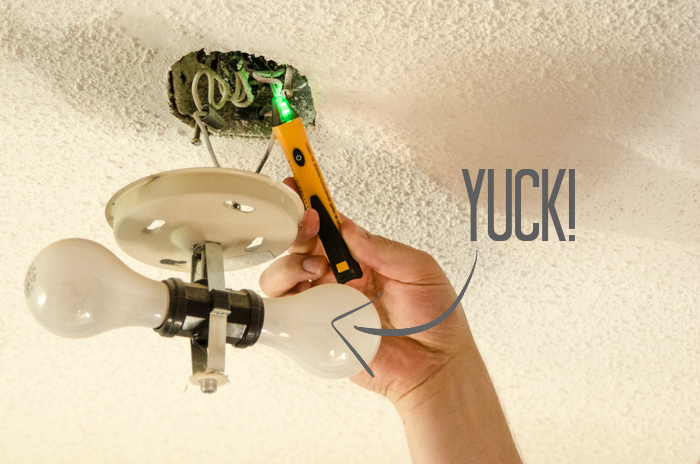
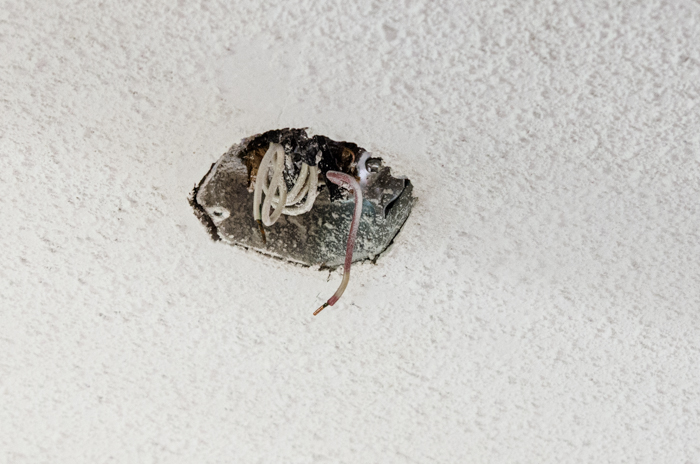
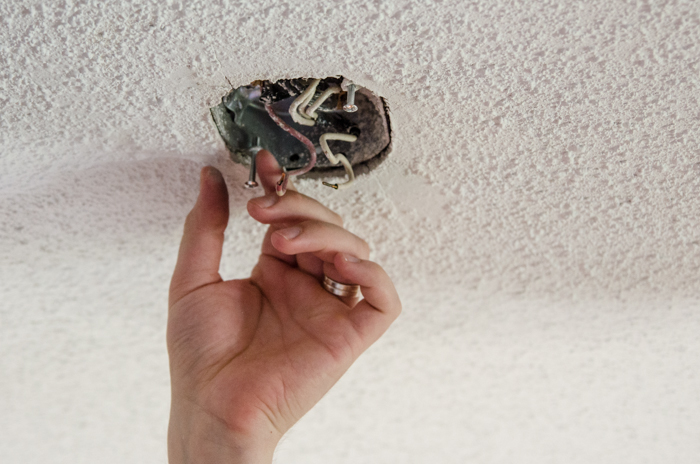
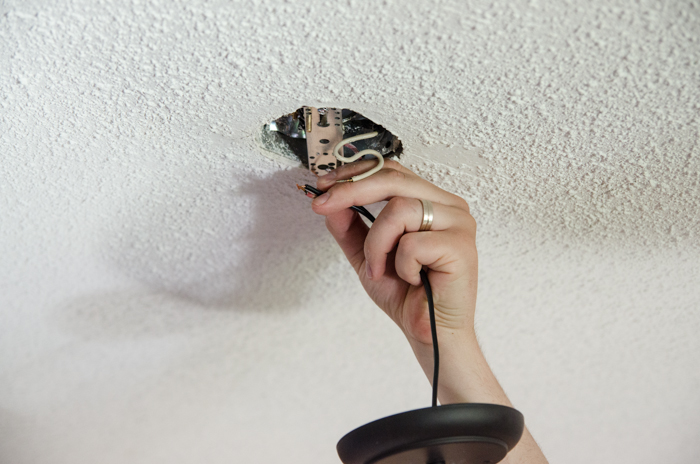
Let’s go to your old fixture for a minute (yuck! this is actually what’s been lighting our babies rooms for the past couple months). Pull out your handy dandy voltage tester and see if the wire is live when you turn your light switch off. Ours both went completely dead with the switch off so we didn’t have to flip the breaker. If yours is still reading live or if you’re unsure- flip your breaker and be safe (pretty please). Then disassemble the fixture that’s in place so you’re left with just the wires, like this!
Look like mine? Maybe a little less paint splattered? This is the part I have the hardest time explaining so take a good look at the photos. Screw two screws into the metal box in the ceiling (there’s space for two). These are to attach the silver bracket but before you attach it… That silver bracket is going to get screws facing down (the gold ones) that will eventually go through the two holes in your canopy. Go ahead and attach the bracket, it just slides on.
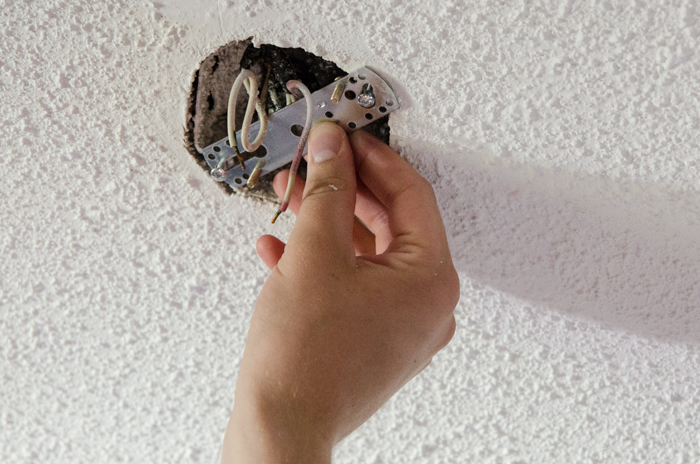
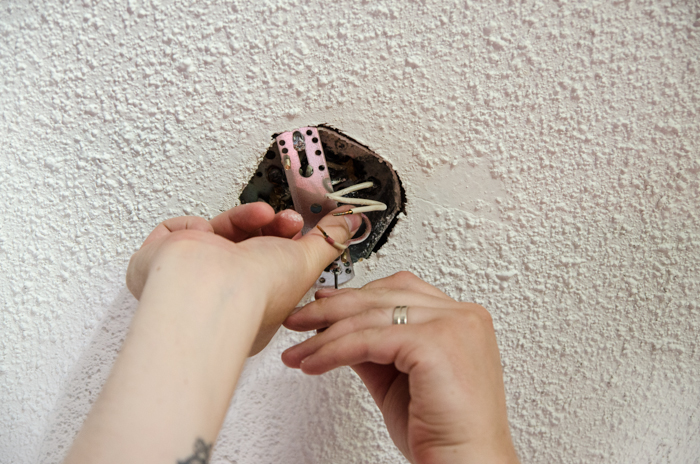
You can then use your screwdriver to adjust the height/depth of the screws (the silver ones) so that the canopy sits flush with the ceiling and the gold screws stick out enough to cap. Once it’s about the right height- let’s wire the sucker! Our light cord had two black wires (a free for all!)- otherwise you’d need to match them up. Pinch one of your light wires to one of the ceiling wires and thread on the Marrette. Tug on it to make sure it’s secure before moving on to the next.
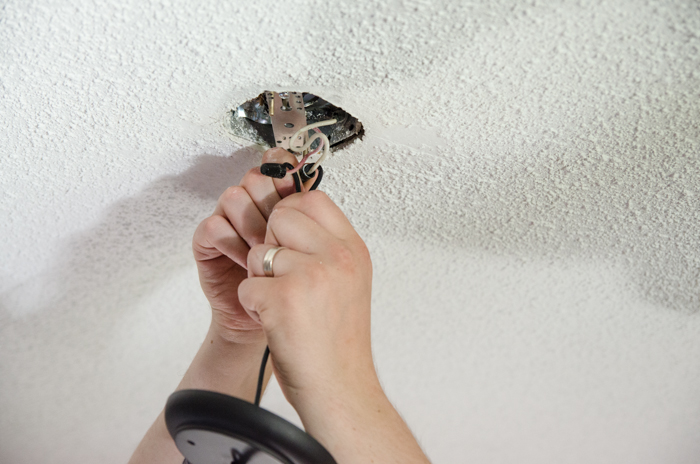
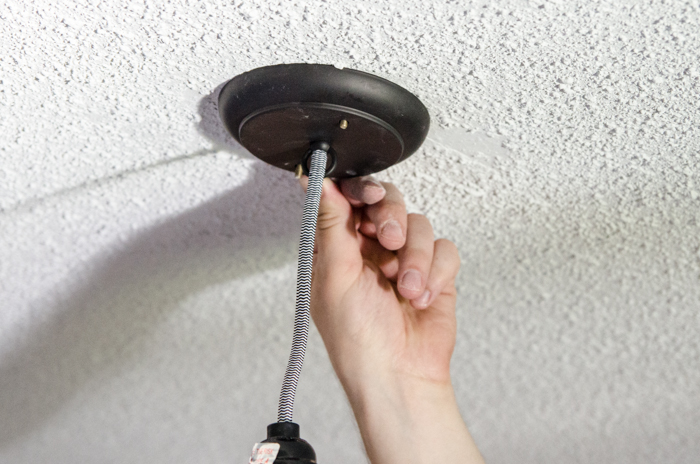
All wired? Bunch up that extra wire behind the silver bracket and attach the canopy by screwing on the little caps that came with the bracket onto the gold screws. Add your shade and bulb and admire your handy work!
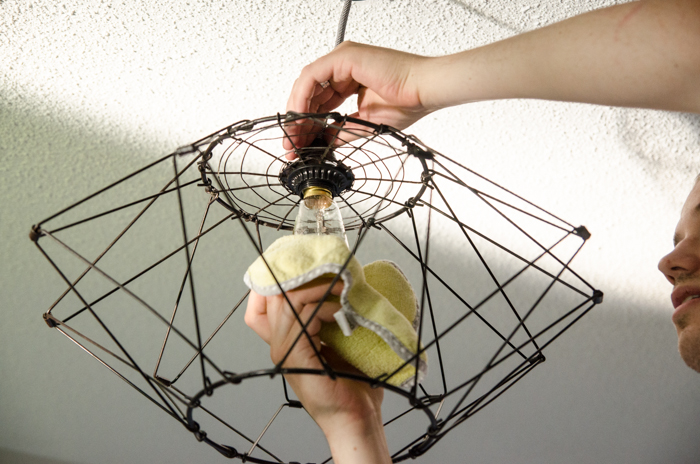
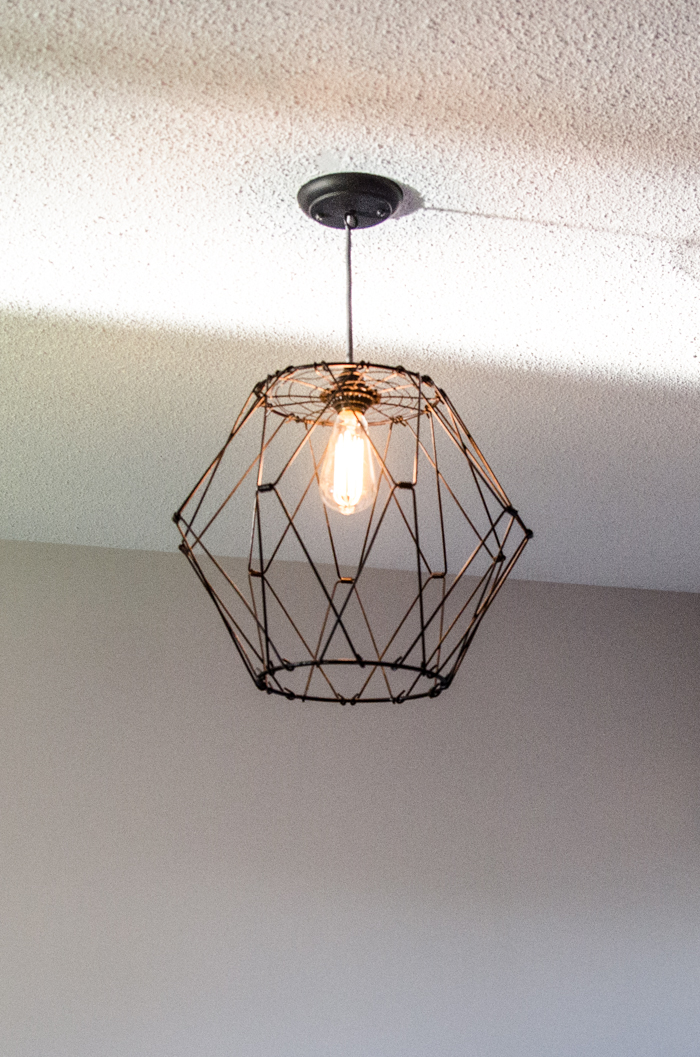
That wasn’t too hard was it? Now you can make any garbage can/basket/ bowl into a light- just like everyone else :) Our light is from Urban Outfitters if you’re curious. The shade and the cord kit came separately. The fun thing about this shade is that it’s convertible. I thought it would be fun as the kids got older they could shape it however they like. If we do the math the whole light cost $70 installed- not bad!
Any questions? Would you ever DIY any electrical?
 Pretty Up Your Grocery Store Flowers
Thanks so much for the detailed steps! I want to change out some of the lights in my house and I think this tutorial will help a ton!
I hope it does help! I’d love to hear if you end up using the tutorial how it goes for you :)
i’ve been wanting this light! thanks for the tutorial! it’s awesome!
I’m glad you like! I’ve been eying it forever- so glad I have a place to use it now!
Awesome tutorial! I am in the market for a new foyer light, and I am just not finding anything I love in stores. I might have to try DIY. Thanks for sharing the how-to!
Thanks Megan! I’d love to hear if you do- let me know if there’s anything confusing in here so I can fix it up :)
oh colleen- i’m so sorry about the hayfever! hopefully you can start feeling better now that you know what’s getting you down. and you know, i think i’d be cheered by that ceiling pendant – it looks great!
Aw thanks Jen! I’m already starting to feel better :)
Awesome light! Thank you so much for linking up to Monday Funday!
Thanks Jamie! I appreciate you stopping by :)
That is such a cute light. Thanks for the tutorial
Thanks Shanna! I’m so glad i found a place for it in our home- it’s so much fun.
This is AMAZING! Definitely one of my favorite DIY light fixtures I have come across. Thanks so much for sharing it at The Makers! Pinned :)
Thanks Katie! You’re too sweet:)
Excellent instructions!!! Thanks for sharing!
Thanks! I hope it’s helpful for you :)
Hi Coleen! I just wanted to let you know that I LOVE your super cool Ceiling Pendant, and I’m featuring you as one of my Rockstars tomorrow morning from Creativity Unleashed!
As a Rockstar you’re in the running for this week’s MEGA Rockstar! Be sure to grab your friends tomorrow and come vote at http://www.theboldabode.com/2014/07/rockstars-creativity-unleashed-week-27.html
The MEGA Rockstar gets loads of love including:
1. Shout outs on all my social media houses.
2. A bucket full of Pins to my biggest group boards
3. A big sidebar ad proclaiming them the MEGA Rockstar of the week
4. And a feature in my weekly newsletter!
Congratulations and Good Luck!!!
Thanks Gwen, you’re too sweet :)
Great Tutorial!!! We would love if you would link up to “On Display Thursday”. http://paperandfox.com/on-display-linky-party-2/
Thanks Carmody! I’ll head over to check it out :)
This how-to was amazing! Love all your pictures showing exactly what should be done next. I am trying to think of where I can give this a try. We are renovating our garage into a den this fall and I think I could use this tutorial then! Thanks so much, super helpful!
Thanks so much Rachele! I’m glad it’s clear- I actually had my Dad proofread this post to make sure I got it right.
Congrats, I just featured this gorgeous wired ceiling pendant at Link it or Lump it! Be sure to stop by and grab a feature button.
http://www.delineateyourdwelling.com/2014/07/link-it-or-lump-it-party-number-46.html
Thanks so much Amy!! I’m headed over to check out the party now :)
This is such a great thing to know how to do! I’m featuring you tonight at the Do Tell Tuesday party–hope to see you there!
Thanks so much Lisa! I’m headed over to check out the party!
This is a fabulous tutorial! I love your blog and I’m so glad you linked up at Thursday STYLE! Hope to see you back this week. You are my feature for tomorrow!
Thanks so much Angela! I so appreciate it :)
This is so, so helpful, Colleen! It is so true that there are hundreds of tutorials out there that skip this part entirely. Love your new fixture! I’m officially on the hunt for a cool basket/bowl/garbage can. ;)
Thanks so much Alexis! Can’t wait to see what you create :)
I just completed this tonight! Your instructions were spot on. So I’m love with my new fixture. Thanks!!!
That’s so wonderful to hear Dee!