We installed wood look vinyl plank over concrete floors in our basement- here’s what I’ve learned from doing it a couple times and tips for installing your own!
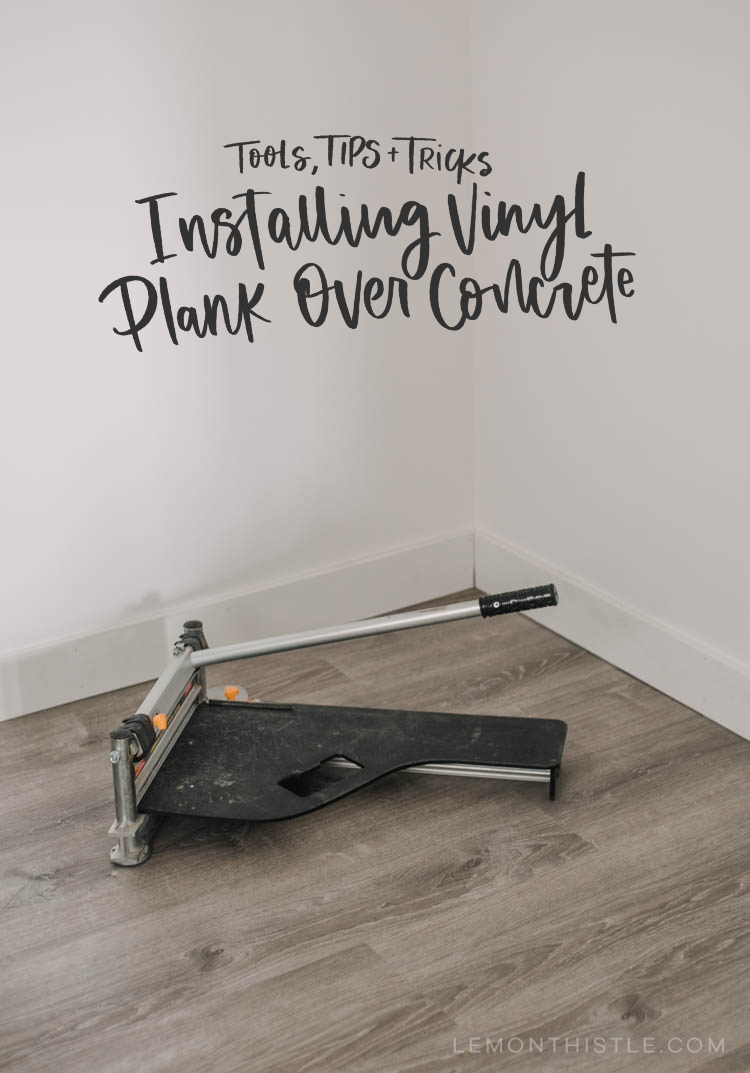
We’re making progress on my office makeover (see the plans here!) and it feels so good, you guys! Flooring went down last week and that always takes a project from ‘work site’ to ‘almost finished’ in a hot minute. And then baseboard is another leap forward… it’s so exciting! Today I’m sharing some tips, tools, and tricks to installing vinyl plank over concrete. This is the second time we’ve done our concrete basement using vinyl plank flooring (see the last place here!) and this time it went SO much smoother.
I did this whole room by myself completely in two evenings (and about half an hour the next day) and feel confident that these tips (and tools!) will help you if you want to do the same. First thing? Let’s talk about what I will ALWAYS look for in the flooring I choose from now on.
I partnered with The Home Depot Canada on my office makeover (yay!) so chose a flooring that their staff had recommended. It’s LifeProof Luxury Vinyl Plank in Sterling Oak and honestly, I only looked at the durability and the colour before choosing it. I didn’t look at how it attaches. I just assumed they were all the same. So other than the obvious things like that… I will now check how they interlock, because this one is WAY easier than others I’ve used.
The way vinyl plank or tiles work is that they interlock as you lay them (put them down at an angle and as you flatten, they lock. BUT putting them down on an angle one way is great… but then how do you get that side edge to also interlock… without pulling up the row ahead of it? Does that make sense? You somehow need to tilt up the tile to lock into the row before it but also the tile beside it. Pain. Total pain. This is what our last house had for the basement. We got it done. But there was definitely frustration. This is also what we tried helping friends install in a warehouse a couple weeks ago. We gave up and ordered pizza.

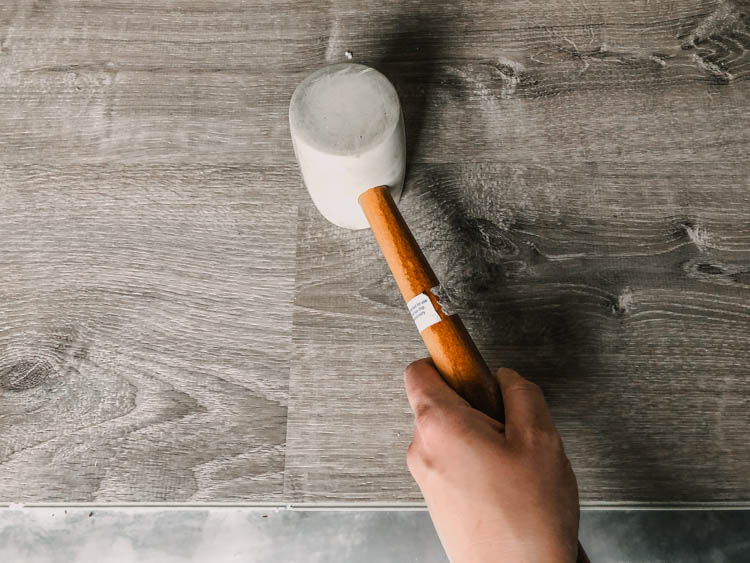
Our laminate floor that we installed in the whole main floor interlocks to the row before it, but then sits in a groove of the board next to it. Simple. This vinyl plank for this space? Is kind of a combination of the two. It interlocks with the row in front of it. But then it clicks in to the plank beside it. You line it up (after interlocking with the row before) and use a mallet to click it into place. This locks it. It’s fantastic. This was the one thing that helped me move so quickly down there. It doesn’t pop out as you lay the next piece then- it’s locked in place!
Alright… so with that out of the way… let’s talk about underlay!
Before you get to the underlay, just note that you need to clean your concrete (remove debris) and fill any large holes. This flooring has underlay attached. With plywood subfloor- that’s totally enough. But with concrete? Moisture will get through, so even if you don’t add an additional underlay, you do need to seal the concrete. The flooring associate at The Home Depot Canada suggested using vapour barrier with tuck tape to seal the concrete. Done- we had both on hand.
The rest of this post is about installing the vinyl plank over concrete. If you are installing on regular ol’ subfloor, my friend Brittany wrote a whole post with this very same flooring (fun coincidence!) and has some great tips for installing this LifeProof Vinyl Plank Flooring for beginners.
A couple things to consider here. Vinyl plank is much warmer than tile. We found it great in our last basement and had no underlay or vapour barrier at all (oops). I knew I didn’t want to drop a lot of money on underlay for my office and have it higher than the rest of the basement (for a good one, it is thick), especially when I wear slippers most of the time in the winter and it’s ONLY for me. That’s the most mom thing to say ever, isn’t it? If it was our kids room down here… you bet we’d probably be debating a quality underlay more. But the one attached to the back of the vinyl plank with the vapour barrier was more than enough for our purposes. So far? MUCH warmer than when we just had concrete!
After laying the underlay or vapour barrier or whatever you choose to use, it’s time to get flooring! Vinyl plank is a floating floor which means you don’t ever actually attach it to the underlay. You just lay it over top. You leave enough of a gap around the edge that it can expand, contract, flex, whatever but that it’s hidden by baseboard. The hardest part about it floating is to keep it square as you work. I usually do a couple rows, square it up, then move boxes of flooring onto the already finished portion to hold it in place while I work. You can see me doing that in this video.
I did this one whole room in the first night, the second room in the second night (my office is two small rooms). Here’s the tools that I used that made it go much quicker than the last time we did this!
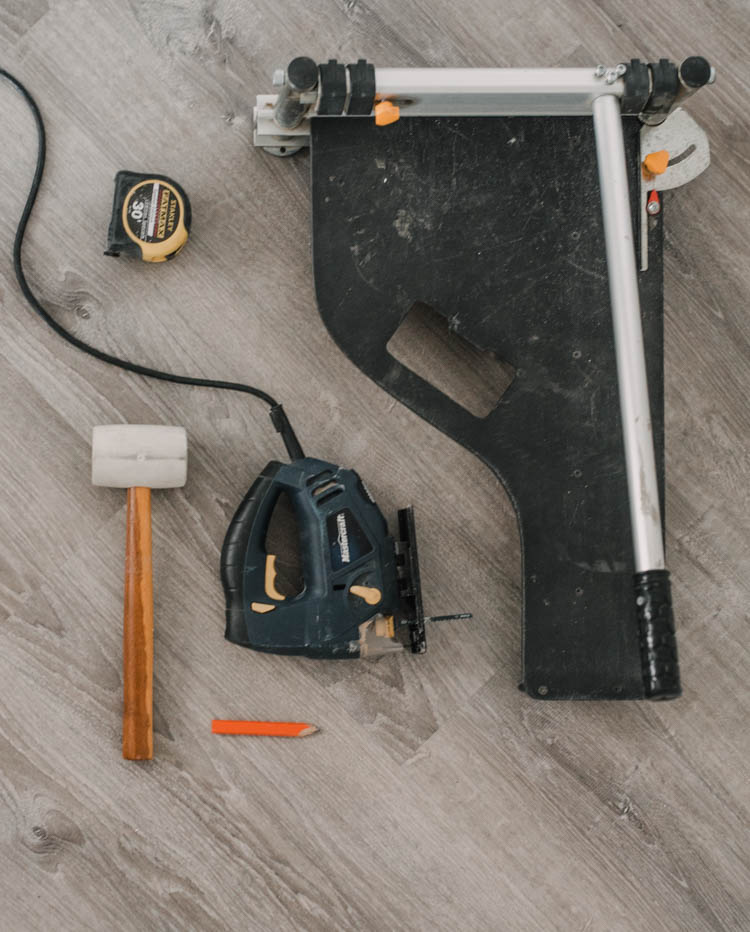
- Laminate Cutter
- Jigsaw with fine tooth blade
- Pencil, Tape Measure, Mallet
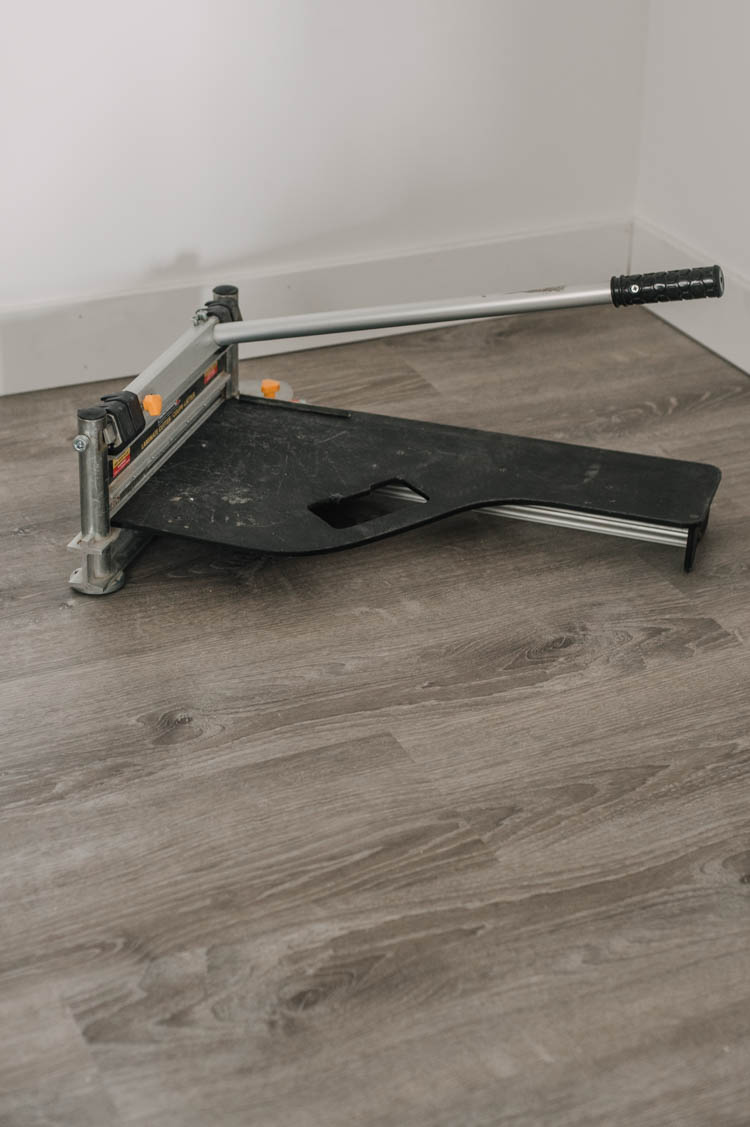
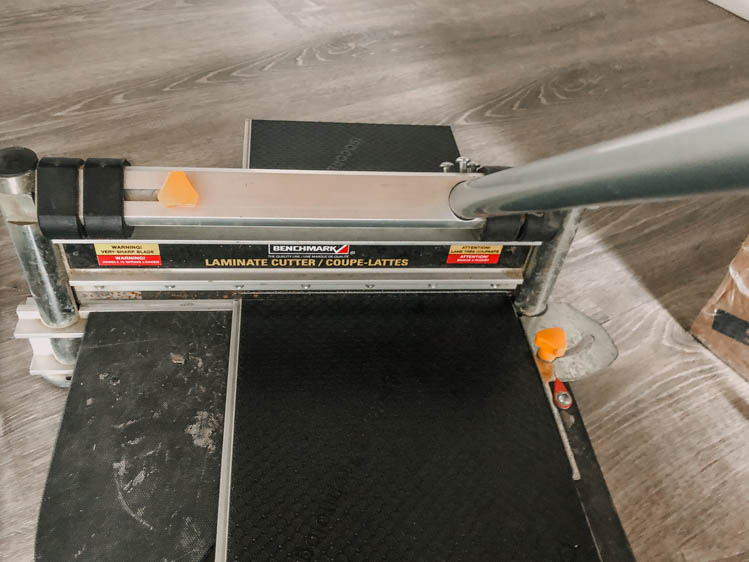
This is the laminate cutter we have and it works just as beautifully on vinyl as it does with laminate. We’ve used it for both. Last time we did this (laying vinyl plank over concrete), we scored the vinyl with a knife and a square, then snapped it. For rounded areas or tricky cuts, we did the same, but with lots and lots of pressure and scoring over and over. Shane found this okay to do but I sure struggled- I just don’t have the strength in my wrists. This cutter let me cut pieces easily with one hand- and even on the tougher pieces (I’ve cut a few different kinds with this), it just takes standing up to get leverage and then it’s easy.
I love shortcuts. One trick for measuring the flooring cuts without pulling out a tape measure is to line your board up (make sure the tongue is on the right edge) then flip it hand over hand/end over end to mark where you need to cut. This makes sure you cut so the right edge is cut (not the one you need to attach!).

The last tip is for those tricky cuts. Somehow I didn’t take a photo of this… I really thought I did! For those- I used a jigsaw. This was by far the biggest time saver of all these tips for me. Last time I would stop when I got to a tricky cut and wait for Shane to come home and do it. This time I whipped right through all the cuts.

Alright, I’m going to leave it at that! I’m so happy with how the flooring is looking and really pleased with how quickly it went down. I was a bit nervous that the Sterling Oak colour would be too cold in colour but even though it’s a grey it has a warm undertone that I’m loving in the space! I can’t wait to pull the rest of the space together and show you!
*UPDATE* My dream office studio is complete, see it here! The flooring is holding up wonderfully 2 years later, too :)

 Modern Handmade Holiday Decor from Etsy (Shopping Guide!)
Wow I couldn’t make it through this article. Run on sentences, just annoying writing. Sorry but this article is stressful to read. Nice pictures though!
I’ve never had that complaint before :)
GREAT article! Exactly what I needed to get started on our basement flooring project. I thought the writing was great and completely irrelevant as you kept the writing light and informative. Thanks so much!!
That’s great! I’ll pass your kind words on to Colleen :)
Nor should you worry about it. Your work is fantastic and your tone and energy in your writing is really good. I thoroughly enjoyed reading all of this.
Not sure when people lost their tact and humanity. Sorry!!
I’ve written a couple books. There are no run-on sentences is this blog! It is very well written and informative. Look me up on Amazon, Danny Z. Kiel. And feel free to review!
Thank you Danny! :)
Really, Stephen? It’s about the info. Geez
Wow are you ever rude.
It was difficult to read this comment, Stephen, because the punctuation and grammar were horrible. Let me fix this for you:
“Wow! I couldn’t make it through this article. There were run on sentences, and the writing was just annoying. Sorry, but this article was stressful to read. The pictures were nice, though!”
You’re welcome.
Love it lol
Perfect response mb. I will be installing the exact same flooring in a few weeks. I found this information helpful. Thank you!
This are great tips. Homeowners can get tips from here.
Loved this Colleen! Now that it’s been installed for a while how do you find it under foot? We’re thinking of installing something like this in a basement laundry room and don’t want it to be too cold in the winter :)
Hi Casey! I haven’t found it too cold at all! It seems to cut the cool feeling really well. We did this in our last house too, just a different click system that was a bit trickier. I’d definitely do vinyl again.
Great tips,but now I am confused about the vapor barrier, we were told by home depot U S, that using a barrier and if there is flooding the warranty is null and void? So they advised not to use
Hi Diane, I havent been told this! I just took the advice of Home Depot on this one. We did have a flood in 2020 but that flooring wasn’t damaged since it’s floating vinyl so we never pursued a warranty :)
So if you have cork backed lvp, do you still need an underlayment?
I’d ask that one at the flooring store you buy your product from! this one didn’t have cork :)
I am also in the US and was told the same thing, that the underlayment is part of the planks and not to use anything else as a barrier. We just finished laying ours down in the basement and I’m hoping it’ll be ok. How did yours turn out? Did you use a barrier?
That could be! I didn’t hear about that? But we did have a flood in our basement- this room was the least affected and the flooring was just fine :)
What kind of vampier barrier did you used.
I’m not sure the specifics- it’s just the thicker vapour barrier we use after insulating walls before drywall!
What would you do differntely for the underlayment of vinly plank flooring if the room is for your kid? I am installing it in my basement bedroom and like it to keep it warmer. I usually feel very cold in the midwest winter and want to maximize the heat.
How’s the vapour barrier holding up with the tuck tape? I ask because I was thinking of doing the same thing in my basement. I just want to make sure mould doesn’t form under the flooring and then gets breathed in.
This is my concern as well! I’m also in Canada and the summers are really hot and humid where I am. I worried about Mould forming if I used a vapour barrier.
I too am wondering about mold under a poly vapor barrier. I live in Winnipeg Canada and our summers are hot and humid, winters are very cold and dry. I have a loose vinyl floor (7 years old) that is laid directly onto the concrete. I am now dealing with severe cupping issues that I attribute to possible moisture. I have heard of poly as a vapor barrier elsewhere but am concerned about possible mold issues.
Great Info, thanks. We have done a lot of concrete jobs but haven’t taken on a project like this. Great advice. Much appreciated!
Found the info helpful. (As a grammar buff, I was surprised to see the comment on run on sentences.)
But the videos weren’t very helpful at the speed with which they played. I needed to see the work in real time.
Very helpful! Thank you
Hello. This a great bit of information. Thank you. I wonder if you’ve ever heard of or seen the issue that we’ve had with out vinyl floor installation in our basement. It was installed by a contractor, and I don’t know what underpayment he used, but I’m going to find a discrete place and find out. Our problem is that when we walk on the floor it crackles, like the underlayment was corn flakes. Someone told us that after some time, the crackle would go away, but we’ve had it about 5 years now and it hasn’t ceased, although it’s more prominent in colder weather. Could that be moisture related? Have you ever encountered or heard of this problem.
Oh wow I haven’t heard of that no!
Hello Doug, we have this SAME problem! Which is why I’m searching the internet and found this blog. Did you figure it out? We just had our basement finished, hired a company to do the entire thing. I’m not sure what they put under the LVP but we have spots that crack and also bounce. I know they did not “float” the floor, as in pour anything to do any leveling, and I’m sure it was fairly level but obviously not perfect. You would think they’d check and fix that Before laying flooring, ugh. They suggested them sending someone out to fill underneath those spots with epoxy? That just doesn’t sound right to me so we haven’t done that yet.
Once the floor is laid, do you put some kind of finish on it? i just got a quote and they included a finish, but Home Depot never mentioned it when I purchased it??? Thank you
No finish on the floors! It probably depends on the type of floors, even our main floor vinyl plank which was installed by professionals didn’t have an extra finish
These tips for installing vinyl plank over concrete floors are brilliant, and I hope you’ll share more valuable tips soon. This is one of the best articles on concrete floors that I’ve read.
Can I use a roll of “House Wrap” material as a moisture barrier on my concrete slab when installing a luxury vinyl plank flooring? Or, do I need to use a 6 mill thickness roll of plastic? Please advise. The link to the House Wrap material is below.
Thank you in advance.
Joseph White
https://www.lowes.com/pd/Lowe-s-9-ft-x-150-ft-House-Wrap/1000203325
I’m not too sure Joseph! I’d ask a flooring expert or contractor :)
Any advice on installing vinyl planks over a heated foor
I haven’t tried it!
Did you stagger the planks, like lay smaller pieces in each row? I assume you did, but I may have overlooked that point. Also what happens if the floor gets a large amount of water in it? Is it ruined? Does the entire flooring have to be picked up? Or can just affected pieces be taken out & replaced? Thanks for all of the info.
Yes i definitely stagger! Vinyl should dry out pretty well without having to replace, but you can remove just one section as well.
Hi! What the name of the flooring in your bedroom? It’s more brown I think! I love it and love your blog!
We used LifeProof Luxury Vinyl Plank in Sterling Oak https://www.homedepot.ca/product/lifeproof-sterling-oak-8-7-inch-x-47-6-inch-luxury-vinyl-plank-flooring-20-06-sq-ft-case-/1001099360 in this post.
The flooring in my bedroom is from Complete Floors in Kamloops! Here’s the details: Supplier – Golden Moulding, Product Line – Mega Plank and color is White Oak
Great article this was very helpful! I’m looking at doing the basement•ish area of a split level we’re moving into. I’m going to be pulling up the current carpet which has cement underneath. We’re going to be using the same flooring. I was wondering if you had any thoughts or recommendations about using drilock OSB subfloor and this on top of it with the built in underlayment.
We didn’t do that ourselves! I would ask the store you’re ordering from for advice :)
Nice post and detail. I am getting ready to do my own floors over concrete. And I plan to use the LifeProof Brand from Home Depot. Good to know the LifeProof brand clicks in better than the others, as I have looked at numerous brands but did not know there was a difference in the actual locking.
I have 2 questions. One about cutting the edge – I was confused by what you mean by “Cutting the edge you need”…is there a wrong edge?…can you clarify? Second question, I noticed you cut with the vinyl side down, is that a key detail to be aware of?
Thank you in advance, Molly
PS – Hope the grammar police don’t grade my post.
Hi Molly, the cut edge of the flooring won’t lock in place so you just need to put it under the baseboards :) I cut with the vinyl side down just since I marked on that side to avoid pencil marks on my floor!
These recommendations for installing vinyl plank over concrete floors are very practical and helpful. Even DIY enthusiasts can complete the installation successfully thanks to the comprehensive instructions. These steps will undoubtedly result in a stunning and long-lasting flooring solution.