• Skip to main content
  • Skip to header left navigation
  • Skip to header right navigation
  • Skip to site footer
  • Shop
  • Get The Email
  • Work With Me
  • About
  • Search

  • DIY
    • DIY Home Decor
    • With Power Tools
    • Renovation
    • For Kids
    • For Parties
    • Wearable
    • Organization
    • Cricut Crafts
  • Home Decor
    • Room Reveals
    • Kid Friendly
    • DIY Home Decor
    • Renovation
  • Lettering
    • Hand Lettered Printables
    • Free Practice Sheets
    • Handlettered DIY
    • Free Brush Lettering Quickstart Guide
    • Learn Brush Lettering E-Course SALE
Lemon Thistle

Lemon Thistle

Rad DIY, Lettering and Design for Real People

  • Printables
    • For Cricut
    • Party Printables
    • Home Decor Printables
    • Bachelor Bingos
    • Free Monthly Wallpapers
    • Handlettering Practice Sheets
    • All Free Printables
  • Entertain
    • Party Printables
    • Party DIY
    • Tablescapes
    • Dinner Party
    • Kids Parties
    • Party Eats
    • Baby Showers
    • Wedding + Showers
  • Blog

Gold Foil Holiday Cards (Adding Your Own Design!)

Nov 07

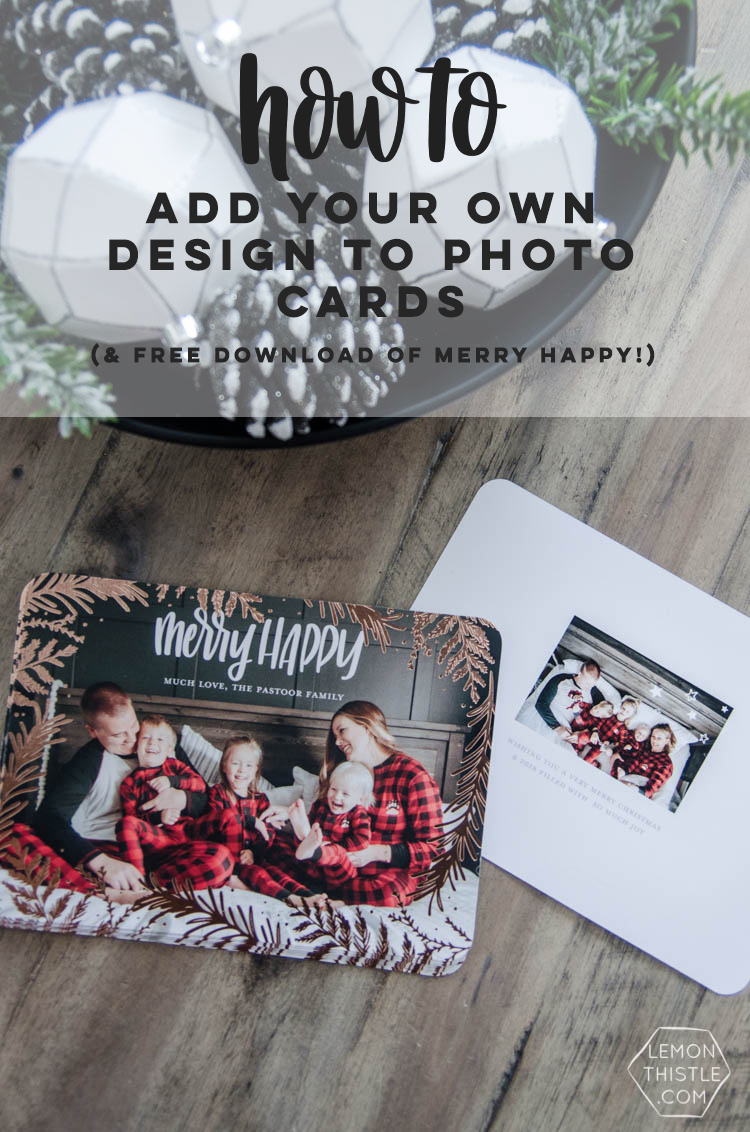
Sharing my free hand lettered ‘merry happy’ design for your photo christmas cards plus how to add gold foil to holiday card designs on Mixbook!

How to add your own (handlettered!) design to photo cards for the holidays- plus free download of my Merry Happy design

This post is sponsored by Mixbook, as always- I only promote products I totally love. Find my full disclosure here.

Every year I have so much fun making our family’s holiday cards and while I totally love being able to letter the designs that we print… I don’t want to miss out on all the fun stuff like ROSE GOLD FOIL and rounded corners. I’m sorry, did I say that loud enough? You can get rose gold foil on cards now, you guys! So today I wanted to share with you our holiday cards that we created in partnership with Mixbook using one of their pre-made designs PLUS how you can add any design you want (or make!) to a pre-made template like any of the real foil ones #swoon. As always- I’m sharing my lettering file with you if you’d like to use it (grab it by scrolling down).

Don’t want to design your card in a software like this? I shared how to make your own with overlays like this in free online software RIGHT HERE. AND if you’d rather make it in Photoshop- I share a tutorial for that RIGHT HERE. This tutorial here has the benefit of GOLD FOIL though!

Rose gold foil holiday cards with hand lettered overlay

The first thing you’ll want to do is pick a photo for your card THEN find a design that you love. I made a vertical one a few years ago and kicked myself because all our fave family photos were horizontal. So I spent a ton of time emailing back and forth with my photographer having her crop shots different ways. Never again! These jammie photos are from an exciting project we worked on that we will be announcing next week but they were too fun not to use for our holiday cards (photographed by the incredible Scarlet O’Neil).

Once you know horizontal or vertical… time to look for a design! There’s tons of card companies out there, but after having photo books printed with Mixbook earlier this year, I was so happy with their quality and printing that I knew they were who I wanted to have ours printed with. I’m going to use screenshots from the design process on their site to help explain and make it ridiculously easy to follow along as I’m going through.

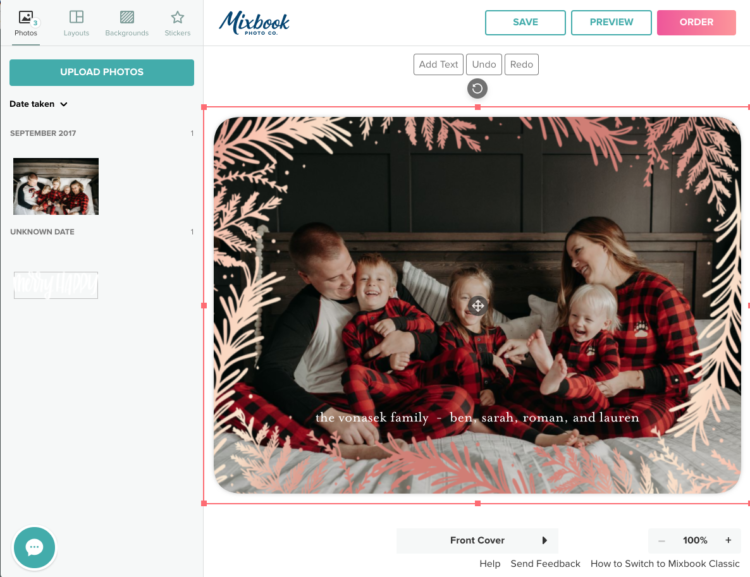
This technique will totally work with ANY of the cards. But because the foil is so beautiful, I’m going to focus on that :) If you want to add your own lettering or design (or my Merry Happy lettering), you want to look for a pre-made template that has a foiled design not foiled phrases. So snowflakes, frames, doodles… all awesome! A foiled ‘Merry Christmas’ you can’t swap out for your phrase. The foiled part of the design won’t change- just the rest will, if that makes sense. I settled on this gorgeous Holiday Pine Frame card but I played with a couple others as well. I would definitely play with a few to figure out what works with the blank space in your photo!

add your own hand lettered overlay to a foiled holiday card

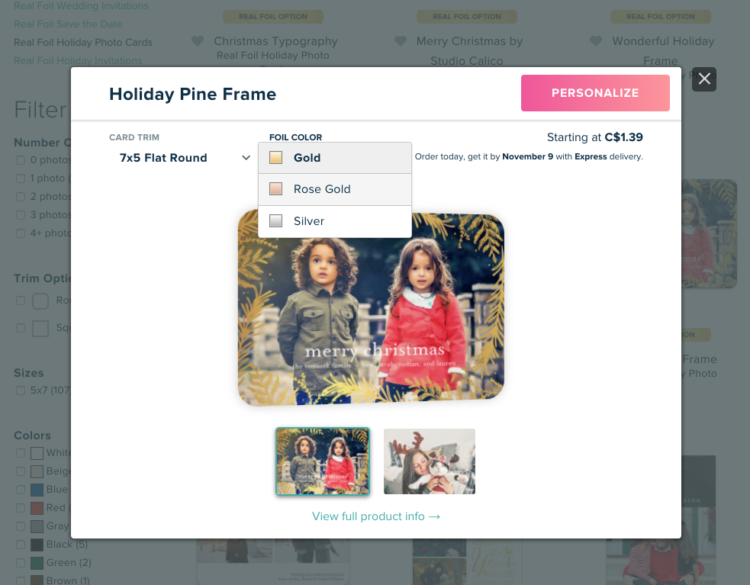
BEFORE you start editing your design- make sure you pick which color of foil you want. Mixbook has the option of gold, rose gold, or silver. If you’re not crazy about the image placement or the fonts or something else like that… know that it’s totally customizable- at this point just look at the foil details. You’ll notice that mine has different fonts, text, and the back isn’t a full page photo like the example here. I love a good editor!

add your own hand lettered overlay to a foiled holiday card

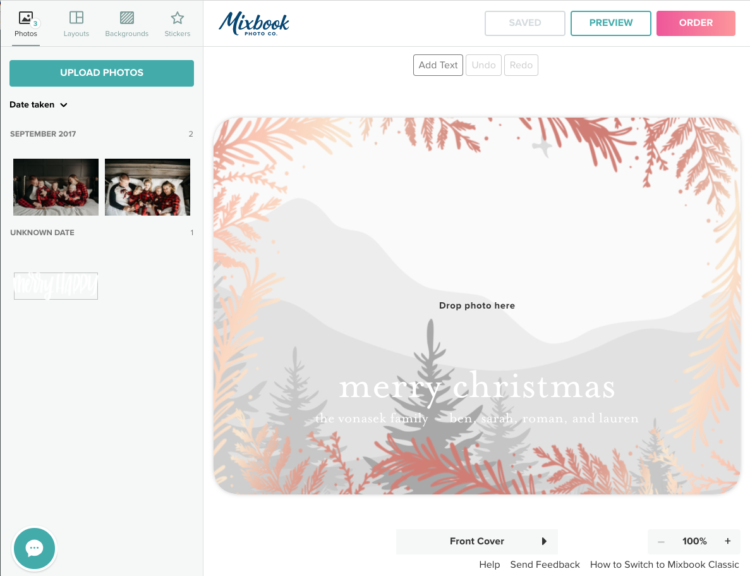
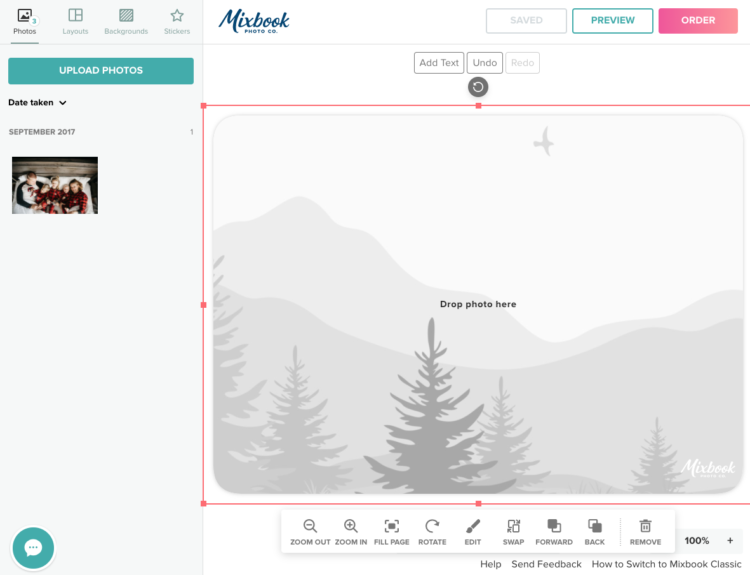
Once you hit ‘personalize’, this is how it opens up and you can upload all the images you’d like to use in your design. Or play with to see which ones work best! I have uploaded both the front photo, reverse photo, and the Merry Happy overlay (white, so it’s hard to see in the sidebar there). Any overlay you upload MUST have a translucent background (.png) and MUST be in the color you want it (in this case, white).

add your own hand lettered overlay to a foiled holiday card

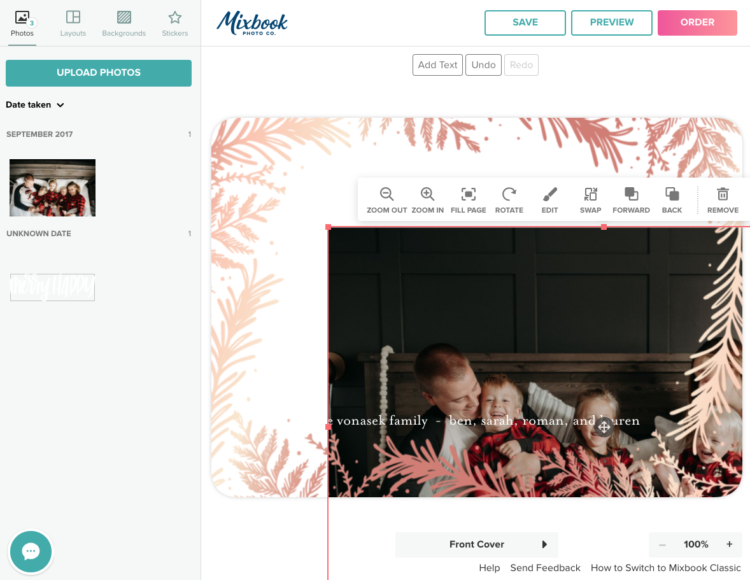
Just drag your image over the design and drop it. It will automatically snap to the template- which was a full page photo for this design. You can see I also deleted the ‘Merry Christmas’ text. Just click the textbox and hit delete. Then, to get your overlay on there (this is the trickiest part, promise)… you need to trick it. If you drag and drop it on top of your image, it will swap out your image for the overlay… which isn’t what we want. You want it to add as an additional image, so drag your main photo off to the side a bit and drop your overlay image on the white space as shown. You can then shift everything back around and resize it if you like.

If you’d like to use my hand lettered ‘merry happy’ design- I’d be flattered! I will send it directly to your inbox. As always, freebies are for personal use only AND I would totally love to see what you design using it ;)

add your own hand lettered overlay to a foiled holiday card

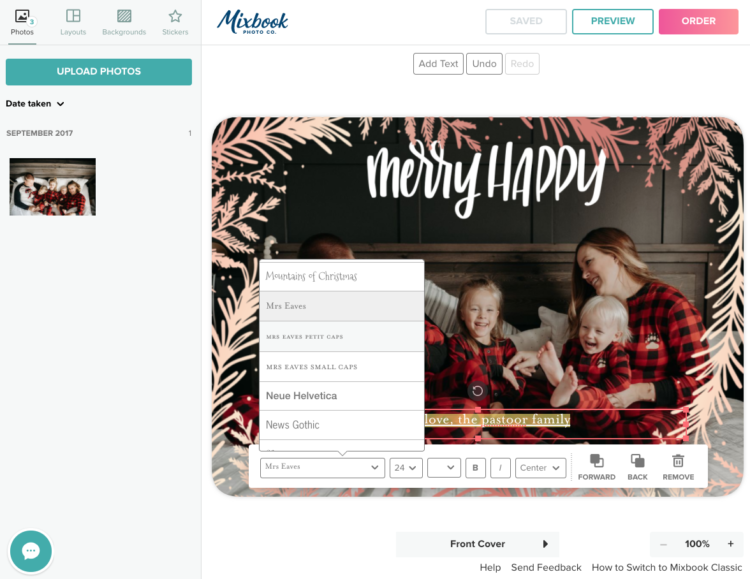
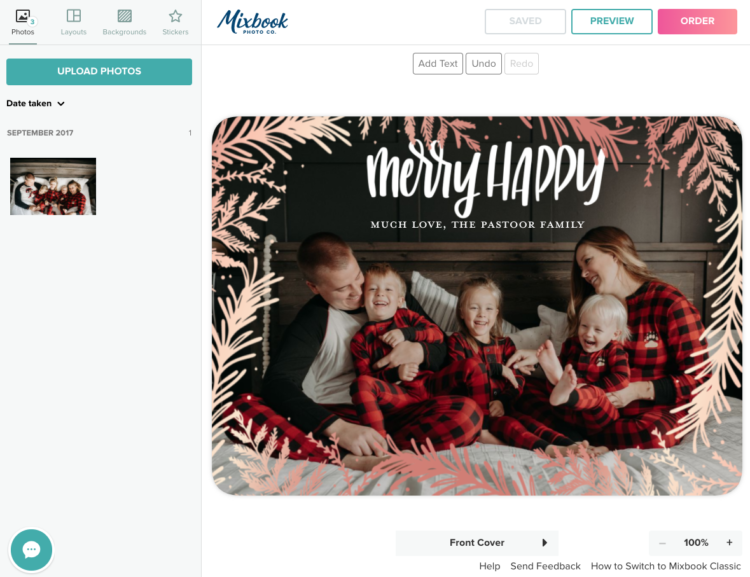
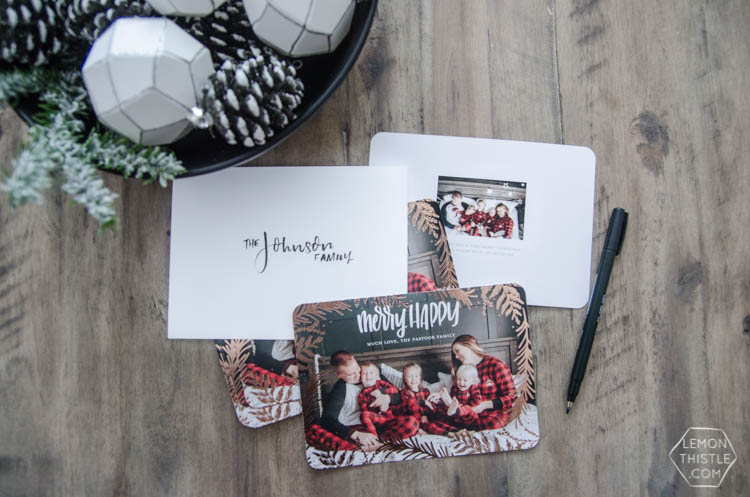
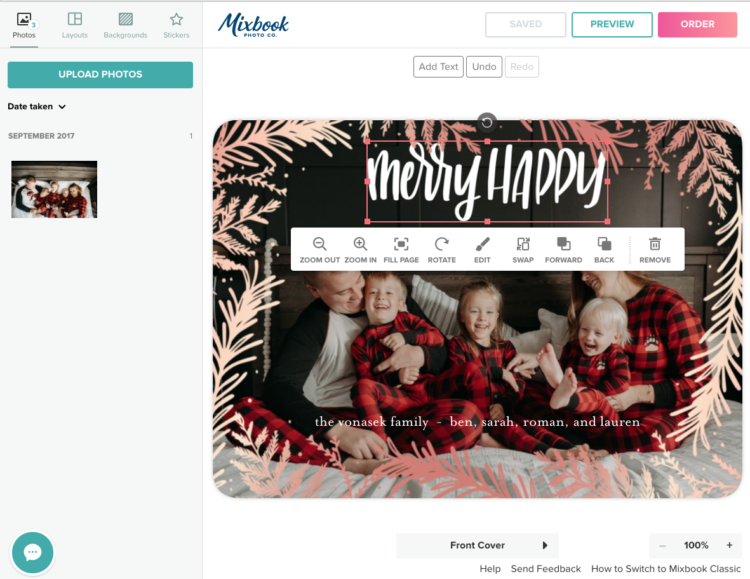
Drag everything around until you like it (I did some resizing made sure the rose gold foil was ON TOP of my hand lettered overlay) then made sure it was all centred using their guidelines. Then, you can edit text! We changed it to our names, then I switched to a really clean, classic all caps font. I love how this balances the playful hand lettering. Since I made these cards, Mixbook has added in an additional 100 (yes 100!) fonts to their editor, so I’m sure you’ll find something you love. If your design doesn’t have a text box there already, you can just hit the ‘add text’ button on the top of the editor.

add your own hand lettered overlay to a foiled holiday card

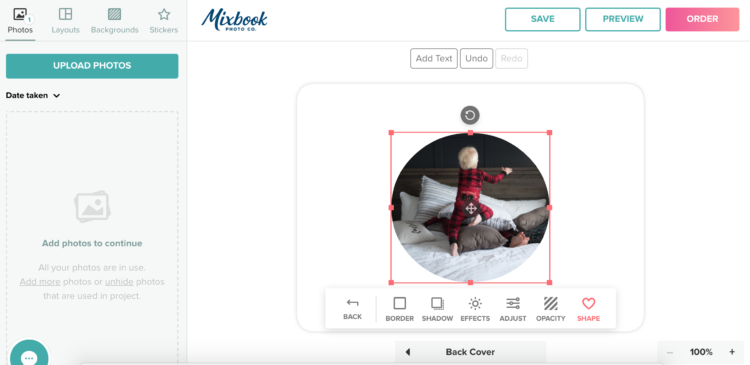
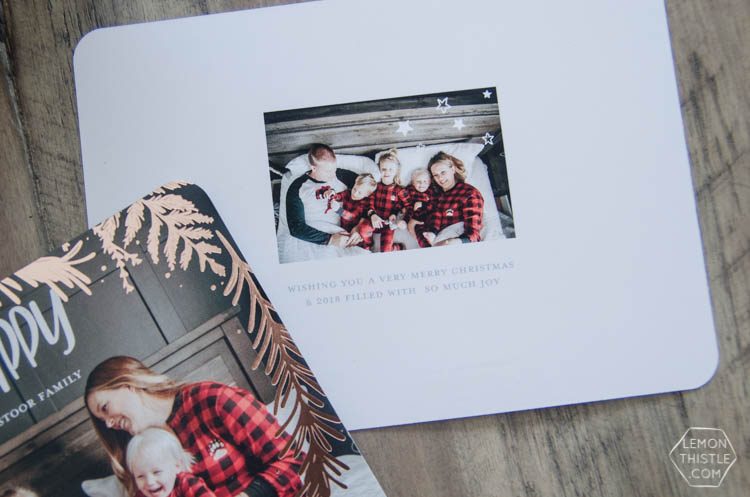
Time to take on the reverse! You could just drop your photo in this full image design, then resize it… or you can delete this and start from scratch. Just drag and drop your image onto the white background and size it accordingly. I also played with having a round image here. You can change any image into a shape by clicking the image, then selecting edit, then shape.

add your own hand lettered overlay to a foiled holiday card

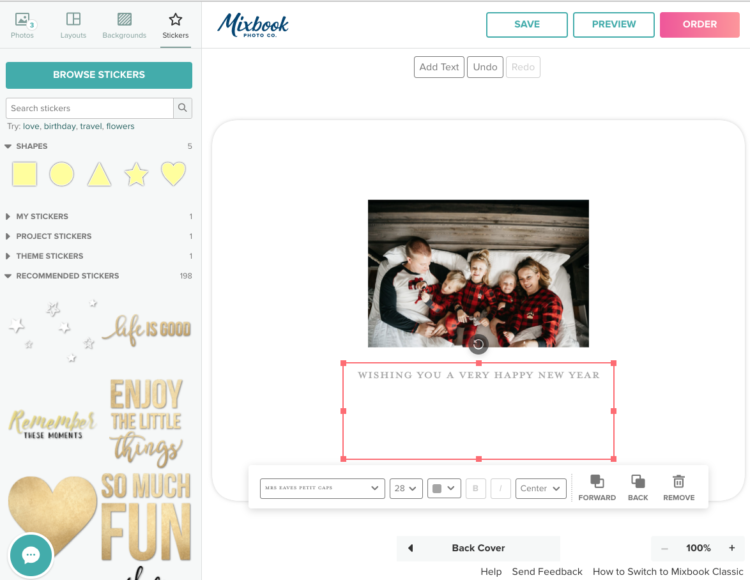
I finished the back of the card off with some text and added a sticker overlay that was already loaded into Mixbook (stickers are in the left, just a different tab than your images). If you wanted to add your own sticker- like a hand lettered 2017 or something, you could do that the exact same way as you did the ‘Merry Happy’ on the front.

How to add your own (handlettered!) design to photo cards for the holidays- plus free download of my Merry Happy design

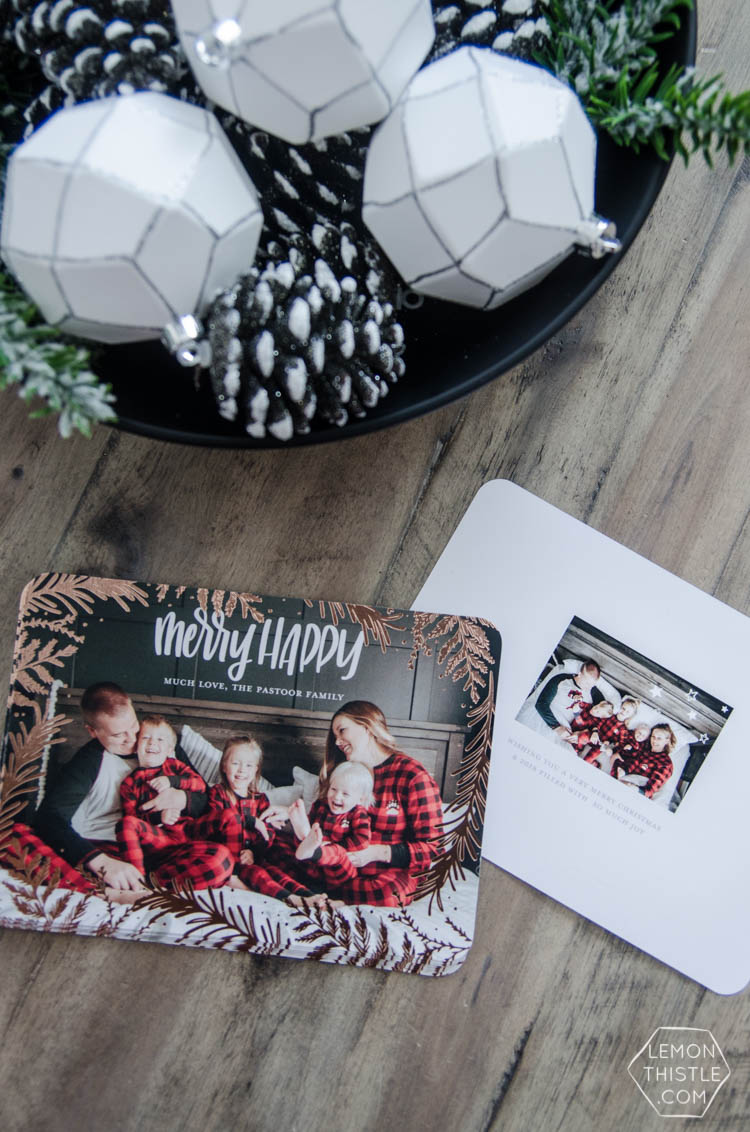
That’s it! It really is so simple to add your own lettering or design. I’m so in love with how these turned out and the foil is just so darn beautiful. I tried to capture how well it shines, but the photos don’t even do it justice.

I hope you found this tutorial helpful! If you do end up using my design or even the tutorial in general- I’d so love to see what you create!

Category: LetteringTag: Cards, Christmas, Digital Design, Holiday Printables, Holidays, Sponsored
Facebook0Tweet0Pin0LinkedIn0
Previous Post: ← Etsy gift guide for the home decor lover- perfect gifts for her Etsy Holiday Gift Guide X2!
Next Post: Modern Bathroom Design Details: ORC Week 6 One Room Challenge- Decor Accessories to bring a classic bathroom to the modern side →

Reader Interactions

Leave a Reply Cancel reply

Your email address will not be published. Required fields are marked *

Sidebar

WOOHOO!

Check your email to confirm!

(+ get your freebies + discounts)


Thanks for dropping by!
I’m Colleen: wife; mom to 4 wild ones; and DIY blogger behind Lemon Thistle. You can expect to see rad DIY, modern home decor, renovations, hand lettering and the occasional party on Lemon Thistle. Read More…

email facebook youtube instagram pinterest

Unless otherwise noted, all content and images are mine. Full posts may not be shared without express written consent. But I love when you share! Feel free to share, without altering, one image with proper credit and a link to the original post. All free printables are for personal use only.

Everyone loves proper credit- if you ever notice something improperly credited, please please shoot me an email and I’ll fix it lightning fast.

Find all my policies right here.
This includes my privacy policy, info on the GDRP compliance and information on affiliate links (Including Amazon Affiliates).

Visit Colleen Pastoor’s profile on Pinterest.

colleenpastoor

My house is never this clean
-
DIY + Home Decor Blogger
Mama of 4 👶🏼🧒🏼👦🏼👧🏼
Renovating our 🏠 the DIY way
🖤 Lettering & ☕️
-
✉️[email protected]

colleen pastoor/lemon thistle
Who has DIY projects on their mind this year?! @ry Who has DIY projects on their mind this year?! @ryobi_canada and I want to help you start knocking those projects off your list by giving away a new nailer and battery set! #ad 
This tool is what we used for this accent wall and all the trim in our home. It’s the one I used to trim out my built in shelving and add the decorative moulding to my geometric barn door. What I’m saying is this thing is a workhorse and I want you to have one too 😉
To enter:
✨Follow me @colleenpastoor and @ryobi_canada 
✨like and save this photo 
✨ tag some friends who’d love to win in the comments! One tag per comment, each is an entry. 
✨ share to your stories for a bonus 5 entries!

Open to Canadians only this time (sorry US friends!) and not associated with Instagram. Closes Friday Jan 22 at noon PST!
Let’s talk about coffee! This is my coffee ‘st Let’s talk about coffee! This is my coffee ‘station’ and the second photo is my dads! I’m talking aaaall about them over on YT today!
Also... see how nice that fresh silicone looks?! 😉 IYKYK
The hallway is finally finished and I’m so stink The hallway is finally finished and I’m so stinking happy! 

It’s felt like such a long time coming for such a small space. Since we moved in 2.5 years ago, this space has seen new doors and hardware, new trim, new floors... twice😅, we changed the boob light to a pot light and I hated it and now it’s got the most beautiful flush mount fixture I’m in love with (thanks @mymitzi!). It finally got some fresh paint and now frames on walls and last but not least... After this weekend, the new floors look like they were here all along (no door jamb gaps!) which was the last thing really bugging me since our flood last year. 

All this to say that home takes time and sometimes getting it right might take a couple tries. Also- the spaces we don’t really think about (hallways) can totally help a house feel like home with some love (and family photos 🥰)
ps. I partnered with #mymitzi to create a tiktok for This makeover... are you following me over there yet?! I’d love if you popped over and said hi!
It’s done! It works! And I’m calling it a grea It’s done! It works! And I’m calling it a great use of my afternoon the other day. Did you catch the stories? These projects both cost me under $10 by using pieces I already had in my home (yay for scraps!) and one package of drawer slides).
You can find the full video about these two kitchen organization projects over on YouTube in collaboration with my friend @love_create_celebrate and her #scrapsmademodern challenge! But for now... I’m rejoicing this coffee maker is off my counter for good 🎉
How’s your January going? Full speed or are you How’s your January going? Full speed or are you taking it a bit slow too? 

I’m not going to lie, I’m easing into this new year thing pretty slowly. All my decorations are still up (we always leave them up til Ukrainian Christmas which is later this week) and I I’ve yet to respond to my emails since before Christmas 😅
I’m enjoying the slowness of it all.
Happy Christmas Eve from our fam to yours 🥰 Happy Christmas Eve from our fam to yours 🥰
Yes, I made the paper bag snowflakes too. Have you Yes, I made the paper bag snowflakes too. Have you? 😅
This year has been one of a kind and I know so man This year has been one of a kind and I know so many people who are taking this year as the push they’ve been waiting for to start a side hustle, start an new career altogether or to just get creative about how they’re making money. So today I’m excited to partner with @kregjig to share some rad projects to make and sell this year! 
Like this rolling storage system I made for my office, that rad dollhouse and the gorgeous bath toy storage. All of these projects are things that I’d personally love to buy for our family and look like they’d be a great return on your time making them! And yes, all of them use #Kreg tools to make them easy to assemble and quick to make! Plus, they’re having a great sale on right now with deals on their K4 and K5 jigs, Rip-Cut and even a hardware jig bundle! There’s never been a better time to get your workshop set up!  #sponsored
Just a peaceful moment and then a real life moment Just a peaceful moment and then a real life moment for ya 🙃 
My #holidayhometour is on the blog and YouTube (I’ll put links in my stories) as part of the #seasonalsimplicity holiday home tour series. I’ll share those too so you don’t miss any!
Load More... Follow on Instagram

Copyright © 2021 · Lemon Thistle · All Rights Reserved · Powered by Mai Theme