You guys, this project turned out exactly like I’d imagined it. It took a bit more mess than expected (I totally ruined my fave pair of jeans by spilling my liquid gold), but it was worth it… sort of. I’m still mourning the jeans.
But enough about my pants… let’s talk this cake topper! You may or may not know that I DIY for my sweet friend Ashton over at Bespoke Decor in Vancouver. She’s the loveliest and always styles the MOST gorgeous weddings. So I’m actually DIYing for weddings every. single. month. And I love it. Before I went into fundraising, I actually graduated from event management and started myself a little event planning company. It wasn’t my thing, but I do miss all the pretty decor details. So this is a win/win. And this means when Cricut mentioned they were doing a wedding campaign… well, I jumped at that! The campaign is all about making your wedding personal to you (‘it’s your story, make it personal’) and that’s just what this cake topper can do.
I’m going to show you how to make it and give you this lettering as a free download, but I’ll make note what kind of file you need if you want to letter it yourself (say your new last name!). It’d also be sweetly personal for a wedding shower.
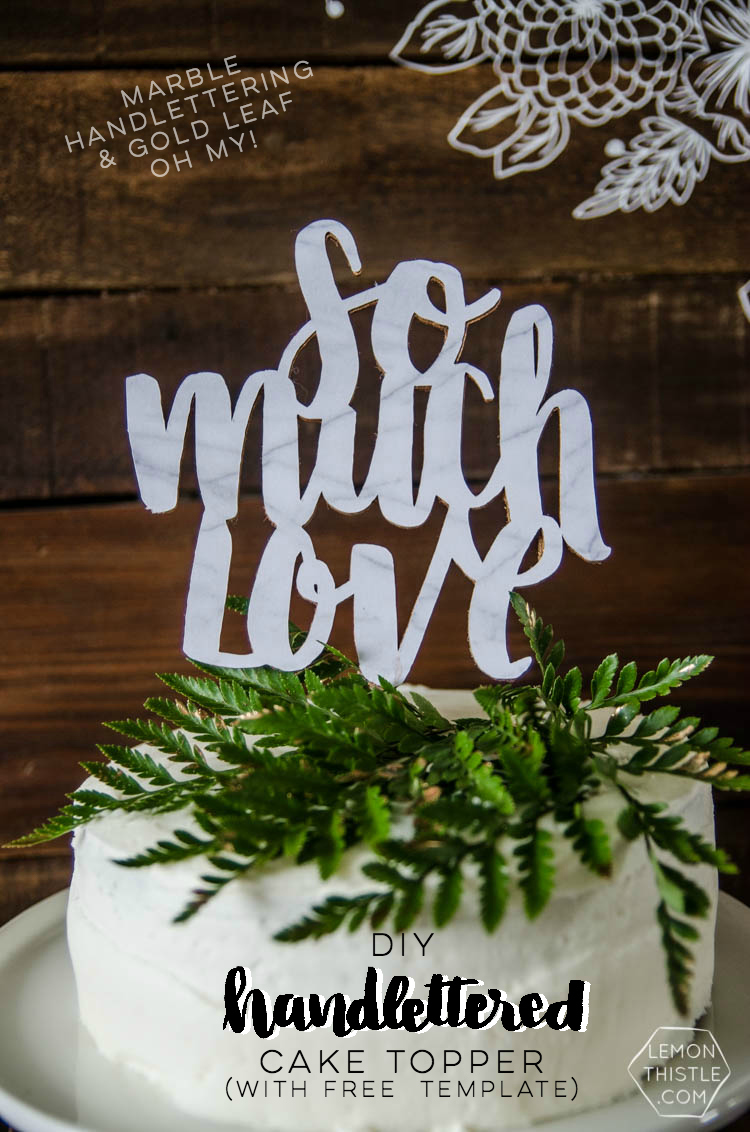
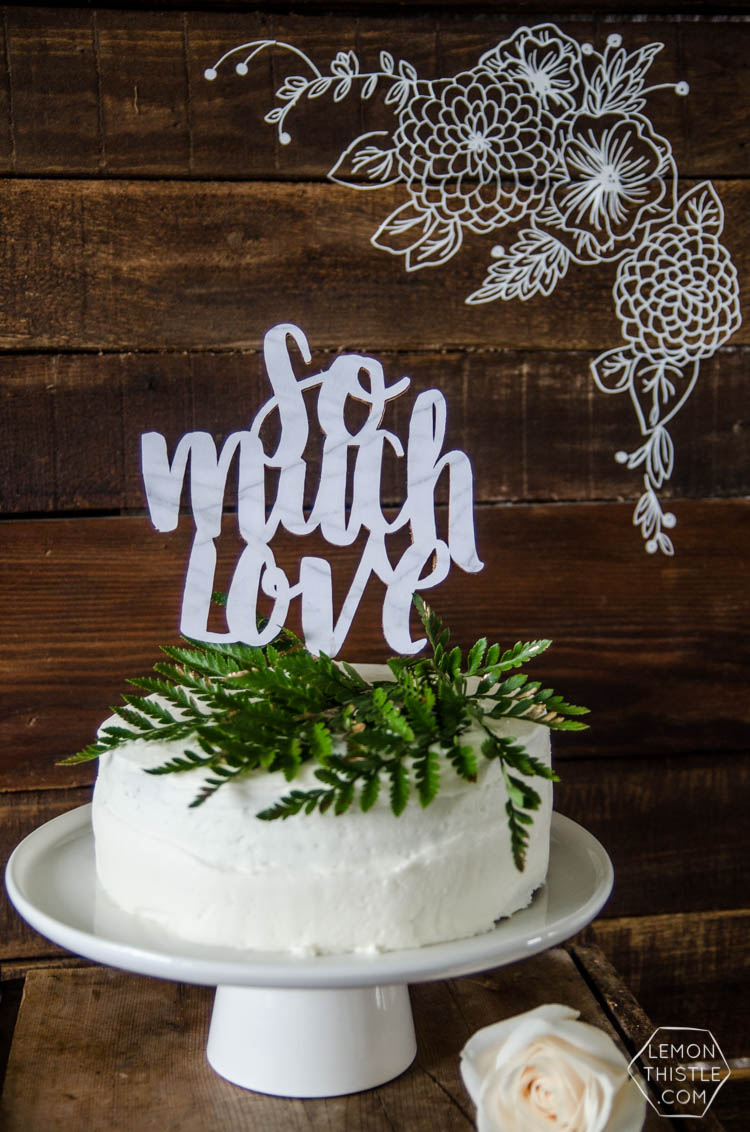
This wedding cake topper has a few of my favourite things- it’s marble, hand lettered, and the edges are gilded. Oh, and it’s on a CAKE. By using the Cricut, you can cut out pretty much ANY shape without all the time it would take to do it by hand- plus, it looks mighty pro. Ready to learn how to make your very own?
To make this DIY Wedding Cake Topper, you’ll need:
- Cricut Explore or similar machine with deep cut and regular blades
- Heavy chipboard (or card)
- Marble design to print on cardstock (I used my new Canon printer, but you could send to the print shop too)
- Spray adhesive
- Coffee stir stick
- Clear Matte Spray Paint
- Liquid Gold
- Small Paint Brush

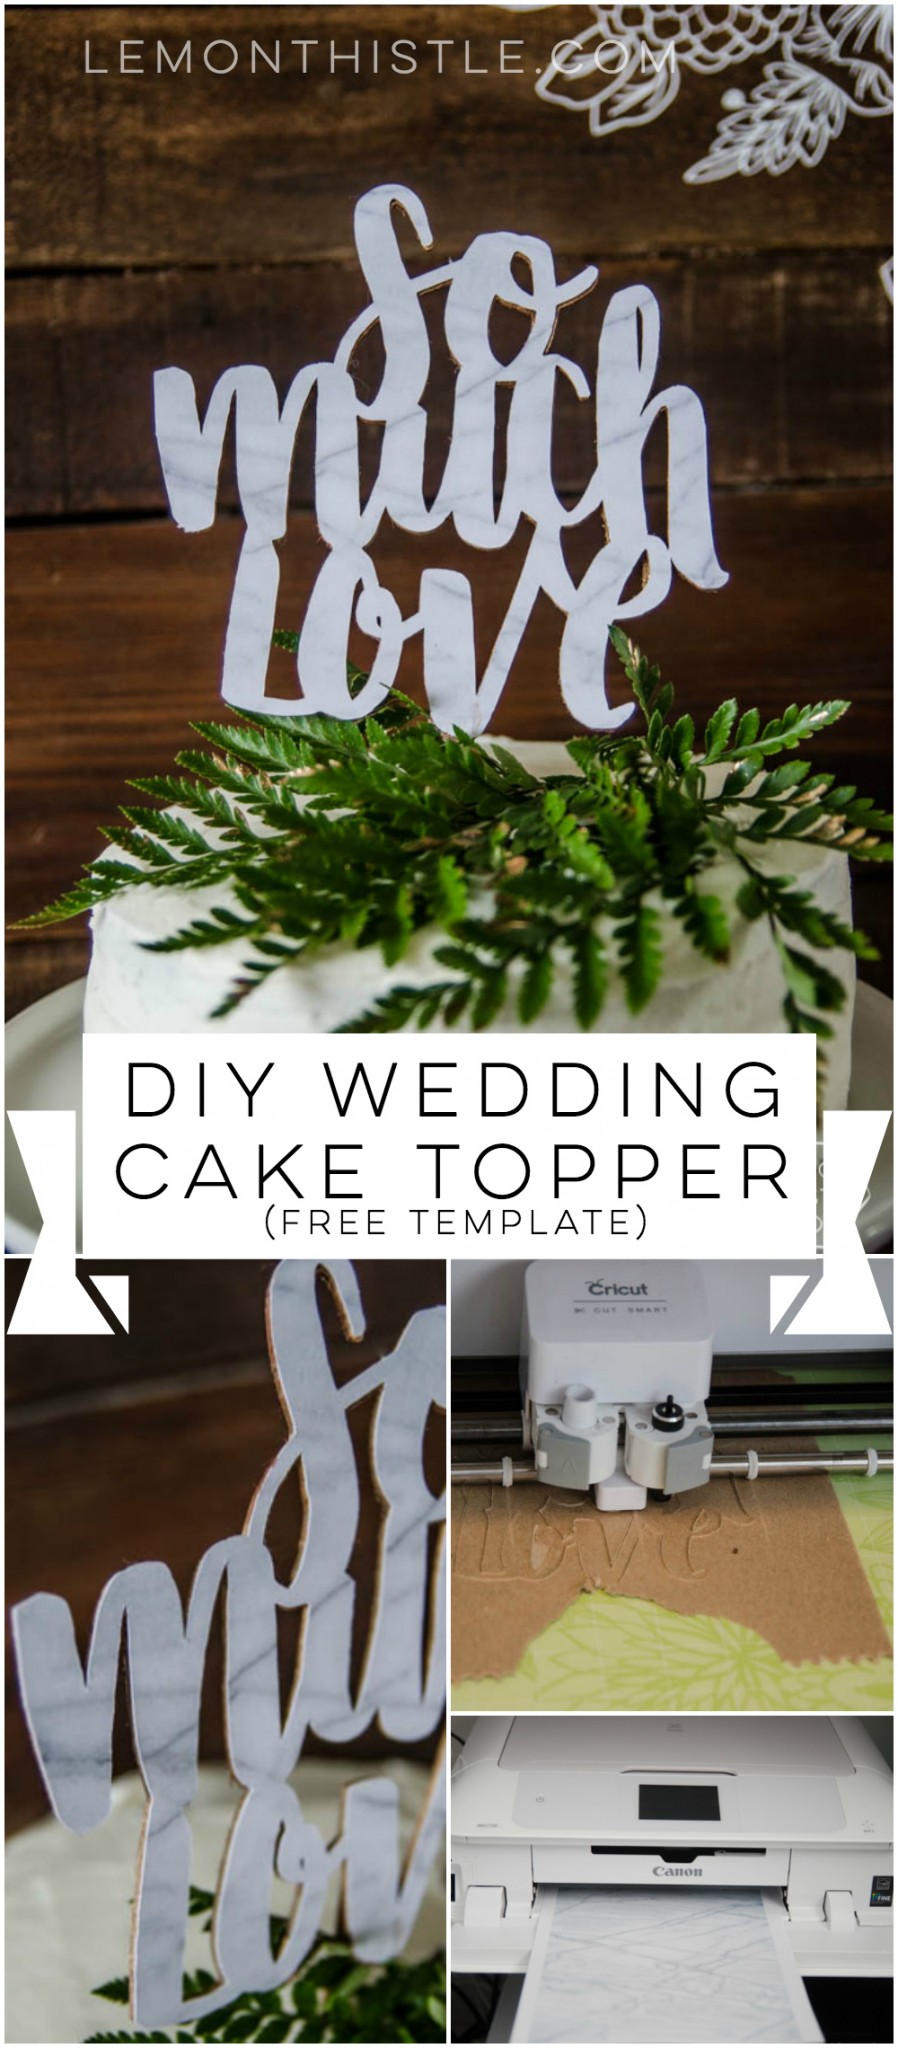
The first thing you’ll want to do is print off your marble design on to cardstock. I did a happy dance when my new Canon printer showed up in the mail (it’s a Pixma MG7720 and is the most beautiful thing) because I’ve been running to the print shop every time I want something printed with any sort of quality (and that’s about a 8 minute drive #lame). This guy not only prints with awesome quality, but I can print from my phone, a memory card, it scans… and it has a touch screen which is neither here nor there but it’s COOL.
Let’s talk marble designs though. I snagged mine by searching ‘marble background’ on Pinterest. There are HUNDREDS to choose from, so I’ll let you pick the one you think is the best.
Next, you’ll need to load your lettering into Cricut Design Space. You can grab mine right here:
DOWNLOAD ‘SO MUCH LOVE’ DESIGN HERE
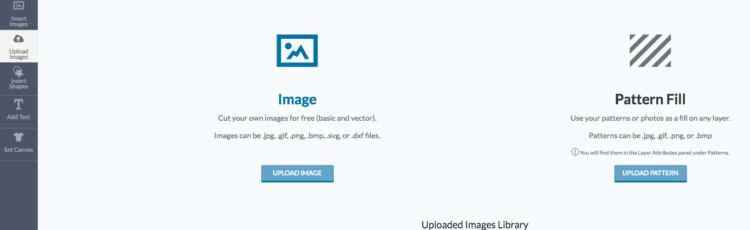
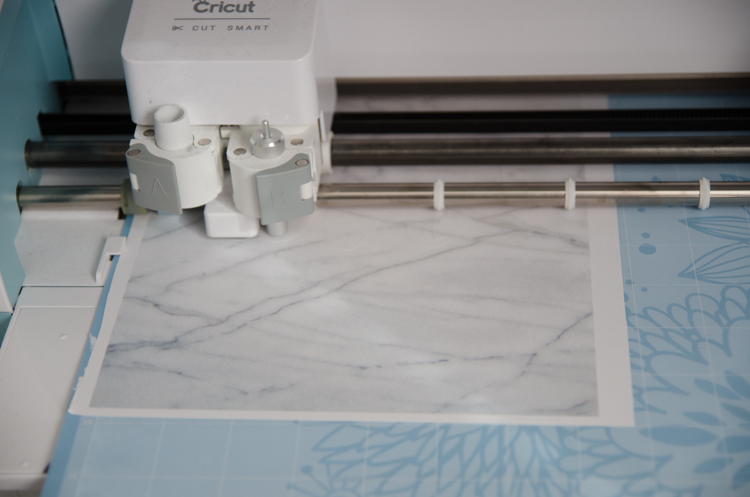
When you have it downloaded (it’s a PNG), click ‘upload image’ in your Design space and select ‘Image’. You’ll want to select ‘simple image’ when prompted. Insert it onto your canvas and size it as you like. Mine is about 7 inches wide. Throw your marble cardstock onto your mat and hit ‘GO’!
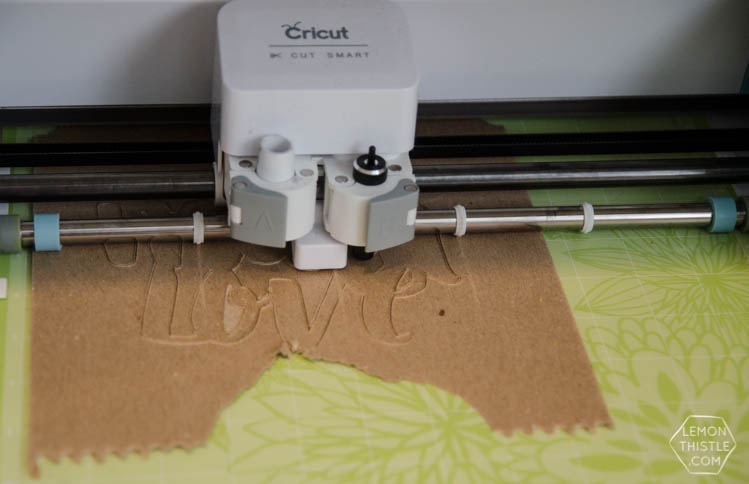
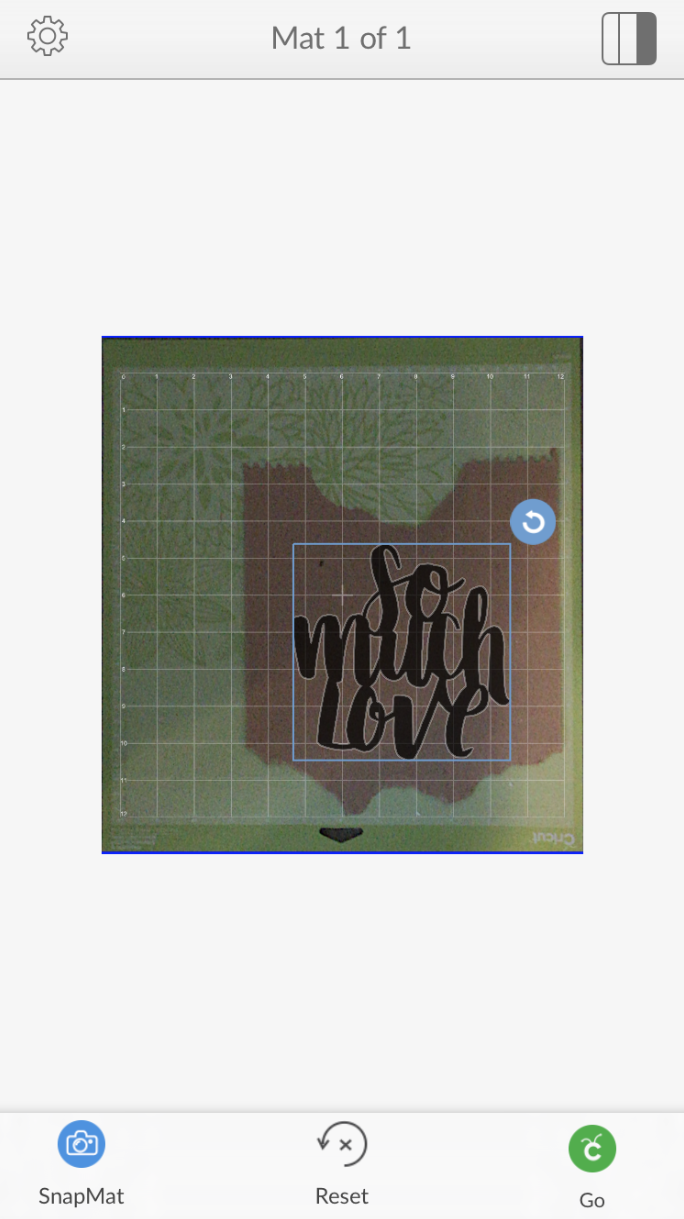
When it’s done, swap to your deep cut blade, grab your chipboard and pop it on your mat. You’ll notice that my chipboard is actually from the back of a notebook I was getting rid of. You guys this is my biggest chipboard cheat! I go through notebooks like a hot damn and started saving the backs a while ago- they come in so handy! But since it wasn’t a perfect shape, I got to test out Cricut’s new Snap Mat feature for the first time. I have been waiting for a feature like this to come out- it’s brilliant. Basically, you use your phone with the Design Space App instead of computer and you take a picture of your mat with the material on there, then you drag your design to where you want it to cut. This will be a total game changer for me (watch out scraps, I’m coming for you ;)).
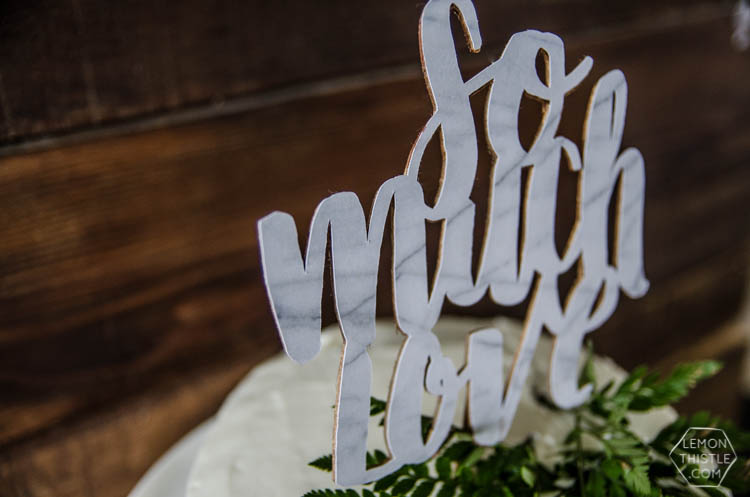
This next part took some trial and error for me. I’ve talked about how to use liquid gold on paper without bleeding before, BUT I have never painted the edges. No amount of clearcoat saves it. SO here’s the trick. Gild just the edges of the chipboard with the liquid gold. Gild the back as well in case anyone peeks their head around to see what you’ve made this of. When it’s dry, use a spray adhesive on the chipboard and press the marble cardstock on, taking care to line them up. Then give the front a liberal coat of clear matte spray paint. This gives it such a lovely texture that looks more like acrylic and less like paper. See the beautiful shine that gives the edges?
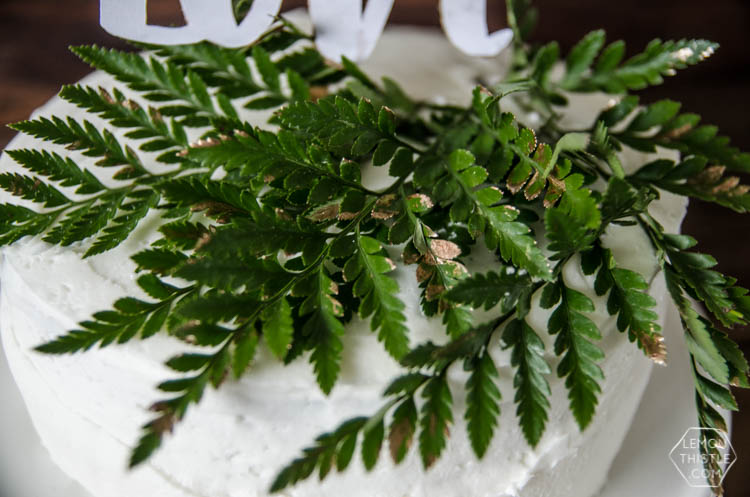
I stuck the coffee stir stick on using the spray adhesive as well but a glue gun might have been a better option. I also used some of the liquid gold to gild some of the leather leaf greenery- I love how that looks!

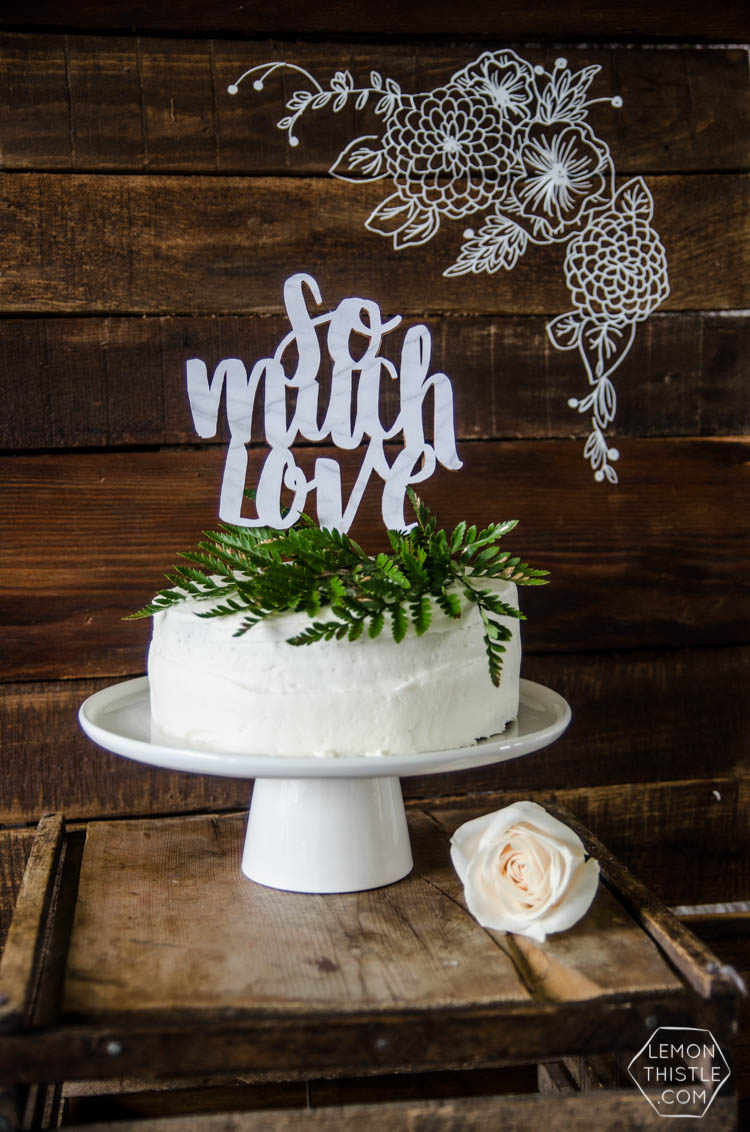
That’s it! What do you think? I totally love it! And the price tag ain’t half bad as well ;) Oh, and see that rad backdrop? That DIY will be coming at you as part of the Cricut wedding campaign on monday, so keep your eye out!
Now, if you’ve read this far… I can only assume that you’ve got wedding on your brain (or you love cake). Either or- you should know that part of this campaign is a MASSIVE giveaway! Like 10,000 in prizes massive. This week is a Canon / Cricut prize pack (which I wish I could enter for) including
- Canon PIXMA iP8720 Crafting Printer + ink + photo paper
- Canon Powershot G7 X Camera
- 8GB Memory Card
- Canon 8GB USB Flash Drive (shaped like a DSLR)
- Cricut Explore Air ™ wireless cutting machine
- Cricut Toolkit
- Cricut Supply Bundle Pack
Rad, right? Get your name in quick though because this one ends tomorrow! But then there’s another huge one #spoiler.
Alright, I’ll leave it at that friends, if you make a wedding cake topper using this tutorial, we would love if you shared it with us on social #mycricutstory @colleenpastoor @officialcricut!
 Spooktacular Handlettered Halloween Printable
This is amazing! You are so talented and crafty. I’m sorry about your favorite jeans.
Aw thank you Jacie! It was probably time to retire them anyways… but it’s still hard ;)
Love the marble idea! What font did you use?
Thanks Vanathi! It’s hand lettered by myself before being digitized. I have the file available as a free download.