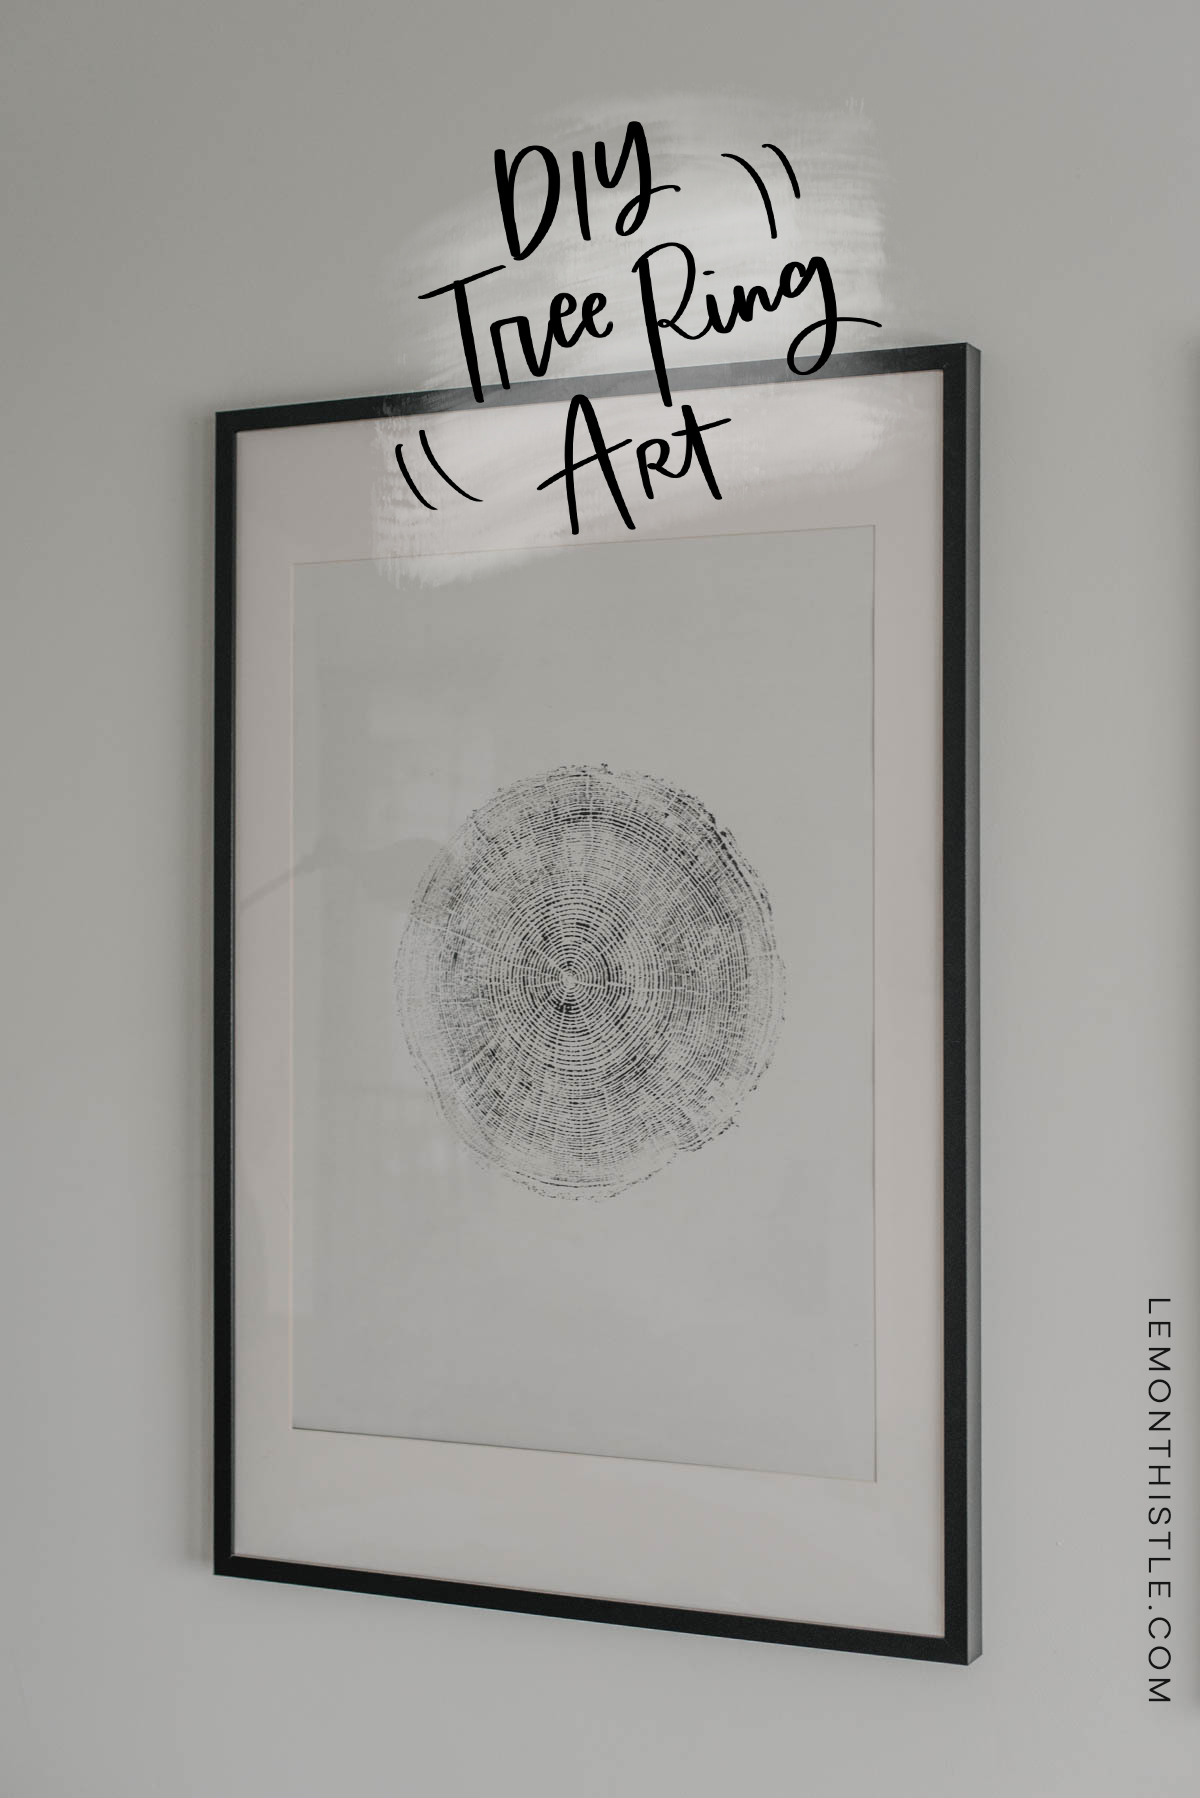
Wood round prints have been so popular in home decor lately, I loved the idea but wanted to try my hand at making my own… It’s easier than I expected! Sharing exactly how to DIY Tree Ring Art for big impact prints and a small budget!
Last year when we switched sofas, I realized in a hurry that I needed to fill that giant white wall. Our last sofa was taller and filled the space, but this new one was lower and made it look like a giant empty room. I settled on tree round prints, but the cost of ordering the ones I loved was adding up for three of them and frames. I decided I’d see if I could hack my own and if it didn’t work, I’d go for the printable ones I’d eyed on Etsy.


Turns out… they’re pretty darn easy to make! But difficult to photograph. Did I mention much more affordable? Let’s walk through the process! I didn’t take many photos because honestly… I expected my first attempt to be a fail. But it totally wasn’t. I still would love to redo them one day (and I’ll explain what I’d do differently) but I love these just as is for now and get SO many questions and comments on them. I knew I was overdue sharing the DIY process with you!
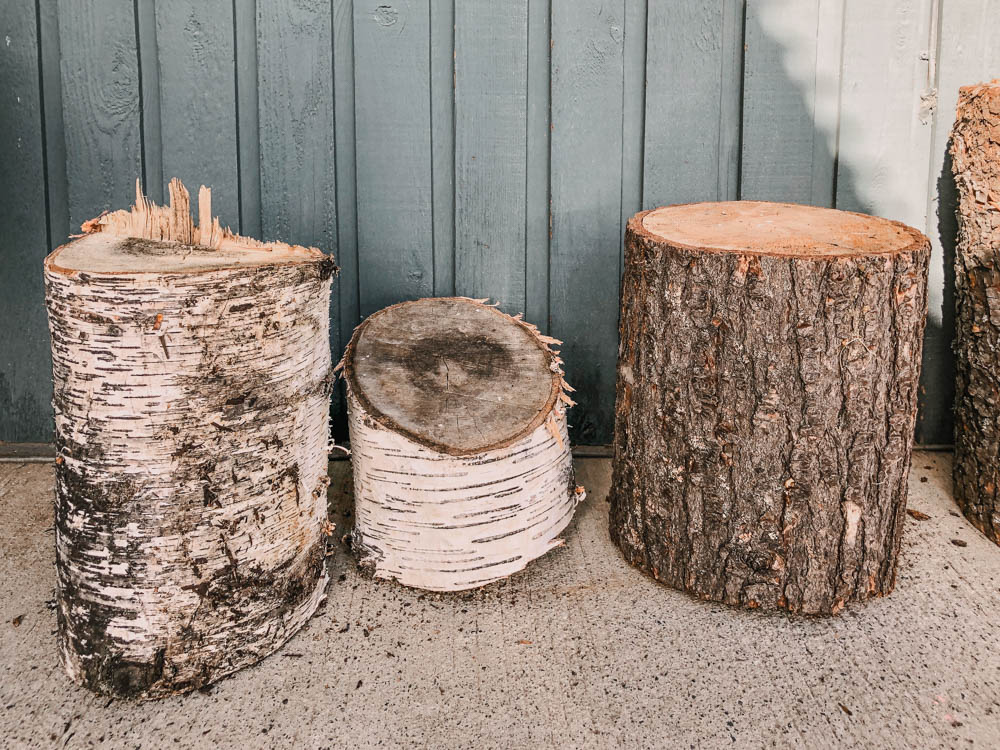
The first thing you’ll need to do is get your wood rounds. You could use disks or full stumps. I didn’t have access to these without heading to the forest so I put out a call on Facebook and had some friends who’d collected the wood as firewood that let me help myself to a few pieces (woohoo!). You could also look at getting wood chargers someone had cut for a wedding centrepiece or head to the forest to cut a slice of your own- make sure to find a tree that has already fallen- there’s so many around here. OR you could get the craft wood rounds. EASY. I haven’t tested those… but they look similar, I’m assuming they’d work!
The kind of tree you’re printing matters. Choose one with a chunky bark… not the white bark trees. I had two different kinds of logs and the birch looking ones did NOT print well at all. Major fail. I’m glad I had the second type of logs.
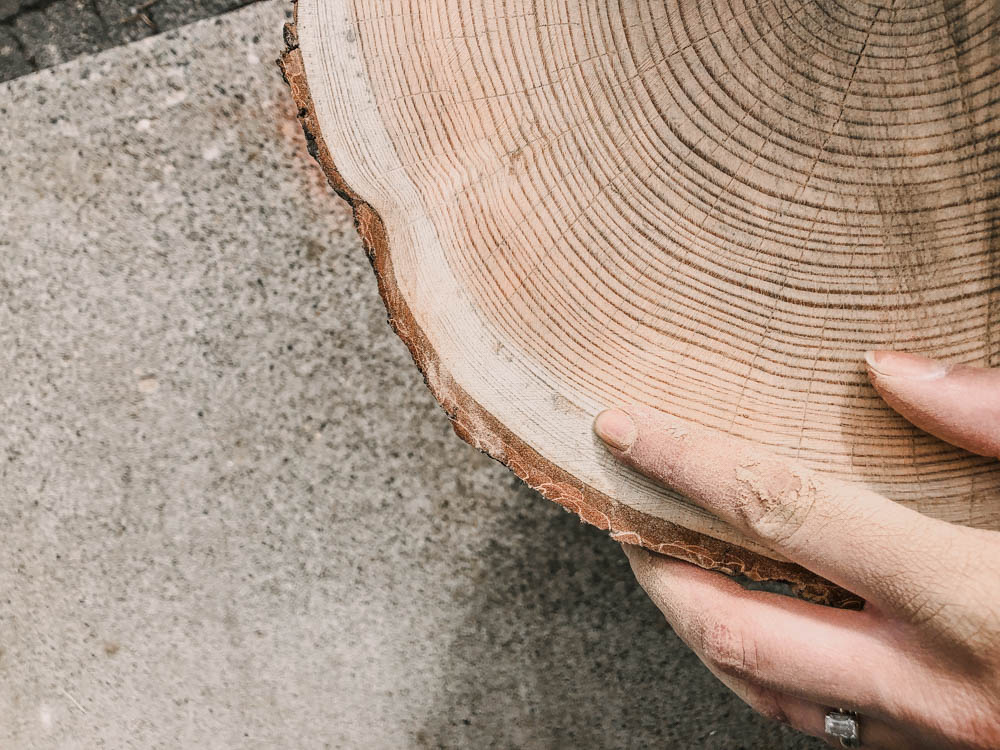
The first thing you’ll want to do is sand down your stump or wood round. This will get rid of any cut marks that would transfer to your paper more than the tree rings. You’ll also want to sand off any sap that would transfer.
Once it’s sanded, wipe it with a damp cloth to remove sawdust (and raise the tree rings a bit, apparently). This works but not enough to get them to print clearly. The next step? Torch it, baby!
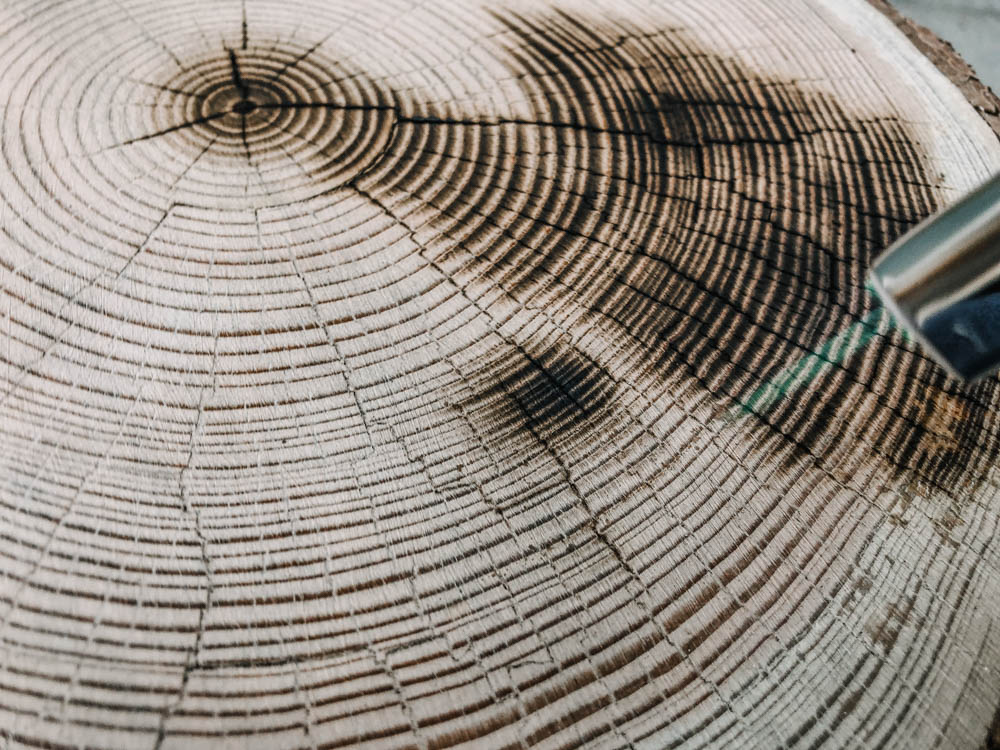
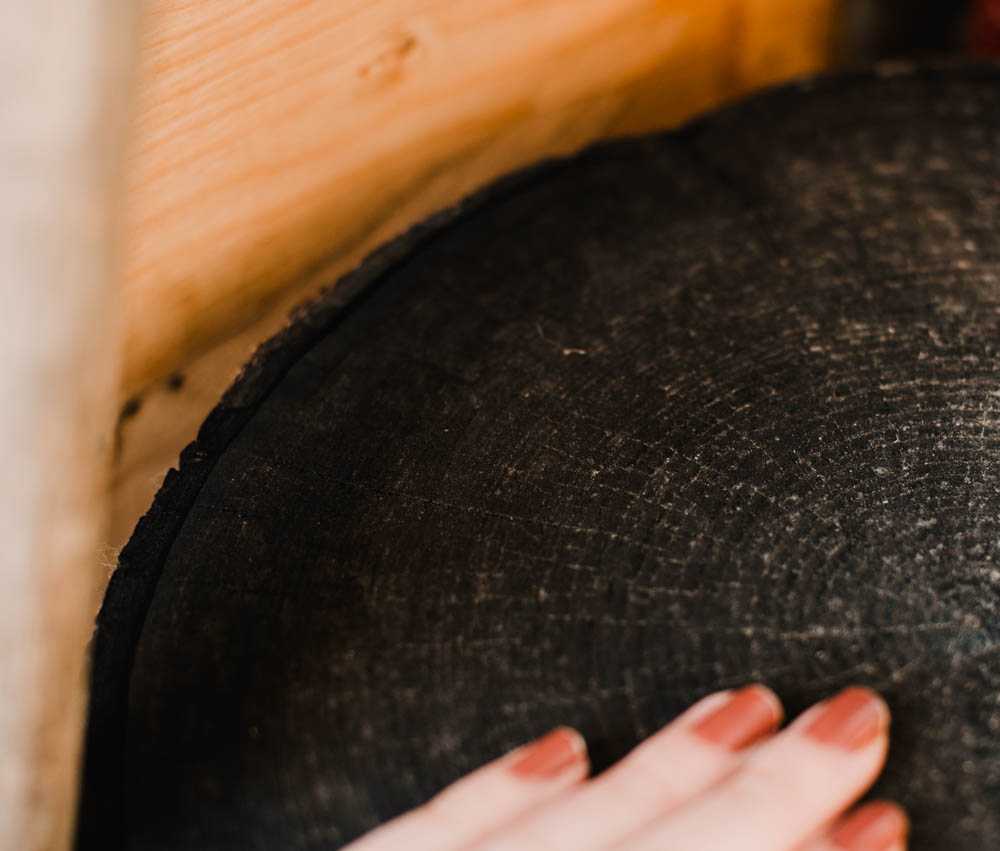
I am super trusted with blow torches that the only one I could get someone to lend me was a tiny one meant for creme brûlée. Know what? Worked perfectly. And I didn’t set anyone on fire (for those of you that declined my request to borrow your fire). You just need to torch it lightly to burn the soft parts of the wood.
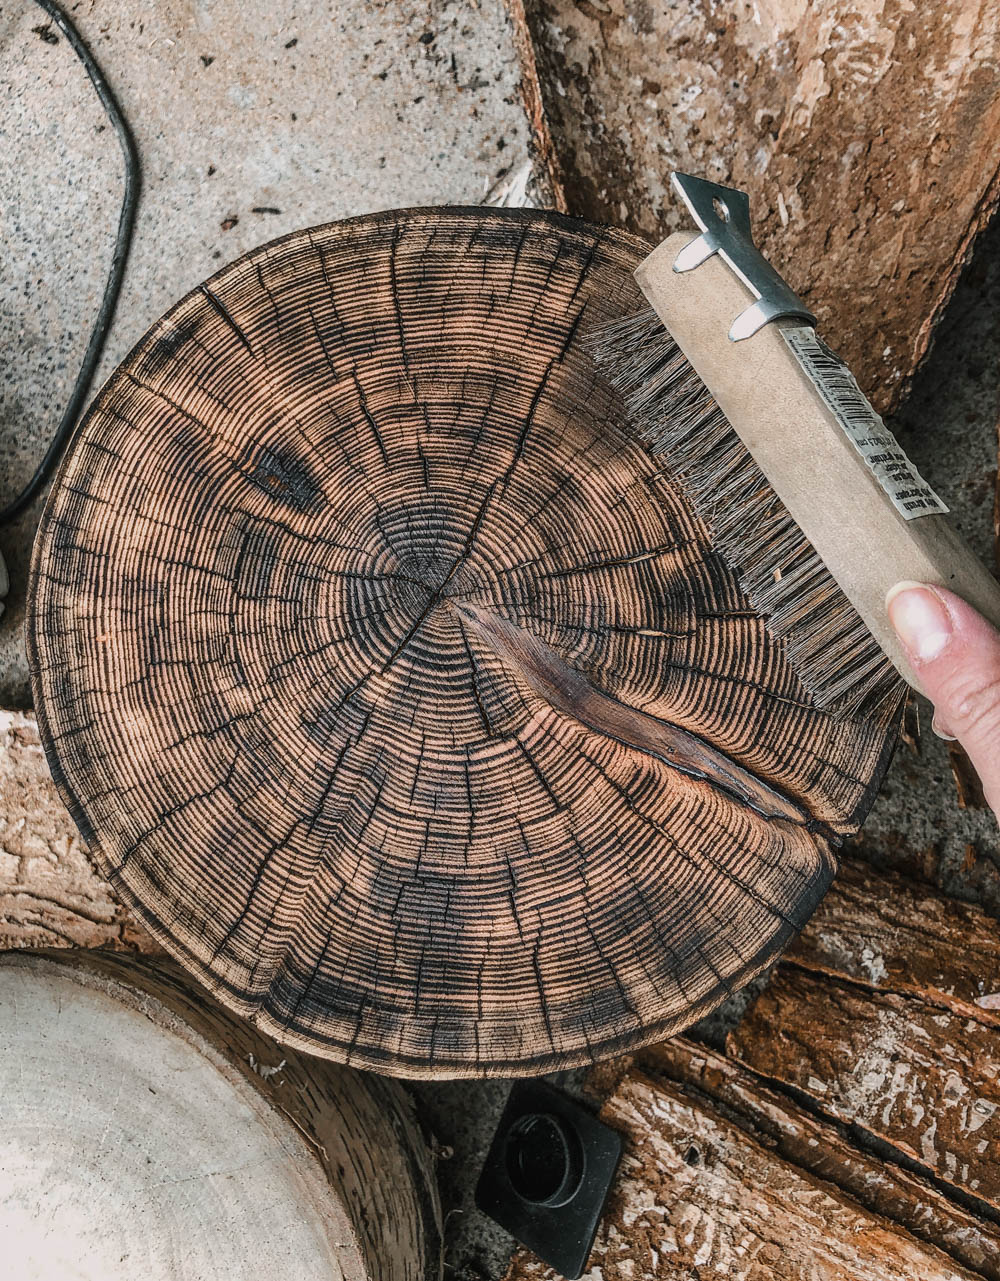
Once this is done, use a wire brush to brush the tree rings clear of the burnt bits- the rings (harder parts) will stay raised and the softer parts that burnt will be brushed away.
You’re ready for printing! I used Higgins Black India Ink for this since I had it on hand for lettering. I just painted it on with a foam brush.
Then, take your paper and press it firmly and evenly onto your tree stump. I highly suggest using a roller (or brayer or something similar) for this. I did not… and this is the one thing I’d change if I did it again! I even have one I use with my Cricut for fabric… But do you think I thought of that? Nope. I used my fingers (which you can totally do too) but from certain angles, can see where I rubbed/the pattern I smoothed the paper over. Can you too now that I’ve pointed it out?
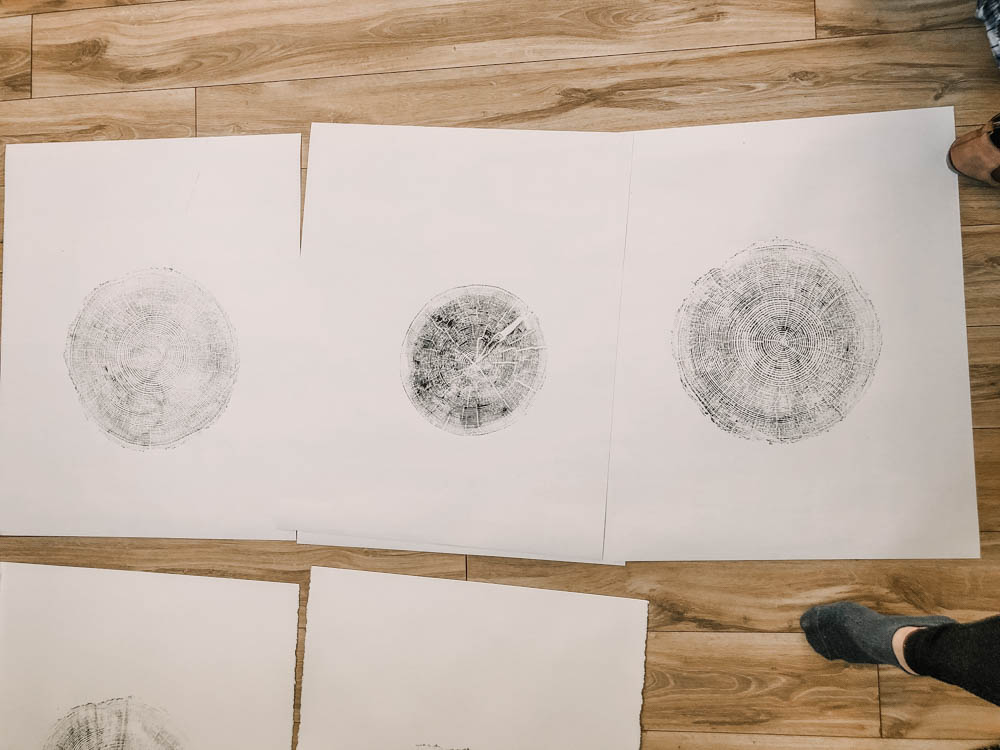
Carefully peel the paper back to avoid smudging and lay flat to dry! Now… PAPER! I tried a few papers. I went and got the expensive beautiful paper from the art store… and ended up liking dollar store poster boards best. I used the back side that wasn’t shiny and it sucked up that ink beautifully. Dollar store, you guys.

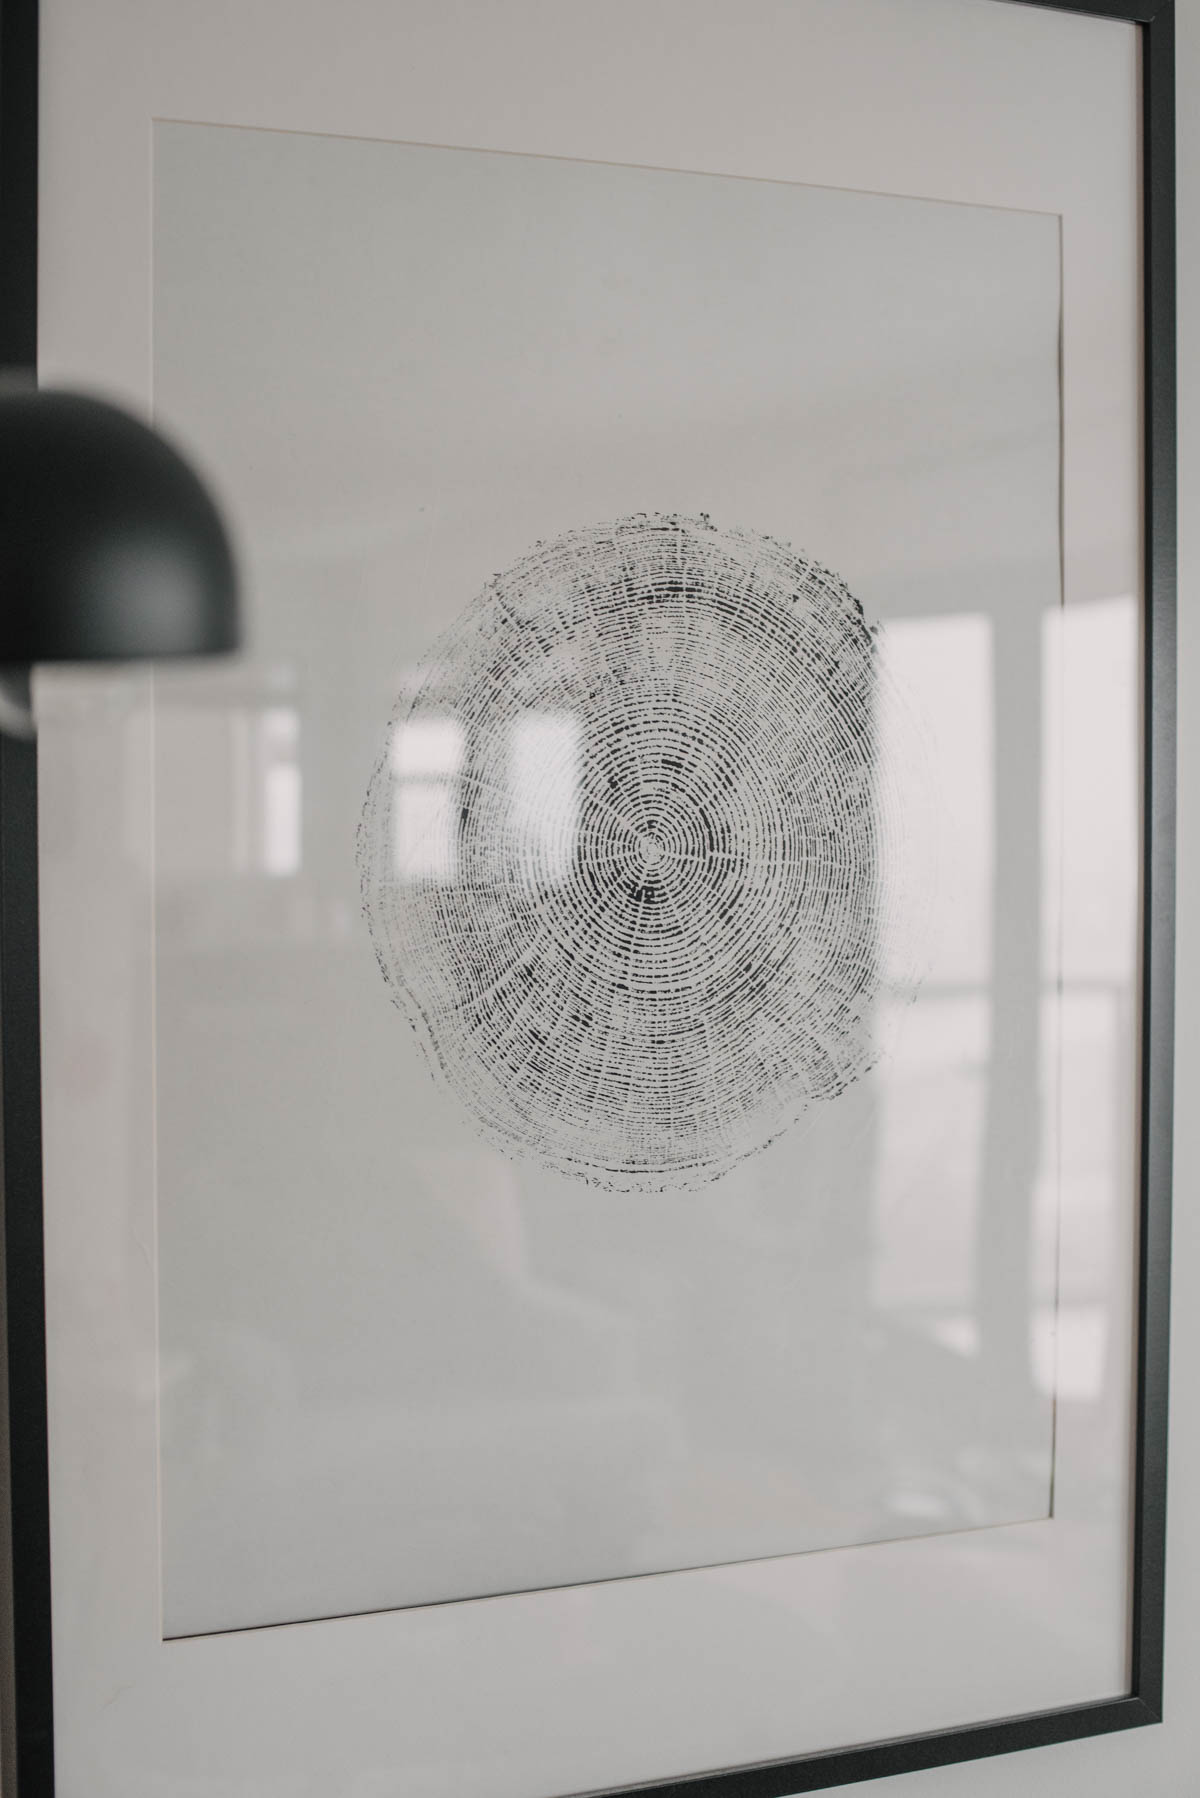
These fit perfectly inside the largest IKEA frames I could find. Ta-Da! I am so so happy with how these turned out for an experiment with a baking torch. Ha! I hope that this inspires you to make some things for yourself. If not these DIY Tree Ring Art Prints, something equally crazy that you know you’ll love in your home.
As always, if you do make them, I’d so so love to see a photo! Share with me via email colleen@lemonthistle.com or social @colleenpastoor!
 How to use Draw with Cricut Design Space
I love how this turned out! So simple yet detailed.
Thank you so much! I’m so so happy with how they came out!
I love this idea! You lost me though when you used dollar store poster board and it “really sucked up the ink”. What exactly did you do with the poster board????? Sorry, missed something ….
Your not going to believe this but, I actually have pictures (photos) of a tree in our yard that we cut down and the inside of the tree is beautiful. I have to find the pictures since we moved and I put all my pictures on thumb drives just in case the computer crashes or we get a new one (not anytime soon). I organized all my pictures boy it was a lot. but a lot of them are outdoors, things that I enjoyed at the moment, for instance rainbows, trees, hawks, and remodeling our house.
I’m going to keep this post to remind me to pull my pictures out and put them in frames.
thanks
I’m immensely educated , thanks to you. I shall one day experiment on this idea. Best wishe to you from India and thank you for the creative oxygen..
I tried this with wood from a large Cherry tree that had fallen. Because the wood is so hard, it took forever to sand, and then, unfortunately, I just could not seem to get the tree rings to raise up. I had a small torch as well, I don’t know if a stronger torch would have made a difference, but I do know, I will go with a softer wood if I try it again.
I would try a softer wood! I tried with birch with no luck as well.