This DIY Cricut Storage Caddy is the perfect storage solution for your Cricut machine and all the mats and tools to go along with it! A simple DIY build that tucks right under your desk out of the way, but ready to craft at any time.
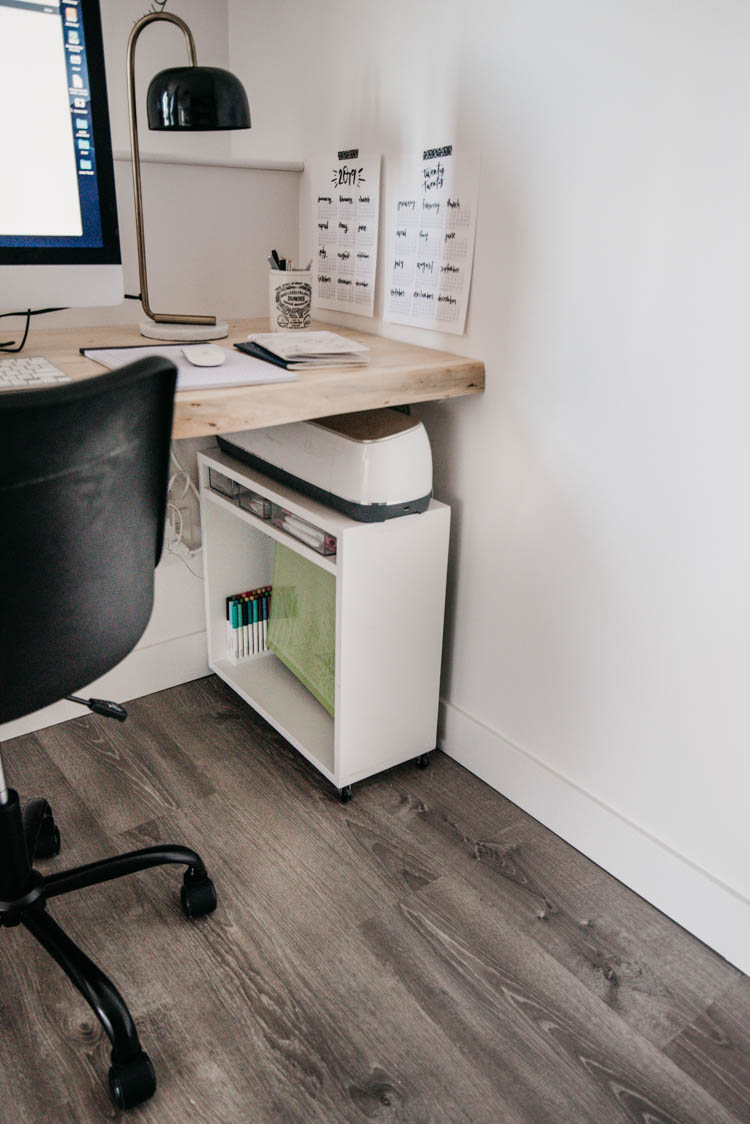
If you follow along on Lemon Thistle, you’ll know that I love to use my Cricut. It’s such a handy tool for crafting, party prep, and making your own tshirts but I’ve also never had a proper place for it to be stored. I have hauled it out and used it on our kitchen table, on my island, on my desk (pushing my computer out of the way), on an Ikea rolling cart and probably 7 other places. When we were building my new office- a storage solution for my Cricut was a must.
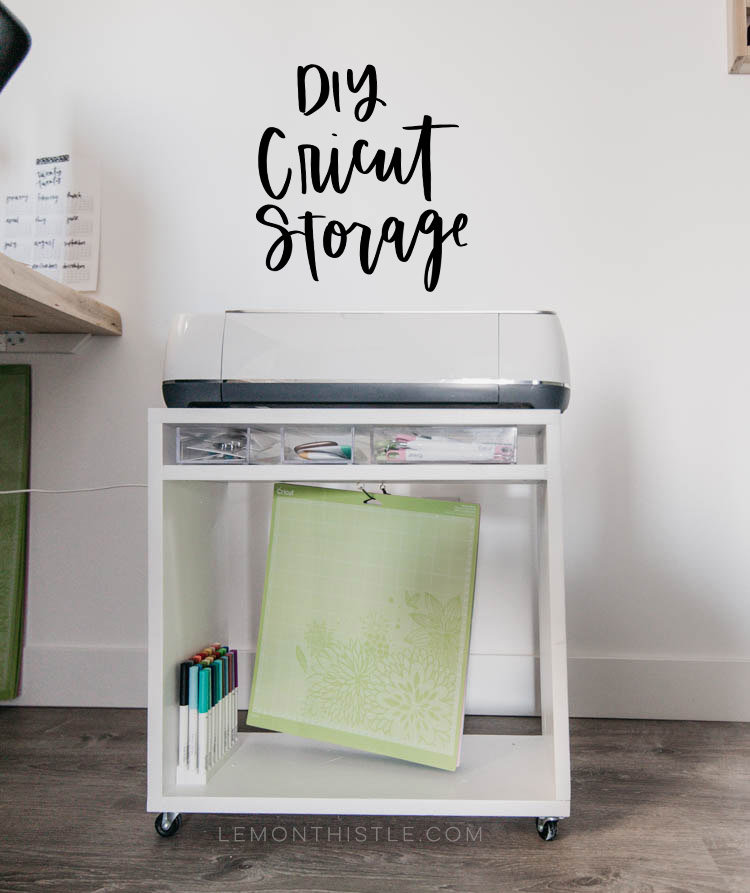
Meet this little rolling Cricut storage and caddy! It tucks perfectly under the desk and out of the way and holds all my tools, markers and mats. Vinyl storage is a whole other beast… when I share my office reveal this weekend you’ll see exactly how much I have- ha!
This build was super easy to put together in an evening and does the job I’d hoped it would so perfectly… ready for the tutorial? First off- a big thank you to The Home Depot Canada for partnering on this office and awesome projects like this one!
Supplies Needed for a DIY Cricut Storage Caddy
- 2 x 1×10 boards (6 feet each)
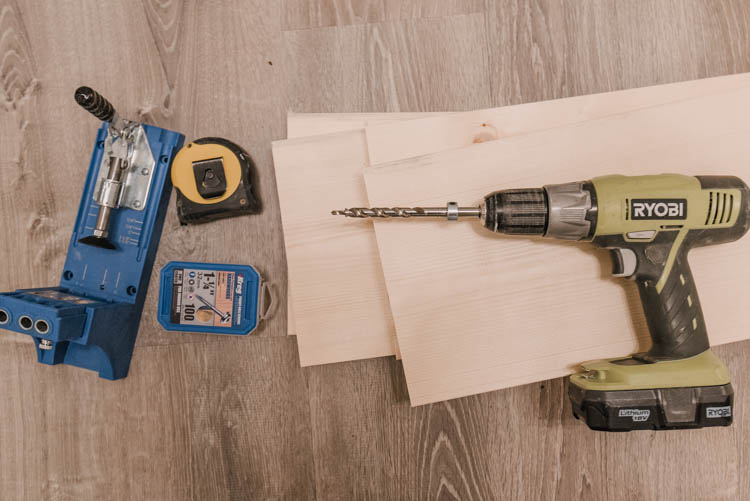
- Saw to cut boards to length
- Kreg Jig
- Drill
- Sandpaper
- Paint
- Eye Hooks
- Heavy Gauge Wire + Pliers or Thin Dowel
- 4x Casters
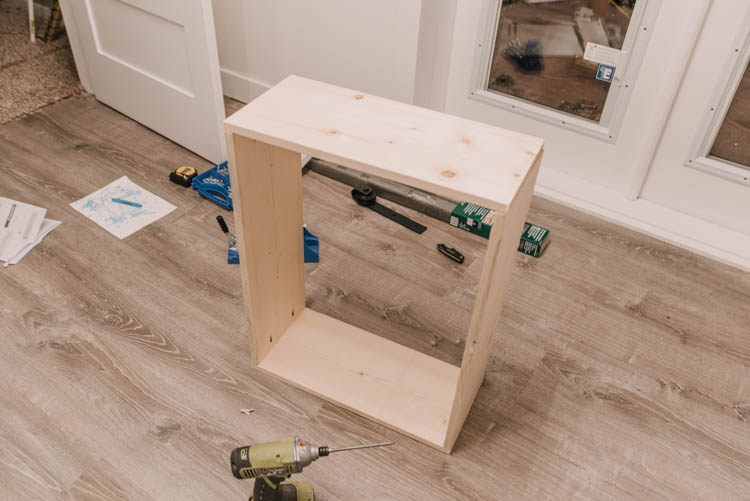
First off- build the frame for the Cricut storage caddy! Measure your desk and how much room you have under it. Take that measurement and subtract your casters (I took off 2″ for these) and subtract height for your Cricut machine (I took off 7″ for this). This is the height your frame can be! Also measure how deep your frame can be (how deep is your desk). I made my frame approximately 20″ tall by 21″ deep.
Make your cuts as follows. Cut your top and bottom board the full depth you’d like your frame (for me this was 21″), and cut your side boards the height less thickness of your top and bottom boards. If you are using 1x material like we are, you would subtract a total of 1.5″ since 1x boards are actually only 3/4″ thick. For me, this measurement was 18.5″
If you’d like to add a shelf in, you can cut that at this time too (mine was an addition after the fact!) by cutting it the length of your top and bottom boards less the thickness of your side boards (for me, this was 19.5″).
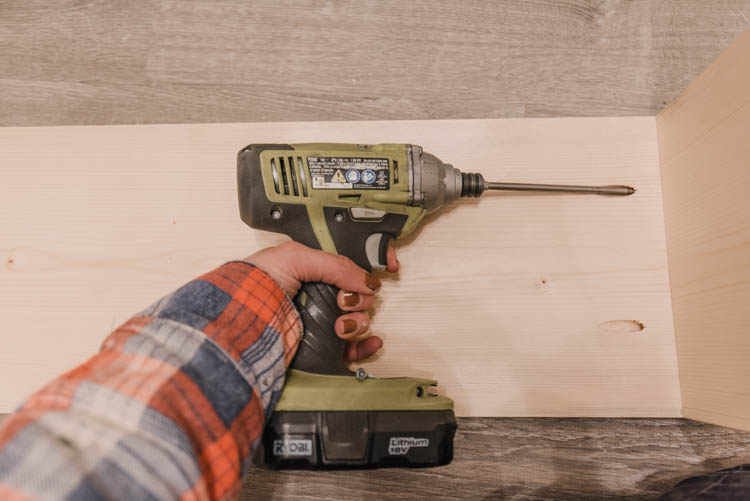
Once your boards are cut, time to drill those pocket holes! This is how the frame is held together all sturdy and square. I used my K4 Kreg Jig for this, but if you won’t use it often- I’d opt for a pocket jig. I drilled two holes per end on the side boards and on each end of the shelf. Attach the boards together using coarse thread pocket hole screws according to the depth of your boards (for 1x, the screws are 1 1/4″).
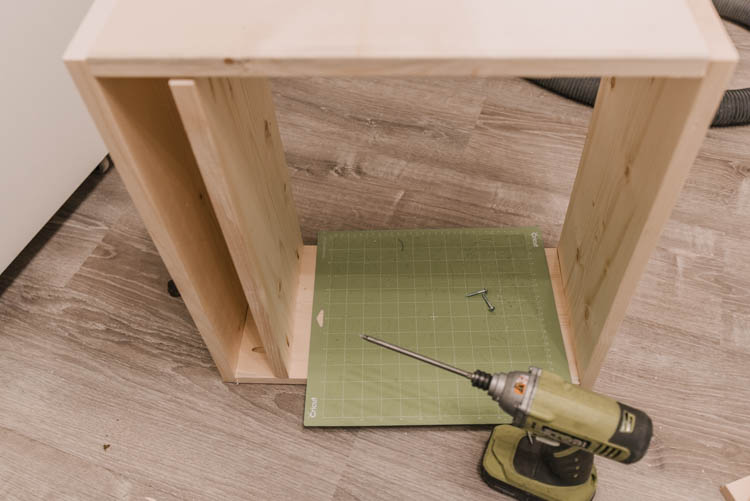
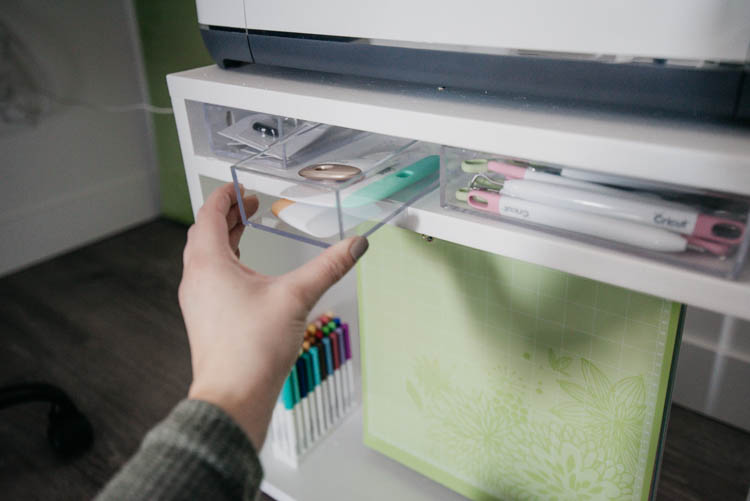
Once the outside frame is built, add in that shelf! You can make this however tall you like, but I wanted to hang my mats on the bottom, so I measured my mat and left some room for the hanger. This left the perfect amount of room for these acrylic trays (from the dollar store) for my tools.
At this time… sand and paint it! You could leave it natural wood if you prefer- I wanted mine to blend in as much as possible with the walls so it wasn’t too noticeable under the desk.
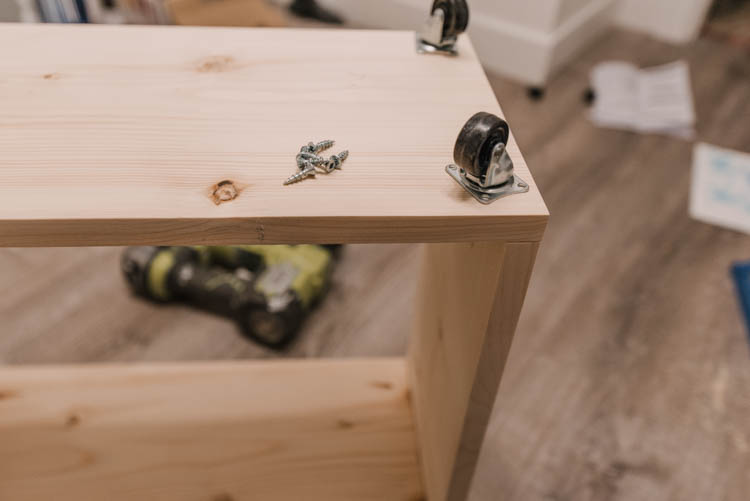
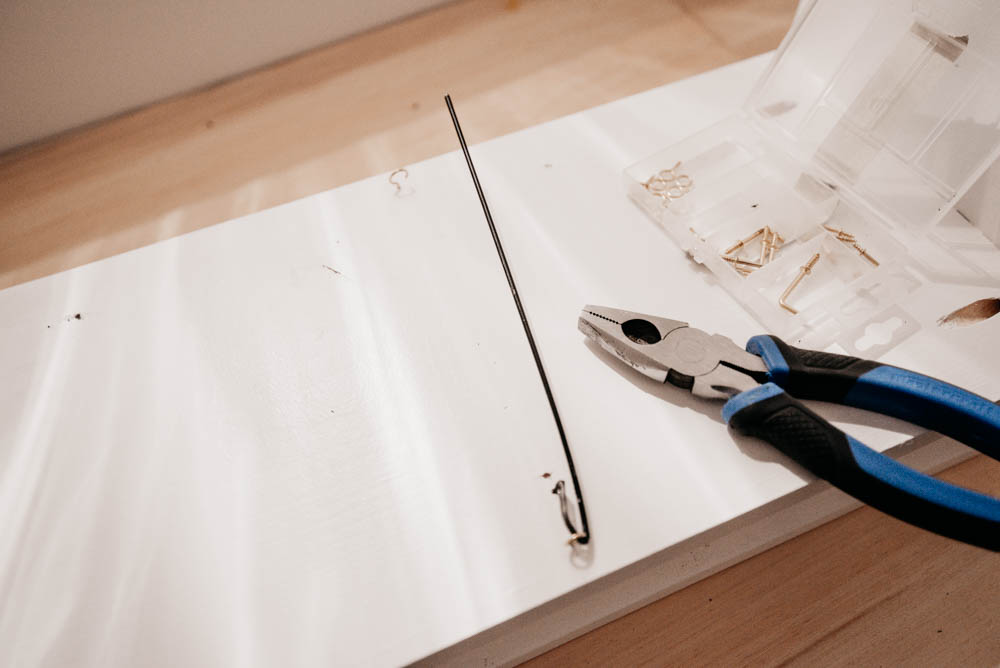
Once your paint is dry, you can add on the casters and the mat hangers if you’re wanting to have it like mine. I screwed two eye hooks in about one inch from the edges on the bottom of that shelf. I used pliers to open one of them so that the wire or dowel could hook in and out easily. If you are using wire like me, use pliers to bend it and loop it around the back eye hook. The wire must be super stiff so that it doesn’t bend, pulling out of the front eye hook under the weight of the mats. If you’d prefer to use thin dowels, notch the one end so that it sits on the eye hook without sliding out (I would use a small hacksaw for this).
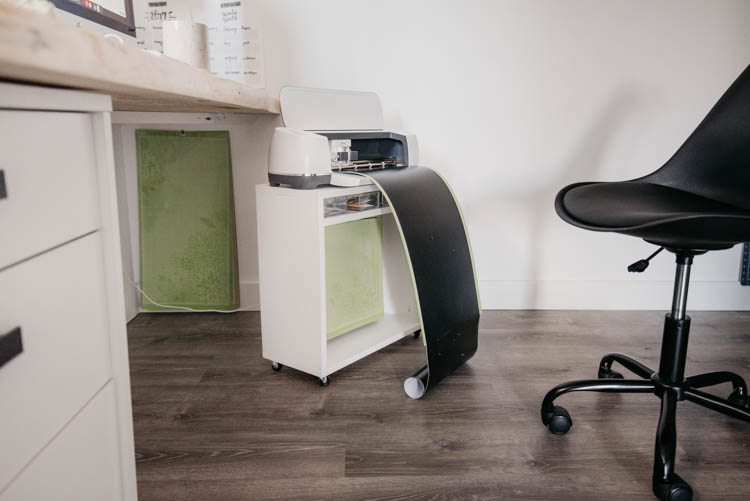
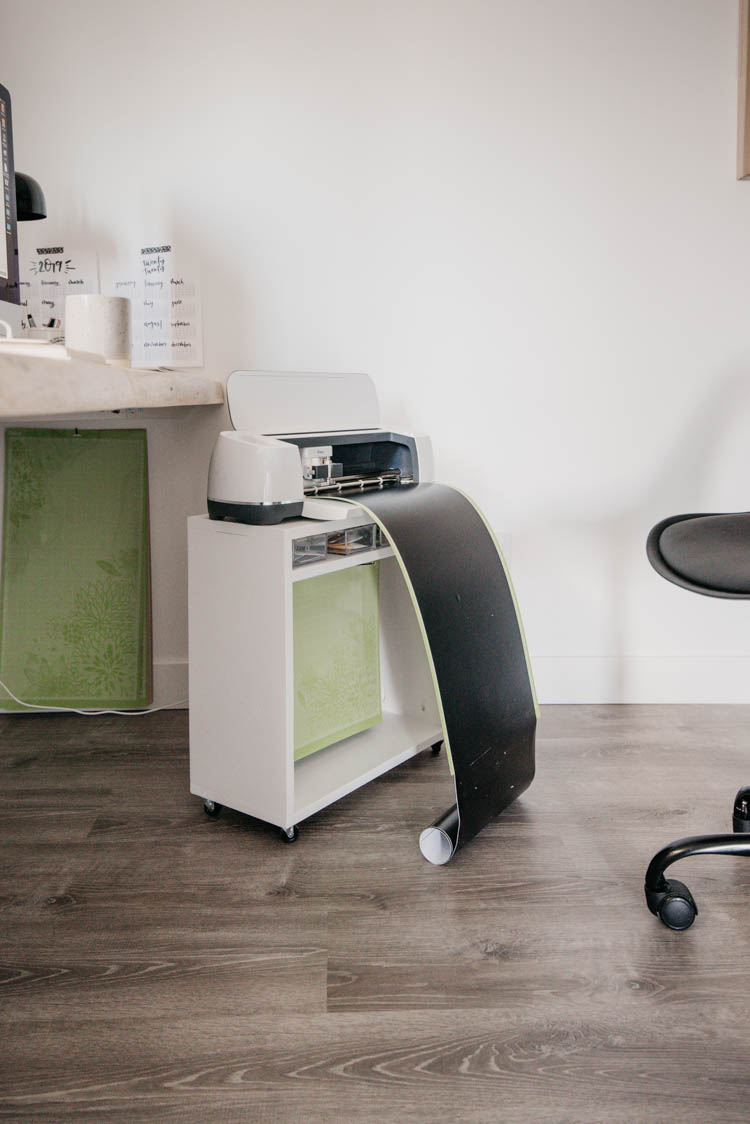
My larger mats didn’t fit on this caddy, so I added a monkey hook on the wall behind the caddy and have them all hung there. ALL of my mats and tools and Cricut machine… all tucked neatly out of the way, taking up less than 1 foot of space under my desk! I’m so so happy with this little Cricut storage solution.
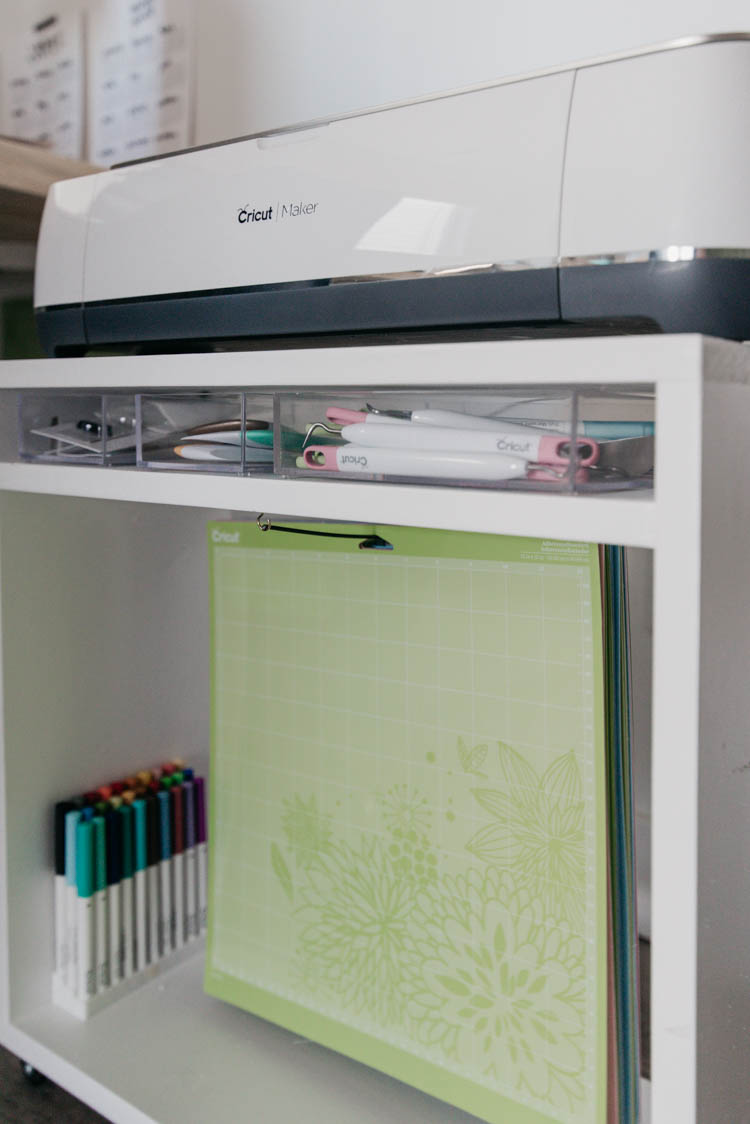
I also tucked my stand of Cricut markers on the bottom of the caddy, next to the mats. They fit perfect here and if I had another set, I’d put them on the other side. Bonus? This hides the pocket holes beautifully. If you wanted to actually hide the pocket holes, you can get pocket hole plugs and put those in there!
That’s it! A seriously simple build and so very functional for Cricut storage. I can’t wait to show you the rest of the storage solutions I have in my office when I share the reveal later this week! Make sure to check back for that :)
In the meantime, if you’re interested in that desk… you can see the tutorial for that right here!
 26 Personalized Gift Ideas with Cricut
Leave a Reply