
This project turned out way cuter than I’d planned! I had planned on functional, but every step I decided to add ‘a little somethin’ and those somethings ended up being really cute! Since we’ve really gotten into DIY and started amassing our own tools, we’ve started to really care about them because we realize how much good stuff costs! So not only am I going to share this DIY paint brush storage board with good ol’ pegboard… but I’ll also give some tips and tricks we’ve used to keep our good paintbrushes GOOD (even with little hands helping).

Isn’t that paintbrush cutout fun? I have a template for that below- after I made that score board with the 3d lettering, I thought this was the perfect place to try it again.
Tips first? Caring for your brushes and washing them super well has been a game changer for us. I know that sounds rudimentary but it takes a reaaaaally long time to get them perfectly clean, but it makes such a difference. You can have paintbrushes that feel like new even after they’ve been used several times and that’s a whole new world to me. It’s also great to hang them instead of store them in a box- they always get beat up when they’re stored with other stuff (we’ve found). We had always bought cheap brushes so hadn’t learned to take care of them well. Now we use almost exclusively Purdy brushes (which you can grab at Home Depot!).

And since we no longer use crap brushes… when kids want to help, I get all possessive. So I solved this problem with a trip to the hardware store for two cheaper brushes. We let them pick a colour to paint the handle of their brushes (I wish I would have gotten wood handles as it would have held the paint better), so they could always know which one was theirs. Aubrey’s is pink (of course) and Emmitt’s is red. When they want to help, they know which ones to grab! Another tip on painting with kids- my dad used to always make me and my sister up buckets of soapy water (bubbles!) to help ‘paint’ with. He’d give us a wall or space that hadn’t been painted yet and we would ‘help’ for hours. Our kids love it too.
Last tip… see that paintbrush at the top that we wrote CLEAR all over? That’s been huge for us too, The worst thing is doing a clear coat and having a flake (or flakes) of dried paint fall into your piece! That’s our designated clear brush now :)
Okay! DIY time- Everything you need for this project, you can grab at The Home Depot.
- Piece of pegboard your desired size (you can get smaller pieces in store)
- Moulding (I used 1×1.5 from the trim section)
- 1×4 (just a scrap piece for your paintbrush cutout)
- Circular Saw
or Table Saw
- Scroll Saw (I used a moto-saw)
- Sandpaper (I used 120 grit)
- 1″ Screws and drill
- Construction adhesive or No More Nails (what I used)
- Paint (I used spraypaint)
- Pegboard hooks

Start by cutting your peg board to size with a circular saw (I just got a new Ryobi One+ circular saw which is amazing because I don’t need to plug it in!). Ours will be going in our storage space and the wall there is pretty small for it to go on, so I measured and cut exactly what would fit. A table saw would have been best case for this cut- it would have made a perfectly straight line. When it’s cut to size, give it a light sand on the edges then you can paint it!
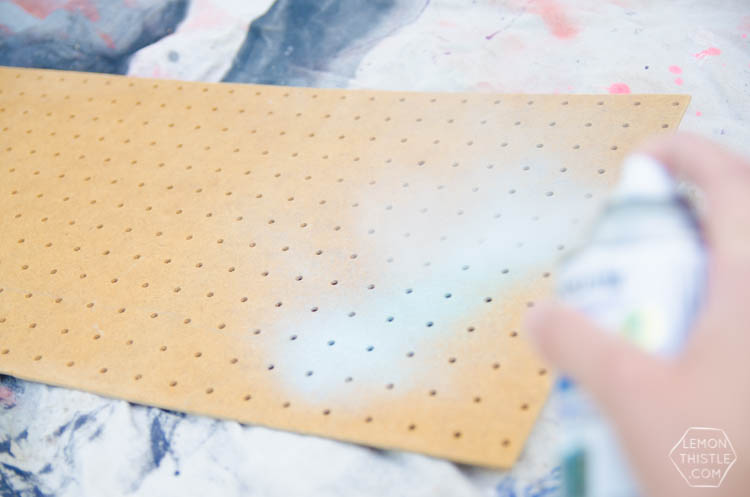

I chose to spraypaint it, but seeing how pegboard doesn’t love spraypaint, I would choose to use latex paint in the future. You can see here how funny it looks on the first coat. It ended up taking 4 coats and almost one whole can of spraypaint to get an even finish.


Next up is that cute paintbrush cutout! You can download the template for that guy RIGHT HERE (personal use only). Print it off then lay it over your piece of wood and press an indent in. trace that indent with your pen or pencil then get to cutting. I used my Moto-Saw for this (like I did with this project) but you could use any scroll saw for something like this. When your paint brush is cut out, go ahead and give that a light sand and then paint. Again, I used spraypaint and probably would opt for latex in the future, the wood sucked it up.


When everything is dry, it’s time to assemble! Cut your frame pieces to size (I didn’t bother to miter the corners for this- it is for paint brushes after all ;)). I attached the frame pieces with screws through the back of the peg board. I tried to attach the paintbrush that way, but the small piece split (you can kind of see that in the photos). I opted for No More Nails to attach that part instead.
Now, you just need to add your hooks in and hang your brushes! Peg board is simple to hang since you can just use one of the peg holes over a nail, skipping hanging hardware.


What do you think? Fun, right!? This project took two nap times to get it done start to finish, if you’re curious about how long it would take!
 3 Photos to master for crafters and makers
I love your paint brush holder…fantastic Colleen. You have no idea how many times I have purchased the same brushes…they are in “one of those” organized containers. It is easier to just go buy an other one. LOL
Thanks for sharing.
Darlene
Nova Scotia
Haha, we’re the same! Our tools need some major organization this one is the only organization project cute enough to share so far ;) Thanks for the comment, Darlene.
Really cute!!! I was actually looking for an oil painting paint brush holder, and stumbled upon your post. I love it!
Thanks so much Joy! This could totally work too? Although as someone who doesn’t oil paint… I really don’t know ;P
I like it but is it difficult to put the pegs in because it lays with the peg board flush touching on the wall? Doesn’t the pegs on the back rub against wall? Easy enough fix anyway just curious.
Nope, Colleen hasn’t had any issues! Let us know how it goes for you :)