
I know that it’s Mother’s Day this weekend and I should probably be sharing a last minute Mother’s Day gift with you all. But really, I shared that on Monday with my hand lettered flower wraps for Mom. And then on Wednesday, I shared my new shop launch (hurray!) and a discount that would make for a rockin’ mother’s day gift as well (frame it and wrap it in a ribbon, you’re good to go!). So today, I’m just going to share an awesome DIY for you instead. But if you did miss Wednesday’s announcement… please head over and check it out! The shop is full of digital prints SO you’ll have time to download your print, and get it ready before Mother’s Day- hurray for no ship time! ALSO, there’s a giveaway going on so FIVE of you will win your favourite prints! Great- right?
I created this DIY Vintage Grain Sack Pillow a while back for The Little Umbrella and it has been well-loved since. I did make it to have on one of their little rocking chairs, but it really doesn’t stay there, it makes it’s way around the house like musical chairs. The oat sack came home with me a couple years ago now, when I was pregnant from my favourite antique store. I spied it hanging in the rafters and immediately knew what I wanted to do with it. Shortly after I got it home, we packed up to move house and just like most projects in my life it took me a while to get around to it.

Here’s what you’ll need to make your own vintage oat sack pillow:
- One Vintage Oat Sack
- Pillow Stuffing or Pillow Form
- Scissors
- Sewing Machine with coordinating thread

Vintage grain sacks have some awesome designs on them. I love the bold colours, but there are some that have more unique patterns with softer colours as well. I have another one with a grey soldier I’m trying to decide what to make with. Most grain sacks have been bleached to be used as fabric so they are white or creamy with no design left on them. If you look in antique stores, you should be able to find some with designs still- Etsy is another place to look.

Once you’ve found the perfect grain sack, you’re ready to get cutting. Start by taking the seams apart, then cut around the graphic you’d like to create into a pillow. I decided I wanted a square pillow, so measured the width and made sure to cut the height to match. This will be the front of your pillow. If your grain sack has another graphic you’d like to incorporate for the back (mine had directions), pay attention to that when cutting the next part. Cut the back piece 3″ (or more if you have a large sack) longer on one edge so you’re left with a rectangle, then cut in half or slightly off centre. These pieces will be hemmed on the open edge and will create the pocket for your pillow form to slip into. I chose to make this style pillow cover because I like to be able to take my pillow covers off for cleaning, and I avoid sewing zippers at all costs. **UPDATE: I made this pillow before I learned how to sew a zipper the easy way. And now- I’ll put a zipper in anything! You can read all about it here**
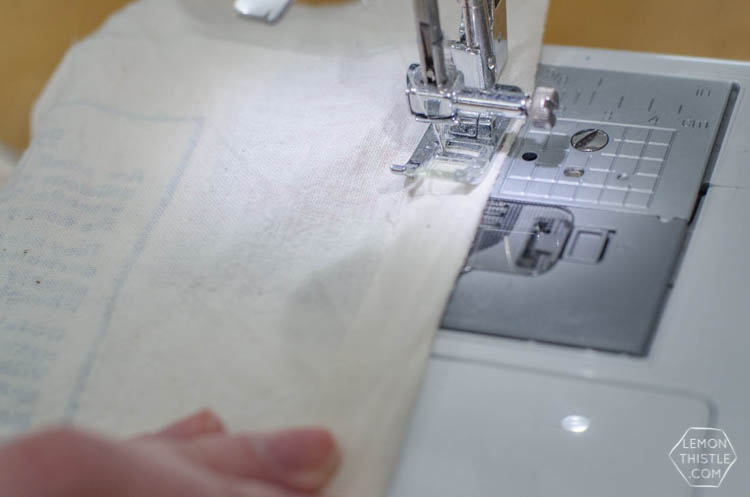
Hem the edges on the back piece that will be left showing to make the pocket (they’re the same edges you just cut). Then lay the front of the pillow face up and the back of the pillow (pieces overlapping so the outside edges of the pillow case line up) face down. Sew around the outside.


Trim all your threads and turn your pillow cover right way. This is your pillow cover! Admire it…then get to making your pillow form! There are several ways to make a pillow form. I hacked an Ikea pillow form. I took a larger Ikea pillow form and marked the corner of my smaller pillow with pen. Then, I used scissors and cut an inch wider than that mark. Push all the stuffing for your pillow into the corner that is sewn from the larger pillow and sew one edge. Push it all to the other side and sew the other edge. Pillow forms are very delicate material so you’ll want to turn your tension to 1 or 0 on your sewing machine.

That’s it! Stuff your pillow cover and you’re good to go. I love that this project is a safe way to bring a vintage touch into a kids’ space. The size of this pillow is itty bitty and perfect for little ones to love and cuddle. Have you ever spotted a vintage grain sack and wondered what to do with it? I’d love your ideas for the other one I’m holding on to!
 Watercolor ABC Book (and Painting Party) for Baby!
So flip’n cute! Such a neat idea!
Thanks so much Brie! I love how tiny it is :)