This beginners Photoshop tutorial will show you how to create your own holiday card design in Photoshop using overlays. From how to place the overlay to how to resize and recolour to export settings.
It’s almost time for holiday cards and as much as I’m almost always late… I’m also such a fan. I have made my own photo cars every year since having babes and I’m not about to stop. I love getting to pick my photo and pick my design to best suit that photo and now that I hand letter… I’ve totally added that on. I’ve been posting my holiday cards here for years. I’ve partnered with different brands to create them on their sites and I’ve shared tutorials on how to make your own using overlays on free services like picmonkey.com

So this year I made not just one… but ten. Because they’re too much fun to create. I’ve bundled them all into a product in my store or you can grab this one from a few years ago for free. I thought I’d put together a post on how to use overlays in Photoshop this year since I’ve already shared how to do it on picmonkey.com (see that one here!).
This tutorial is super basic. If you are familiar with photo shop- you probably don’t need this. I’m totally not an expert- but I use Photoshop all the time these days so will give you the basic language tutorial!
DON’T HAVE PHOTOSHOP?
You can use the PNG files that are included using this tutorial. But if you want to try out Photoshop- did you know that they have a free 30 day trial? I used that years ago when I was deciding if it would be something I’d make use of regularly.
Now… on to the tutorial!
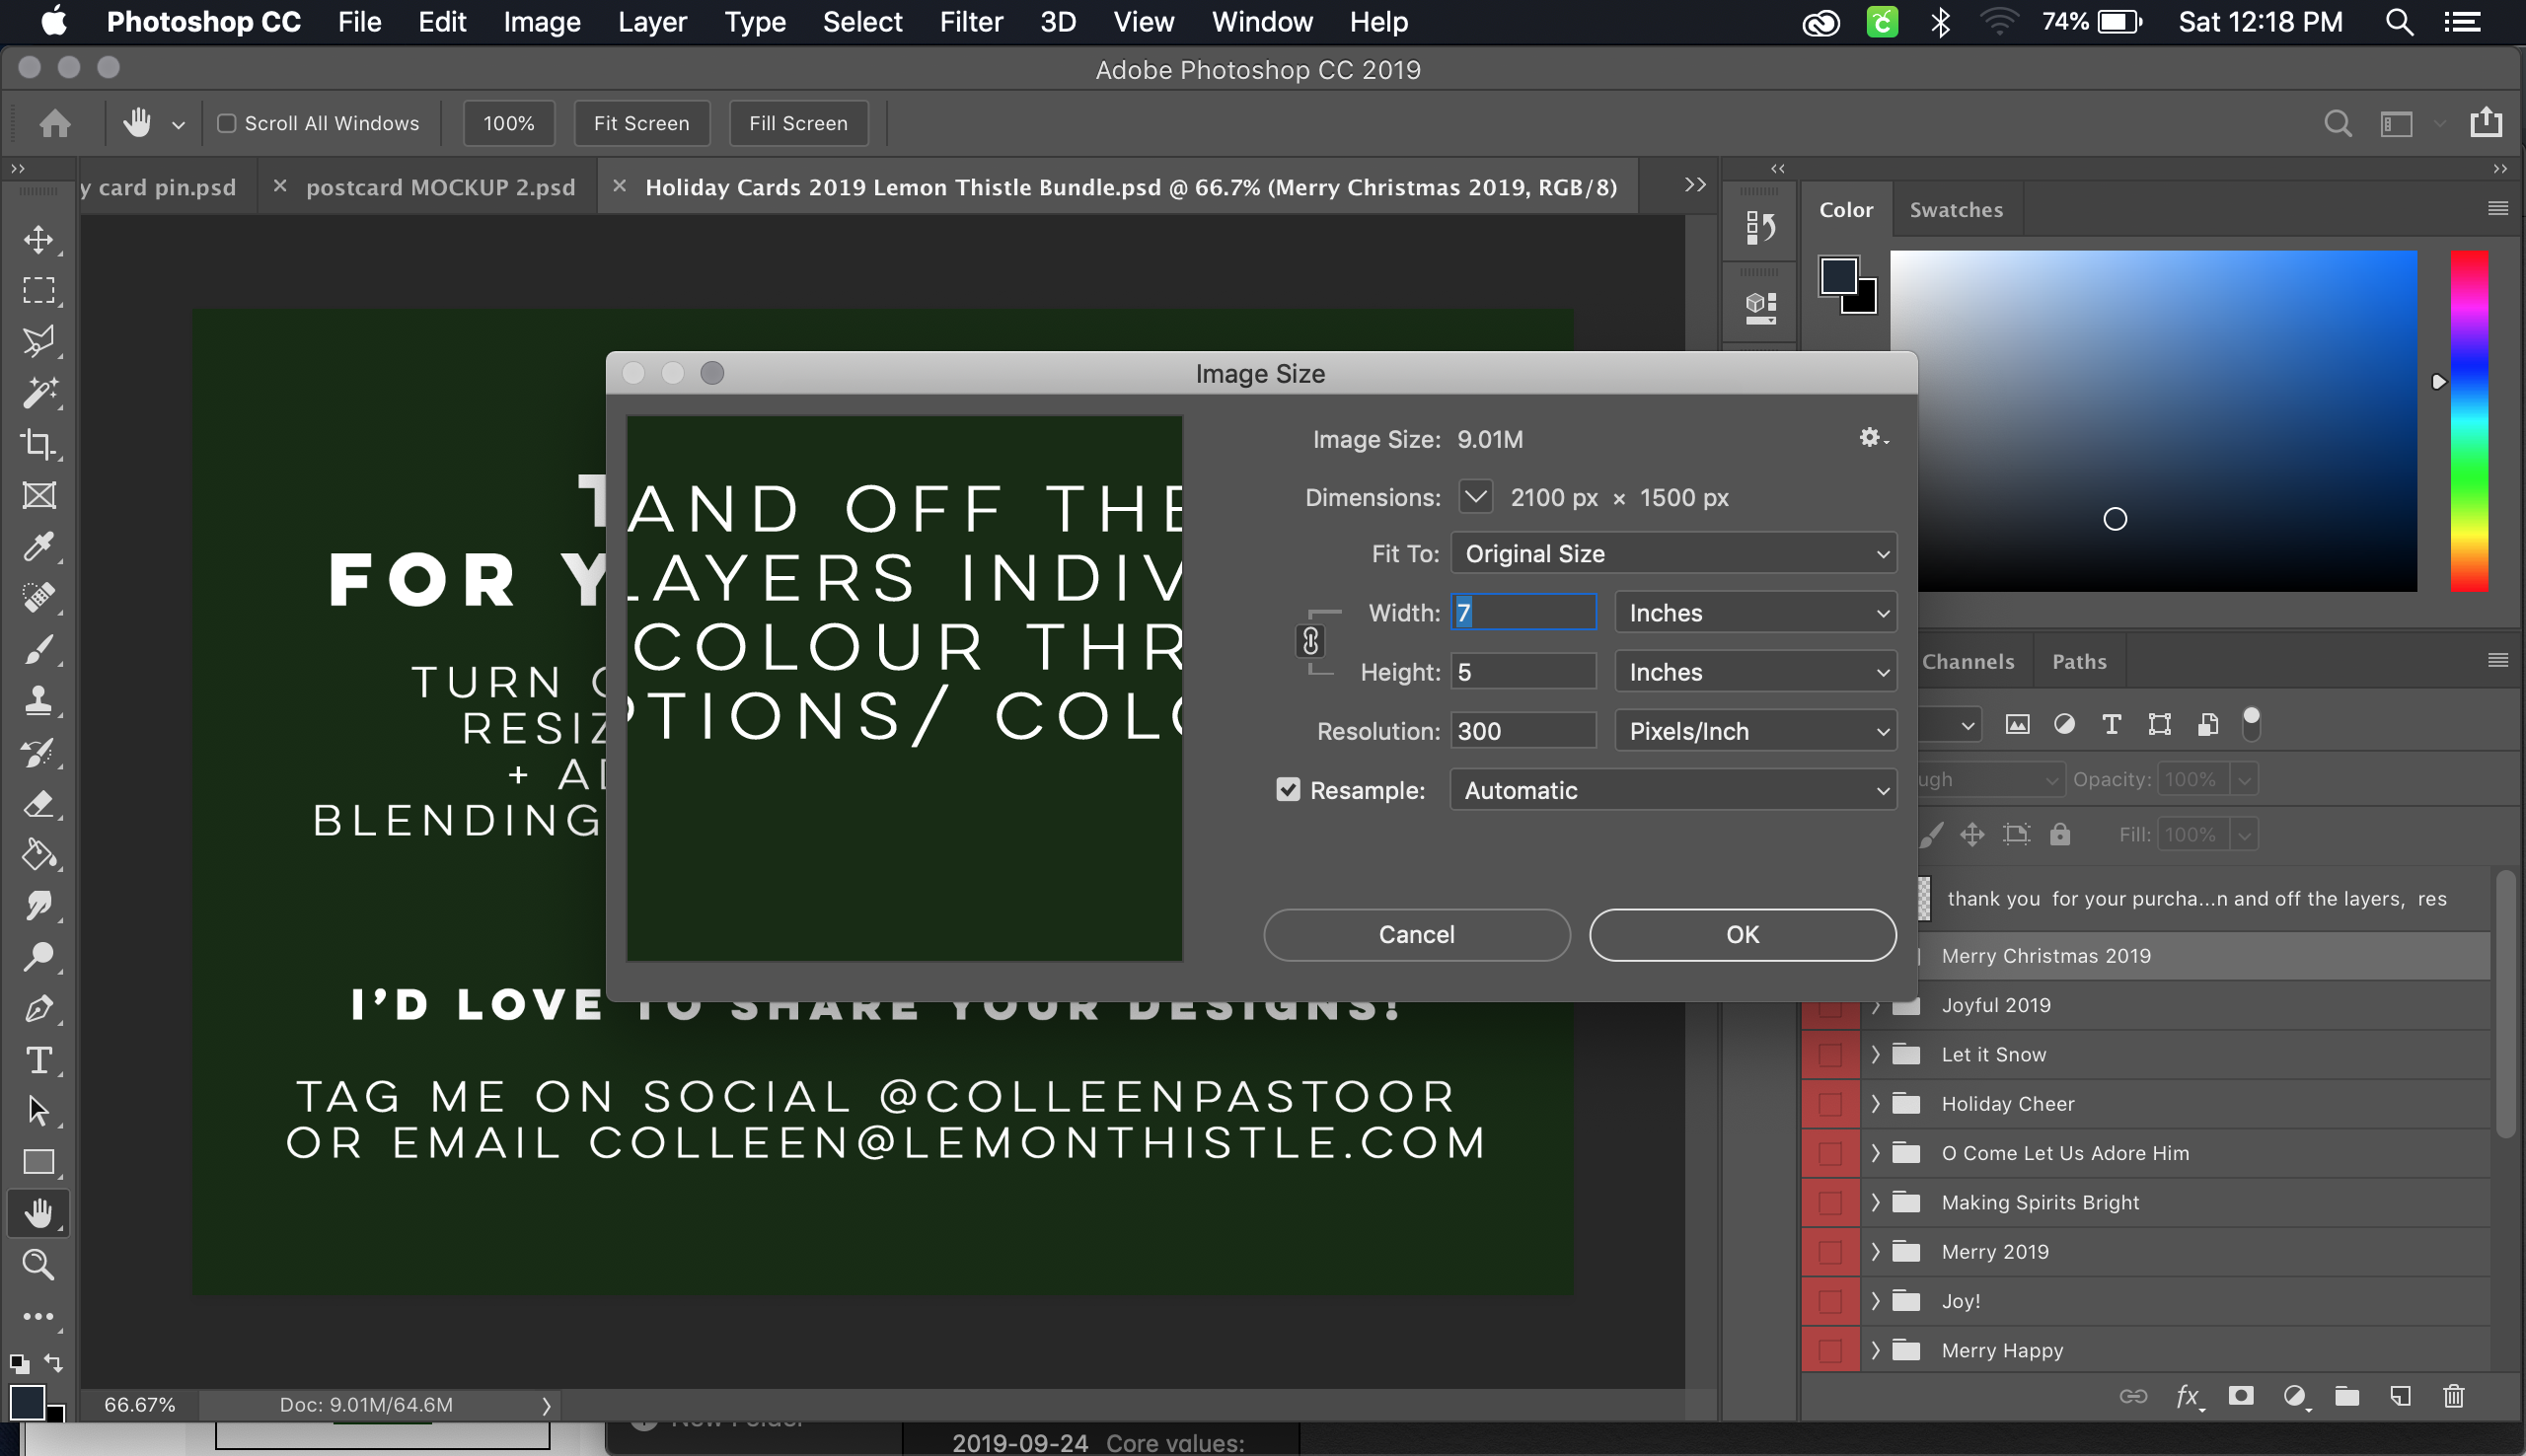
First of all- you’ll need to create your file. If you’re making it for print, make sure to specify 300 pixels/inch. Web size is 72 pixels/inch if you’re creating something for Facebook or Instagram only. I create my holiday cards for 5×7 size if I’m printing as a photo or if I’m printing as a post card (which I love to do using VistaPrint (so affordable!) you have different size options but you can get 50 5x7s for $15… which is so much better than holiday cards from websites that let you design and print them all in one. So not only are you getting exactly what you want but you’re getting it for less than you’d spend elsewhere.
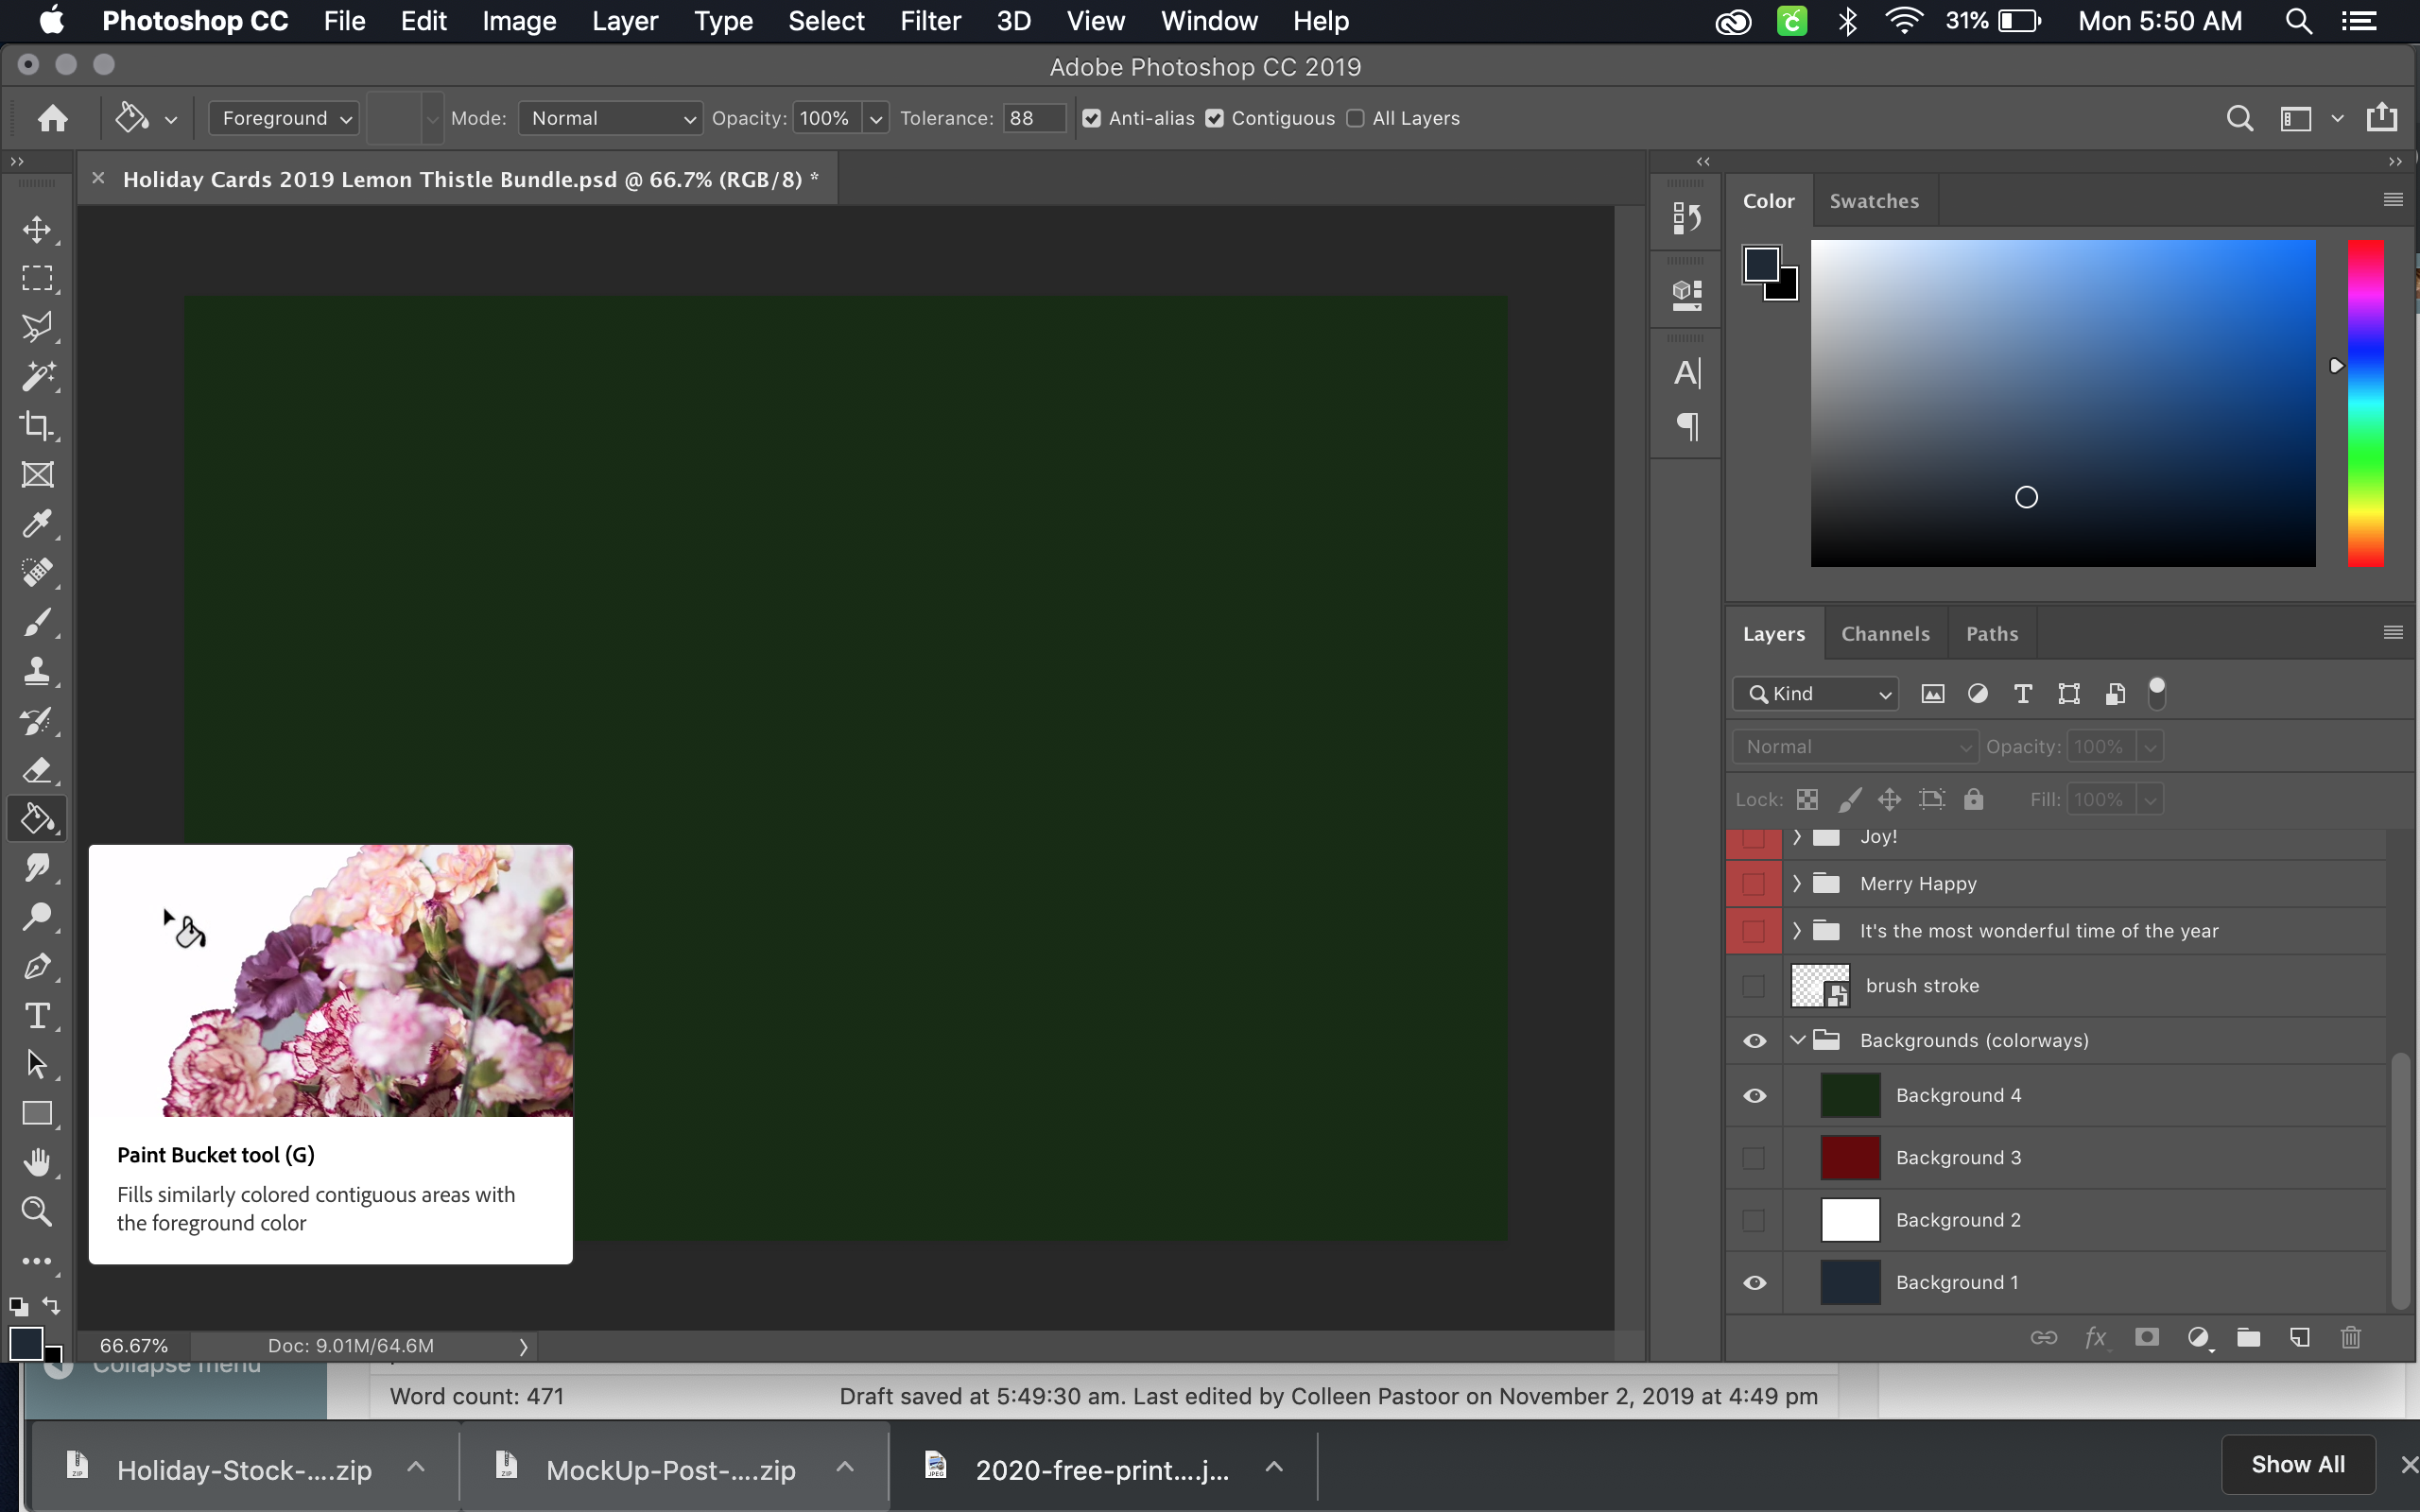
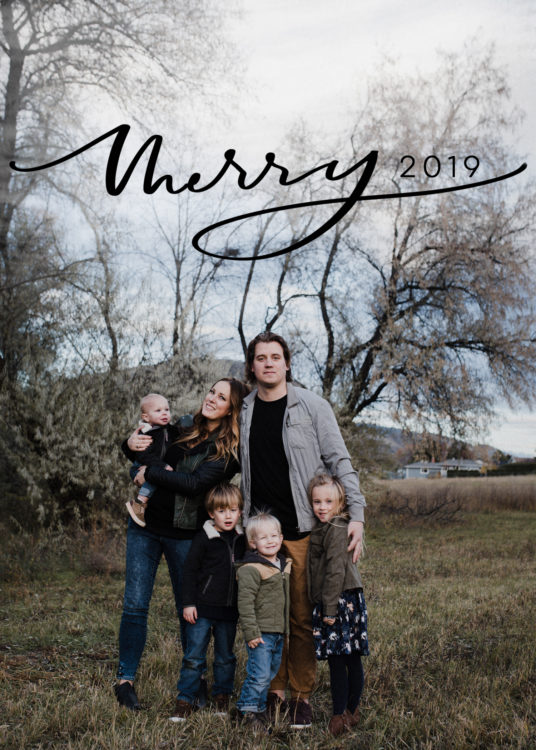
So once you’ve created your file, you can add in your background colour (if you like!), photo, and any overlays and text. The background colour is easy to change just using the (G) paint bucket tool. Choose the dropper to select any colour or if you are using my download, the layers with four background options are already there. You only need a background colour if you will not be sizing your photo to cover the entire card, like this example below.

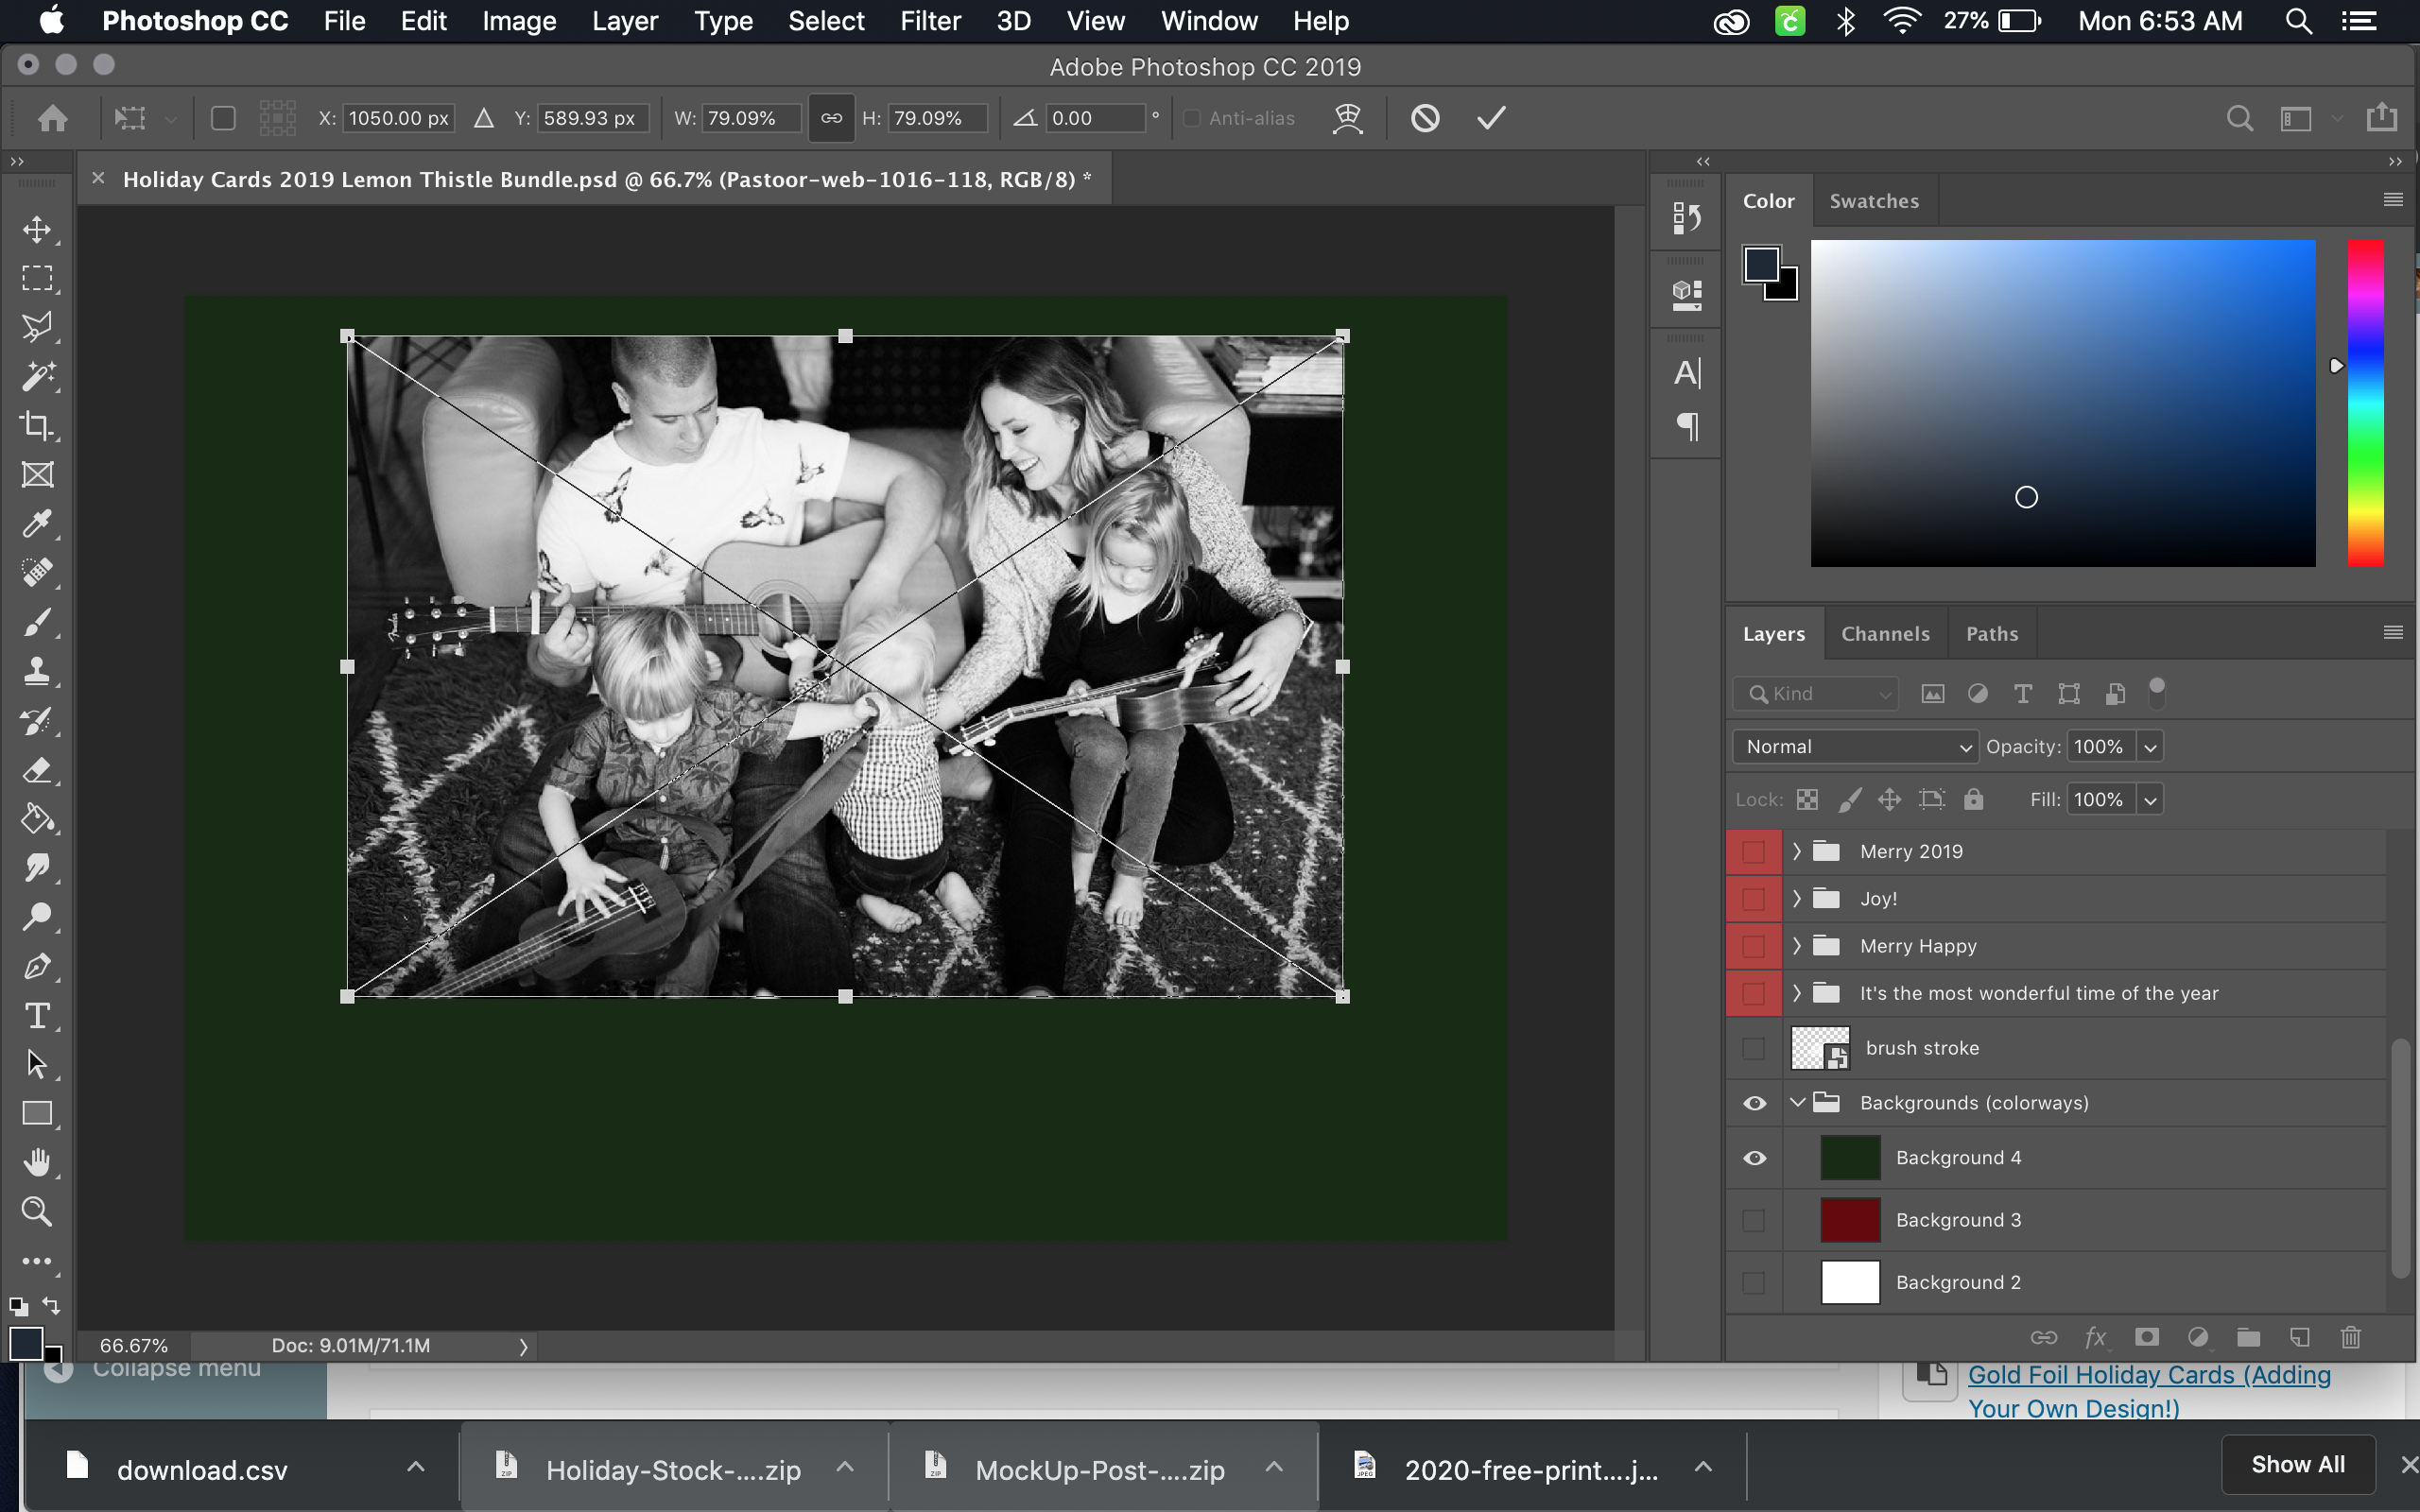
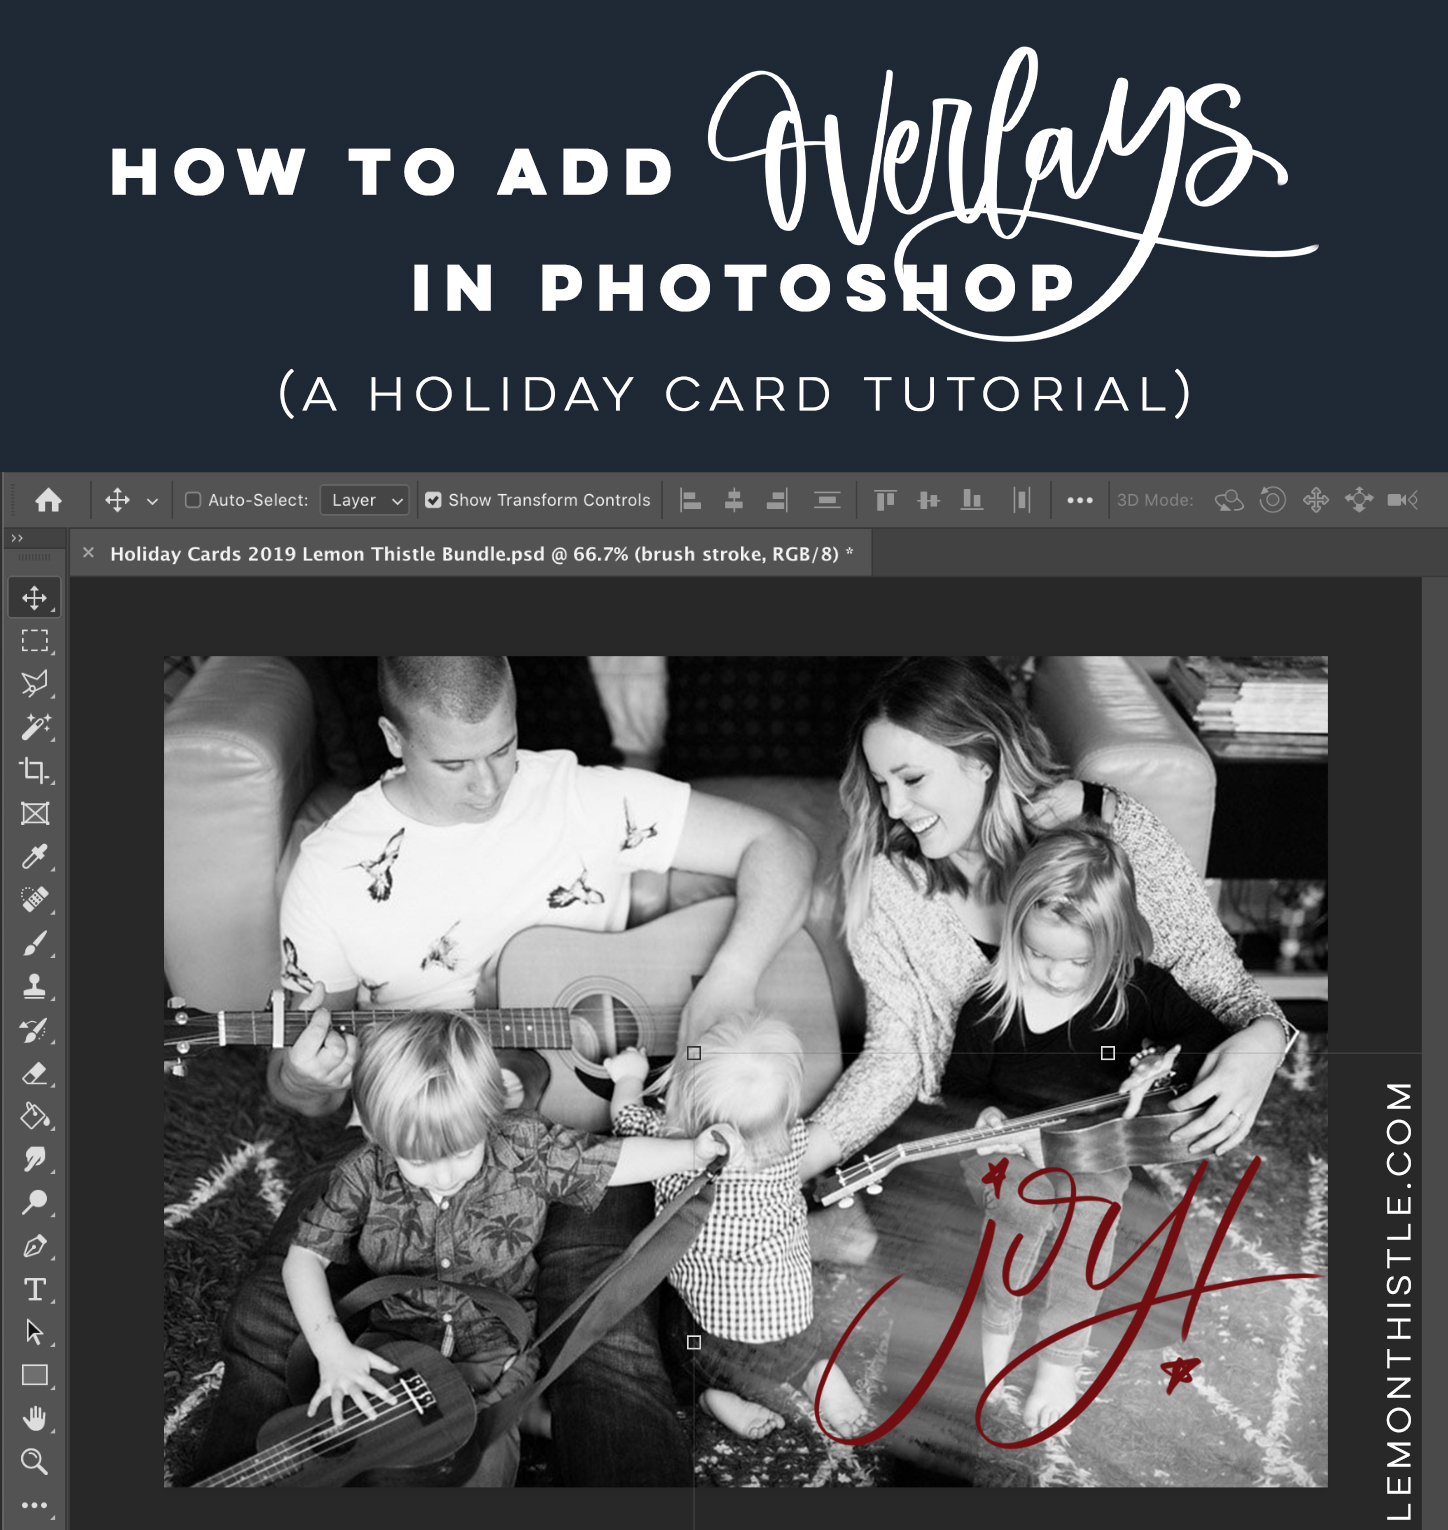
Then you can add on your photo. I tend to find the photo I want in my Finder (Files for Windows) and just drag and drop it on my canvas. Or you can go to File>Place Embedded (shown). Once your photo is showing, you can resize and hit enter to place it. A couple things to note. If you’re finding your image is stretching when you’re trying to resize, hold the shift key down while you resize. If you’re having a hard time lining it up, you can use your arrow keys to move it around. Little pink guidelines also like to pop up to tell you when you’re centred- go slow and watch for those!
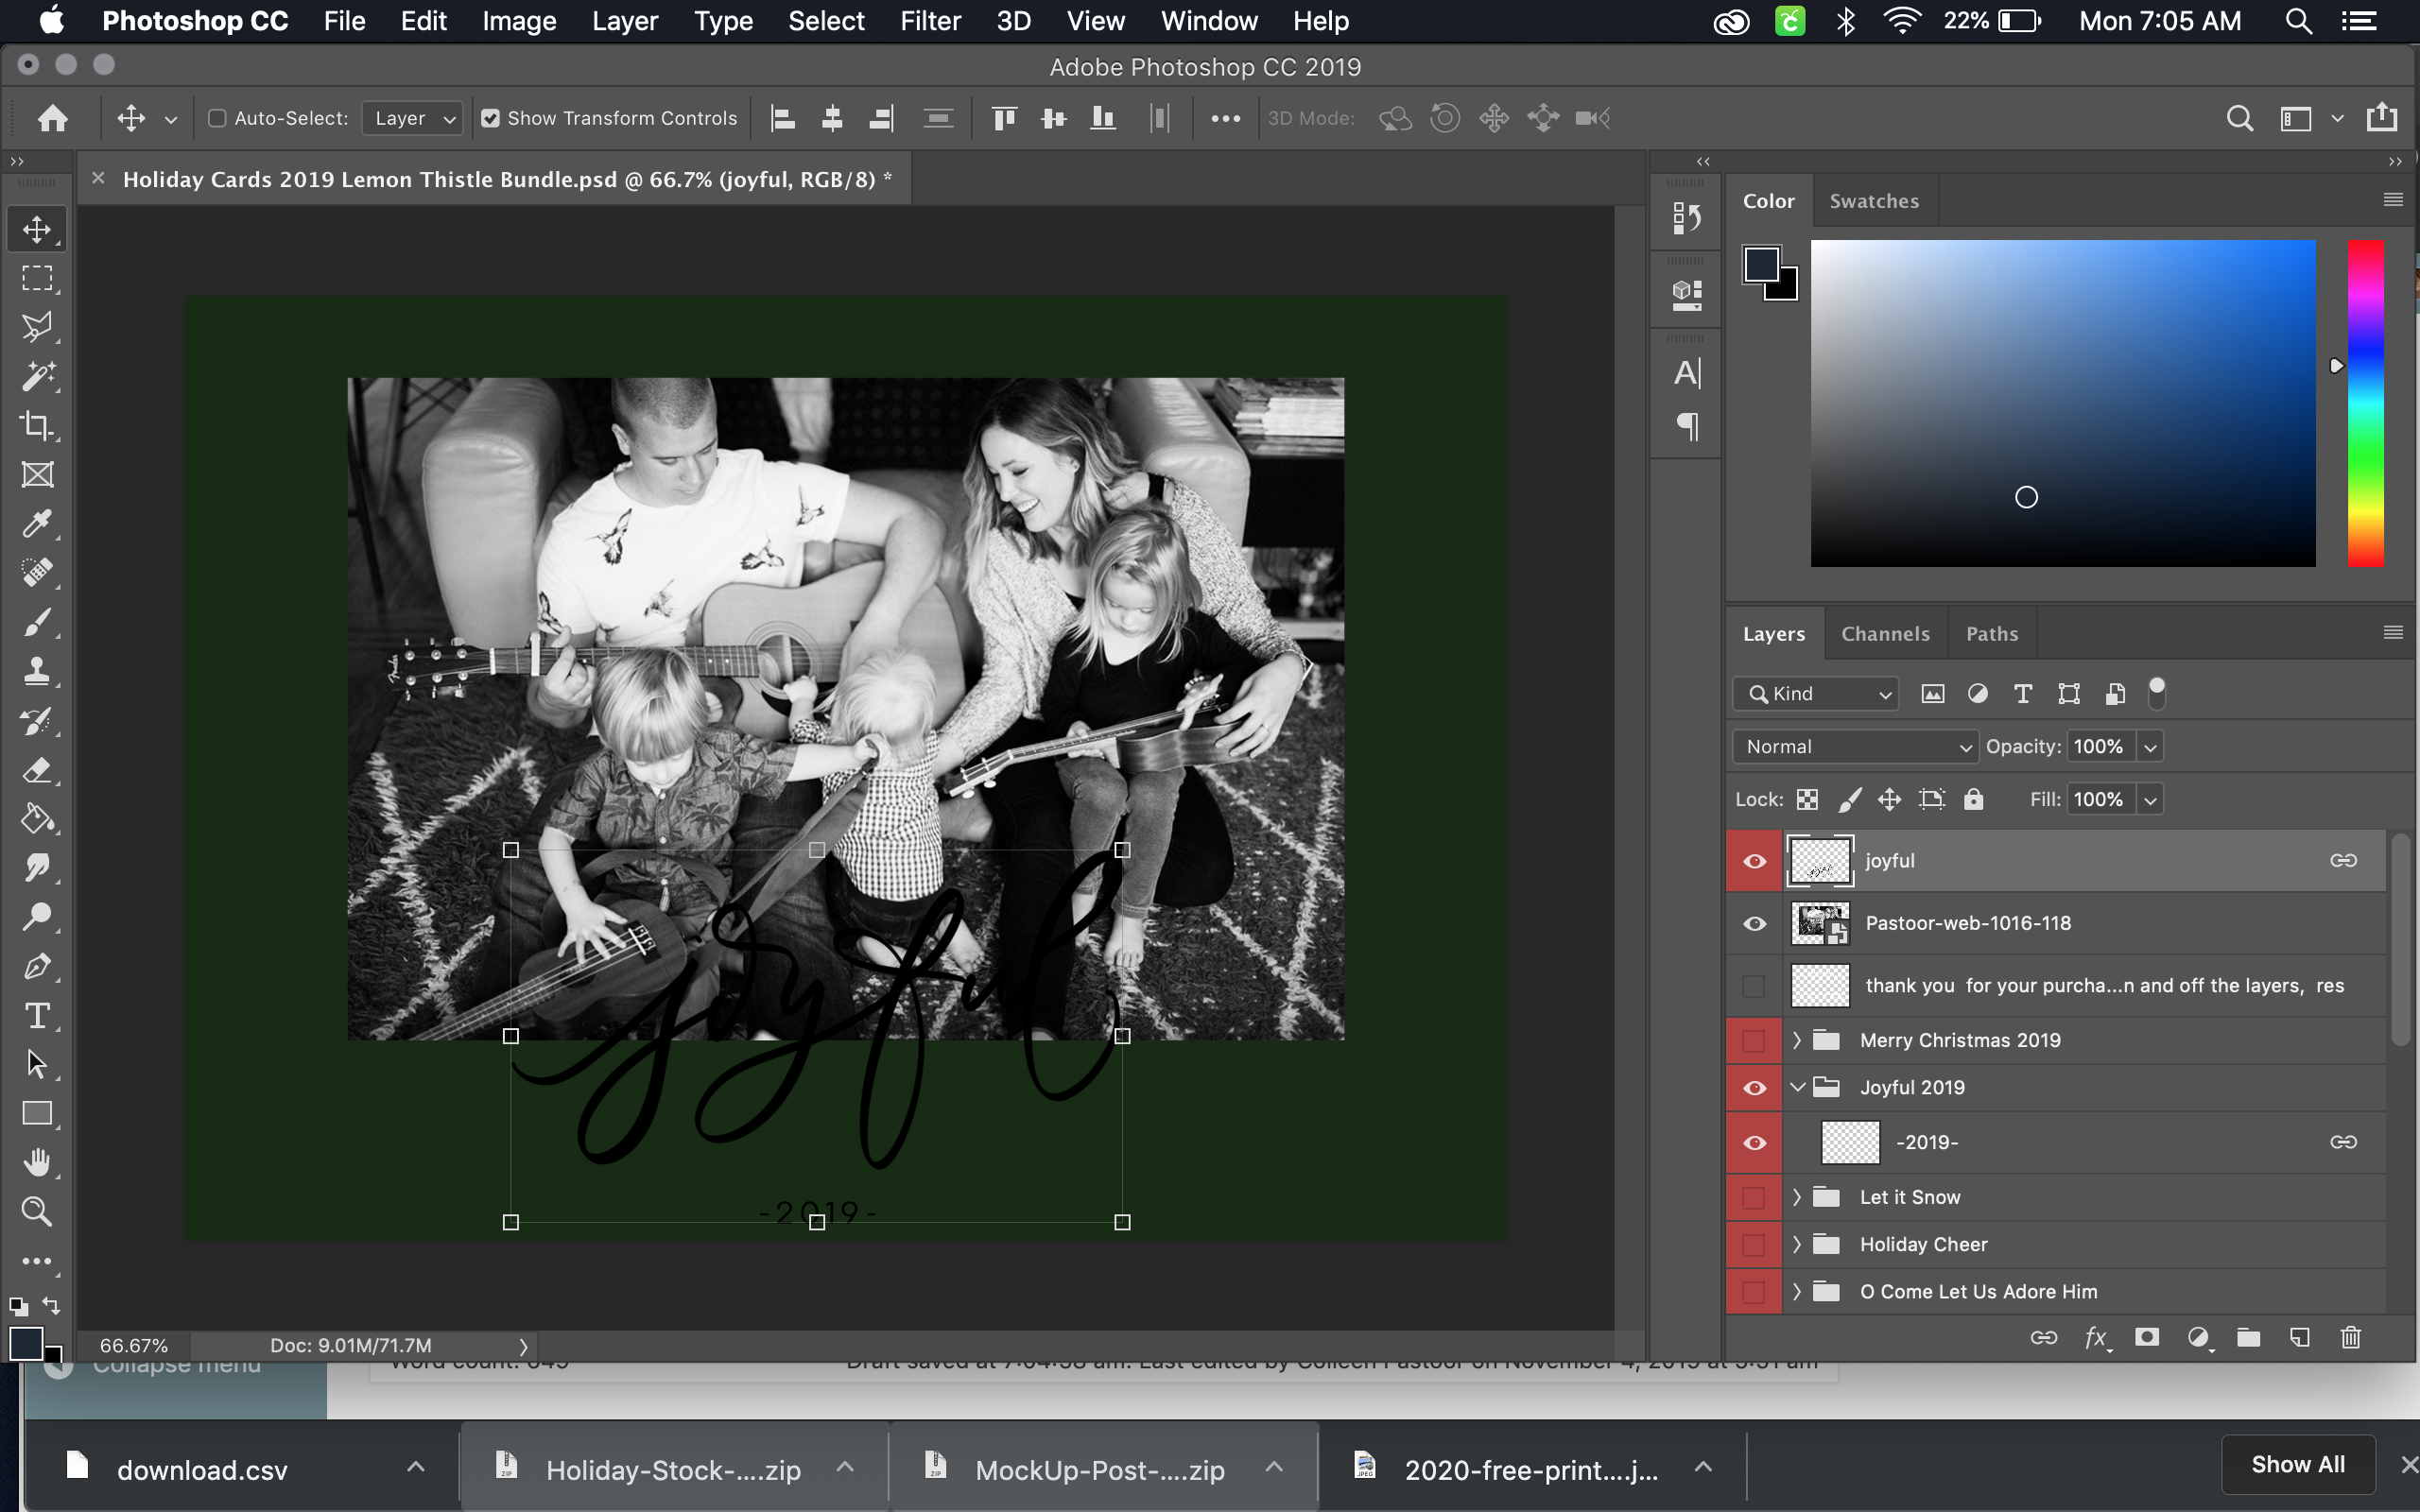
Now it’s time for those overlays! If you’re using my file, you’ll see them by name in the layers panel and you can just toggle them on and off using the eye icon. If you’re using one that you’ve found online, make sure it’s a translucent file (.png, .svg, and .psd all have that capability but .jpeg does not) and place it the same way you did your photo. Translucent just means that it doesn’t have a background colour.
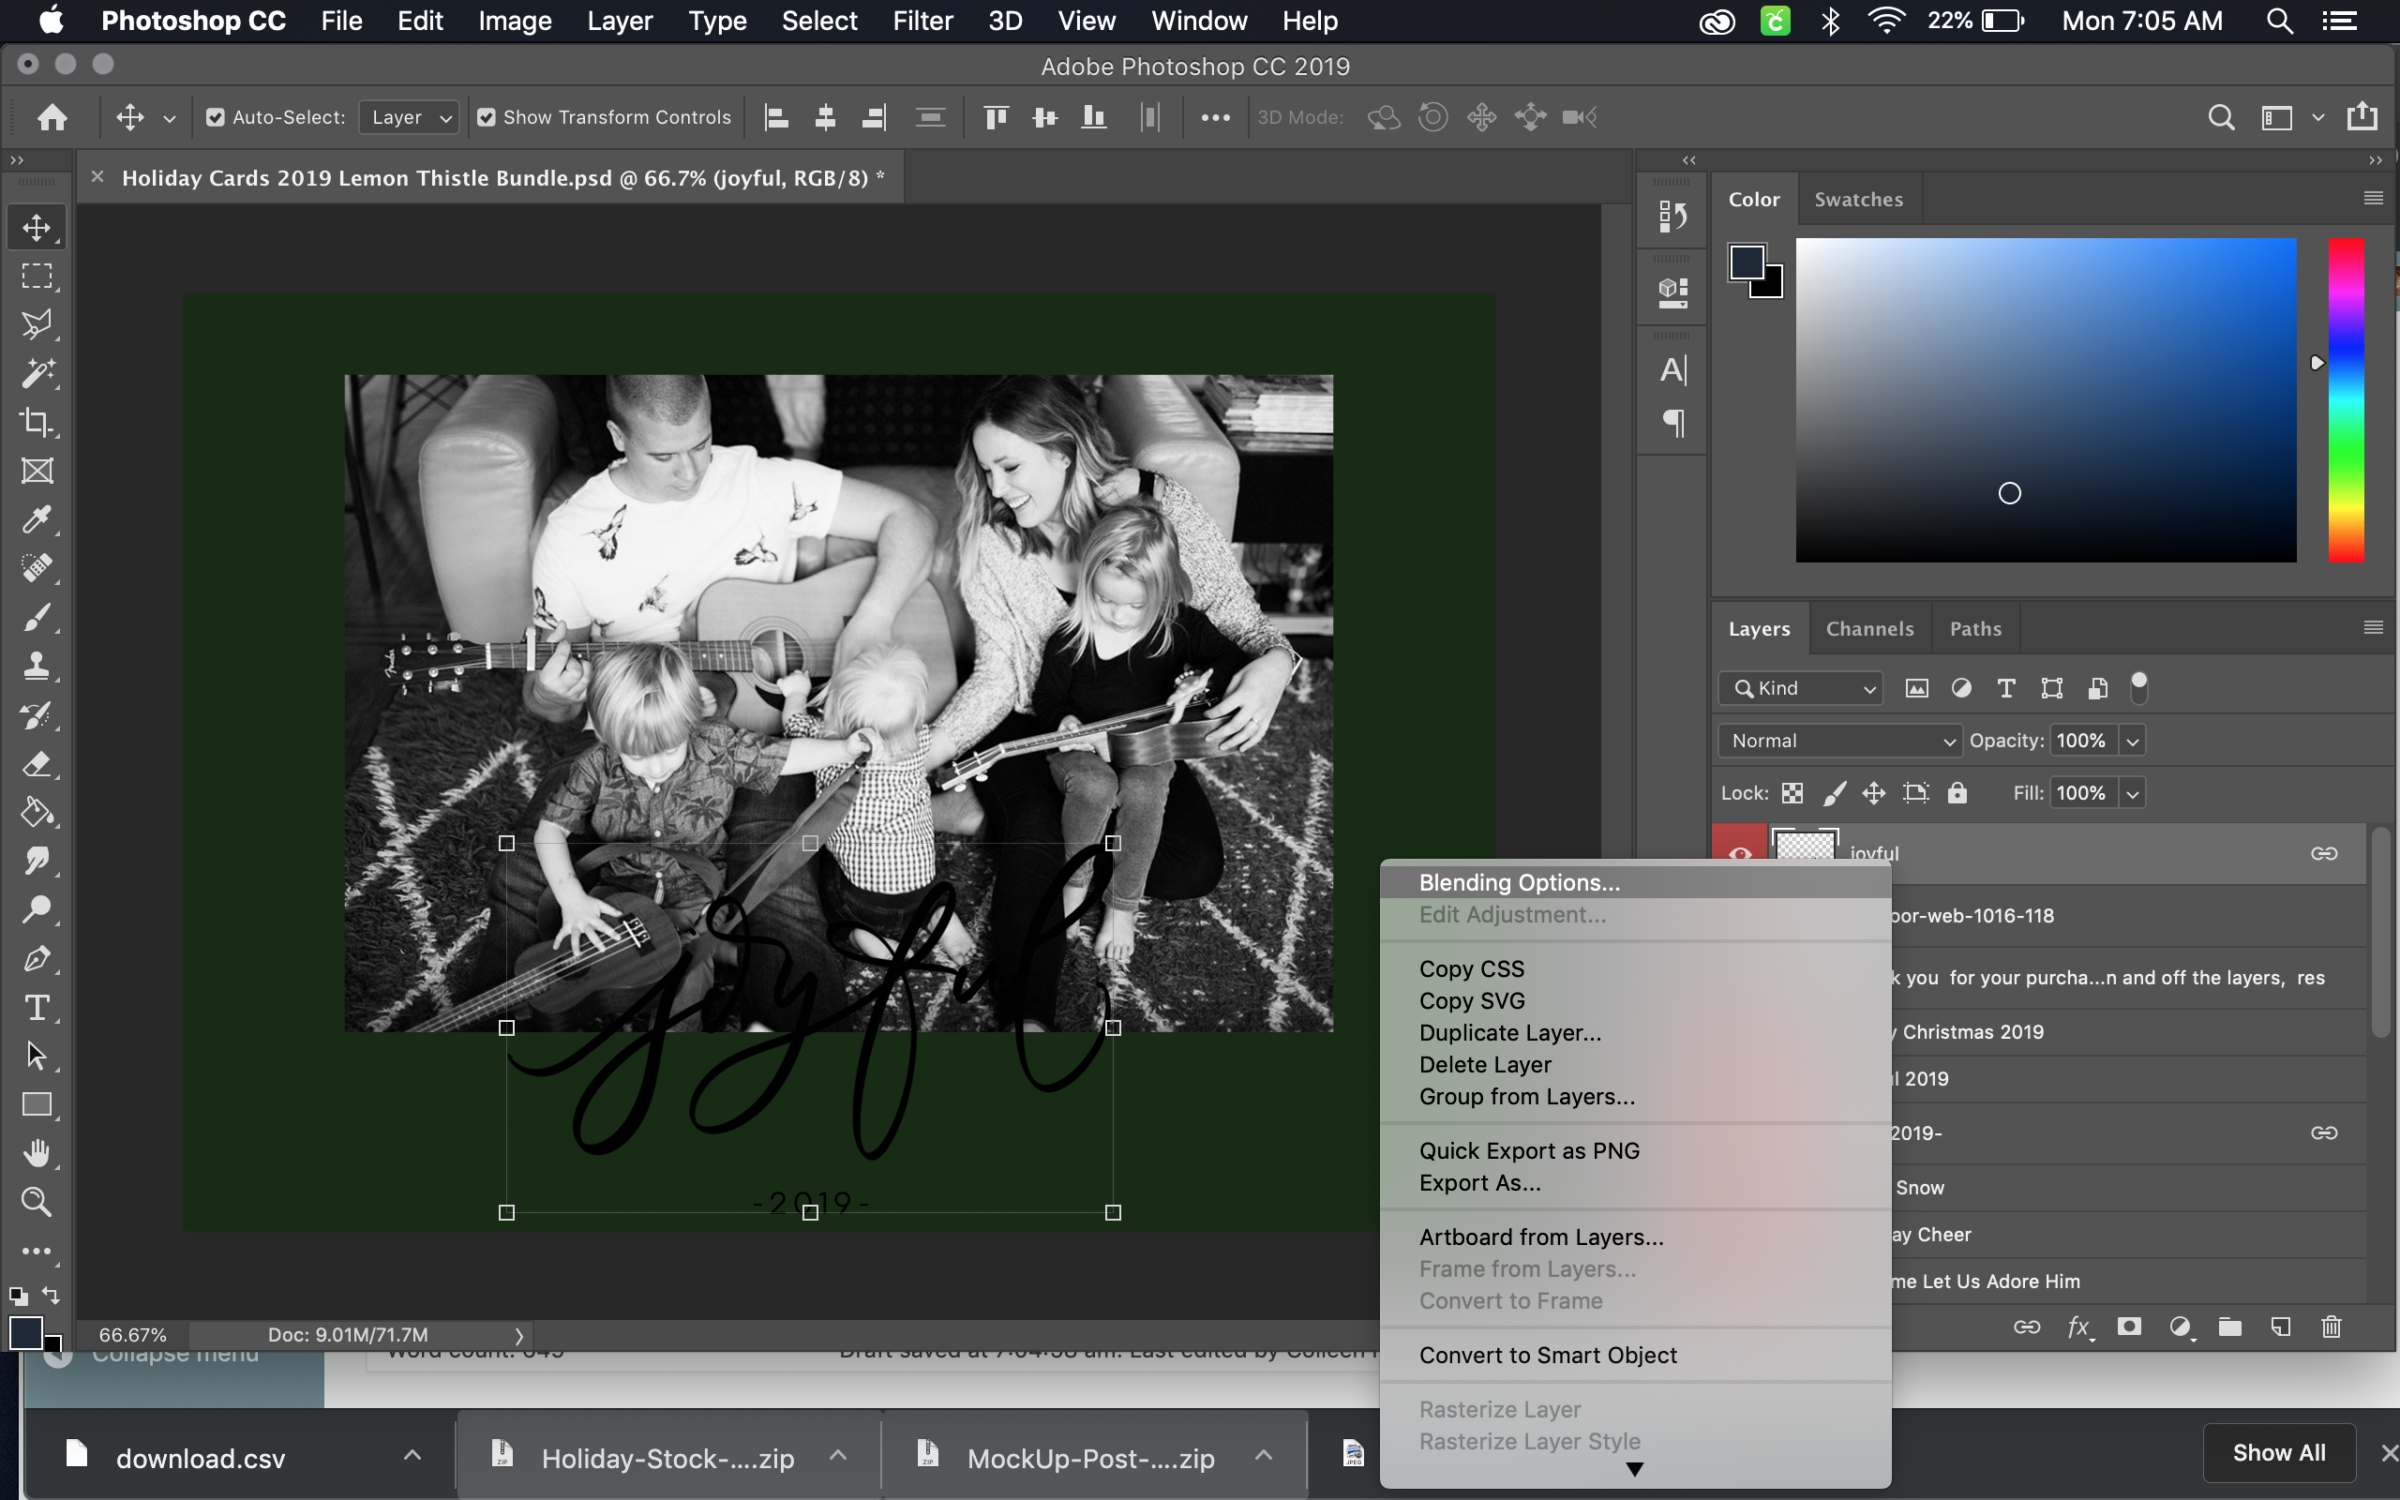
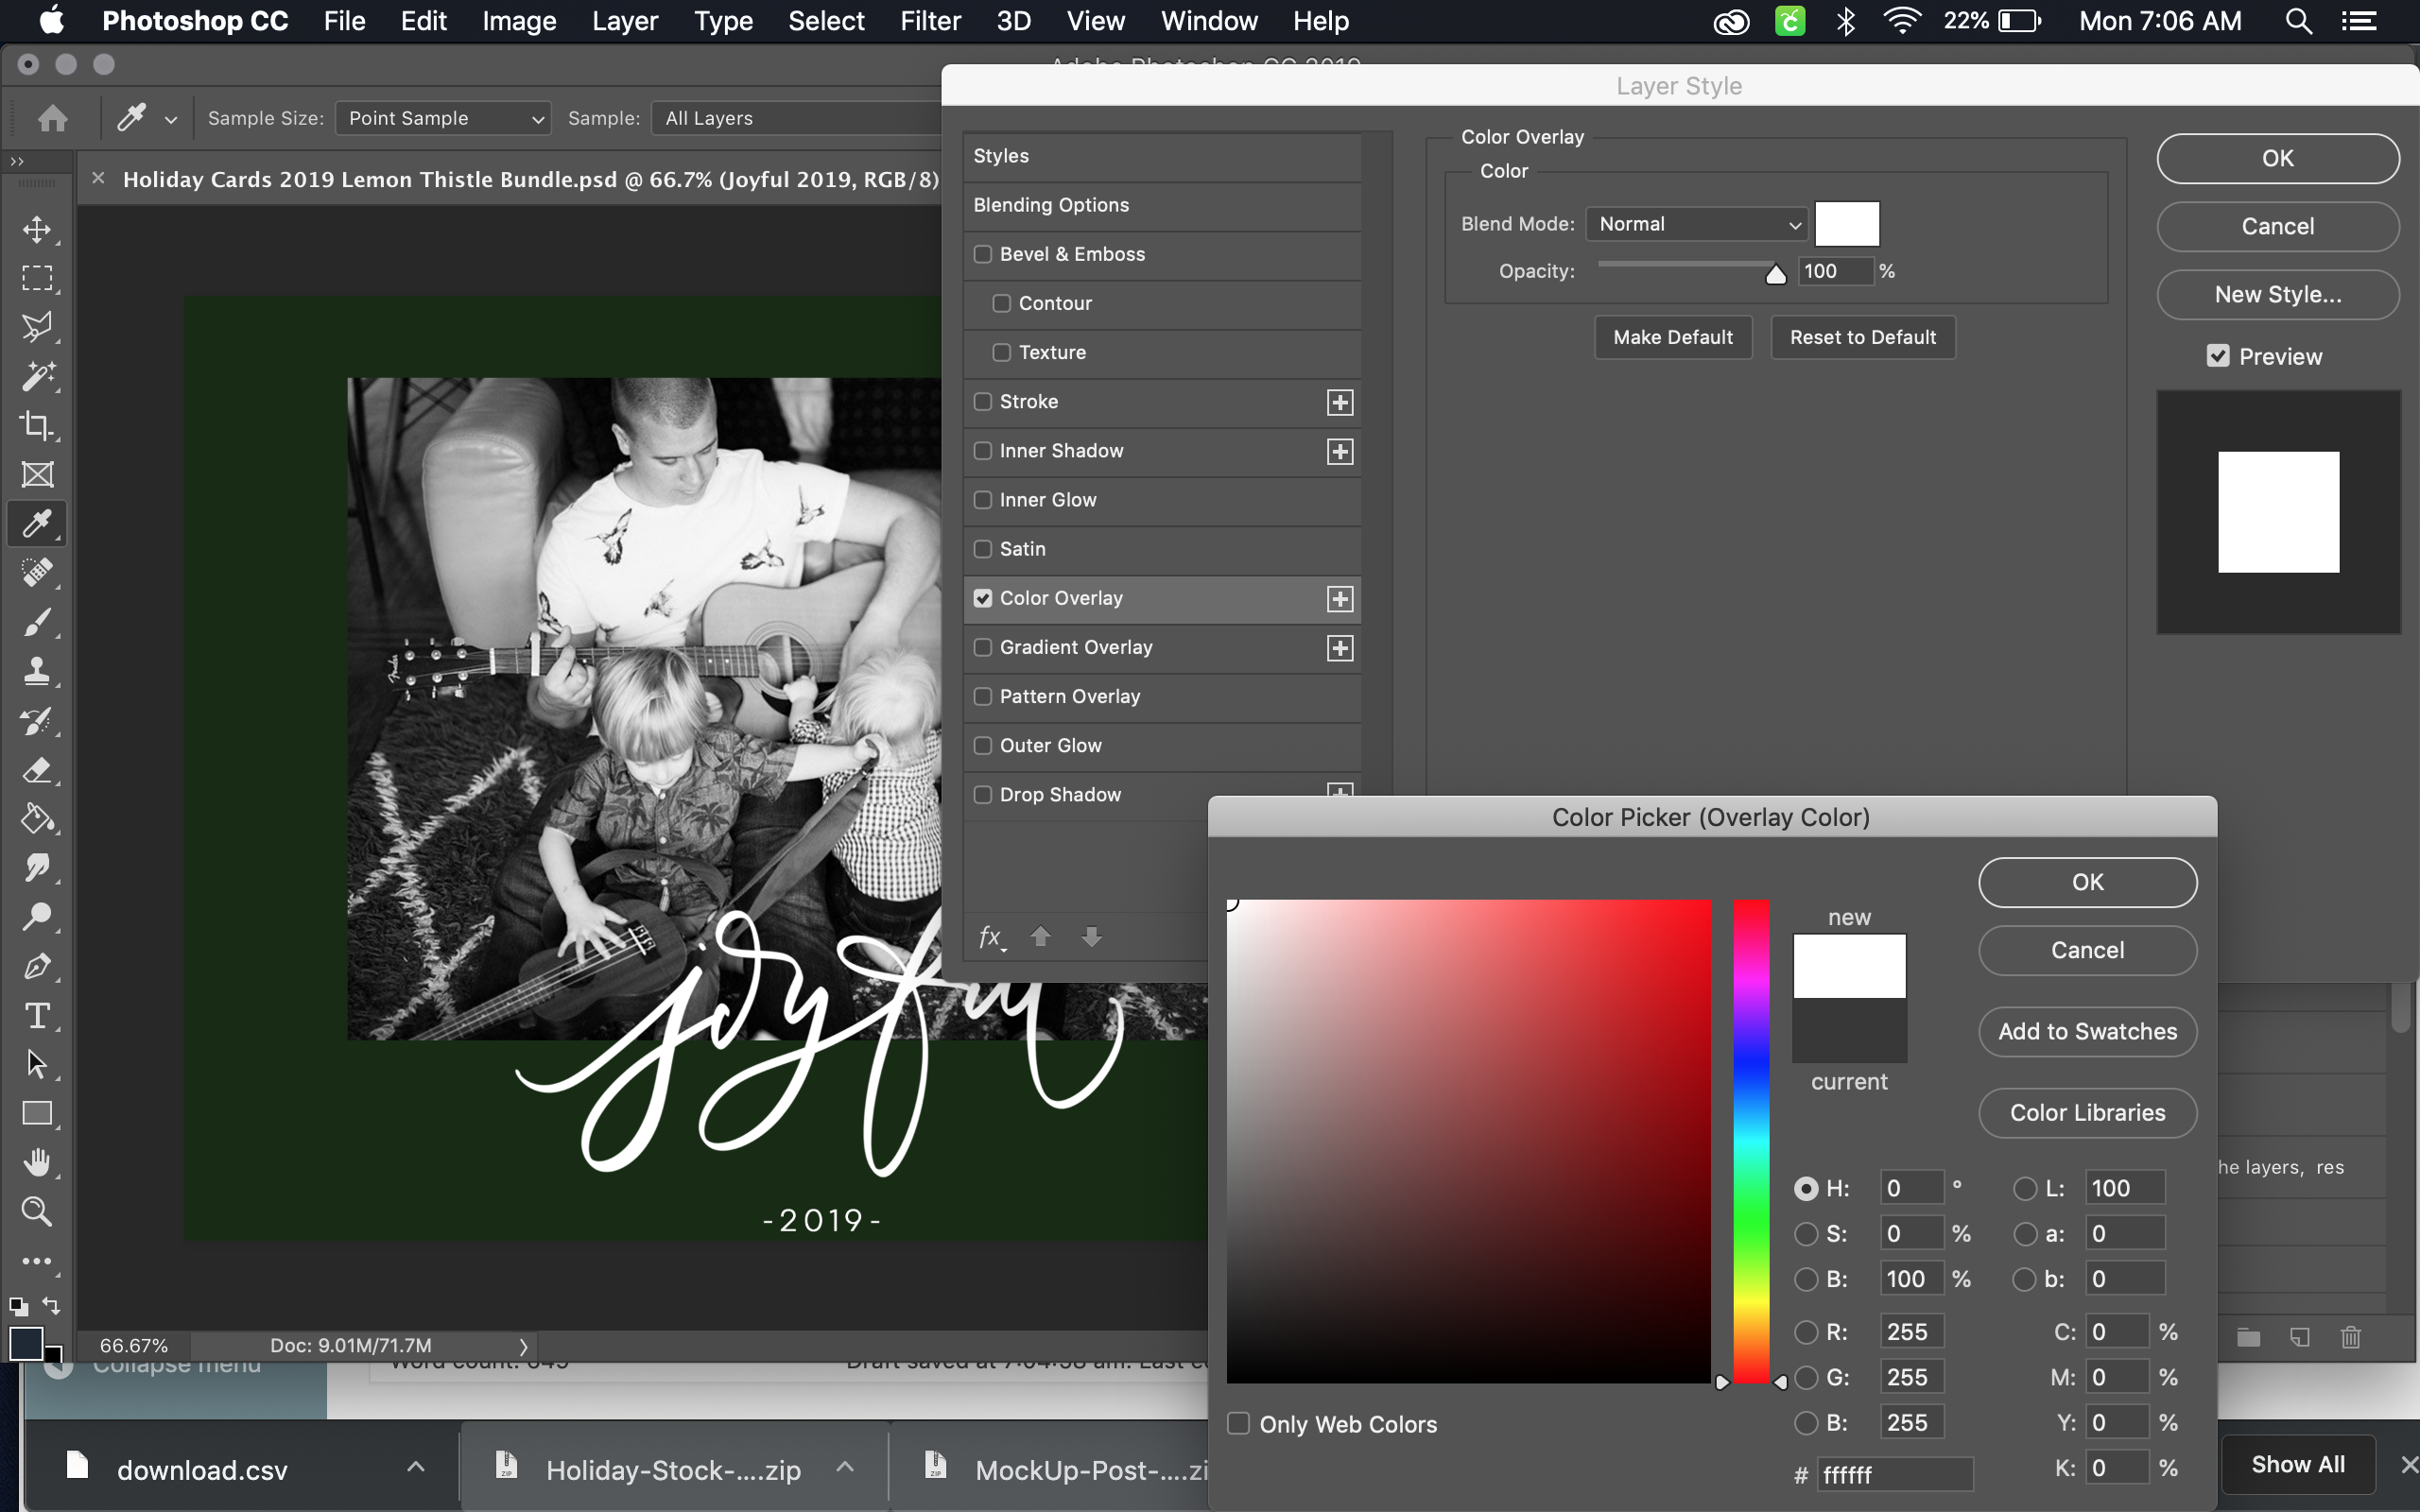
Oh no! It doesn’t show up! It’s black! It’s easy to change. I used to use the paint bucket to fill these up but that never works perfectly. Now, I right click on the layer (or group) of the design in the layer panel and select Blending Options>Colour Overlay. Pick any colour you like and then change it when you change your mind without compromising the design. If you want to use a colour from one of the backround designs, when you’re at the Color Picker window, just move your mouse over your canvas and you’ll see a dropper where you can click to choose a colour. In my bundle file, that means it’s easy to use the blue, green and red I’ve included as backgrounds for text colours.
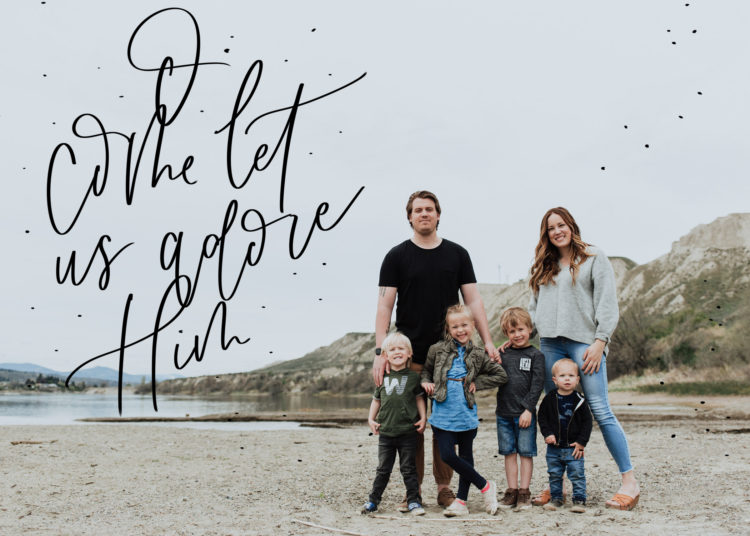
At this point, you can move things around and create a design you love. Here’s some examples I’ve created just using these steps:


BUT if you’re wanting to put your text on top of the image, but the image is too busy no matter what you do… then you’ll probably love using something like the brush stroke graphic I’ve included in my file. This is just a semi transparent brush stroke that’s white (although you could use color overlay to change it!) that gives a soft background to make text easier to see. I use this exact graphic in so many of my blog title images.

You add it in the same way as any other overlay. You can resize and move it around and you can also make it more transparent. Just make sure that layer is selected and above the layer panel, select the Fill option and choose a lower percentage. The lower percentage, the more translucent your design will become. This is also great for grain or dust overlays you might want to add for effect.
Here’s some cards I made using this same brush stroke graphic:


You’re almost done! Now to save your file. If you save it, it will default to a .psd file. This is a Photoshop specific file. Which is great if you want to edit it again. This will retain all of your layers and settings so you can change things later. BUT it will not print. If you want to upload your photo card to any printer’s website- you need to export in .jpg or .jpeg. To do this, select the File>Save As option and from the drop down menu of file type, select JPEG.

Alright- I hope this tutorial was helpful for you! You should be able to use this tutorial with any overlay you find online, design, or purchase. If you’d like to use any of the designs I’ve shared in this tutorial, those are available in a bundle in my shop right here!
Looking for a free overlay? I have this one from last year you might like :)
Ready to test out Photoshop? Remember to test out the 30 days for free first!
Photo Credits: These are all family photos of my family over the years. The photographers for my family photos are Troi Crombie, Stacey Krolow, Natalie Sky and my dad :)
 3 Dollar Store DIYs for Fall Home Decor
love it …i can’t believe all that you share with us …can’t wait to try ….thank you …
Aw thank you so much Madeline!