
A week or so ago, the lovely Shannon from AKA Design challenged myself and Crystal from Hello Creative Family to get our Christmas DIY on. If you know me personally, well… you’ll know I can never turn down a challenge. I’m a wee bit competitive- not in a ‘I’m gonna kick your butt’ way, but in the way that I have SUCH a hard time saying no to a good challenge… I just want to prove that I can totally do it. I hear that there’s books written on saying ‘no’. One of these days I will have to read those- but today it was a fun challenge so the obvious answer was ‘Heck Yes!’. I’m so happy I took on this challenge- this centrepiece is something I absolutely love for the Holidays, but love even more that I can change out the greens and decor in it to go with the season. Maybe moss and daffodils in the spring?
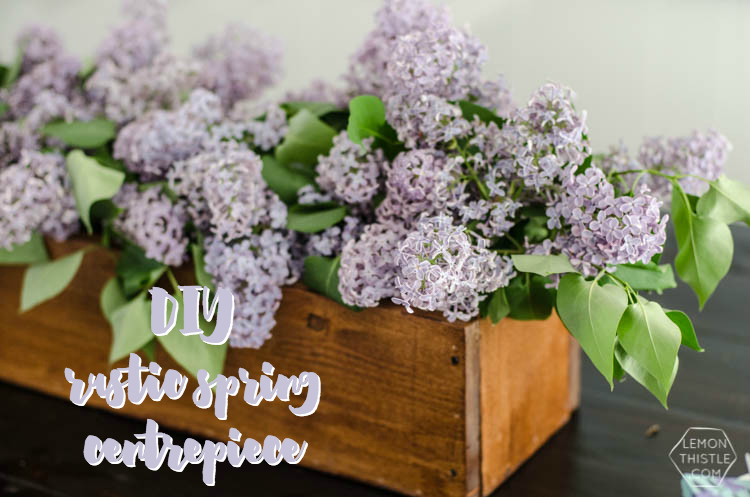
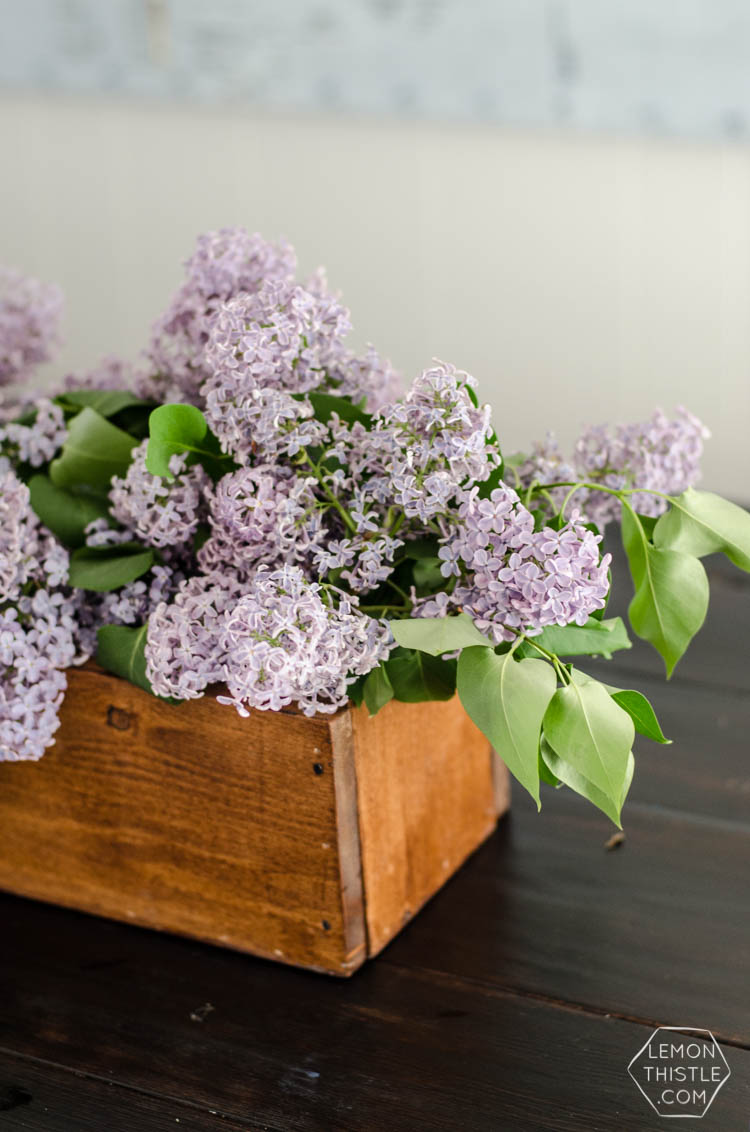
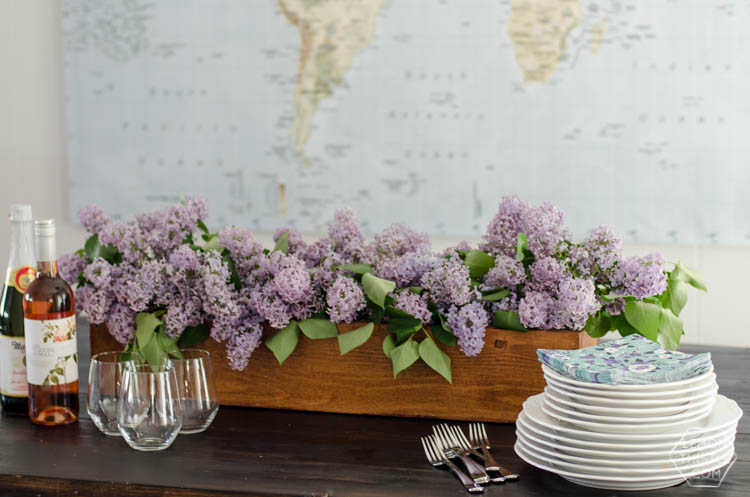
UPDATE: I filled it with lilacs this spring! If you want to see the tips I have to keep it looking full without using buckets of flowers you can head over to my gal pal’s blog and check it out.
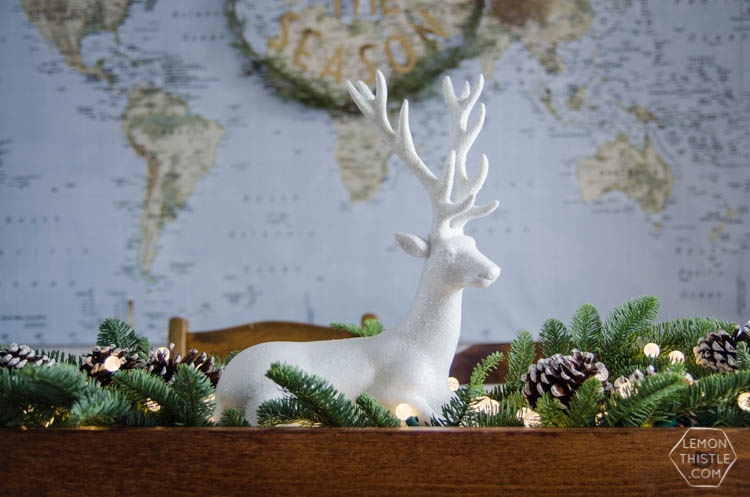

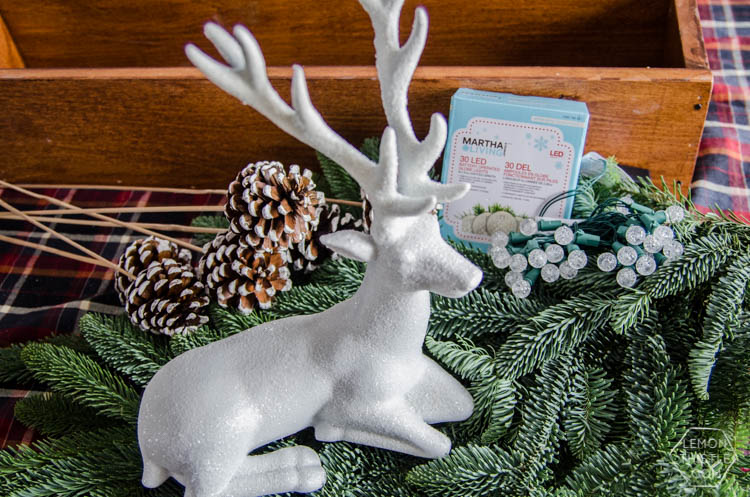
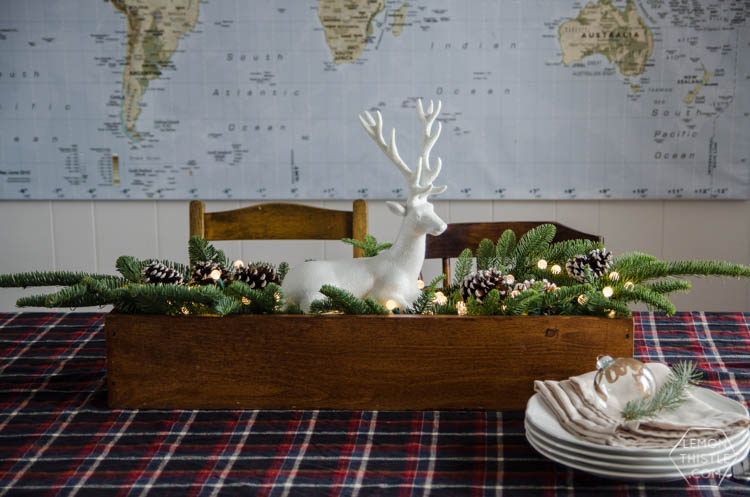
The challenge was this: create a holiday DIY that incorporated those fun Martha Stewart Living battery operated globe string mini lights and supplies found at The Home Depot. I actually had another idea going into The Home Depot, but when I spotted that adorable deer from Martha Stewart Living, I had to find a way to incorporate it into the project. Isn’t he cute? The rustic wood box that the whole arrangement is based in was pretty simple to build- it all came together in a weekend. After completing the kids room (and beds and nightstands) and the patio table and some other bigger projects we’re yet to share, Shane and I so appreciated how quick this was to pull off. Ready to see how to make your own?
Here’s what you’ll need to make this DIY Rustic Holiday Centrepiece:
- 10 foot 1×6 board
- Circular saw (or any saw you prefer)
- Measuring tape, square and pencil
- Sandpaper ( I used 100 grit)
- Stain and sealer (I used Minwax Polyshades in Antique Walnut– satin to skip the two step process)
- Brad nails and nailer
- Cut tacks/ carpet tacks for decorative detail and hammer
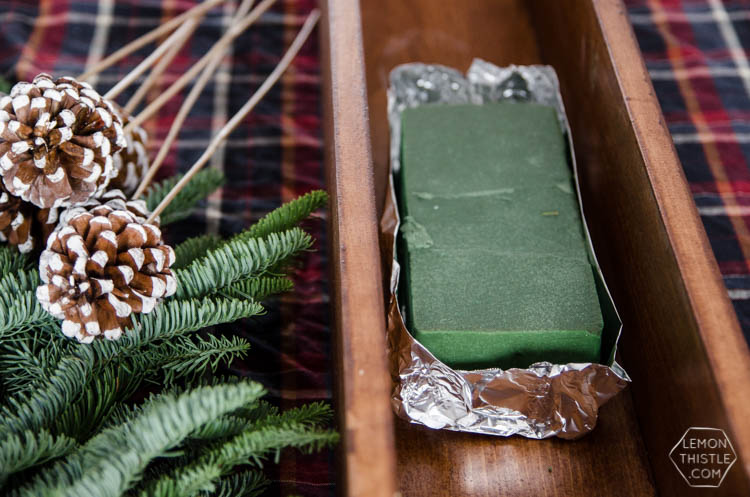
- 1 Block floral foam, soaked in water (and tin foil to line)
- 1 Holiday bough (I believe mine is spruce) and cutters
- Pinecone picks (I chose white tipped ones and used 2 packs- they’re available in store right by the boughs)
- Martha Stewart Living battery operated globe string mini lights (or other lights- I used two packs)
- Martha Stewart Living 12″ white reindeer figurine (or other ornament)


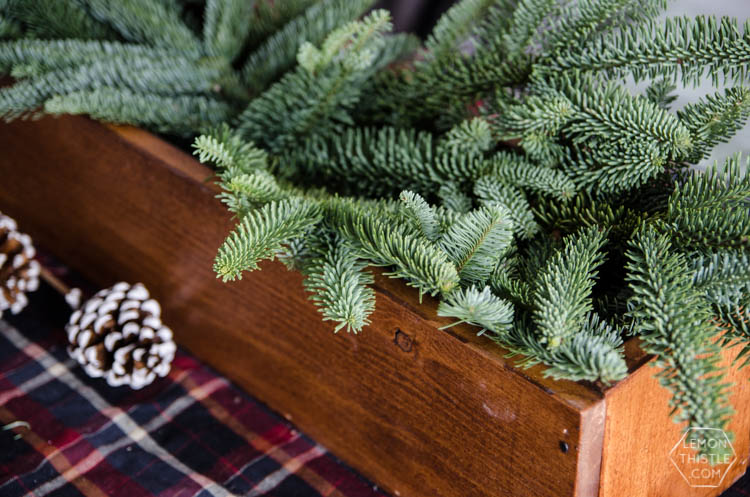
The first step is to cut your lumber to size. We chose to make our centrepiece 2.5′ long. We cut two boards at 2.5′ and one for the bottom at 2’4.5″. The ends were cut to 5.5″ each (this is because a 1×6 is actually 3/4″ by 5.5″… fun fact!).
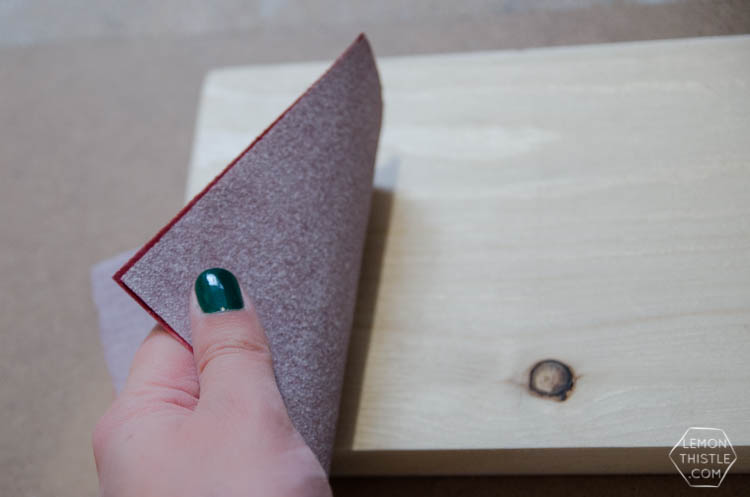
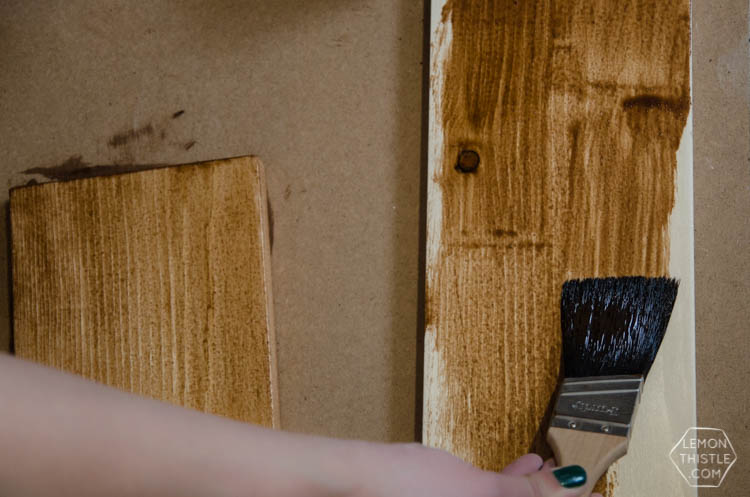
Next, give it a light sand and get to staining. We chose to use Minwax Polyshades in Antique Walnut, satin and LOVE that I only have to worry about doing the one step… not stain then sealer. The only thing to be aware of is that I find it a bit more time consuming to apply than stain or sealer on their own because the colour is in the drippy stuff… if that makes sense. But it more than makes up for it in that you only have the one step to worry about. Let it dry completely before assembling.
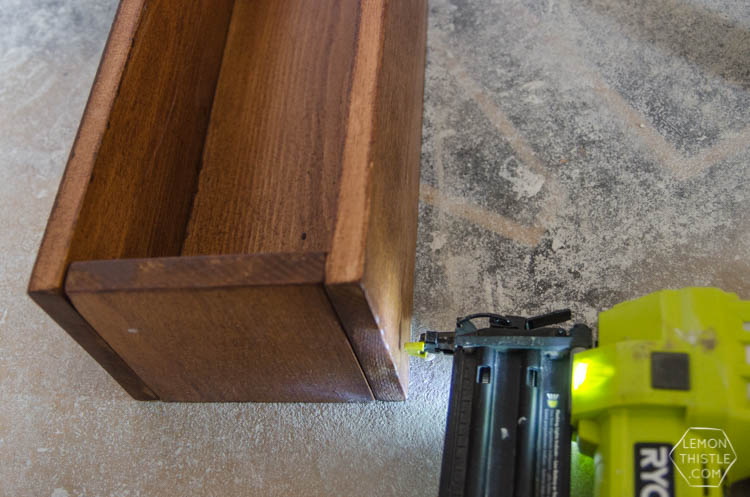

To assemble, lay your bottom board out and butt the sides and ends up against it before using your brad nailer to tack it all together. The brad nails practically disappear into the wood so I didn’t worry about filling the holes. This is the first time I used a brad nailer and it’s totally addicting! We borrowed my dad’s Ryobi One cordless brad nailer and it’s so light (I’ve used a larger air nailer that ran off a compressor before and that thing was heaaaaavy) and easy to use. I want to build all the things now because it made everything go so quick! So that’s on my Christmas list if anyone feels like sending one my way ;)
I also went ahead and added cut tacks or carpet tacks (they are the same for this purpose) to the corners for added rustic appeal. I love these things and like to add them when ever possible.
 ‘
‘
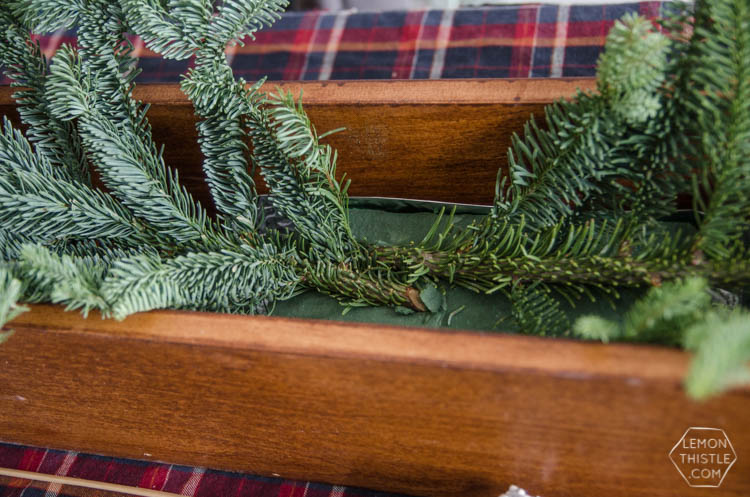
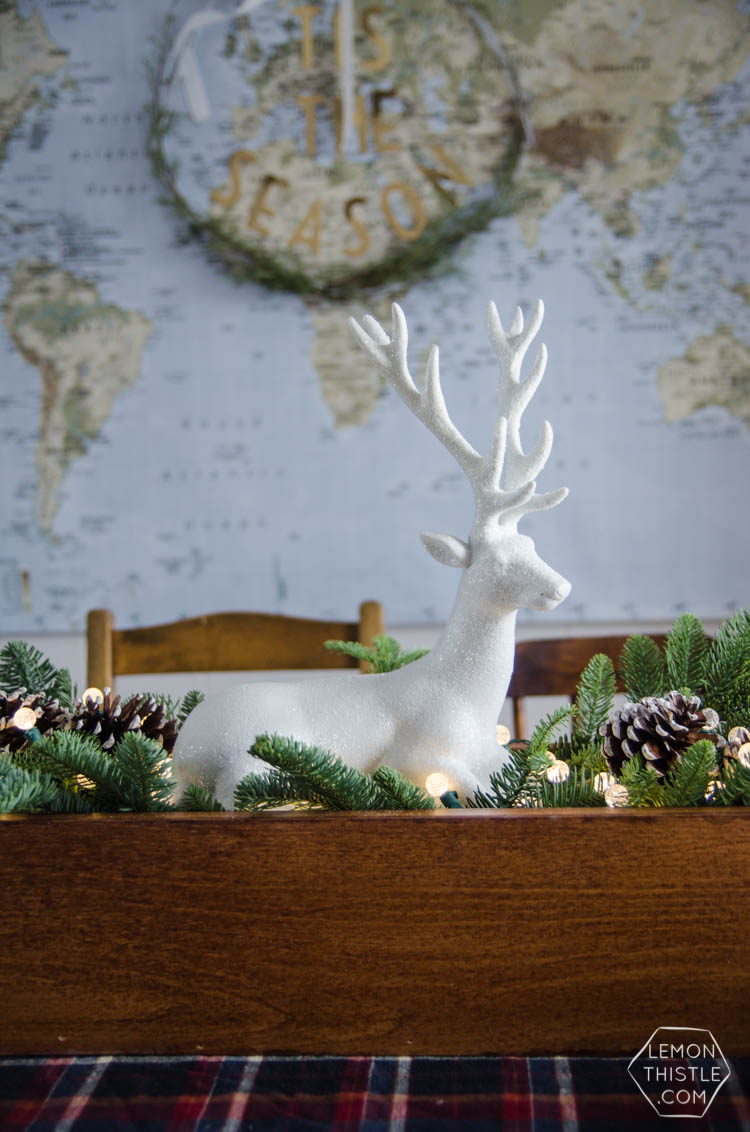
Now you’re ready to get started on your arrangement! I started by soaking my block of floral foam (available at the dollar store) in water, then wrapping the bottom of it in foil before laying it in the box. The fresh boughs will stay beautiful a bit longer by using a block of floral foam. An added bonus is that it fills some of the space that you would alternately have to fill with more greens. Cut your branches on an angle to allow them to stick into the block easily and to give the most surface area for sucking up that water. I only used one bough (three branches), but if you were skipping the floral foam, you would need a second. I chose the spruce looking bough because it matches the muted colours of the greenery I used in my holiday wreath this year (you can spot it in the background on the map by my dining table).
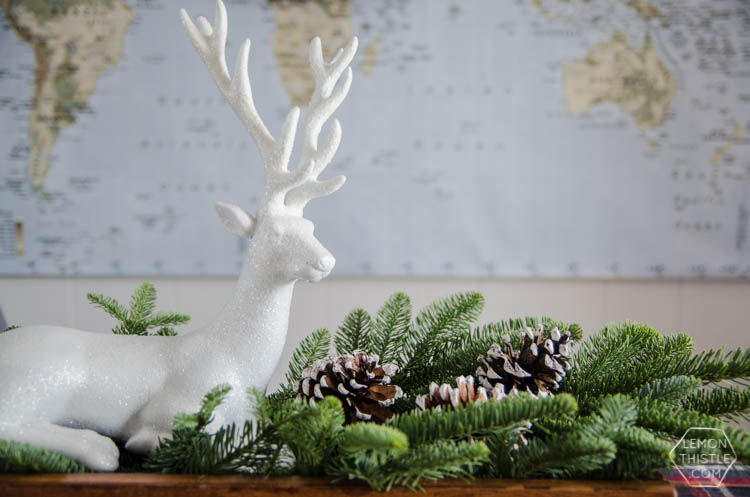
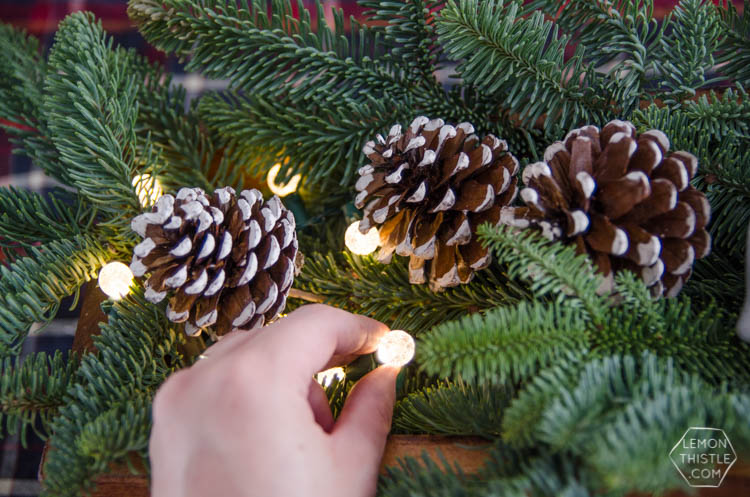
When you have your branches layered into the floral foam, you can add in your decorative details. I put the deer in right away because I wanted everything to work around that. Then I added in the pinecone picks (I cut them to a shorter length first) and lastly, the mini globe lights. By using the floral foam, there is lots of room for the battery packs for the lights in either end of the box without them risking getting wet. I made sure to tuck the cords in around the boughs in such a way that only the globe lights stood out- not the cord.
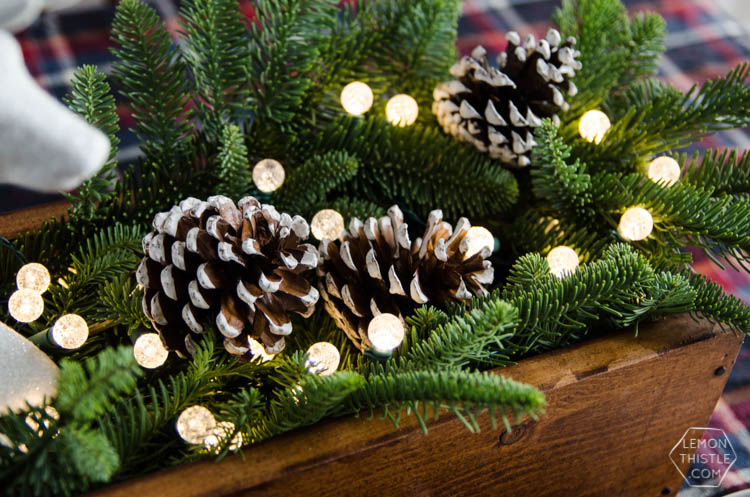

That’s it! I thought about adding flocking to the branches, but given that it’s a centrepiece I didn’t want to worry about getting it in food. Once I had it all put together, I was really glad that I chose to pass on the flocking- it’s so naturally beautiful as is! I also love the scale. It takes up a good portion of the table meaning I don’t feel the need to add extra decorations which works well with my ‘minimal’ approach to holiday decorating this year. I am thinking about testing it out on my kitchen island as well, I think the size would bring so much Christmas cheer to the kitchen. But I’d have to clean my kitchen first ;)

I can’t wait to see what the other girls come up with for their challenge! These lights are so versatile, I kind of want them for every bit of greenery in my house (hello mantle!). I’ll be sure to share their projects on social media when they finish up… because I know you’re as anxious to see as me ;) Now tell me… what is your typical holiday centrepiece? Do you change it up each year or do you have a standard? We had the same one each year growing up, but I don’t think I’ve done the same one any year since being married.
Psst… more spring-y pics because I couldn’t help myself
 Christmas Crafting Cocoa Party
Really fantastic looking, and I’m sure you can use that box for other arrangements in the future! thanks for sharing on craft schooling sunday!
Yes! I definitely plan on it, I think that’s why I’m so happy with how it turned out :)
This is such a gorgeous centerpiece! Thank you for sharing it with us at Snickerdoodle Sunday. Pinning and tweeting :) Have a fabulous Holiday!
~Laurie
Thanks so much Laurie! I definitely am happy with it :)
What a neat idea. I really like the fact the box can be used all year and you can make it different sizes.
Thanks so much Debra! It’s definitely versatile :)
It looks gorgeous! I’ll have to keep my eyes out for that stain. :) Thank you so much for being a part of Snickerdoodle Sunday- hope you’ll return for more fun tomorrow!
Thanks Sadie :) It’s such a great shortcut!
The centre is gorgeous and I hope, with some help, to make something similar. Thank you so much, Colleen, for sharing this!
I’d love to see it if you do Sheila! Thanks so much for the sweet comment.
I love this centerpiece! I love using PolyShades but have not tried Antique Walnut…what a beautiful stain color!
Yes, isn’t that stuff awesome!? I’m really impressed with the colour, other than this one we’ve just used the espresso.
I love this! I am putting something very similar together right now…great minds think alike!
~Trisha
yes, they certainly do!
Love this Colleen. Pinned & shared. Thanks for sharing your holiday DIY at the Inspiration Spotlight party. Happy Holidays.
How exciting! Thank you for letting me know Theresa :)