
You guys have been asking for this one! And I’ve finally gotten it together for ya! Before I get into the details- can I say how much I love when you guys ask for tutorials? It makes my day! It motivates me to keep putting tutorial out that you’re going to find useful and inspire you to tackle a project in your home. So thank you… you’re the best :) These faux wood shades are the perfect way to warm up an otherwise naked window. I love that it brings the warmth of the wood tones that we have in our open shelving across the kitchen to this end of the room and it just gives the windows a finished look.
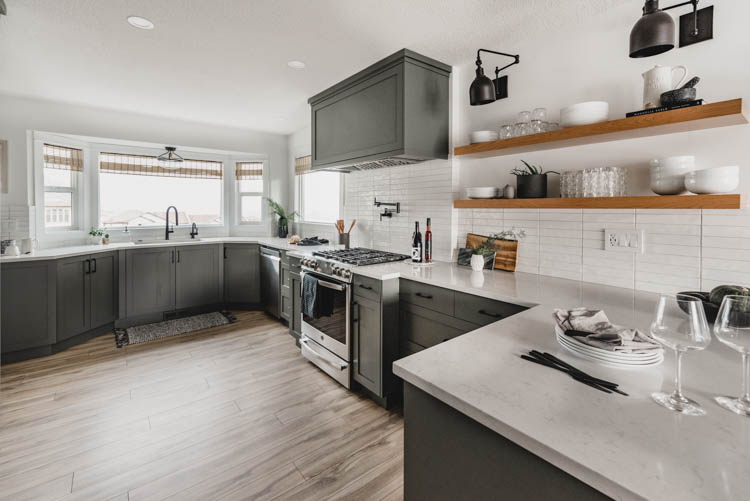
I was pretty set on wood shades since we started planning this kitchen remodel. I priced out woven wood shades/ bamboo blinds from every supplier ever I’m pretty sure but just couldn’t bite the bullet and pay the hefty sum (custom sizes!) for these four windows knowing that I would never even want to close them (no need for privacy back here). This is the perfect solution for these windows. I get the look I LOVE for a pricetag that’s beyond reasonable ($40 for all 4!). BUT they don’t close. So if you need closing I have an option for ya. In our our last house, we did this with a fabric woven shade look in our laundry room. I made it look how I wanted when open- then added it on top of the closing shade. SO you can totally mount these overtop of a shade. This is great if you keep your shades open in the daytime for light but want the option for privacy in the evening. I’m planning to do that in a couple spaces in our home over the next year!
The other thing I was really set on is them looking legit. I have seen a lot of bamboo fencing hacks to make wood shades and they totally work but are a bit wild and rough and don’t have the sophisticated wood shade look I was really wanting. I’m so happy that I stumbled upon these bamboo curtain panels (these are the same but available in the US)… they are perfect for the job! Alright, enough chatter. Let’s get to the DIY!

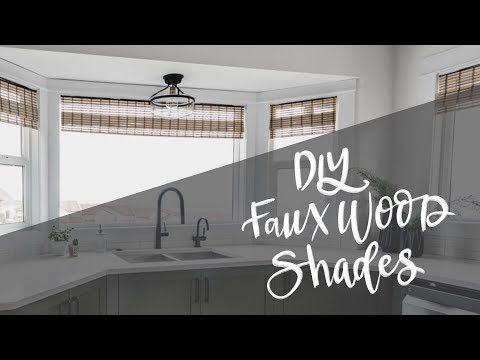
I’ve been trying to do more videos to share DIYs- this one was late at night but when I realized it was going to work- I knew I had to record it for you guys! I also have photo instructions below if you’re not able to watch the video. If you haven’t yet subscribed to my YouTube channel- I would so love if you do that RIGHT HERE! XO
Alright so the first thing you’ll need to do is get your wood curtains to make the shades. I bought mine at our local Jysk- they’re these exact ones. I found ones that look almost identical on Amazon if you’re in the US or don’t want to leave your house ;) I used one curtain for all four windows. I started by cutting it in half lengthways. I just cut between the wood pieces. These two panels became one short and one long window covering each. Once you’ve cut them, pull out enough of the wood slats/skewers to be able to tie off the strings to keep them together. Tie all of the strings before moving on (the worst part of this whole thing).


Next it’s time to cut it! The first thing I did was cut off the large curtain rings on the one end. The wood is pinched in these rivets (?) so you need to cut them off before you can roll up the shades for proper cutting. This was messy and rough so just make sure to do this before you measure. Then, measure your windows and mark it on your wood shades. I just used a sharpie for that because no one will see the outside of mine (second story, backing onto a ravine). When you’ve marked them, roll them as tight as you can and hold your rolls with painters tape.


I totally didn’t get a photo of us cutting these to size BUT I did put it in the video. You actually want to tape the ends where you’ll be cutting and cut RIGHT THROUGH the tape to keep the edges as clean as possible. Then, when you’re cutting, go slow and let the blade do the work instead of pushing the saw through. It will give you such nice clean cuts! once they’re cut to size, measure them in your windows before you take your tape off!


Next, add those folds in to mimic the look of wooden roman shades! I laid these out on the counter and folded in one, tied it off (by threading the needle and thread through the layers and tying it off) and then folded up the bottom edge and tied it off to give it a finished look. You can use any string as long as it blends in, you wont notice it. I did one on either edge and one in the middle to keep it from drooping.


When it comes to attaching them, I tried a couple things. First, I put them up with command strips to decide if I liked them. I did. So I nailed them up just using my brad nailer. I left the suede edging on the top to give me something to nail through and folded it under. Ta-Da! I’m so darn happy with how they turned out. They’re definitely a faux shade but that’s exactly what we needed and I couldn’t be happier with the price tag!
I’m going to leave it at that! I hope you found this post helpful if you’re considering taking on a similar project! Ask any questions and I’ll do my best to answer :) Want to see a whole before/ after tour of our kitchen? Check that out RIGHT HERE!
 40 Modern Home DIYs
These look great! Thanks for sharing this DIY. I have been looking for some Roman shades for my front room, but can’t find any that I really like. I’ll have to give these a try!
Thanks so much Stephanie! I am planning on using these in our main room too!
This is genius! Thank you for sharing your idea. I’m making shades for my fancy dog crate!
Happy New Year!
Ohmygoodness your lucky pooch!
This is amazing and I was just looking at blinds on Lowe’s website and saw these. In my head I was thinking maybe I could find a way to use this and you did! Definitely on my list to try!
We don’t have the store you purchased these in, and the link you have posted for Amazon shows the price tag at $70+., and they don’t seem to look the same. Hope you can clear that up.