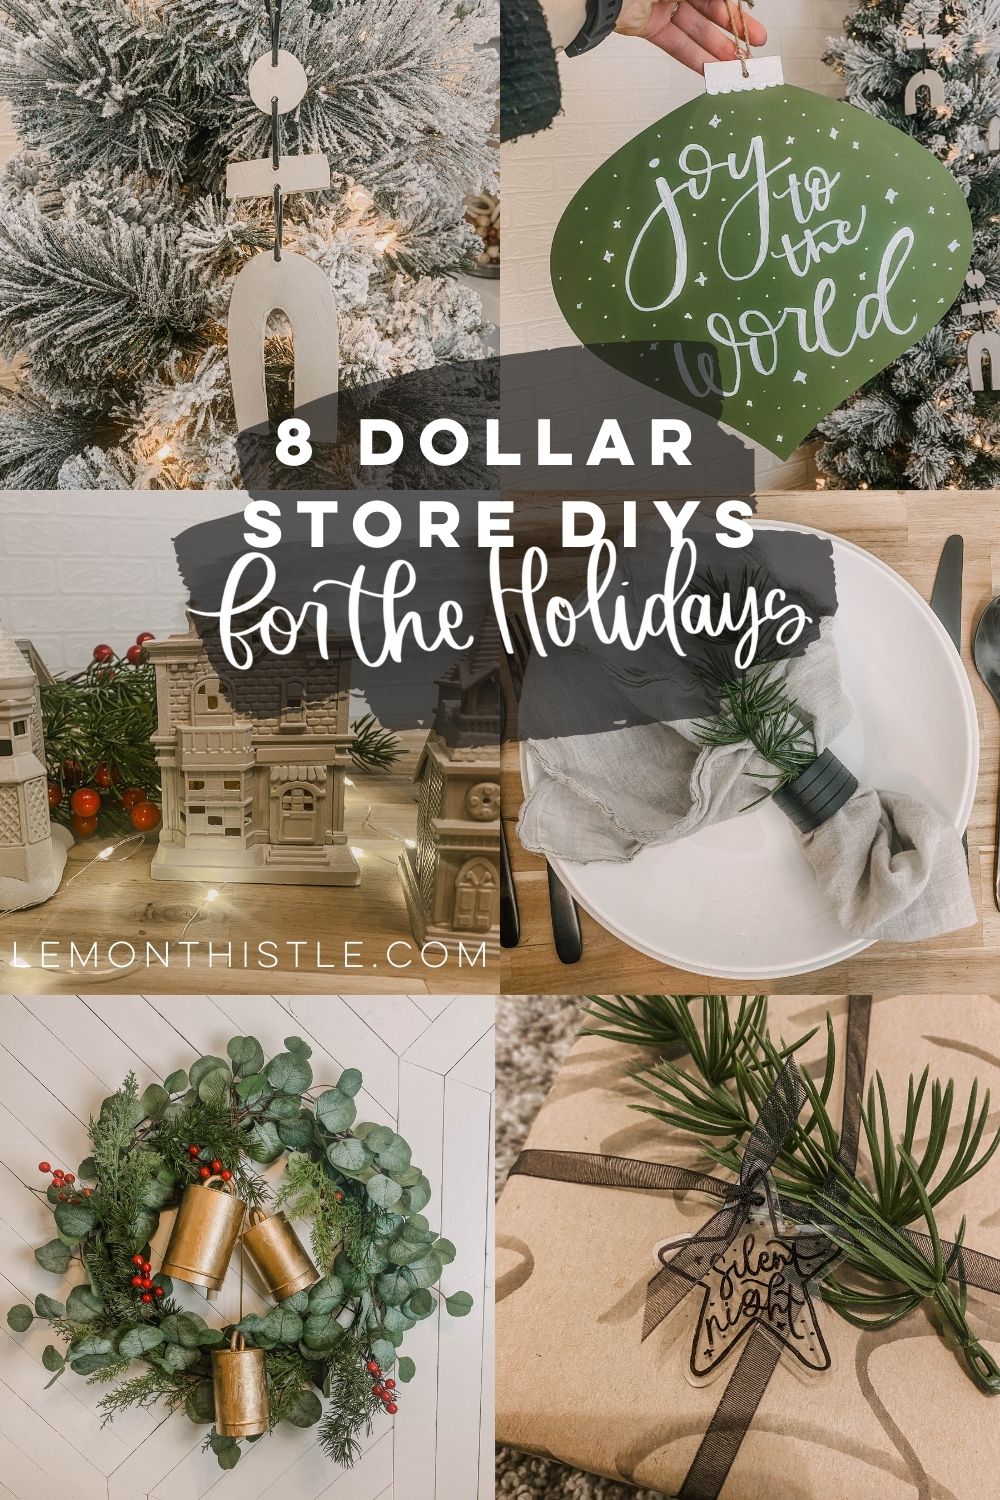
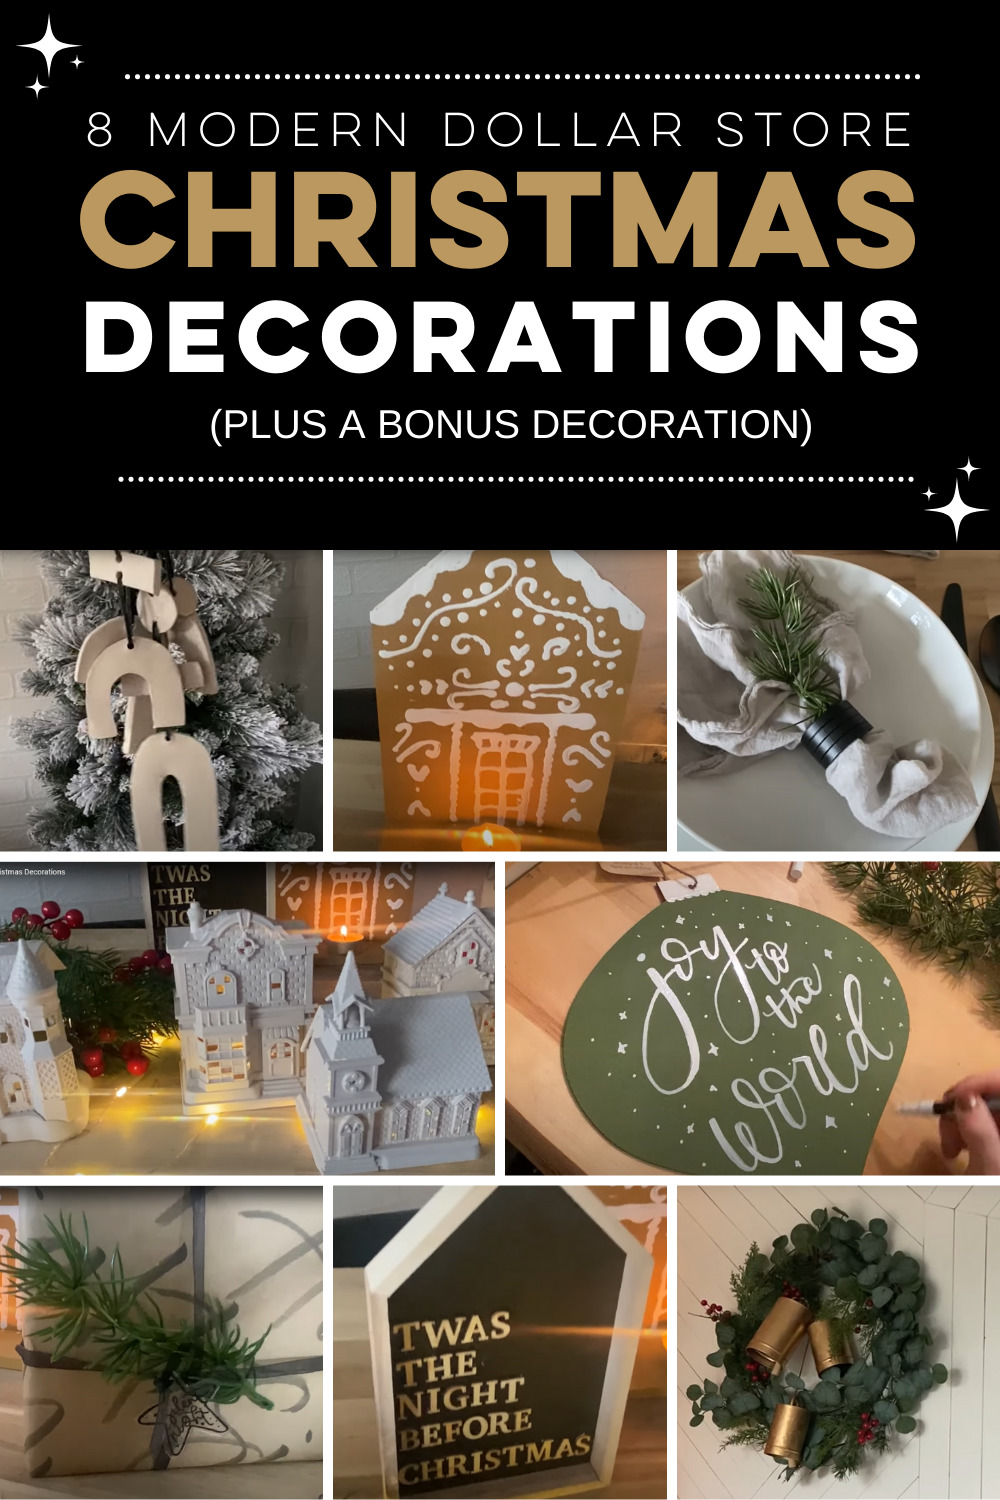
Here are eight modern dollar store DIY décor ideas that will definitely be conversation starters in your home over the holidays! From ornaments to wreaths to table settings!
Today I am excited to share some holiday dollar store DIYs! To prepare for these crafts, I visited both Dollarama and Dollar Tree, since different stores carry slightly different supplies.
It’s good to have some options when you’re creating! Here are eight ideas for beautiful, modern décor items that will definitely be conversation starters in your home over the holidays!
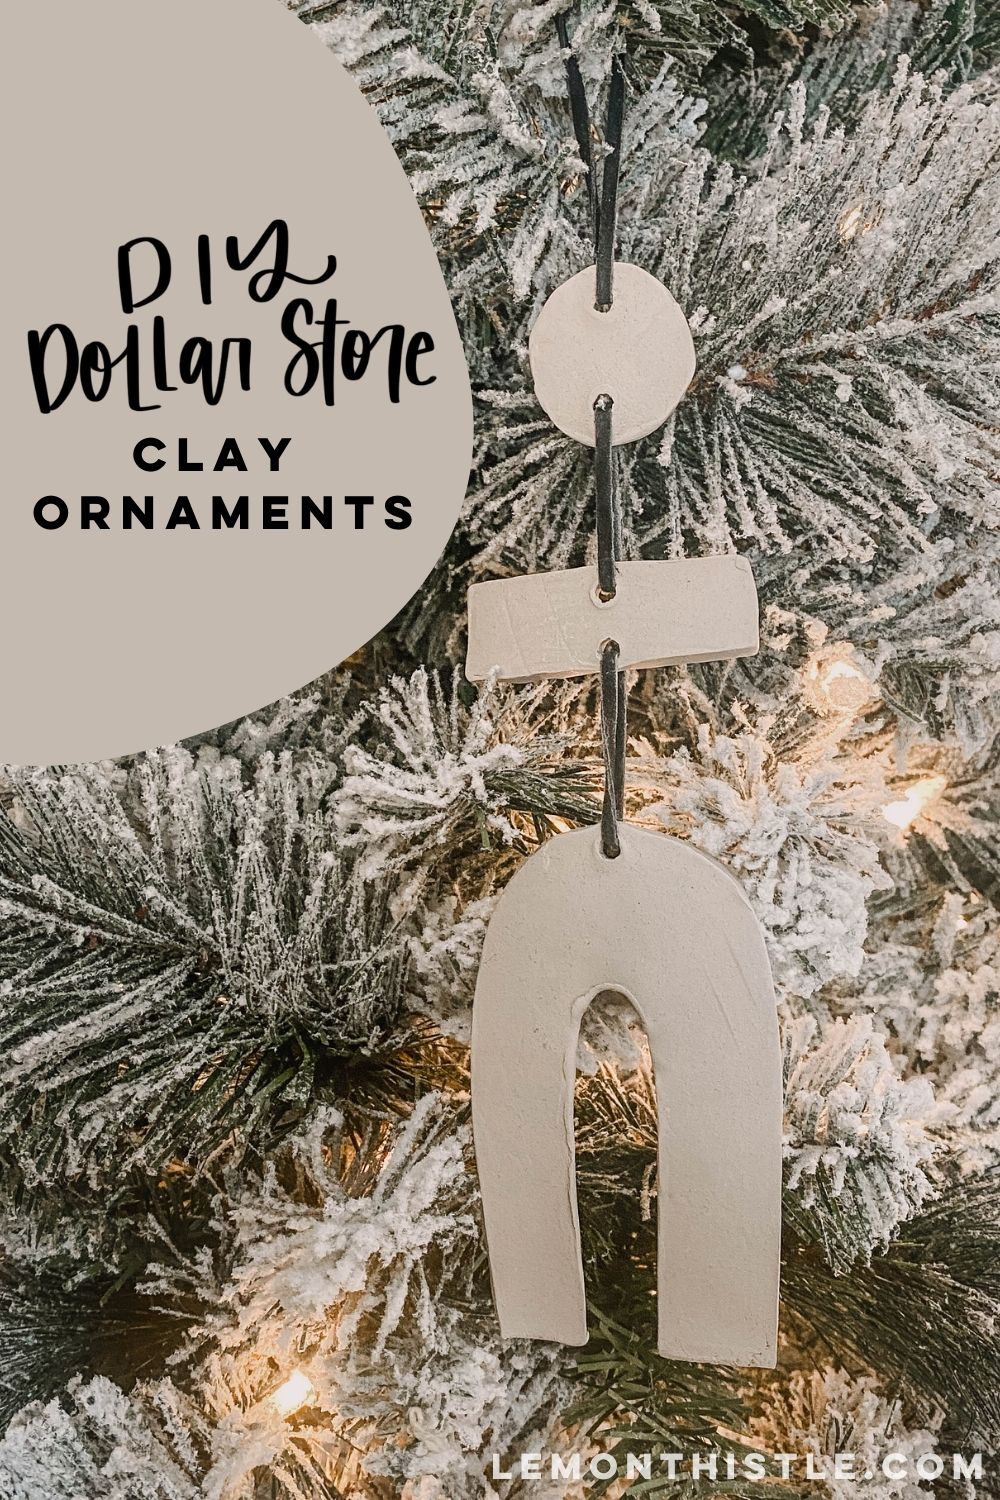
Clay Ornaments
The first project is a simple, modern dollar store DIY, unique clay ornament. To create these one of a kind tree ornaments, you need:
- clay,
- parchment paper,
- a knife or some cookie cutters,
- something to poke holes, and
- something to tie the pieces together.
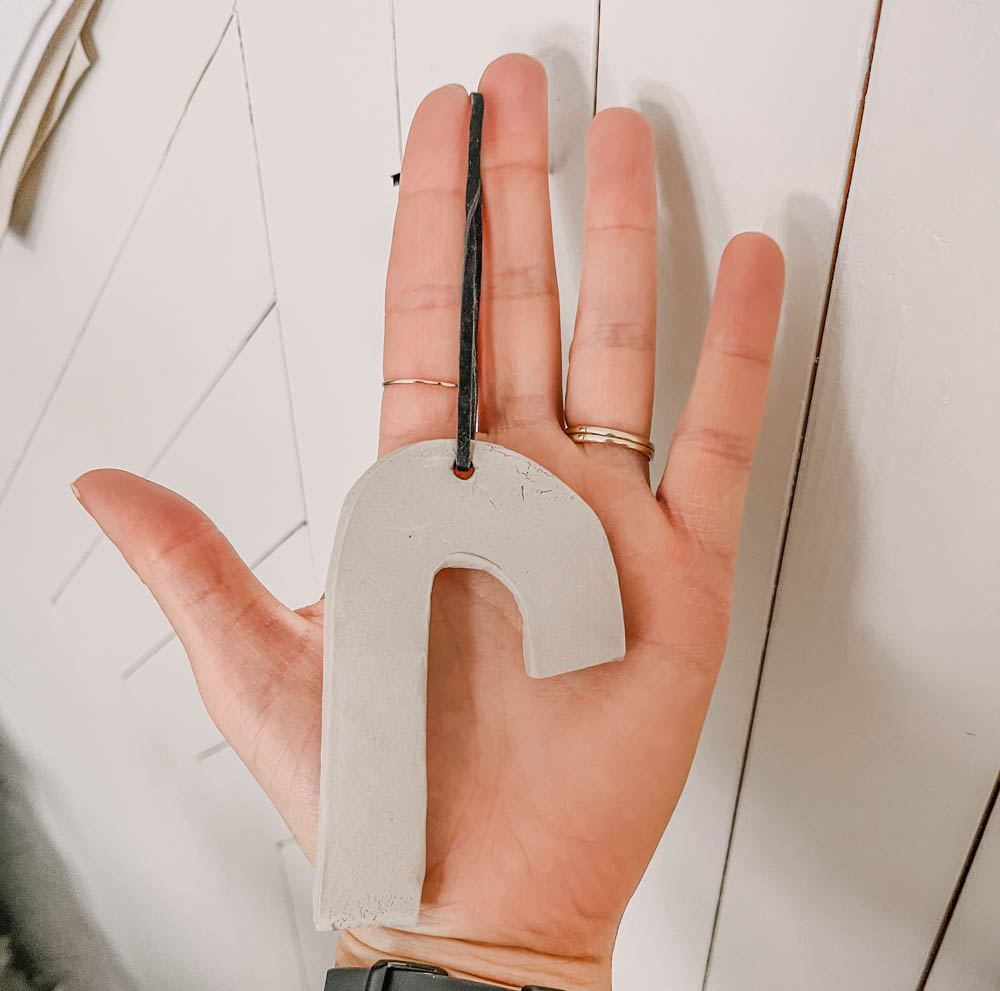
I’m actually creating a smaller version of the wall-hanging I made for my bathroom makeover! This is a very versatile design.
I chose to use dollar store air-dry clay. This option is more fragile than oven-baked clay, and your ornaments will be a bit more susceptible to cracking or breaking. The dollar store clay is coloured differently than most other clay; it is a dark grey instead of white. I actually really like the effect of the grey in the finished product! Keep these things in mind when you make your own choice of clay.
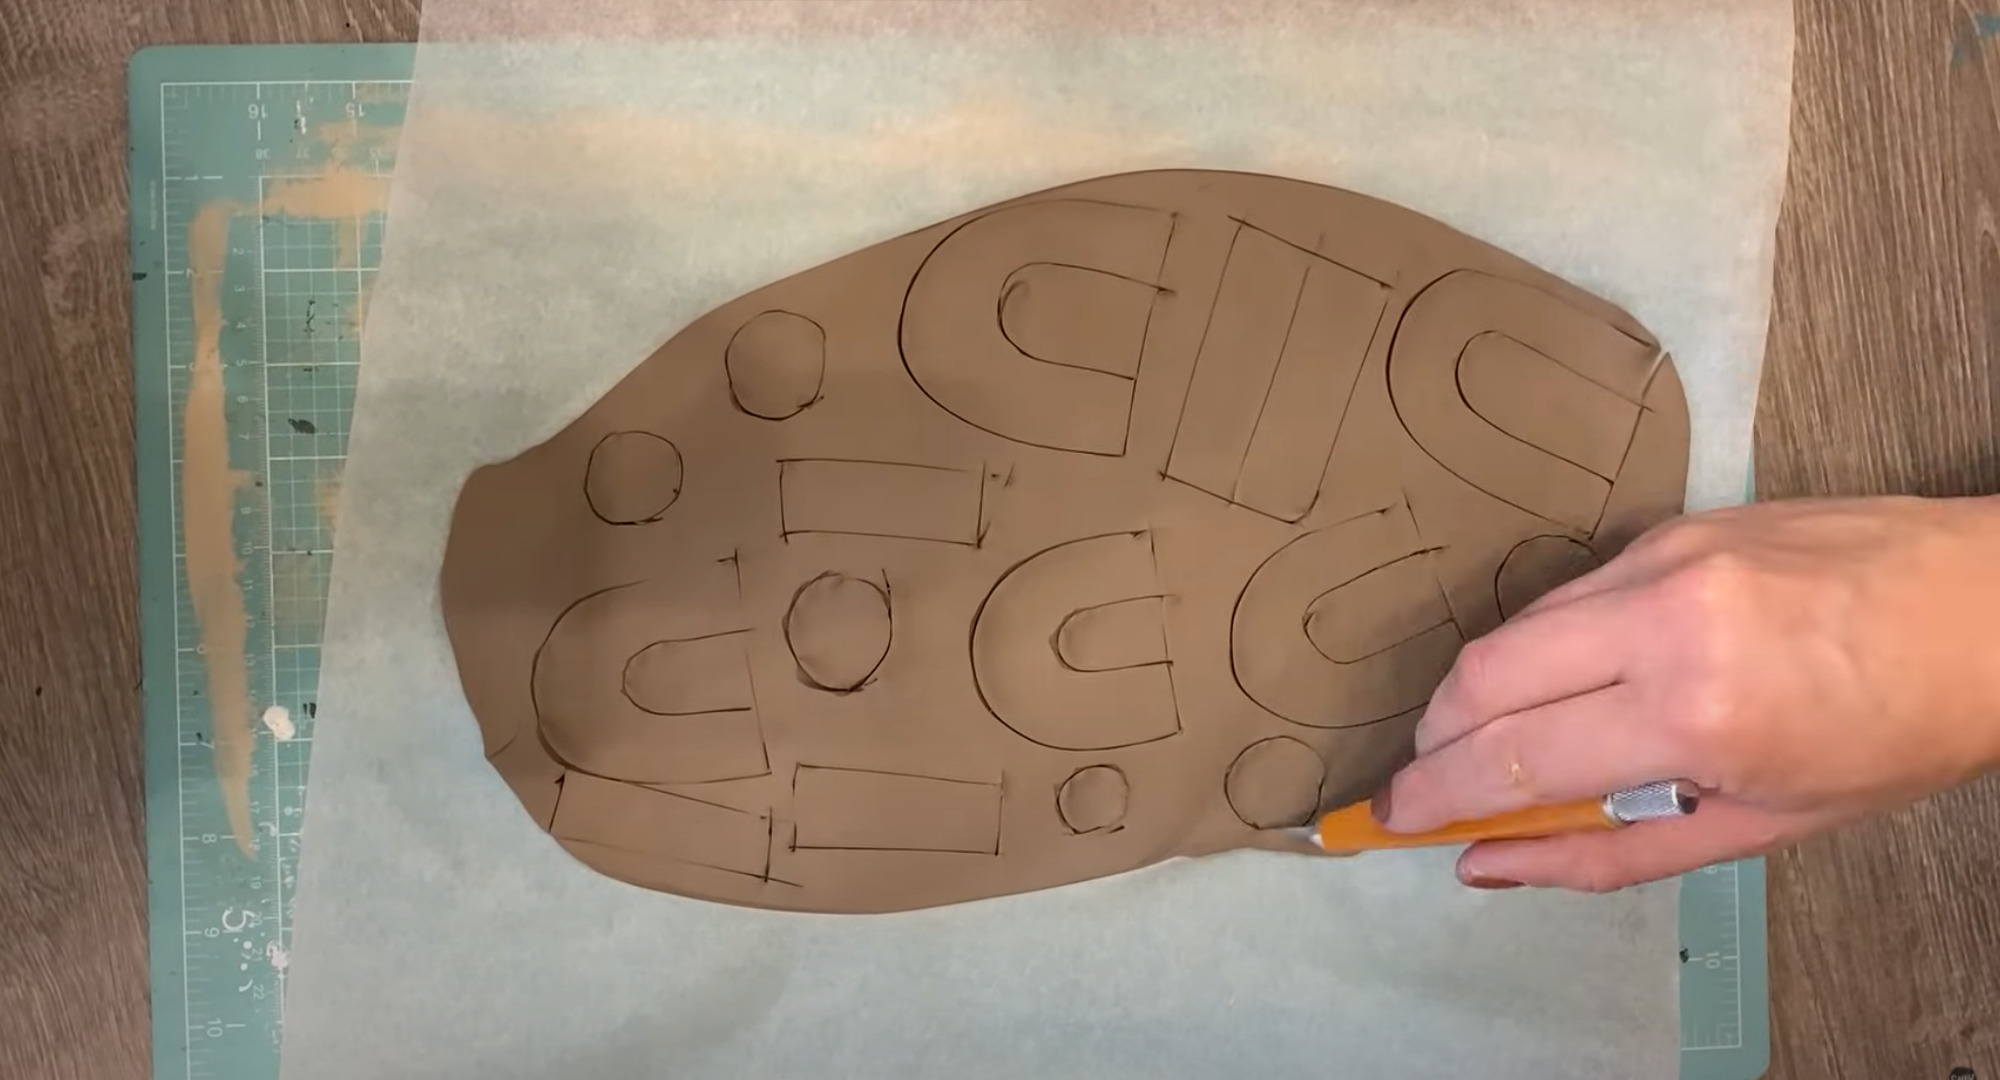
- Roll your clay out on the parchment paper, and then use either a knife to cut shapes free-hand for an organic look, or use cookie cutters if you want to be more precise and less abstract.
- Cut out your desired shapes, peel away the clay from around them, and then you can play with the look of your ornaments by softening the edges from the knife or cookie cutter edges and moulding them to make sure you get the exact shape you want.
- Then, you’ll need to poke holes in them, two per piece (one hole on the top, one on the bottom) except the rainbow-shape, which only needs one hole. You could use the end of a straw or pencil for this.
- Then, let them dry overnight. As they dry, the colour will lighten to a beautiful soft grey.
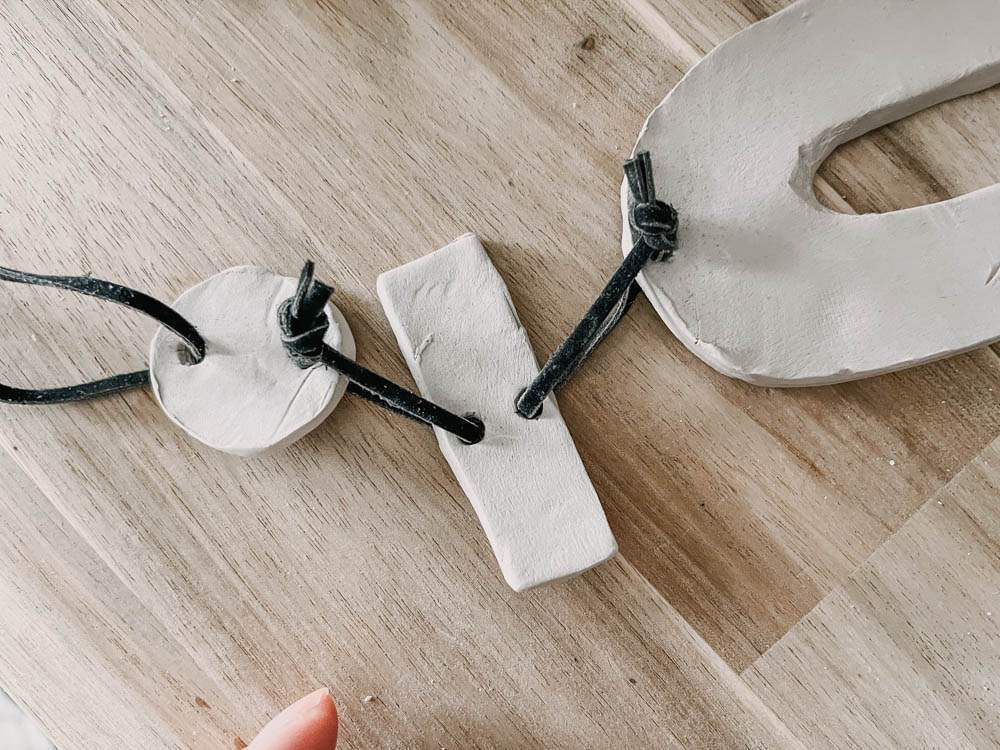
6. When they are completely dry, it’s time to tie the pieces together. I suggest dollar store faux leather jewelry cord in black. Try mixing and matching the order of the shapes to get some variety.
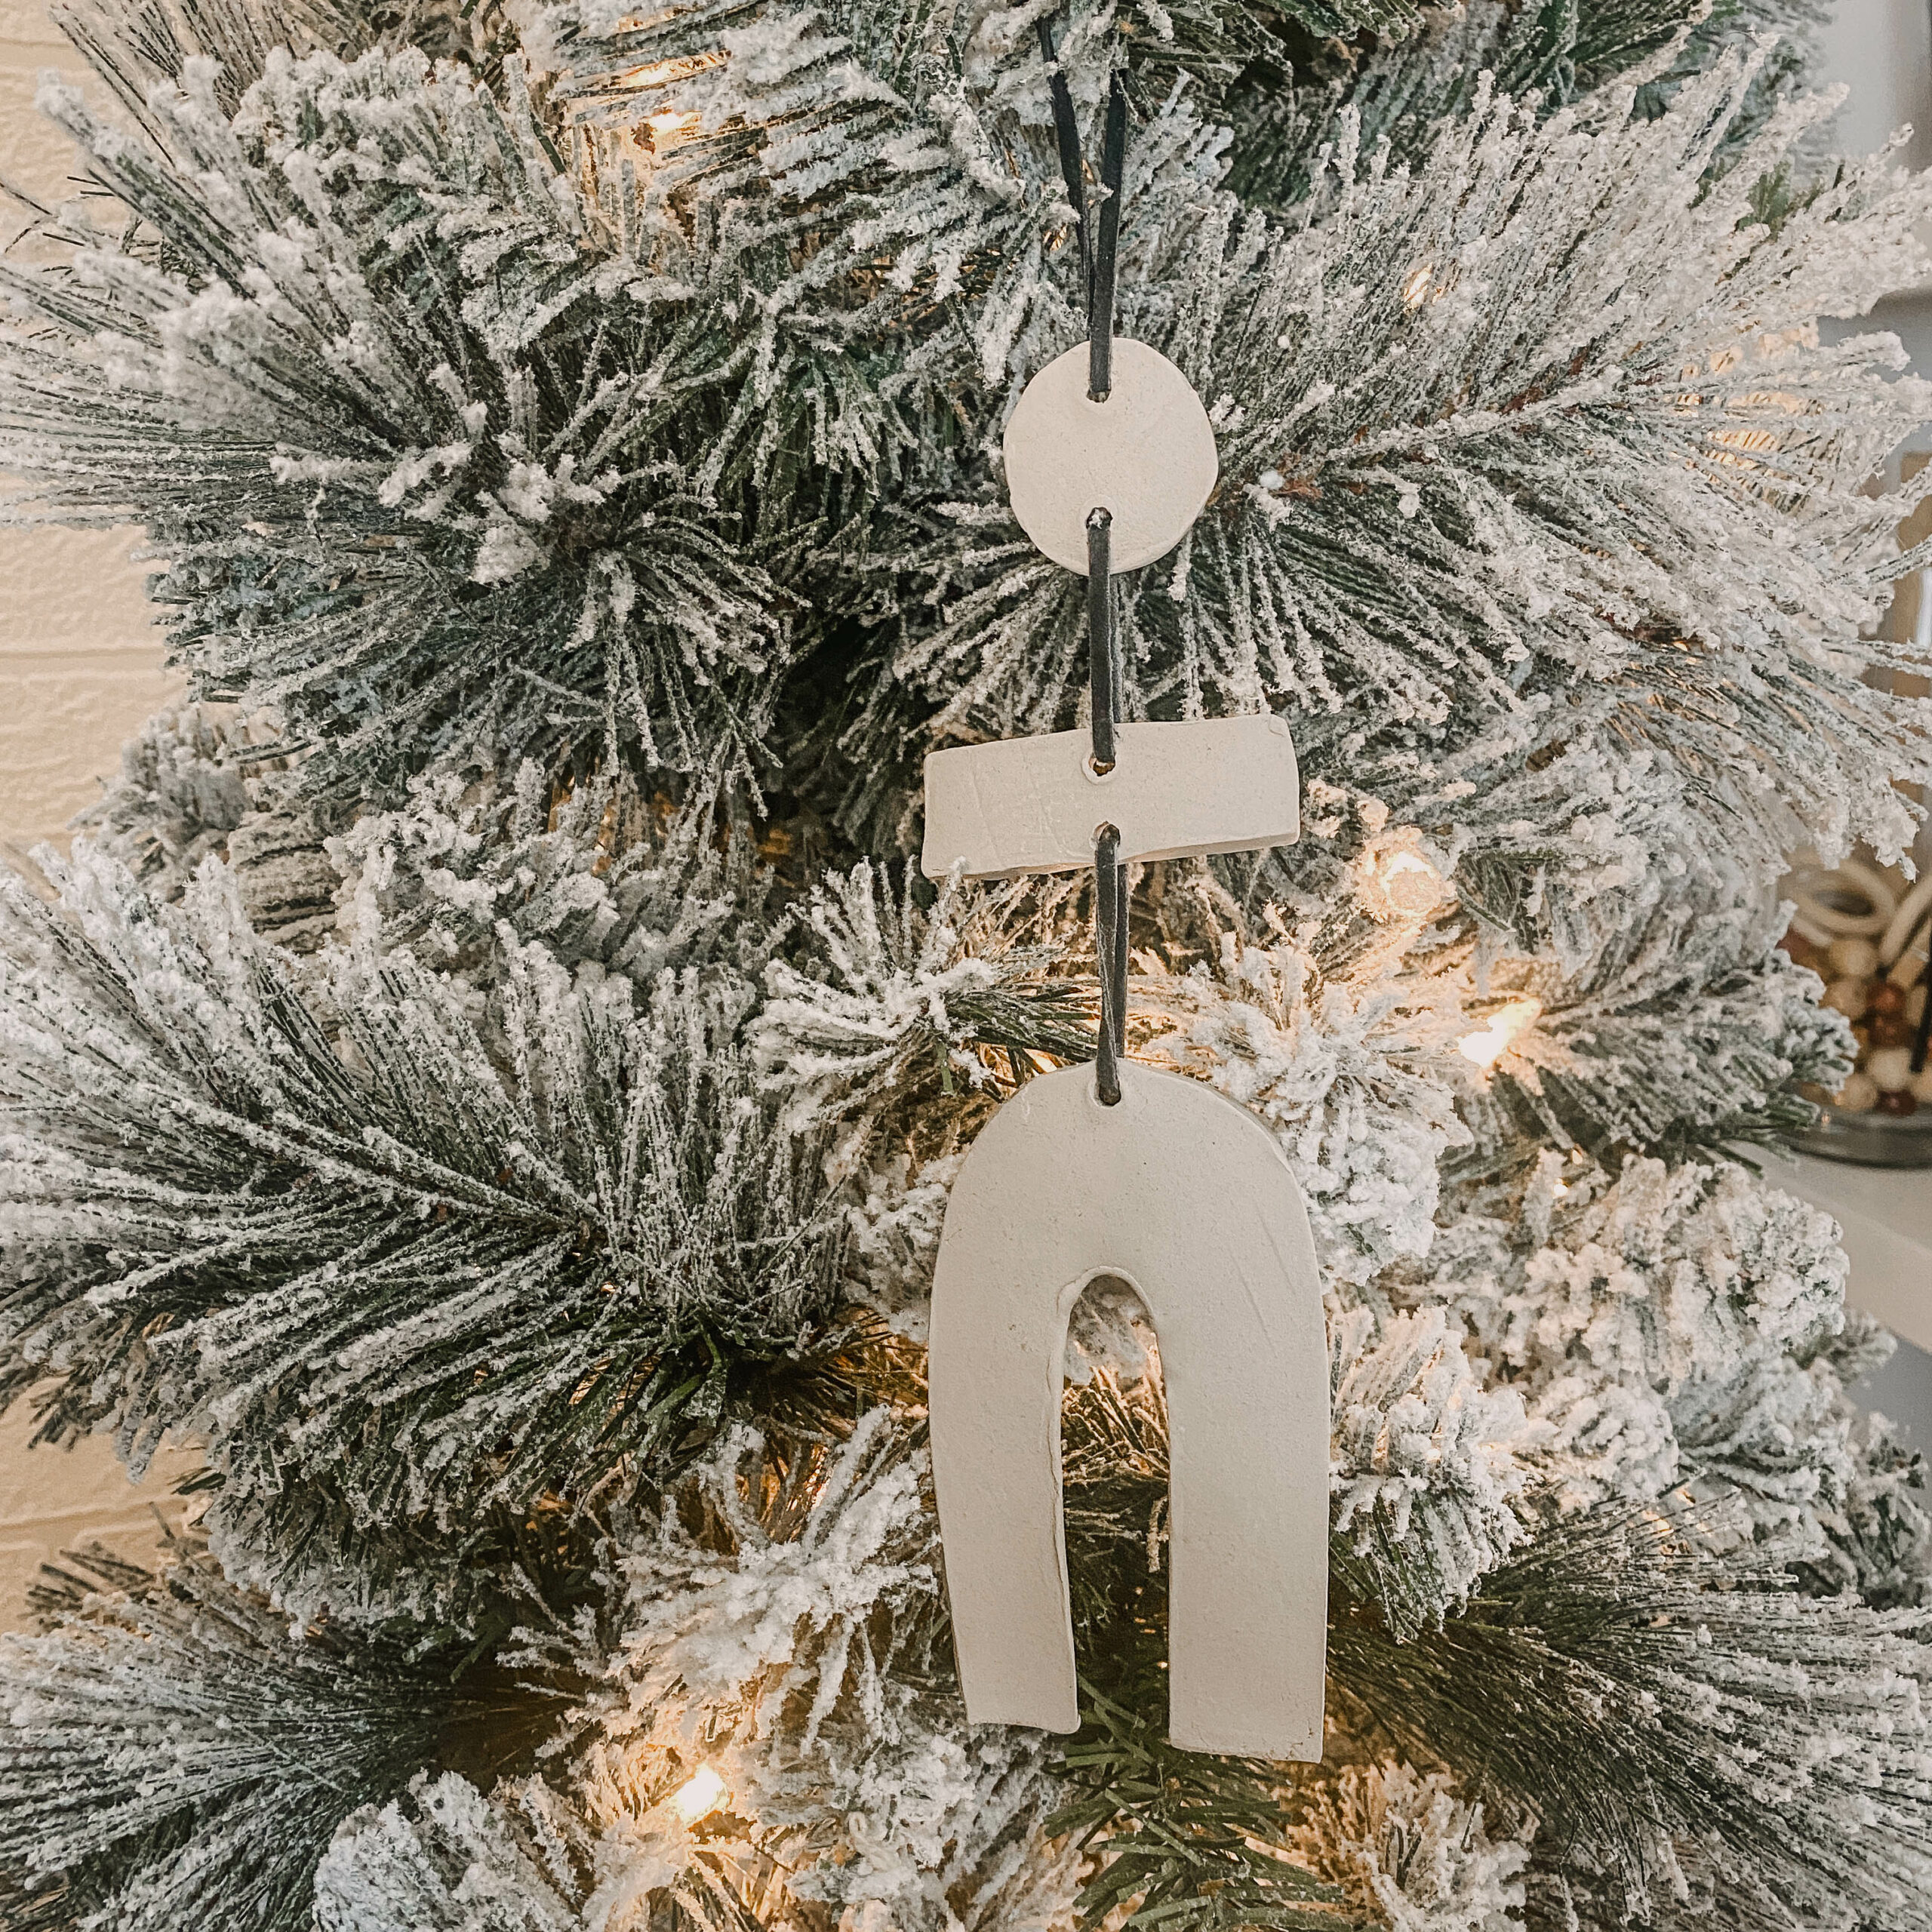
I said earlier that air-dry clay is more likely to break; one of my rainbows totally broke, but I decided it looked like a cute candy cane, so I used it anyway! Try to just have fun and create without worrying too much. This is the beauty of dollar store creations, we don’t have to take ourselves too seriously! I love how these turned out.
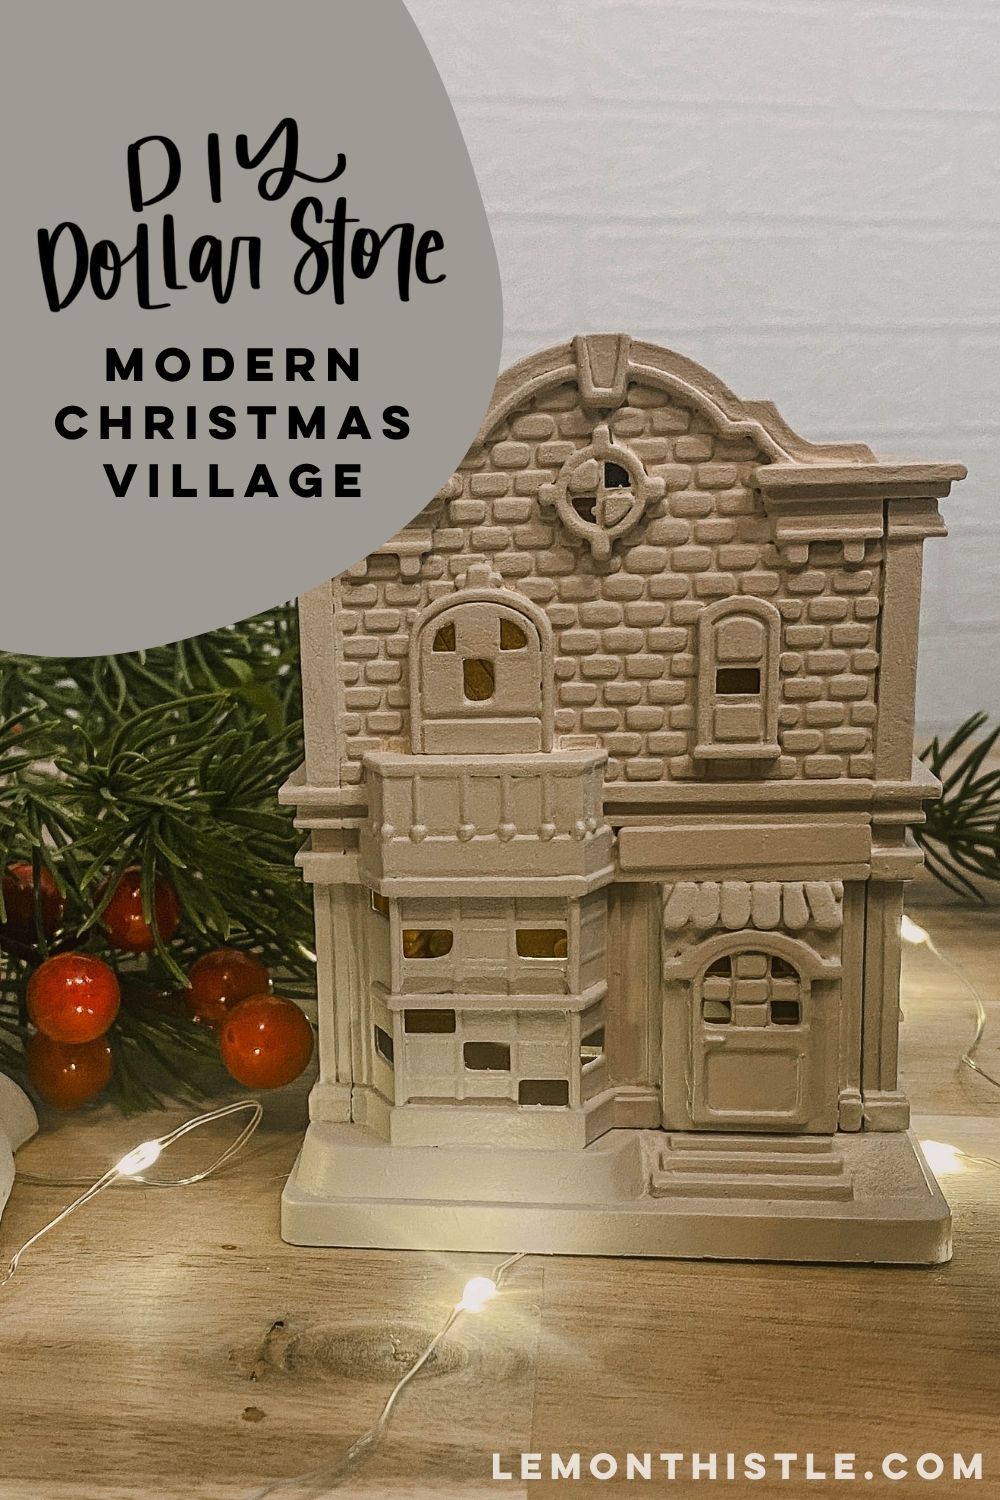
Modern DIY Christmas Village
All you need for this one is:
- plastic house figurines,
- white paint, and
- fairy lights
I found some cute little plastic houses at the dollar store. I really liked the shape of them, but not the colour scheme.
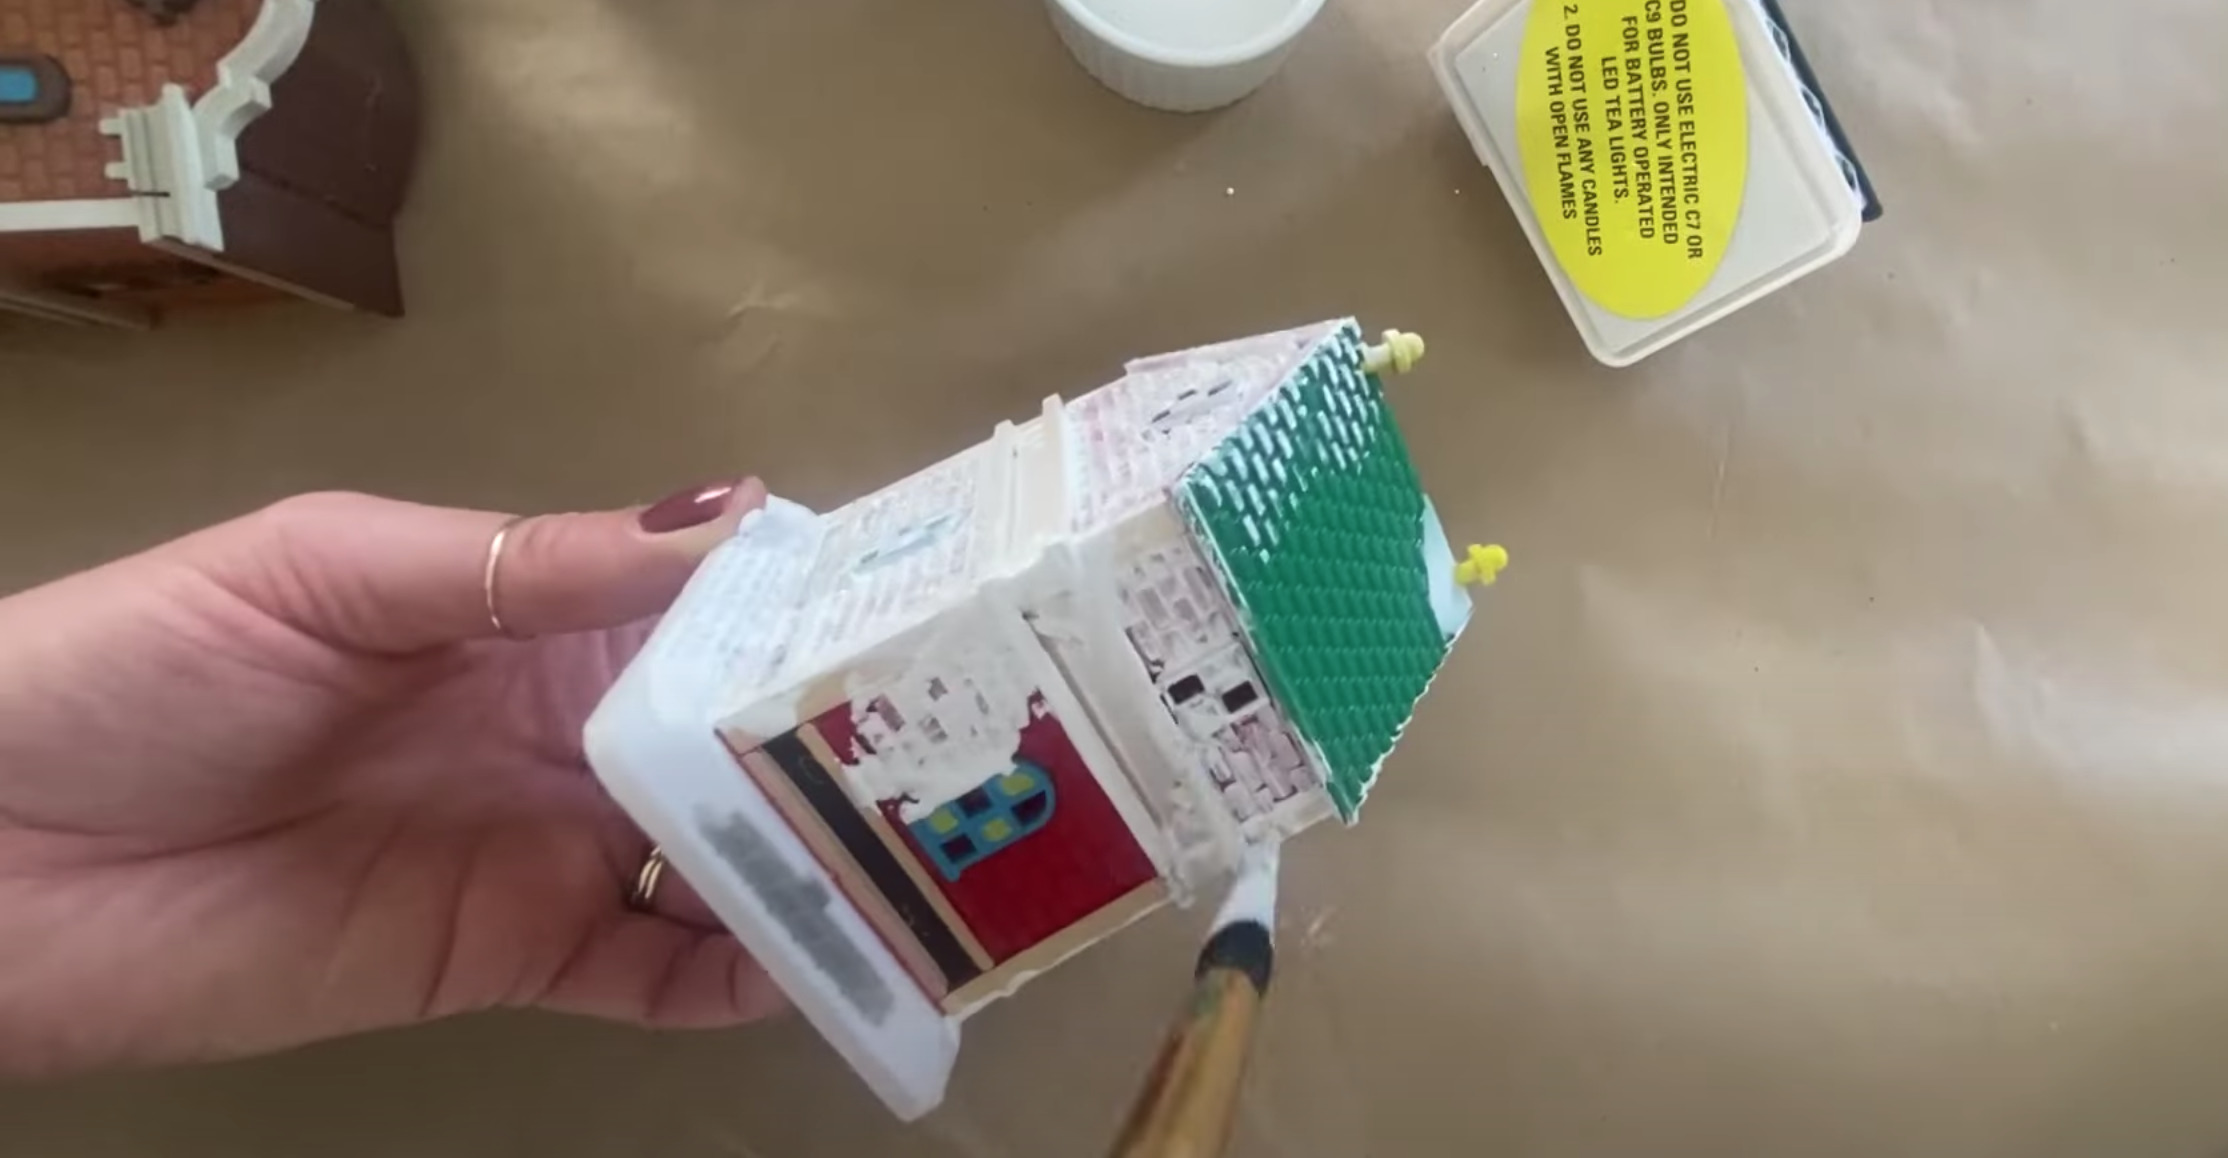
So, I decided to paint them all one colour for a more modern look. I used two coats of white dollar store paint. The coverage was good! But I wanted a warmer colour, so I did go over them again with a smoky beige paint for the final coat.
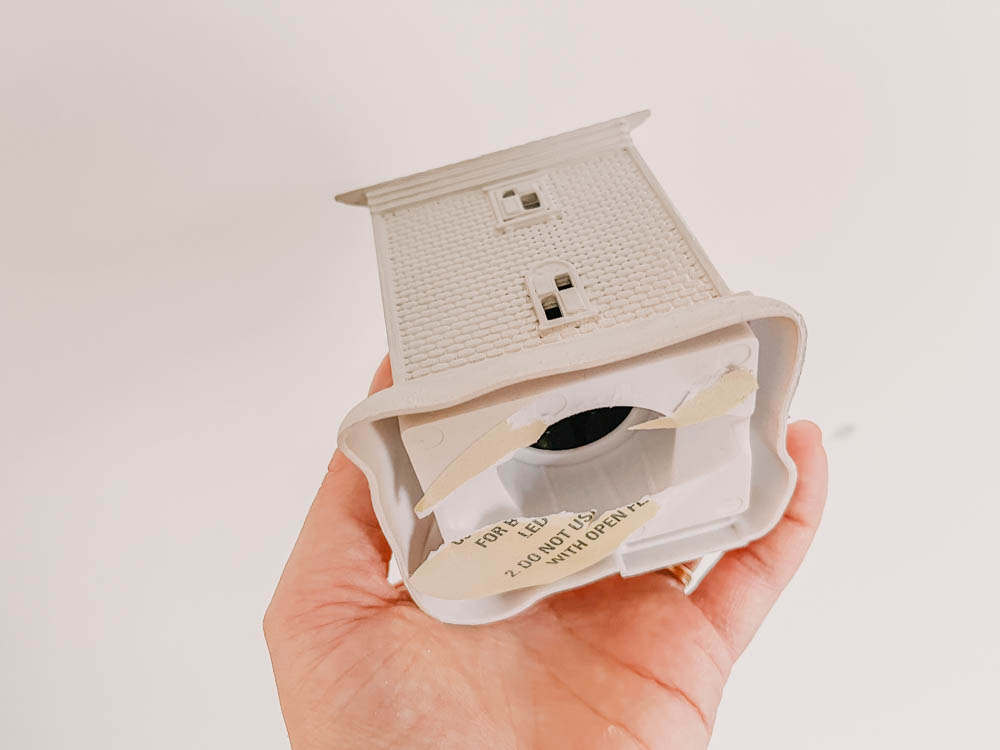
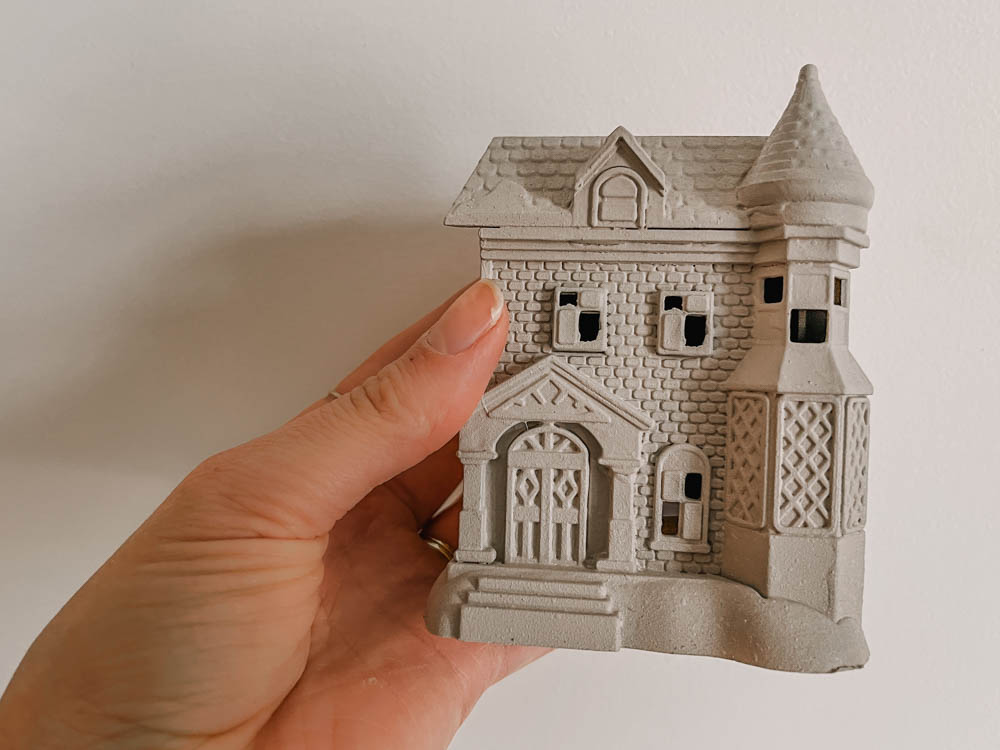
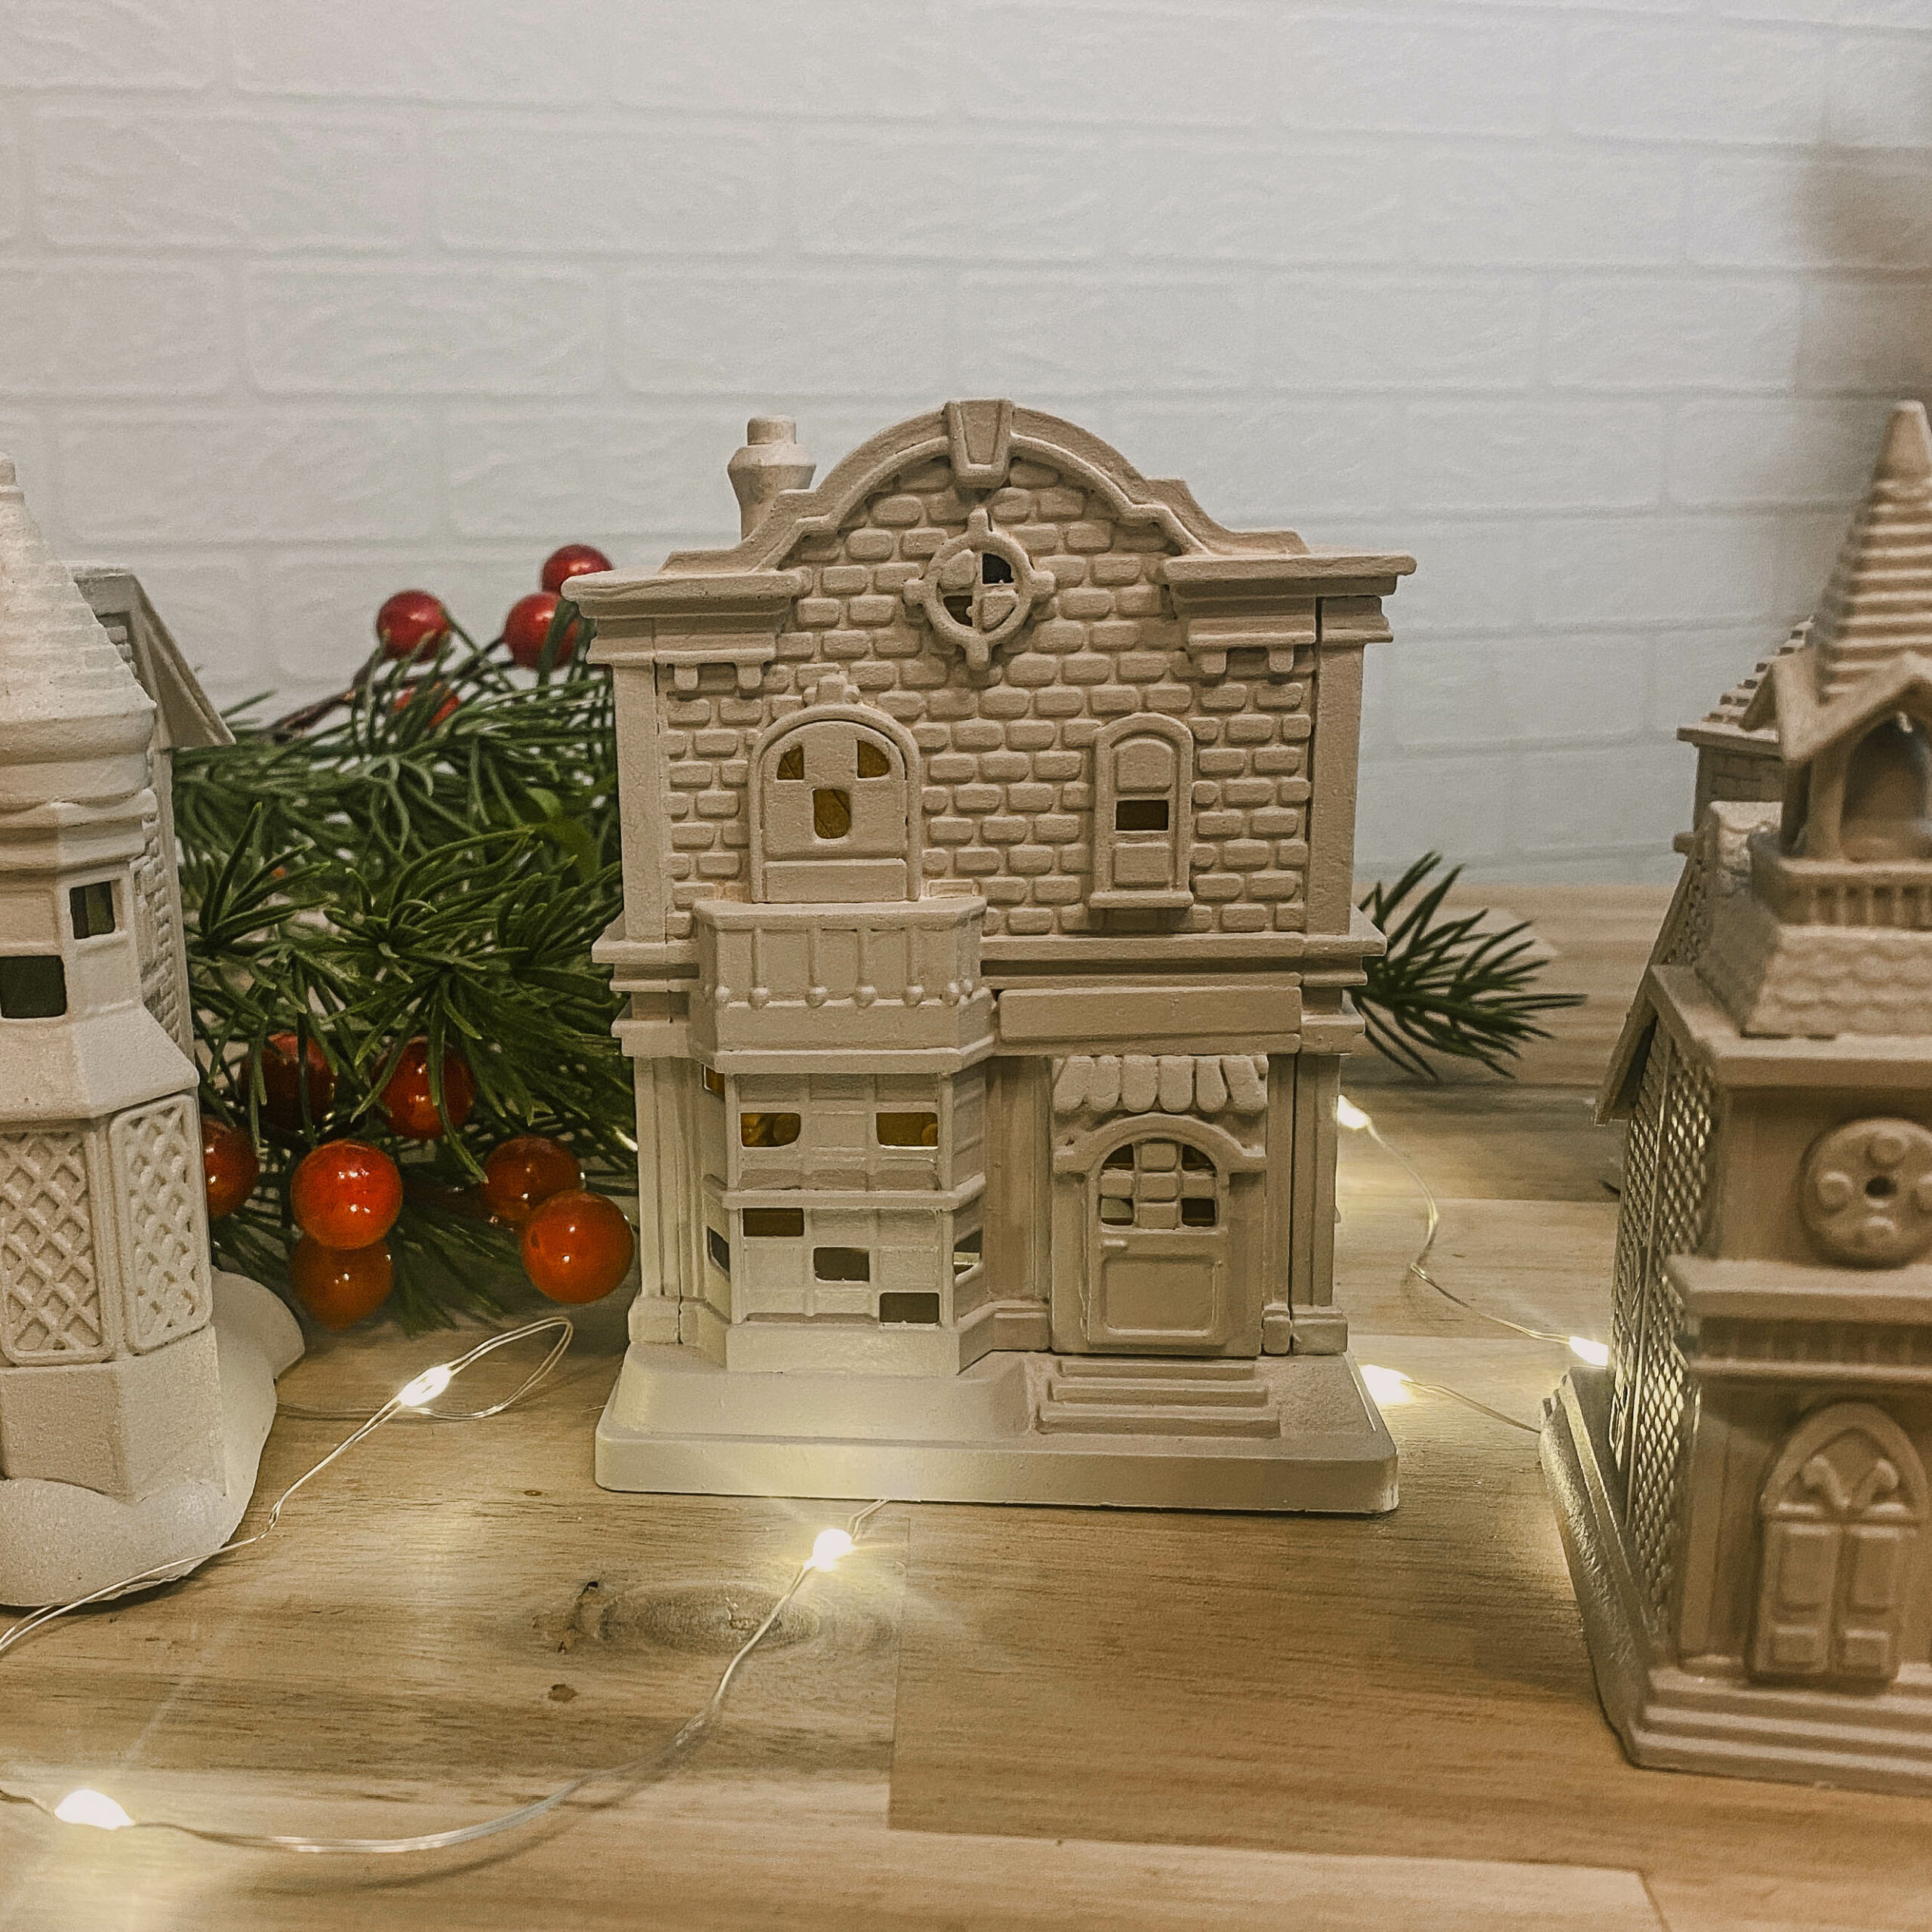
I then wrapped them with fairy lights (also from the dollar store!), and I think these will look really beautiful on a mantel with garland all lit up at night. They do have a space for a tealight (battery operated!) in the bottom, but I didn’t have any on hand. I love how magical the fairy lights look wrapped around the houses though.
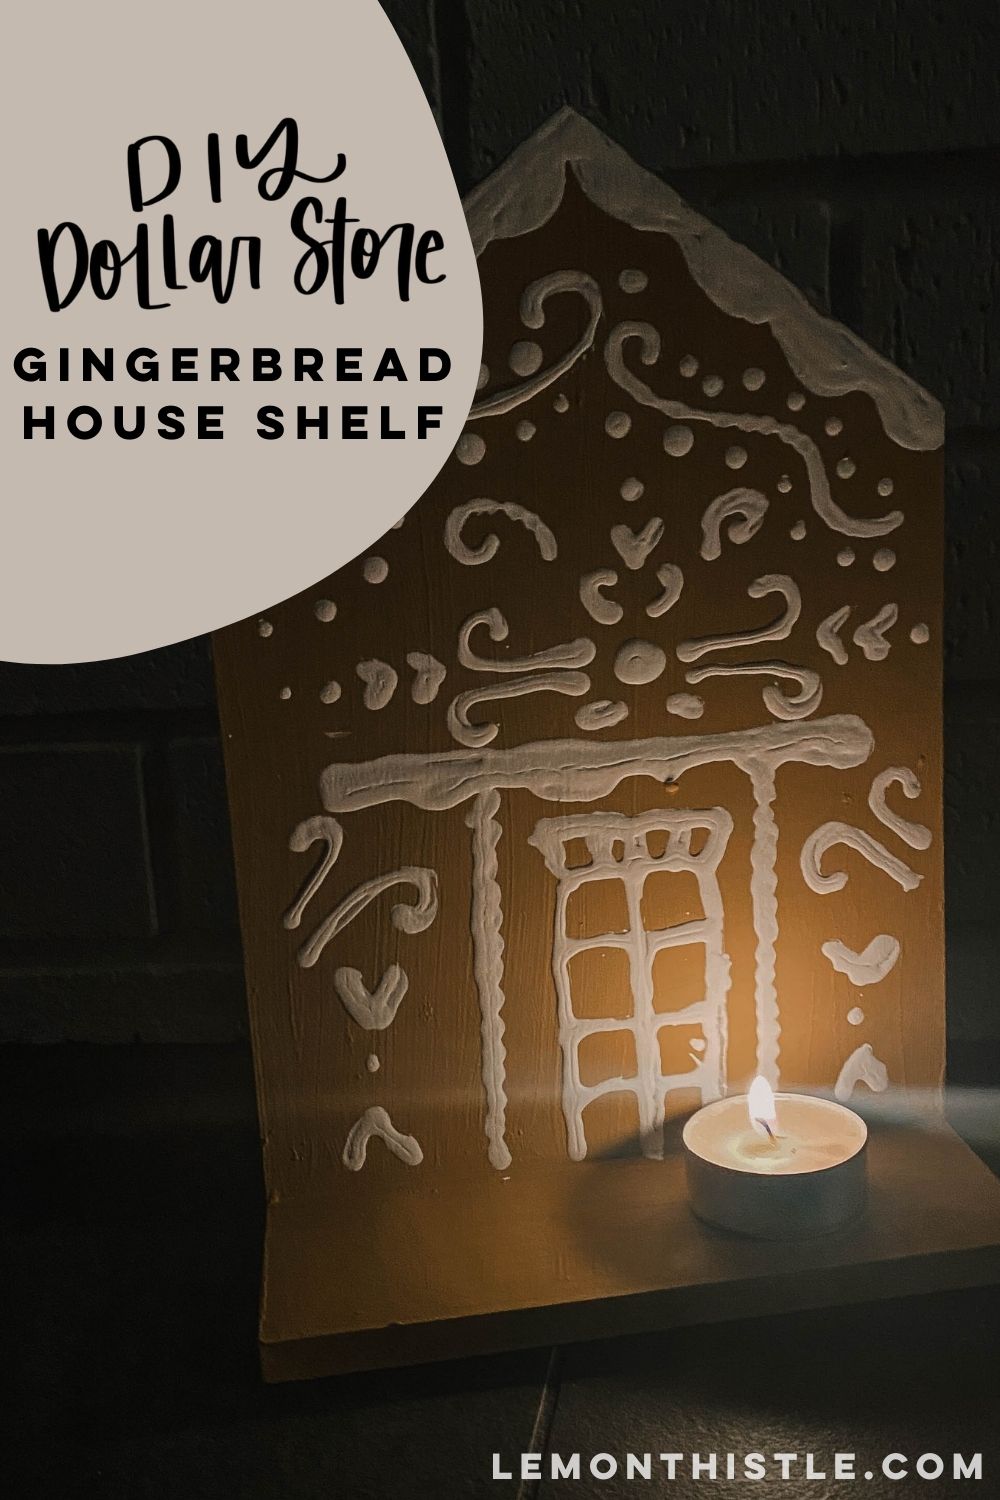
Gingerbread Shelf
To make this, all you need is a house-shaped shelf from the dollar store, gingerbread–coloured craft paint, and a white paint pen or squeeze bottle for drawing white details on your gingerbread house. This is such a simple DIY! To start, paint the entire house (the front, shelf, and all edges) with the gingerbread craft paint. Two coats should do it.
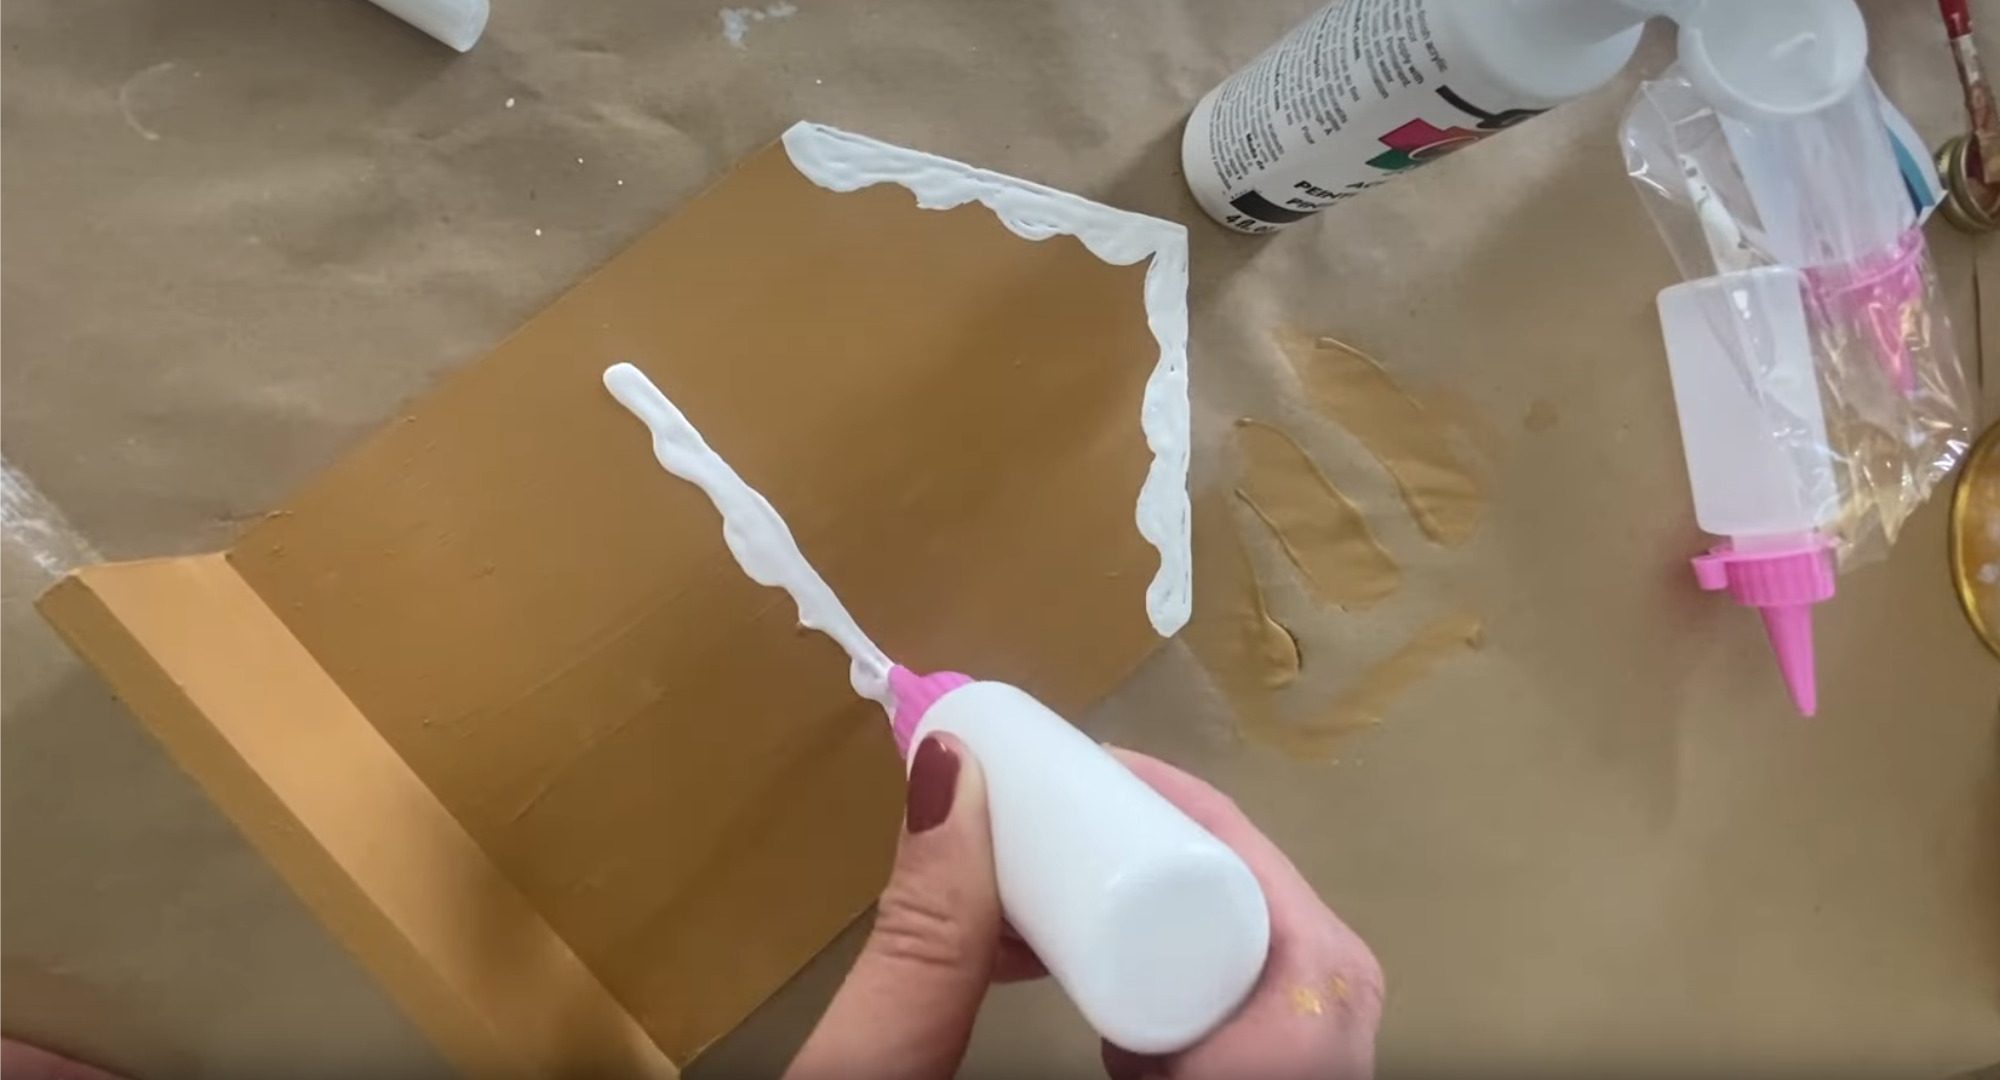
After the two coats of the paint are dry, draw on your white gingerbread detailing. This step was a bit of an adventure for me! I tried the dollar store white paint pen for the first time, and found it didn’t work well enough for this project. So, I used a dollar store squeeze bottle filled with white paint instead! This is a much different look than I thought I would achieve since it went on much thicker and a bit messier than it would have with a pen. But I decided it looks like icing would on a real gingerbread house, and called it good!
This is the truth about dollar store DIYs: you have to be ready to roll with it sometimes and make the best of things.
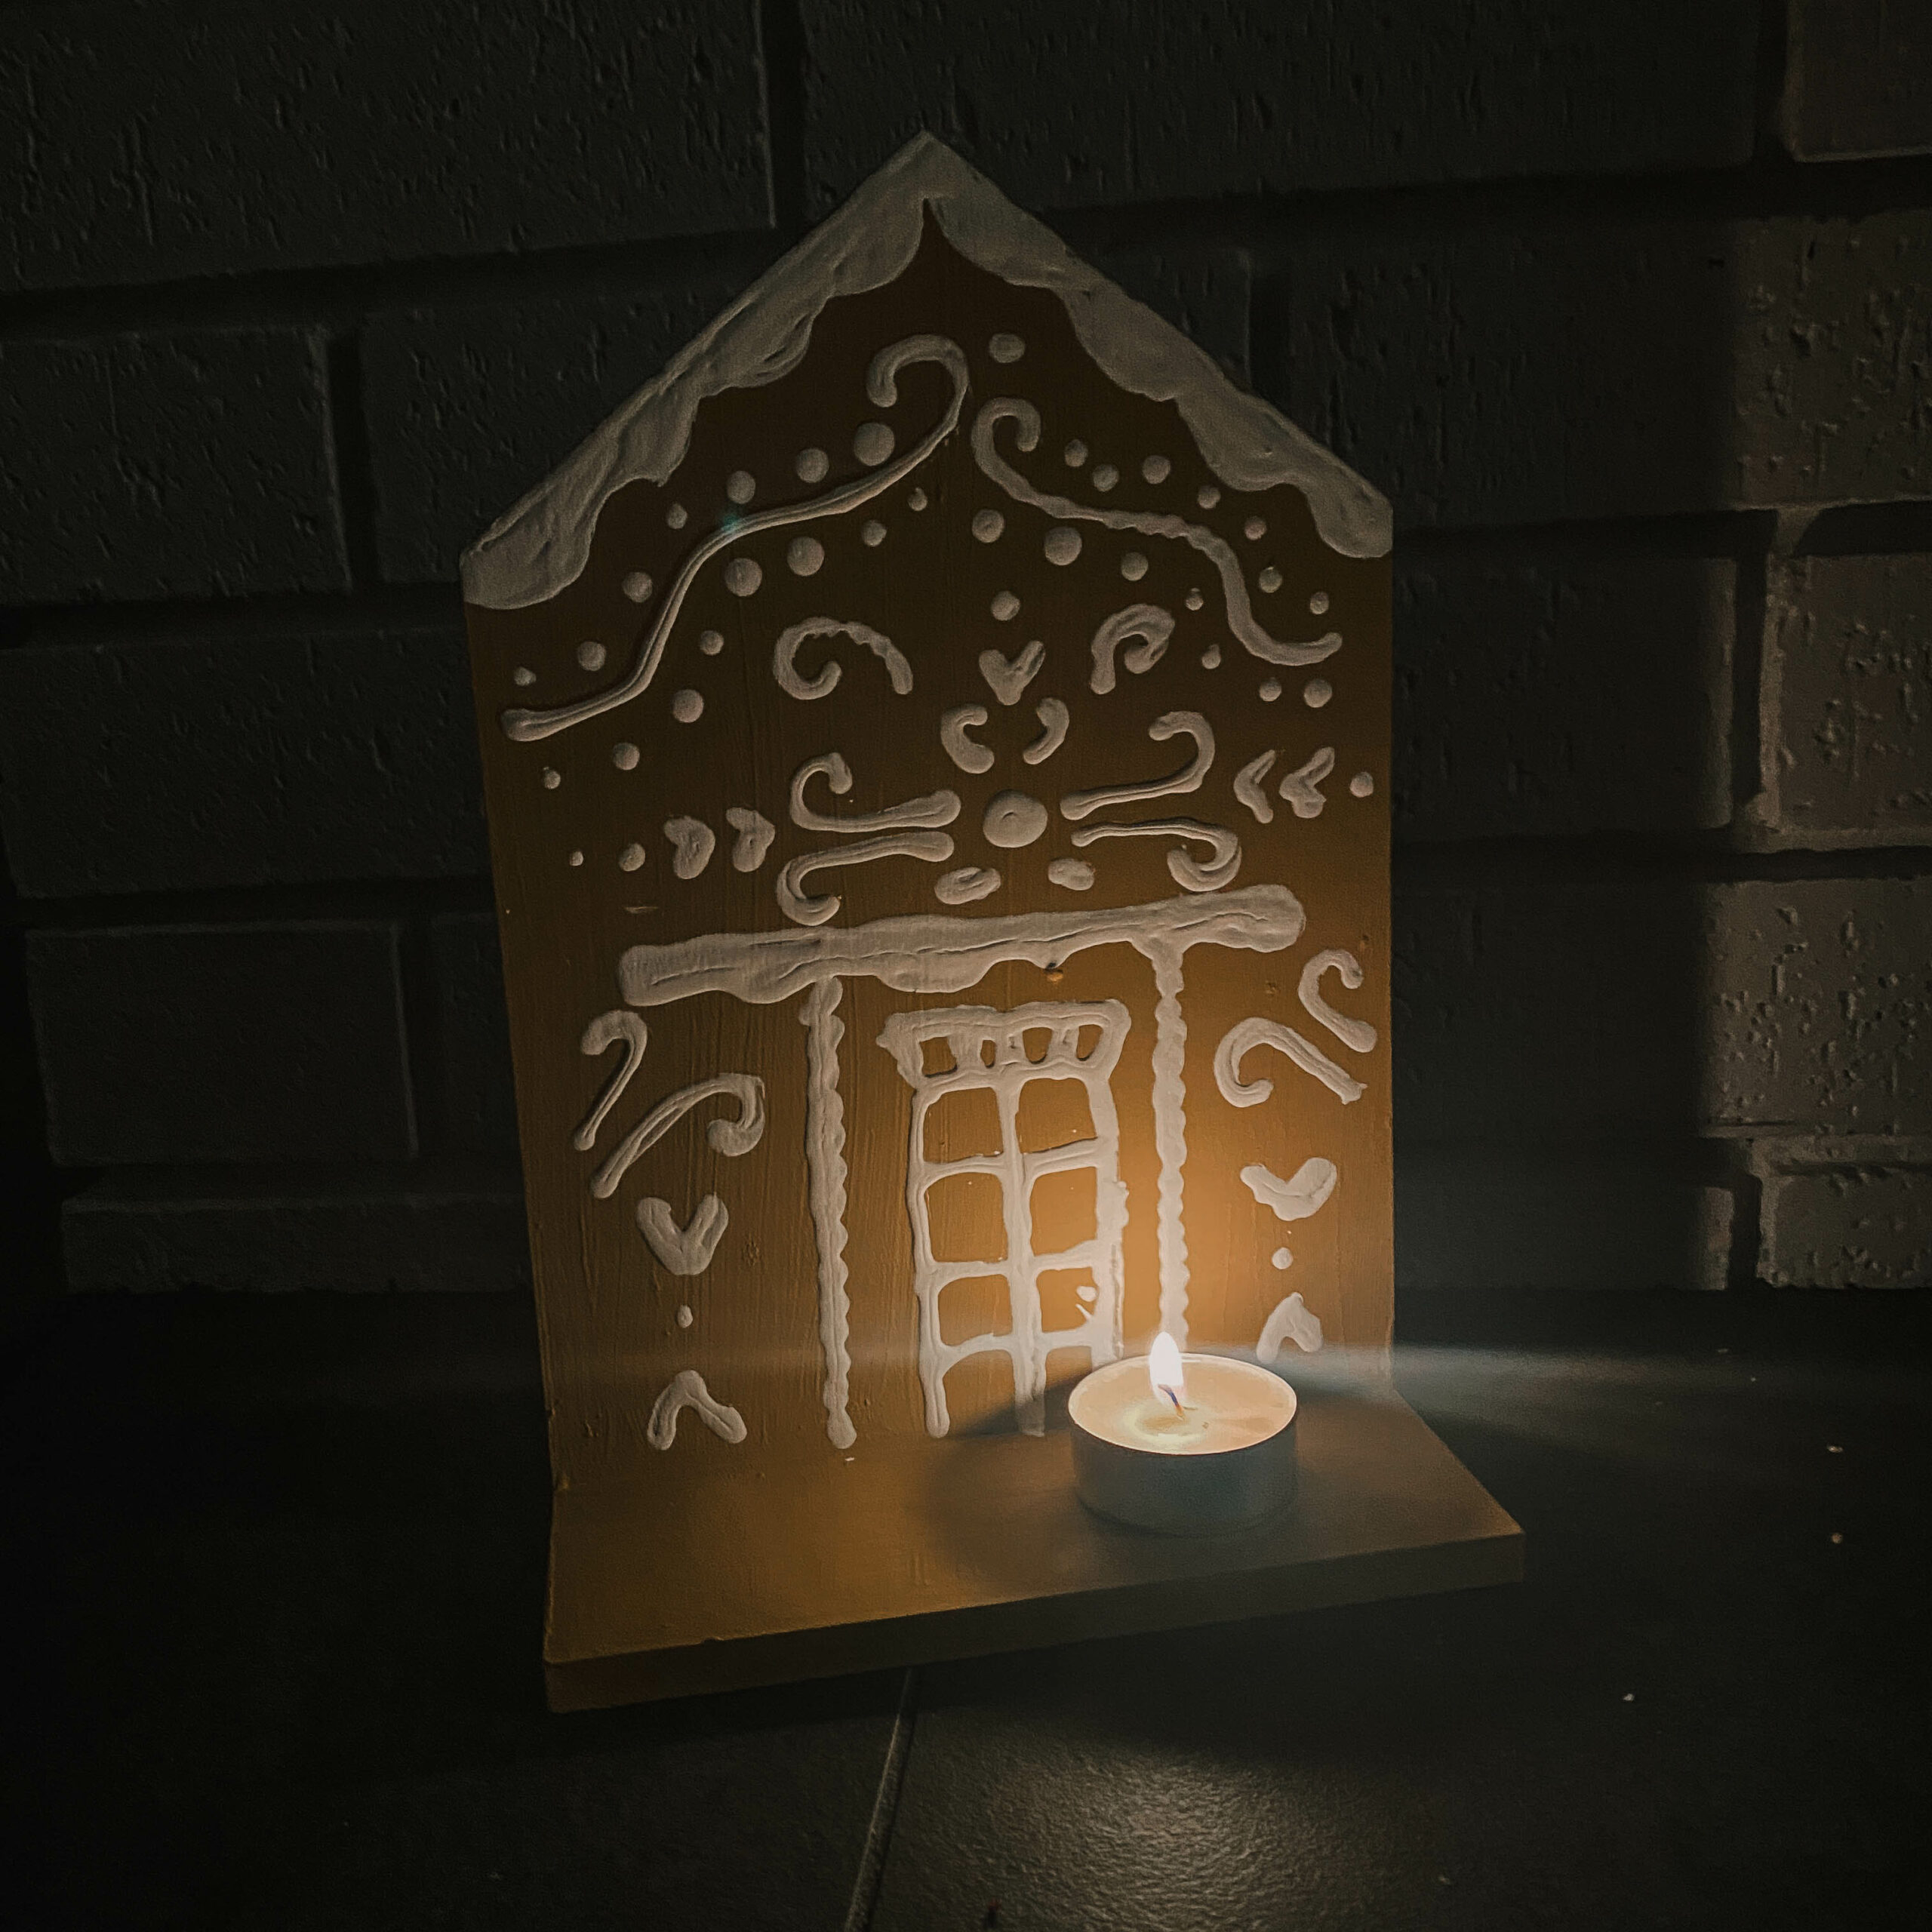
Once the white paint is dry, you can decide how to display your new shelf! It does come with hardware for hanging on the wall, or you could set it on a shelf or counter. Use a tea light, or dollar store bottle brush trees, or whatever else you think would look festive sitting on the shelf. I love how cheery this looks, and how easy it was! I’m going to let my daughter style it in her bedroom.
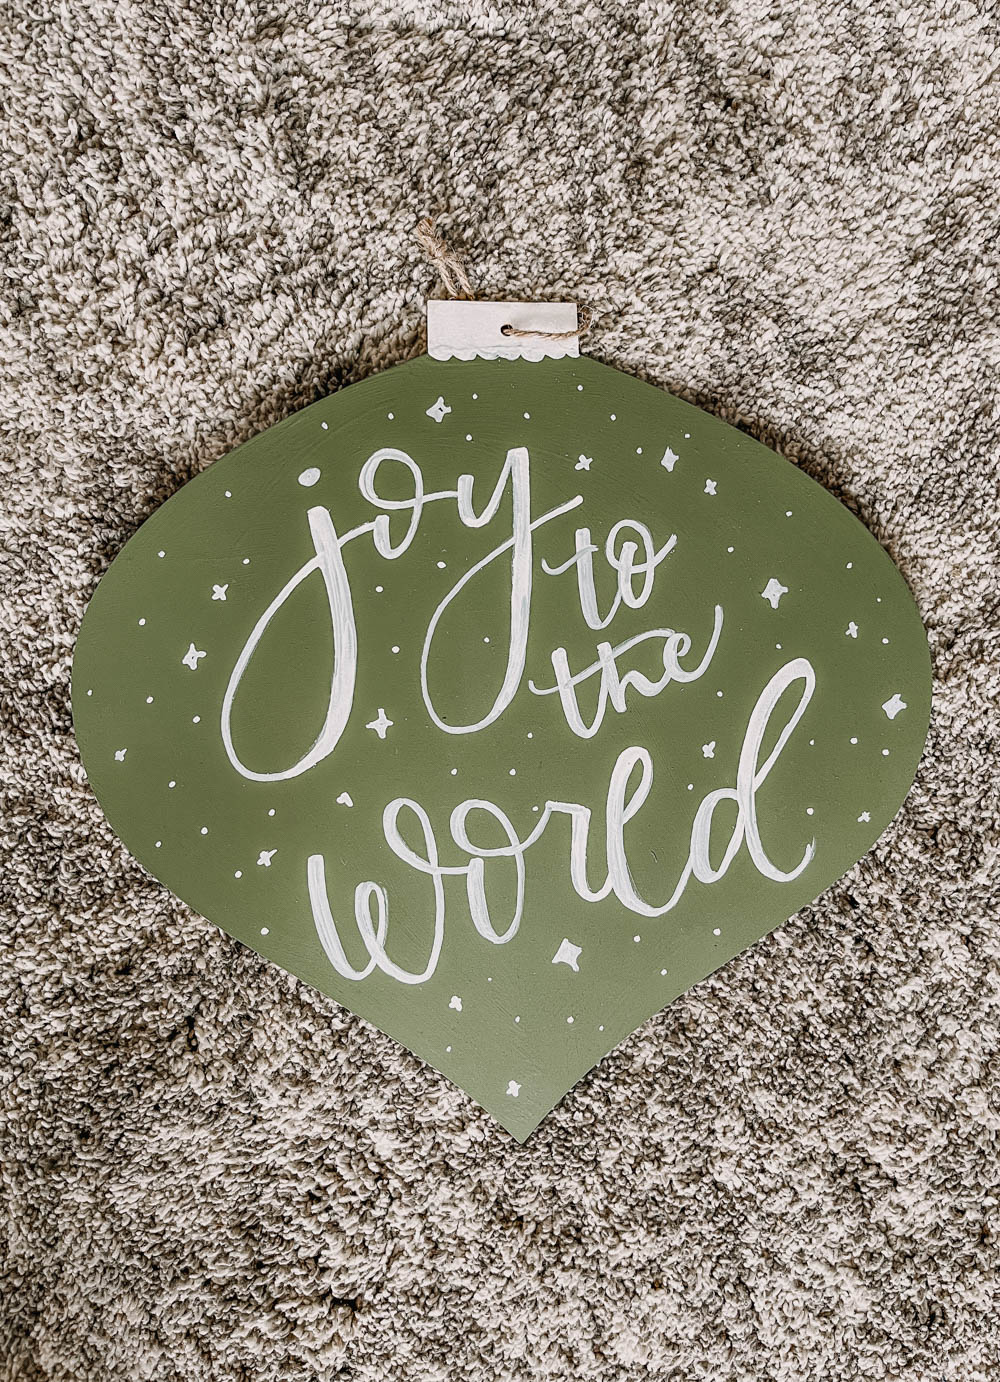
Festive Hand-lettered Sign
There is something about wood blanks at the dollar store! I just can’t resist bringing them home to make little hand-lettered signs out of them for every season. For this one, you will need an ornament-shaped wood blank, green paint, and a white paint pen.
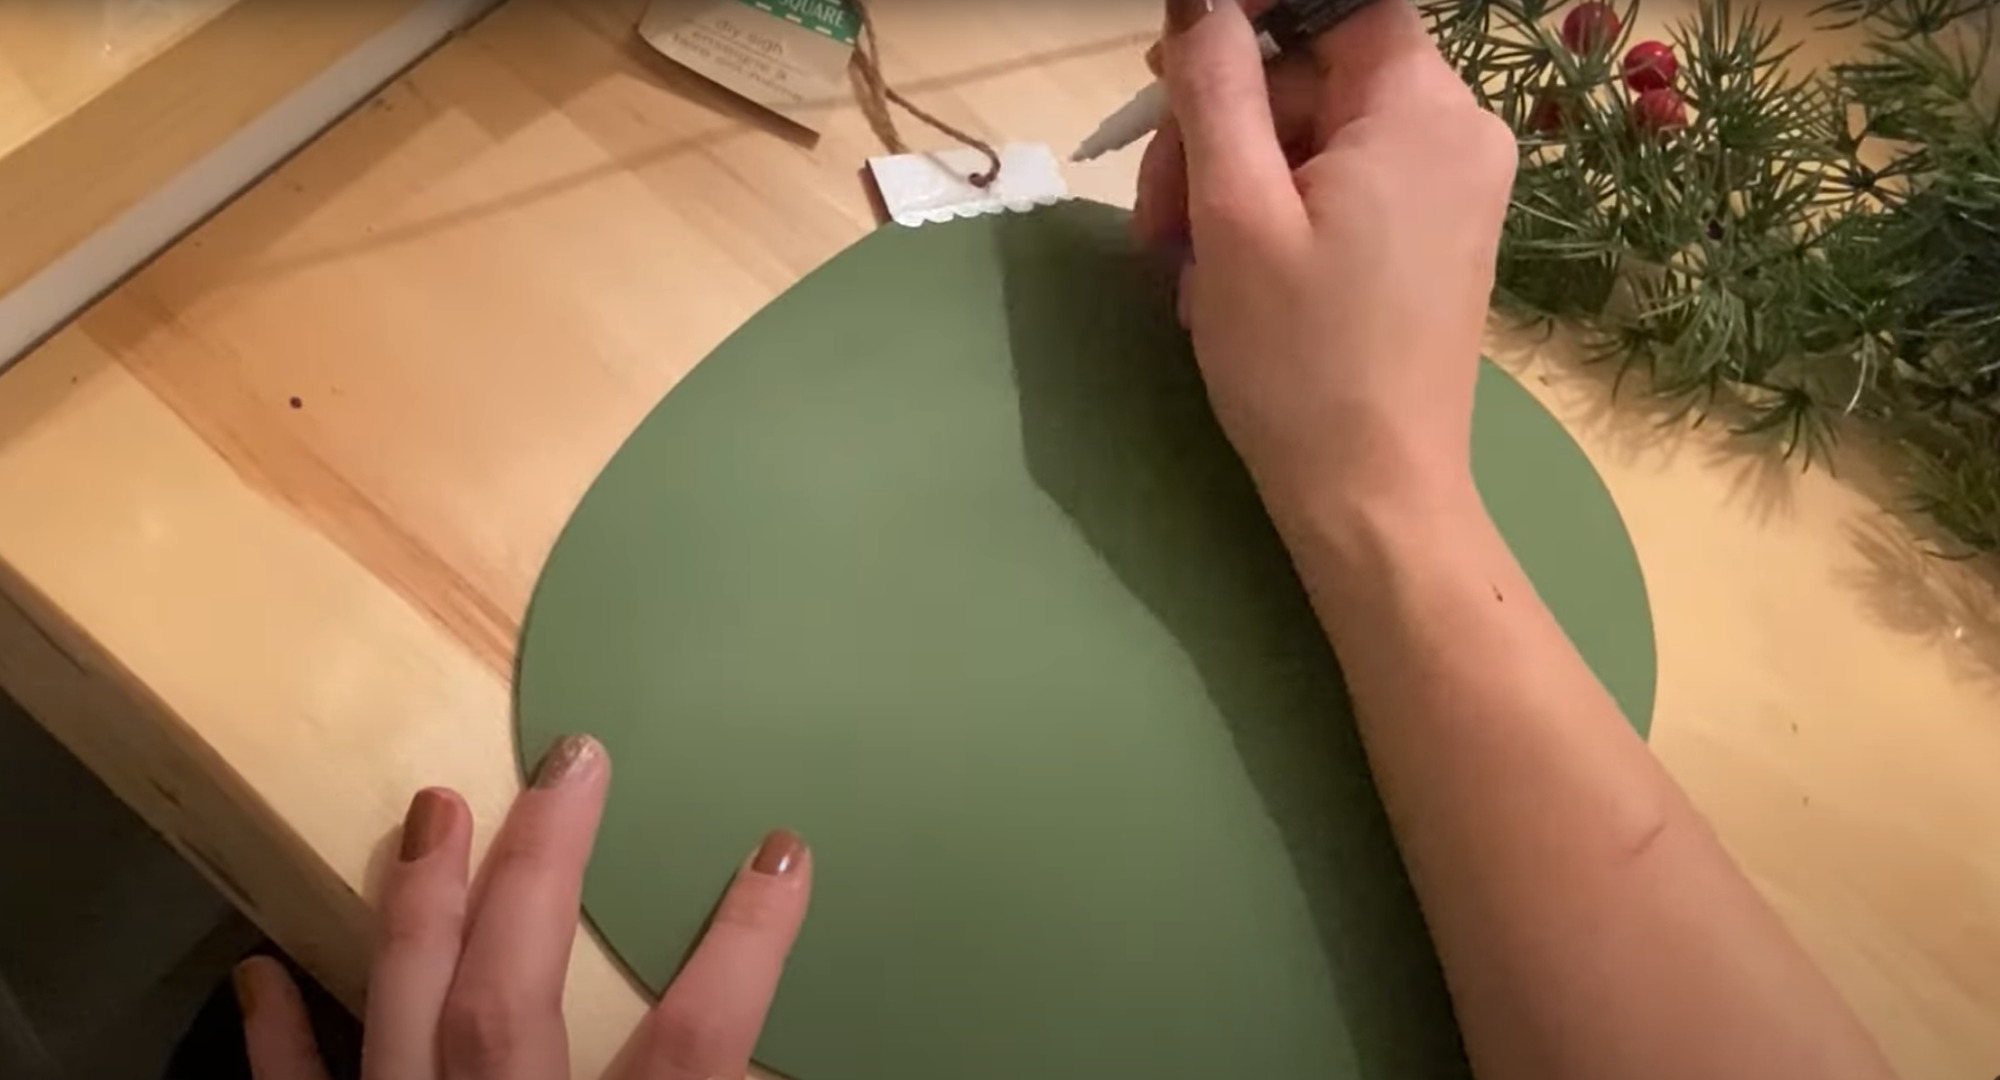
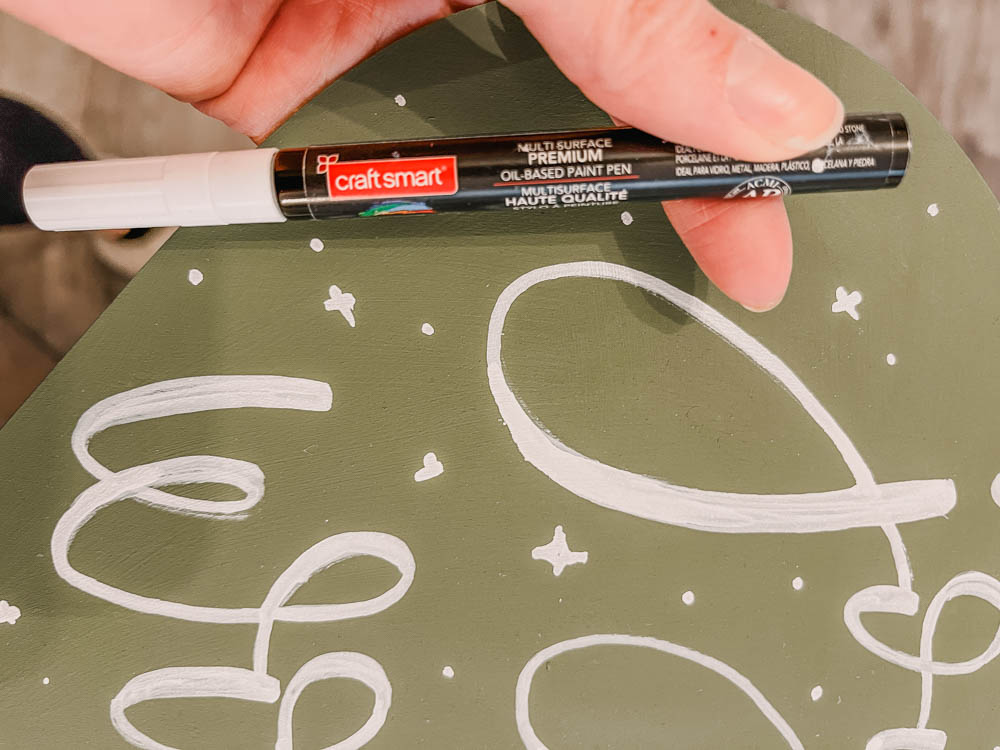
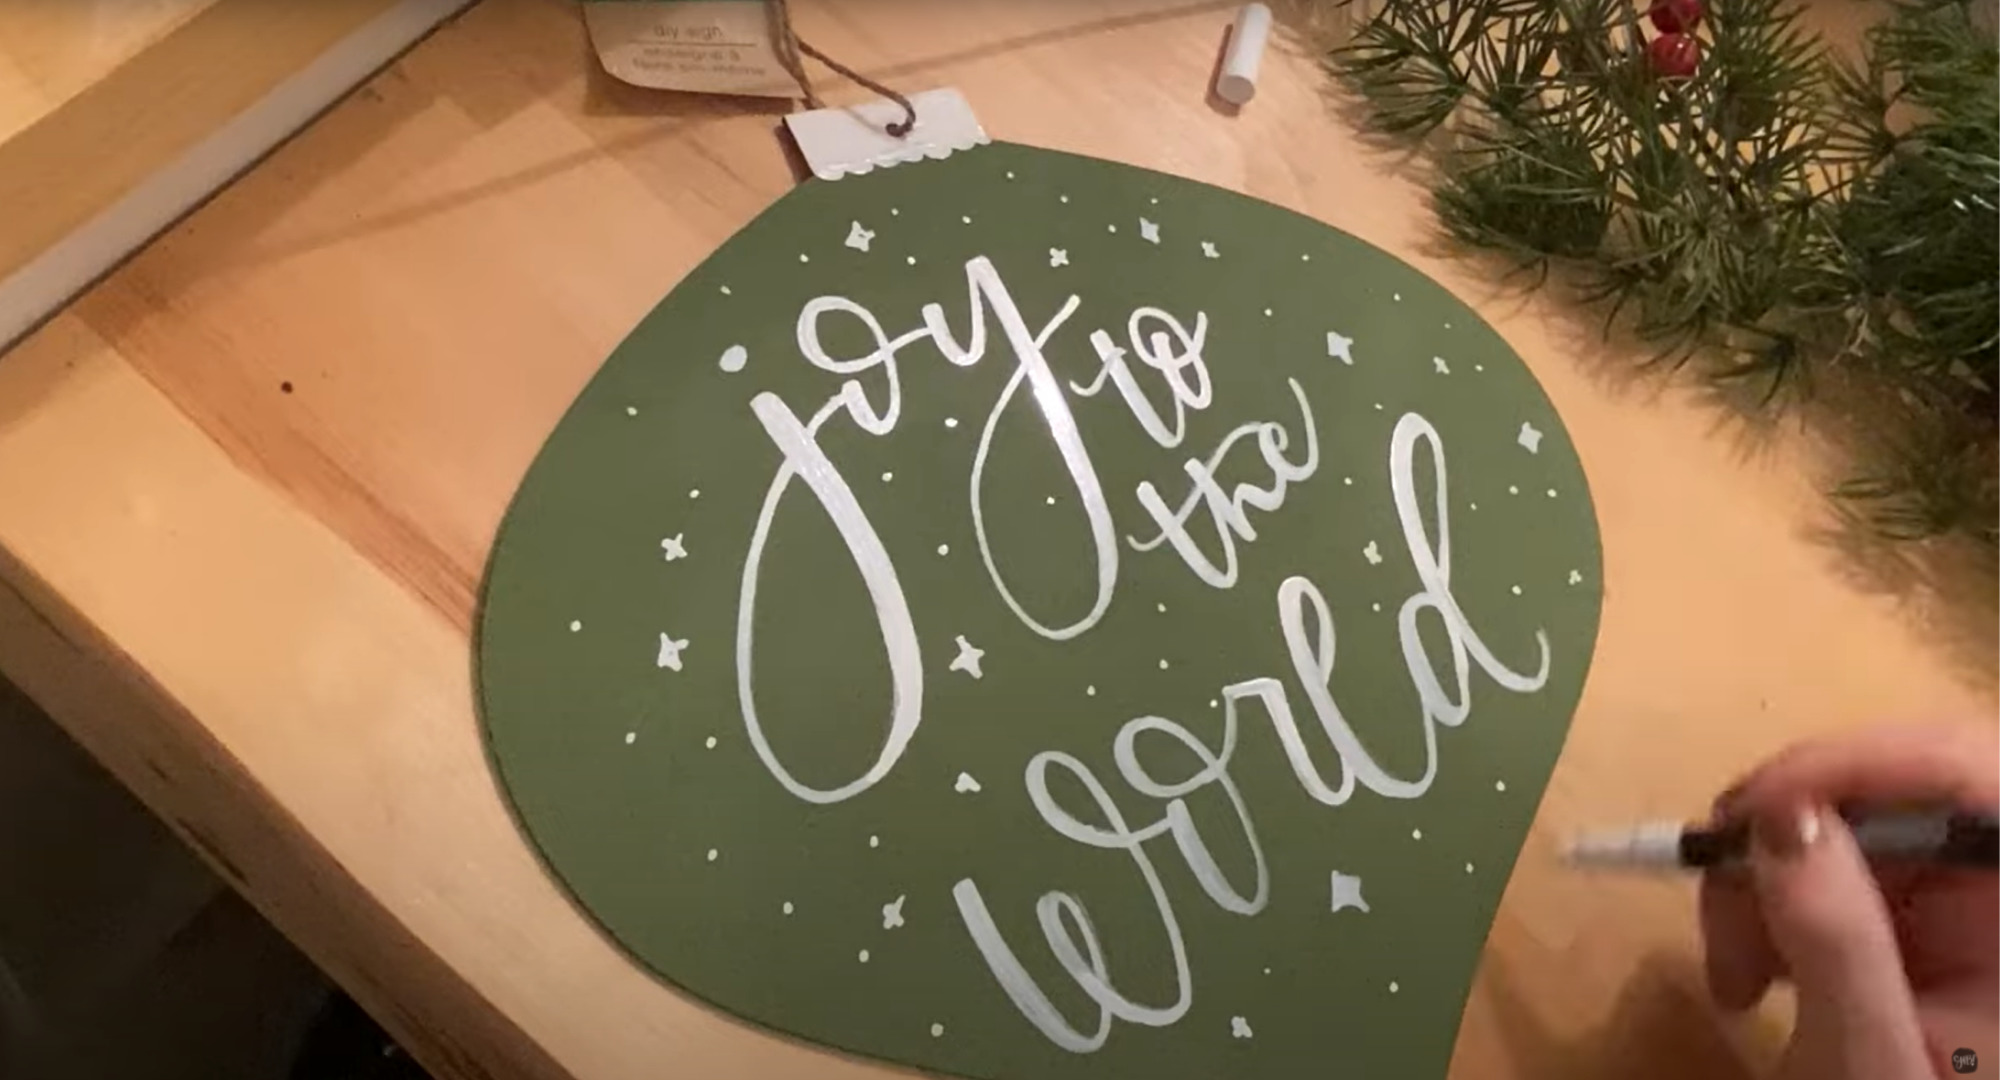
I normally leave my wood signs natural wood because I like that colour, but to make it more festive I chose to paint this ornament green. It took two coats to fully cover it. For the decoration at the top of the ornament and the lettering, I used a Craft Smart paint pen from Michaels. I like acrylic paint markers for most projects on wood since they seem to work the best.
I decorated the top in white, with a little scalloped pattern like the top of an ornament. Then I hand lettered Joy to the World on the green. I used a faux-brush lettering technique. If you’re interested in learning more about that, you can check out my online tutorial, and my free brush lettering quick start guide!
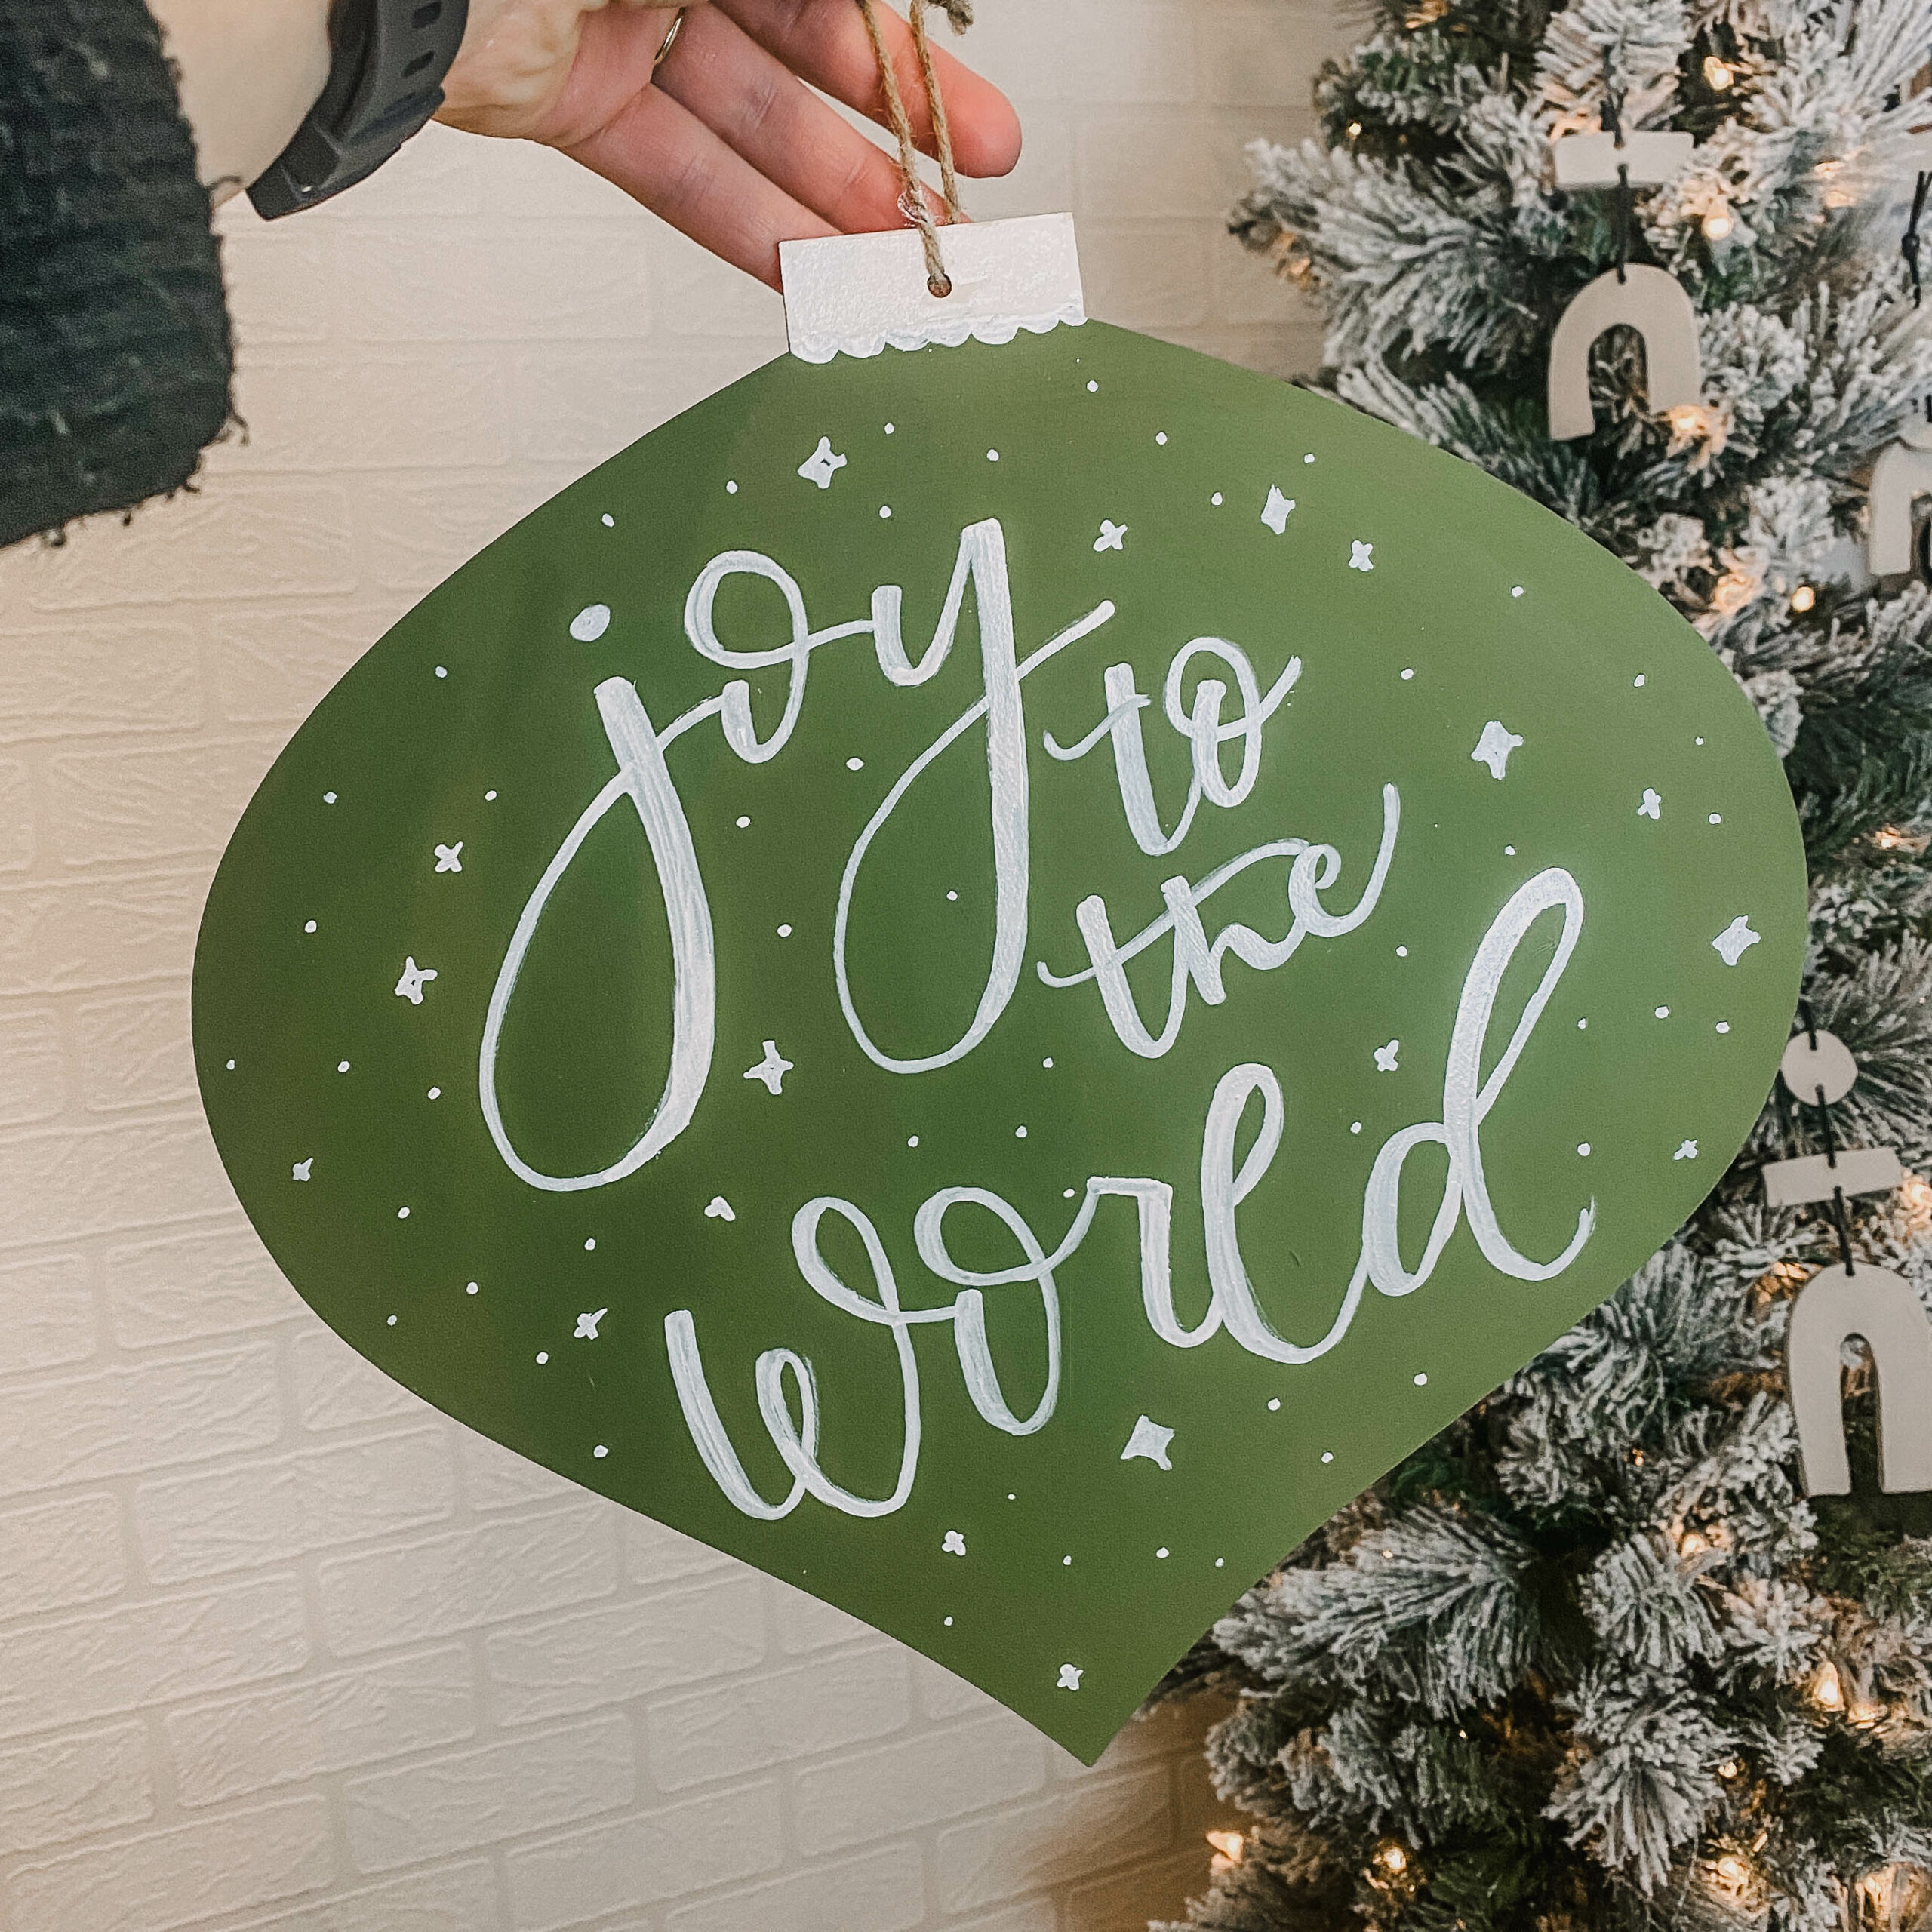
This turned out so well! I especially like the contrast between the green and the white. It would look great hung in an entryway, or even used as a gift topper on some craft paper if you had a big parcel you were delivering.
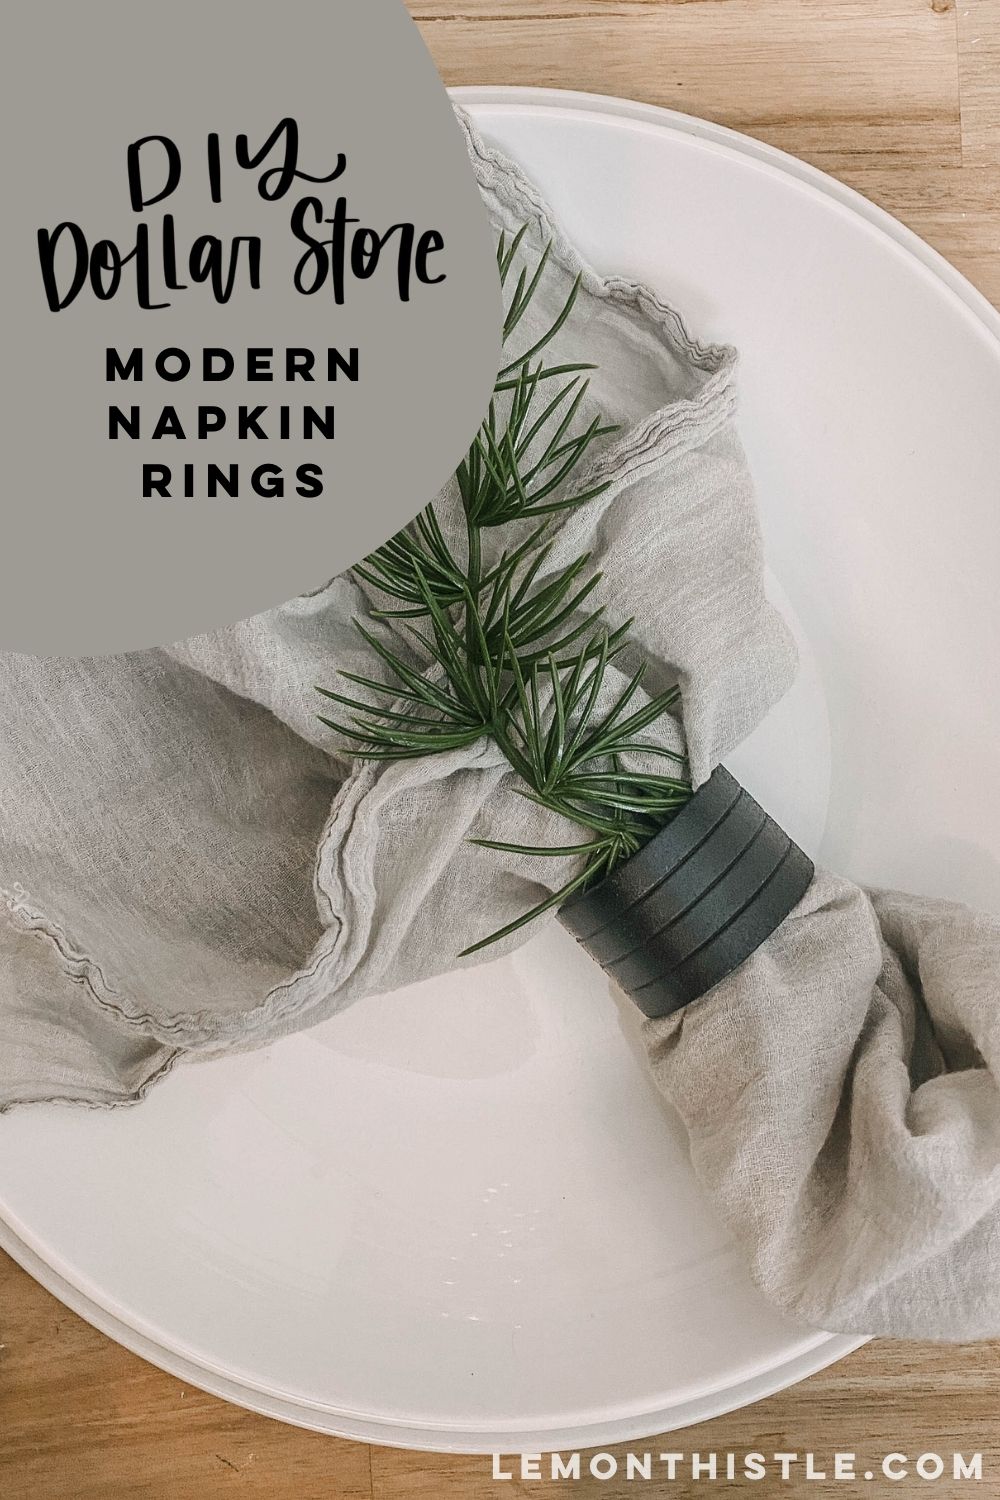
DIY Napkin Rings
This one is so simple it barely deserves to be called a DIY! But it looks adorable, and if you are hosting any holiday dinners this season, this is a great way to elevate your tablescape for just a few dollars.
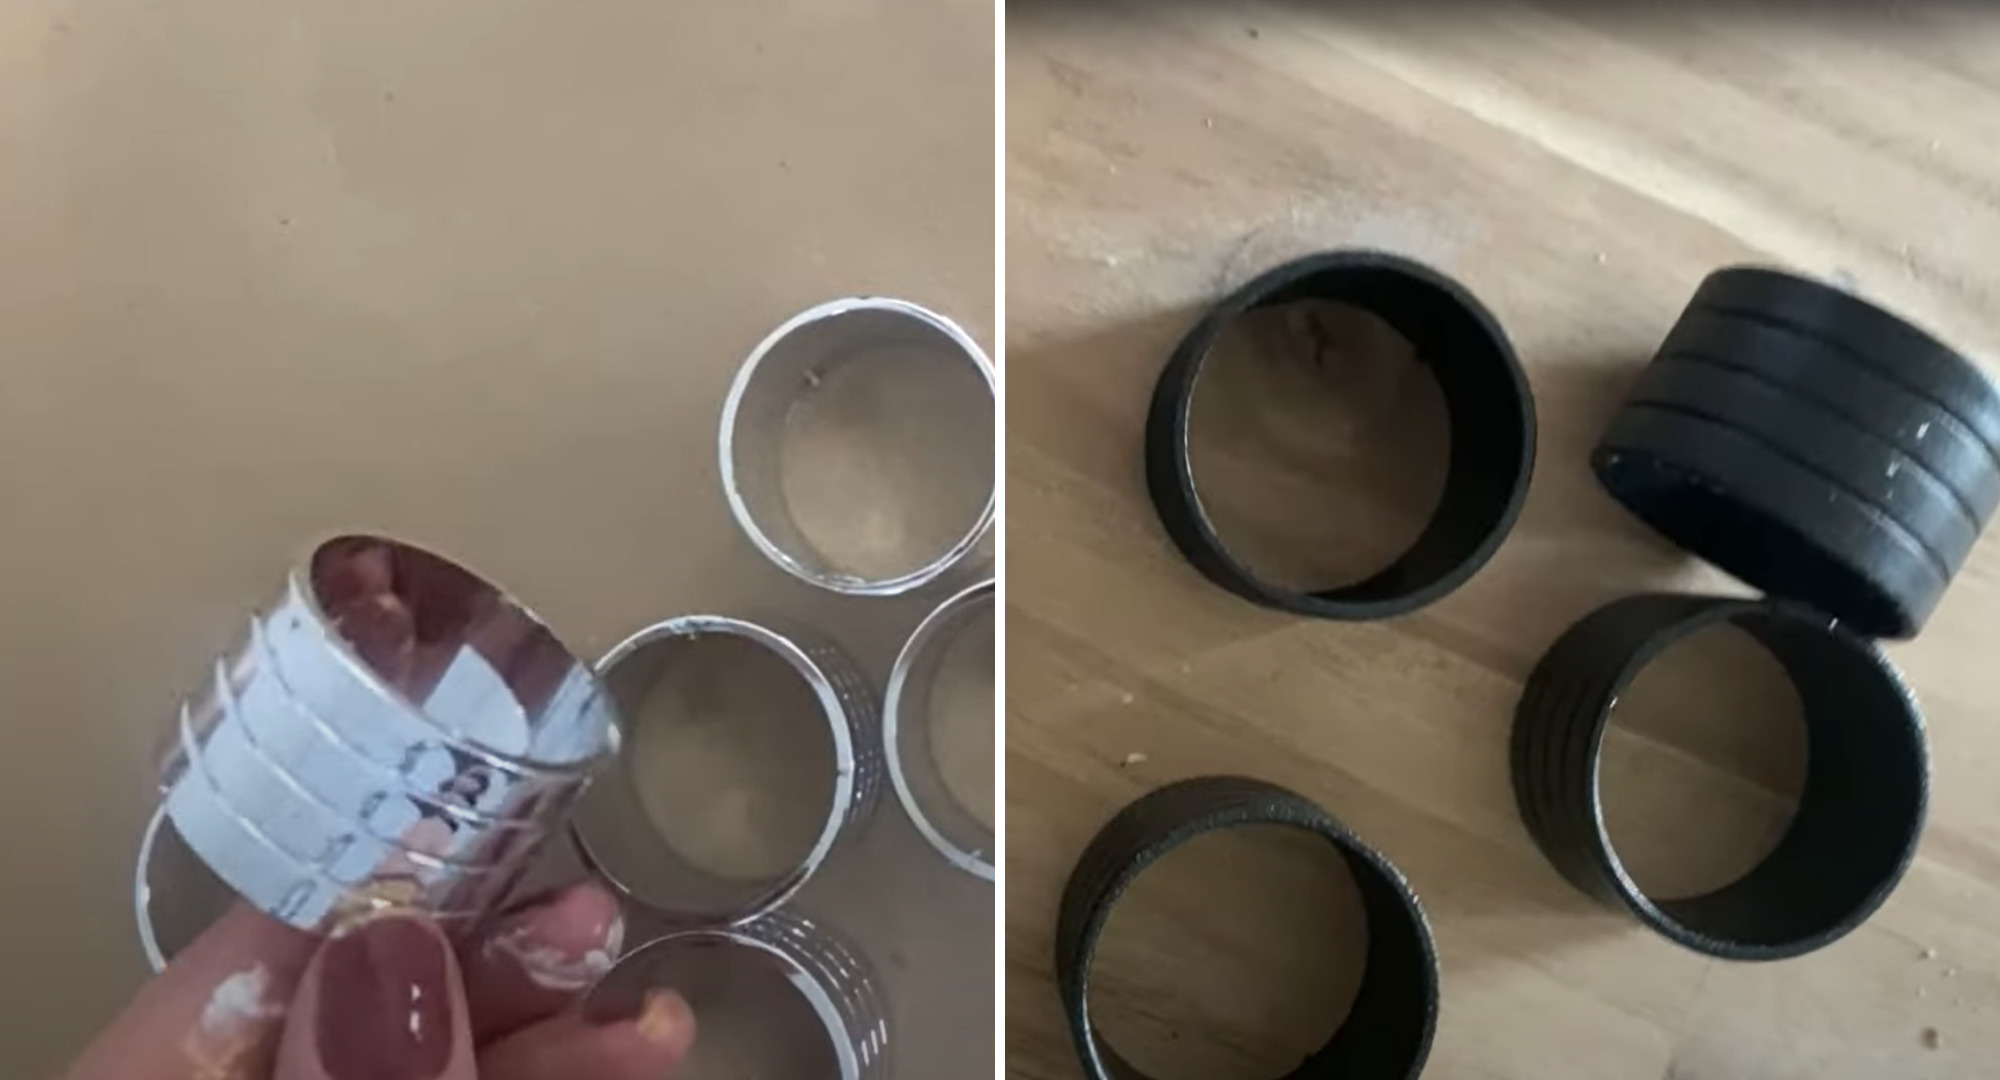
All you need is a package of the silver napkin rings you can find down the wedding aisle of the dollar store, and a black satin finish spray paint. The rest is self-explanatory! They look so beautiful and modern when painted a satin black, especially with the line details.

To style them, I took a single branch of dollar store faux greenery, and tucked it underneath the ring with a linen napkin. Such a pretty addition to your holiday table!
Shrinky-Dink Gift Toppers
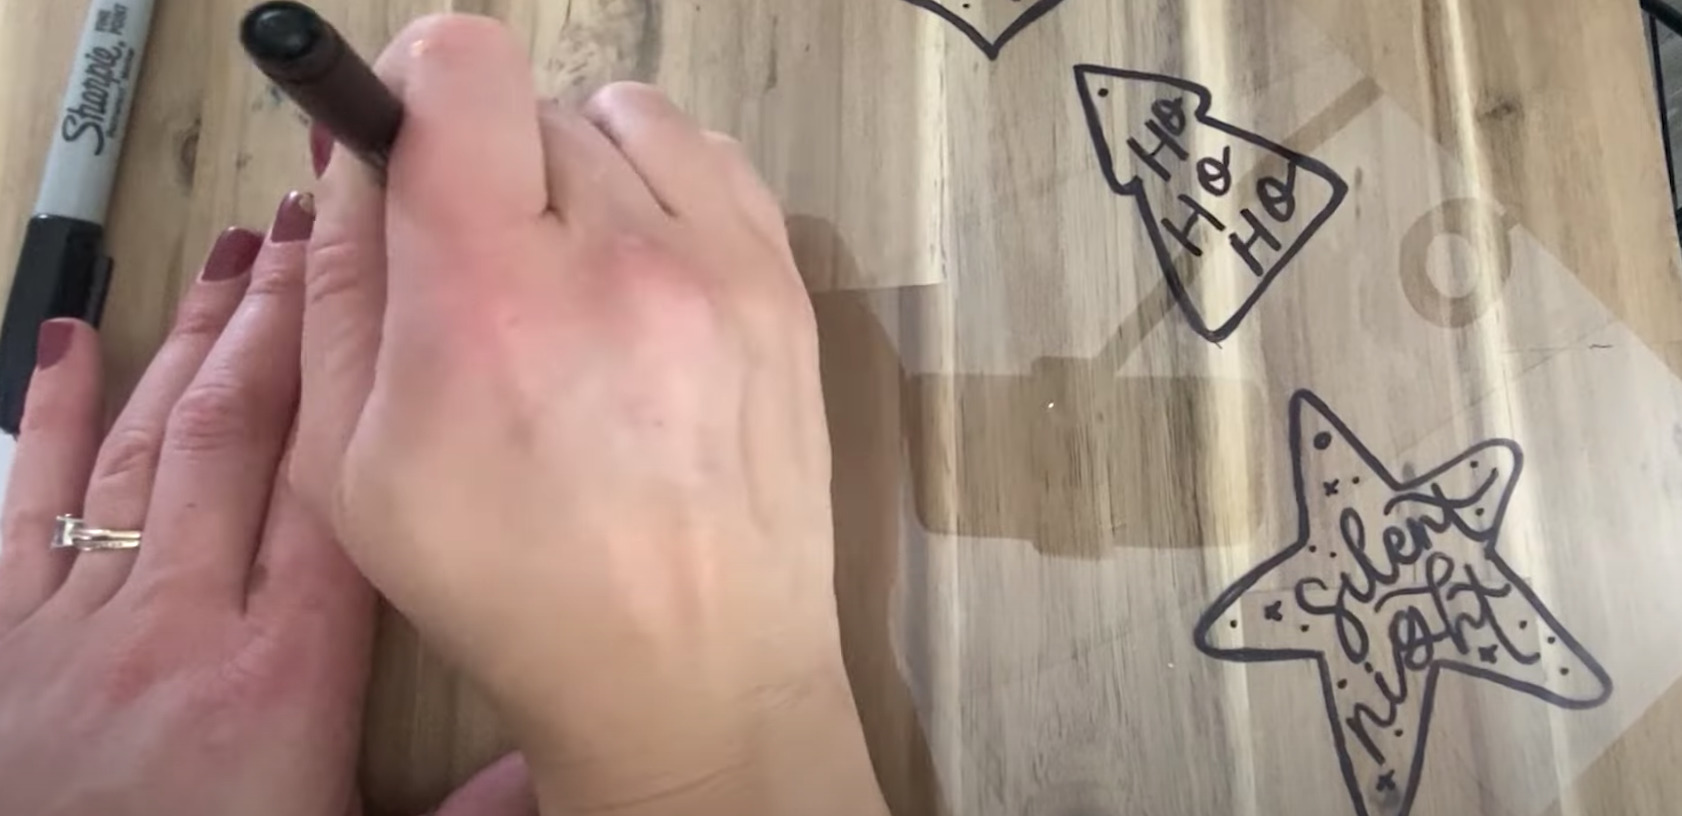
These gift tags are feel-like-a-kid-again fun to make! All you need is shrinky-dink plastic sheets that you can find in the craft section of the dollar store, and permanent markers. That’s it!
Draw holiday shapes like trees, stars, Santa hats, or ornaments. I hand lettered a festive message inside them and added little stars and dots beside the messages. Punch a hole in them if you plan to attach them to gifts with ribbon or twine. And then you’re going to cut them out, leaving a little bit of an edge around each outline. You can definitely add colour if you want to! Give your kids some red and green markers and let them add their own touches.
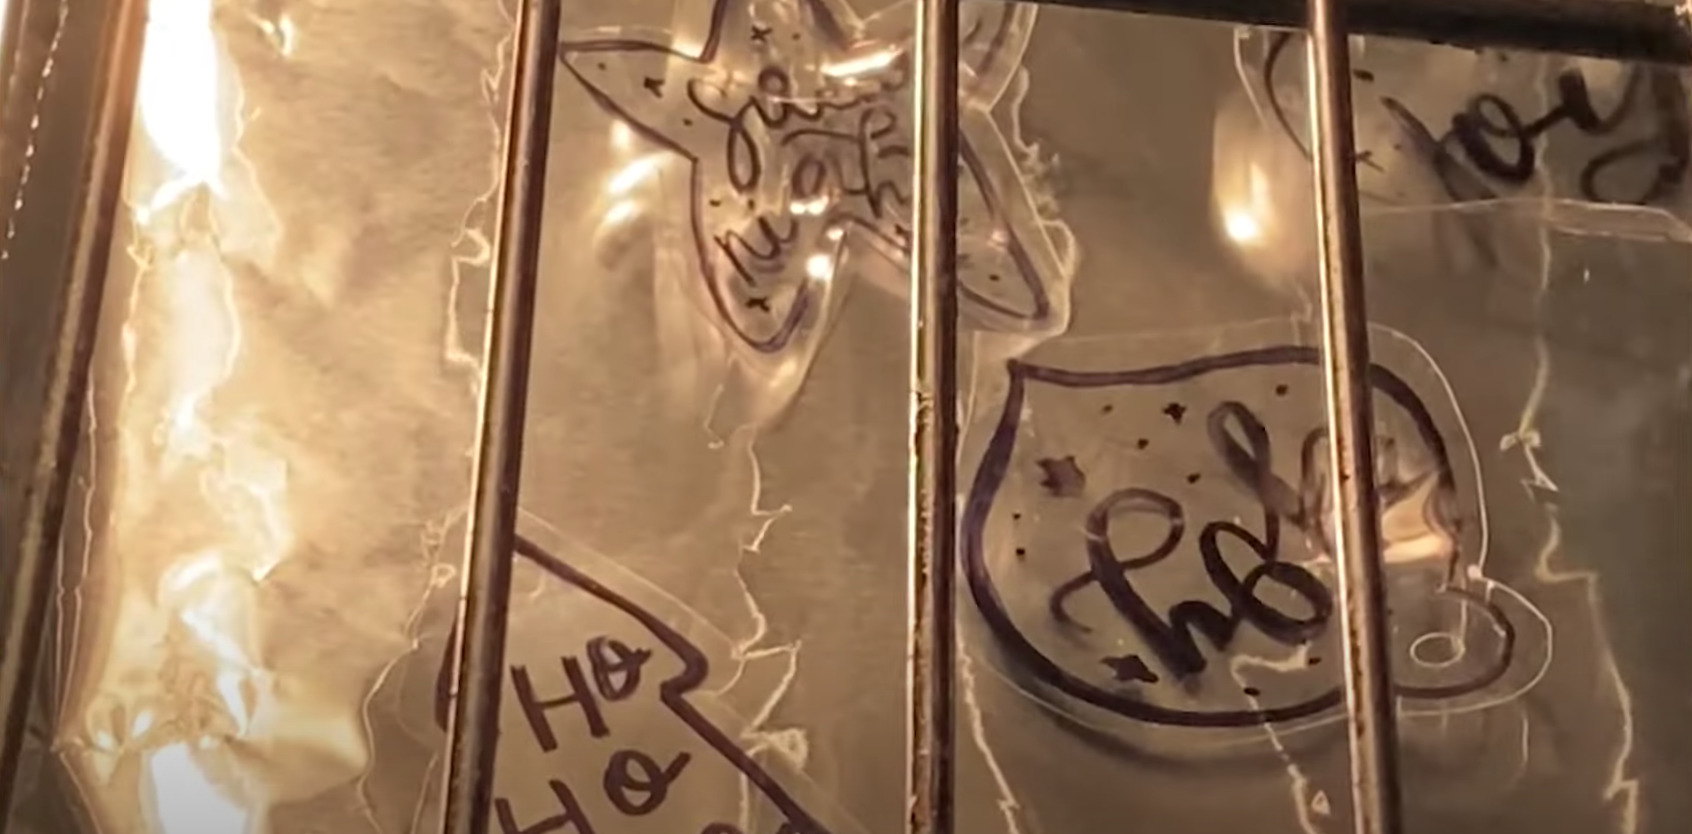
After you are done cutting them out, place them on a cookie sheet at 340 degrees for 10-30 seconds, until they shrink. It is so satisfying to watch! My kids loved it. After they have cooled down, you can go ahead and top your gifts with them!
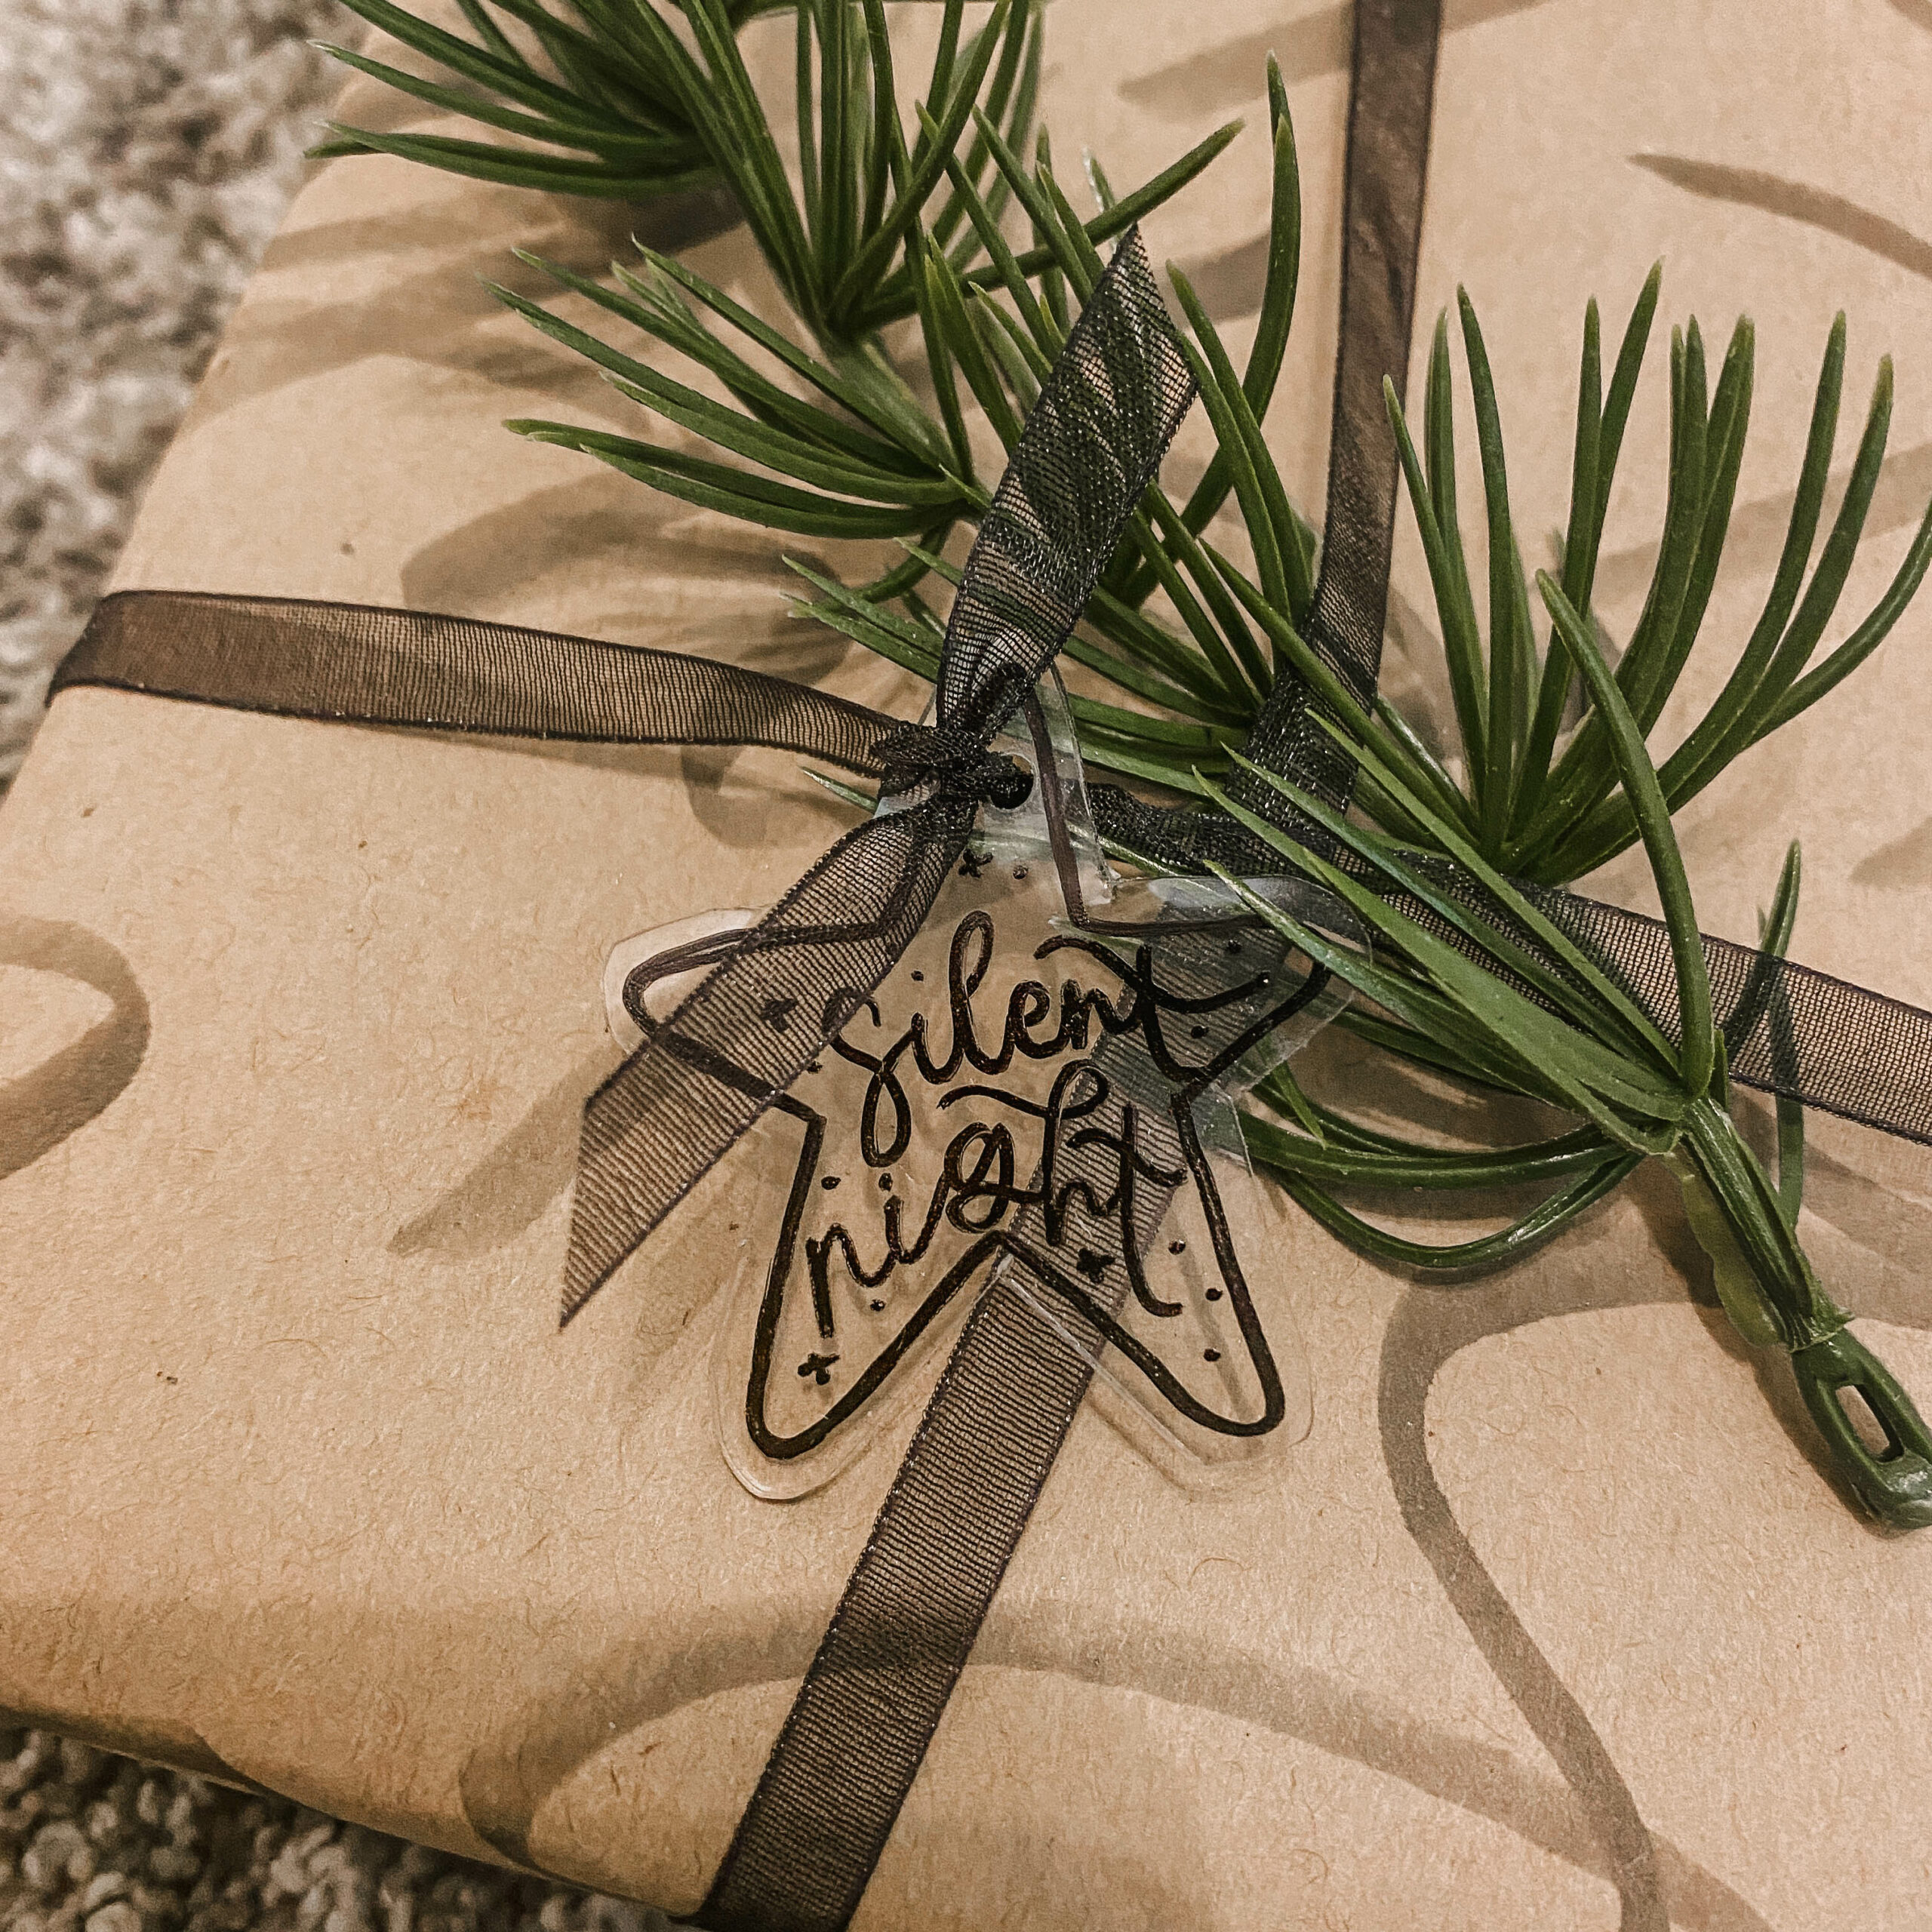
I chose to use them with one of the dollar store DIYs I did for the holidays last year: this hand-lettered craft wrap, made from craft wrapping paper at the dollar store. You can see more about that simple gift wrapping idea right here. Then added the gift topper with some ribbon. I then added a spring of that faux dollar store greenery. I think these look adorable! Such an easy way to really personalize your gifts.
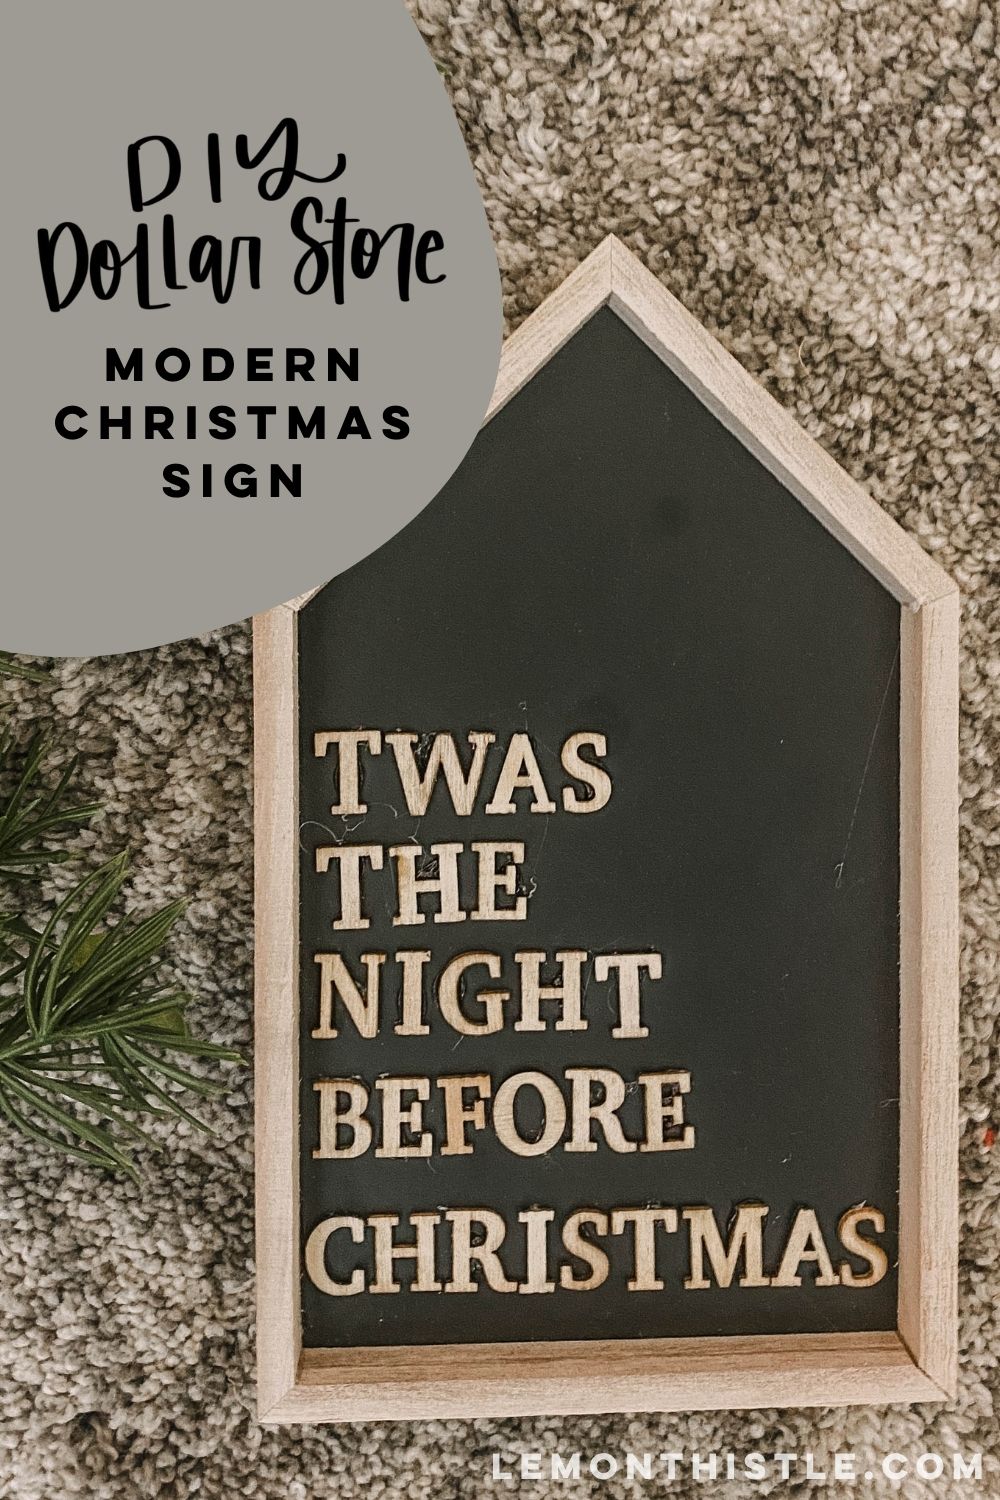
Festive Message Board
This festive Christmas message board is so easy and adds such a nice touch to any holiday décor. All you need is:
- a house-shaped chalkboard that I found at Dollar Tree,
- some little wooden laser-cut letters that I found at Dollarama, and
- some glue.
ou can get laser-cut letters at every dollar store, but just make sure they are the right size for your chalkboard. These ones are a beautiful Sans Serif, and they were nice and small so they fit within the sign.
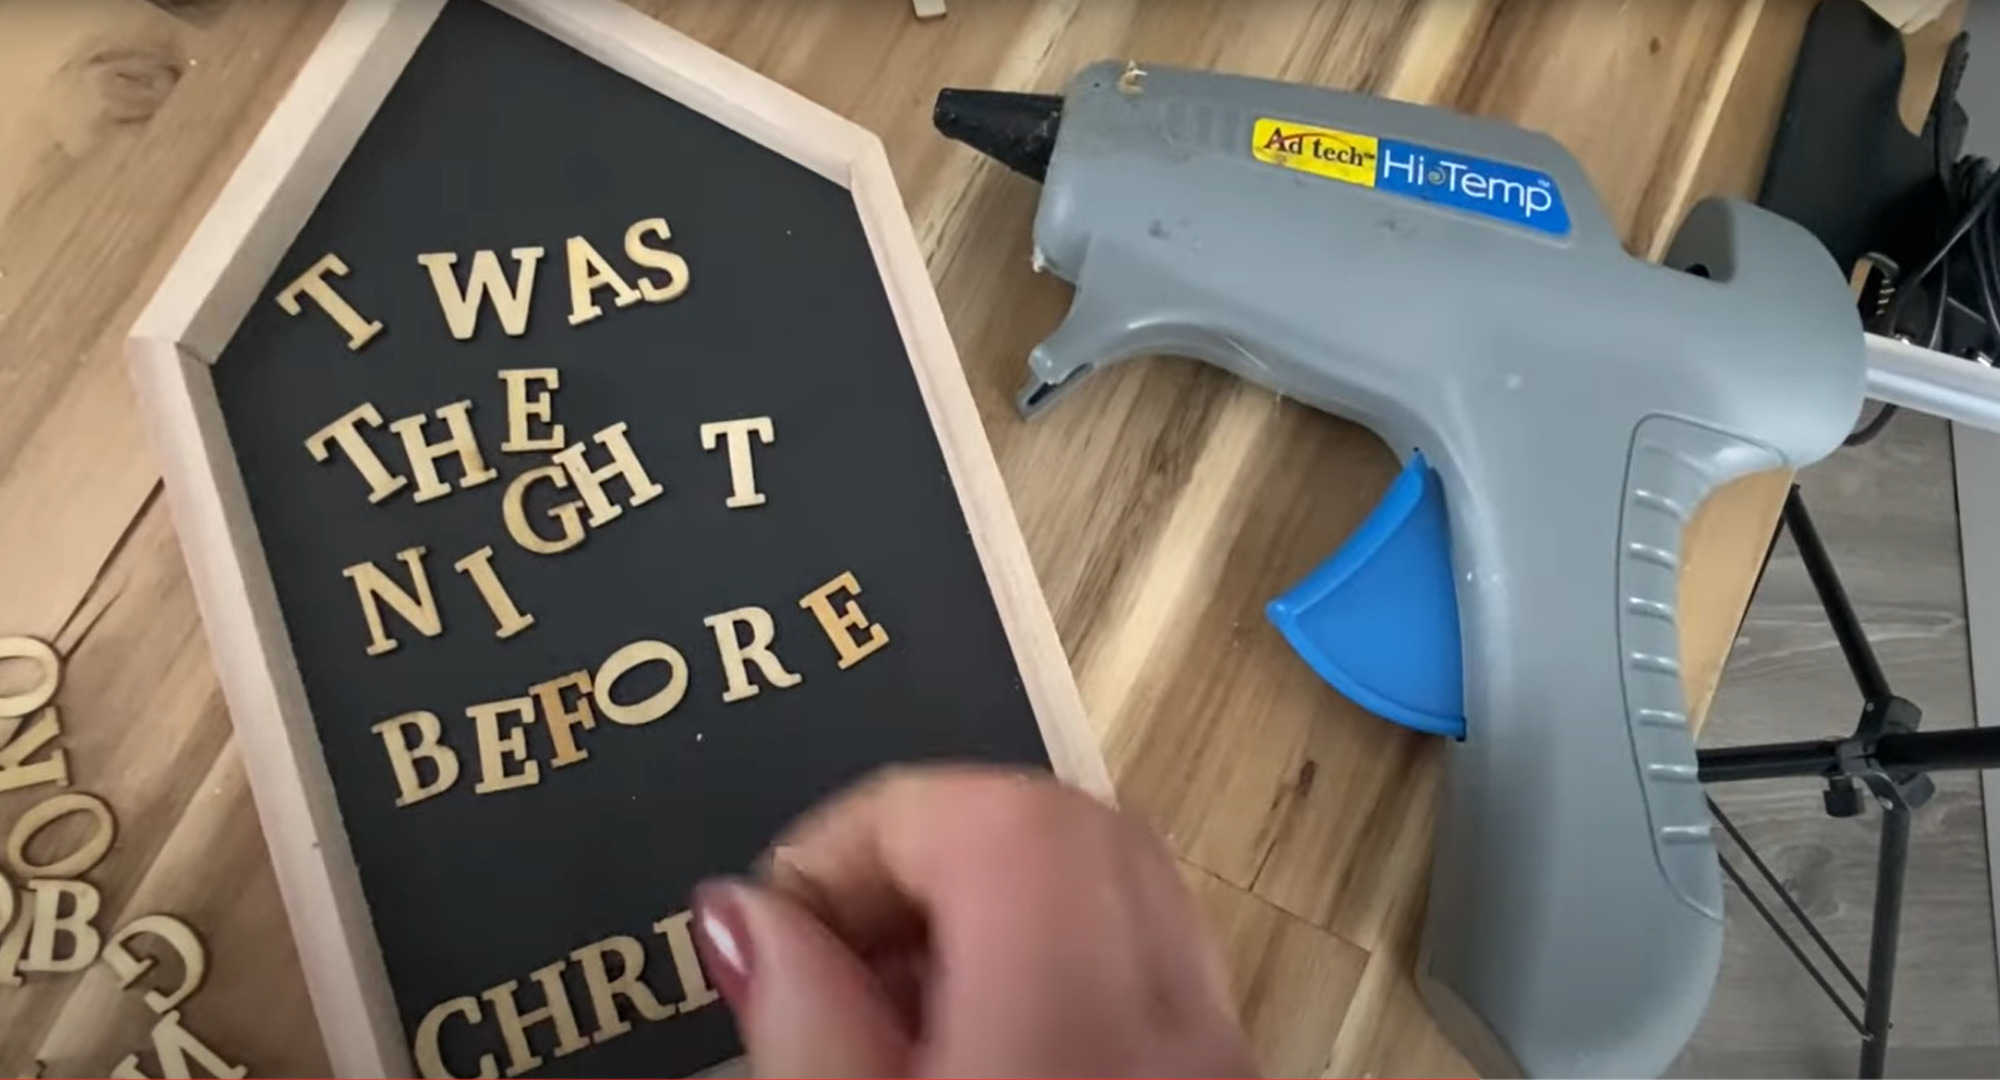
Glue the letters on using whatever phrase you want! I chose the saying “’Twas the night before Christmas, and all through the house, not a creature was stirring, not even a mouse” because the chalkboard is in the shape of a house.
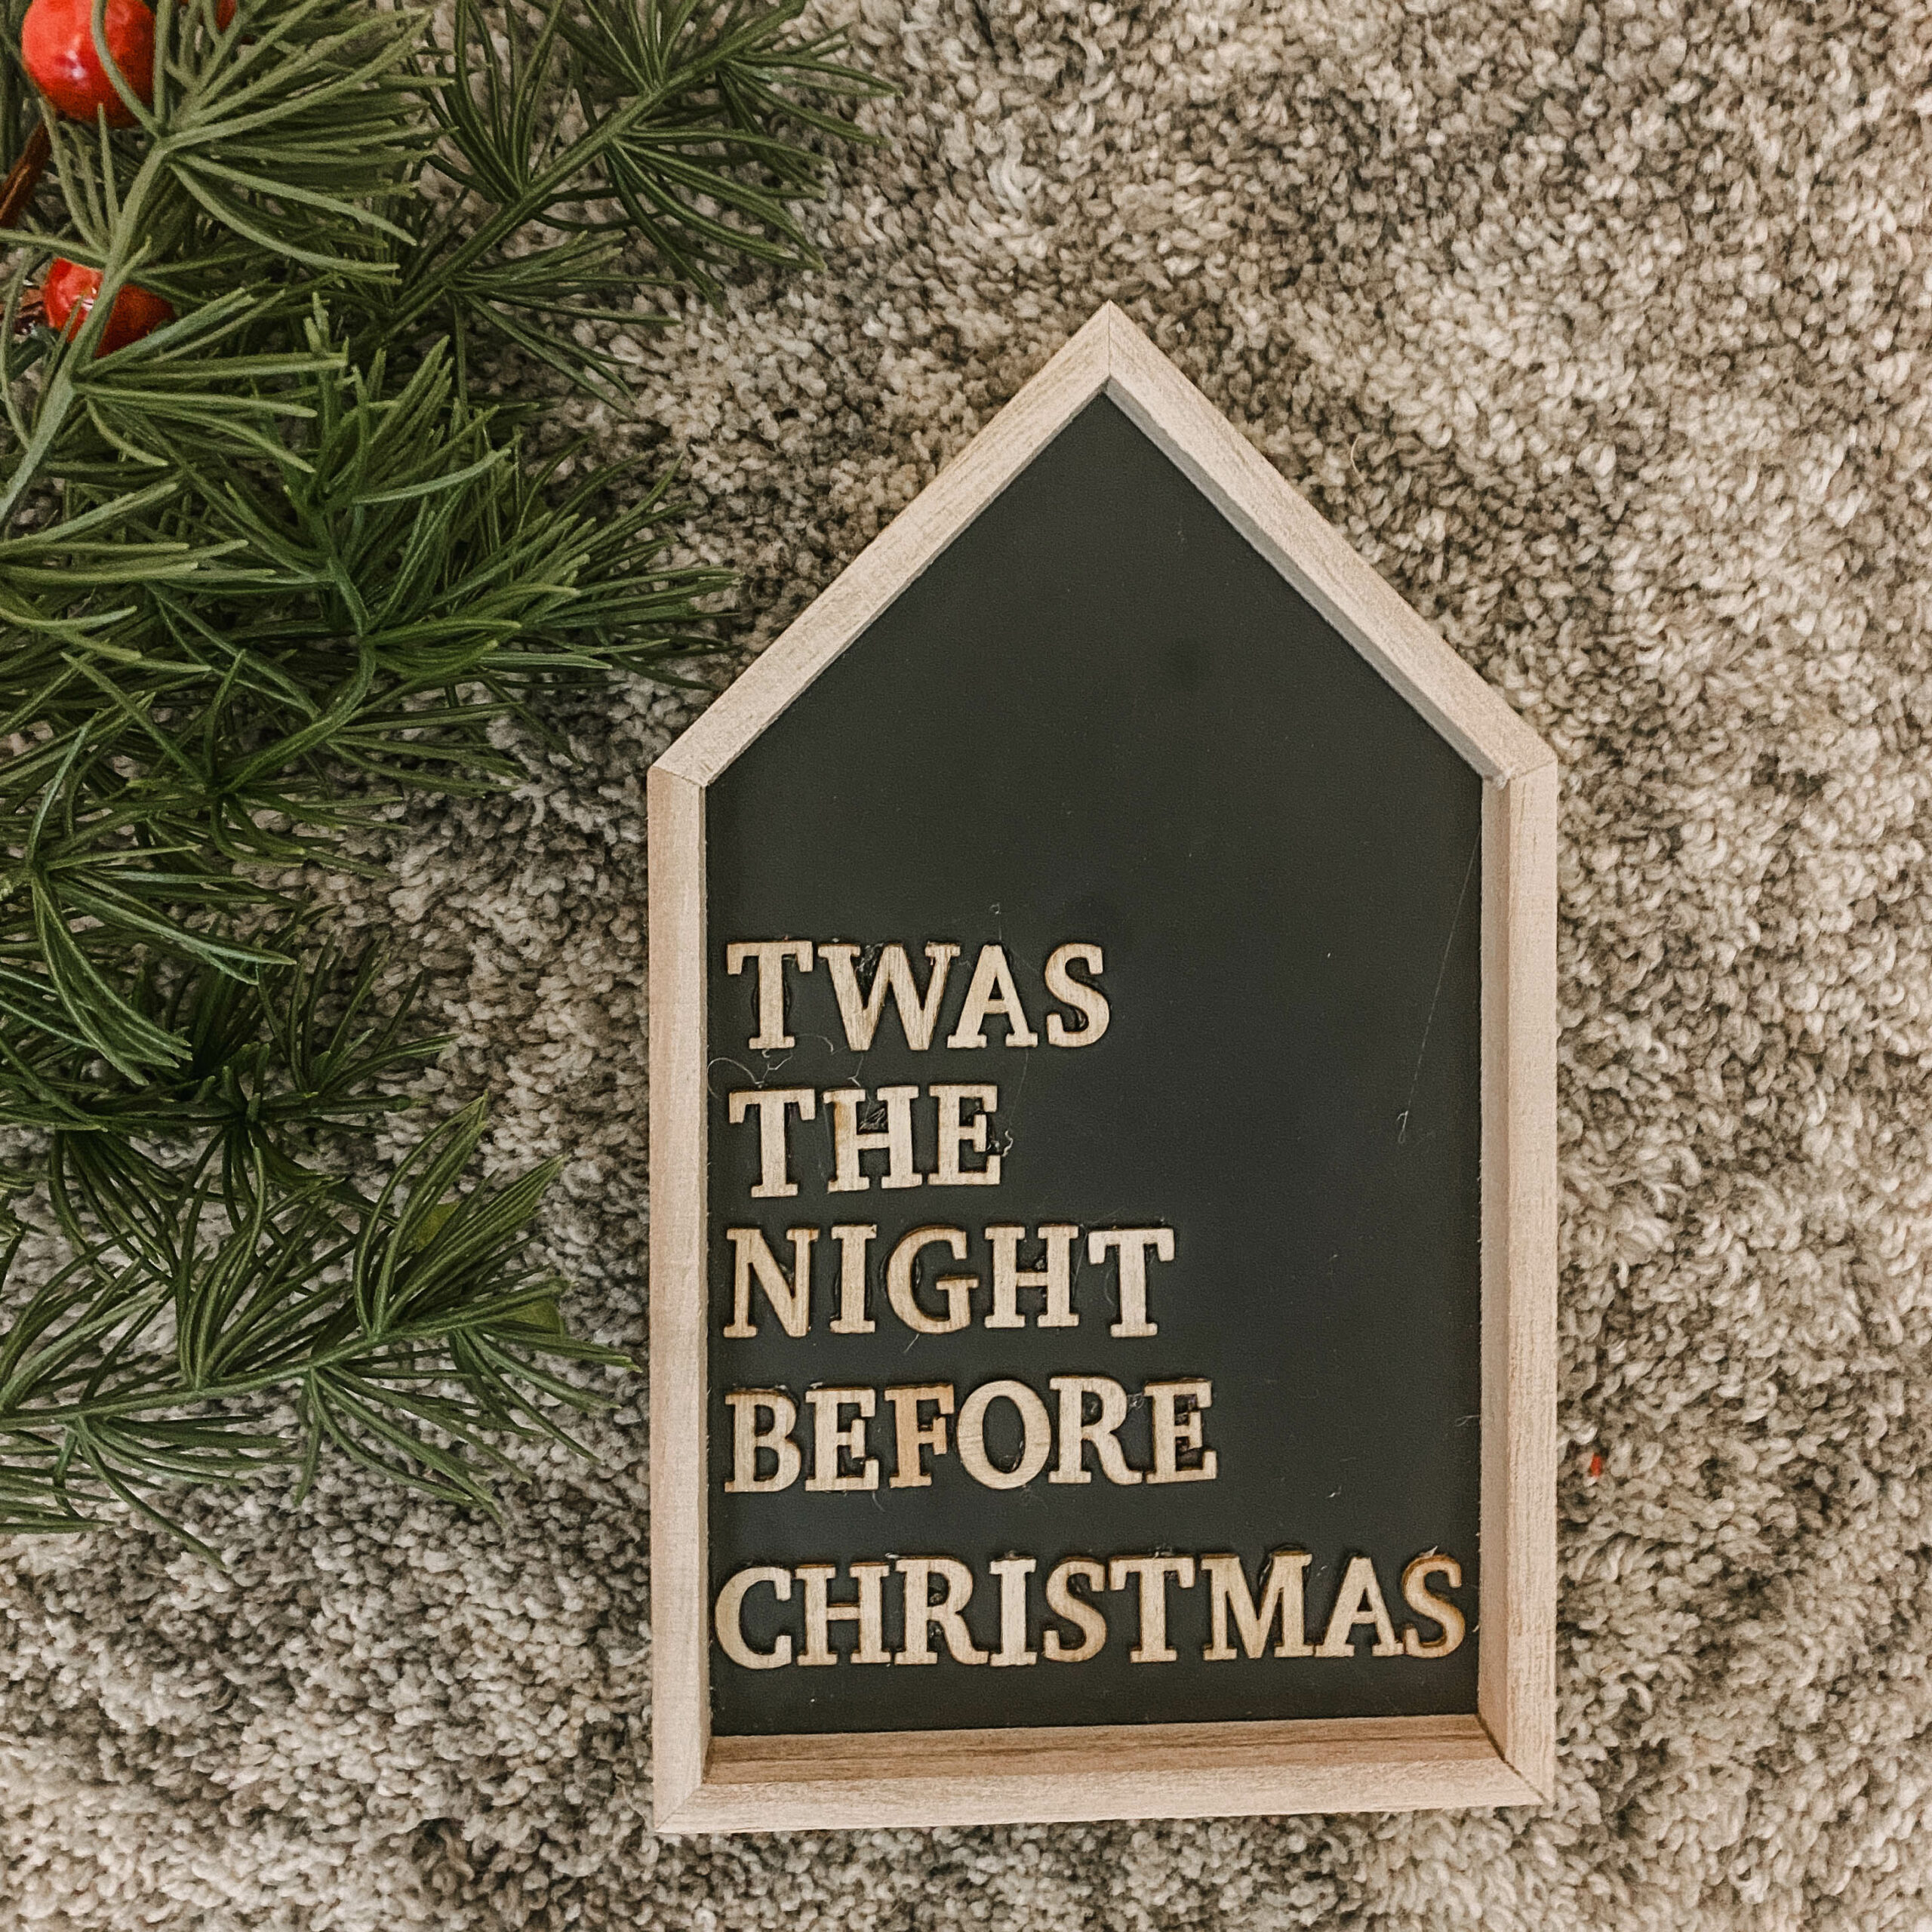
I love the black and natural wood colours, which are neutral and will complement any colour theme you are using to decorate your house this Christmas season. This little project is headed to my boys’ bedroom to hang out on their decorative shelving! You can see their room decked for the holidays in this post here.
DIY Brass Bells
These bells are so impressive, and make a nice addition to the bonus DIY wreath idea I’m going to include below! All you need are:
- dollar store tins,
- some gold leaf paint from Michaels,
- some dollar store wooden dowel,
- twine or the black leather jewelry cord we used for the DIY clay ornaments, and
- some wooden rings, also from the craft section at the dollar store.
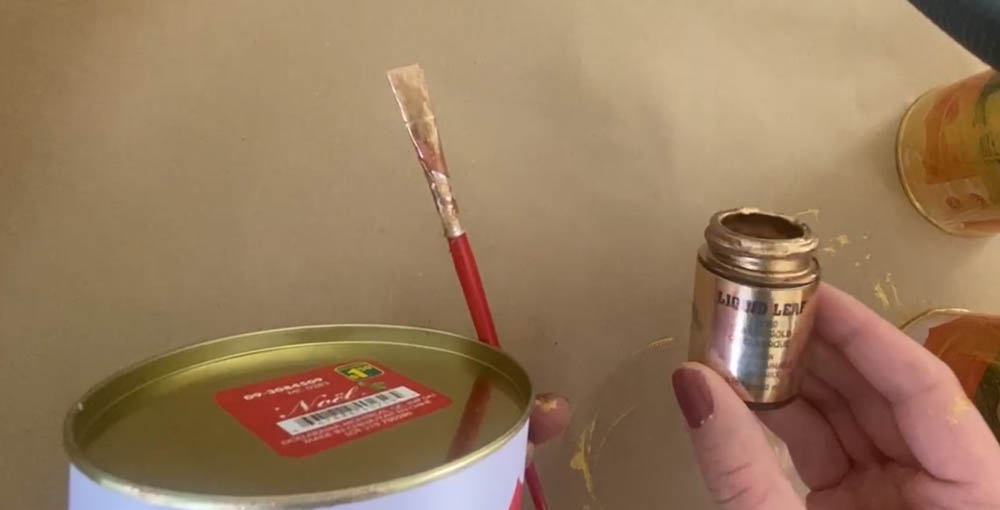
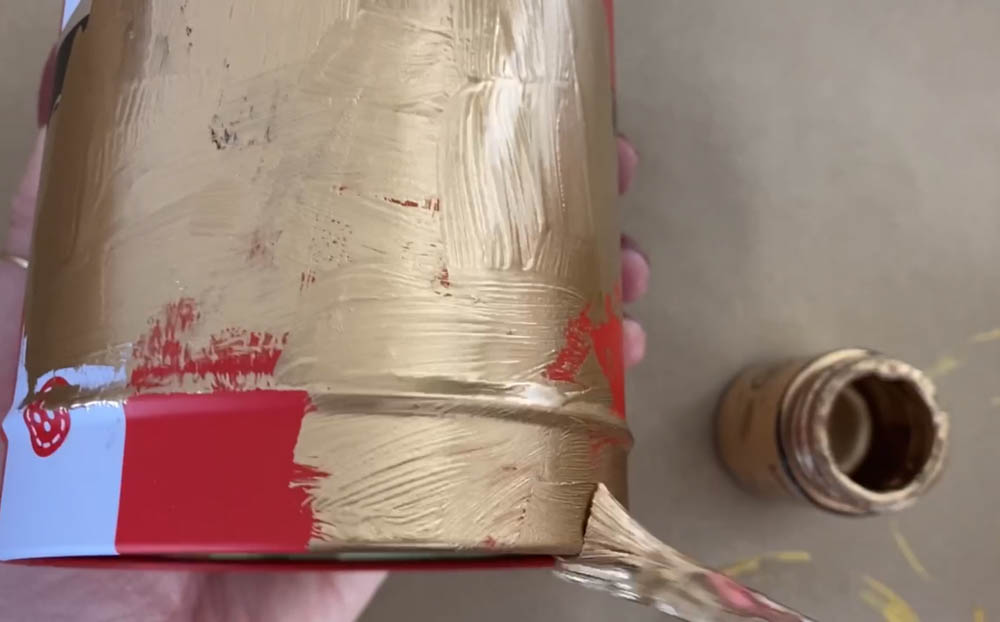
- The first thing you need to do is paint the tins gold. I did try using a dollar store gold paint, but honestly it didn’t work very well. So I pulled out one of my favourite crafting supplies, the gold leafing paint from Michaels- it’s called Liquid Gold. A little bit goes a long way, it dries very quickly, and it looks more like metal when it’s dry than many other alternative gold paints. I only had to use one layer to cover these bells.
- As the paint is drying, I used the brush to rough the finish up and give it a nice patina.
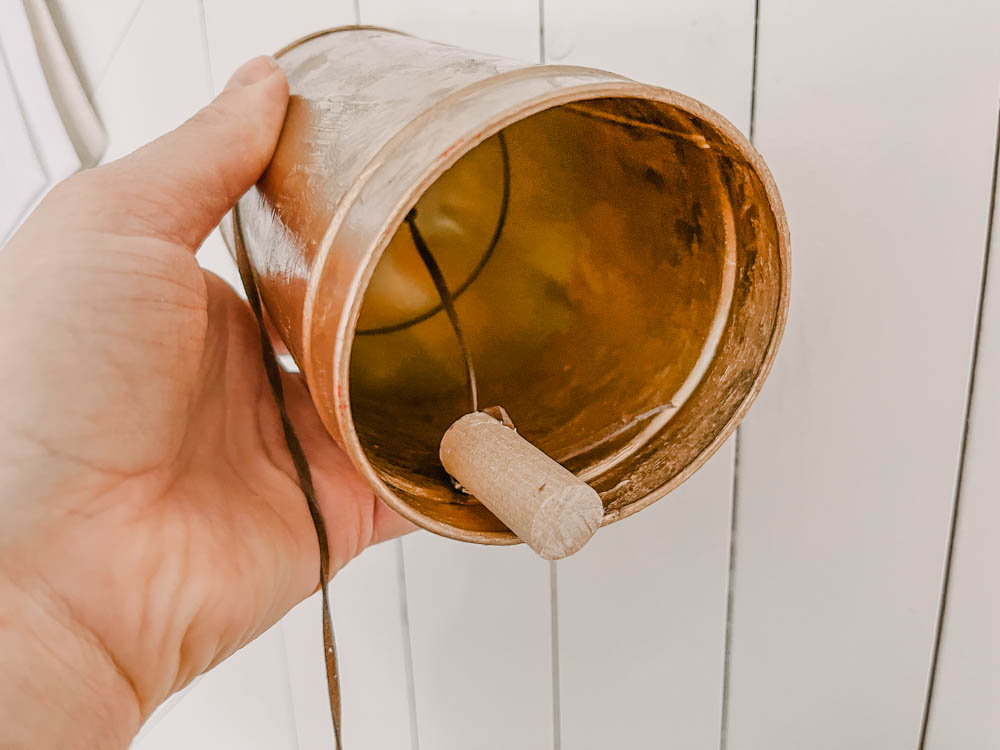
3. After the paint on the tins had dried, I made the little piece that goes inside the bell, a little wooden clapper. I used dollar store dowel for these. I cut the dowel into little pieces, drilled a hole through each one, and then another hole through the tops of the tins. I then used the faux leather jewelry cord to tie the dowel to the bells.
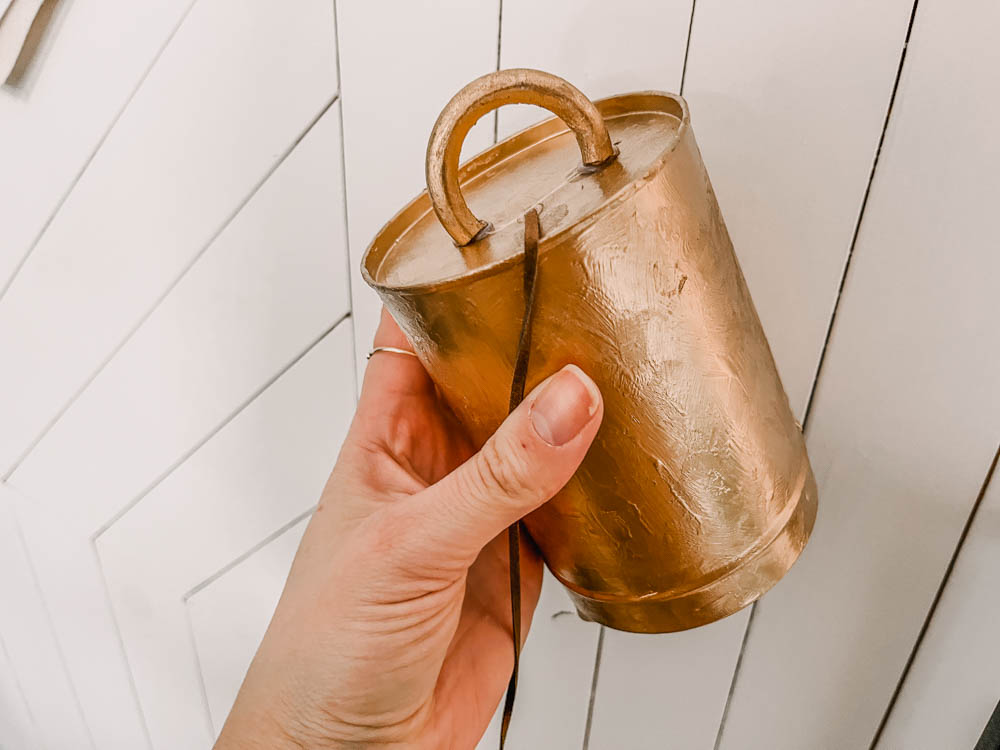
4. To make the finished products look more like bells, I painted the dollar store wooden rings with the same gold paint, and then I cut them about two thirds of the way across, and hot-glued them onto the top of the bells. I really love how this completes the look and makes them look so much more realistic.
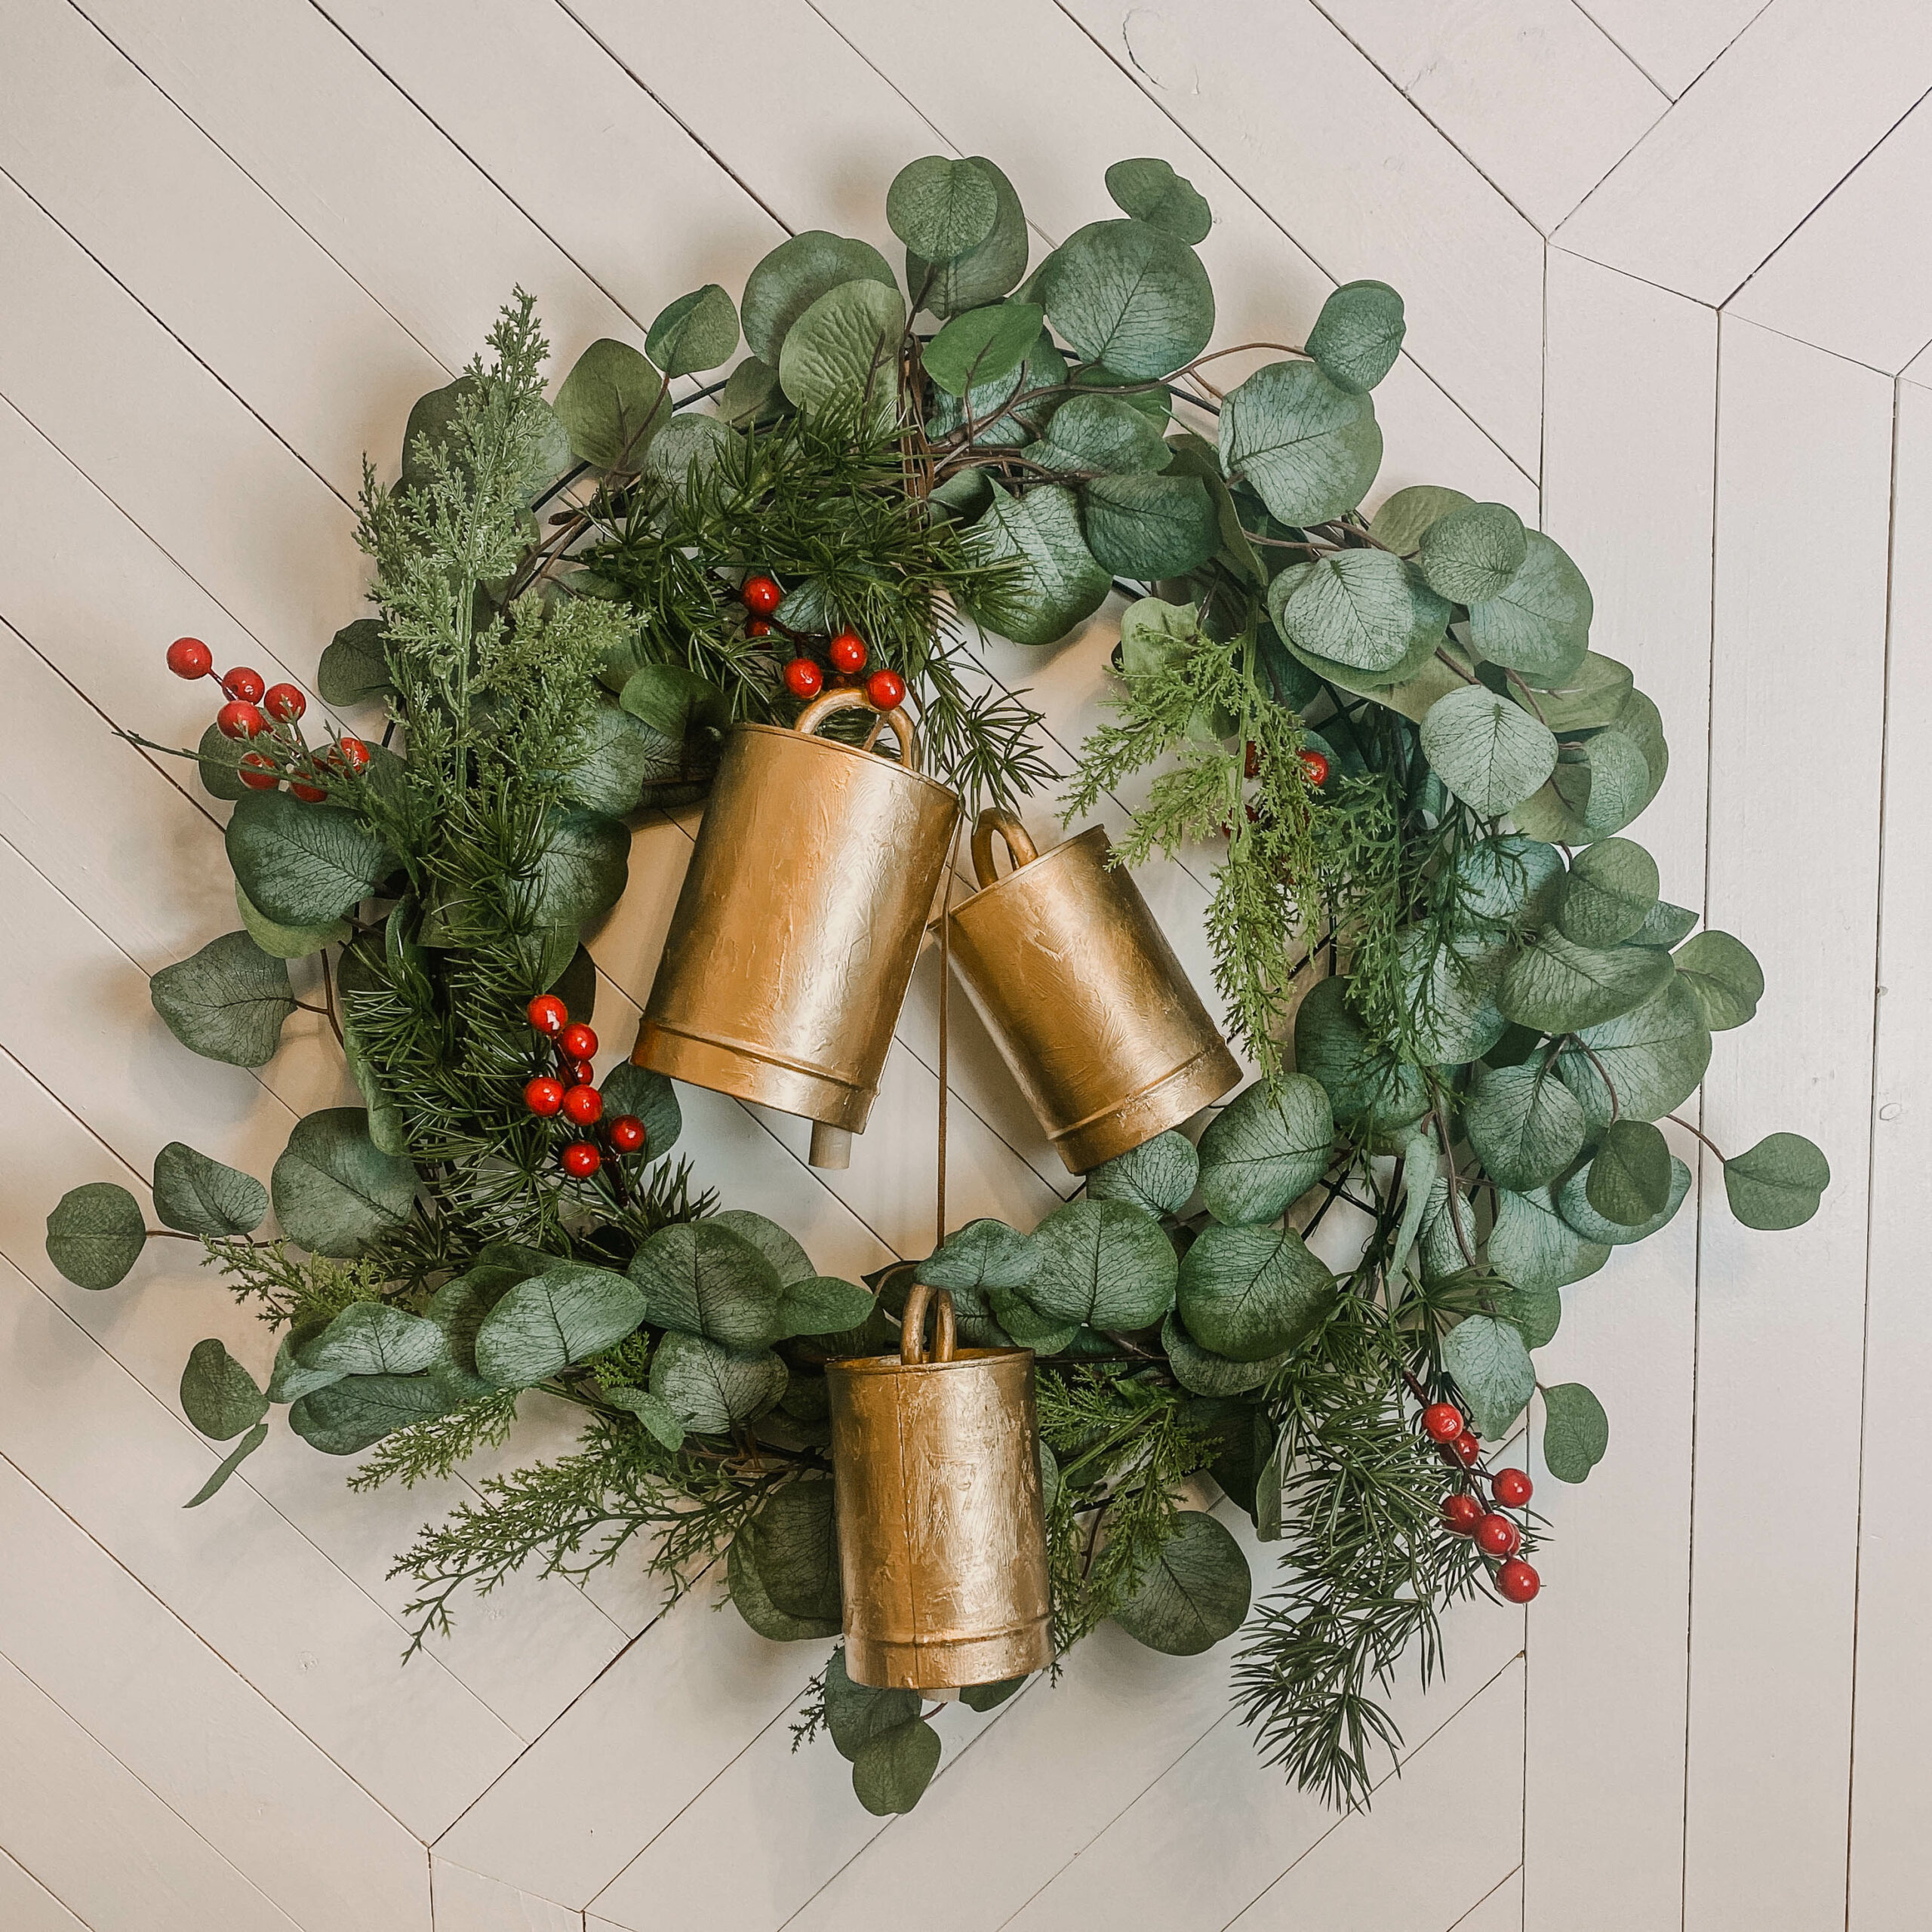
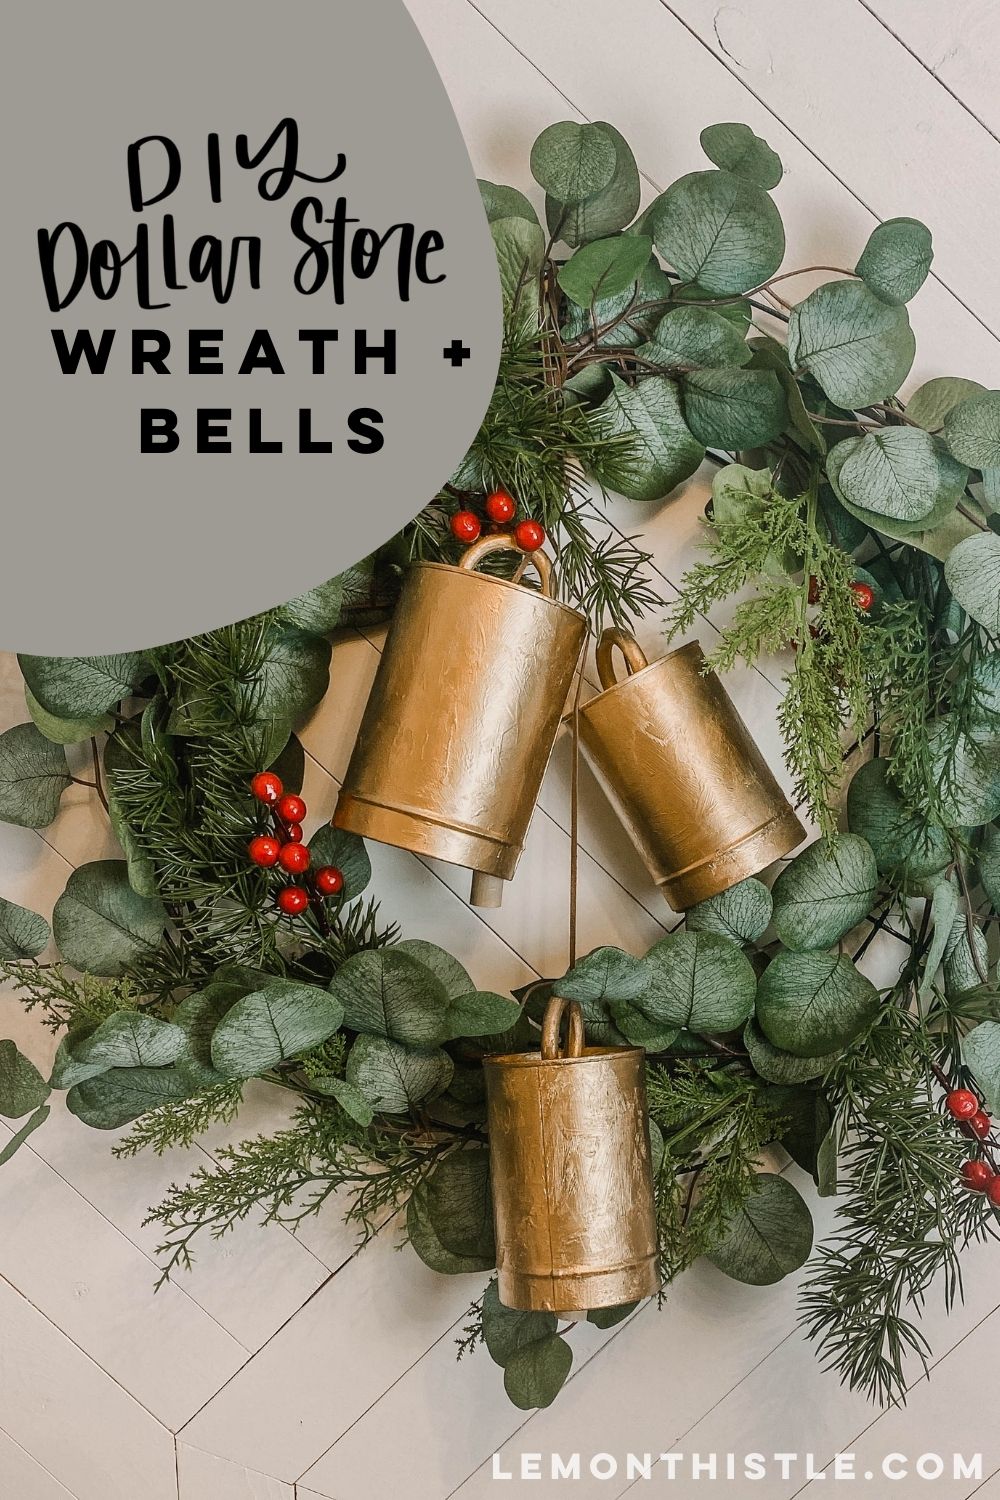
DIY Holiday Wreath with Bells (Bonus craft!)
I made this wreath for the fall dollar store DIY challenge. I used a dollar store wire wreath form and dollar store faux eucalyptus. What I love about making a good basic wreath like this is that you can change it up, season to season.

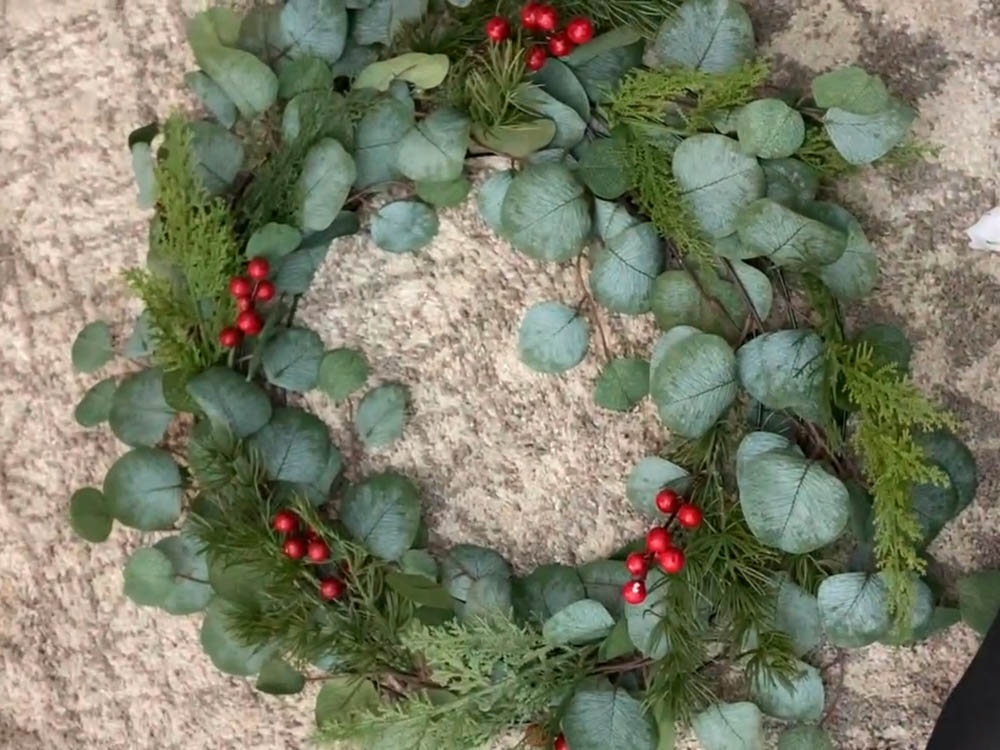
So, to make it a Christmas wreath, I pulled out the fall leaves that I had added to the eucalyptus, and exchanged them for some faux evergreen foliage with little red berries that I found at the dollar store. I used three different picks of dollar store winter foliage, and the change makes it a whole new wreath. I totally love it. Hung with the bells, this piece is absolutely stunning!
So, those are my dollar store DIYs. There are eight of them, nine if we count the wreath and the bells as separate projects! I am so happy with all of them! It is so difficult to pick a favourite, but I love the bells with the wreath and the shrinky-dinks gift tags. And I love the modern clay ornaments too! Let me know in the comments what your favourites are! Happy holiday DIYing!
Once you have your home decked for the holidays, I’d love to see it! Tag me on Instagram @colleenpastoor
watch: 8 MODERN DOLLAR STORE DIY CHRISTMAS DECORATIONS

LIKE IT? PIN IT!
 Mistletoe Printable Hand Lettering Practice Sheet
Do you have exact pictures of everything you bought?
You can see them in packaging in the YouTube video! I didn’t photograph them, no :)